Blogging Help: How To Add Picture Buttons Below Your Menu
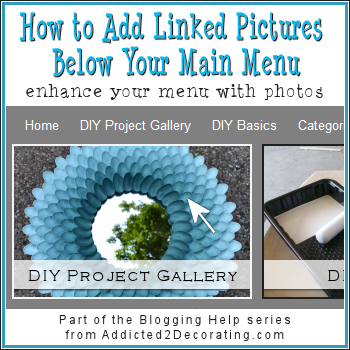
I recently customized a WordPress blog using the Genesis Pure Elegance Theme by StudioPress. One of my favorite features in that theme was the linked featured images section right below the menu bar.

In fact, I liked it so much that I seriously considered switching themes just to get that feature. But in the end, I decided that I didn’t want to spend time switching themes right now, and after giving it some thought, I decided that I could add a similar feature to the Lifestyle Theme that I use. And with a little creativity, and just a bit of coding, I got it done!

After I added the buttons to my blog, I had a few other bloggers ask me for a tutorial, so today I’ll attempt to show you how I added those buttons underneath my menu bar.
These instructions will be specific to WordPress blogs, and I can’t even guarantee that they’ll work for all WordPress themes. I do know that if you use any of the Genesis Themes (which I highly recommend because they’re the best!), these instructions should work. And I’m pretty sure that they’ll also work for Thesis or any other theme that allows you to use a “hooks” plugin.
So here’s how I went about creating my linked picture buttons under my menu bar:
Step 1: Create the photos
You can use any photo editing software to create your photos. I use Corel PaintShop Pro for all of my photo editing. (I use version X4, but there’s a newer version available now.)
You’ll need to determine how many buttons you want to create, and how wide each button needs to be. My blog is 1000 pixels wide, so I decided to make 4 buttons that were each 236 pixels wide and 151 pixels high.

I placed a semi-transparent banner with wording over each photo. This can be done with any photo editing software that allows you to create layers. And just a note…I also saved a template with the separate layers so that the picture and title can be easily updated in the future.
You’ll notice that the pictures I created don’t have borders on them. That’s because I wanted the pictures to have a different color border when a visitor hovers over the picture with their mouse pointer. That means I had to write a bit of CSS code for the pictures.
Step 2: Specify the style of the photo button section in the stylesheet.
I wanted my pictures to have a really super dark gray (almost black) border, and a super light gray (almost white) border when someone hovers over them with their mouse pointer. I also needed to specify how much spacing needed to go around this section so that the dark gray background would show on the sides and the bottom of this section.
Here’s the code that I added to my stylesheet (under Appearance –> Editor) to get the pictures to display like I wanted them to.
#navbuttons {
background: #808080;
width: 1000px;
margin: 0px;
padding: 0px 5px 10px 5px;
display: block;
}
#navbuttons img {
border: 2px solid #202020;
}
#navbuttons img:hover {
border: 2px solid #f5f5f5;
}
Now let me explain what all of that stuff means so that you can edit it to suit your own blog.
In order to be able to specify certain styles (borders, colors, spacing, etc.) for this section I was creating, I had to give it an ID. I chose to call mine navbuttons (for navigation buttons). When used alone, the styles specified under this ID will pertain to this entire section…

To specify this section, I had to add the code:
#navbuttons { style code goes here }
And here’s the meaning of the codes that I used to style this section:
Background – #808080 is a dark gray color that blends with the gray background of my menu bar. I wanted them to look like one seamless area.
Width – I wanted this section to be the whole width of my blog, which is 1000 pixels.
Margin – I set the margins to 0 pixels on all four sides of the section.
Padding – The four numbers on the padding (spacing) specify the four sides, starting with the top, and going clockwise. So I have 0 pixels of padding (spacing) on the top, 5 pixels of spacing on the left and right, and 10 pixels of spacing on the bottom. The padding is what allows the dark gray background to show on the left and right sides of this section, and below the pictures.
Display: Using the “block” display makes the pictures line up side by side.
Next I needed to specify the border color on the individual pictures. I wanted each picture to have a dark gray border.
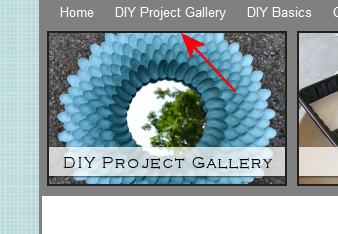
This required a separate section of code that pertained only to the individual images rather than the whole section. That code looks like this:
#navbuttons img { code for the individual image goes here }
The specific code that I used was to style the photo border, and looks like this:
border: 2px solid #202020;
So I wanted each picture to have a border that was 2 pixels wide, solid (as opposed to dotted, dashed, double, etc.), and a dark gray color.
And finally, I wanted to specify a different color border for the individual pictures when someone hovers over them with their mouse pointer.
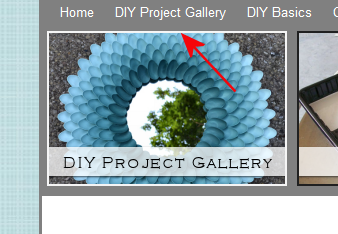
This required a separate section of code that looked like this:
#navbuttons img:hover { code for the individual image goes here }
The specific code that I used to style the photo border looks like this:
border: 2px solid #f5f5f5;
I kept the border at 2 pixels (if you use a different border width on hover, the picture will jump around when a visitor hovers over the picture), and kept the border a solid line. The only thing I changed was the color, and I used a really super light (almost white) gray. I like using really light grays instead of white for things like this because it’s light and bright, without the harshness of white.
So now that you know what all of that code means, you can make changes to suit your blog. Once you have your three section of code written, add them to your stylesheet under Appearance –> Editor. Be sure that you’re editing the document with the title that ends in .css (i.e., style.css)!!!! Stay out of any documents with titles that end in .php!!!
Where do you add the code? You can place the code anywhere you like, just so long as you don’t place it in the middle of another section of code. If you’re unfamiliar with CSS, the safest thing would be to scroll all the way to the bottom of your stylesheet, place your cursor after the final closing bracket (that looks like this –> } ), hit the enter key twice, and then paste the code at the bottom of the stylesheet.
Step 3: Upload the images
Now you need to upload the images to your media library. Just go to Media –> Upload New to upload all of your new pictures.
Step 4: Install Hooks Plugin
A “hooks” plugin is a plugin that allows you to insert code into certain areas of your blog theme that you wouldn’t normally have access to unless you know PHP (and since you’re reading this tutorial, I’m going to assume that you don’t know PHP). 🙂
If you use a Genesis theme, you can use a plugin called Genesis Simple Hooks. Just search for it under Plugins –> Add New and install it from there.
If you use the Thesis theme, I think the plugin you’ll need is called Thesis OpenHook. It can also be installed directly from Plugins –> Add New.
Because I use Genesis, I’ll show you exactly what to do using Genesis Simple Hooks. If you use Thesis, I’m sure the process will be similar, but unfortunately I don’t know the specifics.
After installing and activating Genesis Simple Hooks, go to Genesis –> Simple Hooks. On that page, you’ll see the various sections where you can add HTML and/or PHP code to customize your theme.
Now scroll down to the section called Header Hooks, and look for the specific hook that’s called genesis_after_header Hook.
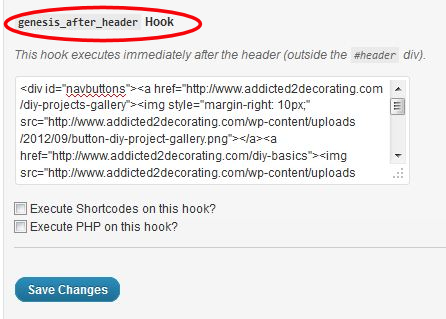
The white box is where you’ll write your code for the pictures and links. This process is much like adding a linked picture to your sidebar.
Step 5: Insert Code For Links And Images
Here’s what my code looks like:
<div id=”navbuttons”>
<a href=”https://www.addicted2decorating.com/diy-projects-gallery”><img style=”margin-right: 10px;” src=”https://www.addicted2decorating.com/wp-content/uploads/2012/09/button-diy-project-gallery.png”></a>
<a href=”https://www.addicted2decorating.com/diy-basics”><img src=”https://www.addicted2decorating.com/wp-content/uploads/2012/09/button-diy-basics.png” style=”margin-right: 10px;”></a>
<a href=”https://www.addicted2decorating.com/completed-room-designs”><img src=”https://www.addicted2decorating.com/wp-content/uploads/2012/09/button-room-makeovers.png” style=”margin-right: 10px;”></a>
<a href=”https://www.addicted2decorating.com/inspiration-files”><img src=”https://www.addicted2decorating.com/wp-content/uploads/2012/09/button-inspiration-files.png”></a>
</div>
The majority of this code is just basic linking code, so I won’t be going over it. Creating linked photos and text uses some of the most basic HTML that every blogger should know, so if you don’t know this HTML, I highly suggest that you commit to learning it ASAP.
But I will point out two sections of the code that aren’t really standard for basic text and photo linking.
First, all of the links and photos need to be inside the <div> codes, and the ID that you created in your stylesheet for this section needs to be specified.
<div id=”navbuttons”>link and image codes go here</div>
And then you’ll also notice that I added a style code to three of the four images.
style=”margin-right: 10px;”
I added that code to the first three of the four pictures to add a 10-pixel margin to the right of those images.
So using the same format, write your HTML code to specify the division ID, your links, and your image locations. And also add a style specification to any image that needs a margin.
When you have your code finished, copy and past it into the white box under genesis_after_header Hook on the Simple Hooks page, click Save, and you’re done!
Pssstt…Do you still blog on Blogger? Ready to make the switch to WordPress? I can help you! Check out my blog design website for more info.
Pssstt again…This post contains affiliate links. I didn’t think you’d mind since I’m passing along this helpful info, right? Just think of it as a way you can help Matt and me save up for a downpayment on that house we hope to buy. And thanks in advance for your help! 🙂




Your buttons look great!!!
Kristi, you continue to amaze me. Great look! Great work! Great share!!
I do love them…although your directions I know are excellent. I just am petrified to do it:) You may have to make me some soon….your time and paying you versus my 15 hours it would take me…well you do the math! Thanks Kristi. I will email you soon.
Currently, I don’t have a blog, but I love yours! I’m totally impressed with how generous you are with helpful information for bloggers and bloggers-to-be. Thank you. Lisa
Wow–such a clear tutorial for such a technically complicated thing. Well, it is for me, anyway. 🙂 Thanks so much for taking the time to share this.
Love the buttons. Getting beat up on it myself, but I love the idea. Maybe I will get it figured out yet…
Wow! Great tutorial! I am so tempted to go and try this right now!
But instead I’m going to check your blog for more gems first ;o)
This is great! I did it and it’s now on my blog…but I have a question. Do you know how to fix it so it’s mobile responsive as well? (I will check back but if you could email me, that would be great!) I’ve been looking but I can’t find it…so on mobile, the menu stretches way past the width and goes off screen. Thanks so much for posting this, it is fun & an amazing way to really personalize things. 🙂
The tutorial was GREAT, thank you very-very much! But I have a problem. When I paste the 1st code for the style of the pictures I don’t see any difference. (Yes, I press enter after finished). Please help me! Thank you again!