Breakfast Room/Pantry Hardwood Flooring Installed! (Plus A Couple Of Installation Tips)
I finally finished the installation of the hardwood floor in the breakfast room and pantry yesterday! This was a big project, and it took way longer than I had anticipated, so I’m relieved to have it done. Of course, it still needs to be sanded and sealed, but that will be one of the last projects I do in here before I put furniture in the room.
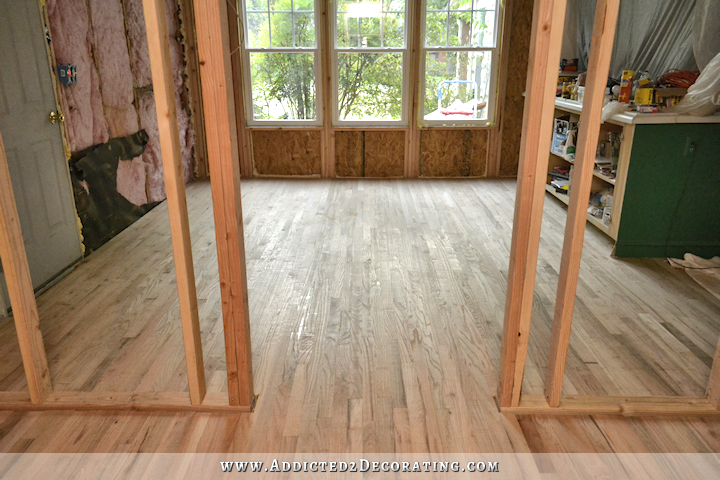
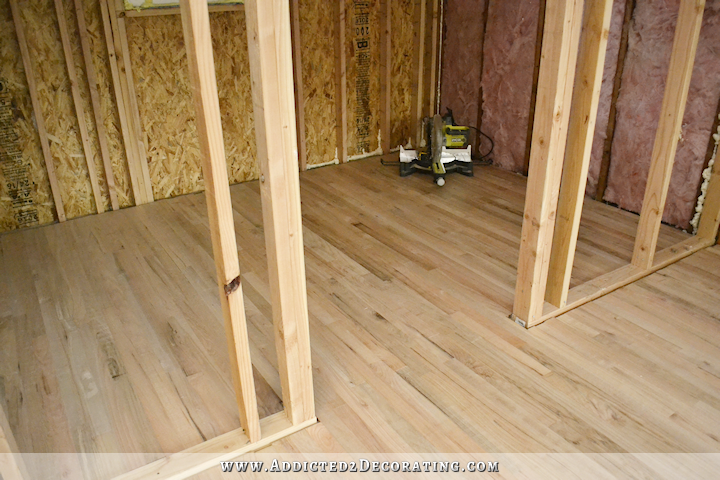
So here’s a look at the newly installed solid red oak flooring. I got the flooring at Home Depot, and the store here keeps it in stock all the time.
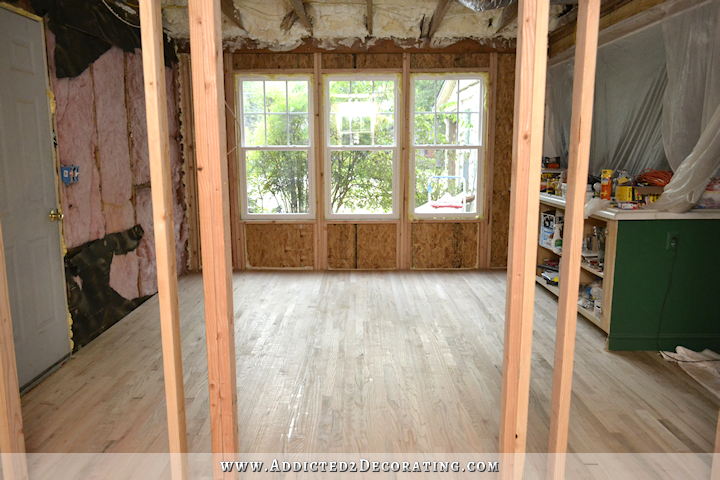
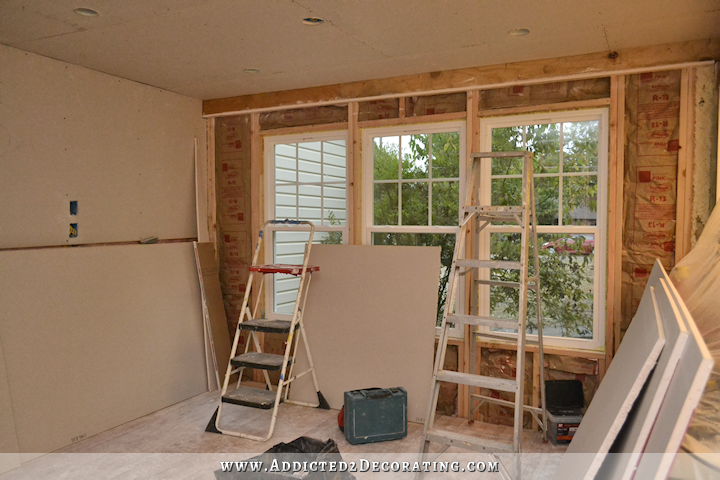
Here’s the full view with my new windows.
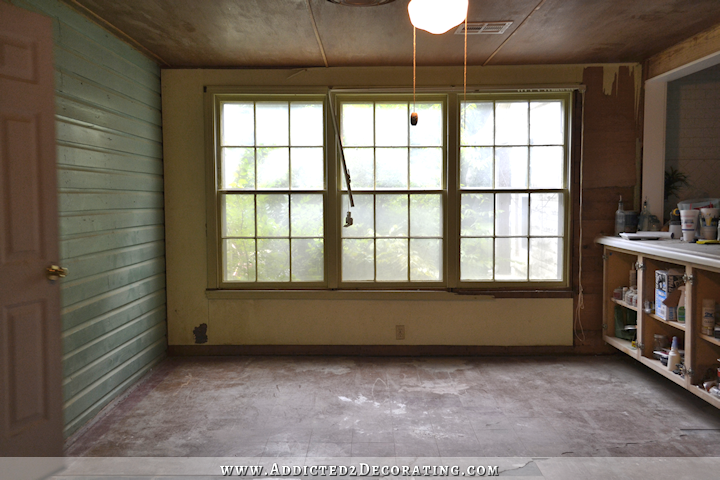
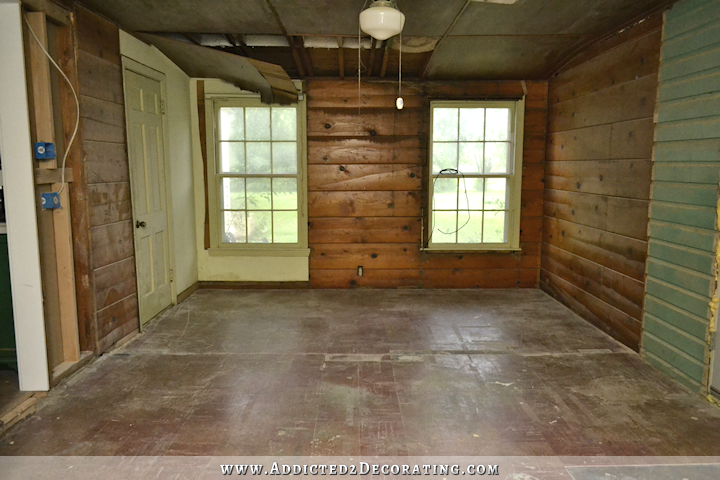
That side of the room, with the old windows and asbestos tile-covered concrete floor used to look like this…
I love to see the progress!!

And of course, the best thing of all is that I no longer have a step down into the breakfast room from the kitchen. It’s now all one level floor from one room to the next.
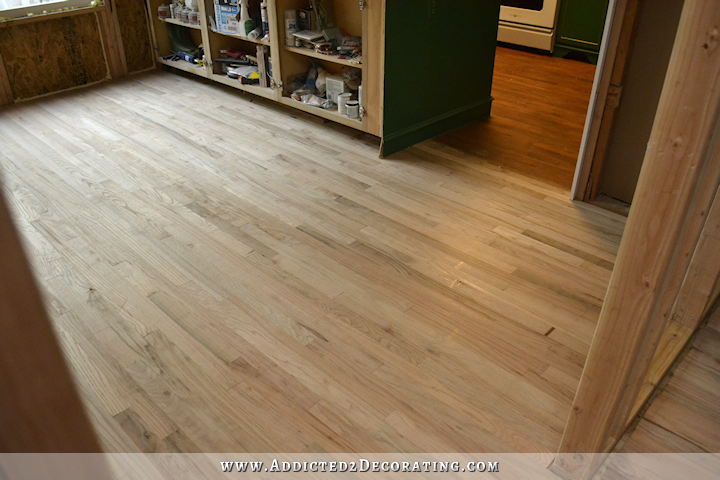
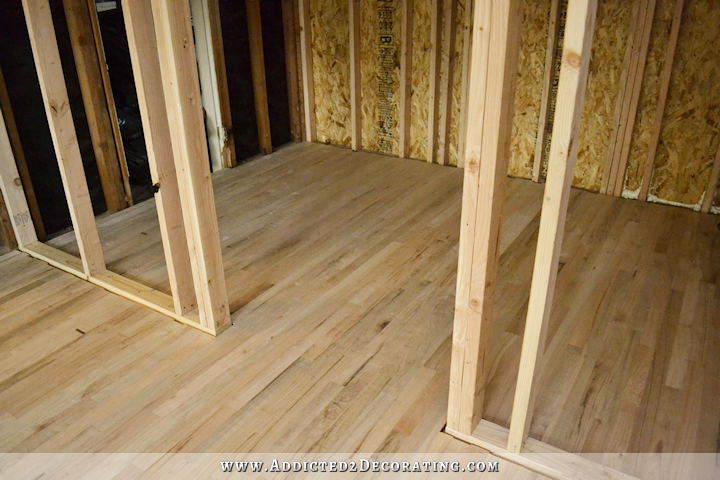
And here’s the pantry at the back of the room…

That side of the room used to look like this…
It’s come a long way! But there’s obviously still so much to do.
So I wanted to pass on a couple of tips for installing hardwood flooring.
Hardwood floor installation tools
First, if you’ve never seen nail-down hardwood flooring being installed, this is the nailer that you use for this project. It’s big with a tall handle so that you can stand while using it. And it has a plunger button on the front of it.
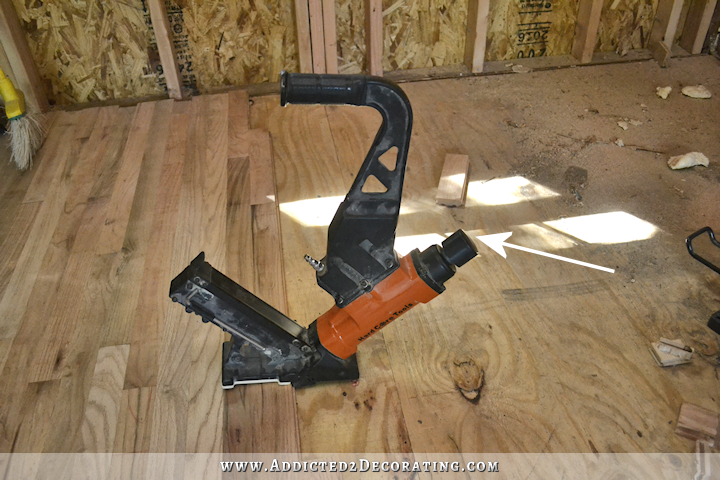
You use the rubber mallet that comes with it to hit the plunger button to shoot the L-cleats into the tongue edge of the tongue-and-groove flooring boards.
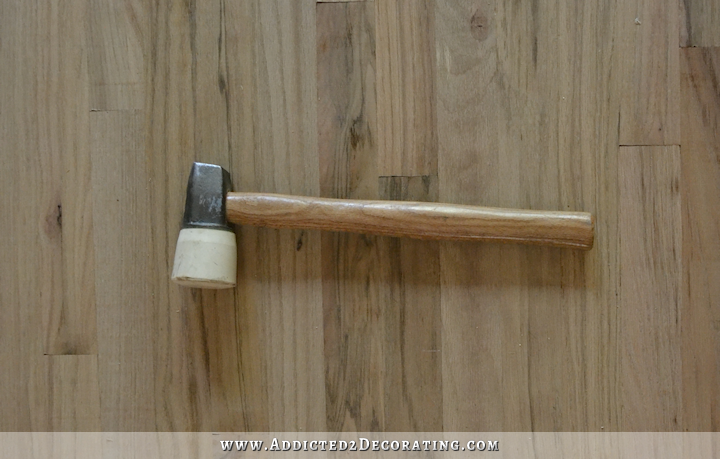
The metal side of the mallet is slightly angled, and you use that side to tap the boards into place. The angle allows you to hit the edges of the boards without damaging the tongues on the boards.
I bought my hardwood floor nailer on Amazon about three years ago, and while they no longer carry the one I have, you can find a similar one here.*) Mine came with two different plates for two different thicknesses of hardwood flooring. The flooring I’m using is 3/4″ thick.
I use it with my 6-gallon Porter-Cable pancake air compressor*, and it works perfectly.
That nailer works great in the wide open areas of the room, which of course, is most of the room. However, when you get to the other side of the room and get close to the wall, there’s no longer any room for the nailer. So when I get about four rows from the wall, I start using my 16-gauge nail gun (mine came with this set*) and nail at an angle just above the tongue.

On the very last two rows, there wasn’t enough room for this nailer, so I installed those last two rows with adhesive and a few nails through the face of the boards. Those holes can easily be filled with red oak wood filler (this one is the best*) before the floor is sanded and sealed.
How to change directions when installing hardwood flooring
When installing my hardwood flooring, I started at the kitchen, and worked my way to the garage side of the room. When I hit the opening to the pantry, I took the flooring all the way to the back all of the pantry…

…and then I continued working towards the garage side of the room in both the breakfast room and the pantry.
But then I still needed to do the pantry floor from the door opening back towards the left side of the room (i.e., towards the kitchen). But that meant changing directions in the wood since that was the groove side of the wood, and you nail through the tongue side of the wood. You can’t nail through the groove side of the flooring boards.
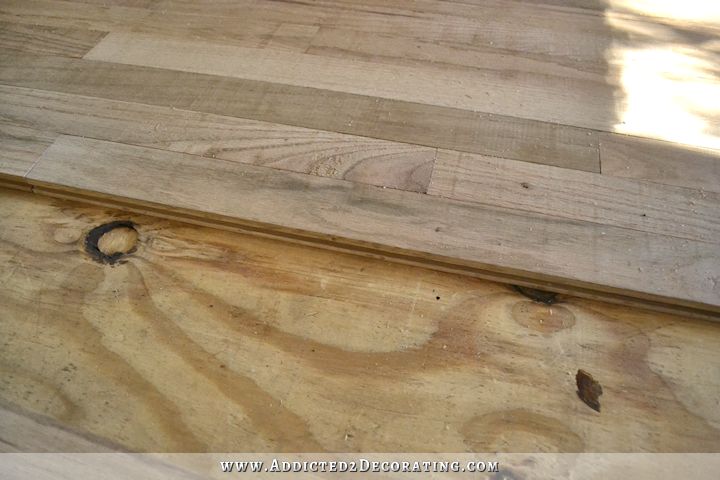
Some people will just butt the two groove sides of two boards up against each other, and start nailing the opposite direction. But since there’s nothing holding these to edges together, that could cause problems down the road, so that’s not really the best option.
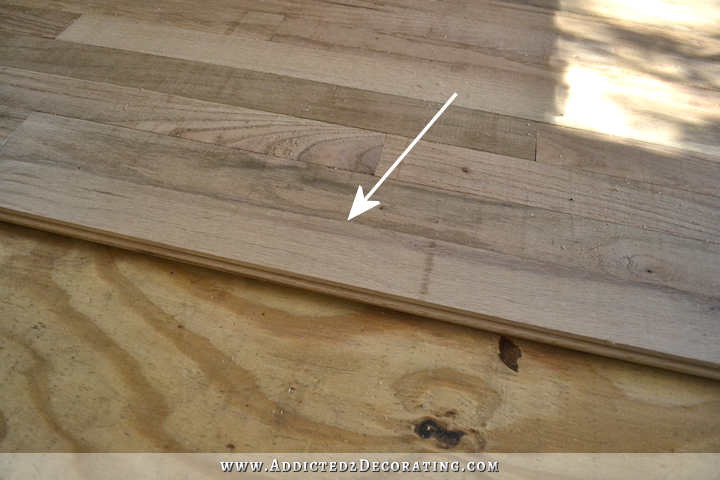
The best option is to use hardwood splines that are made to fit perfectly into the grooves on the flooring boards. These splines form a perfect tongue that holds the next board in place, and allow you to begin installing in the opposite direction.
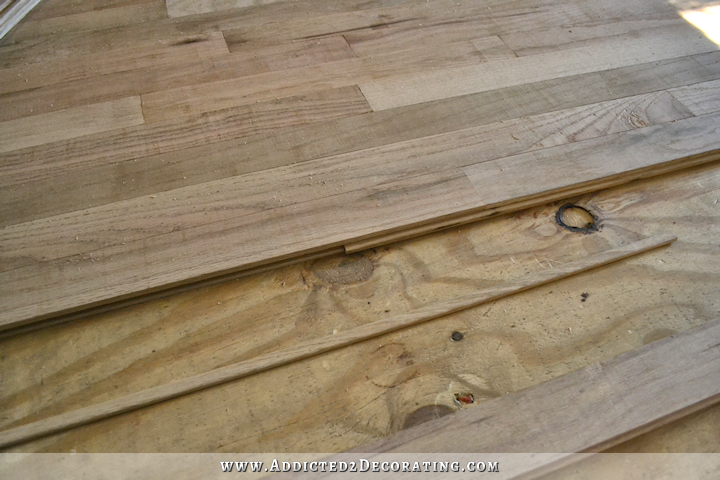
I bought my splines online at Home Depot here.
How to easily remove misfired L-cleat nails
This is one of those lessons I learned while installing the hardwood flooring in my kitchen. I had a few misfired L-cleats that had to be removed before I could install the next row of boards.
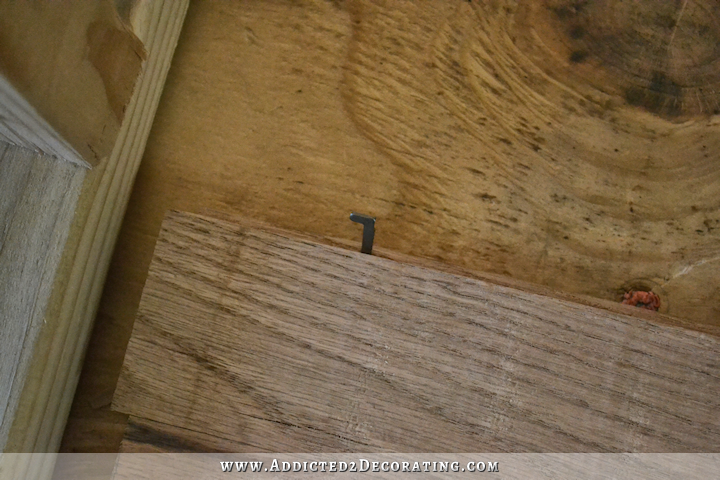
I tried nailing it in all the way by hand, and it just bent and created a mess. I tried pulling it out with pliers, and since those L-cleats aren’t really made to come out, I ended up gouging the face of the flooring board and messing up the tongue on the board.
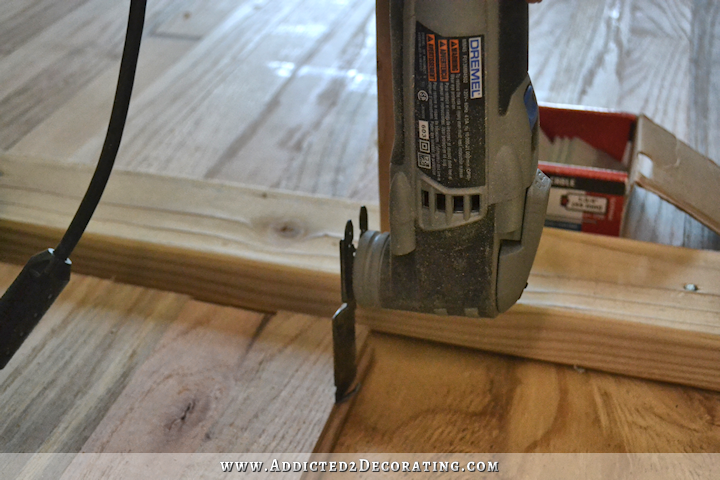
Then it dawned on me that the easiest way to remove it is to cut it. My Dremel oscillating tool (this is the one I have*) with a carbide blade* (an essential in my opinon) removed those things in about two seconds. It’s absolutely the easiest way to deal with misfired L-cleats. Just cut straight down along the edge of the board until you hit the tongue, and the excess piece of L-cleat will come right off.
So those are my tips that make hardwood flooring installation a bit easier. Truth be told, installing hardwood flooring is actually pretty easy. Just remember to allow the wood to acclimate in your house for a good amount of time before installing. I had mine stacked in the music room for about three weeks before I got started with the installation. Three weeks isn’t really necessary (one probably would have been enough), but longer is always better. There’s not really a set amount of time you have to wait. The issue isn’t time, but rather it’s the moisture content of the wood. The longer you can give it, the better.

Addicted 2 Decorating is where I share my DIY and decorating journey as I remodel and decorate the 1948 fixer upper that my husband, Matt, and I bought in 2013. Matt has M.S. and is unable to do physical work, so I do the majority of the work on the house by myself. You can learn more about me here.

Which floor did you buy from Home Depot? Do you have a link?
Do you have a lot of bad (warped/bad knots) pieces?
How much did you pay?
I have never been able to find it online. I just looked on my receipt, and the SKU# on the receipt is 750584000018. It’s called 3/4″ X2-1/4″ #1 common red oak in random lengths. It comes in bundles (not boxed) and each bundle covers around 19 square feet. I actually had very little waste due to knots, warped pieced, etc. In fact, I think I bought 19 bundles, with three bundles left over. And in all of the bundles that I used, I may have had four pieces that were unusable due to knots, etc. At my store, this flooring costs $3.38/square foot, but that price might very a bit throughout the country.
So I take it your pictures reveal the breakfast room from the pantry? Just trying to get the whole perspective. That is the kitchen to the right in the picture? No matter what it looks great. Glad you are done with this huge project.
They’re taken from both directions. The three windows are at the front of the breakfast room. The pictures showing one small window with the framed (but not yet drywalled) walls is the pantry. When looking towards the front of the breakfast room (the view with the three windows) the kitchen is on the right.
Thanks for the answer…
It is looking great! It is nice to see the room coming together and with the pantry wall up I can get a better idea of the space! I love it! I was also just thinking. I am glad that you are finishing all the main rooms before really decorating. I know you have so many ideas in your amazing brain, but I was thinking that when you decorated for others you were working on a finished room. Now you will have all of the main living areas complete. (With the exception of the family room ) I think it will be easier to decorate each room with your amazing style and have all of the rooms flow. You are getting so close! Keep up the amazing work!
Great job! It’s really coming along. I doubt if I would ever tackle a job like that at my age (60) but I think it’s great that you show us how, and give your learned tips!
On our new house build, the flooring Co. had a heck of a time getting the moisture levels down enough to install the hardwood. Two dehumidifiers, the A/C running constantly, and almost two weeks before it came down enough! Didn’t help that other workers were in and out all day, every day, and sometimes were leaving doors opened all day! But it finally got done, and we may actually get to move in by the 14th! I’m glad we went with prefinished hardwood, or we may have had a hard time waiting for the stain to dry!
Can’t wait to see your next post!
Great job! I bet you can’t wait to do the fun stuff !!
The windows and the flooring look great! I really like that it is level with the kitchen floor and easy for you and Matt to get around. Wonderful job and thanks for sharing the tools of your trade with us.
Wow, just can’t imagine tackling any of the things you do…you are just amazing and your work is that of a real artist!
I bet your hubs LOVES that he can easily go from one room to another as well. :o) What an exciting feeling.
Thanks for the tips and detailed pictures. These will help us immensely if we decide to install hardwood ourselves next year. It must feel so good, too, to no longer have the level difference between kitchen and breakfast room, the benefit of which you will get to enjoy multiple times every day. That was such a practical improvement.
Looking awesome!!!
I think the OCD side of me would have put the floor in and then built the partition on top of it. I’ve done way too many renovations moving fixtures (usually, cabinets) where I’ve sworn at the previous owners for installing flooring AROUND the fixtures–especially hardwood flooring.
Like, oh, my current kitchen, where the flooring not only goes around the cabinets, but the he polyurethaned around the fridge. 😉
Oh, believe me, wrestled back and forth over that decision. I was originally going to do the flooring first, but mostly because I couldn’t figure out how to change directions in the flooring. After researching that and finding those splines, I knew it was feasible to change directions while still maintaining the strength and integrity of the tongues and grooves.
But the main reason I finally decided to do it as two separate rooms is because the pantry section (which was an add on) isn’t square. The front original part of the room is fairly square, but the pantry is off. I was so afraid that if I did the flooring all the way from the front wall to the back wall, those long rows would end up being curved and very obviously not square. That would have, quite possible, driven me crazy. 😀
Wouldn’t doing the flooring before building walls or built-ins create a problem should you want to change the flooring? We put carpet in our living room, then built a permanent bookcase to frame an opening (same as in your music room) on top of the carpeting. Since then I’ve removed the carpet but now I’m left with the pieces under the built-in bookcase. And it’s thicker than the flooring that replaced it. I’m still trying to figure out how to hide the carpet pieces that show.
Hardwood flooring should always go in before cabinets and built-ins. That’s just standard. That way if you want to remove built-ins or rearrange cabinets, you’re not stuck with big holes in the flooring that need to be filled in and matched later (which almost never looks as good as it should).
DEB Makes a good point. I think I draw the line at hardwood because of its permanence, expense, and ability to refinish it to update it or change the color. You might put carpet or floating flooring or even glued-down flooring OVER hardwood, but you’d probably want to make sure you could remove it someday if you wanted to and refinish the hardwoods. But hardwoods are kind of a baseline. You probably would never want to pull hardwoods out unless they were damaged so beyond repair (water damage, rot, etc.) that they can’t be sanded and refinished. Then again, I’d gladly rip-out the oak floors with dark pegs in my living room in a heartbeat if money were no object, so I guess that rule isn’t hard and fast. 🙂
Fixtures like cabinets, built-ins, and appliances are another story. You’re more likely to want to be able to replace those and not have to worry about the footprint of your hardwood flooring. Maybe the one exception is a bathroom where the tub or shower should probably be directly on the subfloor.
There is one other exception I can see and that’s expense. If you have a lot of built-ins, like say a large kitchen with a ton of cabinetry, it can be pretty costly in the context of a full renovation to put flooring underneath all those cabinets where it’ll never be seen. That can be anywhere from 1/4 to 1/3 additional cost. I guess in that case, you have to decide whether you’ll ever be redoing the room and if not, whether you care about the next owners or not enough to waste that much money. I’ll be honest and say I did make that call when I did my entire condo over with Pergo-style flooring. I didn’t go under the kitchen cabinets. It was just going to cost too much and I knew I wasn’t staying there.
Yep, we went back and forth about putting flooring under our new kitchen cabinets when renovating (laminate, not hardwood). The flooring guy and the cabinetry guy both had opposing views with good reasons for each. Ultimately when we worked out the additional cost it was an obvious choice. Besides, we (or future owners) will probably change the flooring before changing the cabinets (especially if the flooring guy was wrong about the predicted water tolerance of his product!) so it’s actually easier not running under the cabinets.
It really looks like it’s a part of the house, instead of an addition that someone tacked on. Beautiful job on those floors!! I can’t wait to see what design plan you ultimately choose. 🙂
Can I say I have pantry envy just looking at the footprint for it?! We plan do to do a renovation on ours next year, but we don’t have even half the space you do to to enlarge it. I am really looking forward to seeing what you do with yours!
Looking at your Blog post is like watching a Soap Opera. I can’t wait to see the next progress. We have done a lot of remodeling and I am right there with you. What you can do and what you have done is AMAZING!! Keep up the great work girl I cannot wait to see what is next….
Kristi, Thanks for the step by step instructions on your gorgeous new floor – I still have a few questions – Did you just lay the plywood down on top of the concrete? Did you glue it? How did you know that after re-doing the concrete and laying plywood and then flooring on top, that it would be level with the kitchen floor? When you got to the other side of the room with the oak flooring pieces, did you have to cut them off at an angle? How did you get the flooring straight but yet looking even when you got to the other side of the room?
I am amazed at your drive and work ethic Kristi! You are truly inspiring and deserve all the blessings that come your way! I too – follow your blog to see what you are doing next and how
you are going to accomplish it! Can’t wait to see the next episode….
So, are you still planning on turning the back side of the island into a banquette (not sure I spelled that right)? I’ll be sad to see it go.
Love love love what you have done!! I am interested to know if you plan to put any counter space with electrical outlets in the pantry. I have often wanted an out of the way place, besides my kitchen, to plug in crockpots and other appliances. Just curious.
I can seriously recommend that Dremel tool! I bought it because you wrote so postively about it and we’ve used it on several occasions, including a very similar one to yours to get rid of nails stuck in wood that had to be removed and couldn’t be torn out with pliers. So thanks for that tip some time back 🙂
and the room is coming along fantastically – you wouldn’t think it’s the same area as in the “before” pictures!!
You never cease to amaze me! Great job! Keep those pics coming!
This is getting so exciting! The hardwood looks so so good too! This must be a huge weight off of your shoulders. Can’t wait to see the finished pantry!! I would die for a pantry that big, lol.
The flooring looks great, you’ve done a fantastic job……yet again!!!! I can imagine how amazing it is to have the floor level with the kitchen now and so much easier for Mattt to maneuver . Well done Kristi.
Hi Kirsti. I don’t post a lot, but I’ve been following your adventures for a long time. I am inspired by you to take on some remodeling projects at my own home. I have a favor to ask. When you sand and seal the breakfast room floor, would you show how you link up the new refinished floor with the old? I’m going to have to refinish our floors one or two rooms at a time and I wonder if it will show when I link up to the previous finished floor. I hope that makes sense. Thanks.