How To Make Your Own Drapery/Curtain Trim (Plus, My New Sitting Room Curtains – Finished!)
My new sitting room curtains are finished and hung, and while I thought this was going to be a quick and easy project (ready-made trim, no drapery lining needed, etc.), it wound up being quite an involved project. But I learned something very valuable for the future. I learned a somewhat involved but still pretty simple method that can be used to turn any wide decorative ribbon or any fabric into a trim that can be used on drapery or curtains.
But first, here’s a look at how my curtains turned out…

The fabric is a velvet that I had purchased for an upholstery project that I had planned for the music room, but then I ended up purchasing a new settee and no longer needed this fabric. The trim is some that I bought years ago for some living room draperies, but then I changed my mind on that as wel.
So last week (or maybe the week before…I’ve lost track), I dyed the trim so that it was less peachy pink and more orange. Well, after it was dyed and rinsed, I stuck the trim in the dryer. That was a big mistake, because it ruined the interfacing on the back of the trim. It peeled off in shreds with very little effort, leaving the trim very thin and flimsy.

So I picked off all of that backing, and then picked out the side hems, and ironed the trim flat.

And then I headed to the fabric store to see what I could find to stiffen up the trim and give it some body again that would make it easy to work with, and give it more structure, especially along the edges.
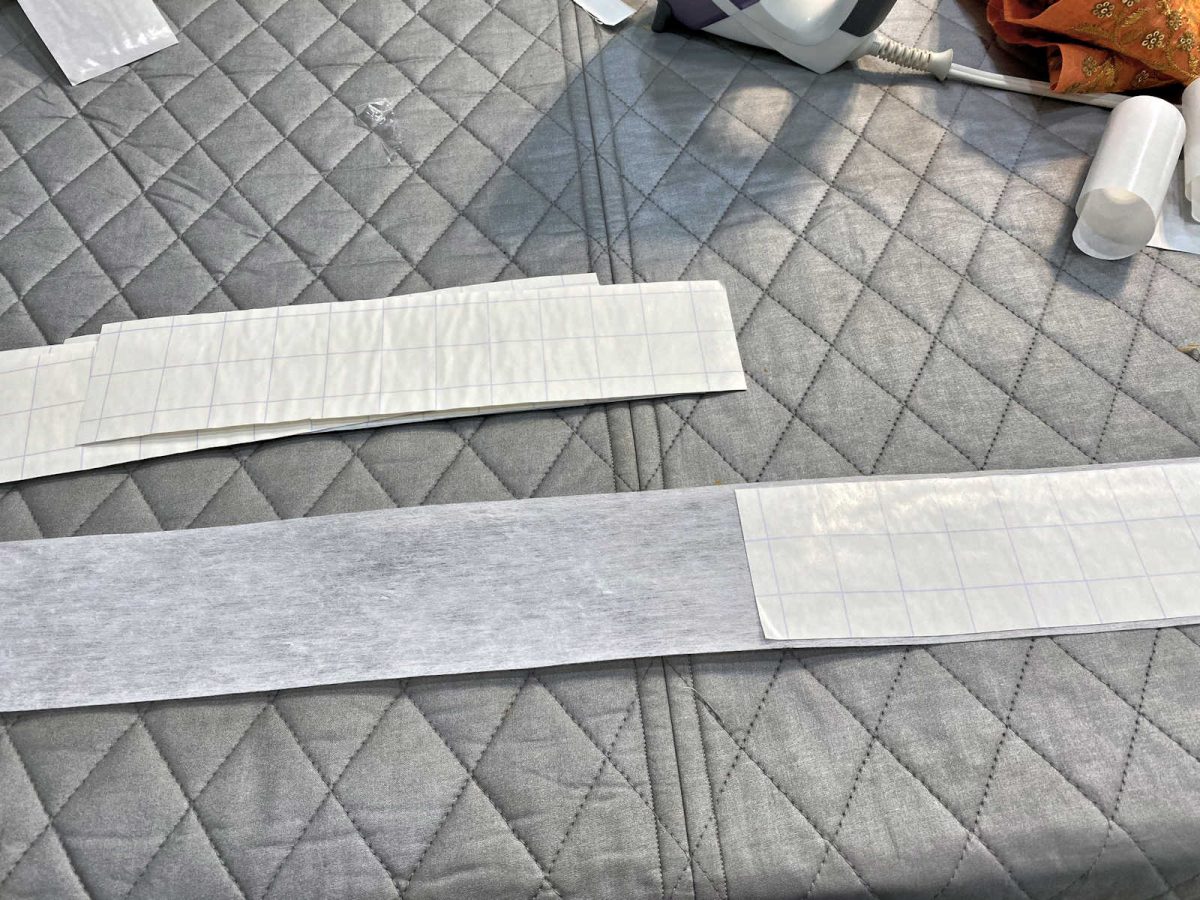
After looking at all of the fusible interfacings and other options, I decided to go with this product — EZ-Steam II, which is a two-sided pressure sensitive fusible web by Pellon, the same company that makes all of the interfacings.

This turned out to be the perfect product for this project. I cut the sheets into strips, and then used those strips on a piece of 3-inch non-woven drapery heading that was cut to the length I needed for the drapery trim. I peeled off the backing and stuck each piece to the drapery heading. It’s sticky, but remains repositionable until you use the iron on it. Once you use the iron, it becomes permanent.
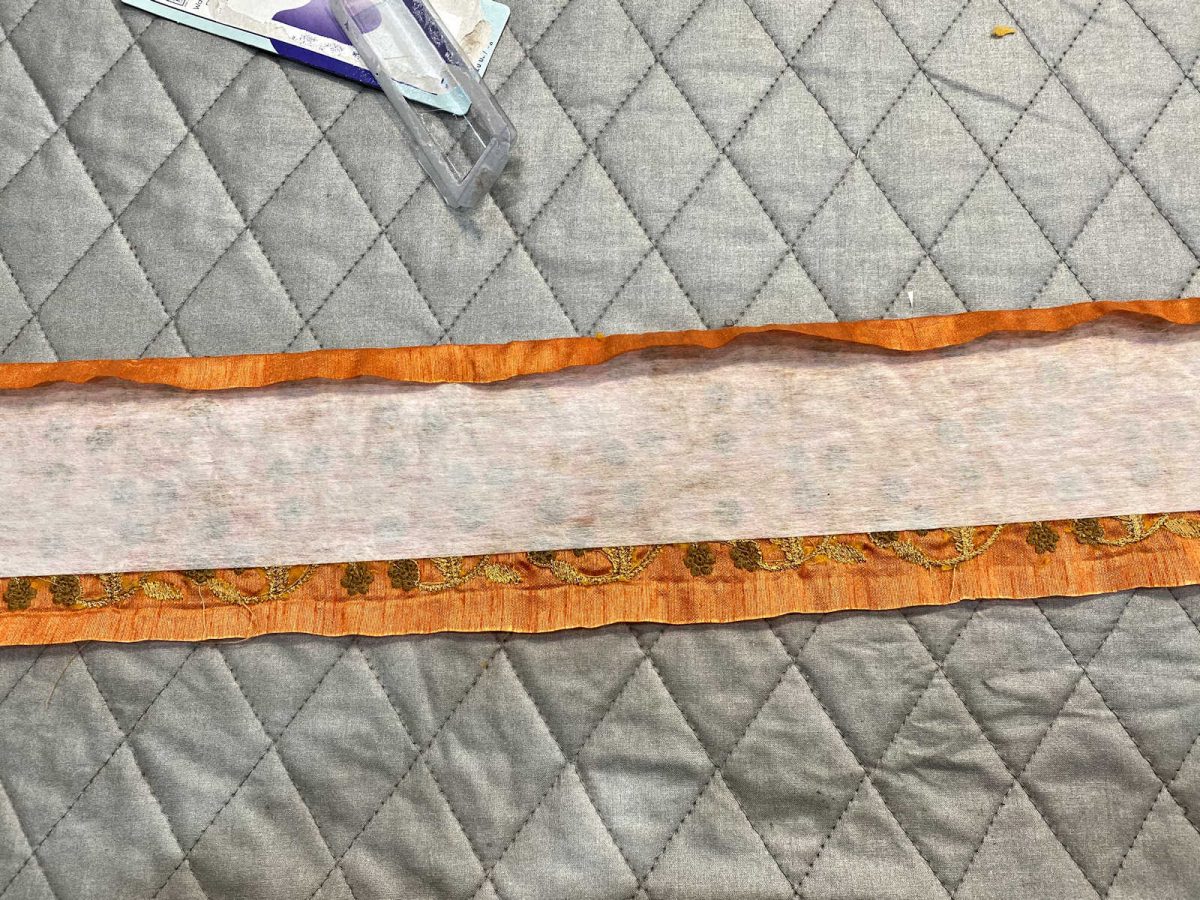
So after sticking the strips of webbing to the full length of the drapery header and ironing it on to be permanent, then I peeled the paper off of the other side of the pressure-sensitive webbing and stuck it to the back of the trim. It became very handy to be able to reposition the webbing before ironing it, because this trim was a bit finnicky to work with.

When I got it exactly where I wanted it, I ironed the webbing in place, and then folded the edges of the trim over the edges of the webbing and ironed.
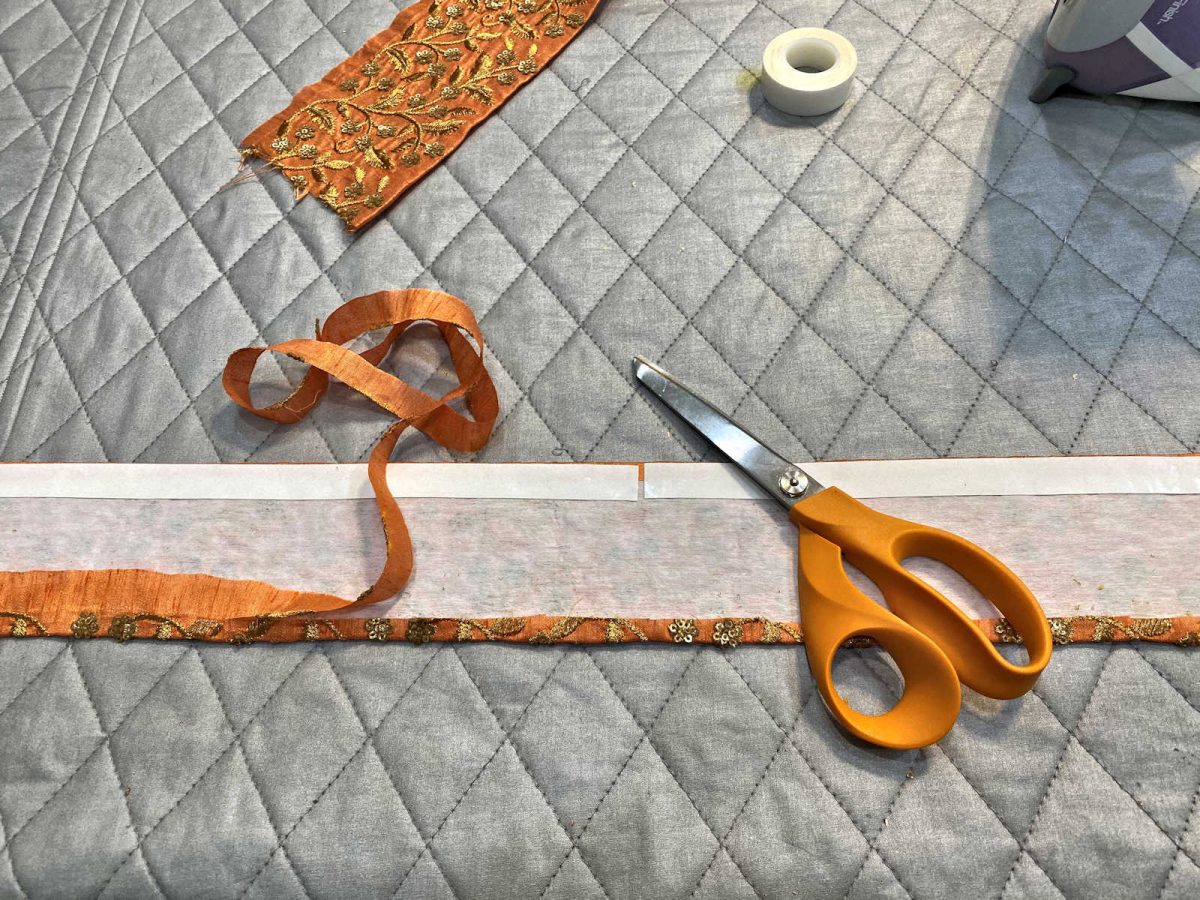
Then I trimmed off the excess so that only about 1/4 inch remained.

And then I used peel and stick Fabric Fuse tape, which is an excellent tape that creates a permanent bond that I’ve used on several projects in the past.

And I placed the tape in such a way that it held the edge of the trim in place while also lapping over onto the webbing quite a bit to hold everything together.

And then I repeated that process on the other side, folding the trim over, ironing in the edge crease, and then cutting off the excess.
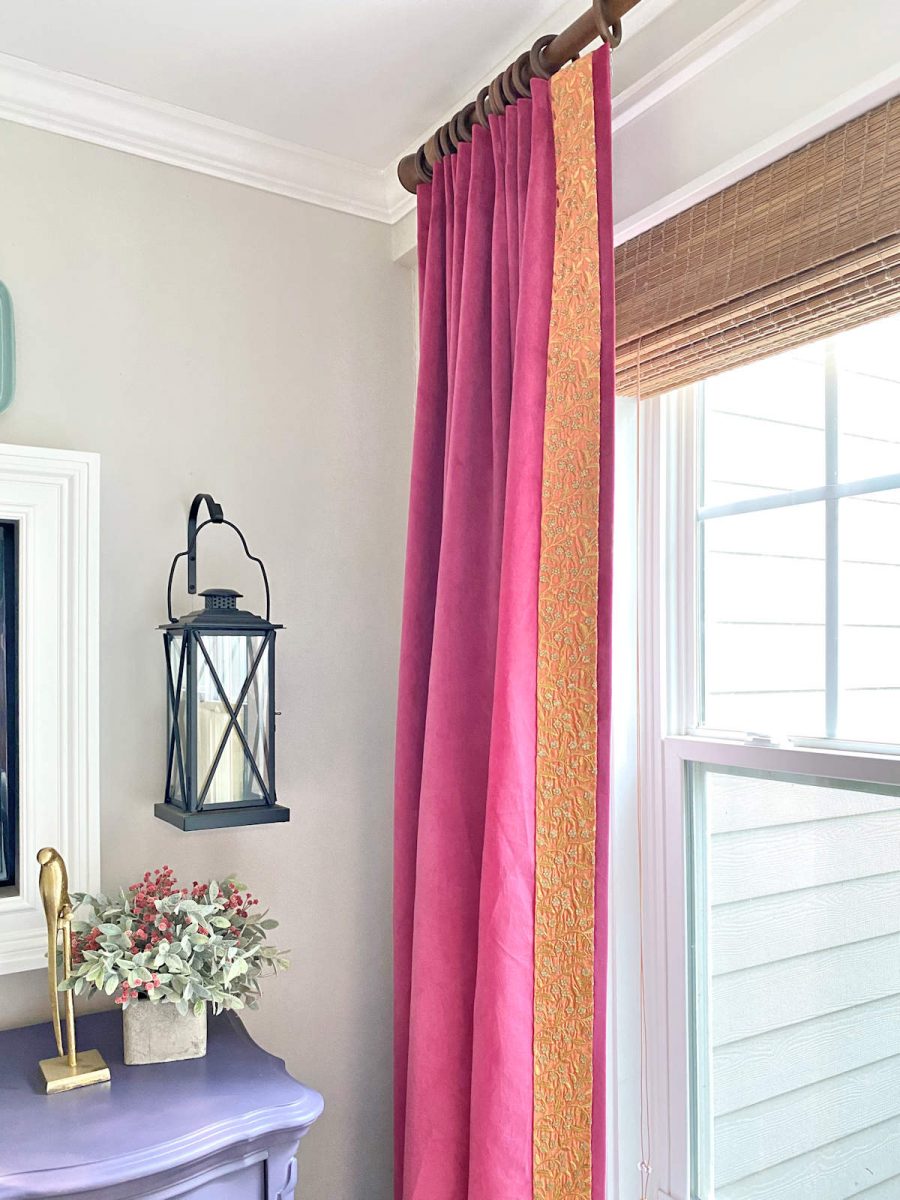
And when it was finished and ready to be applied to the drapery panel, this is what it looked like on the back side…
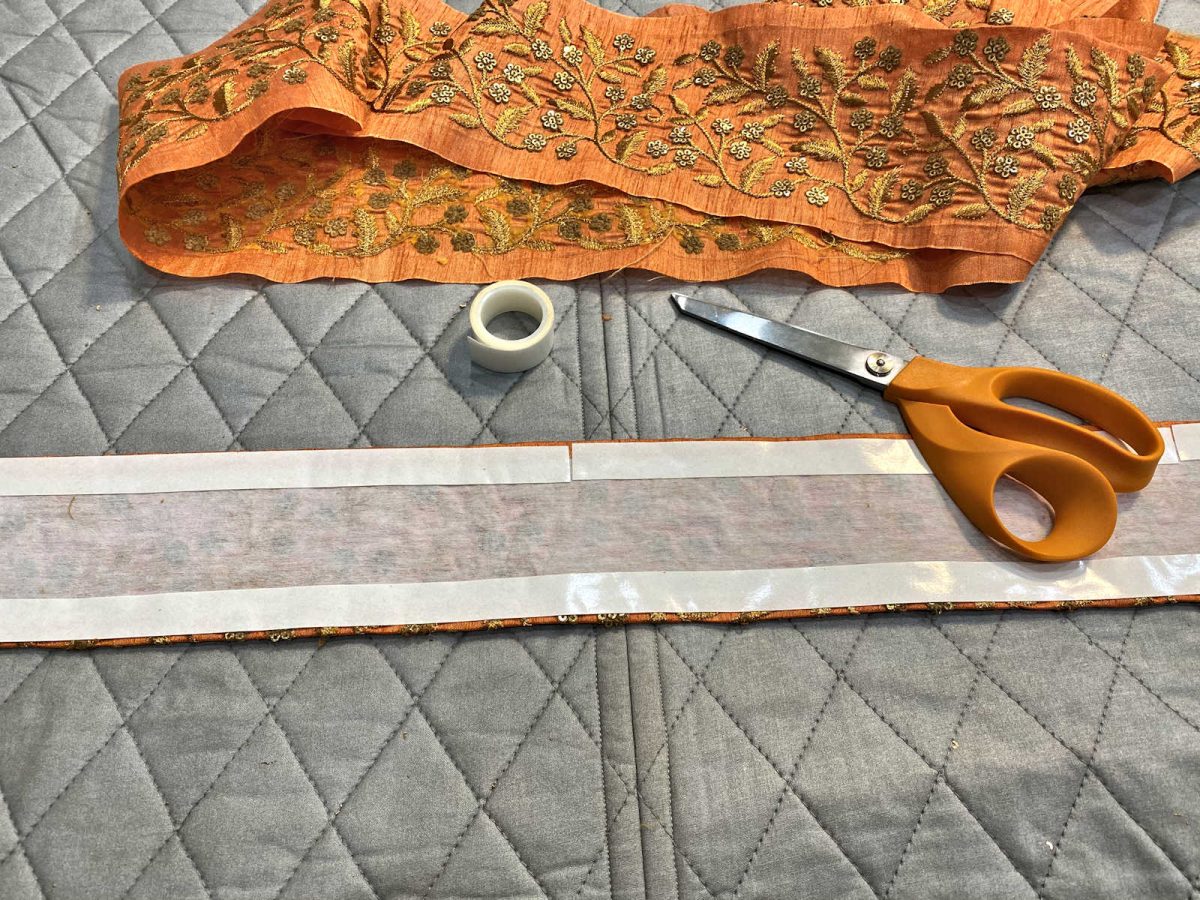
And this is what the front side looked like…

The finished trim was about an inch narrower than the original trim, but I’m okay with that. I think three-inch-wide trim is just right. And that peel and stick Fabric Fuse tape is double sided, so once the trim was all prepared, I simply peeled off the paper and stuck it to the curtain panel along the leading edge.
I didn’t take pictures of the process of making the curtain panels since I already have so many curtain and drapery tutorials from the past. But here’s a quick recap. These curtain are not line because they’re made of upholstery velvet, which means that the velvet already has a white lining attached to the back side of the fabric. So there was no need for an additional layer of lining.
So to make my curtains, I cut three yards of the fabric, sewed a 1.5-inch double folded hem (i.e., fold 1.5 inches, pin, and iron, and then fold another 1.5 inches, pin, iron, and sew into place). And then I repeated that on the other side. And I didn’t do any fancy hidden stitches or anything like that. I just sewed right on top. With the two side hems sewn into place, I then attached the trim to the leading edge of each panel. Then I sewed in the hem (a four-inch double folded hem), and then I sewed in the header (using drapery header tape and single pleats).
I’ll link to other tutorials below so that you can have more info on all of that if you need it.
So after all of that, this is what my new curtains look like in the room…

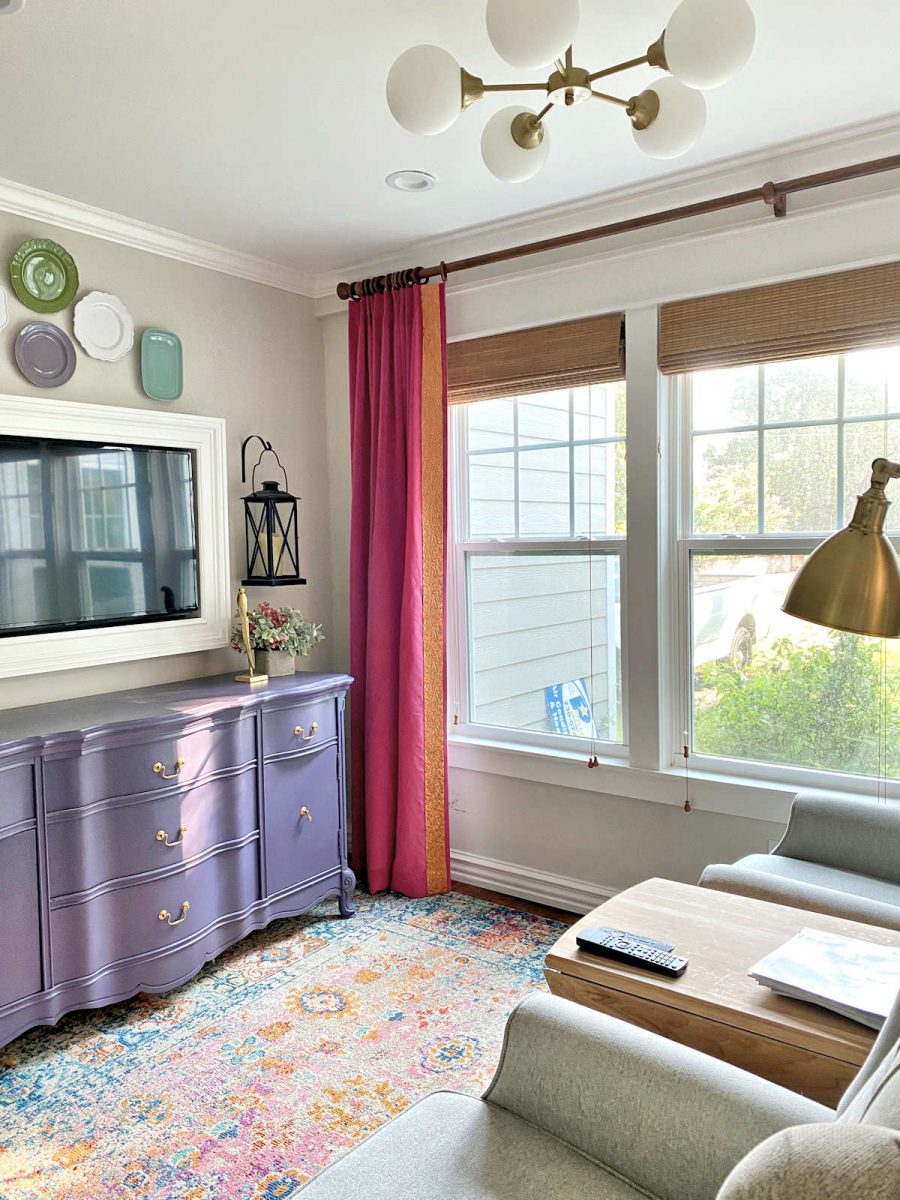

I like them a heck of a lot more than the white ones that were in here before. I’m just not a white curtain kind of person. So the color these bring to the room is definitely more me. I do wish I had thought to remove the plates and lanterns from the TV wall before taking these pictures, because now they kind of clash, and they aren’t staying. But I have something up my sleeve for that wall, so you’ll see it shortly with its new look.

Addicted 2 Decorating is where I share my DIY and decorating journey as I remodel and decorate the 1948 fixer upper that my husband, Matt, and I bought in 2013. Matt has M.S. and is unable to do physical work, so I do the majority of the work on the house by myself. You can learn more about me here.


![I Have A Level Breakfast Room Floor! (Leveling A Concrete Floor With A New Layer Of Concrete) [VIDEO]](https://www.addicted2decorating.com/wp-content/uploads/2016/08/breakfast-room-leveling-the-concrete-floor-square-thumbnail.png)
You have so much more patience than me 🙂 I would have thrown the trim in the trash when I realized what had happened and declared solid pink draperies just fine. 🤣The final product looks great in the room and really brings out the rug. Can’t wait to see what you have in mind for the Tv wall.
You are a master problem solver! Many people would have given up. They are stunning.
Oh how I love your colors.
The trim is beautiful and I love the mix of bright colors in this room. The only suggestion I have would be to make soft, not sharply creased, folds along the center of each pleat and loosely tie each panel with three wide (3″) strips of scrap fabric near the top, center and bottom of each panel. Let them hang two days. This will “train” the pleats so they hang more evenly.
A lot of work but they look divine.
Beautiful Kristi!
Beautiful!
Where did you get your recliners for the sitting room?
They’re from Wayfair. Here’s my affiliate link for it: https://bit.ly/3rI7udv
The room looks beautiful and I love the pink/orange combo for the curtains!
Those turned out gorgeous!!! Can’t wait to see the newly decorated walls!
Love to see your amazing talent. I’d like to send you photos of my Kitchen /family room to get your opinion on color walls and cabinets.
So pretty! I could happily live with this room just as it is…. but, change is coming! Wonder what you will do to make it better?
I love, love, love them! The color is beautiful with the rug. The trim is like icing on a cake. Love seeing them with the living room too. I can’t help but see this room (& every room you’ve done) in their before state. It is truly unbelievable! Your vision is a gift and the talent you have to do almost all of it yourself. Thank you for sharing!
Perfectly beautiful!
Do you plan on repainting the console? I thought it was that lovey dark eggplant but it looks light in these pics. But I know colors look different online & I’m using a new phone so that may be why. Can’t wait to see what you do on the tv wall!
I don’t plan on repainting it, except for touchups. And the color that shows in these photos isn’t just your phone. It’s actually a very dark purple, but in the early morning when the light comes into that room more directly, it looks much lighter. And then about mid-morning, it looks much darker again. 😀
Beautiful!!
This phrase comes to mind… “The house that color brought to life.” Yes?
kristi I always look forward to seeing what problem you’ve solved or color combo you’ve come up with. TaDa! Again!
The colors all work so well together…it’s another room that smiles.
Kristi I love your site but the ads sometimes are so numerous it makes the site unusable. I installed an ad blocker on my desktop specifically because your site was so overloaded. I just tried to read this on my phone and gave up. But I wanted you to know why I won’t be reading unless I’m on an ad blocked device. It seems like there would be a happy medium where they would make you money but not be so intrusive as to make people block them completely.
I’m on a laptop using Windows 10 and Firefox browser and this site always loads quickly for me. It runs very smoothly on my end. Your phone’s browser could be slowing it down…. maybe try another browser on your phone?
It isn’t that it loads slowly. It’s that the ads are so numerous, you can’t read the content. On my iPhone, it’s literally impossible to scroll where there isn’t an ad showing. I guess the tech is really smart, it knows how big your screen is and inserts an ad every screen length. But no joke, trying to read this post on my iPhone I saw probably 40 Pottery Barn video ads. That’s not an exaggeration. It’s very distracting and frustrating.
I love your color choices! Beautiful!
The curtains look fantastic – very Mumbai bazaar – such rich colours. The new rug works much better too. I think the central medallion on the other one was the problem being so off centre in the space.
Oh my, when I read that you had put that in the dryer, I cringed! But at least you were able to salvage it, and it happened BEFORE you attached it to the drapery fabric. Hopefully if you ever need to dry clean the drapes, the trim will be fine. I recall once making a dozen cloth napkins out of decorator cotton, thinking that cotton would be okay to wash. Wrong! They came out stiff, scratchy and super wrinkled. Once I steam pressed them forever, they were better, but I ended up only using them once, then giving them to goodwill. Most home decor fabrics/trims cannot be washed, and some can’t even be dry cleaned!!!
You have such a happy house. I’m always on the look out for good iron on interfacing that actually hold. This one is new to me so I’ll give it a try. Also haven’t used that double sided tape before. Thanks for the resources. Your draperies are lovely.
Exceptional job!! So inspiring.
I love looking at you bright, beautiful and bold home. I have always been a blue, gray and white girl. But, your colorful home makes me happy! Can’t wait to see what you create next!
Sheila F.
It looks great! I love the pink and orange together – in fact just in general your colorful home photos bring a big smile to my face.
Sooooo pretty! The plates are kind of fighting with the curtains now, but I remember you saying before that you had something planned for that wall…. cannot wait to see it! Hope you are enjoying a very blessed, relaxing weekend. =)
I see you attached your trim with the double sided fusible tape. Did you have to iron that on? Did you feel it was necessary to sew the trim on (on the sides) to make it more secure? I’m always worried for the trim to peel off! Beautiful work? Can you apply all trim this way?
The one I used is a tape that doesn’t require ironing. I did iron it because it wasn’t sticking on velvet as well as it does on regular fabric, and the heat helps to activate the adhesive so make it stickier. But I generally don’t iron that kind on. It’s also not a tape that you can sew through. If you try, the adhesive will gum up on your needle, and it’s a huge mess. If you want to iron on the trim and then sew it, you have to use a fusible tape that says on the label that you can sew through it. I’ve used this permanent double sided fabric tape on trim for pillows and curtains, and I personally love it. It’s always preferable if you can sew it on, especially if you plan to have your draperies dry cleaned regularly. But when working with tricky fabrics (I find velvet tricky to work with) and don’t want to mess with sewing trim on, I highly recommend the permanent tape.
They look great.