Building The Front Porch Steps – Part 2 – Treads, Risers, and Stain
I’ve been steadily making progress on my front porch steps these past couple of days, and I’m happy to say that the steps are completely built, and the treads are stained!
I haven’t done any painting yet, so the risers still look a bit messy. But I’m waiting to so all of the painting at the same time, which means after the handrails are finished.
But let me back up a bit and show you how I got to this point. First, if you missed the first part of this project, you can check it out here:
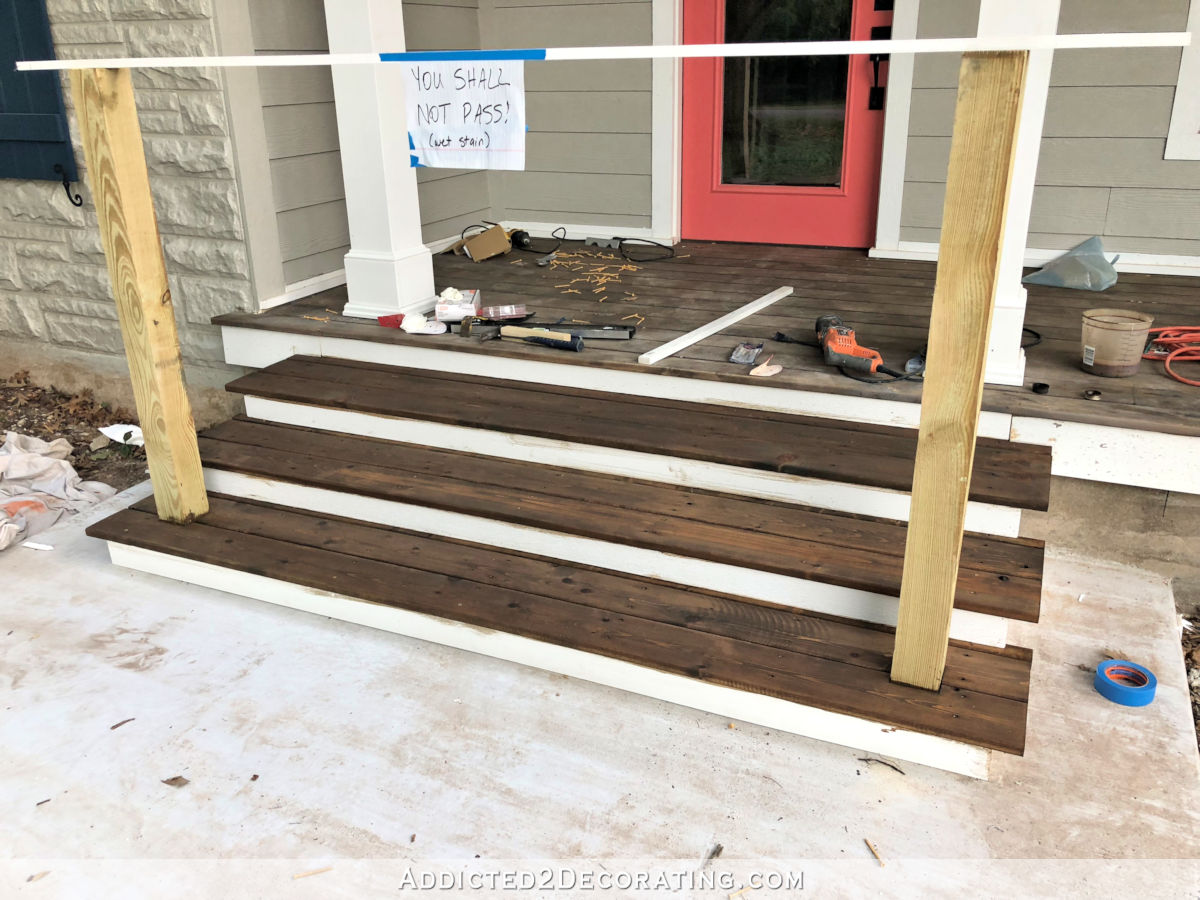
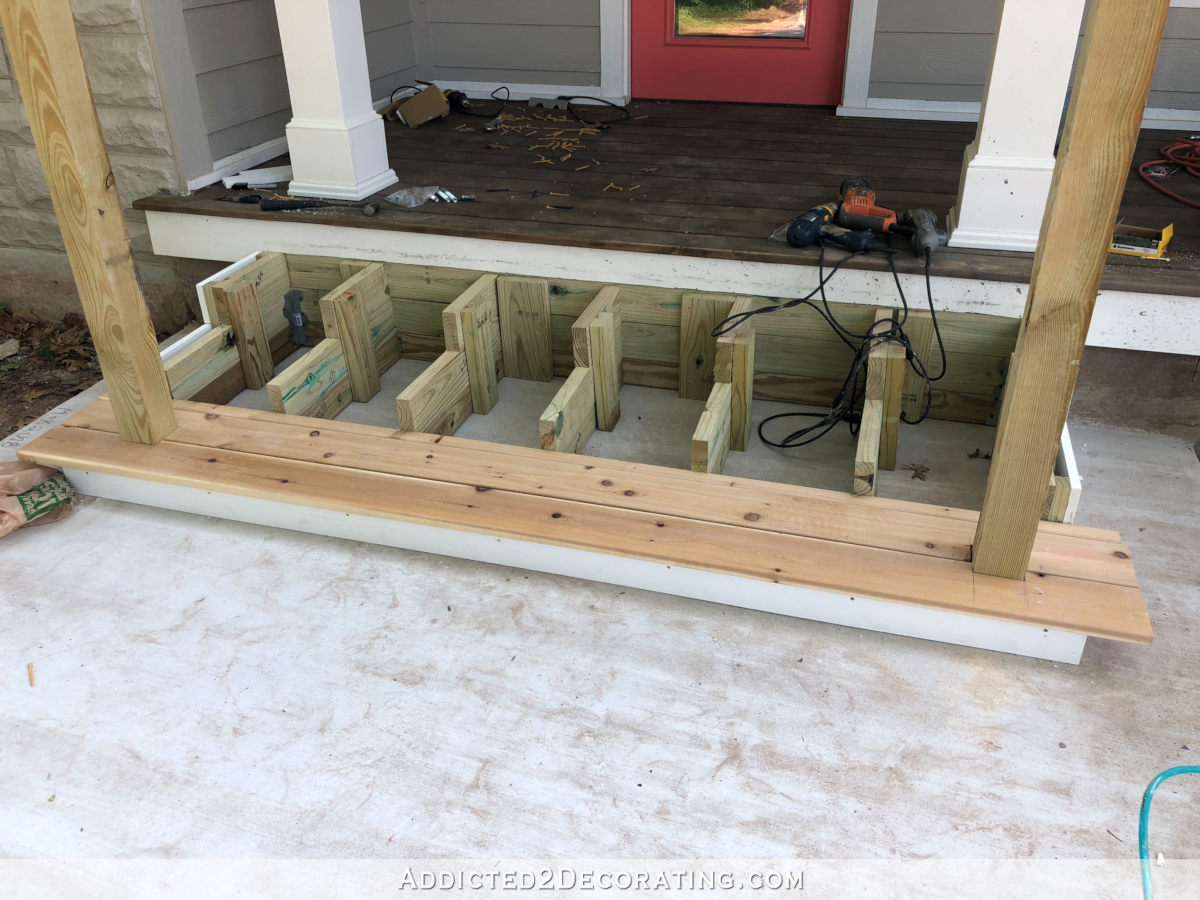
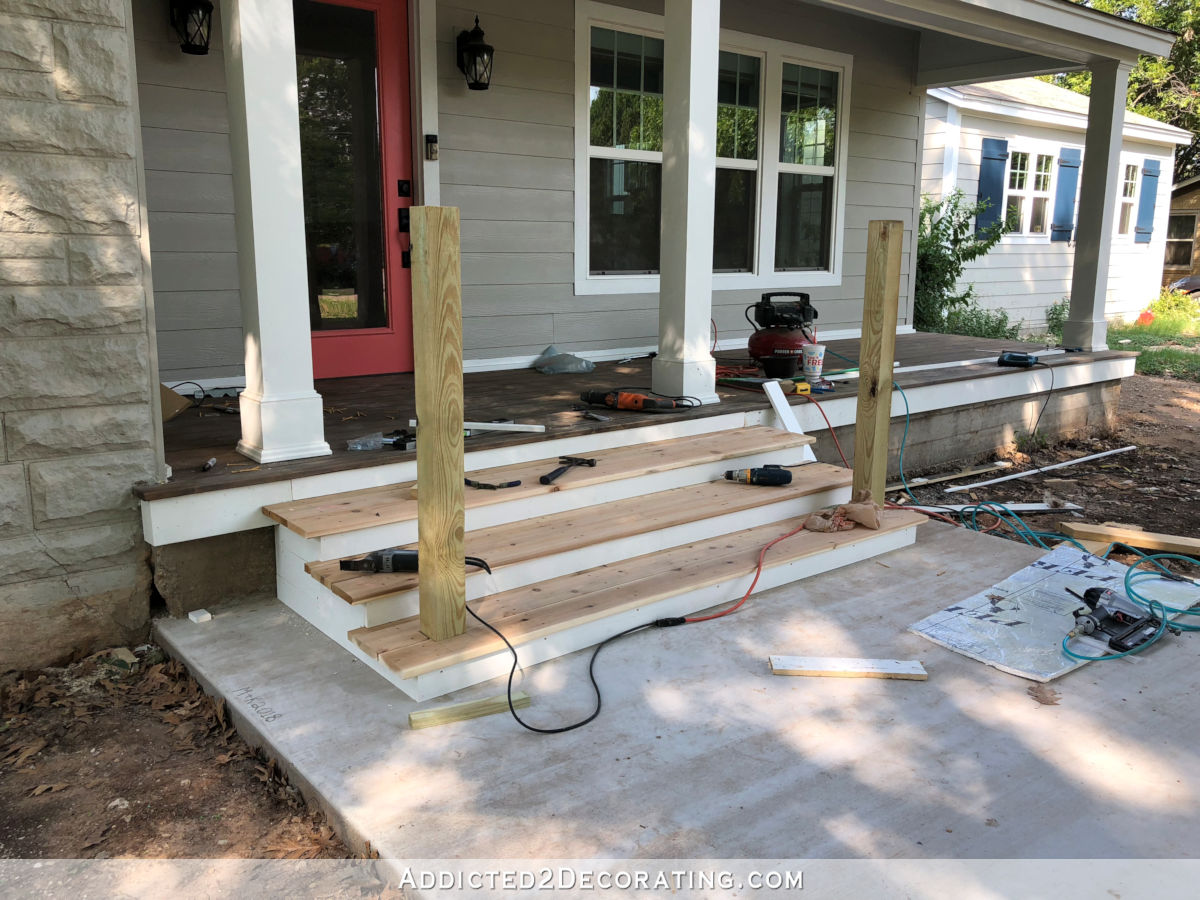
At the end of that post, the basic framed steps looked like this…
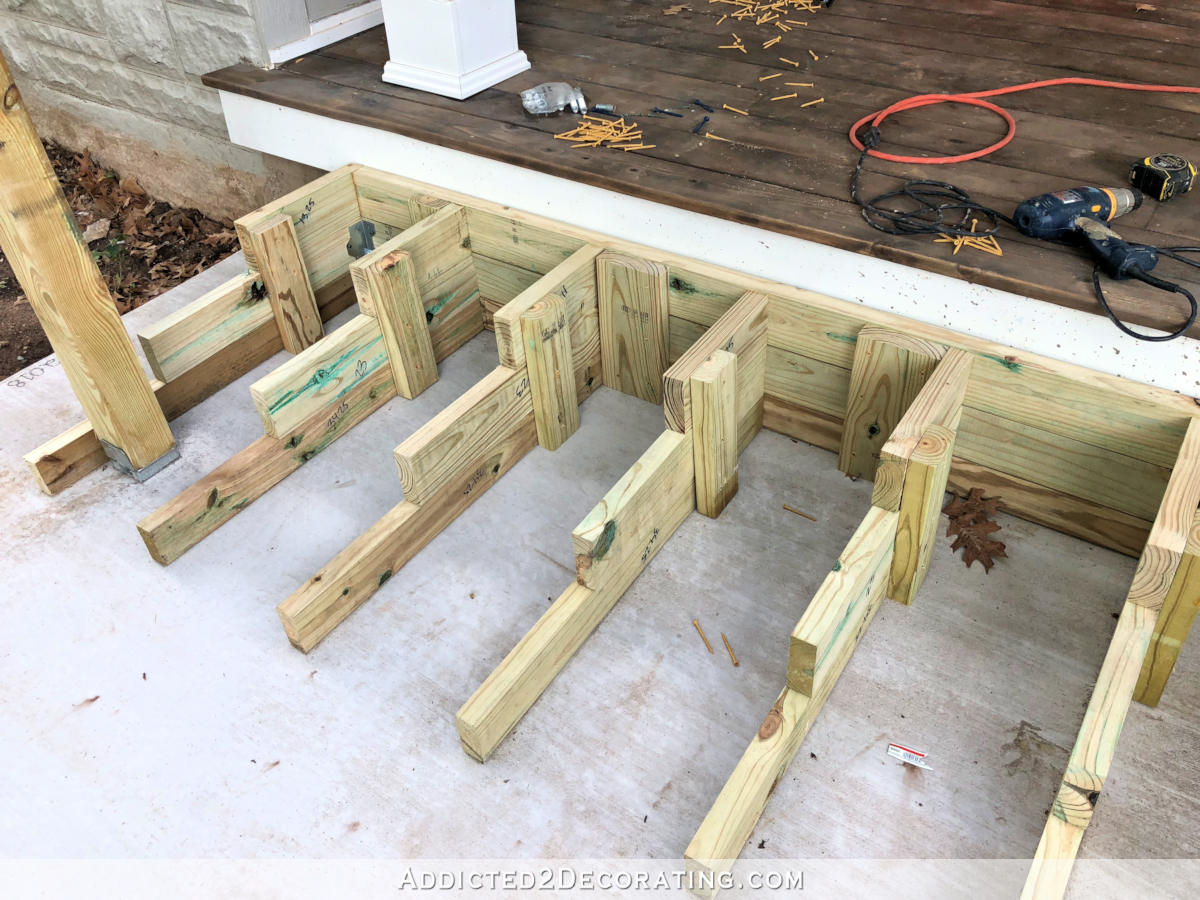
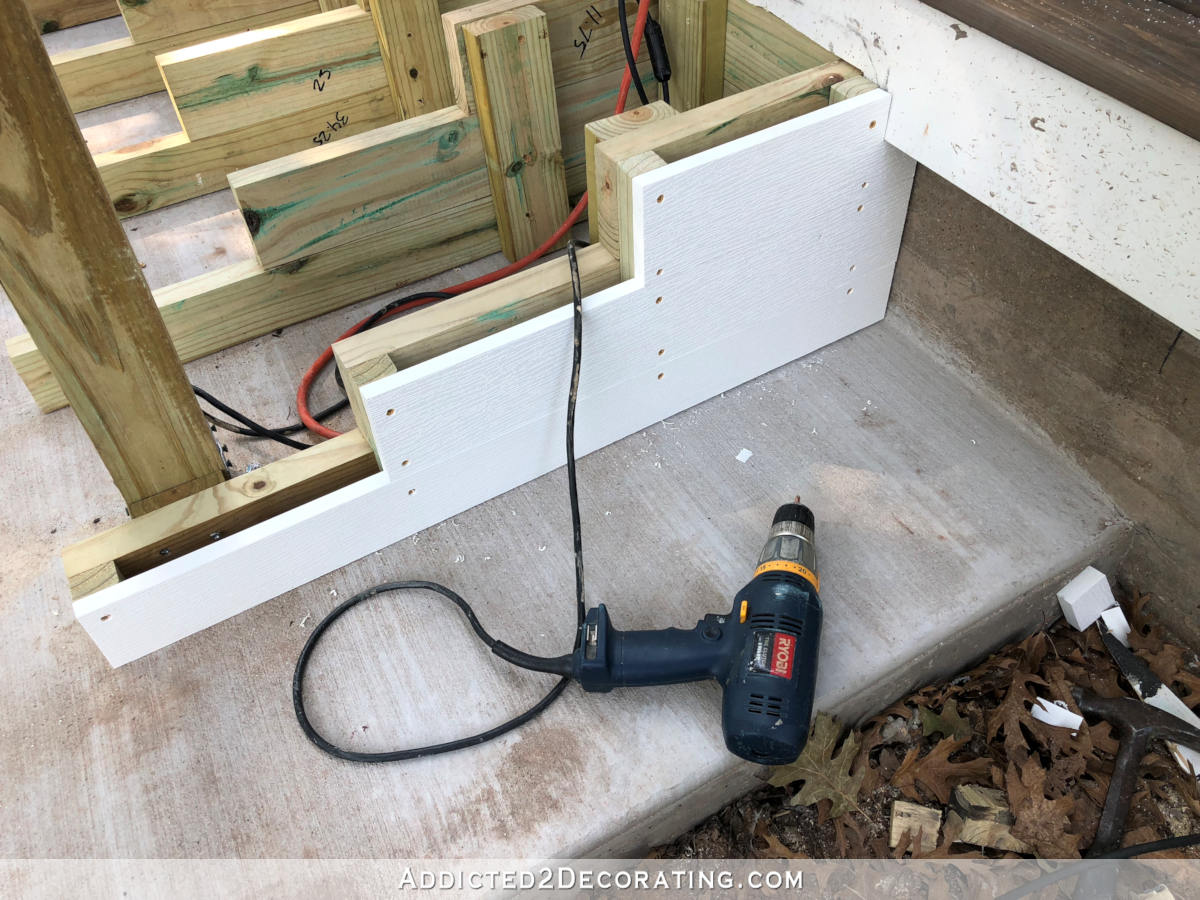
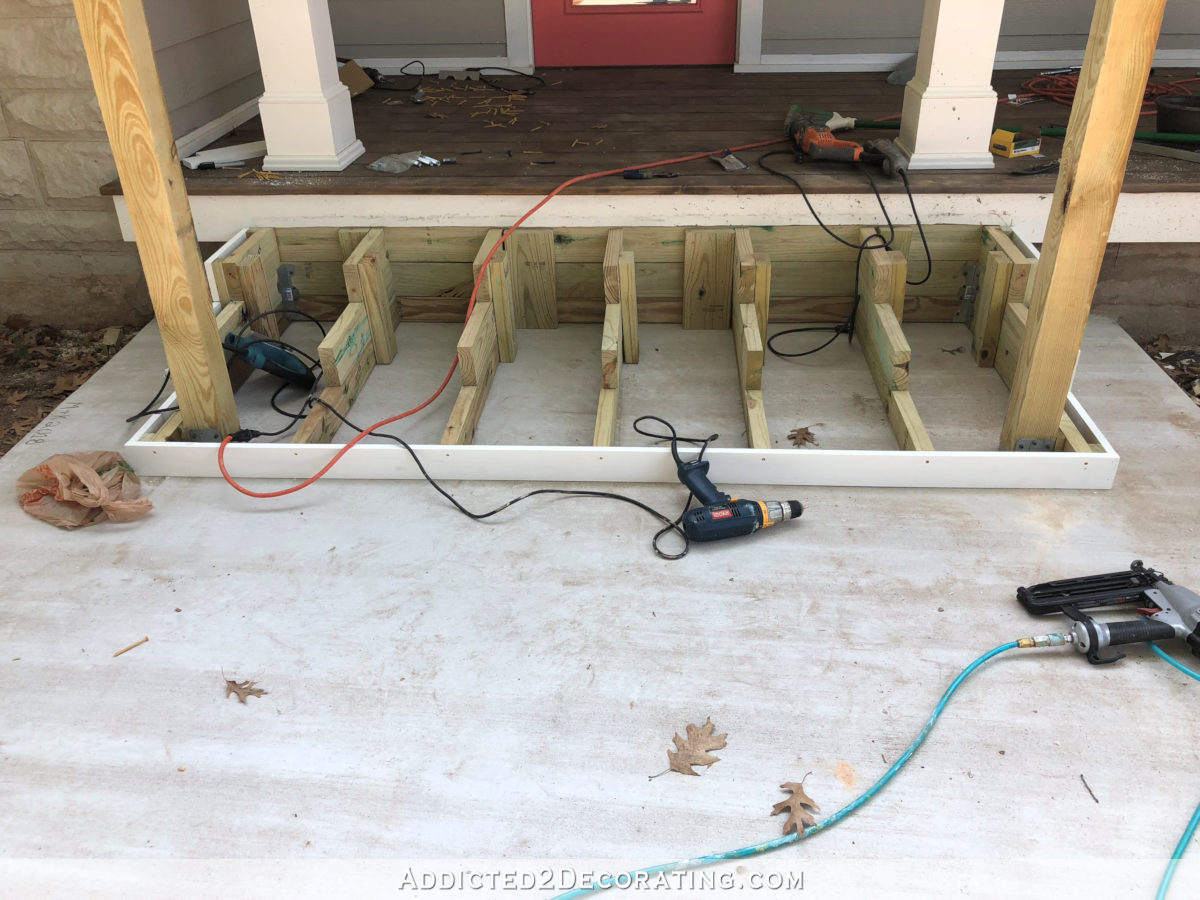
So it was time to start on the pretty stuff. I started by covering the sides with PVC boards, but first I wanted to add spacers to the sides of the frame so that I could attach the PVC boards to spacers rather than directly to the side frame boards. I just wanted to have some breathing room in there so that moisture wouldn’t be constantly trapped between the PVC and the frame boards. I just cut these spacers out of scrap treated lumber.
And then I cut the PVC boards to fit and screwed them into the spacers.
Then I was ready to start on the steps. I worked from the bottom to the top, starting with attaching the bottom riser board. For that, I also used a PVC board.
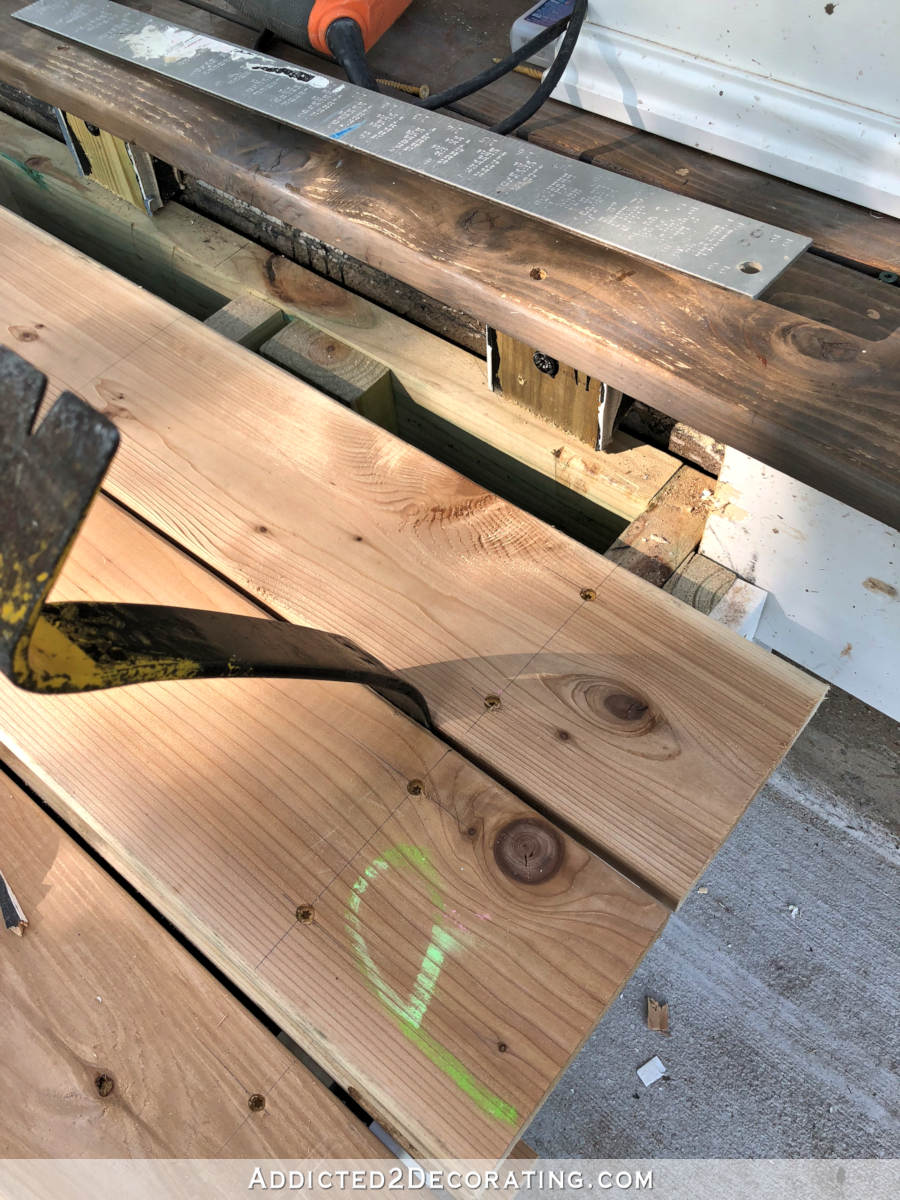
And then I cut the boards for the tread. I used cedar deck boards, which is the same thing I used on the porch. This step was the hardest since I had to cut around the posts. I used a jigsaw to cut out those areas.
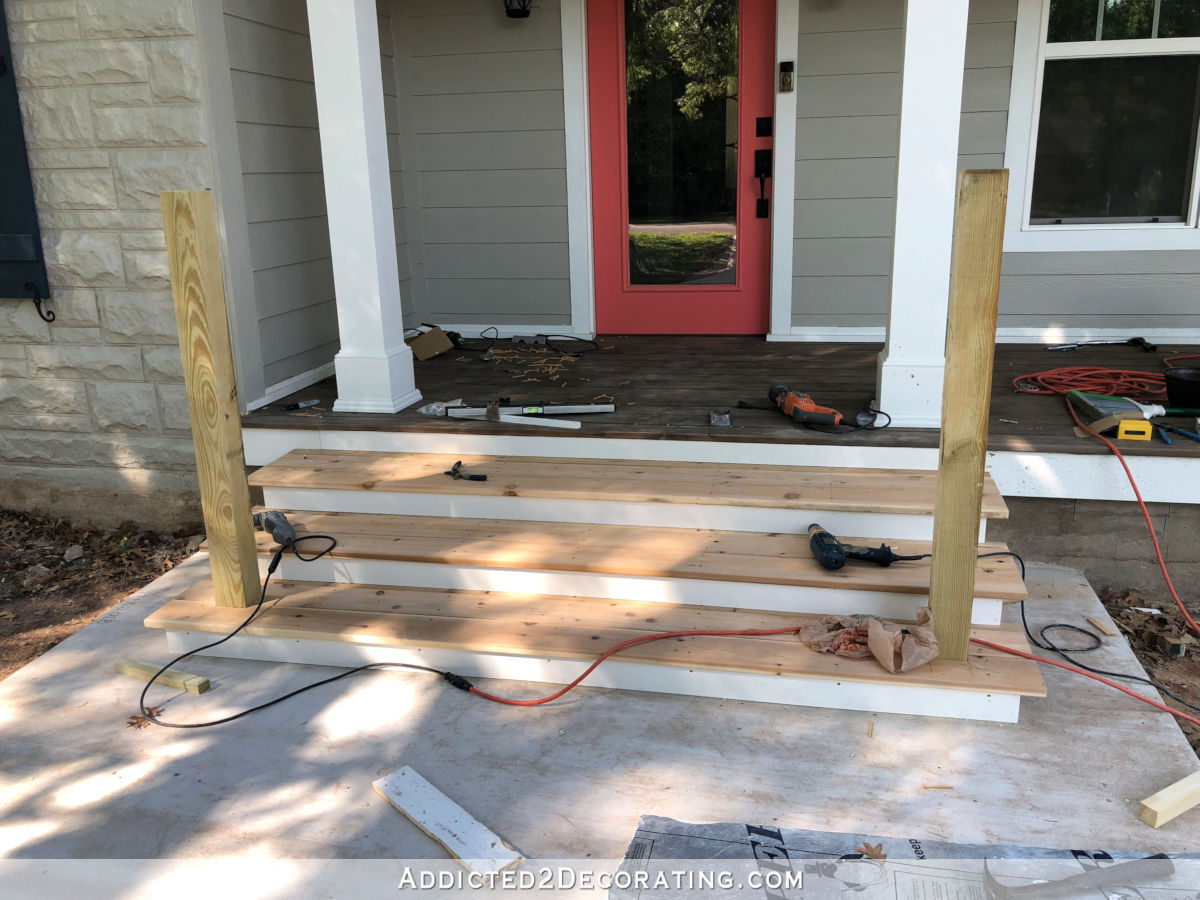
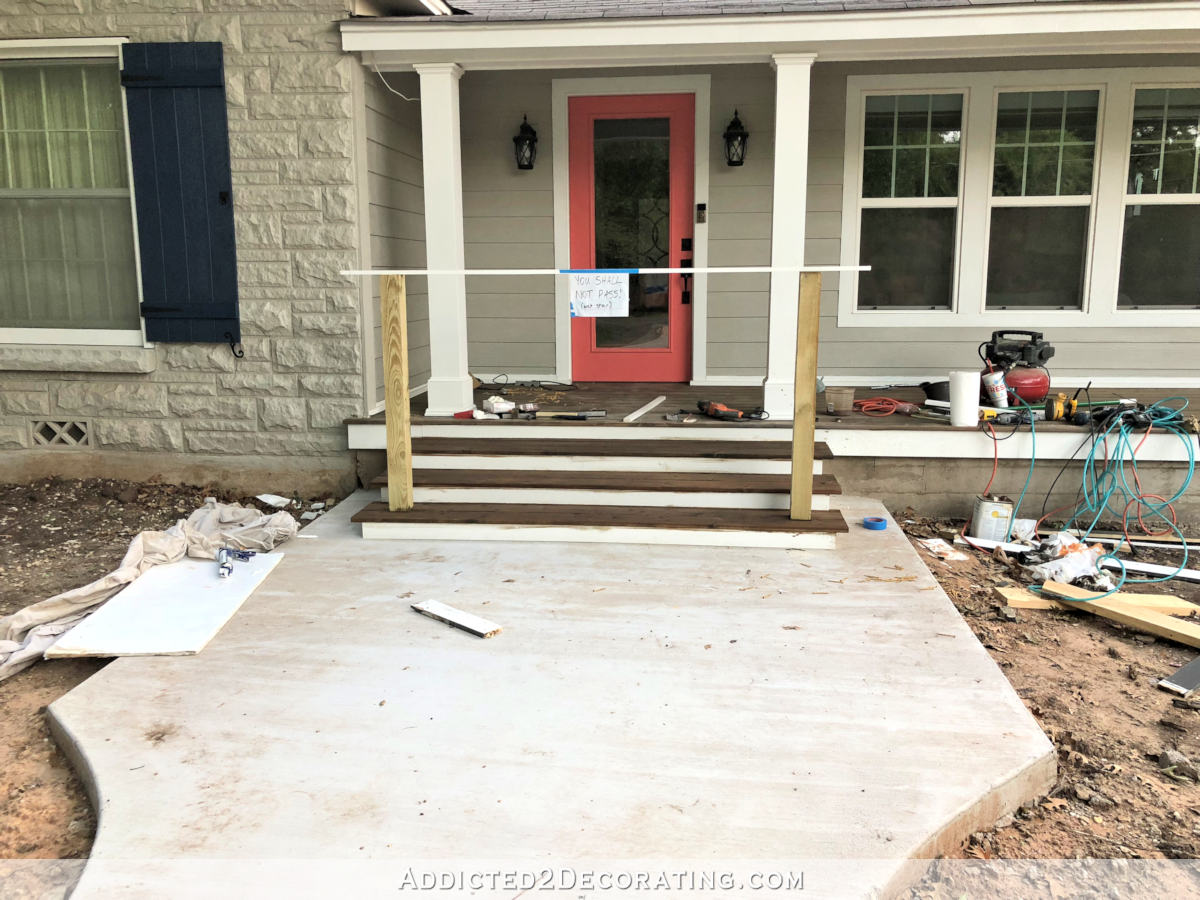
With the first step done, I moved onto the second step and did it in the same way — riser board first, and then treads.
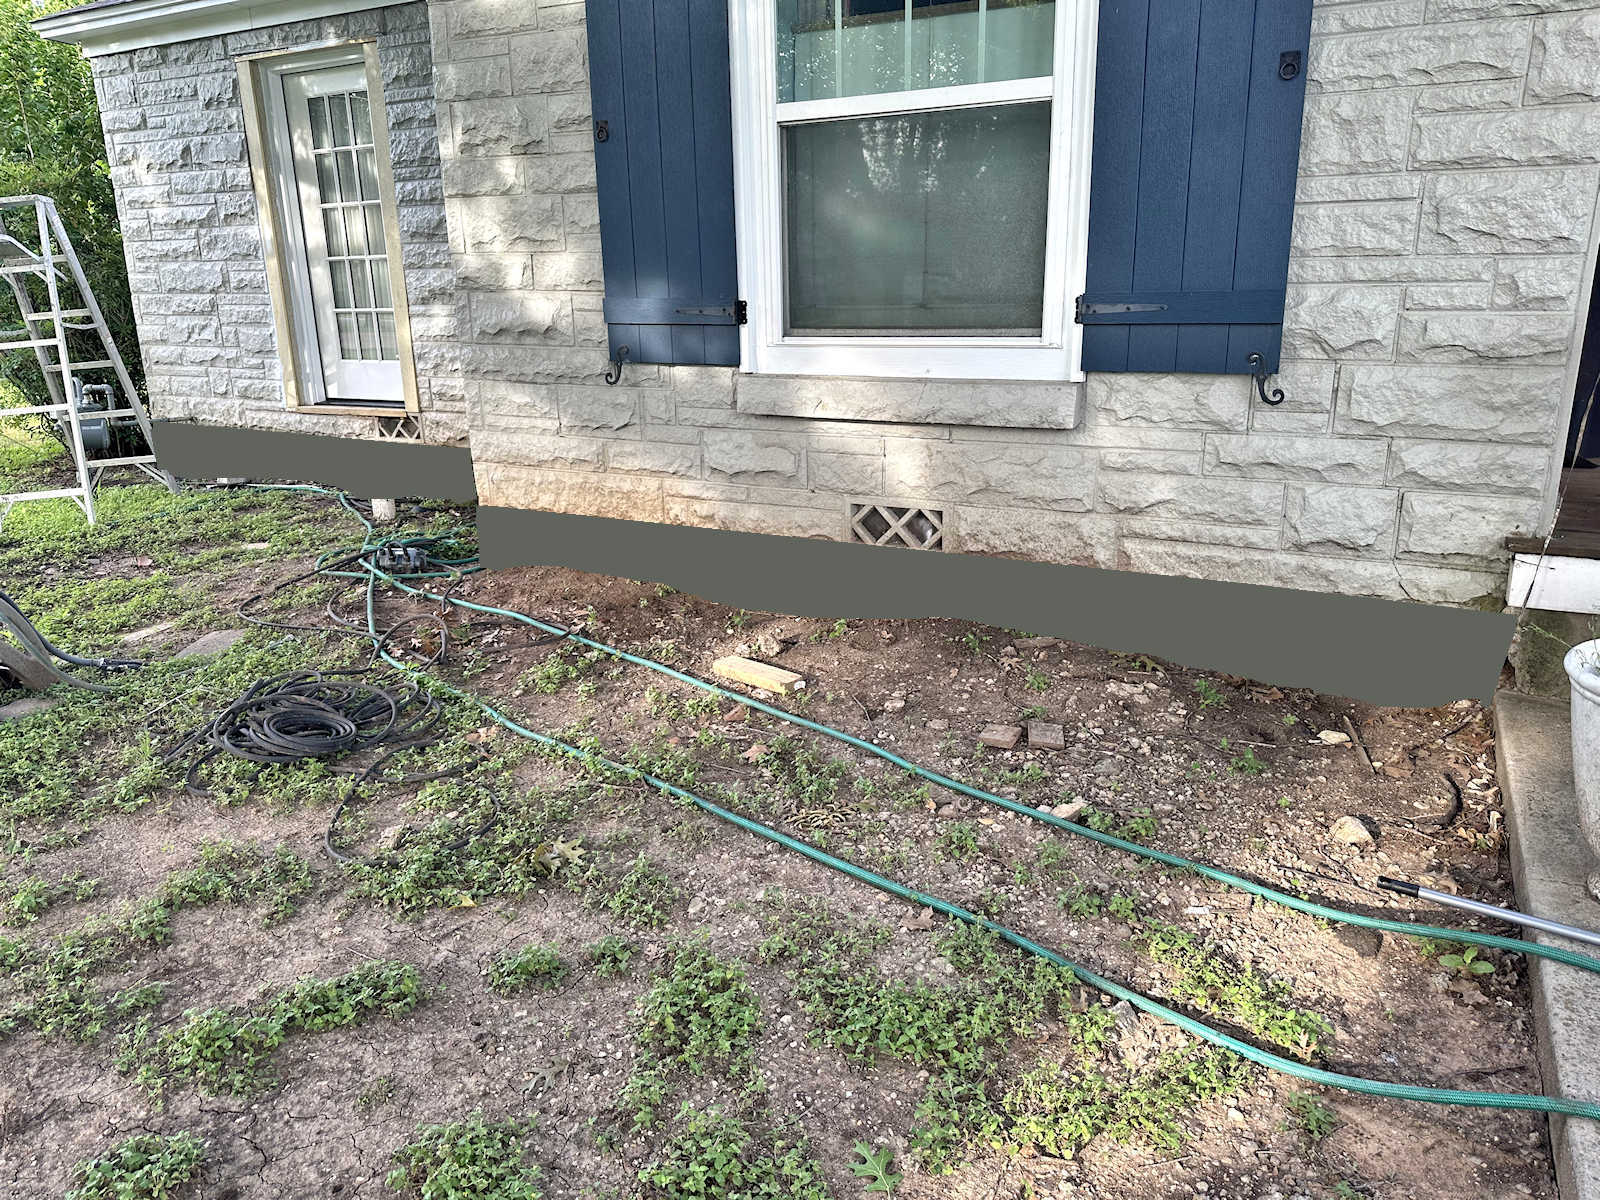
When I got the third step, I expected it to be quick and easy like the second step. But then I decided at the last minute that I wanted to replace the skirting board around the porch with PVC boards. I can do most of that later, but for now, this part of the skirting board that comprises the riser on the last step had to be removed before I attached the treads. This was quite a chore to get this out. Let’s just say that when I build things, I don’t mean for them to come apart. 😀 But I was finally victorious and got that stubborn board out of there.
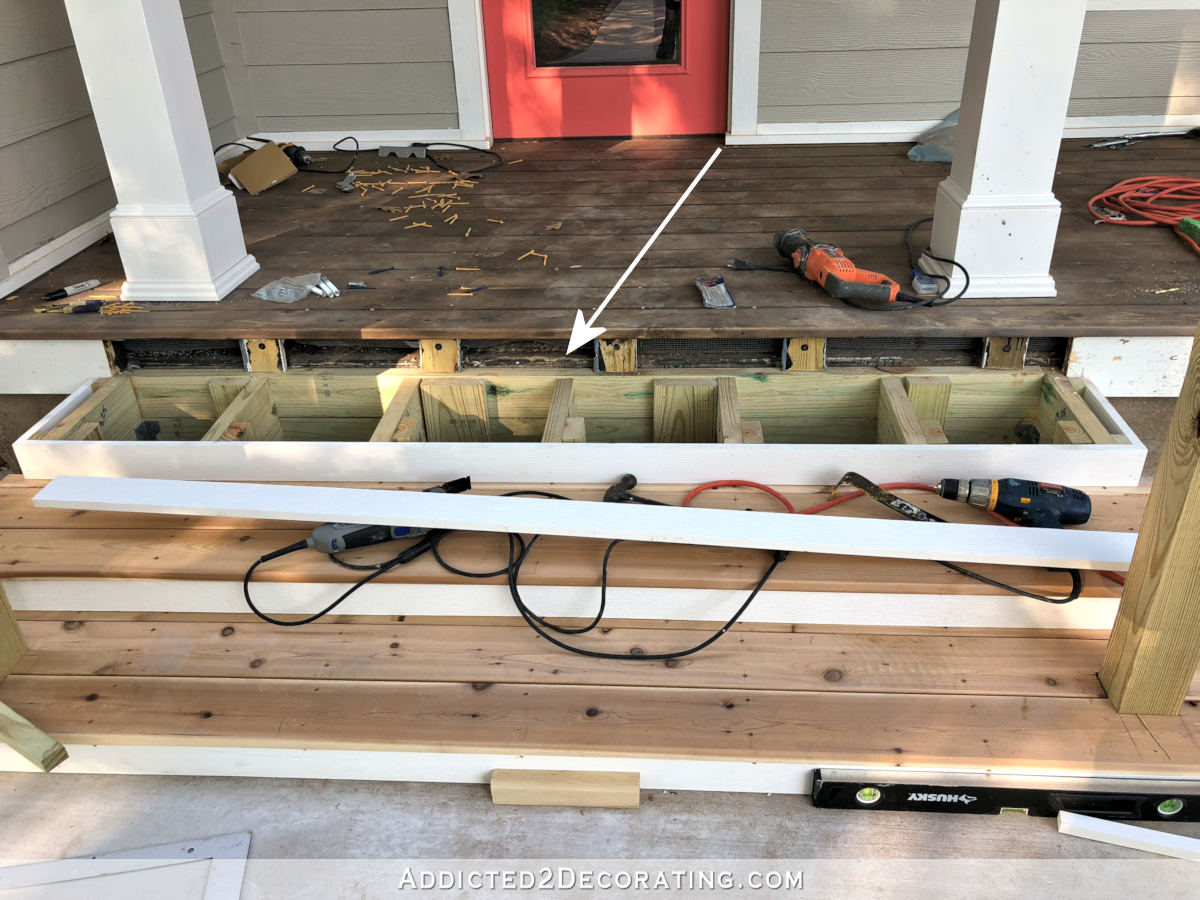
Then I could attach the treads to the top step.
I wanted to overhang on the front treads to be 3/4-inch, so I used the edge of a scrap piece of PVC board to easily align the first tread board on each step.
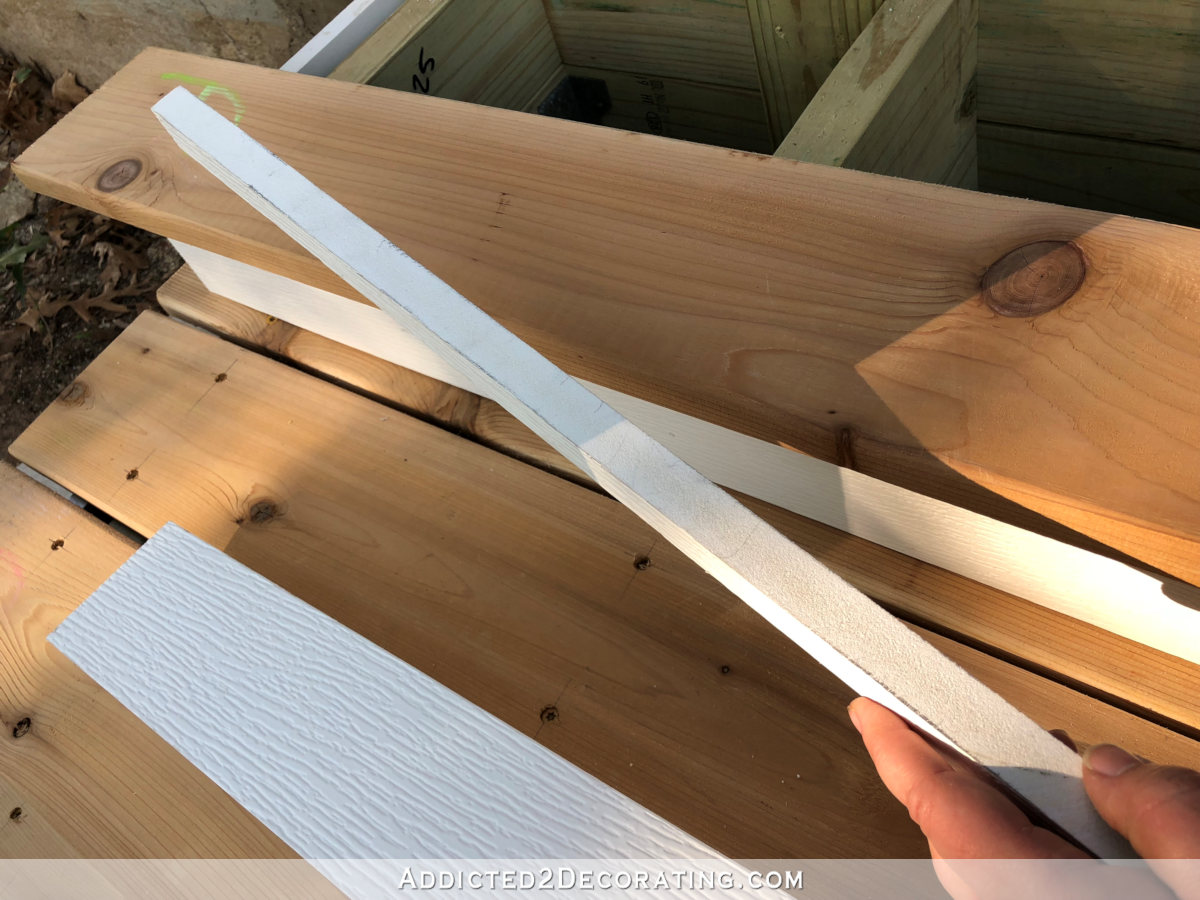
I just put that scrap right up underneath the first tread board (after the riser board was attached) and made sure the front edge was flush with the scrap PVC board.
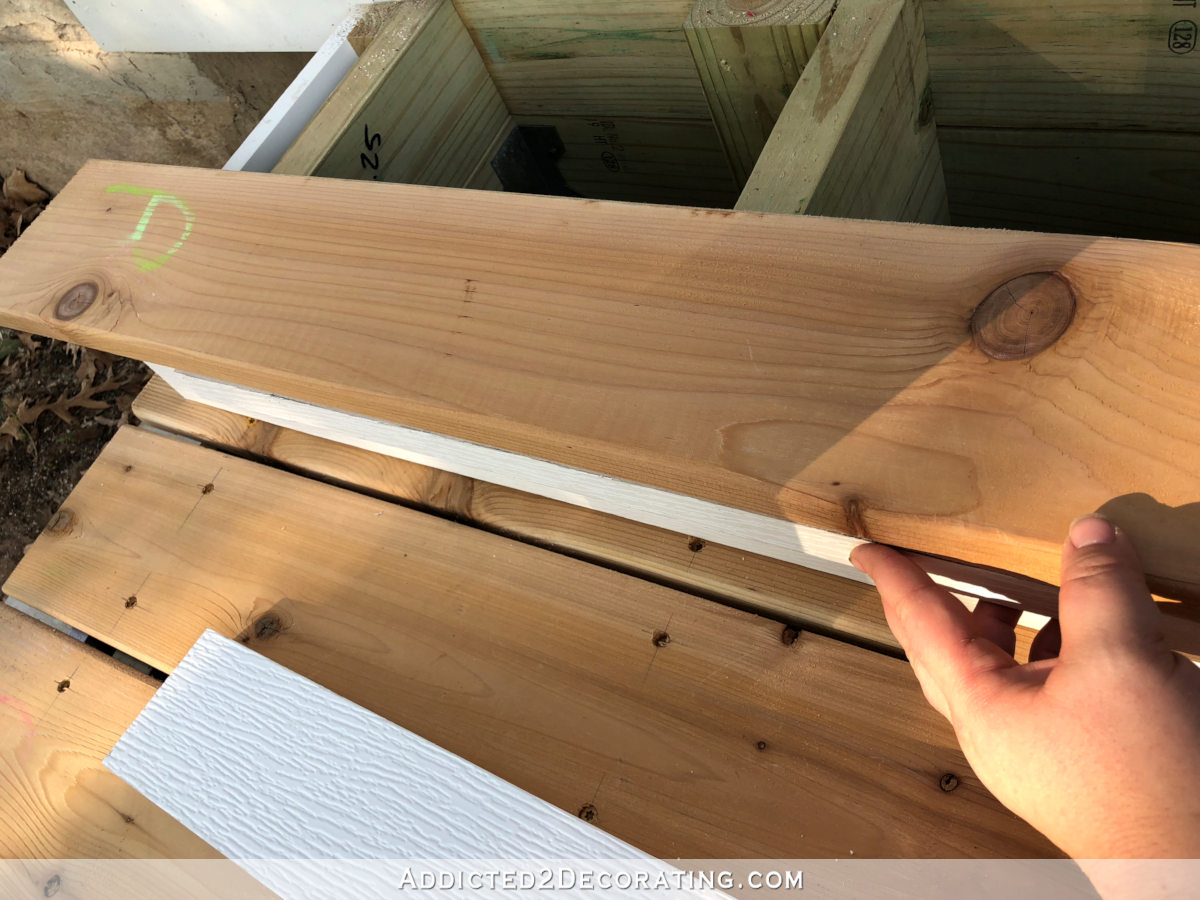
To keep a consistent spacing between the boards, I used my prybar as a spacer. Almost all boards have a bow in them, so one trick I’ve learned is that it’s so much easier to place the board so that it bows towards the previous board in the middle, rather than bowing away from the previous board.
So I start at one end, using my prybar as a spacer, and screwing that board into place…
Then I go to the other end of the board and repeat that process…
Since I’ve placed this board so that it bows towards the previous board in the middle, now these boards are touching in the middle…
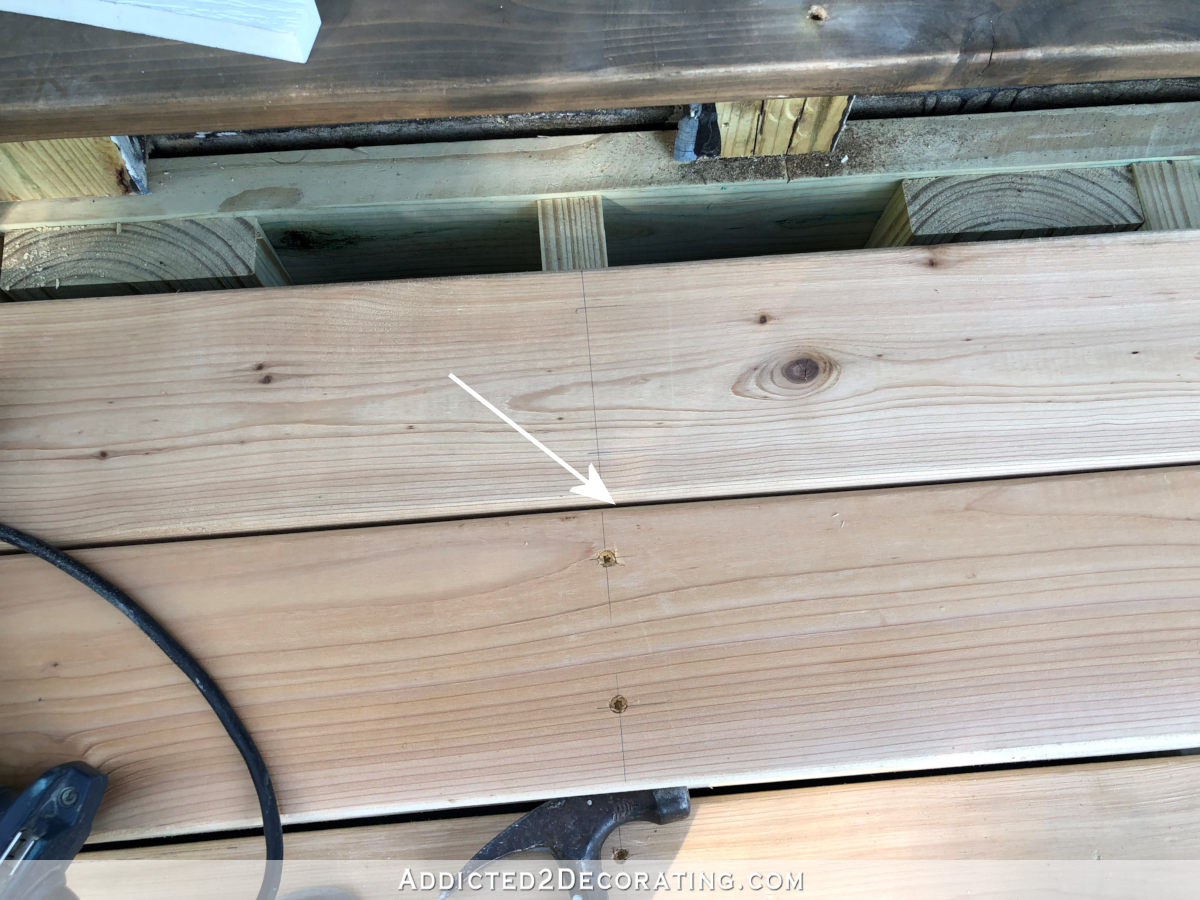
So I just tap my prybar between them to get the right spacing, and screw the middle in place.
Once the ends and the middle are screwed down, I can go back and fill in the rest of the screws.
I’ve just found that it’s so much easier to push the boards apart by tapping my prybar beween them as a spacer than it is to pull boards together. That was a very hard and frustrating lesson that I learned while laying the boards on my front porch.
My front porch and step situation is probably a unique one, but I had to use my jigsaw to do quite a bit of cutting to get the last tread board to fit on the top step…
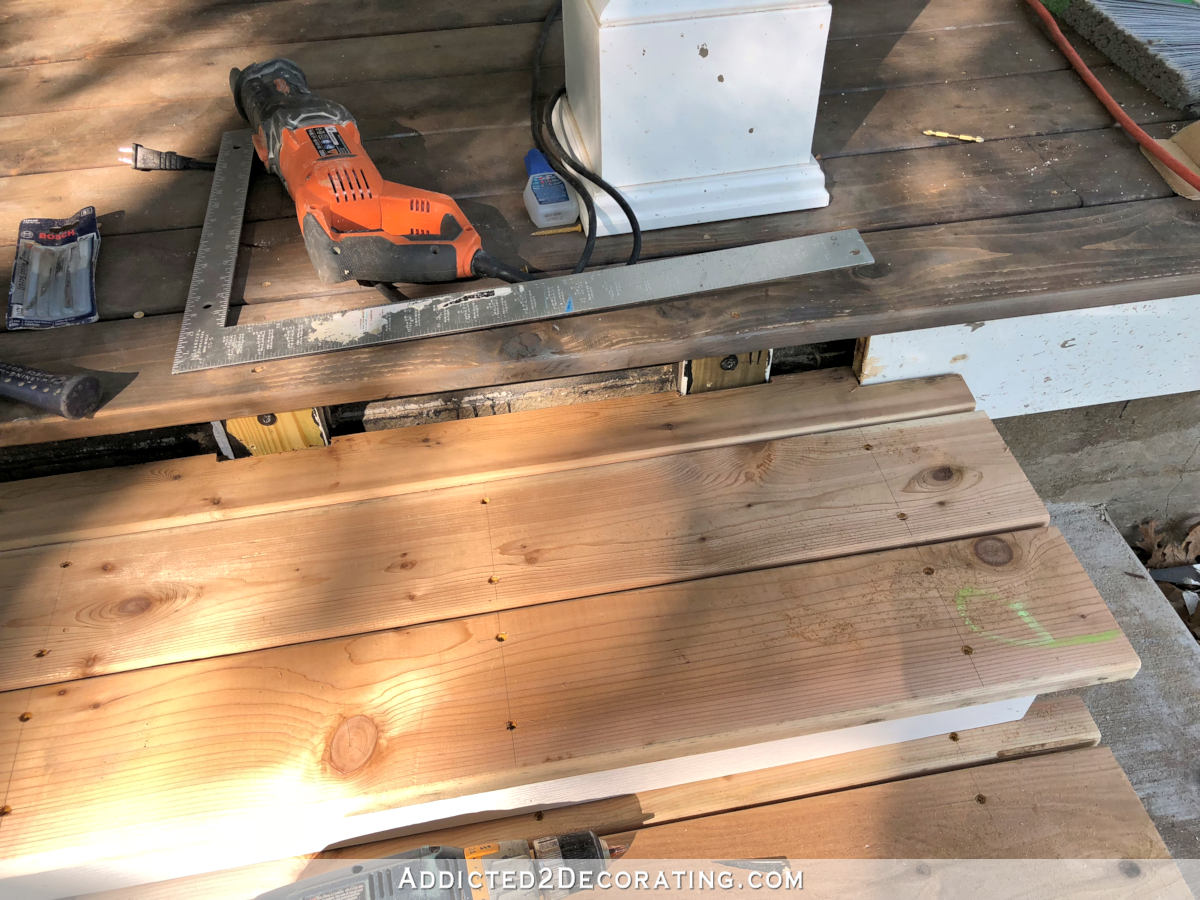
And then I could put the last riser board into place.
And with that, I was ready to move on to the finishing — caulking, stain, paint.
I used the same stain/sealer that I used on the porch — Thompson’s penetrating oil in a semi-transparent mahogany finish. I was shocked to see how much the porch has faded since I stained it earlier this year…
But fortunately, I was expecting it. I was always planning on doing a second coat on the porch, and I knew I should wait to do that until the steps were built. So hopefully once that second coat is on, they’ll match.
So it’s getting there! I love how this is turning out so far…
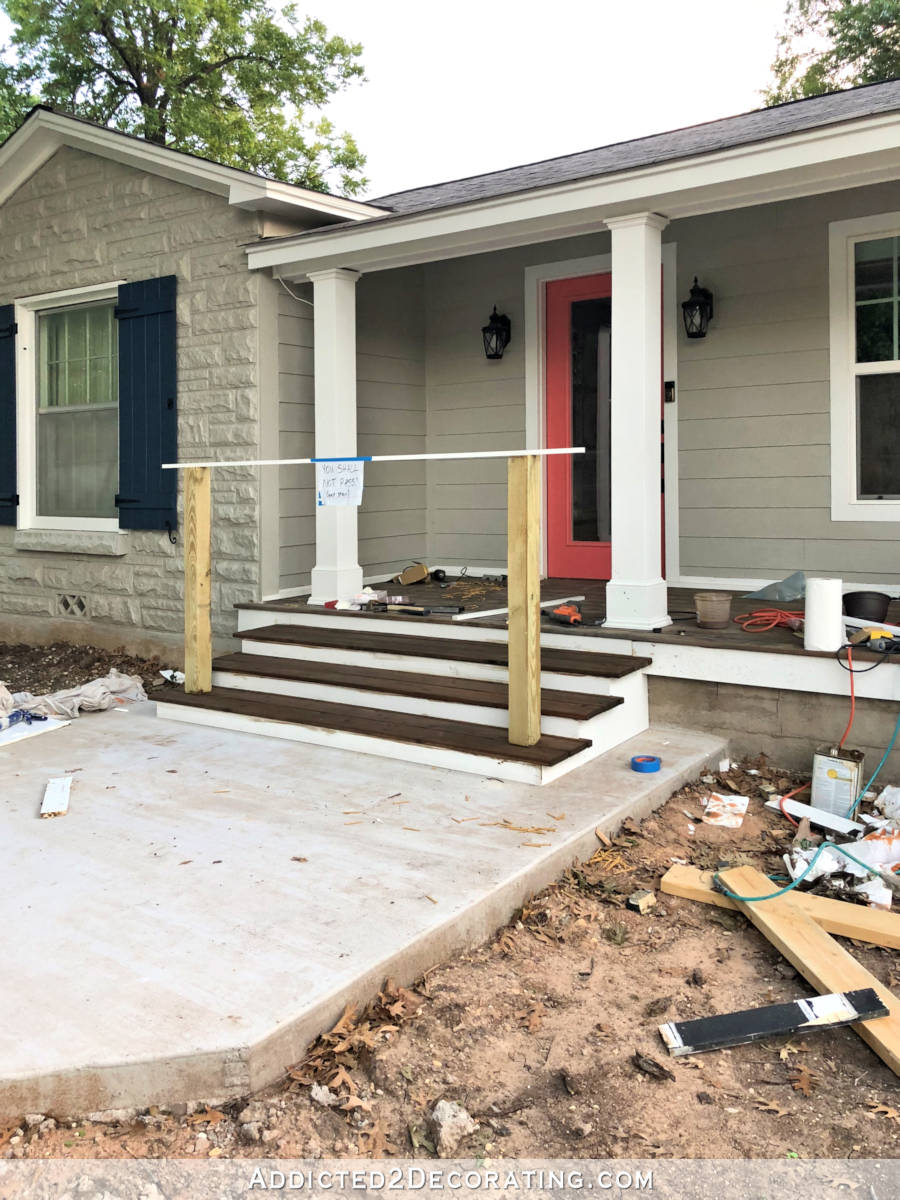
Next up, then handrails!
Update:
My steps and railings are finished! Here’s a peek at how they turned out…
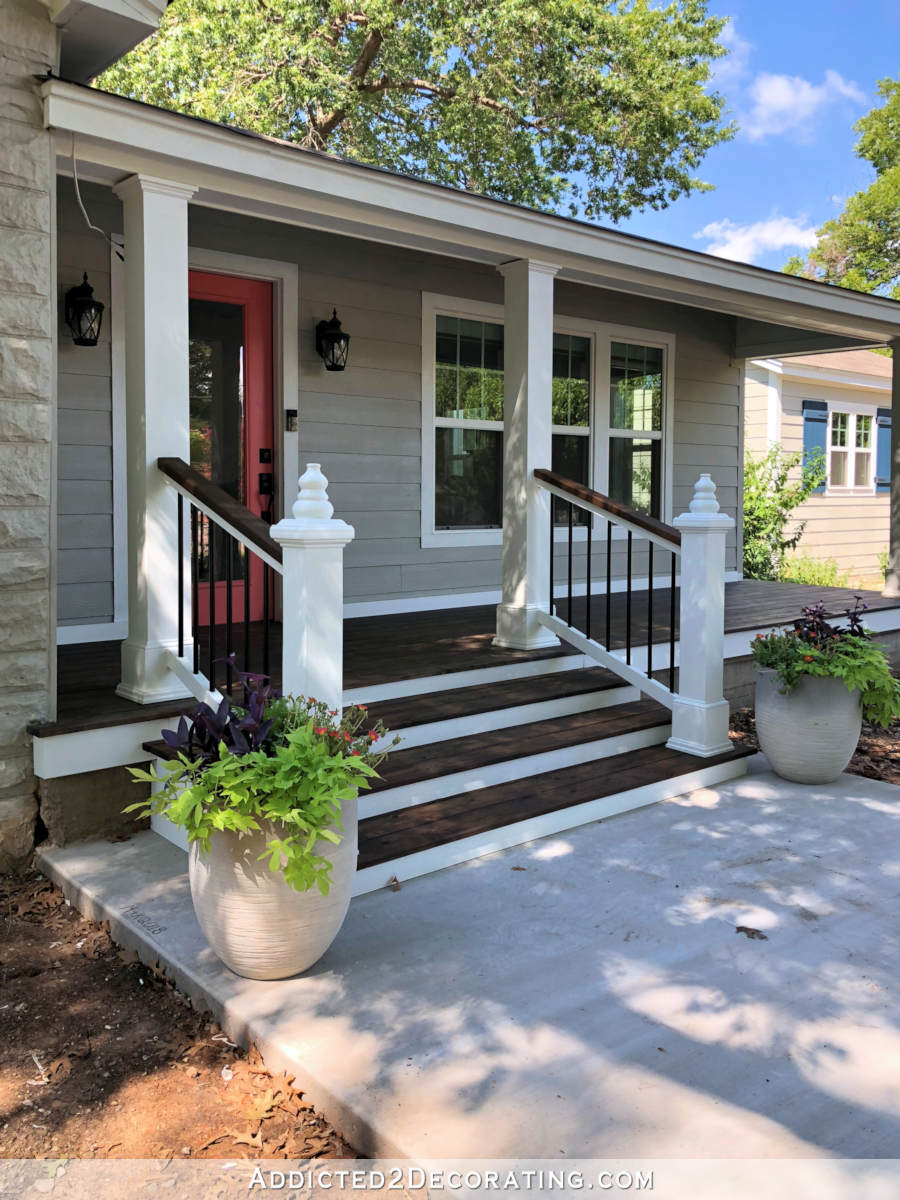
You can see Part 3 of this project here…
And you can see the finished porch steps and railings here…

Addicted 2 Decorating is where I share my DIY and decorating journey as I remodel and decorate the 1948 fixer upper that my husband, Matt, and I bought in 2013. Matt has M.S. and is unable to do physical work, so I do the majority of the work on the house by myself. You can learn more about me here.


It looks like the side overhang is much longer than the front overhang. Is that an optical illusion or is there a reason it’s not symmetrical all the way around?
I really like the wide, short steps!
I allowed more on the sides because I’m still considering adding some trim to the sides. I can cut it down once I add the trim (or decide once and for all not to add trim).
Beautiful and functional! Your design and execution are unmatched. What are you considering lately about a railing around the porch? I recall your old post about the proper height. I’m bringing it up because based on your photos here, once you have a handrail on your steps and restain the porch, a rail around the whole lovely porch may be guilding the lily.
I’m just going to do the handrail and leave it at that. I’ll leave the front porch open.
Brava!
I’m so impressed! The 2 set of steps that we added to our house are so sad looking!
Love your choice of mahogany! Just stunning!
Fabulous. It’s really coming together nicely. I love the nod to LOTR on the sign.
I was going to comment about how nice the porch and steps are, but what I really, really wanted you to know is that “I LOVE YOUR SIGN!”
Thank you for all the detail on the build. Your front porch has become a beautiful and welcoming feature to your home. I can’t wait to see how you build the handrails.
I really like how wide you made the stairs. Looks great!
It looks just lovely. I have a question…is there some sort of slope on the cement under the stairs for rain water to drain away so as not to get trapped inside?
The dark steps and white risers look really nice.
I diverge from you when it comes to selecting colors and decorative elements, but I ALWAYS love your woodwork! Love these steps! They are gracious and gorgeous!
Love the nice wide steps! Don’t you think the difference in the stain could be a wet vs. dry thing? The whole area will look pretty when you can deck it out with some plant pots and other welcoming decor! I would suggest pulling in the door color, and some Crotons (plants) have eye catching colors which are easy to take care of.
LOL! “You SHALL NOT PASS!” Mad building skills and a sense of humor, too! You ROCK, Kristi!
Looking Good.
This looked weirdly familiar until I suddenly realised that the steps we had built in our home look just the same (took me a while to get there as I was so in awe about your fabulous building skills again…). in our case, the steps are dark brown/nearly black stained oak and the risers are simple and white and it looks so classy – just like your fabulous entry is going to look when everything is done (who am I kidding – it looks fabulous already!).
My husband who just had a peek across my shoulder loves your sign – it’s one of our most-quoted LOTR expression 🙂
Looks amazing!👏🏼👏🏼👏🏼👏🏼
Kristi the stairs look great. Where do your get all your woodworking skills. You are really impressive.
Love the wider stairs and the 2 tone colour. Only thing I worry about is how quickly the stain would fade and how often I would have to stain them again. But I do love them so much!
I just came across your page from Pinterest. I love how easy this seems and know I can do this to replace my old concrete stairs. Just wondering though when you built it up did you connect it to the existing porch as it looked like it was separate. Thank you!!!!
The frame of the steps is connected to the porch with concrete screws.