Building The Front Porch Steps – Part 3 – Adding The Porch Step Railing
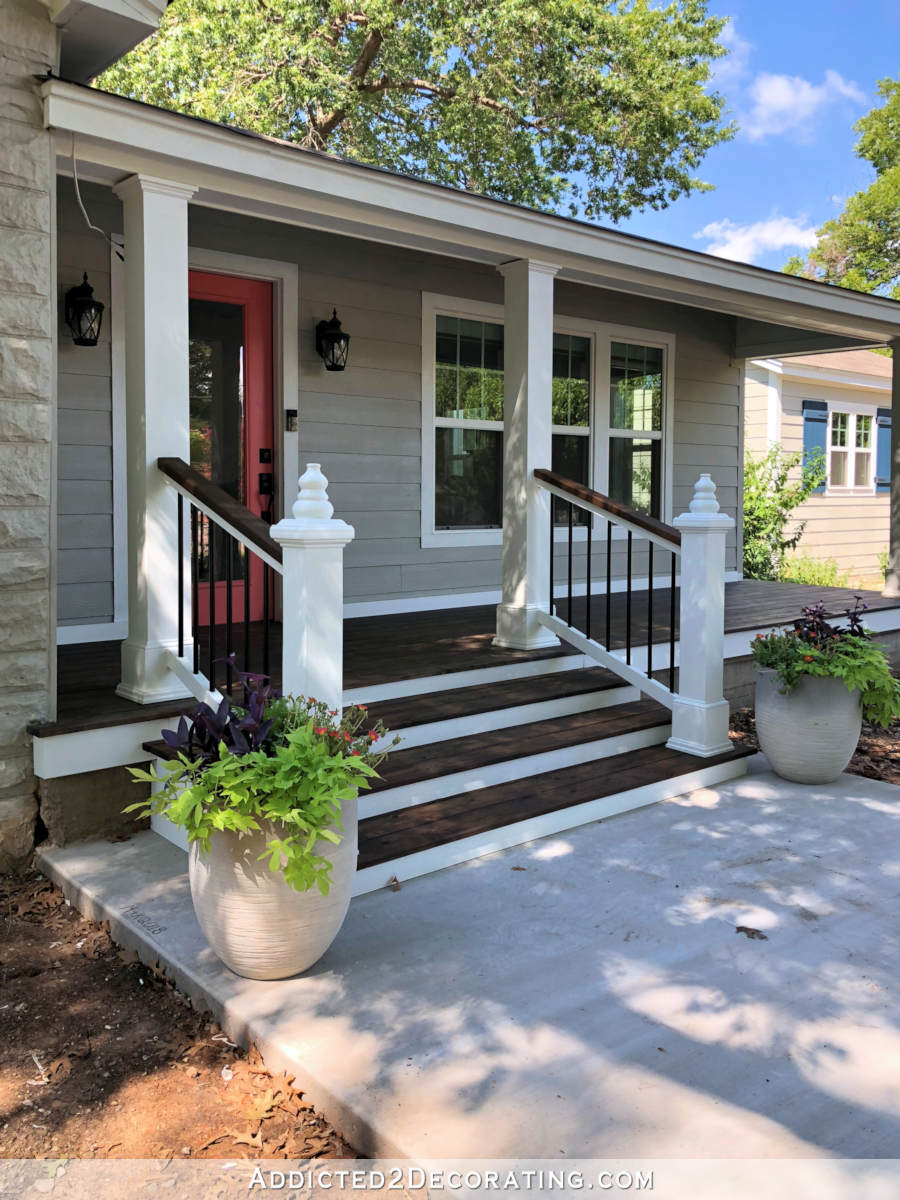
Today I’m sharing the third and final big step in my front porch steps project — building the porch step railing. Here’s how my finished railing turned out…
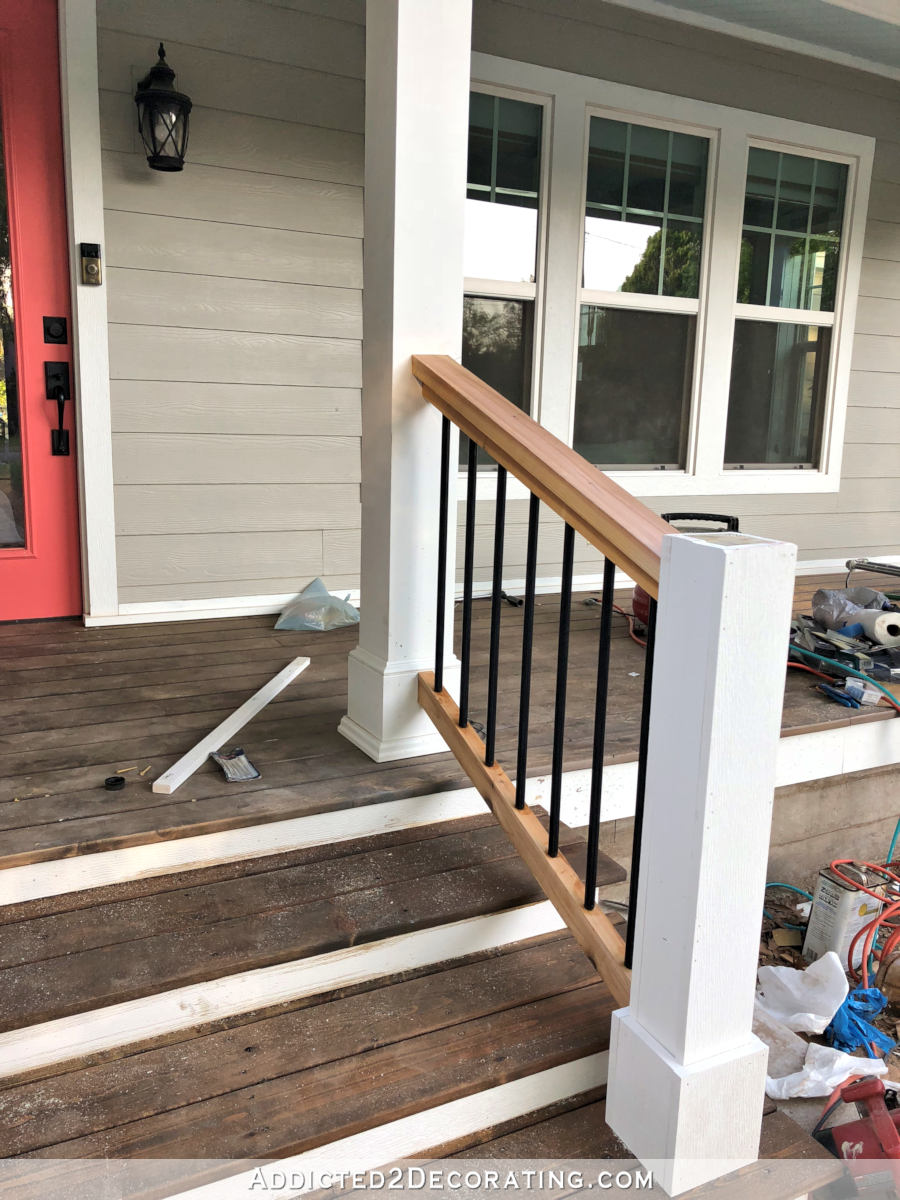
Now when I say “finished,” I don’t mean that it’s completely finished, of course. My new porch step railing still needs paint and stain. Right now, I’m planning on staining the very top handrail, and painting the other two rails white. And of course, I still have a bit of trim, a cap, and a finial to add to the post, along with some caulk and paint.
So “finished” simply means that it’s built. 🙂
If you missed the first two posts in this project, you can get caught up here:
- Building My Front Porch Steps (The Box Method) – Part 1 – Building The Basic Frame
- Building The Front Porch Steps – Part 2 – Treads, Risers, and Stain
How To Build Porch Step Railings
Now let me show you how I built the front porch handrails. I started by covering the posts with PVC boards. The frustrating thing about this is that the 4 x 4 posts aren’t actually 3.5 inches wide. They’re 3 5/8 inches wide. That means that I couldn’t use 1″ x 4″ boards (which are actually 3.5 inches wide). I actually had to spend more and get the next size up (1 x 6’s, which are actually 5.5 inches wide) and rip them to the correct width using my table saw. Then I attached those pieces to the left and right sides of the posts.
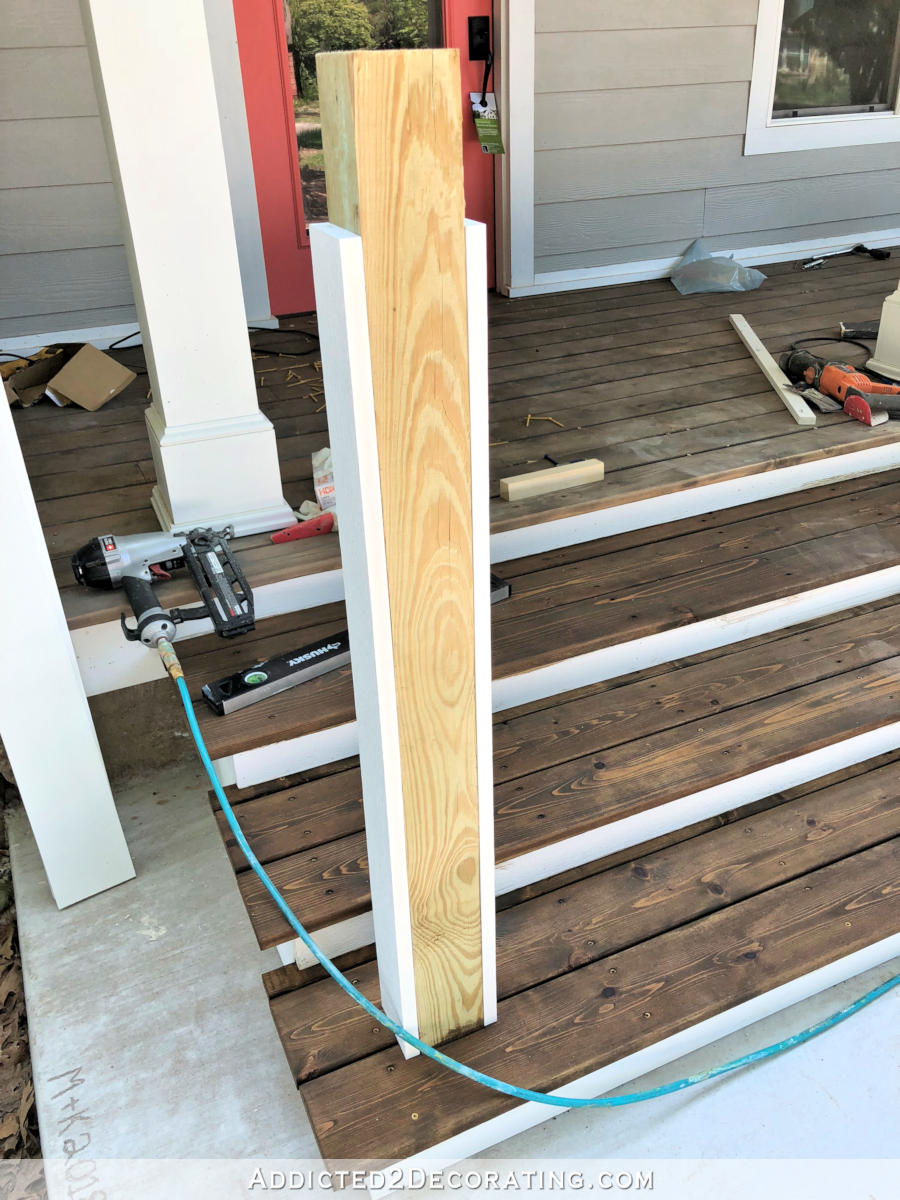
Then I ripped pieces to fit the front and back and attached those.
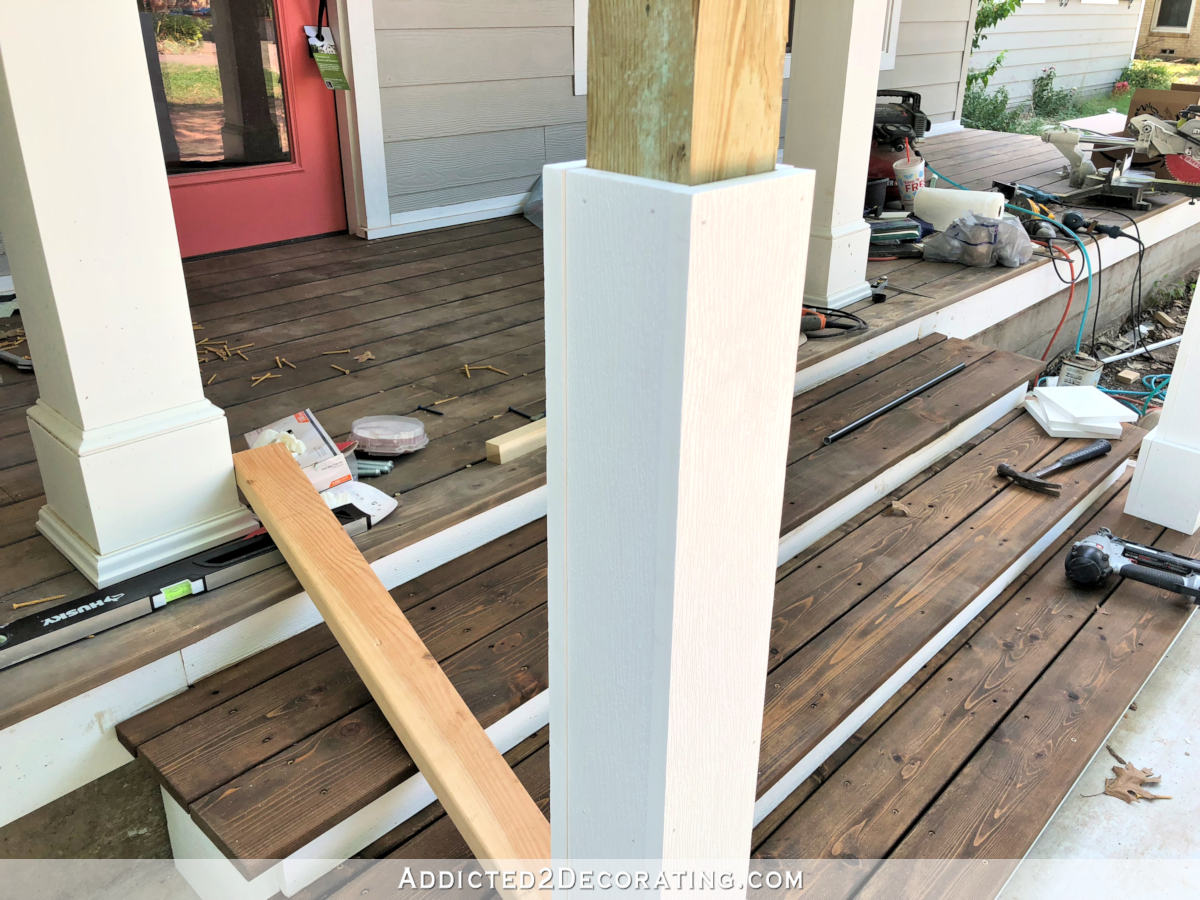
I want these posts trimmed out exactly like the columns on the porch, so before I could work on the handrail, I needed to attach the trim pieces at the bottom. I made these the exact same height as the ones on the porch columns. I attached the left and right pieces first…
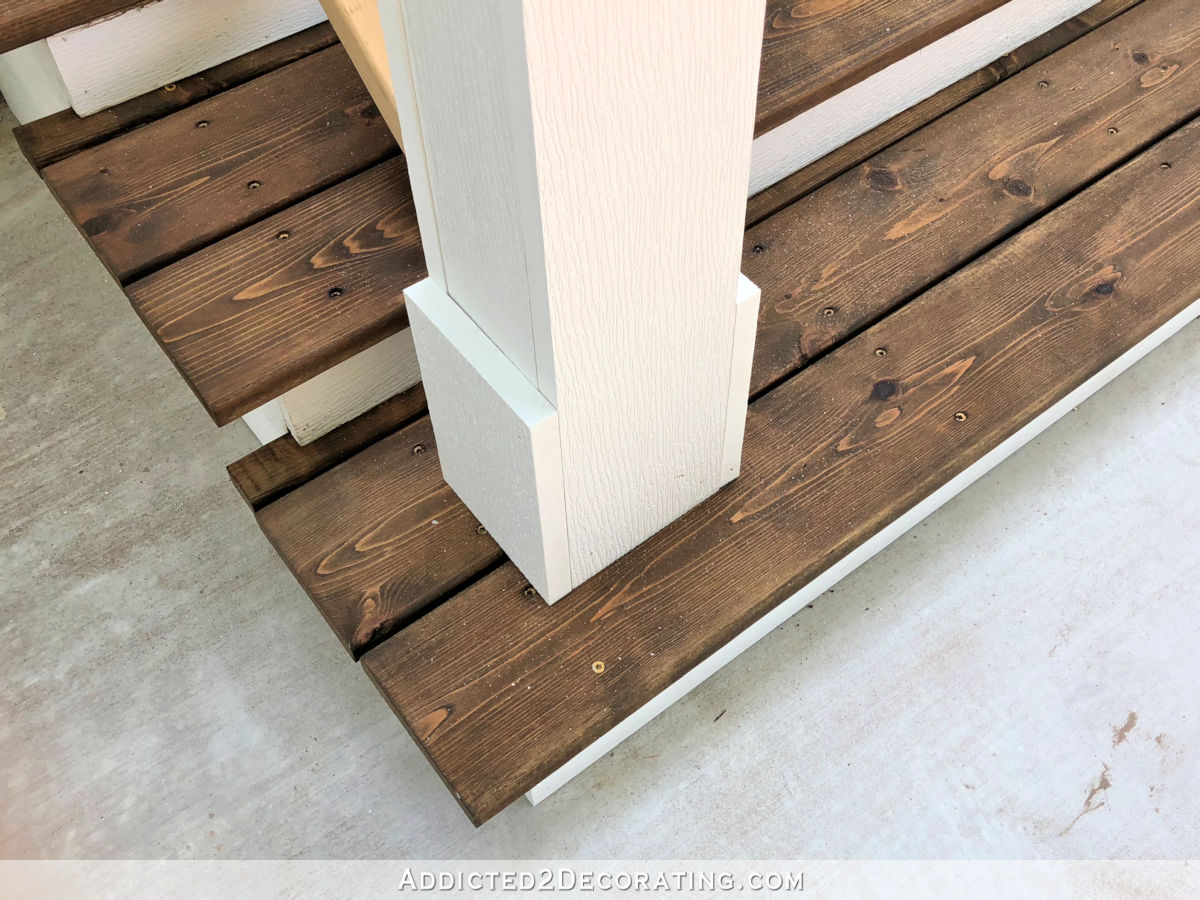
And then attached the front and back pieces…
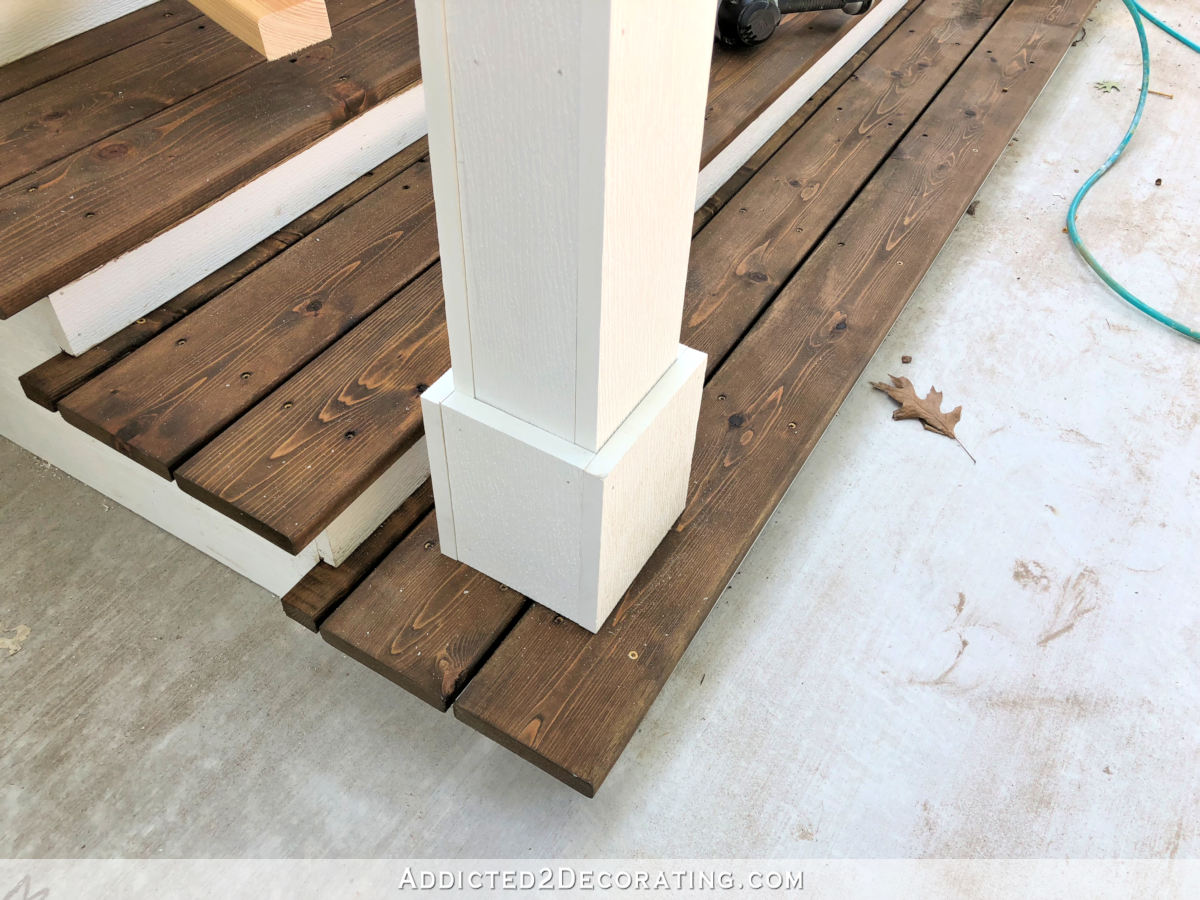
As far as the trim goes, that’s all that I needed to attach in order to do the handrail. The rest of the trim can be attached after the rail is done.
Next, I measured the finished height that I wanted (38 inches) and used my speed square to mark the height on all four sides.
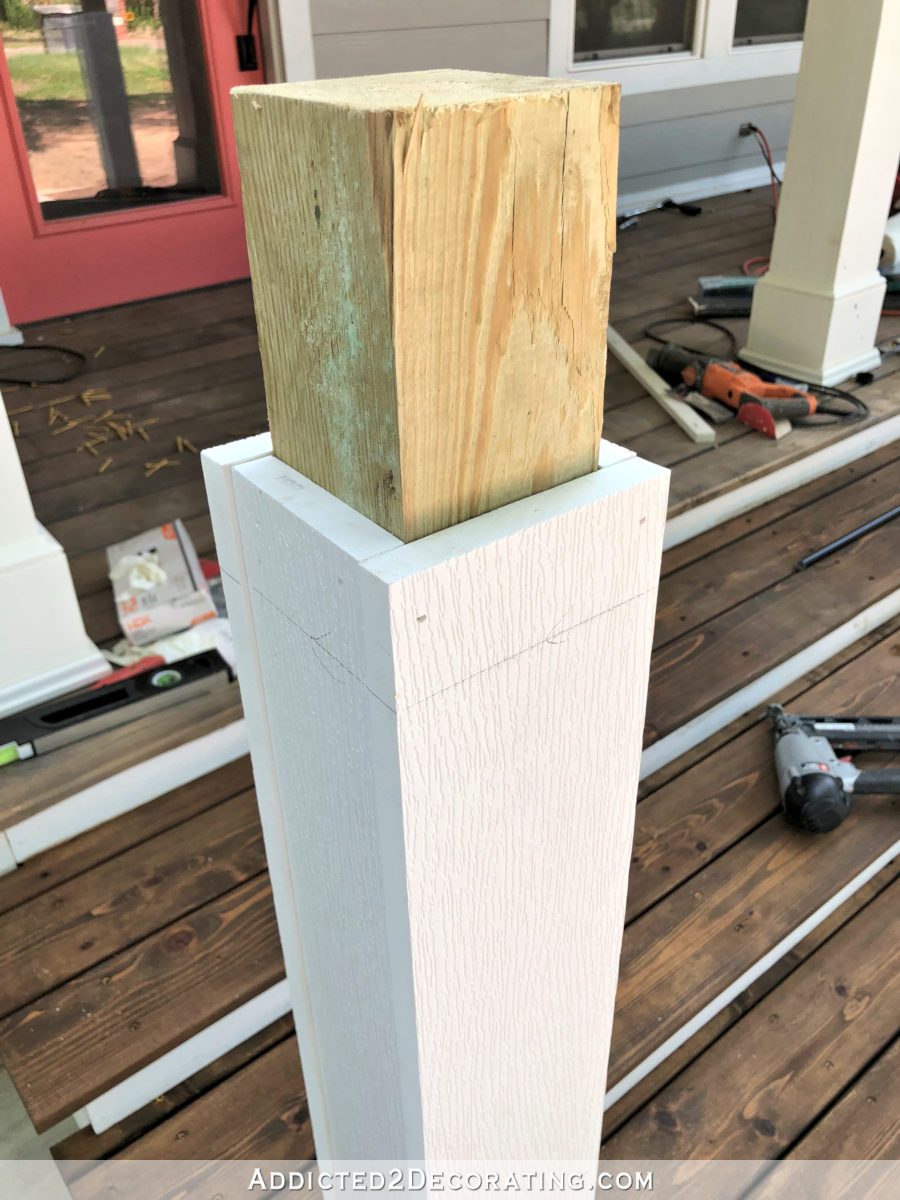
Then I used my circular saw to cut along those lines on all four sides and remove the excess height.
In building the porch step railing, I started from the top and worked my way down. The directions on the balusters that I used (these are the ones I used) said to start at the bottom and work up. That didn’t make sense in my mind because the front porch handrails needed to be at a very specific height. The rest could be adjusted if need be.
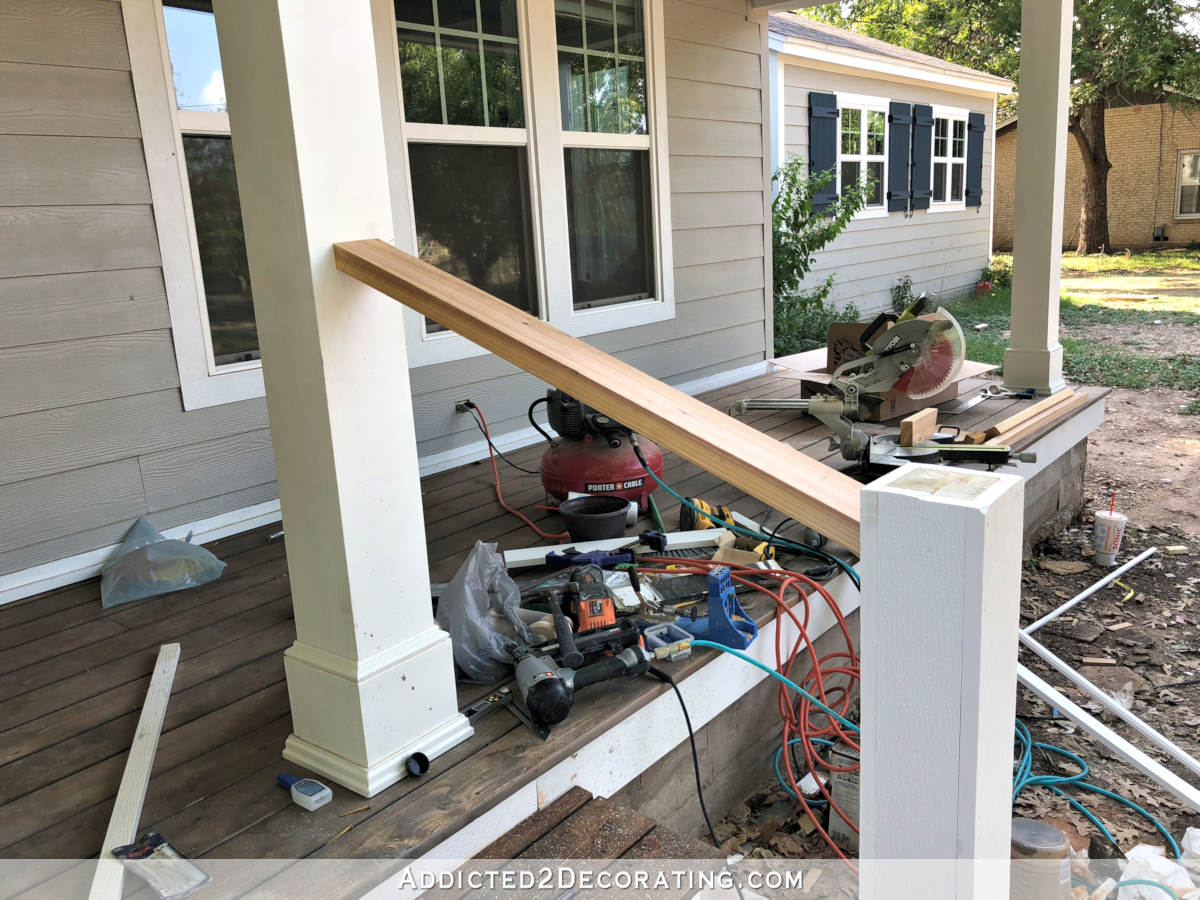
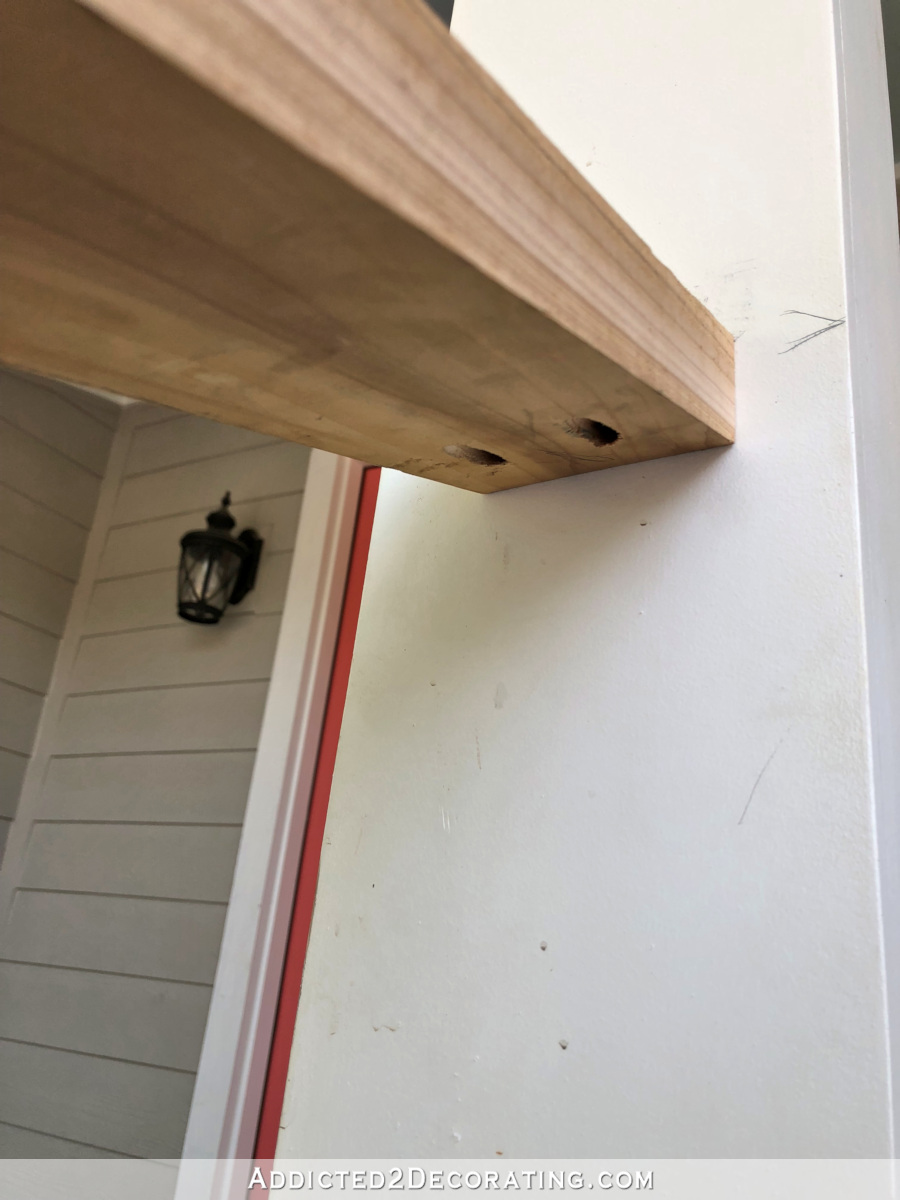
So using a 2 x 8 piece of cedar, I ripped a piece to 3.5 inches wide. (I didn’t use cedar 2 x 4’s because I couldn’t find any that weren’t incredibly rough.) Then I measured and marked the handrail height on both the column and the post, held the handrail up to both marks, and marked the angles with a pencil. Then I cut the angles and attached the handrail using pocket screws on the bottom side of the handrail.
Here’s a peek of the underside where the pocket screws attach the handrail to the column.
Next, I ripped a two-inch-wide piece from that same cedar board to fit right under the handrail, cut to the same length and with the same angles on each end, but this one was cut so that it stood upright rather than lying flat like the handrail.
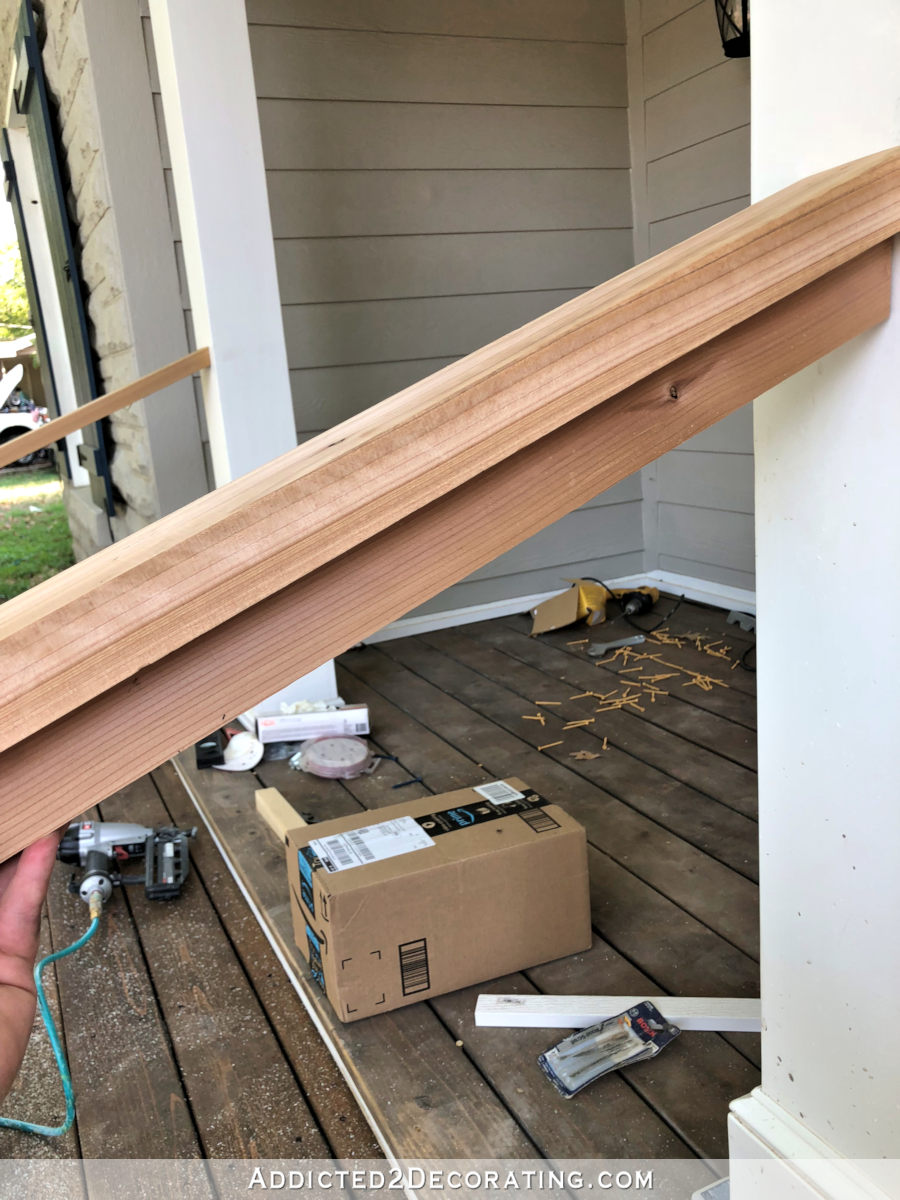
Before attaching that piece to the handrail, I measured and marked for the placement of the baluster connectors. These are the ones I used. They can be used on straight railings or on steps. You simply have to twist them to make them angled, and then screw them into position with the screws that are supplied with the connectors.
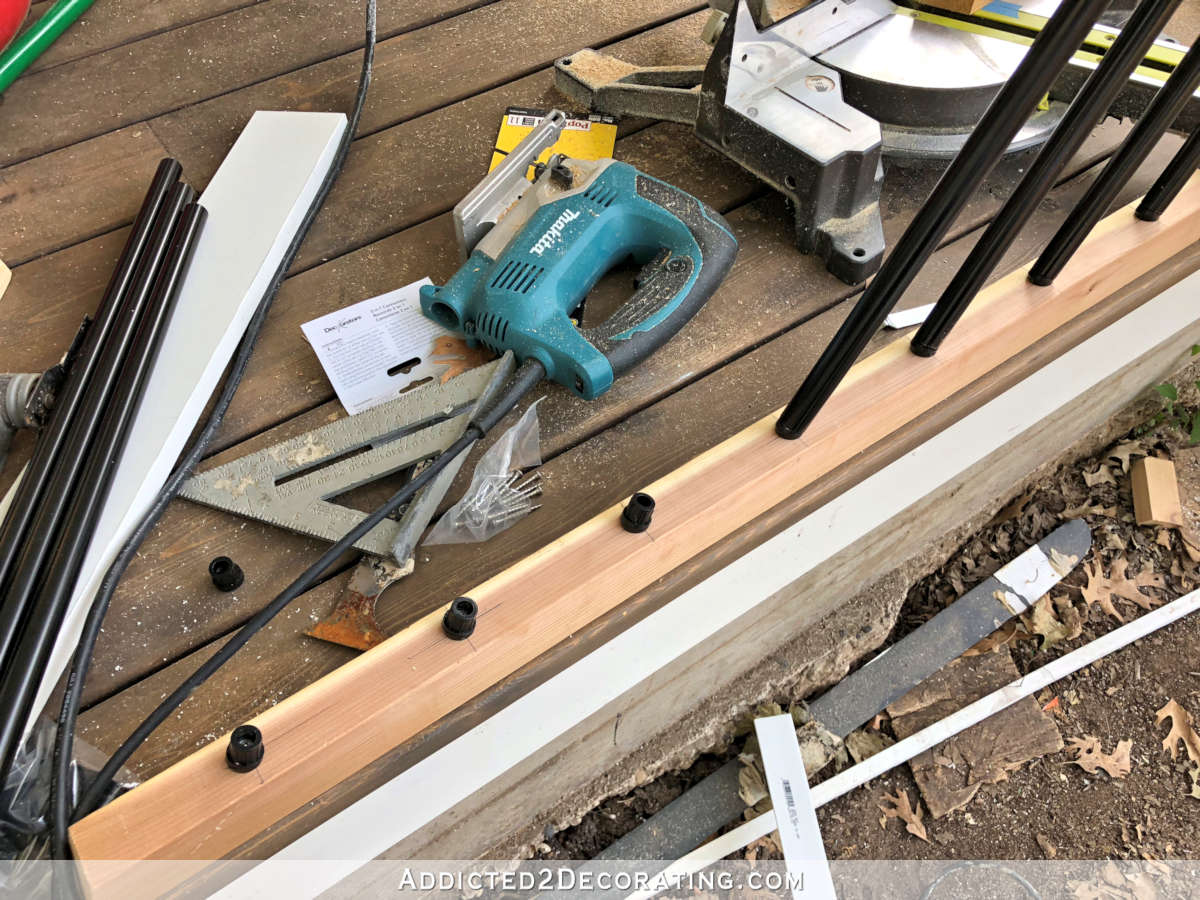
Once I had the connectors all attached, I removed the balusters (I was just making sure they would work 🙂 ) and then attached that rail to the bottom of the handrail using 2.5-inch screws screwed through the bottom of that rail and into the bottom of the handrail.
Using that same cedar board, I also ripped a piece that’s 2.5 inches wide for the bottom rail, and I attached the baluster connectors using the exact same spacing.
Then I realized that lining all of these things up and attaching them was a near impossibility for us mortals with only two hands.
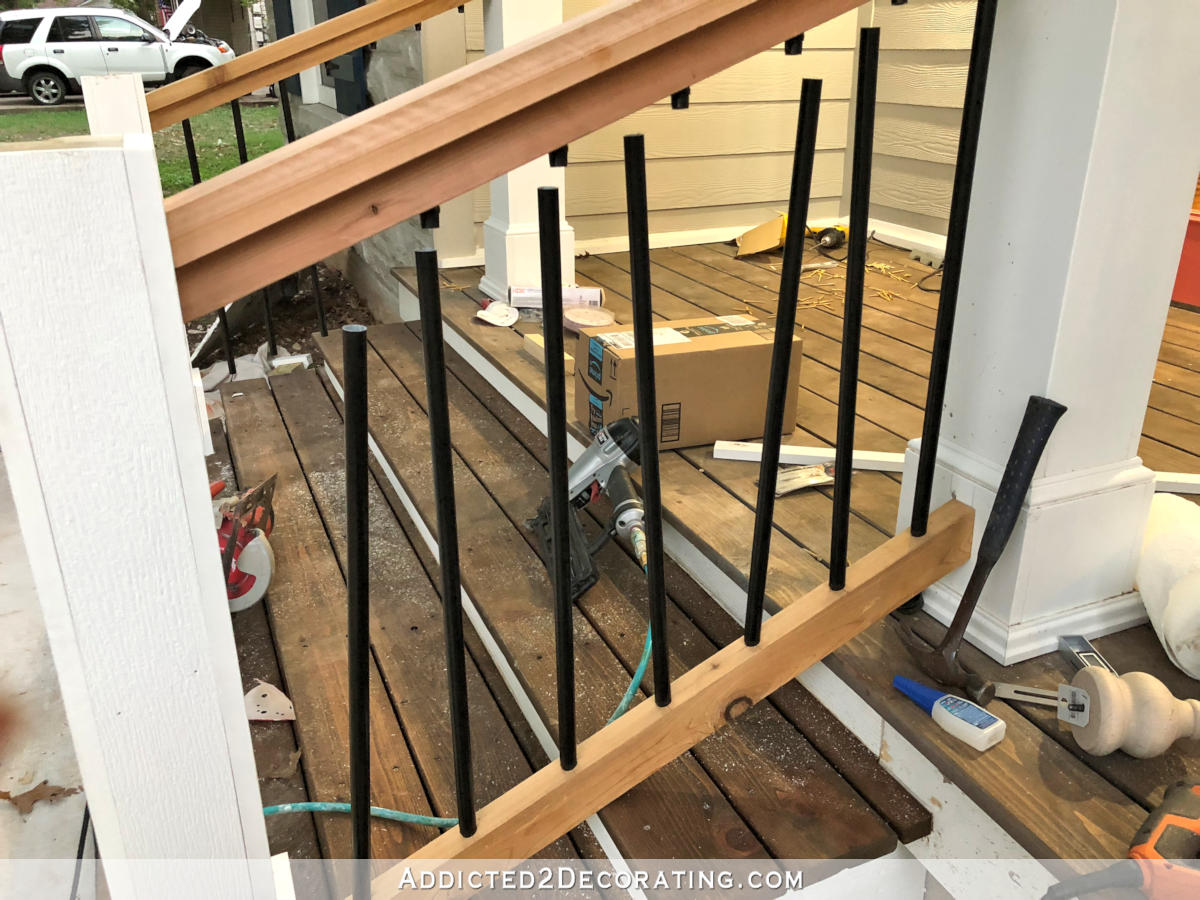
I was about ready to give up and wait until I could call in reinforcements when I realized that I could just let tape be my other hands. I used some adhesive sealant inside the metal tubes, attached them to the top connectors, and taped them into place so they wouldn’t fall off.
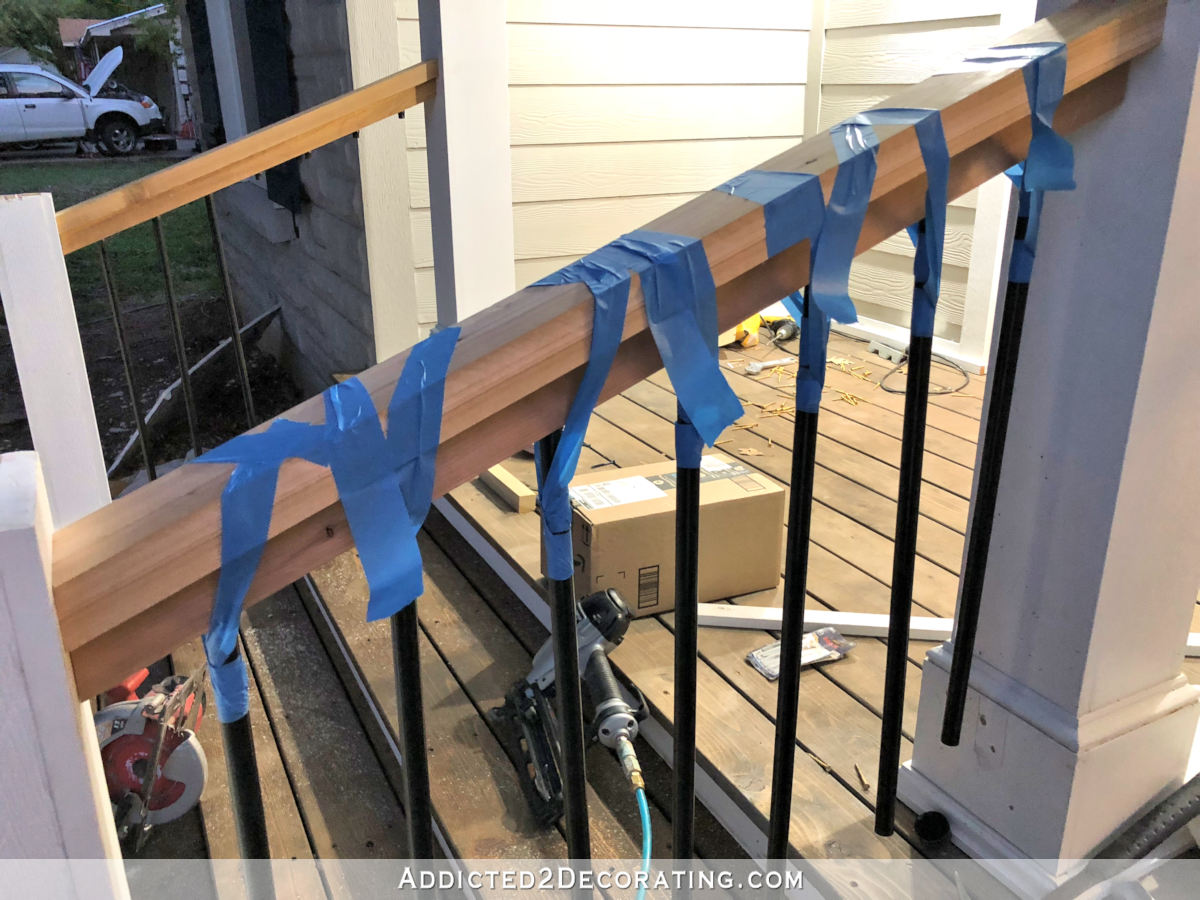
It was still quite the challenge to get all of the seven balusters lined up with the bottom connectors on the bottom rail with only two hands, but I somehow managed. It used up almost all of my reservoirs of patience (my reservoirs of patience generally run pretty low anyway 😀 ), but I finally got them all attached. And then I attached the bottom rail to the post and column using pocket holes that I had pre-drilled on the side of the bottom rail.
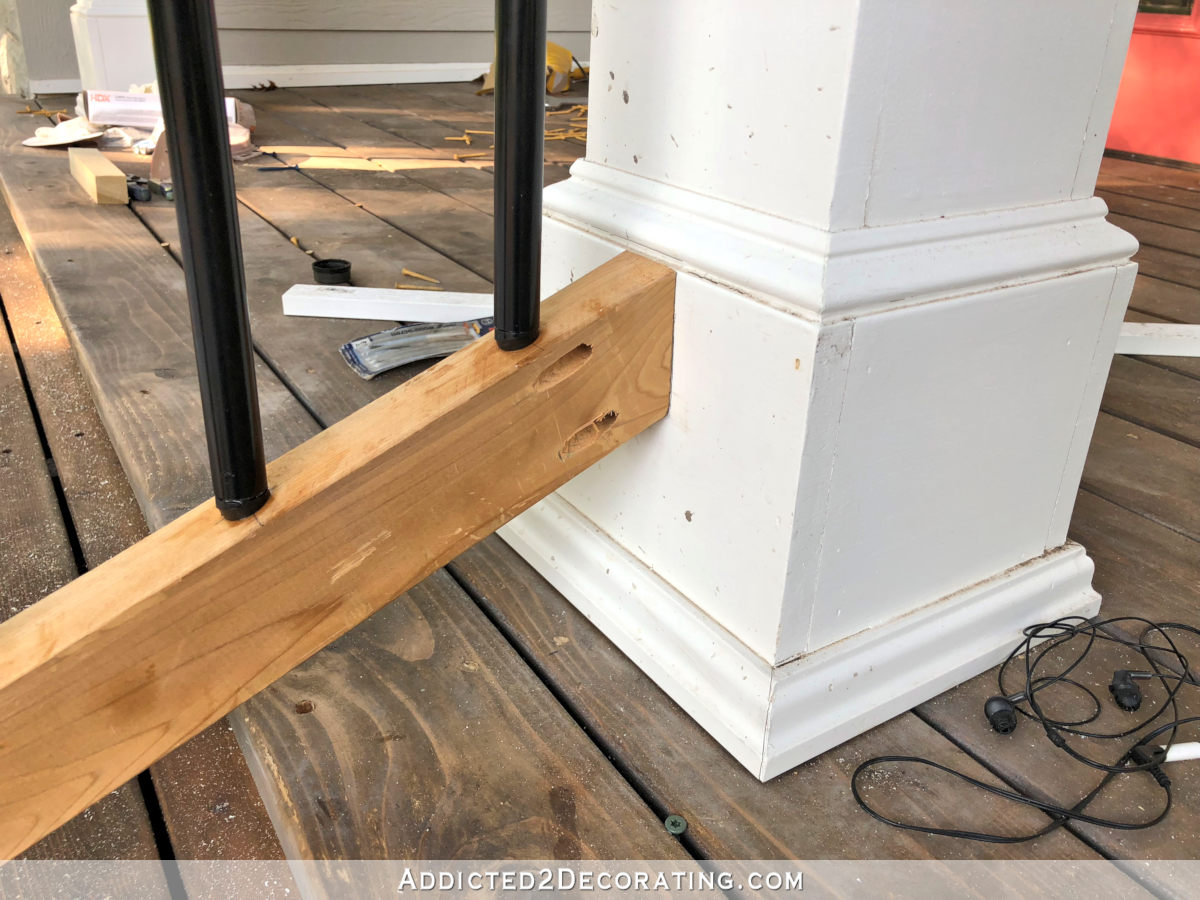
Unfortunately, I couldn’t hide those pocket holes underneath the rail since there wasn’t enough room to get my drill underneath that bottom rail to attach it. But Kreg has pocket hole plugs that can be used to fill and hide pocket holes.
As a side note, the balusters were a bit too long for my railing, but they’re aluminum, so they cut very easily with a miter saw. Just be VERY SURE that you wear eye protection (or just close your eyes completely while cutting, which is what I did) because those little metal pieces go flying. And the last thing you want are metal fragments hitting your eyes.
And with that, the porch step railing was built.

I’m really thrilled with how it turned out. I love how the black metal ties in with all of my other black accents, and like I said above, right now I’m planning on staining the top front porch handrails and painting the other two connecting rails white. And of course, the post still needs some trim, a cap, a finial, some sanding, a bit of caulk, and paint.
I should have these steps and front step railings completely finished this weekend!
Update:
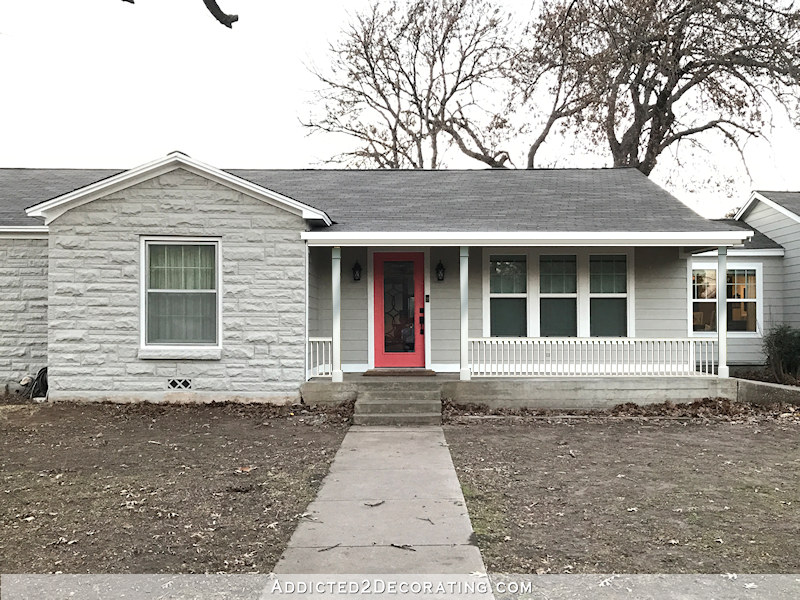
The porch steps and railings are finished! Here’s a peek at how they turned out…
You can see more of the finished steps and railings here…


The front porch is just awesome, and I love that handrail. I feel so blessed to be living in a house with the your creativity.
Blessed on both sides 😉👍🏻
Aww! What an awesome compliment! You are a keeper for sure!!
How sweet!
I can see the finish line!
One suggestion .. I would add a bottom trim piece to the railing, just like you have on top, to balance it out. That piece not being there makes I look unfinished and top heavy. Hope that makes sense as my terminology is not the best.
The top is the actual handrail that will be stained. I think it would look funny to attach one to the bottom, especially since I don’t want something stained on the bottom, and painting a wide piece attached to the bottom would then make it look bottom heavy. I don’t have a problem with it looking top heavy since that’s where the handrail goes, and a handrail is naturally thicker than the rest.
Likely when it’s stained and painted there will be no imbalance. Looks awesome.
Fantastic!
Amazed by your creativity, skills and talent EVERY.SINGLE.TIME.
I love it! The black ties in beautifully and your plan to mix white trim with stained wood will look great! While it was frustrating for you, the picture of all the balusters all catty-wampus was both funny and very realistic and is one of the reasons I like your blog! YAY! Great job!
Love the black rails and Matt for feeling so blessed. How sweet.
really nice job
Hi
The fact that you could build the stairs and railing in about a week amazes me. I do a little DIY and it always takes twice as long at I think it will. I know this is after the fact, but would it have worked if you had attached the spindles to the top and bottom rails on the ground and then attached the piece as a whole? I want to replace a short piece of railing on my interior stairs.
THanks
I do think that would have worked, but doing it that way would require waiting for several hours (maybe up to 24 hours) for the adhesive sealant to set so that it could all be picked up and moved as one piece. I’m on that patient. 🙂
Looks great! How wide is it between the hand rails?
It looks fantastic and your plan how to paint/stain sounds perfect to me!
My favorite is the beefy wood posts painted white, the stained steps and porch and the black, basically ALL of it!
Looks fantastic! I’m already excited/anxious for spring to roll around to see some landscaping. 😁
You might want to consider putting a sealer on those cut edges. The raw edge of cut PVC is porous, and attracts dirt like crazy! They’ll be grim and grimy looking in no time.
Pros try to miter PVC edge as much as possible for that reason, and when they can’t they put on a sealer to keep the edges clear(er).
Is there a particular sealer that is used?
I get what you’re saying,…. dust or additional surfaces to grab moisture, grow mildew, etc.
It’s the same sealer that’s used to glue PVC together. It basically works by chemically dissolving the PVC a bit so it becomes fluid, and then hardening back up, but this time without a raw edge.
Just make sure you use the clear variety and not the colored stuff!
https://www.homedepot.com/p/16-oz-PVC-Clear-Solvent-Cement-310143/100072353
Thank you.
Kristi I don’t recall but does your building code require you to put railing on your porch when it is so low to the ground? I don’t believe our’s does. I loved having no rail for clean sight lines of view. Rails do add a nice feature, texture trim to houses though.
Nice work on all of it.
Forgive my terminology but are “butted” trim pieces versus mitered the new standard on homes? Have been noticing a lot of window and door trims like that lately.
Love the armchair quarterbacking after the project is completed. Kristi, I applaud you for doing what you do. Maybe it’s not what a carpenter would do sometimes, but it’s your way, your house. As long as it satisfies you and Matt, and it’s safe, that’s what counts. I love how it looks and how you find ways to overcome working alone.
Love it, love it, love it! It all looks so cohesive now! Good on ya gal 😋😋
Well that tutorial was pretty technical. But interesting nevertheless. It just looks fantastic. The work you do on your house is probably a higher quality than a hired carpenter would do. i should know. i have had plenty of hired carpenters do cruddy jobs.
Love it! This will really compliment the front of your house along with the new sidewalk. One thing I’m wondering though is if staining the top rails will make them visually disappear from a distance while the bottom rails painted white will stand out?
As usual, a beautiful job!!! But in the future, PLEASE don’t close your eyes while using power tools.
You are truly AMAZING!! This looks so awesome, I love it!
I’m impressed!
That sure is pretty. Well done!
Looks great. I just started reading your blog a few months ago. I love it. I sat here this evening telling my husband about “this blogger” that can do everything! My husband can do what you do, minus the sewing, but I can only paint. It’s fun watching a woman excel at these types of projects. Keep up the great work and thanks for sharing it with us.
Looks awesome Kristi!!!
Reminds me of when I made a doll crib for my granddaughter last Christmas. I used wooden dowels and getting them lined up top with bottom (this was the first and ONLY thing I’ve EVER built!) I (for some dumb reason) thought that using dowels and drilling holes in two pieces of wood would be easier than attaching perpendicular pieces of wood to each other!! SO, how DID you figure out how to line up the top and bottom connectors, and this was complicated by an angle!!!
Wow! Never cease to amaze! Another great job!
Looks super good! Love the paint/stain mix.
Kristi, as always you are a “Super Star”! You have more talent in your little finger than the majority of us have in our entire body. I feel kind of sorry(not really) for the husbands in your neighborhood having to witness you doing the majority of the work on your house unassisted. Keep on being an example to women that construction is not a mans world! We love you Kristi!
Re: Tired, frustrated,…
You go girl! You have reached a huge milestone in life. It does not matter if people don’t like you, your stuff, your life, it only matters that you like you, your stuff or your life. You will feel freer and more creative after this.
By the way your are creative and extremely talented. I am in awe.
Susan G. Beaverton, Oregon
Hi Kristi. I just wanted to say how much I enjoy your blog, your tips, and your “no-fear” attitude. You are not afraid to try something and if it works, great, if not, you come up with a plan B.
Please don’t be disheartened by the comments made about your entry wall. It’s your house! And I agree. I went back and re-read that post several times and NO where did it say you were looking for anyone’s comments.
In looking back on these posts, there are SO many people who are inspired by your projects (myself included) so please please don’t give up on us and those that look so forward to your posts.
I so wish you lived closer so I could run over and give you a big hug!! Take care sweetheart!
Your porch is absolutely gorgeous! We’re getting ready to redo our porch railings and this is exactly the look I want. How far apart did you space your balusters? I love this look!
I can’t remember exactly, but I looked up the building code on that (there is a code that specifies maximum spacing) and made mine as close to or just under that maximum spacing specified by code.
Hi Kristi,
Thank you for your response. I’ll see what I can find out. A review on Lowe’s mentioned a 4 inch spacing but I’ll keep investigating. Your spacing looked perfect! My husband and I love your blog! It has given us inspiration to finish renovating our home.
Blessings!