Cloud Effect Acrylic Pour Painting (Plus, A Super Cheap Alternative To Floater Frames For Canvases)
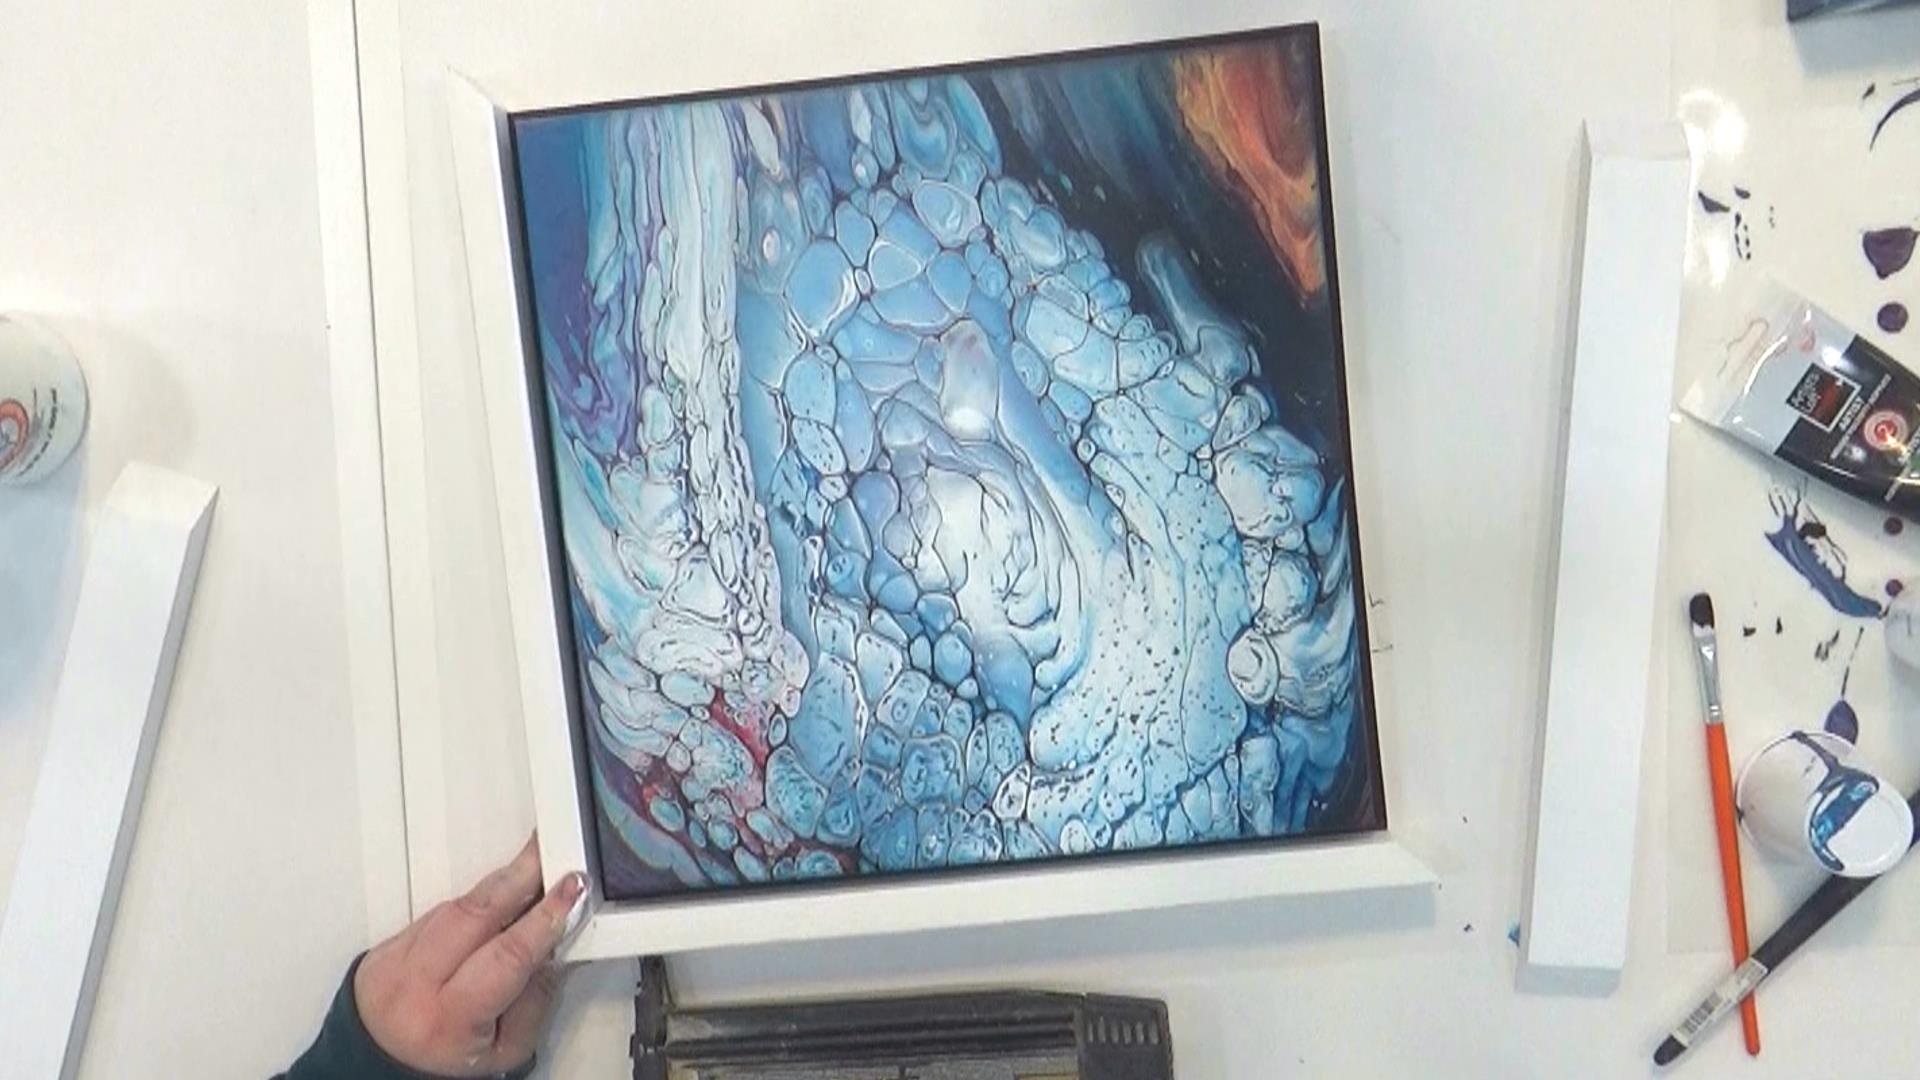
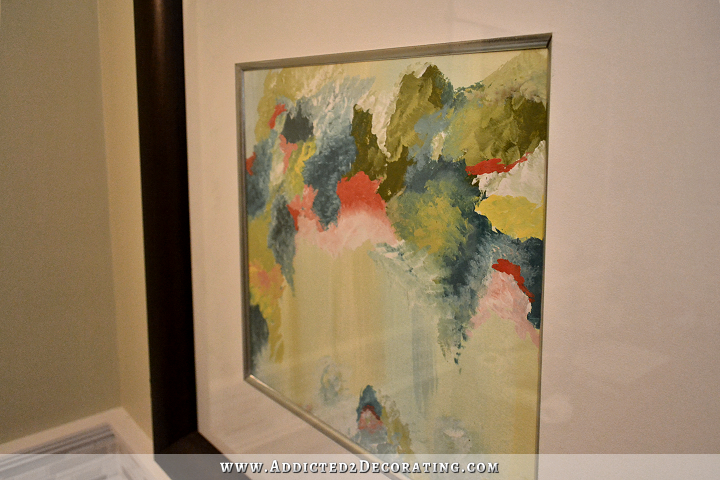
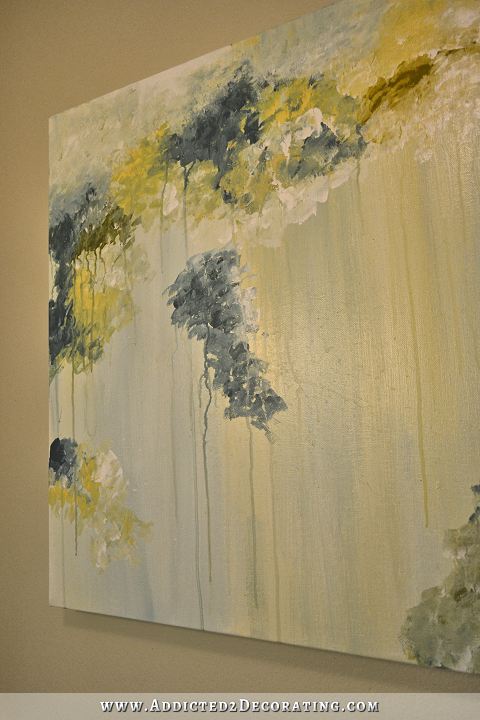
Projects haven’t been going well around here lately, so I needed to take a break and just do something fun and artistic. So I tried out an acrylic pour technique that I’ve seen others do lately called the “cloud effect”. As the name would suggest, it’s an effect caused by adding a certain paint (Decoart Americana Satin Enamel) to the white paint, and it creates these billowy clouds of white paint.
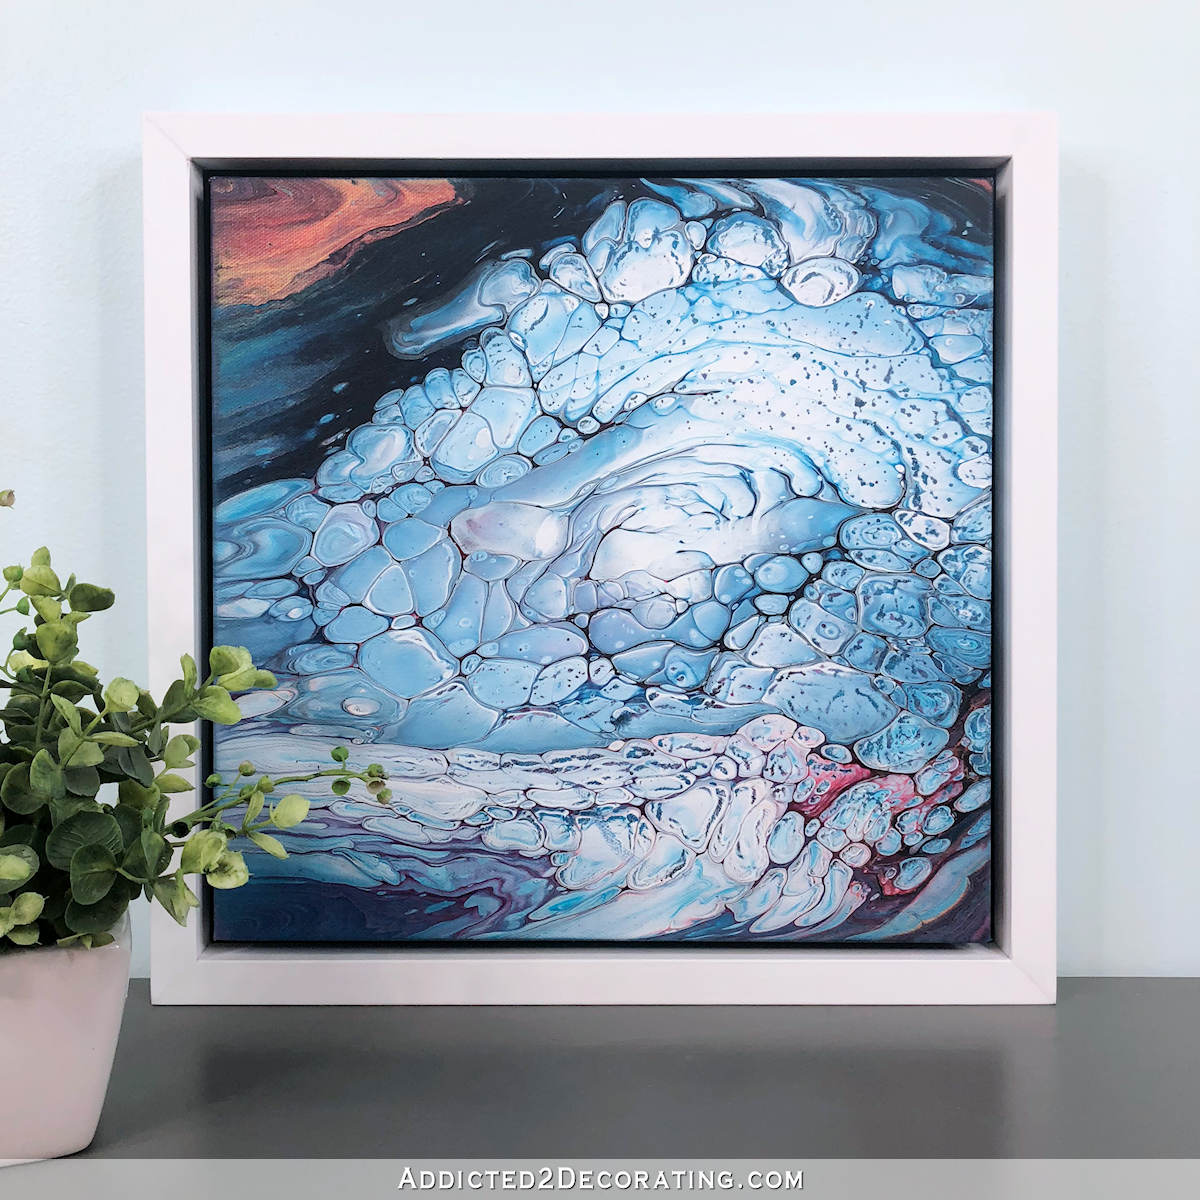
And while I was at it, I also added a frame to my canvas. I love the look of framed artwork. For some reason, unframed canvases hung on a wall just remind me of a college dorm room or a person’s first apartment right out of college. I much prefer the finished look of framed artwork, but when I use gallery-wrapped canvases (the thick ones that are stapled on the back to create clean sides of the canvas), I like the floater frames that have the gap between the frame and the canvas so that the sides are still a little bit visible.
But those floater frames (especially the thicker ones that fit the 1.5-inch-thick gallery-wrapped canvases) are expensive! I’ve seen floater frames for 12″ x 12″ canvases cost anywhere from $30 to $50, so I made my alternative to mimic the look for under $4.
You can see the whole project here…
If you’ve never done an acrylic pour before, you really should! It’s fun experimenting with different paints and colors to see what happens. And what I love even more about it is that the result is only about 1/4 dependent upon your effort, while the rest is left up to chemistry and physics. It’s like a tangible display of the beauty and art of chemistry and physics.
For this painting, I used the following paints:
- Liquitex Basics:
- Phthalocyanine Blue (with a drop of Artists Loft Mars Black)
- Turquoise Blue
- Rose Pink
- Deep Violet (with a drop of Artists Loft Mars Black)
- Golden, Iridescent Gold (Fine)
- Decoart Americana Satin Enamel, Pure White
- Artists Loft, Titanium White
All of the colors except the gold were mixed 2 parts Floetrol to 1 part paint, with a tiny bit of water mixed in. The Iridescent Gold was mixed 1:1 with Floetrol, with no water added. The white paint mixture was about 4 parts Artists Loft Titanium White and 1 part Decoart Satin Enamel Pure White. I mixed that first and then added the Floetrol in the 2 parts Floetrol to 1 part paint ratio.
After all of the colors were mixed individually, then I layered the colors into a cup, and then poured the paint onto the canvas.
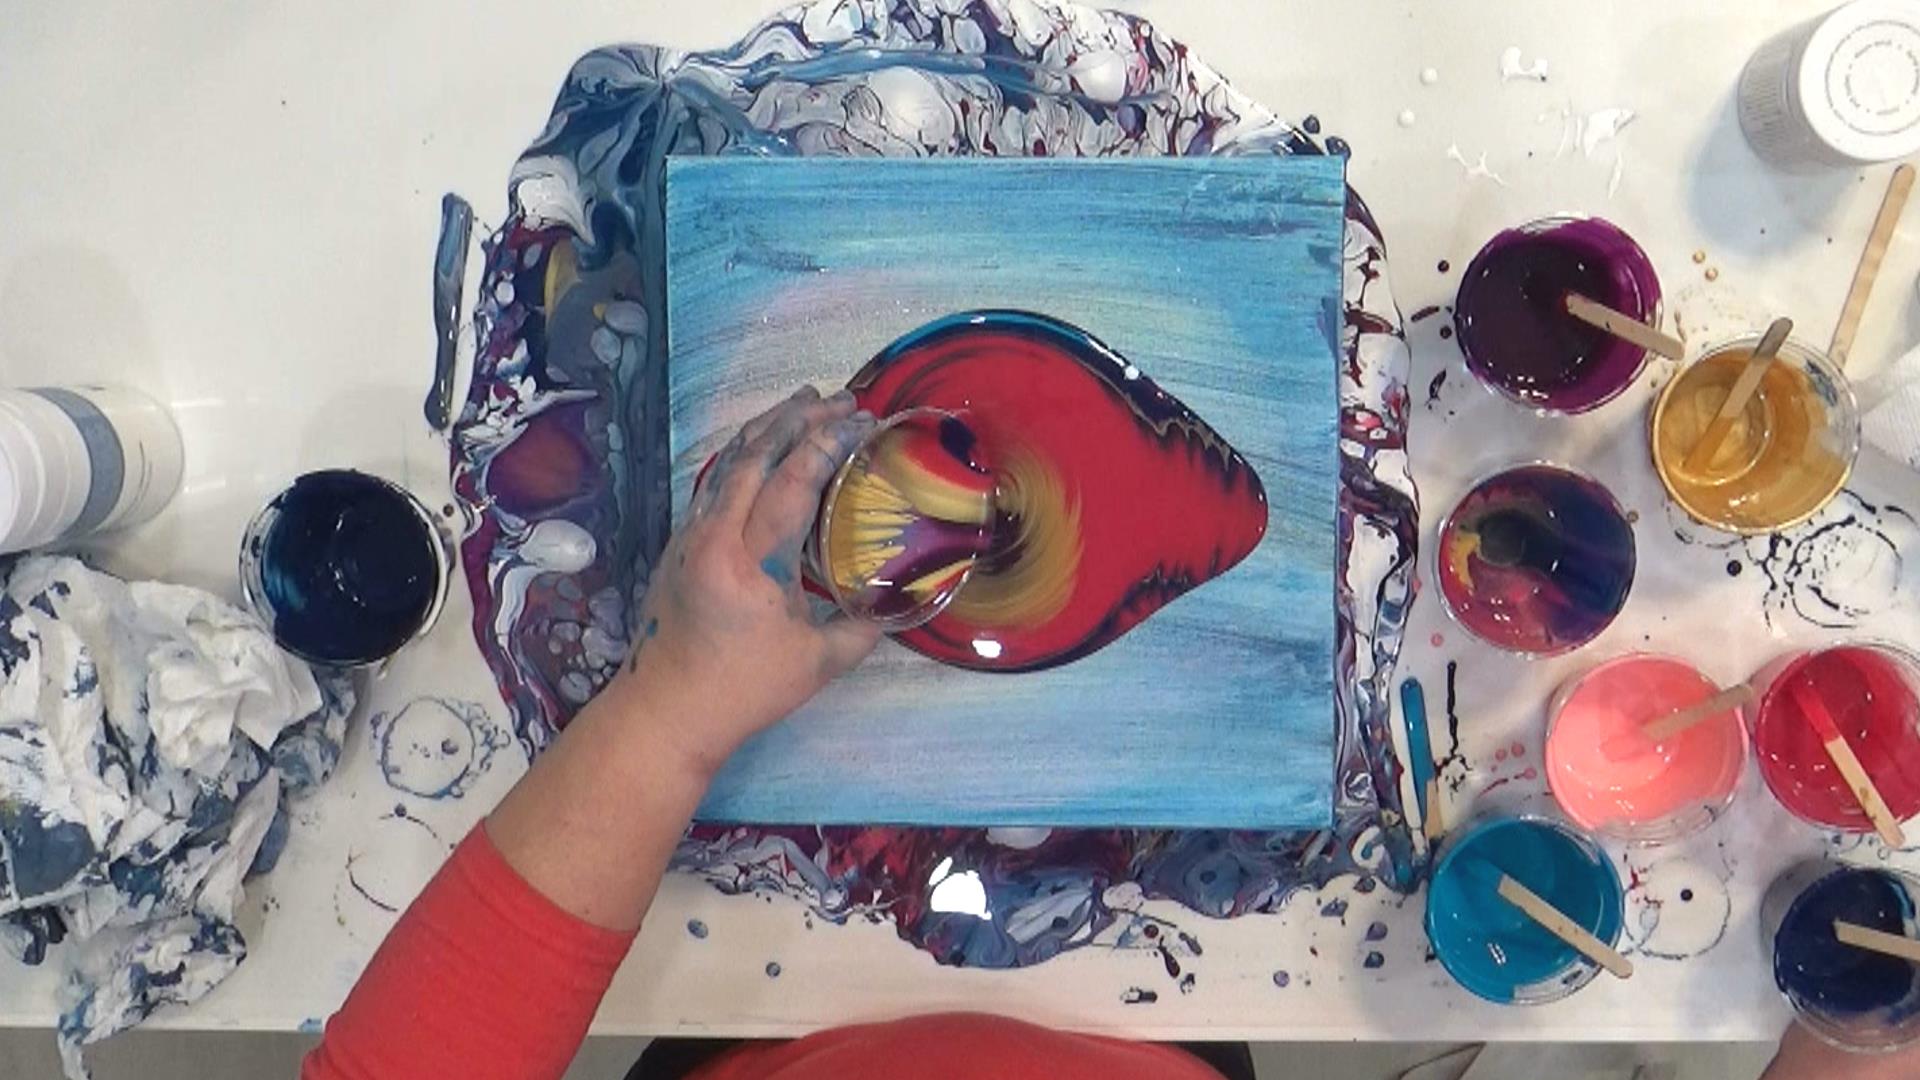
I was using a canvas that I had previously used and scraped because I didn’t like the outcome. So that’s why the canvas isn’t white. 🙂
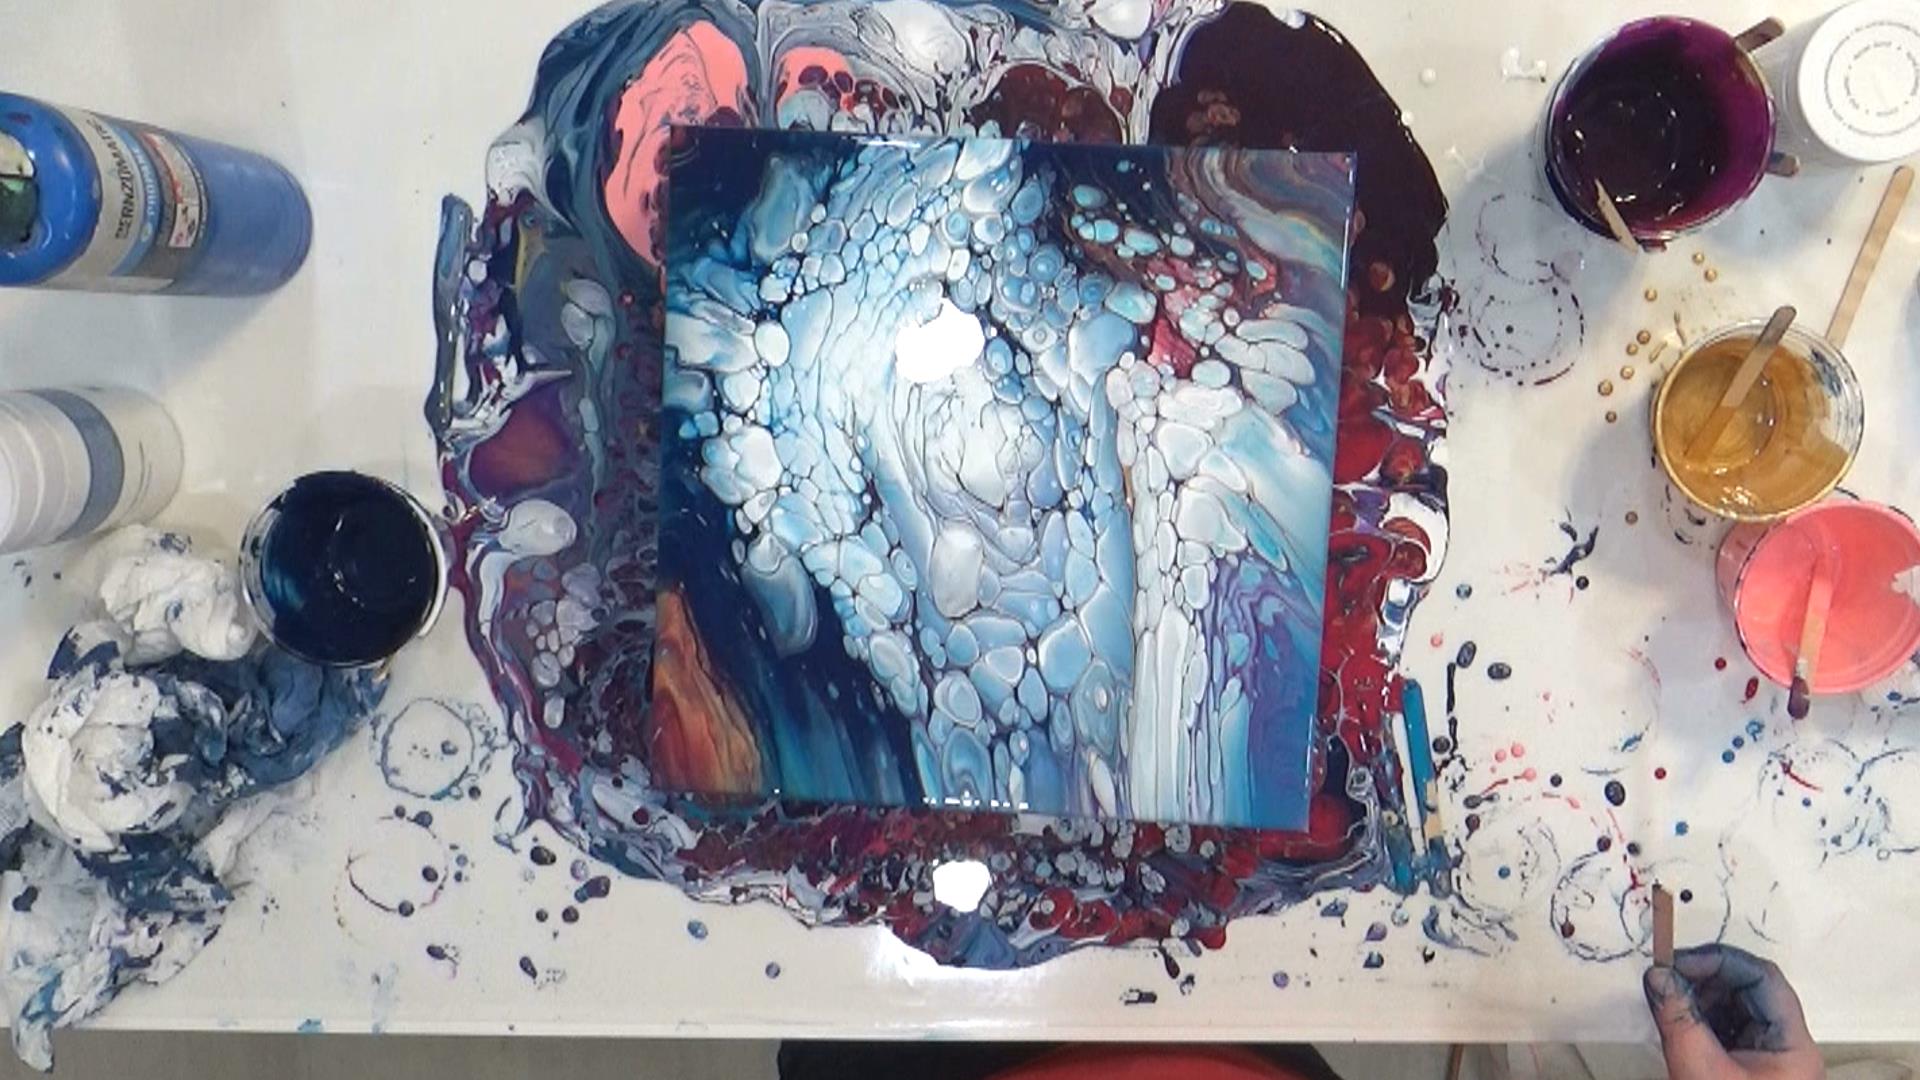
After pouring the paint and using my torch to remove the bubbles, I then started moving the paint around on the canvas by tilting it in various directions.
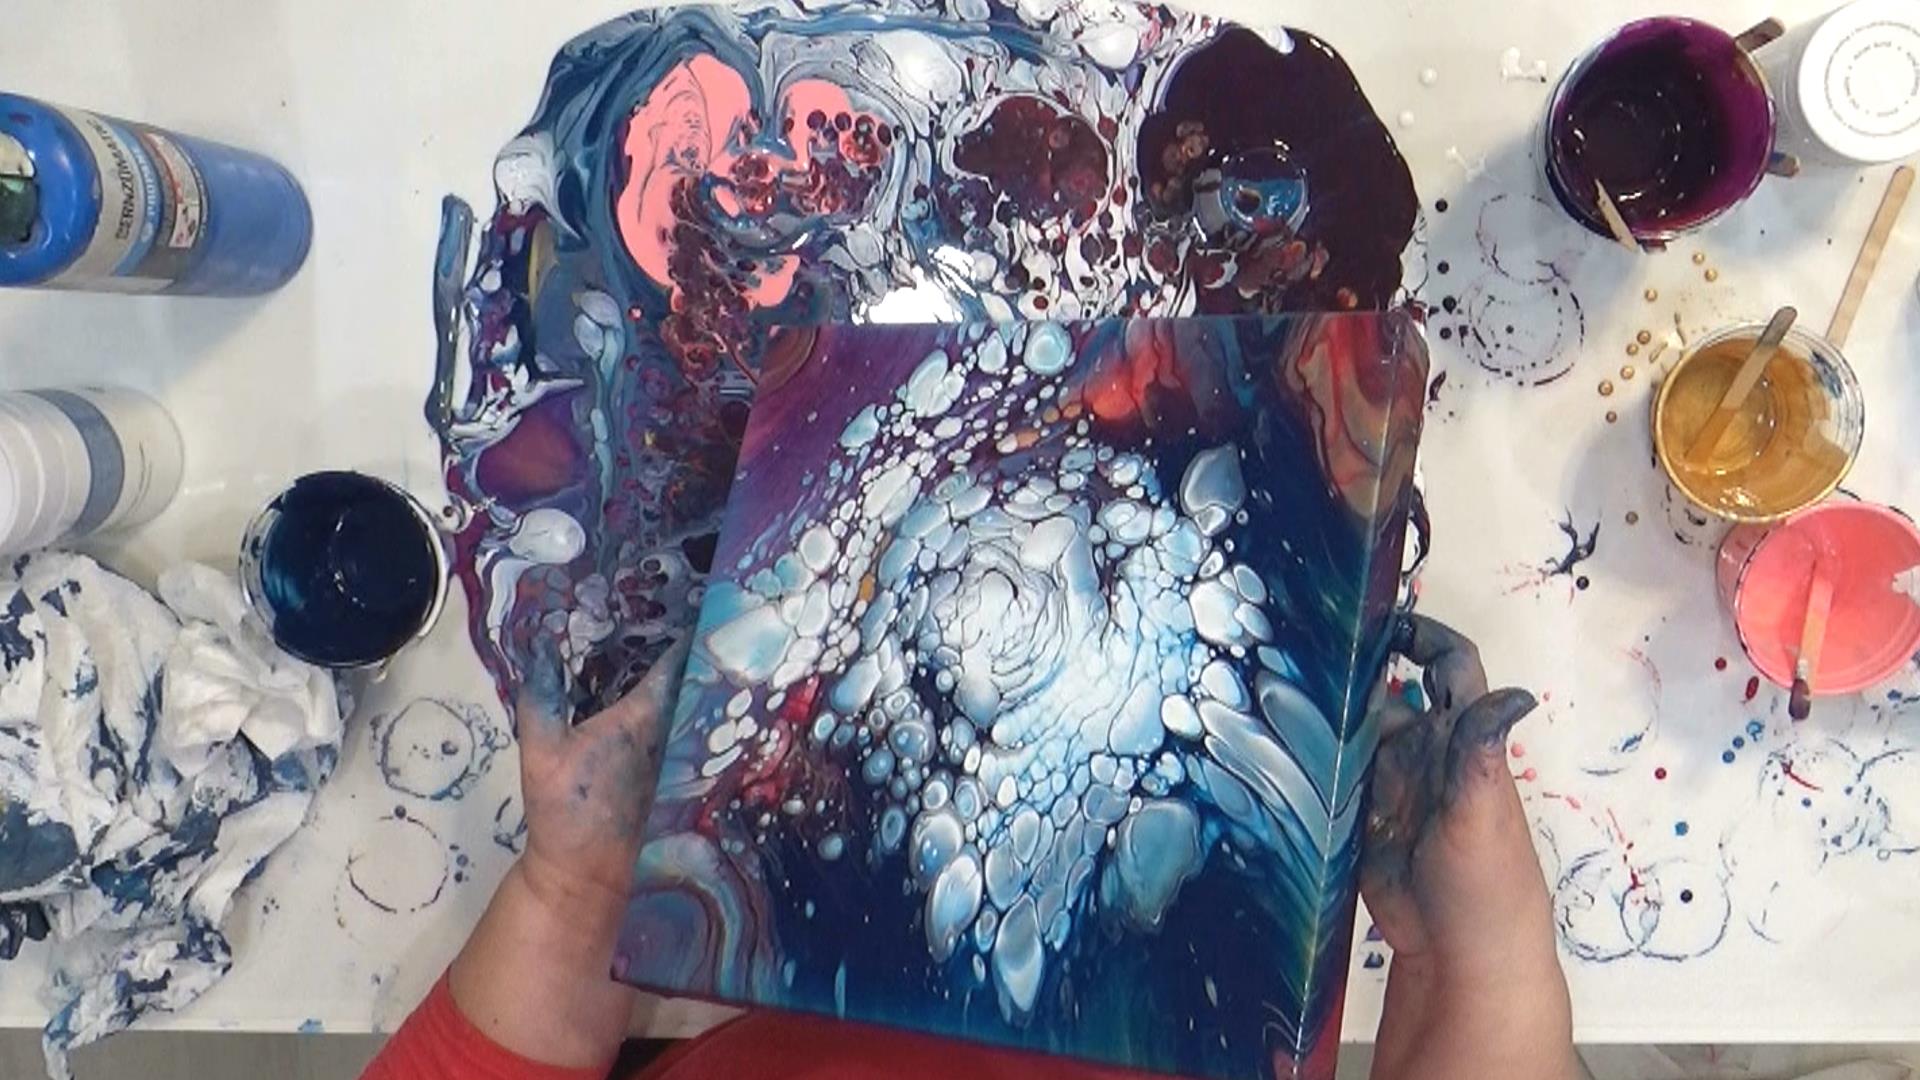
Once I got it where I wanted it, I placed it on four small cups and let it dry.
I left it for about 24 hours to dry, and then worked on the frame. First, I used a scrap piece of 1″ x 4″ lumber and cut it into 1/4-inch strips using my table saw.
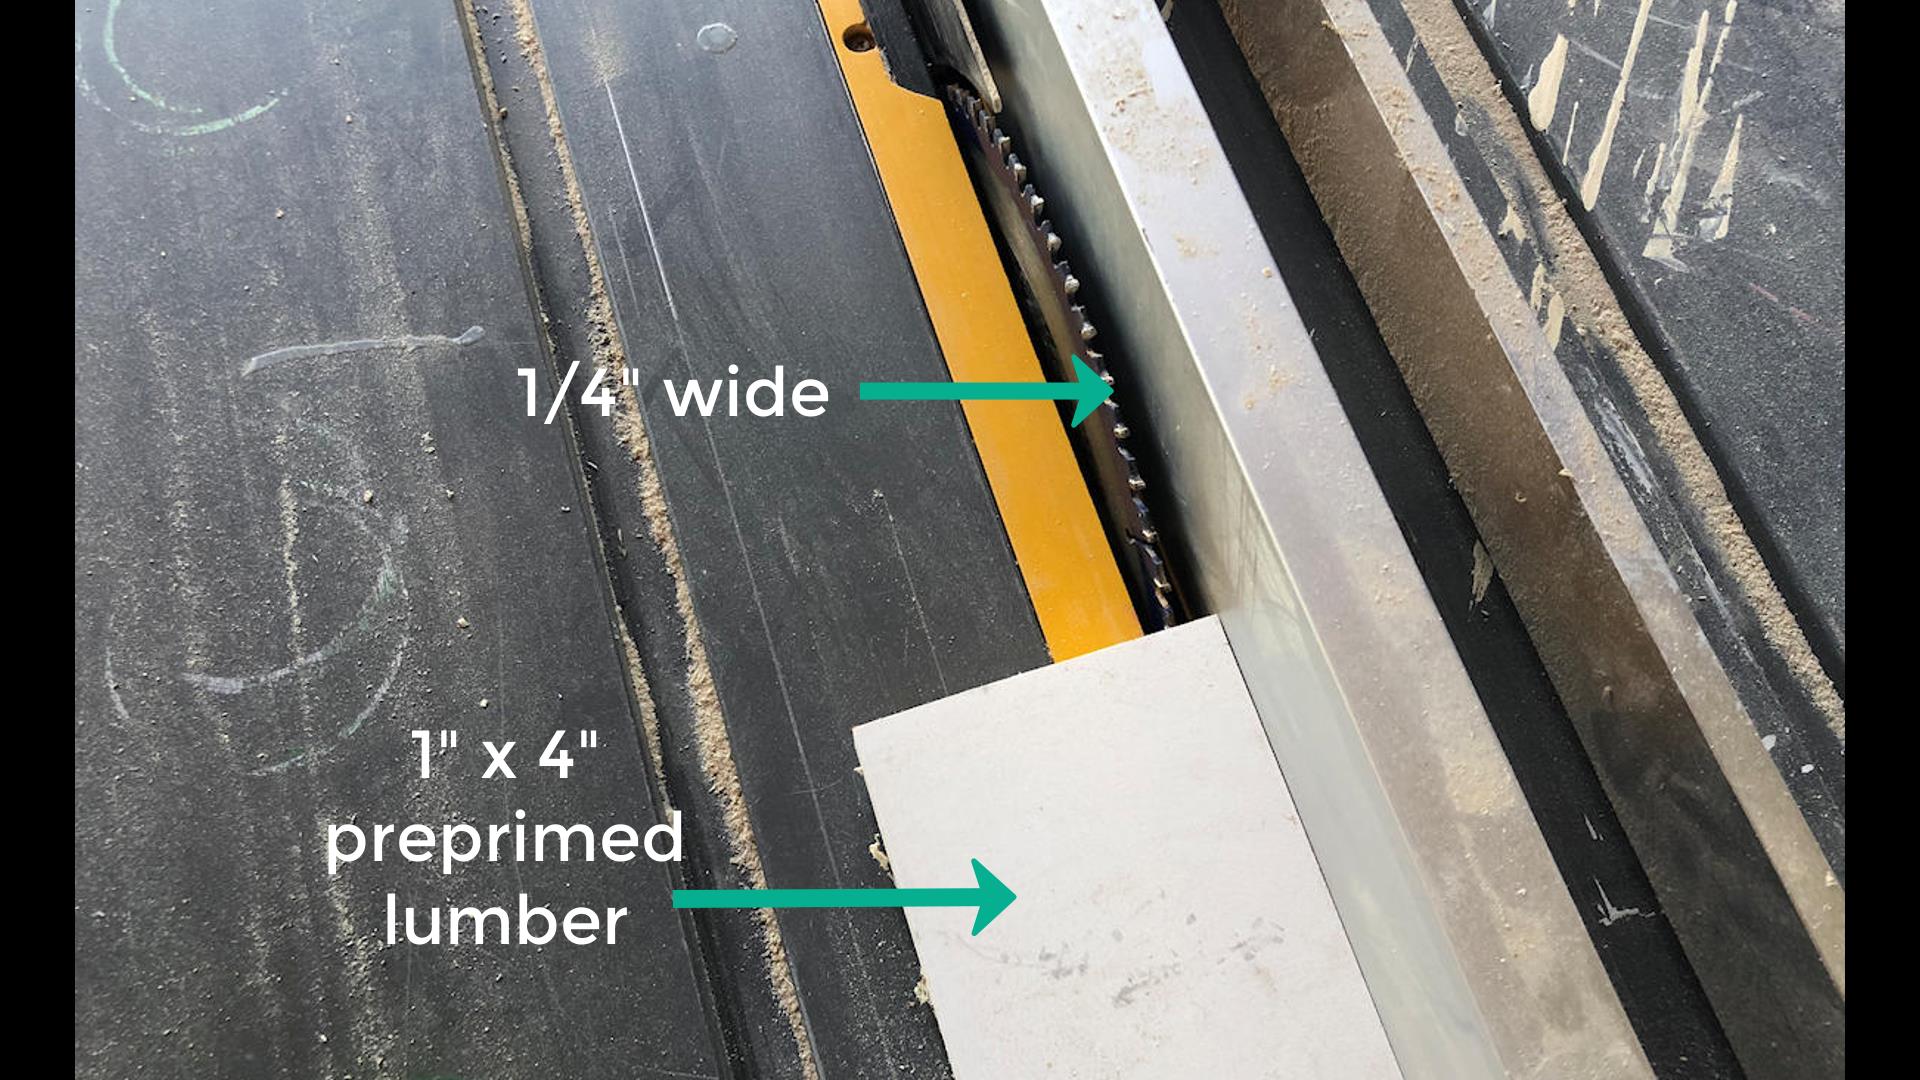
Then I mitered the corners using my miter saw, and then painted those pieces black.
I wanted these to mimic the look of the gap that you see on an actual floater frame. Since these pieces were cut from a 1″ x 4″ piece of lumber, they were 3/4-inch tall, so they only covered half of the edge of the 1.5-inch gallery-wrapped canvas.
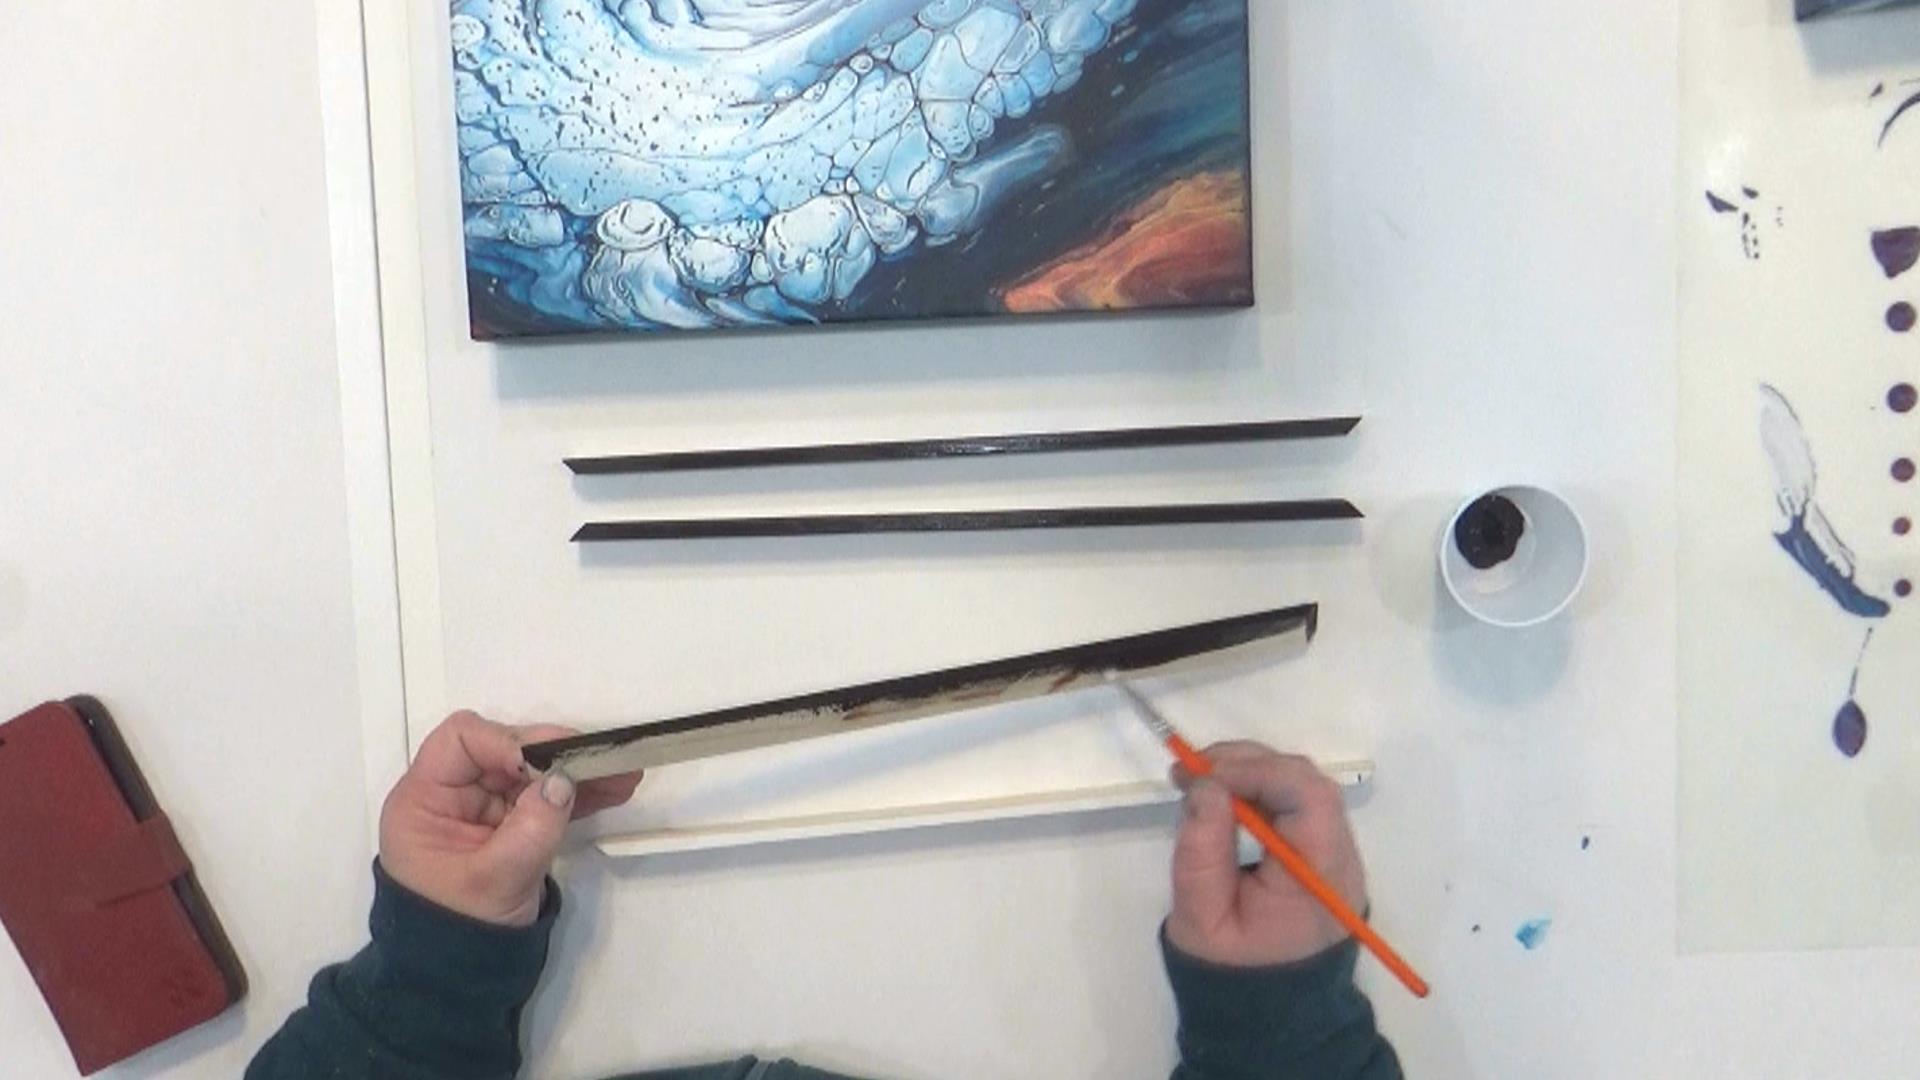
When those pieces were dry, I attached them to the sides of the canvas using small 18-gauge nails.
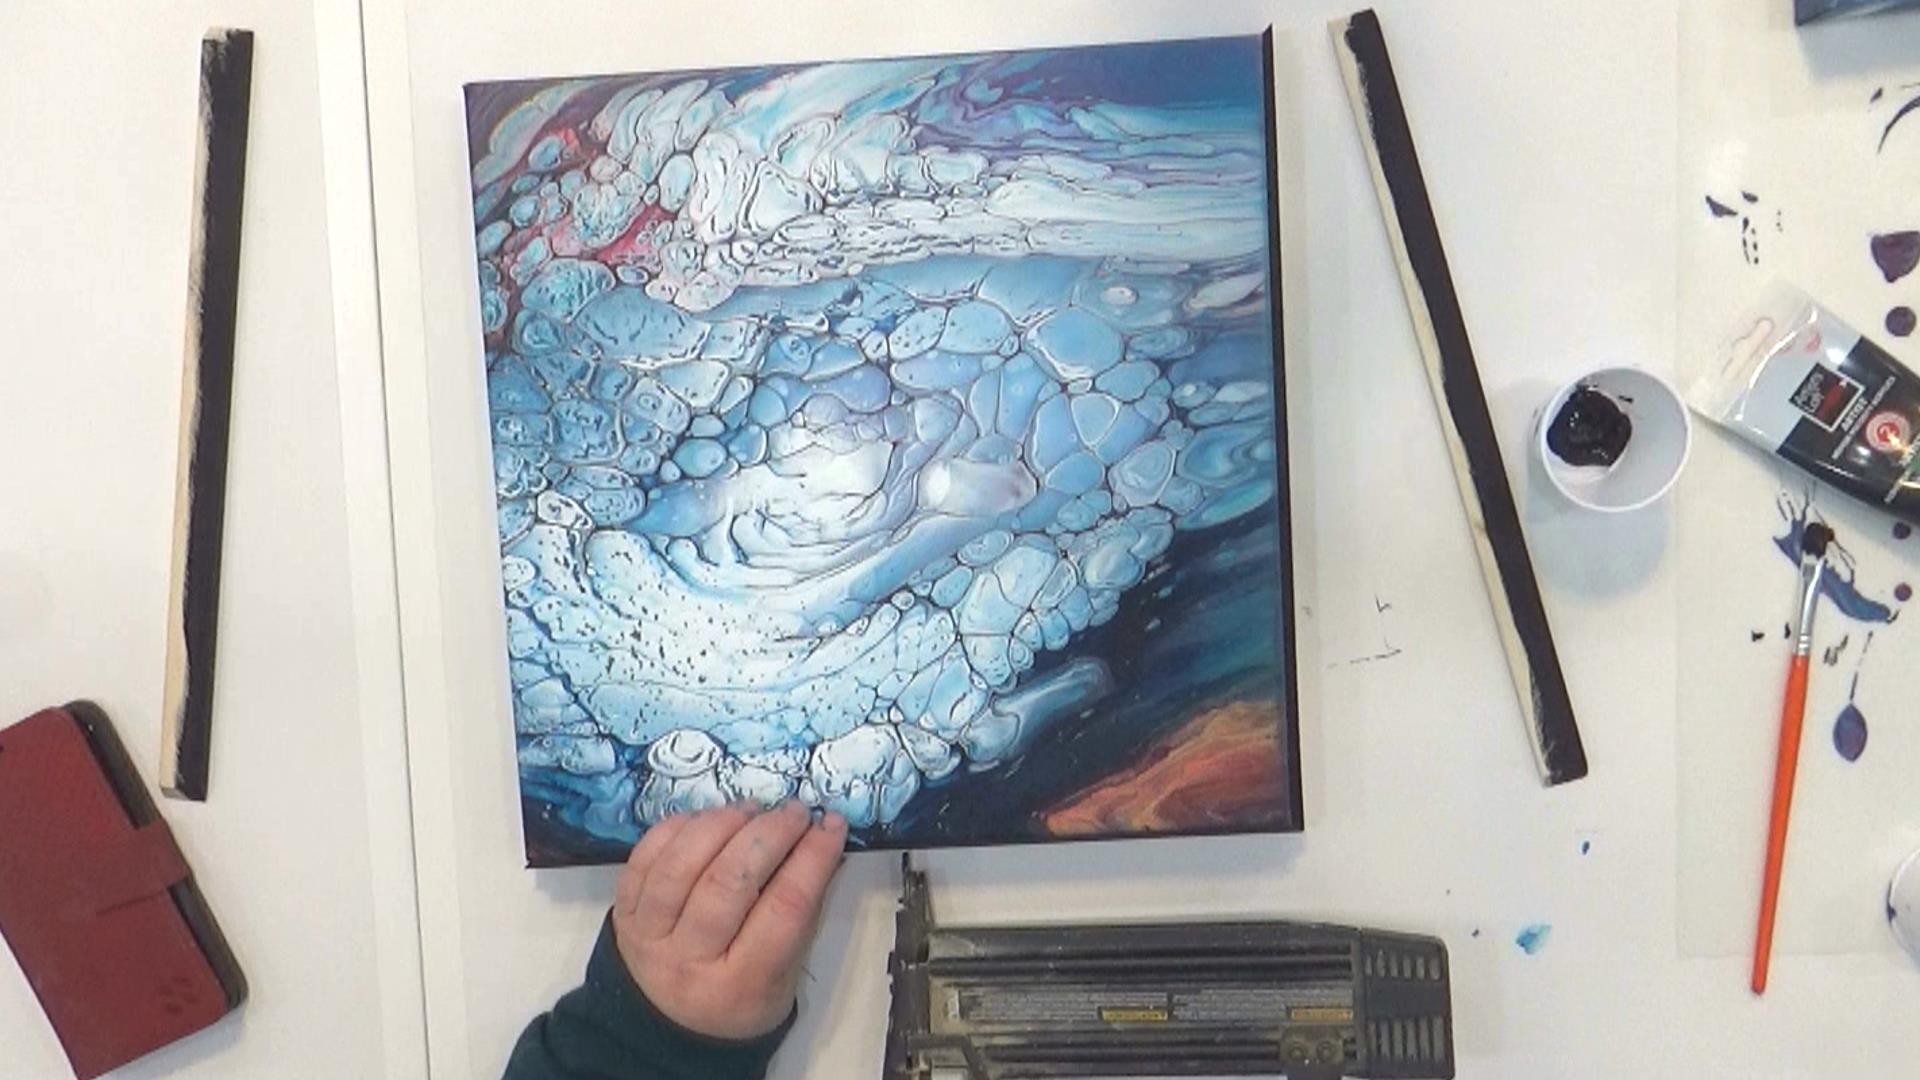
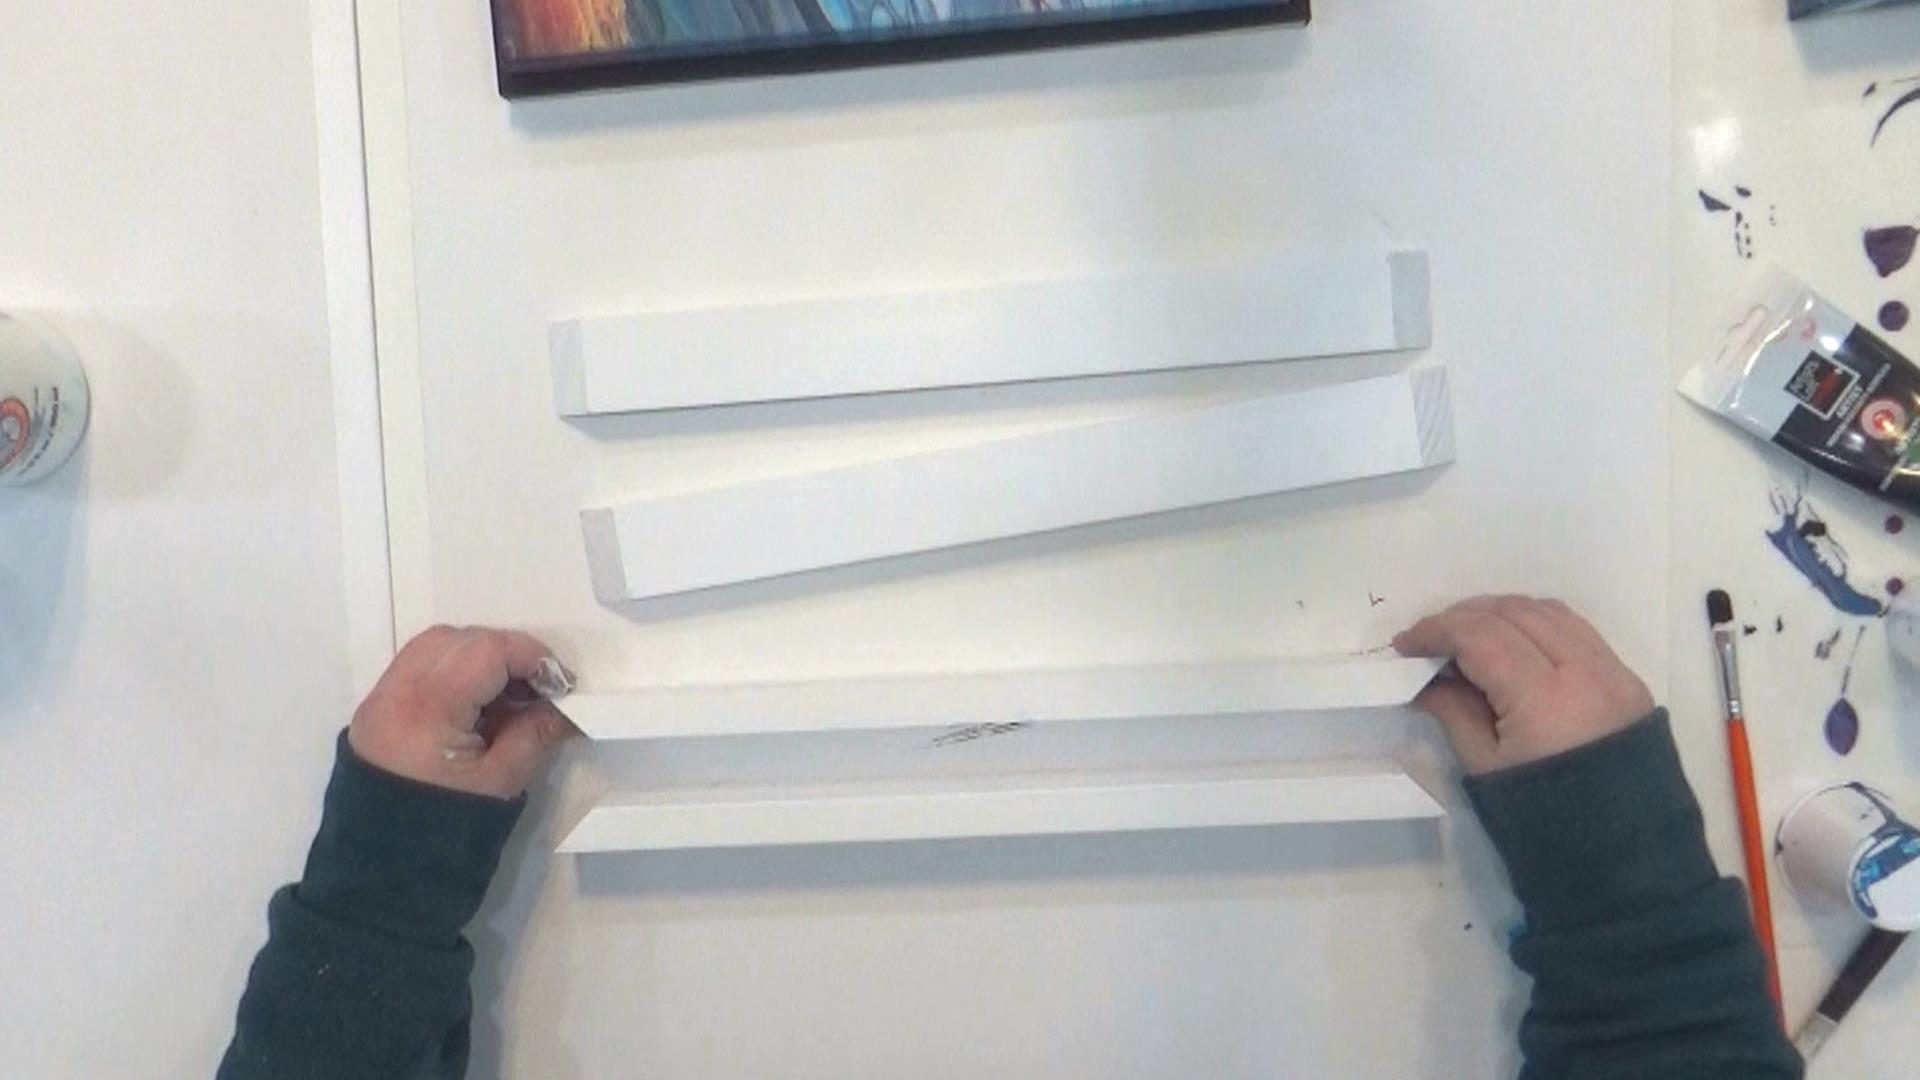
Then I cut the main pieces of the frame out of 1″ x 2″ pre-primed finger joint lumber, mitering the corners using my miter saw.
Before attaching these, I painted the inside edges of those pieces (i.e., the sides that would go up against the black pieces). Then I nailed them into place the same way.
I filled all of the nail holes and tiny cracks on the mitered corners with wood filler…
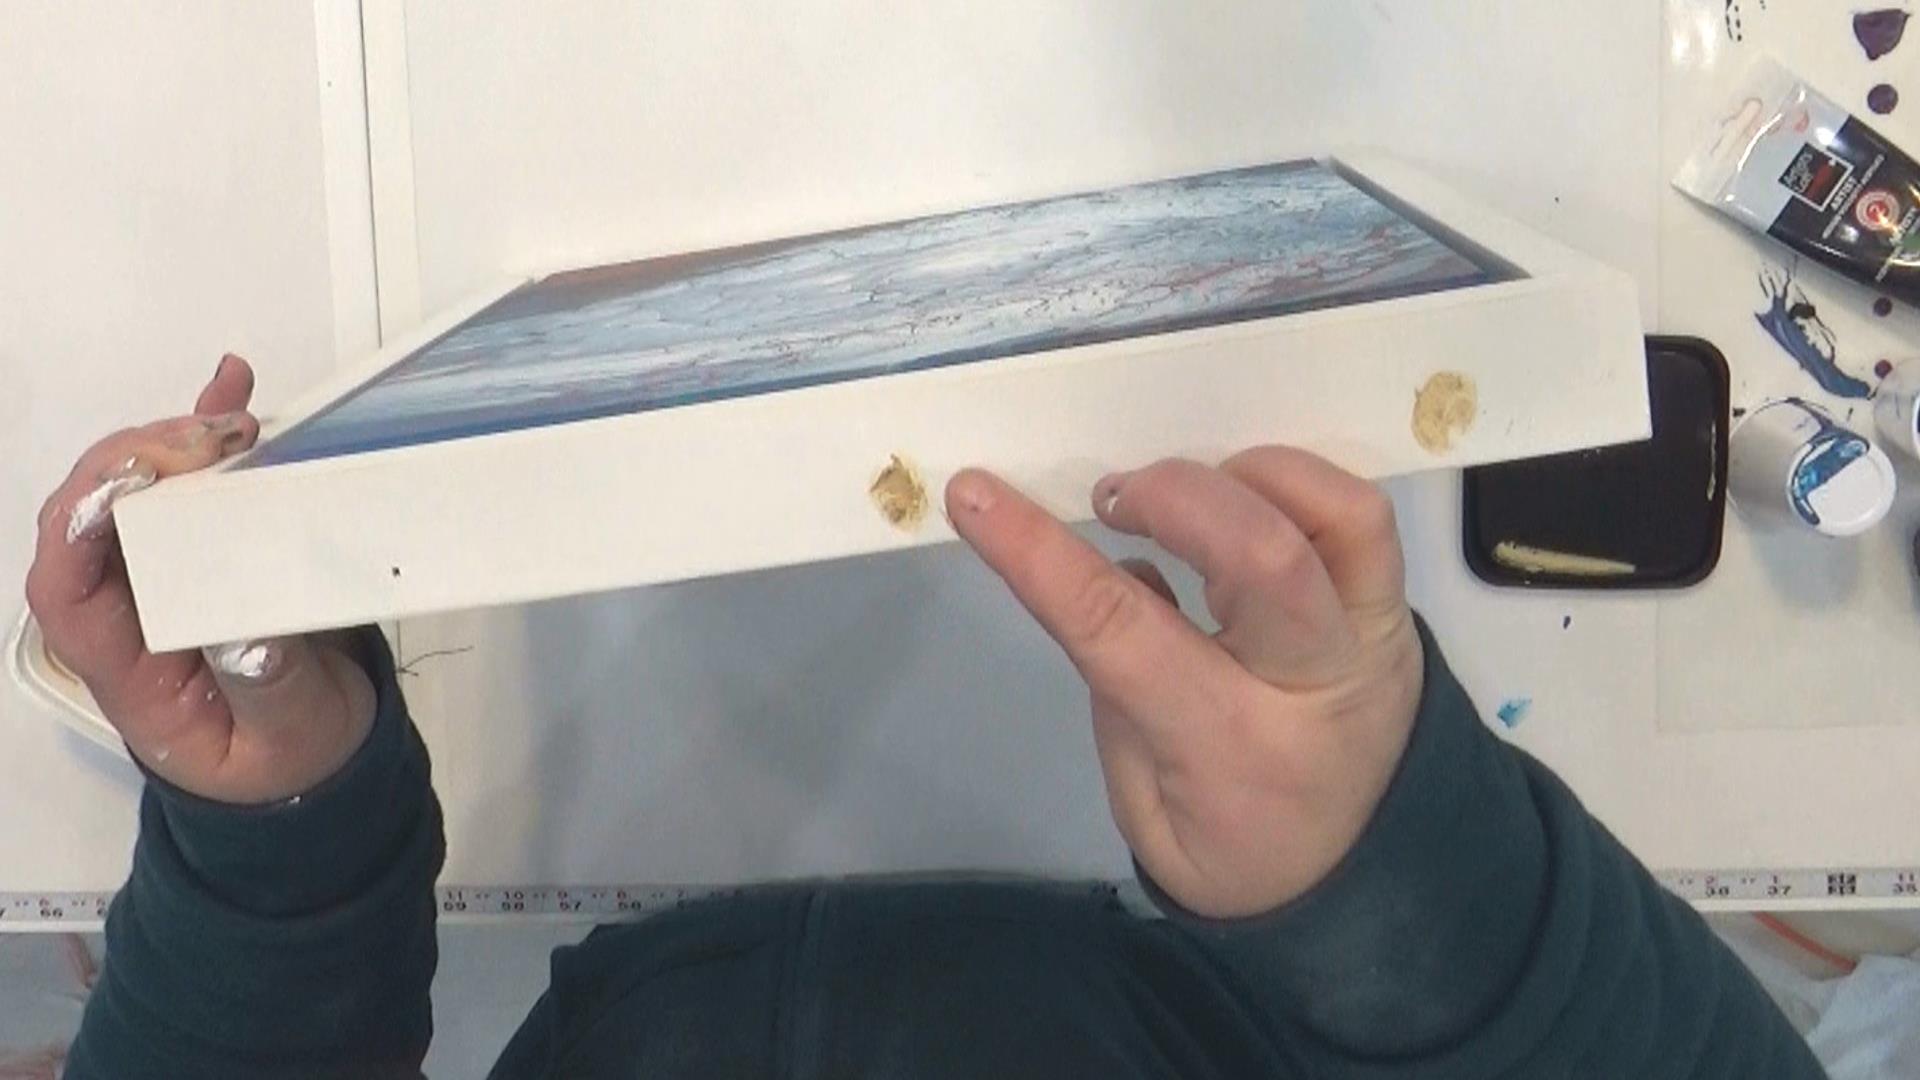
…and then sanded everything smooth and gave the frame two coats of paint.
And it was finished! A frame that mimics the look of a floater frame at a fraction of the cost!
By the way, if you want to see more artwork videos, be sure to subscribe to my YouTube channel! I have about a thousand artwork ideas that I want to try out, and I’m not sure if I’ll be sharing all of them here on the blog. We’ll see how many I actually have time to do. I might end up doing some sort of monthly or bi-weekly recap post of the artwork I’ve tried so that the blog doesn’t become an art blog. I’m still not sure exactly what I’ll share here and what I’ll just keep on YouTube, but I do know that if you want to see all of the videos as I publish them, you can for sure do that if you subscribe to my YouTube channel. Of course, any project video I do that’s more house-related (building my studio cabinets, building the coffee table for my living room, etc.) will definitely be posted on the blog as well.
Also, I’m happy to sell any of the artwork I create if any of you are interested (unless I specifically make it for a room in my home). I have so many ideas, and there’s no way I can keep everything I make. So just let me know if you see something you’re interested in.

Addicted 2 Decorating is where I share my DIY and decorating journey as I remodel and decorate the 1948 fixer upper that my husband, Matt, and I bought in 2013. Matt has M.S. and is unable to do physical work, so I do the majority of the work on the house by myself. You can learn more about me here.
Fascinating! Particularly like how you worked that floater frame!
I love love love the resin petri dishes you did! If you have a rainbowy one for sale, I’d love the opportunity to get it!
I actually have 26 of those petries, and I’ll be making many more this week. I got new molds, and I’m anxious to play with some resin! 😀 I’ll be offering them for sale with an optional frame for display.
Thank you for exposing your power tools. I want to see your miter saw. Please list what brands you use for table saw, etc. Where do you get your art mats? Do you make those, too? I wouldn’t be surprized. You are my inspiration, and my motivator. Thank you!
How would I see the artwork you might sell?
So far, I only have this one. 😀 I’ll be working on getting an Etsy shop set up where I can list everything I have available. I will have about 20+ resin and alcohol ink petries available soon.
This is an amazing hack! Thanks for the tutorial!
Ahhh this is perfectly timed. I recently bought some beautiful artwork on canvas – and need frames! DYI sounded great at first… But I was struggling. This is literally the solution I needed to make my frame process look way better than the current result. Thank you!
Amazing artwork Kristi. It’s gorgeous and so unique.
Amazing, as usual!! ❤️❤️❤️
Love this, thank you for the tutorial!
I feel like I should completely change the colors in some room in my house, any room, so I can buy that painting and hang it. But I like my colors so I guess I’d better try the technique in my colors.
Normally I do prefer text and photos over videos, when perusing blogs, but the closeups in the video just blew me away!
Love, love this! Did you buy all of your paints at a store or order them online? I’m just wondering what might be easiest…
I found most of them at Michael’s and Joann Fabrics. But I had to order the Decoart Satin Enamel on Amazon. I think Michael’s does carry that, but they’re always out when I’m there.
Thank you for another great tutorial! I will tuck away the floater frame idea into my memory bank.
Wow – love your frame work – isn’t it ridiculous the prices they charge! I bought a tool and whatever matting I need to frame things sometimes – and just cheap frames or sale frames wherever I can find them. They may not be perfect all the time, but they do the job. By the way, I LOVED the artwork you made with the petrie resin art. Can’t remember the site now. I was waiting for a certain mix of colors for several rooms – I just adored them. An Etsy store would make us all so happy. Thank you…signing up for your YouTube channel! Looking forward to the first pictures of your project starting soon! PS) How is Cooper?
Cooper is doing well. He hasn’t yelped in pain in four days now!
Oh that makes me happy. I hate to see our fur-babies struggling with pain. Hopefully he will continue to heal, and be back to his crazy fun self! 🐶
Do you still sell the digital macro photos of the petri dishes? I meant to order a couple and now I cant find them.
I’ll be adding them to my Etsy store very soon. I plan to do digital downloads for sure, but I may also offer prints for those who don’t want to be bothered with finding a place to print them for them.
My Etsy shop is here, if you want to keep an eye out for them: https://www.etsy.com/shop/KristiA2D
Do you have a place that you sell your artwork somewhere online?
Not yet, but I’ll be working on setting up an Etsy shop in the next couple of weeks.
Wowee! This one is my favorite of yours. The red in the corner is very galatical. I’d love to buy a space-themed one to go with my gallery wall of outer space pictures, haha! Would definitely love to see that Etsy shop up. 🙂
Do you think this effect would work on a canvas that is a much larger scale? I have a 3′ x 6′ canvas sitting around and have the perfect place to hang it in an open stairwell.
I do, but you might want to practice on some smaller canvases first. I mean, only a little of the outcome is dependent upon you. It’s mostly just chemistry and physics. But it does take some tweaking to get the paint consistency right. I’d want to do that tweaking on a smaller canvas before taking the chance of wasting the amount of paint that it would take to cover a 3′ x 6′ canvas. And on a canvas that big, I would also want a helper to help me move and tilt the canvas. I don’t think something that large would be a one-person job. Once you get enough paint on there to cover a canvas that large, it’s going to be quite a handful to pick up and move.
That is awesome! Both the artwork and the Frame! Sorry to hear OTHER projects haven’t gone well. You win some, you lose some, but THIS was obviously a WIN!
Watching your projects whether they be artsy, crafty, or buildy, are the highlight of my feed. I have wanted to try an art pour project for several years. Alas I keep looking at all the wasted paint. Have you ever dipped a smaller canvas into the extra? Just curious if that would work.
Glad Cooper is doing better. And isn’t it wonderful to know yourself well enough to know when to take a break and do some art before getting back to projects? Kudos, Kristi. Thanks for sharing with us.
You made the torch look so easy. I have never seen this or even heard of it to pop bubbles. Do you just lightly swipe it back and forth real quick? Thank you.
Yes, very lightly and quickly. You can’t linger at all or get too close because the paint will definitely burn. 🙂
Thanks so much for sharing. I love the way your pour turned out. I often see artists spin their cloud pours all the way off every side of their canvas. While I like those results as well, I enjoyed seeing your variation on the composition. It’s beautiful!