Framed Magnetic Chalkboard Spice Rack
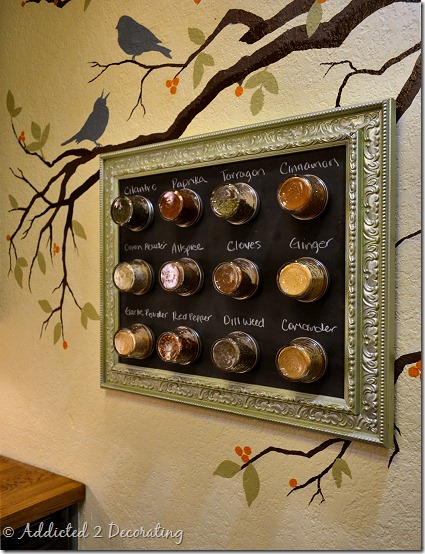
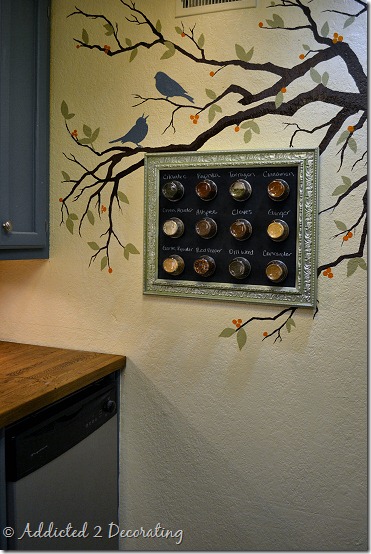
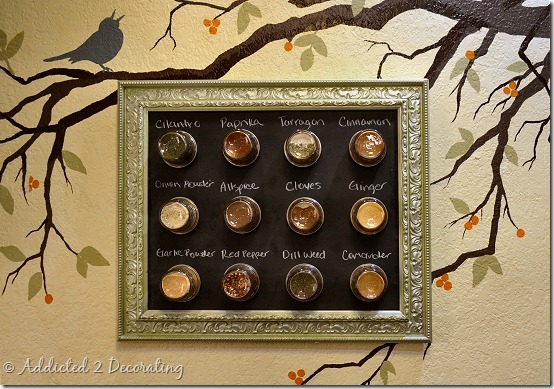
I finished a project this morning, and I’m so excited about how it turned out. Let me introduce you to my new framed magnetic chalkboard spice rack.
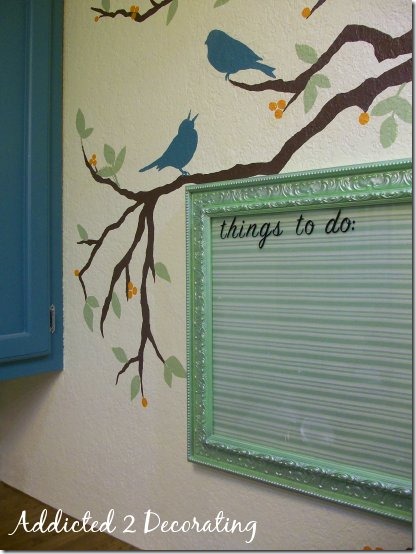
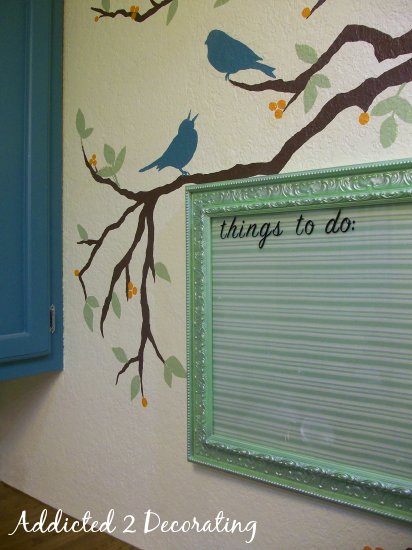
If you’ve been around here much, you probably recognize that frame. It used to be a dry erase message board.
I made that dry erase message board in January of this year, and since then I have learned an interesting thing about myself. I don’t use message boards. In the months that this has been on my wall, I’ve written on it once. That’s it. Once.
So, having no need for a message board, I started thinking about other ways I could use that space. Let’s face it, when you live in 834 square feet, every single inch is valuable, and that includes the limited wall space I have as well.
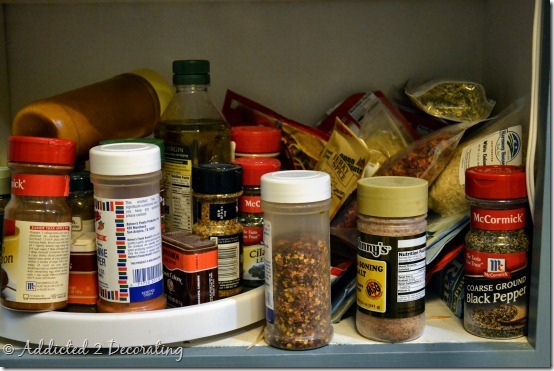
I didn’t need a message board, but what I desperately needed was a way to better organize my spices. The spice shelf in my cabinet had become so messy that it was useless. Little jars piled on more little jars, and everything overflowing to the point that my lazy susan wouldn’t even turn anymore.
Before making mine, I searched online for some instructions. Obviously this idea isn’t an A2D original. You can even buy magnetic spice racks at Ikea and other stores. I did make some changes to mine, though. Here are the details:
Tools & Supplies:
- 1/4” plywood or MDF,
- Metal duct,
- Decorative frame,
- 4 oz. jelly jars,
- Neodymium magnets,
- Epoxy adhesive,
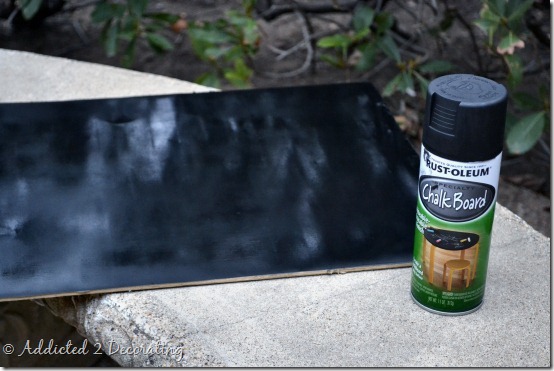
- Chalkboard paint,
- Sandpaper,
- Chalk,
- Gloves,
- Tin snips,
- “L” square or yardstick, and
- Jigsaw.
Instructions:
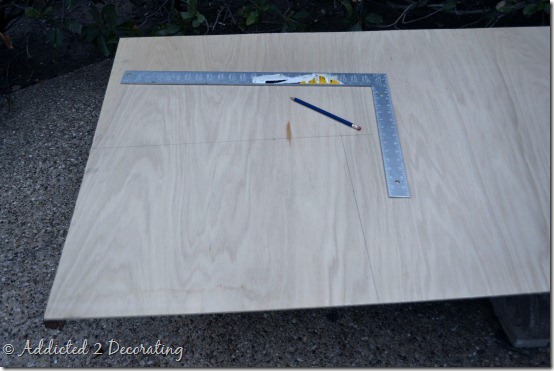
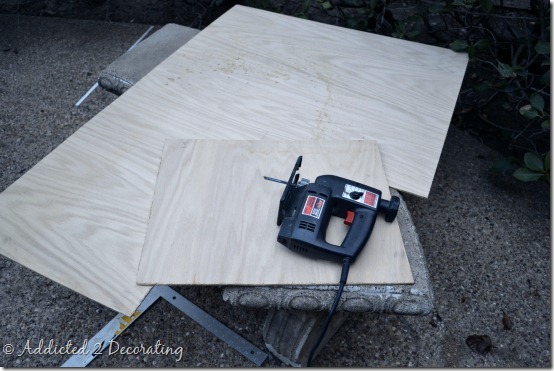
1. Using a jigsaw and “L” square (or yardstick), mark and cut out a piece of 1/4” plywood or MDF to fit into the frame.
2. Use a jigsaw to cut out the plywood (or MDF).
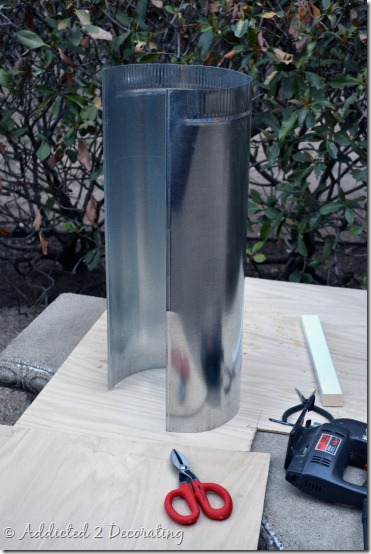
3. Next, using a metal duct that looks like this (available at any big box home improvement store)…
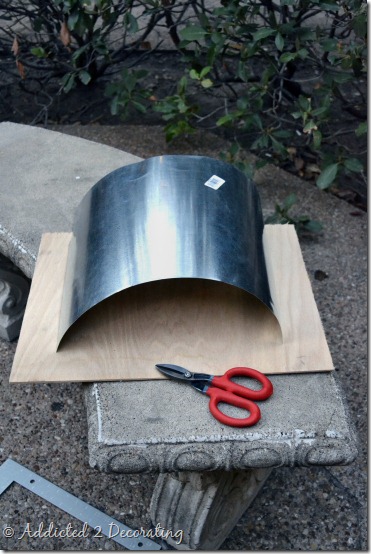
…use tin snips to cut the metal to fit the plywood. Be sure to use gloves!! The edges of the cut metal will slice right through your skin if you’re not careful!
You can also purchase a flat sheet of metal (also available at big box home improvement stores), but the cost is significantly higher. This metal duct was under $5, while a flat sheet of metal would have cost $20.
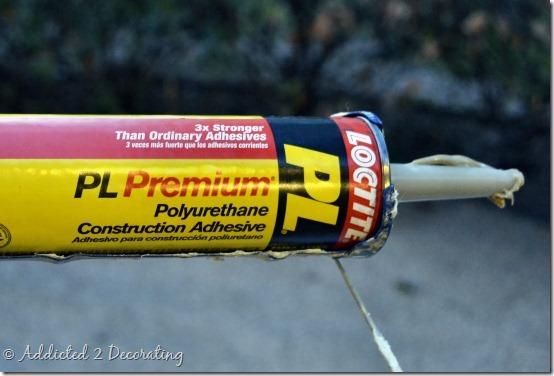
4. Using a strong adhesive like this one…
…adhere the metal to the plywood and weigh it down with heavy items so that it’s completely flat.
5. When the adhesive is completely dry, use 220-grit sandpaper and sand the surface of the metal, then cover with chalkboard paint. Remember, when using spray paint, several thin coats is better than a couple of thick coats!
6. Next, assemble the jars. *Don’t use hot glue for this! I learned the hard way that hot glue doesn’t hold those super strong magnets!
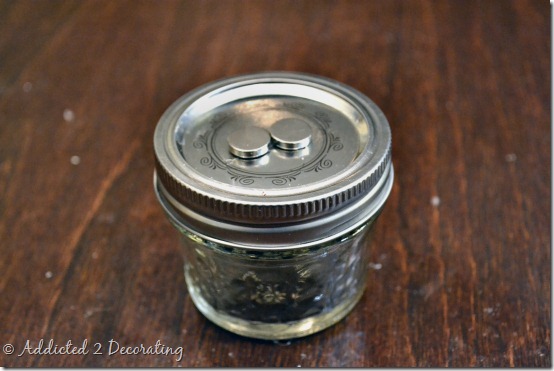
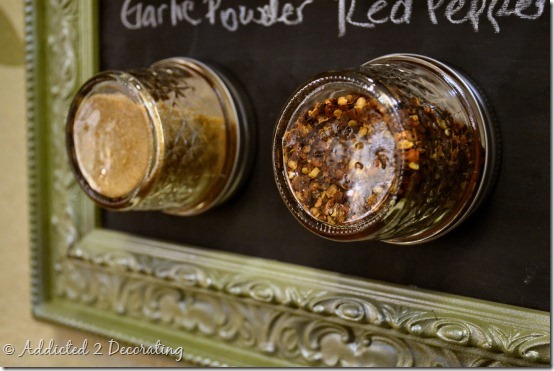
So using an epoxy type of adhesive, glue the lid of the jar into the ring, and then glue two 1/2” x 1/8” neodymium magnets to the top of the lid.
With everything assembled, it should look like this.
If you use larger neodymium magnets, you could probably get away with using only one per jar. Unfortunately, this was the largest size I could find locally.
7. With all of the jars assembled, you’re ready to fill them with spices.
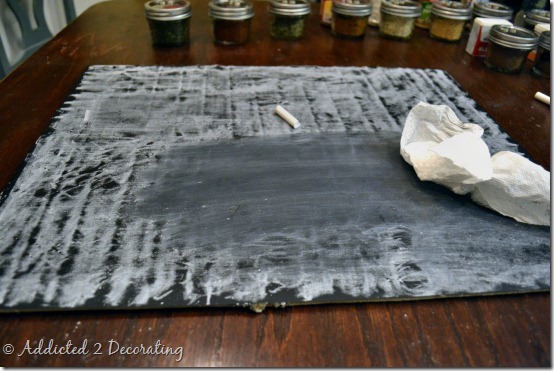
8. Before assembling everything, be sure to condition the chalkboard by rubbing the side of a piece of chalk over the entire surface, and then wiping off the chalk.
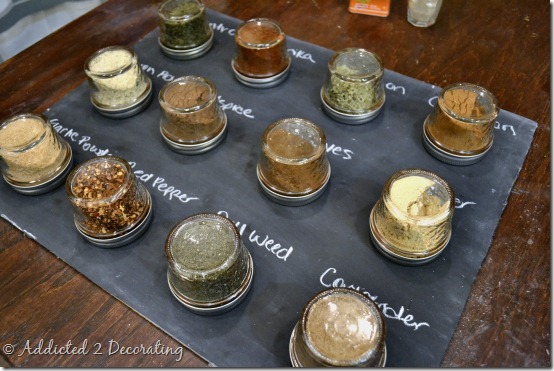
9. I also chose to write the names of the spices on the board before nailing the chalkboard into the frame.
10. Nail the plywood into the frame, attach the spice jars, and you’re done!
I think I’ll definitely get much more use out of this than I did out of the dry erase board.
As a side note, I’ve read from many sources that spices retain their flavor much longer if they’re not always exposed to light. Unfortunately, my kitchen gets almost no natural light, so I’m not worried about these spices losing their flavor.
However, if your kitchen does get a good deal of natural light and/or if you find that you leave your lights on in your kitchen quite a bit, then it might be better to use the inside of a cabinet door for a magnetic spice rack, or you could make this framed spice rack to put inside a pantry if yours is large enough and has enough wall space.
I still have a lot more organizing to do in my kitchen. Remember when I said I’d give myself two weeks to get it organized? Ha! Yeah, right! But it’ll get there, slowly but surely, one project at a time.
Addicted 2 Decorating is where I share my DIY and decorating journey as I remodel and decorate the 1948 fixer upper that my husband, Matt, and I bought in 2013. Matt has M.S. and is unable to do physical work, so I do the majority of the work on the house by myself. You can learn more about me here.







Love this! I made something similar at my old house and had it inside my cabinet, but I love showing it off
How do you get your jars open without spilling the contents?
The top is magnetic.
great job and that was my question. thank you for answering it!
I love this, Kristi! My problem would be that if I took three down at the same time and they looked similar, I might not know for sure where to put them back. Guess I would need labels on the jars, too.
I was thinking that too but what if you used the chalkboard paint on the bottom of the jar? Then you could put the spice name on the bottom of the jar also.
While searching today, I just found some chalkboard contact paper- so you can write the name on the jar, and remove it if you choose to put a different spice in that particular jar.
I was thinking about that, too. I think I'll write the name of the spice on top of the lids with a Sharpie marker. That way it won't show when it's on the magnetic board, but I won't lose track of what spice it is when it's sitting on the counter.
I just pull them off the magnetic board, give 'em a little shake to even out the contents, and then open the lid. 🙂
What a fun, useful project! It turned out beautiful. The timing is perfect for me as I recently had my husband price the sheet metal for a magnetic board and decided not to do it for now because of how spendy it was…maybe I can reconsider with your metal duct tip. Thanks! Have fun with your projects!!!
Great DIY project! I'm noticing a trend with chalkboard paint-do you plan on using it for other projects?
Right now I don't have any other plans for it. In general, I'm kind of tired of the whole chalkboard paint trend, but it seemed appropriate with this project. 🙂
I have a silly question. When you prepare the chalkboard is there a certain brand of calk you use? When I tried some generic brand it just scratched the paint and when I went to write on it you could barely see the words. I started over with the chalkboard paint but can’t figure out were I went wrong.
Love this. I agree this is much more useful than the white board. I love how you reused the frame.
I love pretty organization and this is super cute! Great idea, Kristi! (We did something a lot different but similar idea using metal lazy Susan's. It's definitely a huge space saver!)
likeeeeeeeeeeeeeeeeeeeeee
What a great idea….I made a message board with sheet metal too….painting it with black chalk paint so it doubles as message and magnetic. I bought a piece of sheet metal at a home improvement store for $18.00 (my frame is 2ft x 3ft). My husband said no way! He visited the local furnace installer and got the piece cut to fit for $8.00…..thats why I married that guy……he's the best!
This is amazing! I love the idea of using spices as a decorating technique and getting rid of that spice cabinet where you cannot find anything. So creative and going to try it out myself.
Did you know they make magnetic paint? Just sayin'
I’ve used the magnetic paint and it would not be strong enough to hold these jars.
Yep. I've used it on several projects. It's awful, especially when you consider that it's about $20 for a quart. Last time I used it, I vowed to never use it again.
This was far easier than the magnetic paint, and worked much better.
simply brilliant!
Great idea!!! If your kitchen has a lot of natural light, you could also use opaque containers rather than clear glass ones. It might not be as pretty, but perhaps paint them different colors?
Kristi great idea! You are so creative! Thanks for sharing. I'm a new blogger who's trying to learn the "secrets of blogging" step by step. Wanna pay a visit? I'd be thrilled to see you around my place.
Love, Olga
http://www.stardust-decorstyle.blogspot.com
Beautiful idea – wish I could implement it myself..but my boyfriend gets through so many spices that he would need much bigger jars than on your spice board as I would be forever refilling them 🙂
Wow…totally awesome, creative and out of the box thinking…love it! In addition to my love of decorating I am a huge foodie and my spice cabinet looks a lot like yours did…having to pull everything out just to find one item is a pain the butt not to mention time consuming. This is quick easy decorative and perfect!!! Great idea and fabulous execution! (can you tell how much i love this?)
This is awesome! I used to have my spices in a similar thing but used little tins with pop off tops. The screw thing would work so much better so it doesn't spill when getting the top off! Love it!
I love this! I have clear canisters but I never thought about making my own spice rack. I like seeing the color and textures of the spices. The frame pulls it all together nicely.
Absolutely AWESOME, Kristi! I also love the "live and learn" aspect of this project. 😉
Very cool, unique idea! Great job!
Very cool unique idea-I will remember this one and maybe try it someday!
I love it! It's beautiful and functional. I have the same problem in my kitchen. This would be a great gift as well.
Beautiful job on a (decorative) functional piece. The colors look great against the mural. (And thanks for the tip on the metal.)
Oh I LOVE THIS! Amazing job.
I would love for you to link up to my Fresh Friday LInky Party!
http://www.releasemecreations.com/2011/11/fresh-fridays-link-party-4.html
What a great idea! We have been toying around with some different ideas for organizing our spices and something like this just might work! I think I might put chalkboard labels on the bottoms of the jars though… we'll see… Thank you for sharing!
you´re amazing really! where did you go to college??
I went to Dallas Baptist University. 🙂
hope we could find all this things here in Mexico!! but its really hard to find decent scrapbook paper! I can imagine looking more complicated stuff!! :S
Love the idea…the chalk wall makes a beautiful suggestion as the containers may change and obviously so the labeling.
Beautiful.. Stylish & Functional! Love it!
What a great idea! This would be the perfect gift for a friend of mine that has all of her spices on the counter… she's running out of room!
Thanks for the post!
This is simply fabulous and so practical. I love that tree too.
Question…do u think I could bypass the metal and use magnetic paint. Think it would be strong enough? I heard somewhere that peeps paint magnetic and then chalkboard on top of it so they have both magnetic and chalkboard together.
I’ve used the magnetic paint a couple of times, but I personally wouldn’t suggest it for this. My experience with the magnetic paint in the past is that no matter how many coats I use, I can only get it to hold up very lightweight items, like a magnetic clip holding one piece of paper. Anything heavier, and the magnet slides down the board.
i LOVE this!! 🙂 Just curious as to what size of metal duct you used and picture frame size?
I’m not sure about the metal duct size. I just measured the flat portion of it to be sure it was large enough to fill my frame. The frame I used is a 16″ x 20″.
This is a great idea…I have a piece of metal I have been hanging on to for a long time not knowing really what to use it for….now I do! Thank you
This is fantastic. I’ve never been a fan of the traditional spice racks, but didn’t have any ideas for an alternative. Definitely giving this a go!
This would work great for nails and screws, as well. Mine are usually loose.
You’ve done a great job with that and your tutorial is fantastic, thanks! I’ve got this linked to my spice racks post too today, for inspiration!
Instead of using sheet metal AND chalkboard paint you could use metallic paint instead of the sheet metal. you could then use the chalkboard paint over top or just make/buy magnets with the names of the spices on them!
Love this! I think the mural around it ties it all together. Is that a painted mural or decal? Thanks for this great idea.
It’s painted. You can see the details here: https://www.addicted2decorating.com/my-wall-mural-has-been-critiqued-and-found-lacking.html
DEAR KRISTI:
I LOVE YOUR CREATIVE MIND…YOUR WEBSITE IS MY “GO TO”…B/C YOU HAVE ALLOT OF DIFFERENT ASSIST LINKS, YOUR BLOG TUTORIAL AND YOUR PAGE IS EASY TO NAVIGATE. I’M VERY MUCH LIKE YOU…MY TO DO LIST NEVER GET DONE…I HAVE PILES OF PROJECT DIY’S EVERYWHERE…BUT HAVE LIMITED BUDGET, SKILLS, AND TOOLS AND LEST WE FORGET “KNOWLEDGE”…SO IT SITS THERE COLLECTING DUST AND I DESPERATELY NEED A MAN TO GET IT DONE “OR” LEARN TO DO IT MYSELF BUT THAT TAKES ALLOT OF TIME WHICH MEANS MY PILES LINGER…I’VE DEBATED ON WHETHER OR NOT TO START MY OWN BLOG APPROPRIATELY TITLED “GIRL HANDYMAN” CROSS THRU “MAN AND WRITE MAM” BUT LOOKING AROUND AT ALL MY UNFINISHED PROJECTS…WELL, I DON’T NEED TO TELL U…BESIDES, I DON’T KNOW HOW TO BLOG 🙁
A FEW ?? ON FRIDGE FACELIFT AND WHERE YOU FOUND THOSE SWEET JELLIE JARS AS I DON’T EAT MUCH JELLY? ALSO, I WANTED TO SHARE A LINK INSTRUCTING ON HOW TO INSTALL MY OWN HOME DESIGN POT RACK AS I AM NOT IN A POSITION TO PURCHASE THESE OUTRAGEOUS OVER PRICED METAL HANGING FROM THE CEILING…CRAZY!! SO WITH A LITTLE HELP FROM WADE, TELL ME HOW YOU WOULD SUGGEST “A GIRL” LIKE ME PRESS ON TO HANG A POT RACK AS SIMPLE AS THIS ONE…I’VE LOOKED ALL OVER THE INTERNET FOR TUTORIALS WITH NO LUCK AND FRUSTRATION BUILDING…I HAVE A SMALL KITCHEN VERY MUCH LIKE YOURS, NO ATTIC ACCESS AND LIMITED SPACE FROM CEILING TO END OF PAN, ABOUT 30INCHES…IT WOULD WORK WITH A LITTLE TWEAKING ON SIZE HOOKS AND OTHER SMALLER PARTS…I’VE ALWAYS WANTED ONE AND WALL SPACE IS NOT AN OPTION….THANKS FOR ALL YOUR CREATIVE JUICES !!! MARYJO
WADE CHI…..
http://wadechi.swalrus.org/?p=830
great spice board. I would suggest a caution for your Mom’s with kids and the magnets; incase they might come off after being glued. Several yrs. ago one of our church families 2 yr. old son found a magnet and swallowed it and died. It was such a heartache, I do like to send this message out to your web page. thank you
Can I ask what spices you used. I just can’t read the writing on the board.
What a beautiful idea!!!
!!! That is almost my kitchen. I’ve been planning a magnetic spice rack for a couple weeks and browsing tutorials. I think I’m just going to stick my magnetized spice jars on the side of the fridge and use some kind of paint to label the bottoms of the jars. But I’m cracking up because I have bird-on-branch decals on my kitchen walls to liven up my tiny apartment (probably about 834 sq ft, too). My spice shelf is a mess and the spot on the wall where I could mount a spice rack like yours is presently occupied by my bird decals and my WHITE BOARD. I guess there are only so many possibilities.
Can u make me one? I am not a very crafty person, but I love this! Add me as friend on facebook.. Shelley Preston
I dont mean to be a spoil sport but REALLY!! You can buy a really nice carosell or standup spice rack with labels etc. etc. at Bed Bath And Beyond for 39.00 ( I just saw it there yesterday) OR you can go through all that work and make one yourself for 45.00 (cost of supplies on Amazon not counting the tin and the frame etc.) REALLY people lets get serious ; Sue oh dont forget the s+h and/or the gas to drive around looking to buy this stuff in local hardware stores to avoid the s+h,ing It,s cute but not THAT cute 😉
I think perhaps you’ve missed the point of what I do here. The very fact that anyone in the country can walk into BB&B, WalMart, KMart, Target, etc., and purchase one of those “nice” carousel or stand up spice racks for $39.00 is the VERY reason that I don’t want that mass-produced-looking, big-box-store junk in my house. Let me just suffice it to say that if that stuff qualifies as “nice” in your opinion, then we have very different definitions of the word “nice”. My goal is to make my home as unique as possible, filled with items that are custom made specifically for my home, while doing so on a reasonable budget. Not to fill it with cheap, mass-produced stuff that was made in China, sold at a big box store, and can be found in hundreds of thousands of homes across America. And if that means spending $20 more on a highly-customized, unique spice rack that was made just for my kitchen, then so be it.
I’ll choose customized and unique any day over cheap and convenient, as can be seen my my home:
https://www.addicted2decorating.com/before-and-after-small-kitchen-makeover.html
https://www.addicted2decorating.com/my-tiny-condo-breakfast-room-makeover-before-and-after.html
That was a great response. To many things made from China are not made to last. I to love to save a buck, but to creative is priceless.
Well said! I have a oak tower spice rack that spins but I plan on making this darling one and replacing it. Actually, I was just thinking what I can put in it when I recycle it in my craft room. Thanks for the great idea and tute!
That is a great idea. I too know how important space is, my home is 750 square feet. I have one question do you save Money by making it vs buying it at Ikea?
That is a great idea. I too know how important space is, my home is 750 square feet. I have one question do you save Money by making it vs buying it at Ikea? Thank you for sharing and for the wonderful pictures.
What a unique and clever way to display and store your spices. Thank you for sharing your idea with us, especially the step-by-step instructions including photos. You did a fabulous job!
Claire
Thanks so much, Claire! And I actually get use out of it! 🙂 It’s quite handy to have my most-used spiced just right there rather than buried in my disorganized cabinet.
Love the look of this, but there’s a quicker way. Do the frame, insert plywood painted with chalkboard paint, buy rare neodymium magnets (available on ebay) with holes in the center. Use screws to attach each magnet to the painted board where you want each jar. Stick jars with metal lids to magnets. Done. Saves the time messing with the metal sourcing/cutting/gluing etc.
This site was so helpful. Thank you.
Great idea! I love to craft, and made a Magnet board out of an oil pan. It’s huge, but by hanging it on the wall it takes up little space for my embellishments and sewing materials.
Maureen
I wish I had remembered this post and read the comments before trying this with magnetic paint! Ugh, there goes $20 and 3 hours. The magnets stick but if I accidentally touch one the wrong way, they all come toppling down. Now I need to get some metal like you did. I’m fitting a 9″ x 29″ space in the back of a shallow cabinet. Hopefully I can piece something together with these–big orange said their sheet metal wasn’t magnetic, so I’ll bring my magnet with me next time and look around myself. Thanks for all your tips!
I love this idea! I’m using it as the starting point for my spice rack. I was able to find a small sheet of metal for $4 at Home Depot in the fasteners aisle and I’m baby food jars since they work out to $.50 a piece (but I had to spray paint the lids). My itty bitty kitchen needs all the help it can get. Thank you!
I have too many spices for my lazy susan, too. Then I found a double stacked one that actually holds everything I need it to. I miss the old metal spice containers. My mother put up a magnetic knife rack on the wall and used that to keep them handy.
hi Kristi,
Could you ell me where you bought the jars and how much did it cost you?
Loved your idea of Magnetic spice rack! thanks for sharing it!:)
*tell
I actually bought them online from Amazon.
I think I’ve also seen those tiny canning jars for sale by the full box at Orchard Supply (OSH) here in California.
Hi. I love how it looks. It’s definitely good for big kitchens as a decorative piece as much as functional. It seems to me though that you must have more spices hidden away perhaps in your pantry as this many jars is just bare minimum. I just invested in several lazy susans for my main spices in my tiny kitchen over the oven and pull out spice racks that hold about 6 spice jars each in my mini pantry (for just 2 $ at big lots!) it works great for me. Overall I love your project. 🙂
I’ve been looking online everywhere for suggestions on how to keep the best before date of herbs and spices handy when decanting into new tins? I dont want to write it permanently on the tin as the date will change over the years.
Any ideas anyone?
These instructions were a godsend. (a) I attempted before to use watch-part cases (small round cans with glass inserts in the lids) with magnets attached to their bottoms that I stuck to my fridge. A lot of “fails” with magnets separating from the bottom of the case. Now I know why. I was using the wrong kind of glue. (b) I DESPERATELY need a better solution than what I’ve been doing for the same reason as yours. Your description makes me confident. Easy to find a fancy frame! (c) The metal ducting is a brilliant solution for bringing down the cost and I like the deeper and screw-top mason jar-type containers much better than than the watch parts cases (which are tricky to close and too often fall open spilling spices onto the floor. Messy hassle!) Thank you!
I love this idea. I have one question though. How did you mount to the wall so that the frame doesn’t move when removing spices? Sorry if I missed this above. I thought I read all of the comments.