Cost Difference Between an Ikea PAX Closet and A DIY Built-From-Scratch Closet (Plus, Why I Haven’t Started Building Yet)
My weekend didn’t quite go as planned, as so far, this week hasn’t, either. Part of that is due to poor planning on my part, and part of it is due to circumstances beyond my control. I’m not going to stress about it, though. The build for my walk-in closet will be started very soon, and until then, stressing about it isn’t going to accomplish anything except put me in a very bad mood. And nobody wants that. 😀 So all I can do is laugh at this comedy of errors and wait patiently.
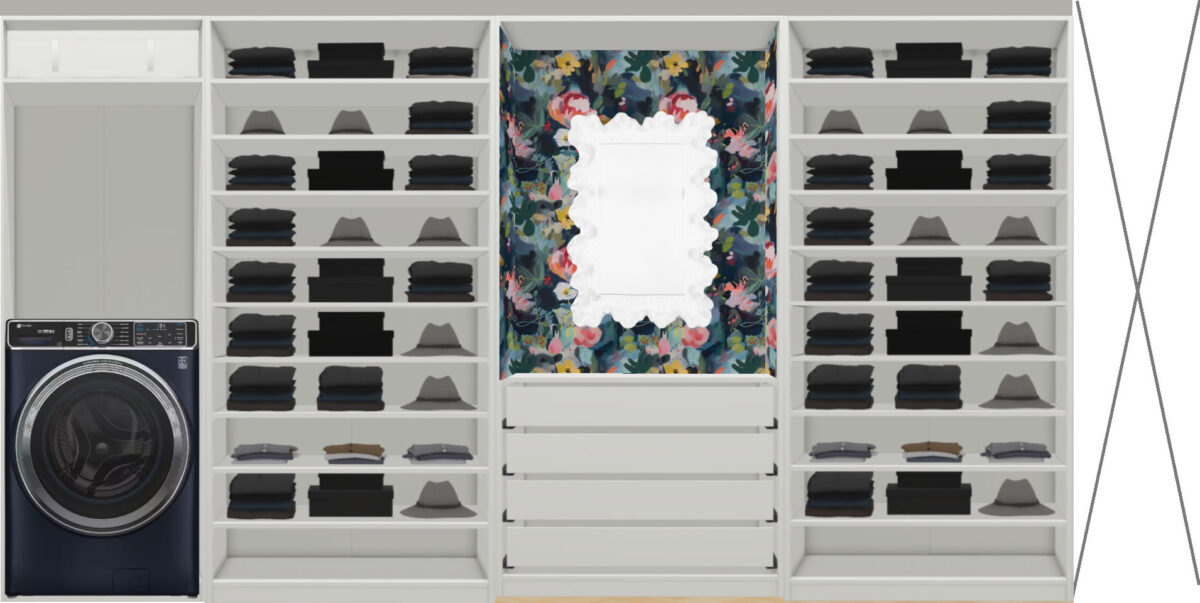
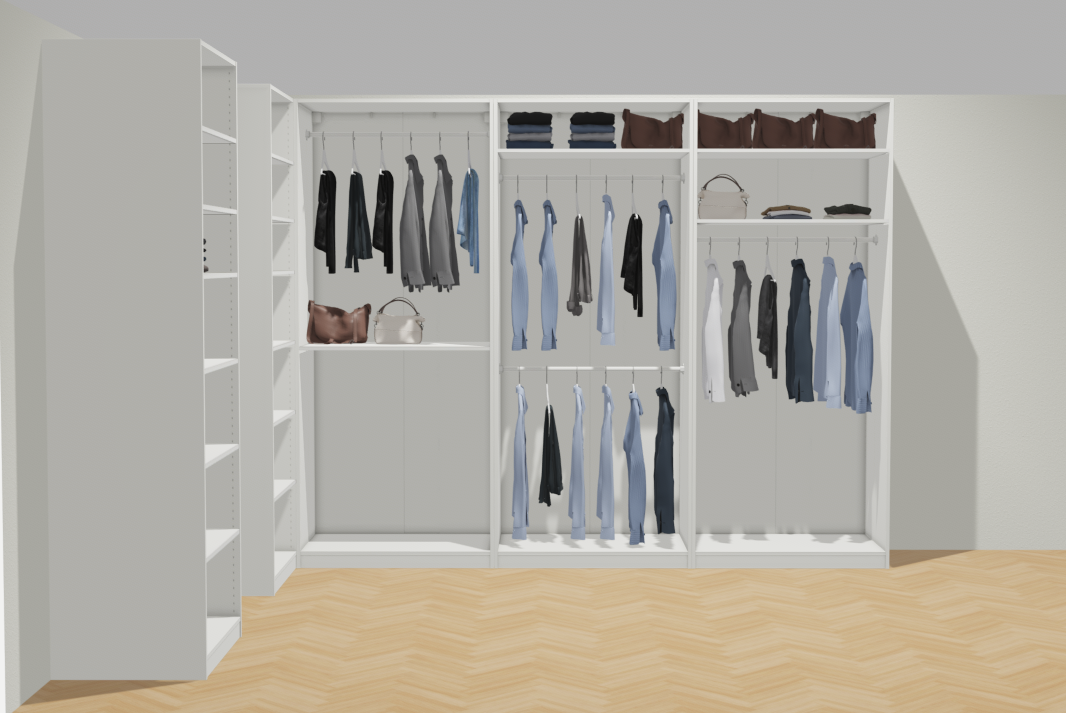
Here are the errors on my part. First, I have been working off of closet mockups that I did a while back using IKEA’s PAX wardrobe designer. With that design tool, you can certainly get a good idea of what the finished closet will look like, but obviously, you’re stuck using the products they carry. So you can’t do any fine-tuning of the details. It wasn’t a problem at the time because I was just trying to get a general idea of the layout of the closet, and this is what I came up with. If you’ve been following for a while, you’ve already seen these.
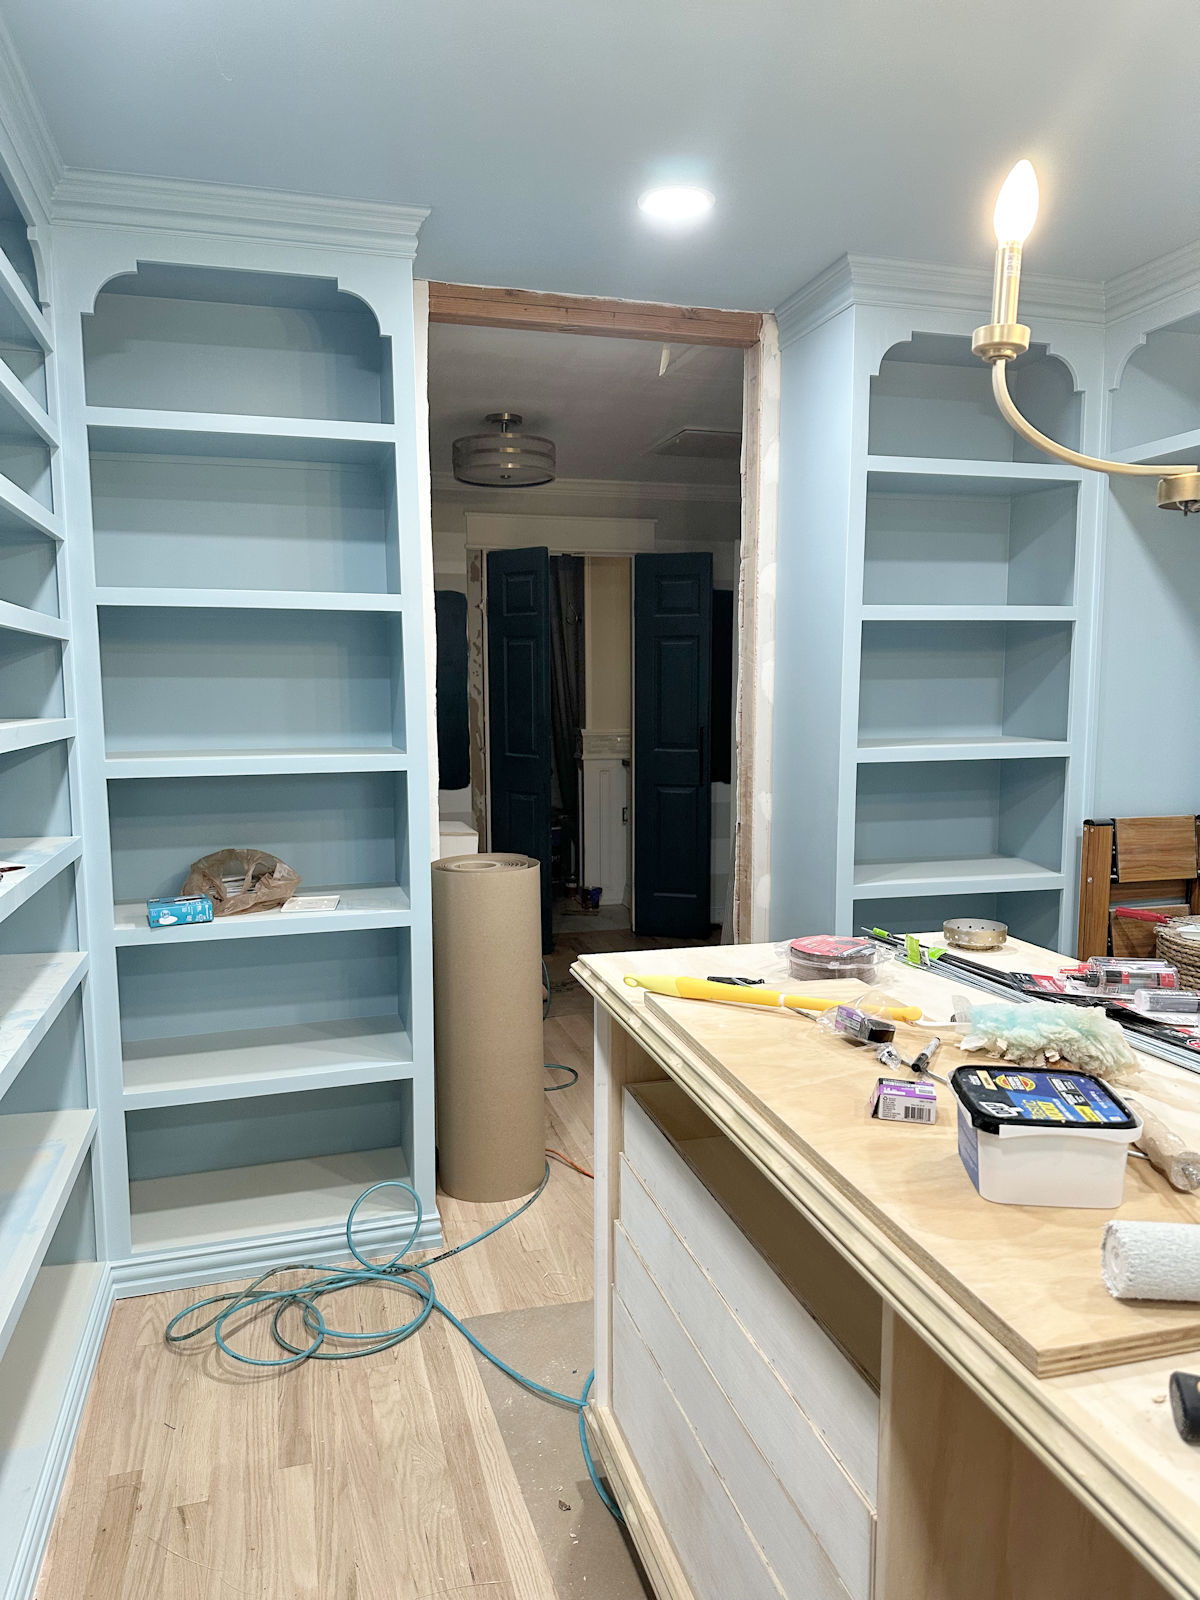
The right wall of the room will look something like this…
And then the left side of the closet will look something like this…

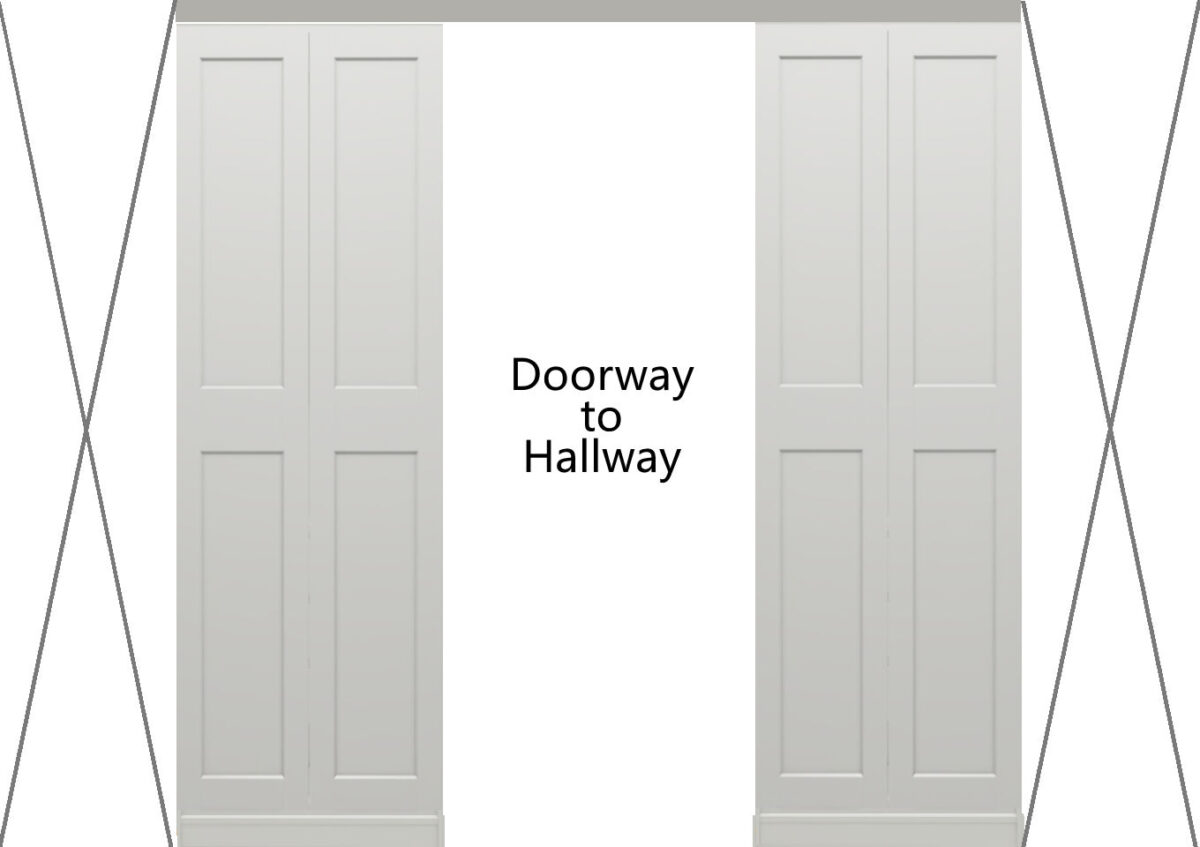
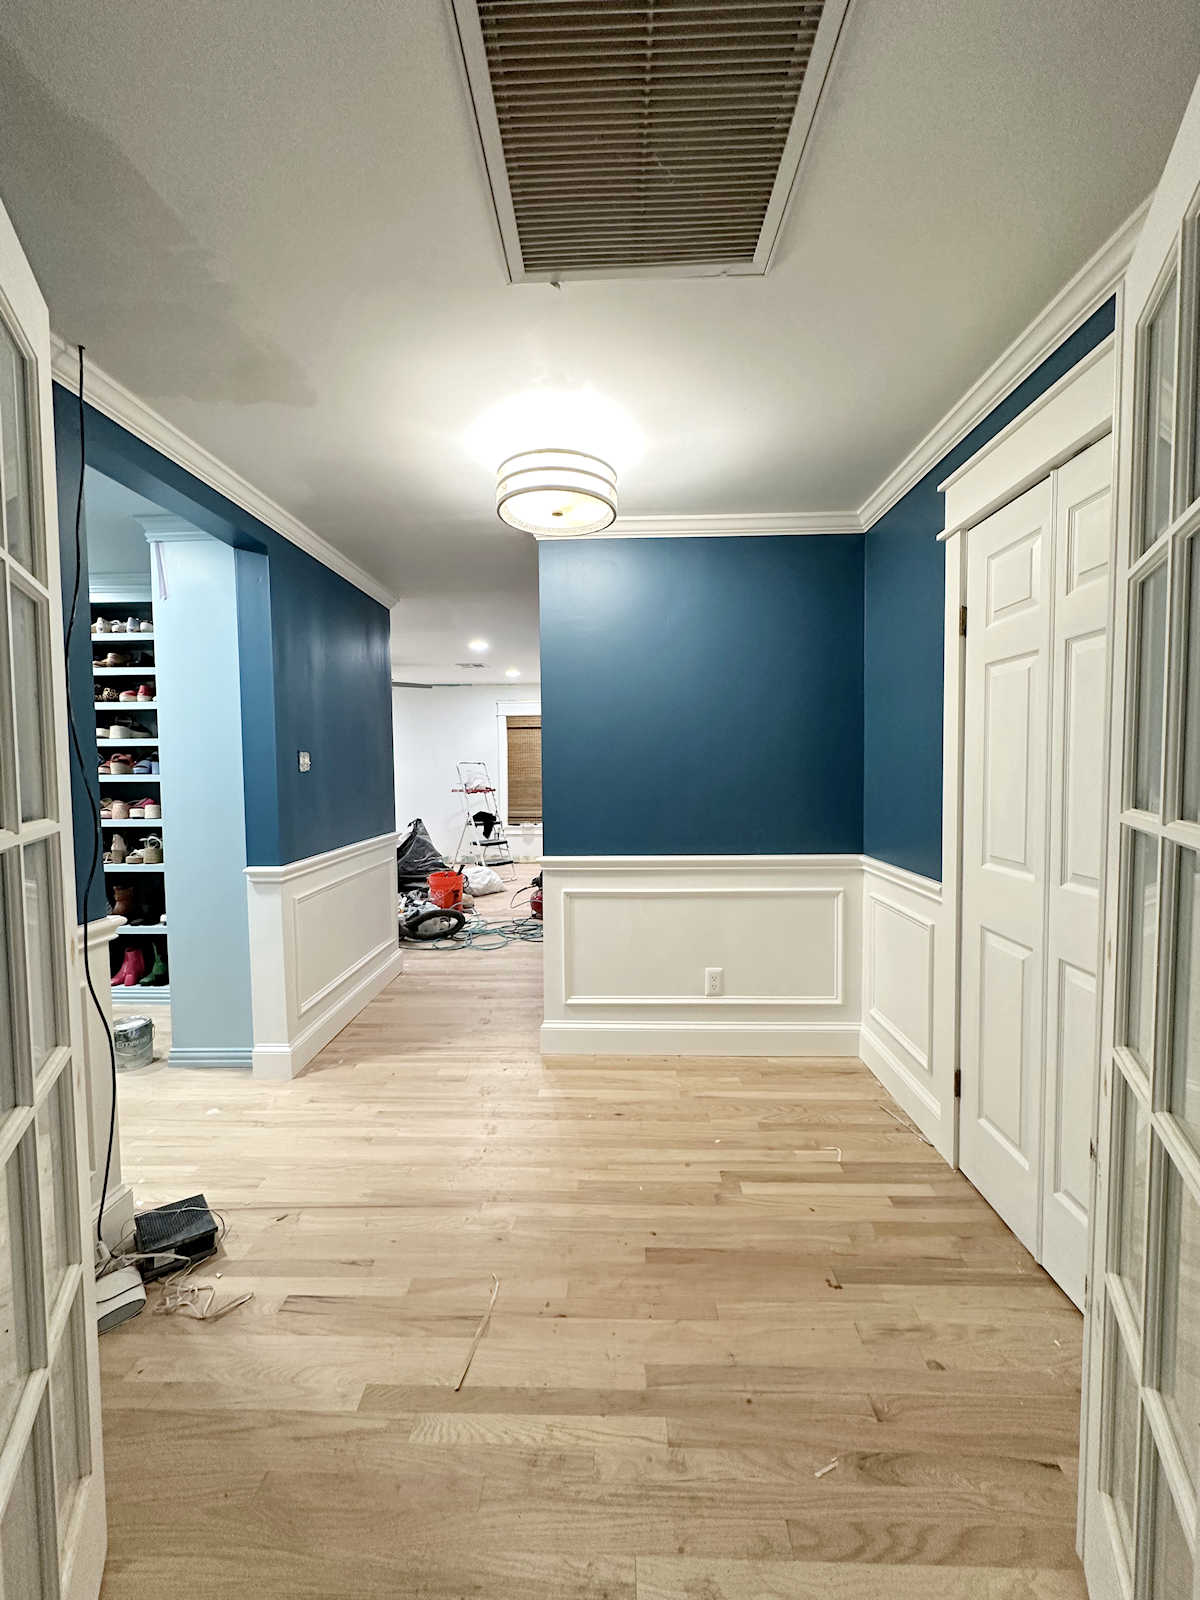
And then the wall with the doorway on it will look something like this…
Put all of that together, and it creates a floor plan that looks like this…

So last Friday, using those images, I figured how much plywood I’d need to build everything. To be quite honest, the sheer amount of plywood this project will take shocked the heck out of me. I wasn’t expecting that number at all. And knowing the price of sanded cabinet-grade plywood these days, I had some serious sticker shock. I looked at all of the plywood options online at both Lowe’s and Home Depot and decided that Lowe’s had more options.
Saturday, I headed to Lowe’s thinking that I would load up all of my supplies, rent the Lowe’s truck, bring them home, unload them, and get started building. But there were four issues.
First, in all, I had figured that I needed about 25 sheets of plywood. But on my list, I had failed to determine how much I needed of each thickness. Not everything would need to be built out of 3/4-inch plywood. Some things would require 1/2-inch plywood, and still other things would require 1/4-inch plywood. In my excitement to get started, I had completely failed in my planning.
Second, when I was there, I found two other types of plywood that were considerably less expensive. They were both labeled for interior/exterior use. One was just over $35 per sheet, and the other was just under $50 per sheet. That would save me a considerable amount of money if I could use one of those instead of the pretty sanded cabinet-grade plywood that ran from $65 per sheet to $89 per sheet. So at that point, I began suffering from indecision, as I often do.
And third, it was while I was standing in Lowe’s looking at the plywood options that I realized I really needed to make some tweaks to my plan since I was going off of the designs that I had hastily put together using Ikea’s PAX wardrobe planner using their limited options without any customizations. And I definitely needed to add some customizations.
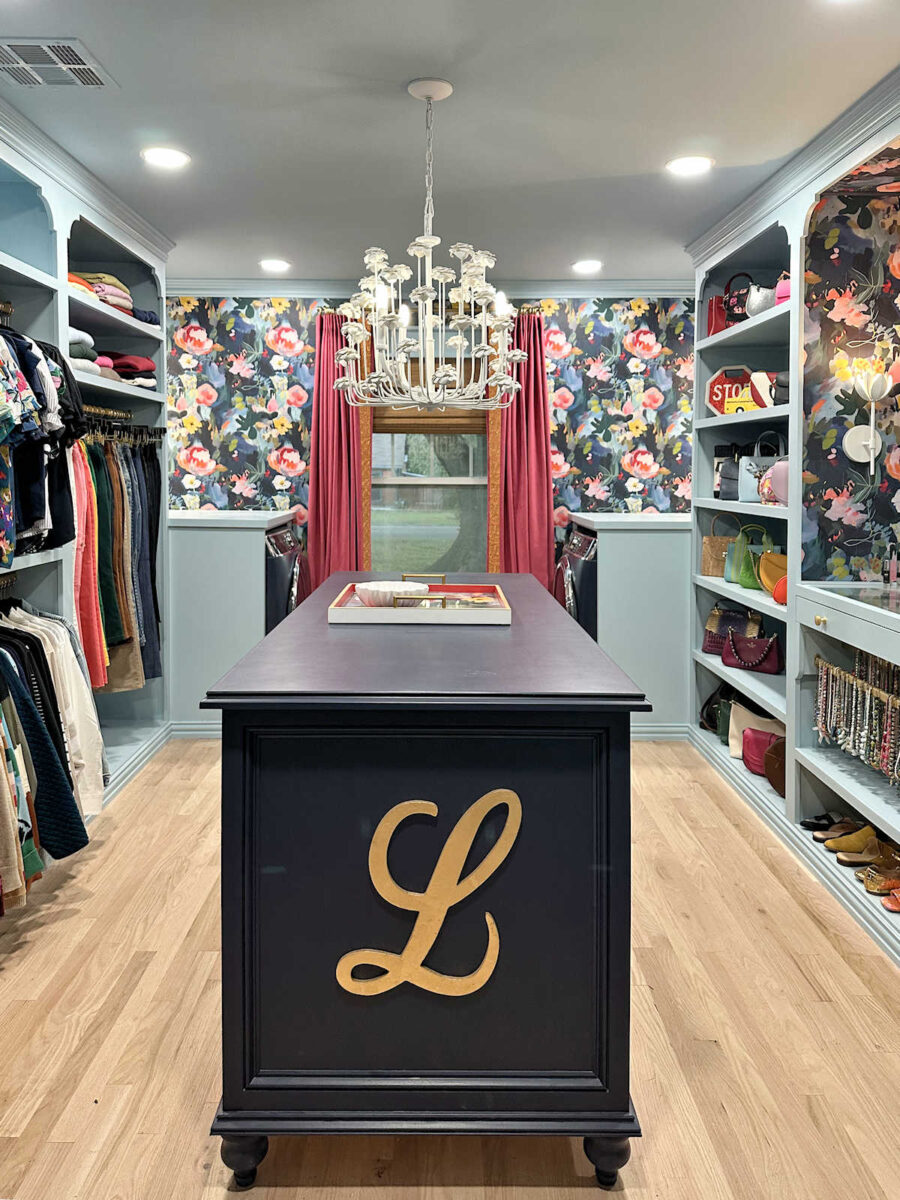
For example, this room is going to be a closet and laundry room combination. Somewhere in the room, I need to make space for a laundry hamper. Where would that go in the room? Also, I’m only five feet tall, so I need a space in the room where I can store at least a step stool, if not an easily accessible step ladder that can stay in this room. Where will that go? And do I really need drawers at the bottoms of the sections where the hanging clothes will go? I’ll have a 72-inch island in the middle of the room with lots of drawers. Do I really need more on the side of the room, especially if those drawers will require the hanging bars to be moved up, making them more difficult for me to reach?
And fourth, as I stood there looking at those stacks of plywood, I counted out 21 sheets of 3/4-inch plywood to see exactly what that looks like. I realized then and there that there’s no way I wanted to rent the Lowe’s truck piled with 21 sheets of plywood and then get home and have to unload all of that myself when they have delivery available. But if I was going to pay $79 for delivery, I wanted to purchase every single thing I needed in one purchase and have it all delivered at one time, including all of the trim boards, molding, everything. So I needed to do a lot more detailed planning. Plus, I needed to make a decision on type of plywood I wanted to use. I don’t need to spend an extra $20-40 per sheet on stain-grade plywood since my entire closet will be painted. (Spoiler alert: I ended up going with this plywood. I saw it in person, and it looks really nice with a sanded finish that will look good once painted. It’s just shy of 3/4 inch thick.)
So I spent the rest of my Saturday and Sunday afternoon finalizing every single detail I could think of for this closet. First, I selected laundry hampers. I ended up purchasing two of these half moon woven hampers (affiliate link). I purchased the light color, which oddly, isn’t available anymore. So you’ll have to imagine these in the light natural color. I bought two because I like to separate my bleachable whites from everything else.

And then I needed a step stool or ladder that would look presentable in the room, so I ended up purchasing this three-step folding aluminum ladder with the wood grain look. When it’s folded up and put in its slot in the cabinet, that side view will be visible.

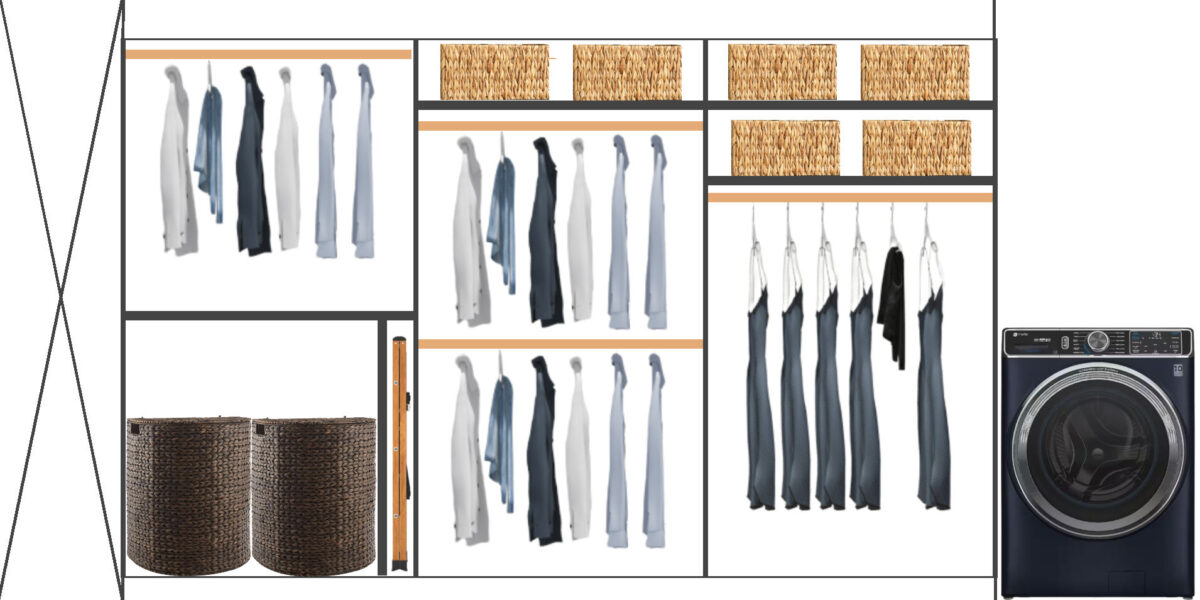
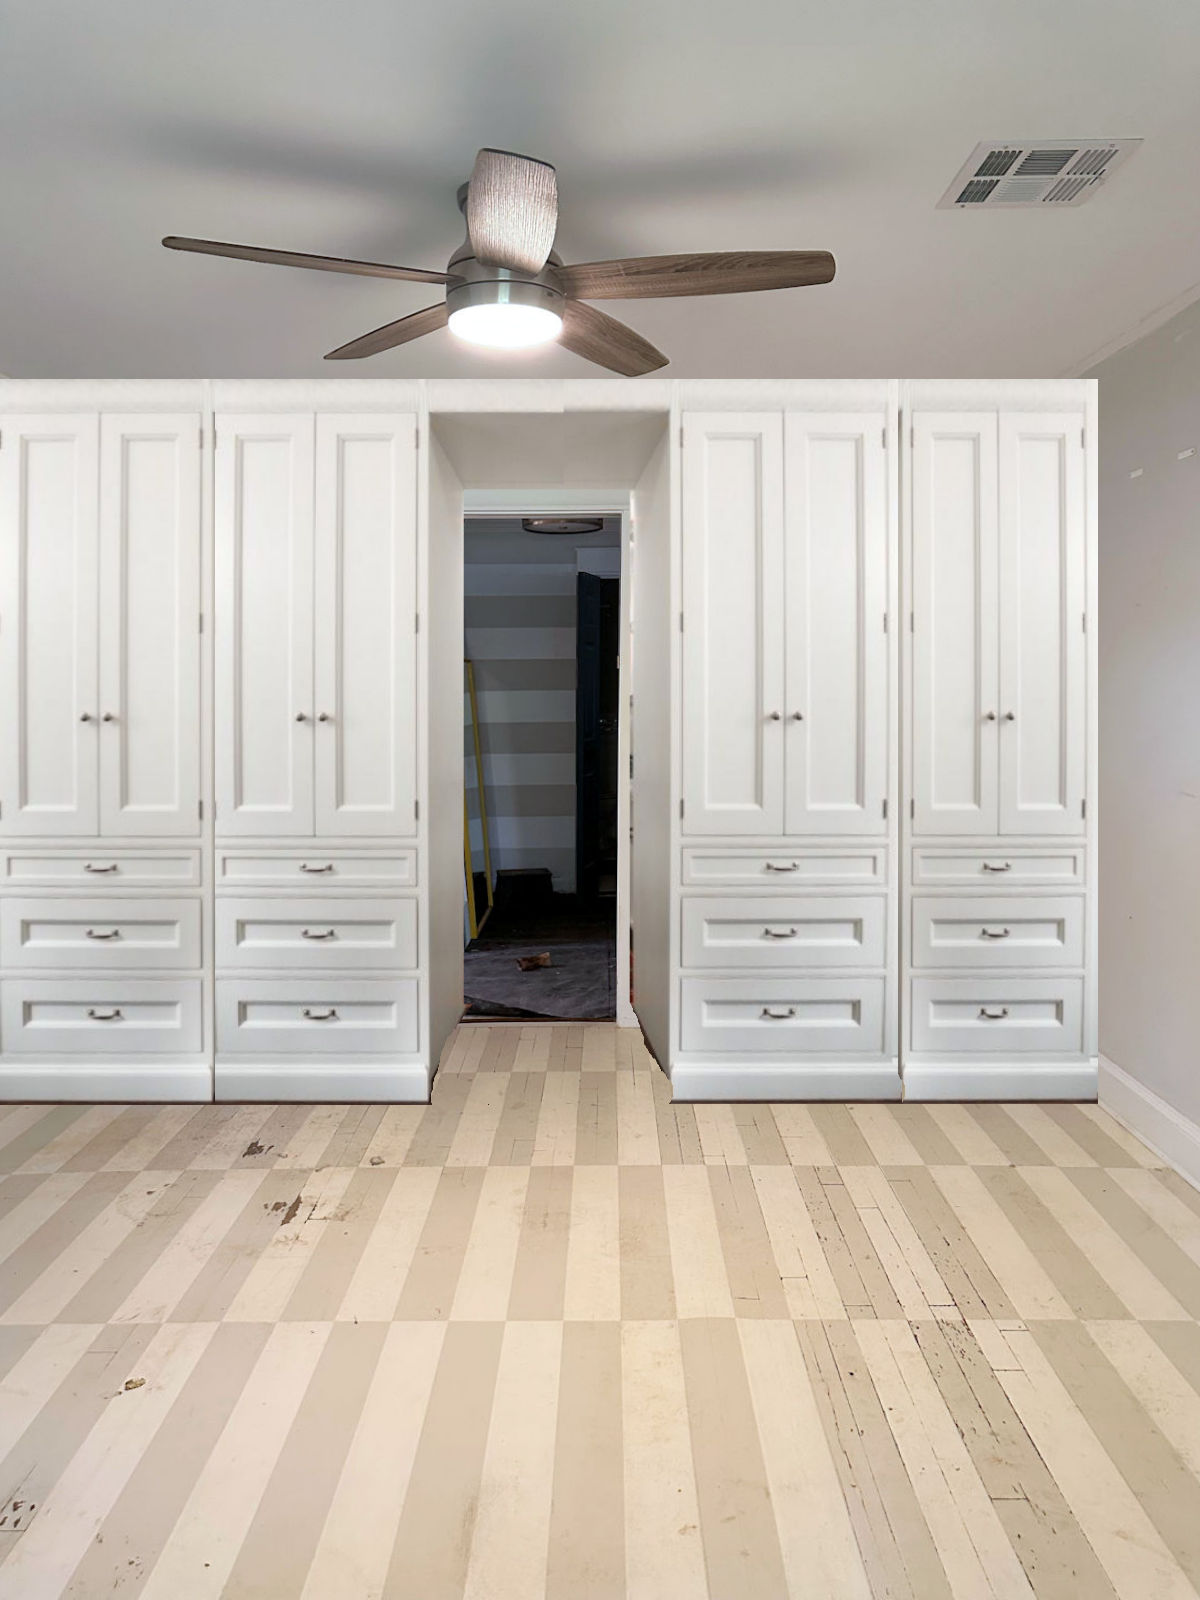
With those items purchased, and with the measurements in hand, I needed to find a place to store them. So I spent some time reworking the hanging clothes side of the room. So that side went from looking like this, with a bunch of drawers I really didn’t need…
…to looking like this, with a space for laundry hampers tall enough so that the lids will open, a dedicated slot for the step ladder, and the hanging bars for the clothes I wear regularly brought down lower so that they’re easily reachable for me. The hanging bar on the far left section is still high, but that’s where I’ll hang things I don’t need to access on a regular basis.
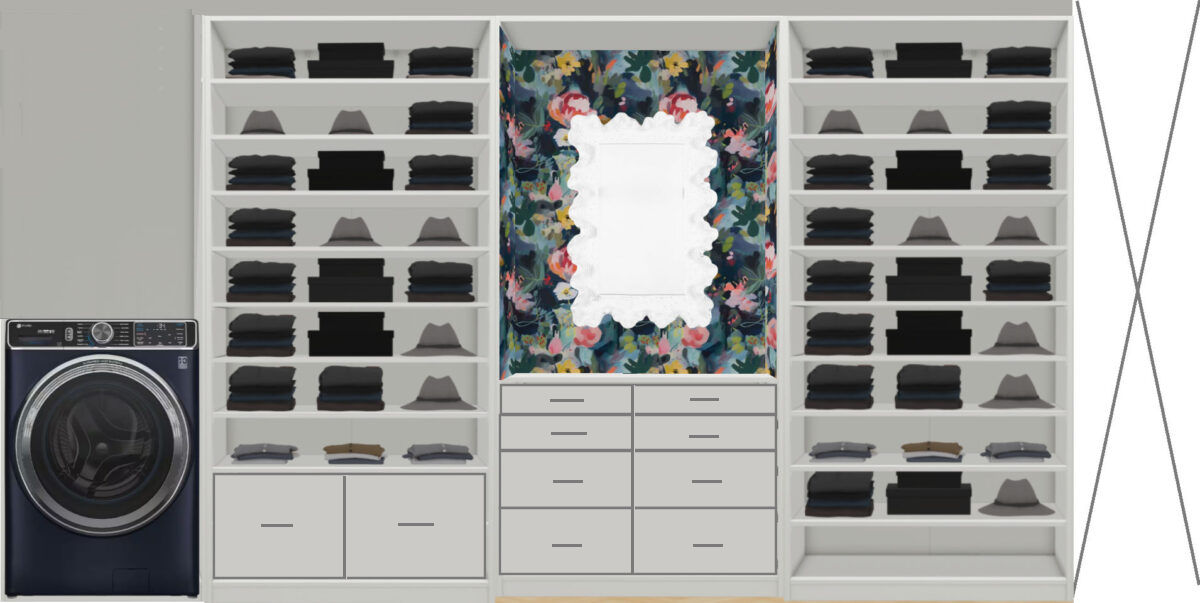
The right side of the closet stayed pretty much the same except that I added two 14-inch-deep drawers right next to the washer where I can store the big containers of laundry detergent, bleach, etc., for easy access. My washer holds a pretty large reservoir of laundry detergent, enough for about 15 loads of laundry, so I won’t need to access those for each load. But again, with me being so short, I’d rather have those things stored low for easy access rather than in a high cabinet that will require me to use a ladder to access them. I also tweaked the drawers in the center section to include two rows of shallow drawers and two rows of taller drawers rather than having them all the same height.
So with my finalized plan in hand, I meticulously figured all of the supplies I’d need to build everything, including the drawers, and placed my order. I ended up buying 21 sheets of 3/4-inch plywood, 6 sheets of 1/2-inch plywood for the drawers, and 9 sheets of 1/4-inch plywood for the drawers and backing for the cabinet sections. Plus, I ordered all of the trim boards and molding to finish it out completely.
And because I was purchasing so much, the man at the Lowe’s Pro Desk who was helping me place my order had me set up a Pro account, which gave me a discount of $257.43. I also applied for a Lowe’s credit card, which gave me an additional 5% off of my purchase.
The grand total for all of my supplies, including tax and delivery, came to $2235.14.
The cost of building a closet from scratch vs. the cost of an IKEA Pax wardrobe closet
I was curious how that compared to an IKEA Pax wardrobe with a similar setup, so last night, I redesigned the PAX wardrobe with the changes. Of course, I still couldn’t get all of the details that I wanted, like the 14-inch-deep drawers or the section for my step ladder. But I got pretty close.


The total for the PAX wardrobes came to $2410. But of course, that doesn’t include any of the customizations, like adding crown molding, baseboards, trim boards on the front edges of the wardrobe boxes, adding the cubby for my step ladder, etc. It also didn’t include doors for the two cabinets flanking the closet doorway since the PAX doors wouldn’t work with my configuration. So I would have to build those myself anyway.
Once all of those costs are added, a PAX wardrobe with a similar configuration plus customizations and trim/molding would cost a grand total of $3200.75, including tax and delivery.
I can definitely see the appeal in using a PAX wardrobe system, but there’s no cost savings there for people who are able to build from scratch. Plus, with a PAX system, the backs of the wardrobe sections are basically thick cardboard, and I’m pretty sure the boxes are made of MDF coated with melamine. I don’t personally have a problem with that, but I do know that painting melamine is a lot more difficult than painting plywood.
Also, with the PAX system, you have limited choices regarding the sizing. They only offer three widths, so if those don’t fit the measurements of your room, you just have to make it work. In my price comparison, I was comparing the 39-inch-wide PAX wardrobes to the ones I will build at 46 inches wide, which will fit the size of my room much better.
Anyway, if you’ve been considering a PAX wardrobe, but you have the ability to build from scratch, that will give you an idea of the cost comparison between the two. Of course, there are pros and cons to each. One benefit (probably the main benefit) of using PAX is the time savings. It’s much faster and easier to put those together than it is to build from scratch. But if you’re planning to do a lot of customizations with trim and molding to make it look custom-built when it’s finished, it might be worth it to just build the whole thing from scratch to save money.
So I’m on the delivery schedule for Thursday. I’m hoping it will be early in the day so that I’ll actually be able to start building on Thursday. But if not, at least I’ll be able to get started on Friday. But no matter the timing, I’m not going to stress about it. This is supposed to be fun, right? 😀
More About My Walk-In Closet/Laundry Room

see all walk-in closet/laundry
room diy projects
read all walk-in closet/laundry
room blog posts

Addicted 2 Decorating is where I share my DIY and decorating journey as I remodel and decorate the 1948 fixer upper that my husband, Matt, and I bought in 2013. Matt has M.S. and is unable to do physical work, so I do the majority of the work on the house by myself. You can learn more about me here.
Really excited for this phase to begin!
Would it maker better sense to put the hamper section closer to the washer? Also, have you considered overhead storage/shelving above the washer and dryer for items such as detergent, bleach, iron, etc.? I wouldn’t take valuable clothing space for detergent if you can have directly above the washer. This is just my observation for a better flow and making the most of your room.
I did consider putting the hampers in the section right next to the dryer, but the reason I didn’t do that (and this probably won’t make sense to anyone but me) is because that section next to the dryer will be for hanging jeans, pants, and dresses. I don’t care about the dresses so much, but I wear jeans and pants pretty much 100% of the time, so I want them easily accessible. I tried to imagine swapping that section with the section that holds the high bar and the hampers, and I didn’t like it. I don’t like the idea of the section I’ll be accessing the most being up against the cabinets flanking the doorway. It’s the combination of the fact that those side cabinets will somewhat block freedom of movement combined with me being right handed, that made me decide against it. I don’t want my left shoulder being jammed against those side cabinets while I’m reaching up with my right hand and searching for pants or jeans. I want that section to be as easy to access as possible since it will be the most used. As I said, that probably won’t make sense to anyone but me, but I can assure you that I not only thought about it, but I obsessed over it. 😀 As far as the hampers go, it’s not a big deal to have them a bit further away. Heck, some people keep their hampers in a totally different room, like a bedroom or bathroom, and have to trek across the house with dirty clothes to do laundry. So having them a few steps further away from the washer doesn’t seem like a big deal to me.
As far as the drawer for the detergent and other items, I’d just rather keep those low than high, especially considering that the washer will stick out well past the side cabinets. Reaching up and over for someone who’s only five feet tall is a pain. Plus, I still need somewhere to put a hanging bar or drying rack for clothes that won’t be dried, and over the washer is the perfect place for that. I’m looking at pulley-style drying racks to go over the washer, so I don’t really want to put shelves or cabinets above the washer.
You could add wheels to your hampers! I tried to figure out a way to wheel my hamper clear to the other end of the house, and ended up buying a folding suitcase-like handcart and bungeed it to my hamper! LOL! It’s not perfect, but it works. It comes in handy now that I am using a cane, and before that a wheelchair and a walker! Who knew I would break a shoulder and 4 months later have a fall and injure my knee on the other side of my body! Necessity – the Mother of invention!
That all makes sense. I know you have so many ideas on your mind right now, that sometimes the simplest things are overlooked and I wanted to point it out just in case :). It’s going to be so awesome. I am so excited for you to have this space. What a dream!
I am 5’11” so we are complete opposite on that spectrum. HAHA!
This is so fun! And we get to watch, and admire, and not have to clean up construction dust!
BTW, am I the only one when doing laundry now thinks “spray and hope for the best” when encountering stains? 😆 🤣 😂
Oof! That’s a lot of plywood! Will you be using your new workshop to offload, store, and build in? Very exciting to see this all come to fruition – no wonder you are excited to get started!
I’ll have them deliver to the carport. That seems easier to me.
Aren’t you worried about weather affecting the plywood.
Not particularly. It’ll be under the carport, and there’s no rain in the forecast for more than a week. It’ll be fine.
I wonder what the cost is to use MDF in places where quality of surface is not important? I have no idea which is cheaper, and why you would use one over the other. I had wondered why you didn’t have it delivered, so glad you went that route and got discounts to boot!
Also, for reaching the higher hanging clothes, a hook might be useful! I found many, but this:
Greeily Clothes Hanger Reaching Hook Telescopic Adjustment clothes hook pole Light and can Extend from 37″ to 65″ with 4.7 “Hook and Sponge Handle.
Greeily Clothes Hanger Reaching Hook Telescopic Adjustment clothes hook pole Light and can Extend from 37″ to 65” with 4.7 “Hook and Sponge Handle.
$14.99
Amazon.com
30-day returns is inexpensive and telescopic for us shorties. I think I’ll get one for myself!
3/4″ MDF is $1 less per sheet than the plywood I purchased. I’d much rather build with plywood than MDF.
Keep up that positive attitude
Are folded items going on all those shelves? If so could i suggest a folding board! My husband even uses ours. Makes clothing look so crisp and tidy.
Where will you be storing all your jewelry?
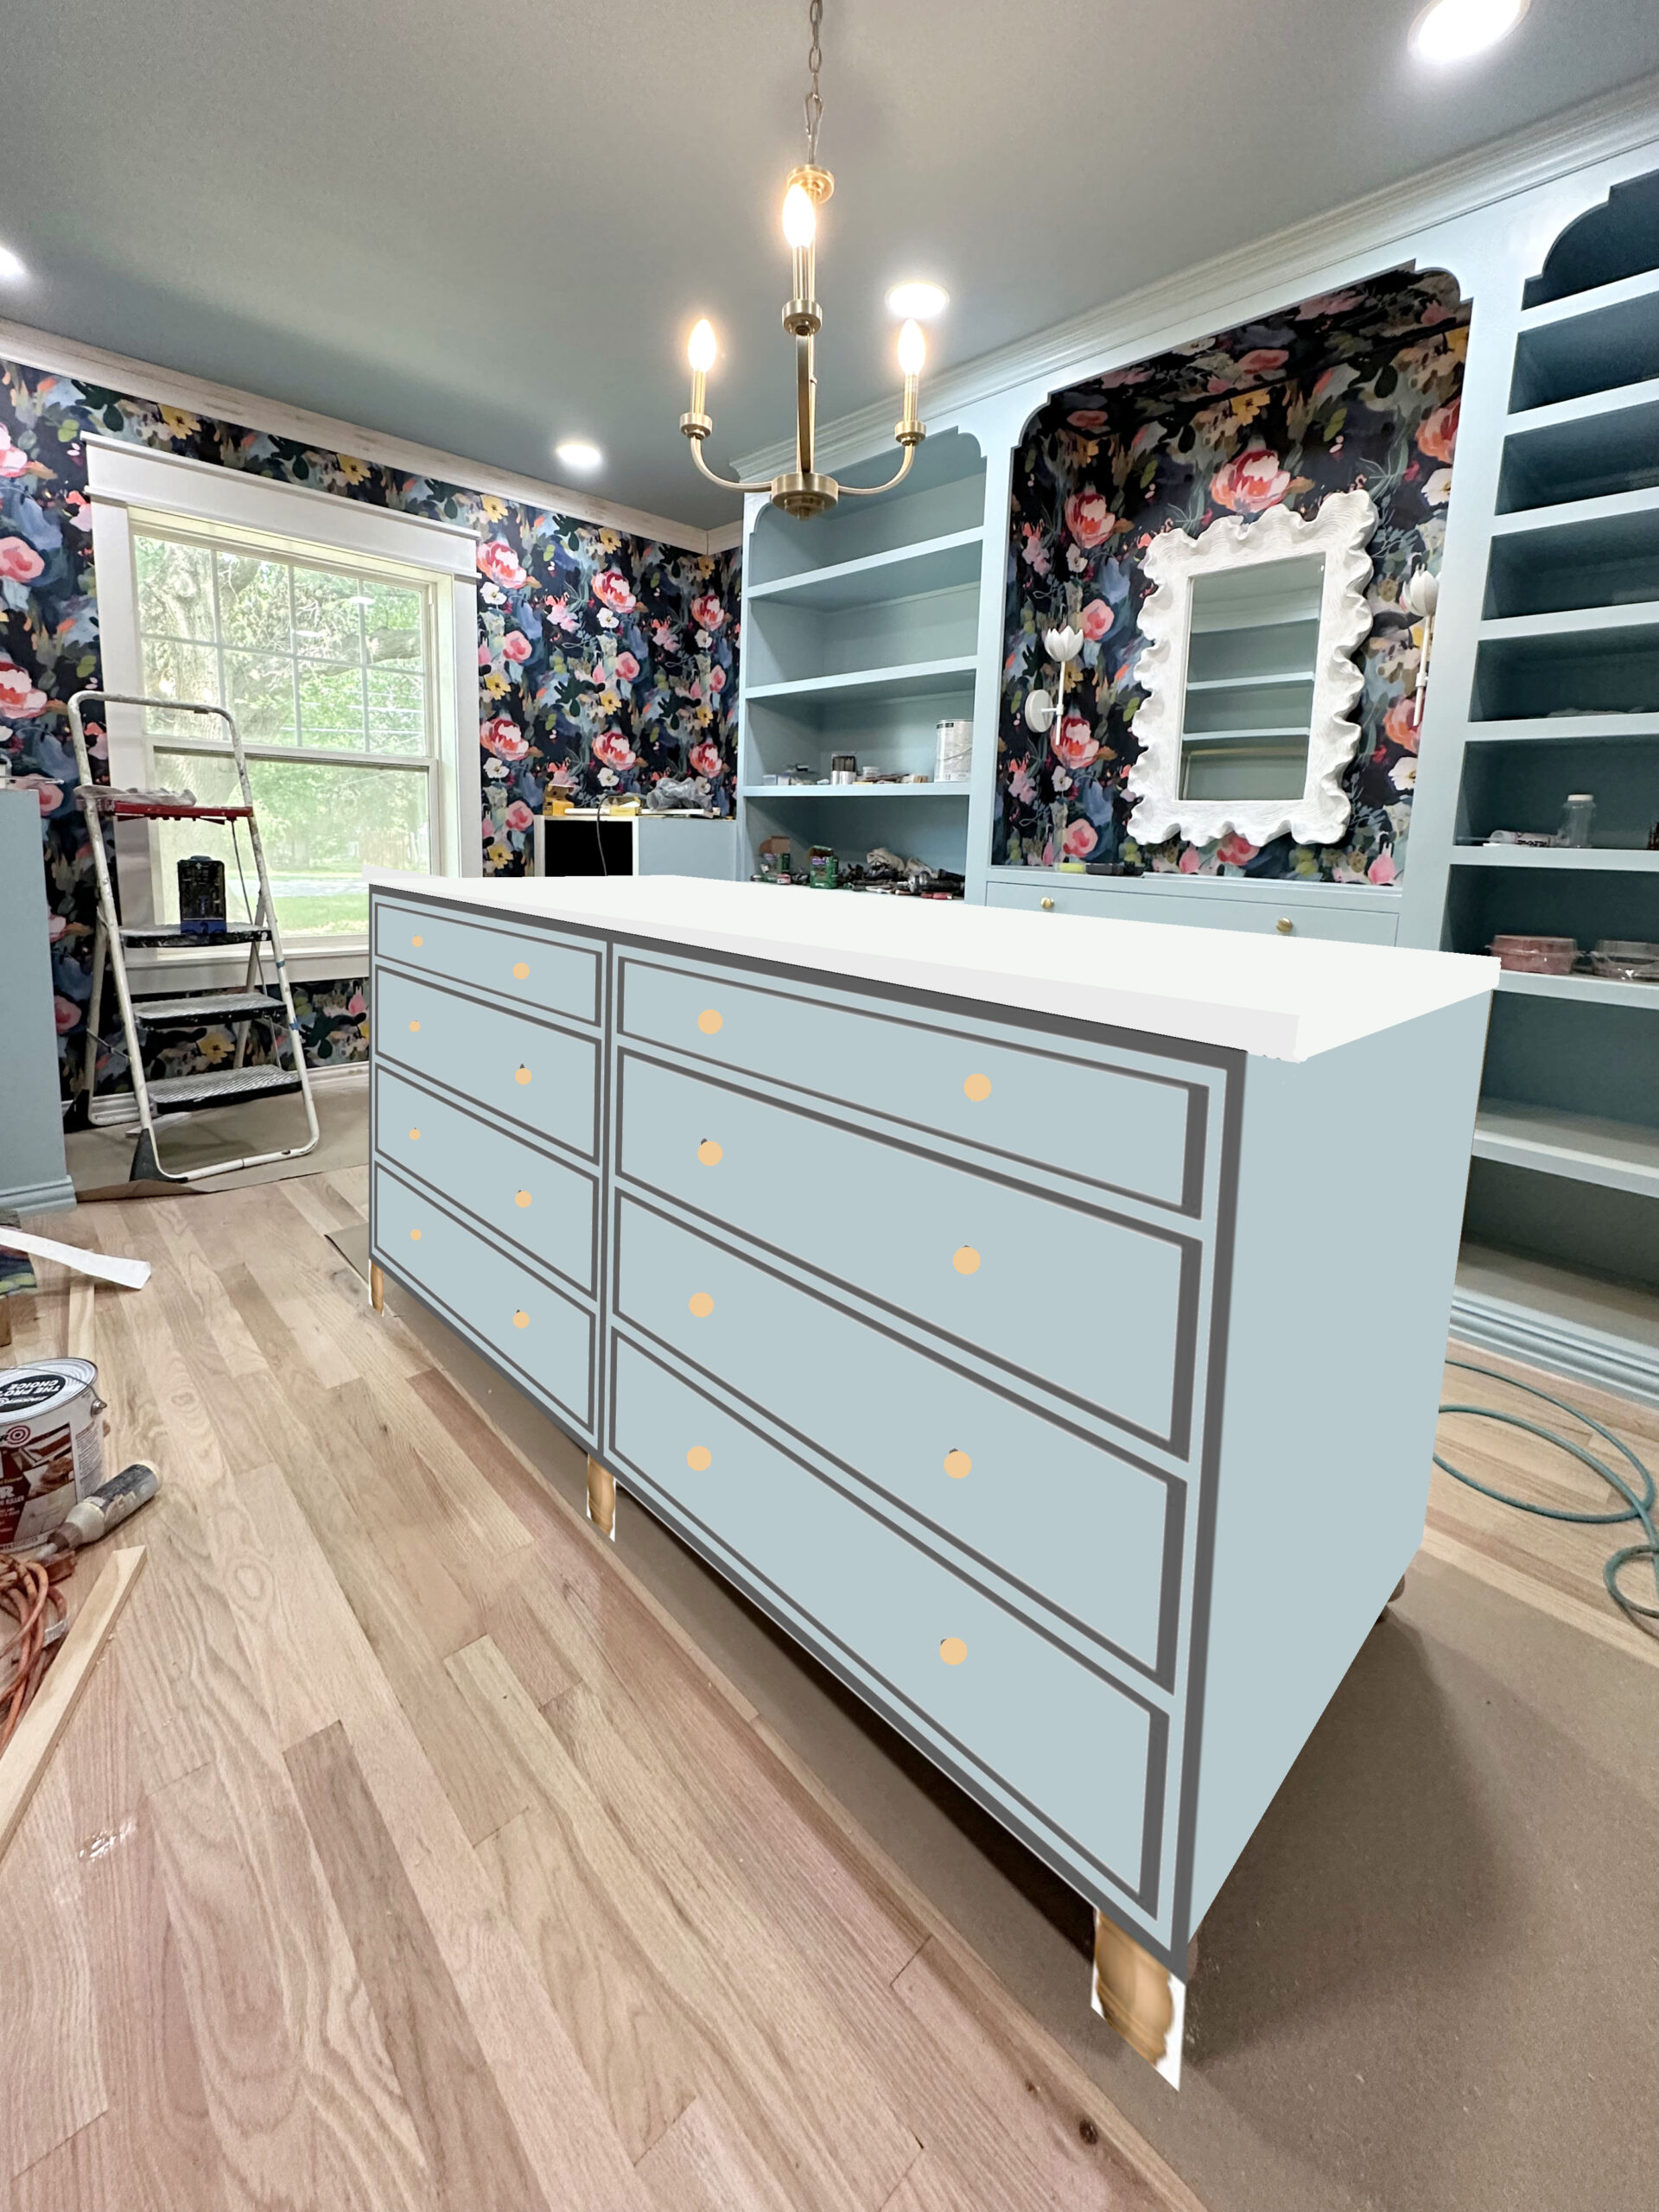
All of my jewelry will go in the center island. I’m still thinking through the details of the design for the island. I think I almost have it finished.
Your custom cabinetry will be far superior to the IKEA cabinetry in quality and you have build it exactly the dimensions you want. Yes, it will take a lot more time and effort but it will be worth it! The laundry baskets are pretty but I’d want to have square or rectangle ones as there would be less wasted space in the cabinet. Maybe the ones you chose hold more items than you would need to hold between wash loads.
It’s likely too late for this but have you thought about adding a pull out step to replace the drawers?
It looks good and yes pretty darned pricey but it’ll be built solid and well not to mention beautiful!
A pull out step wouldn’t be tall enough for me. I need a three-step ladder to reach the backs of the highest shelves.
Unless you mean the vertical ones that slide out on a drawer slide and unfold. I looked into those, but they’re very expensive (about $700 each), and I’d need about four of them for the whole closet. Definitely not worth the price to me.
Don’t now if you considered this but perhaps a pull down closet rod would work in those frequently accessed areas like over the hampers, washer and dryer. This would lower the times you have to drag out the step stool. They seem to be well built and can definitely hold the weight of clothes
Did you consider using smaller hangers so that you can go with the smaller depth cabinets? I’ve seen youth size hangers of 14″…..
I wear an XS and I use the 14″ hangers. Love them, they don’t leave dents in the middle of my sleeve. I use both the flocked and plastic. Flocked for hanging in closet and about a dozen plastic for drying.
If I ever get down to an XS, I’ll start using 14 inch hangers. For now, I don’t think 14 inch hangers would work for my clothes. 😀
Since you are height challenged, have you considered using pull down shelving and hanger rods rather than using a step stool? They work wonderfully for above washer and dryers too!
Unless IKEA changed the PAX design, they are not even made from MDF, but from chipboard. The shelves start sagging after an year or so. Building them yourself will be higher quality, sturdier, and customized to your exact requirements.
Suggestion about your dirty laundry hampers: Instead of buying them, consider building two side-by-side bins on casters, so that you can roll them over to the washing machine for loading.
Great idea! Or put casters on the ones already purchased.
When my mom designed her house (54 years ago) she had deep drawers in each bathroom that were hamper size. It was hard as a 7 year old to get the lone sock at the bottom, but I’d sure love them in my house now. They still function perfectly after all these years.
Kristi, I am curious. Do you plan to use your new workshop to store and build the wardrobe cabinets and drawers? I know you haven’t finished out the interior yet so was wondering about your plans.
No. For now, my workshop is just a safe place to store my tools when I’m not using them. I’ll be using my carport to cut all of the pieces for my closet, but I’ll actually be assembling everything in the closet. Each section will be so big (about 90″ high by 46″) that if I built them in the workshop or the carport, I wouldn’t be able to move them through the house and into the closet by myself. So they’ll have to be built in place.
Your attention to detail is amazing. Love it!
Oh my goodness…I thought you were always a Lowes Pro…do the same at Home Depot!
Every little bit helps. Also, the rewards are nice on the card…we are using them all right now as we build our downsize house. A few of the other perks are nice as well. Thank you for that comparison with IKEA. I was thinking of going for units in my master closets…maybe my husband will build what we need too. Seems much smarter. Looking forward to watching things go forward.