DIY Jewelry Organizer – Building My Jewelry Drawer With Glass Countertop
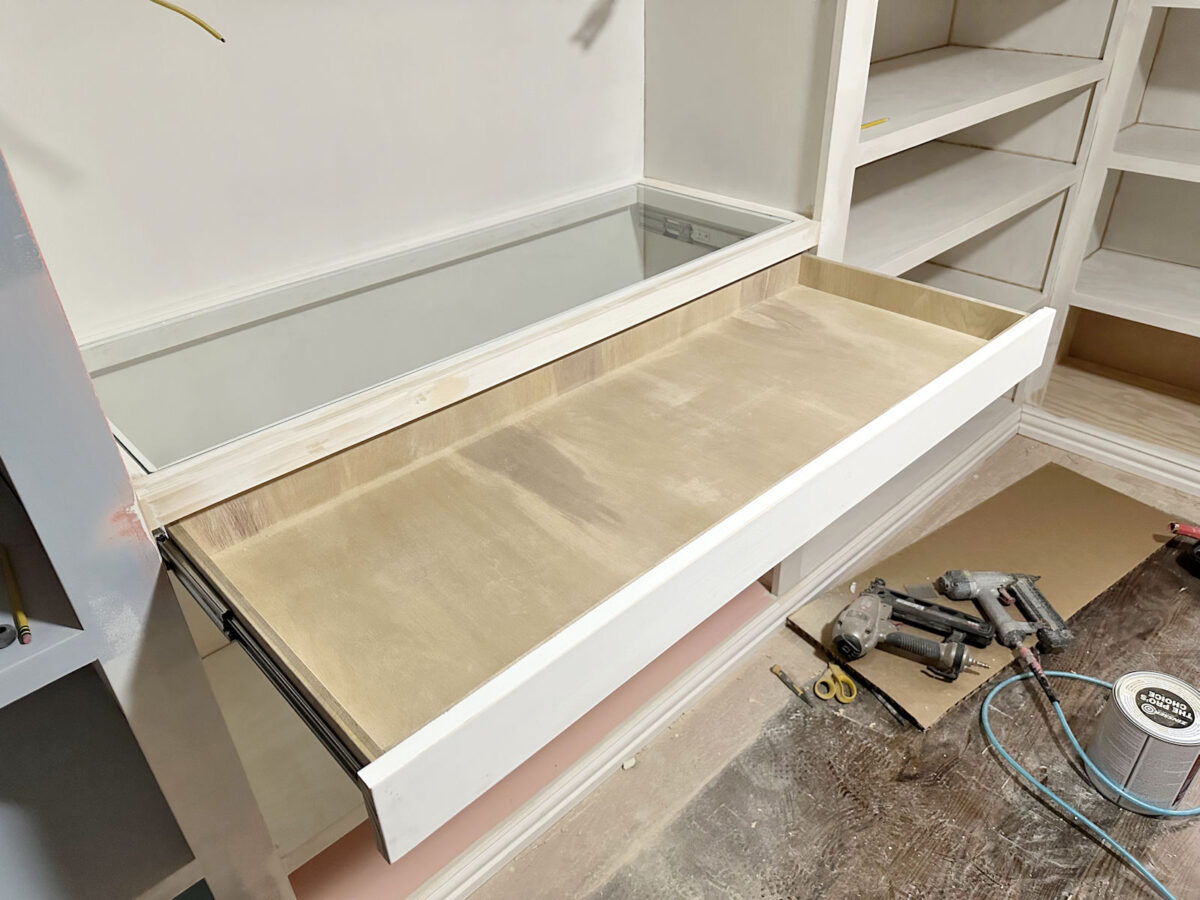
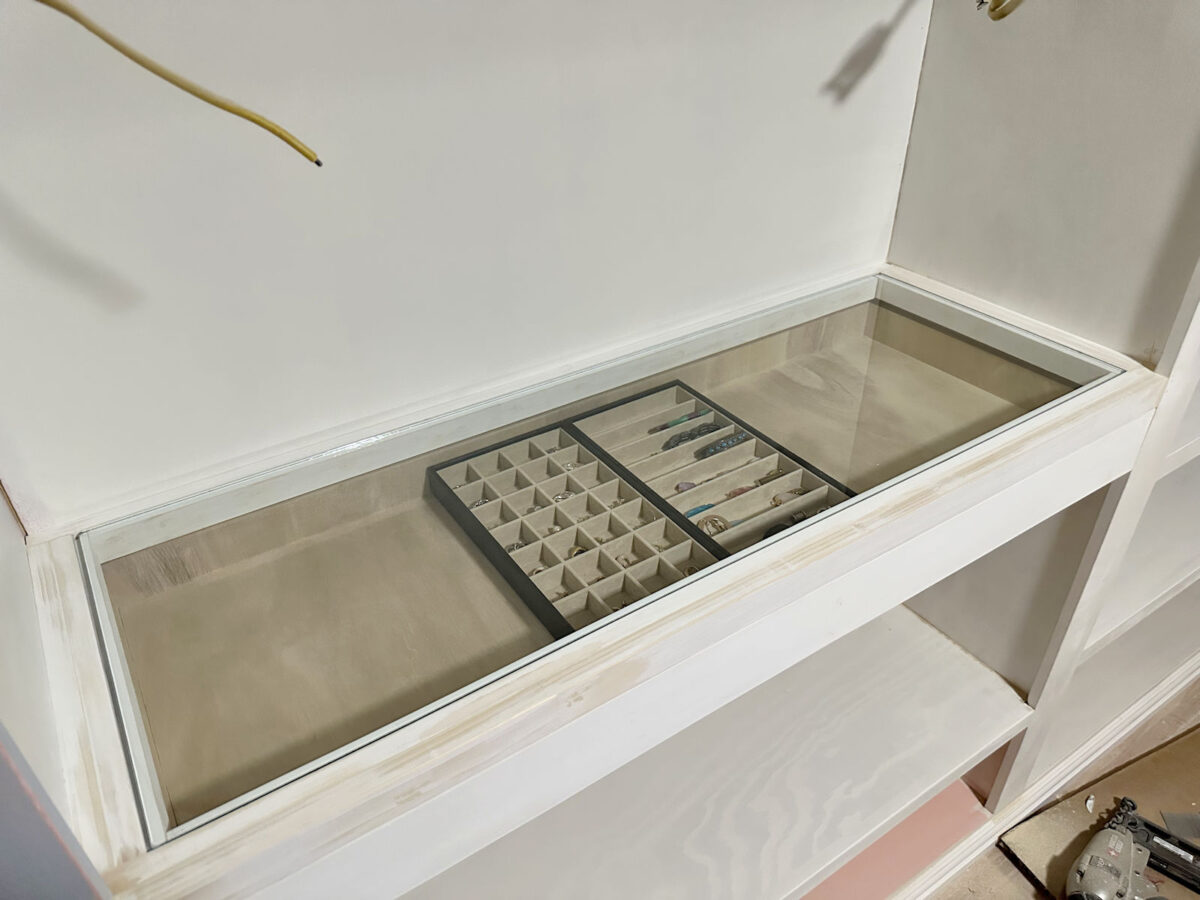
Yesterday, I finished one of the last remaining projects on the perimeter cabinets of my walk-in closet. I built the first part of my DIY jewelry organizer — the jewelry drawer with the glass top. This drawer is specifically for earrings, rings, bracelets, pendants, etc. I haven’t yet added the individual compartments to the drawer, so I put a couple of my current jewelry organizers in the drawer so we could get an idea of how it will look. And of course, it still needs to be primed, caulked, and painted, along with the rest of the cabinets.
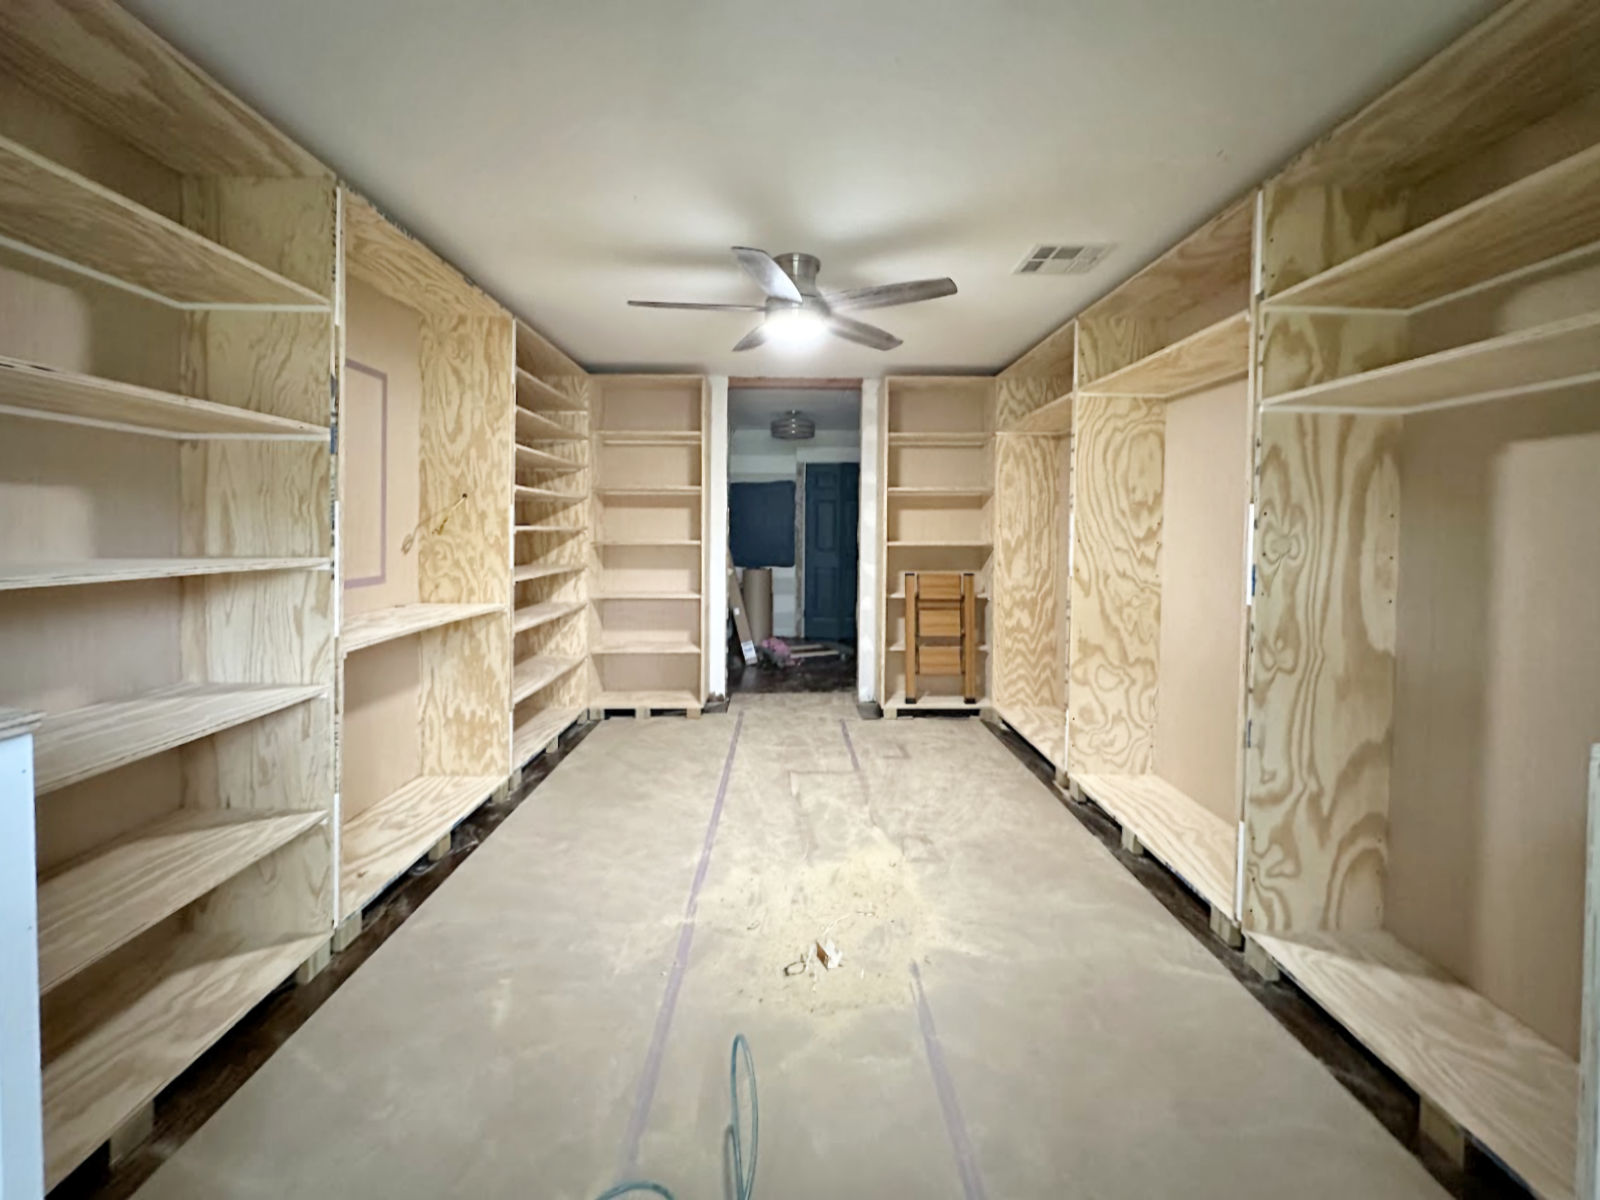
This is only one part of what will be a very long series of posts on my biggest built yet — my walk-in closet and laundry combination. If you missed the previous post, you can find that here: Walk-In Closet Progress: Redoing Shelves And Adding Shelves
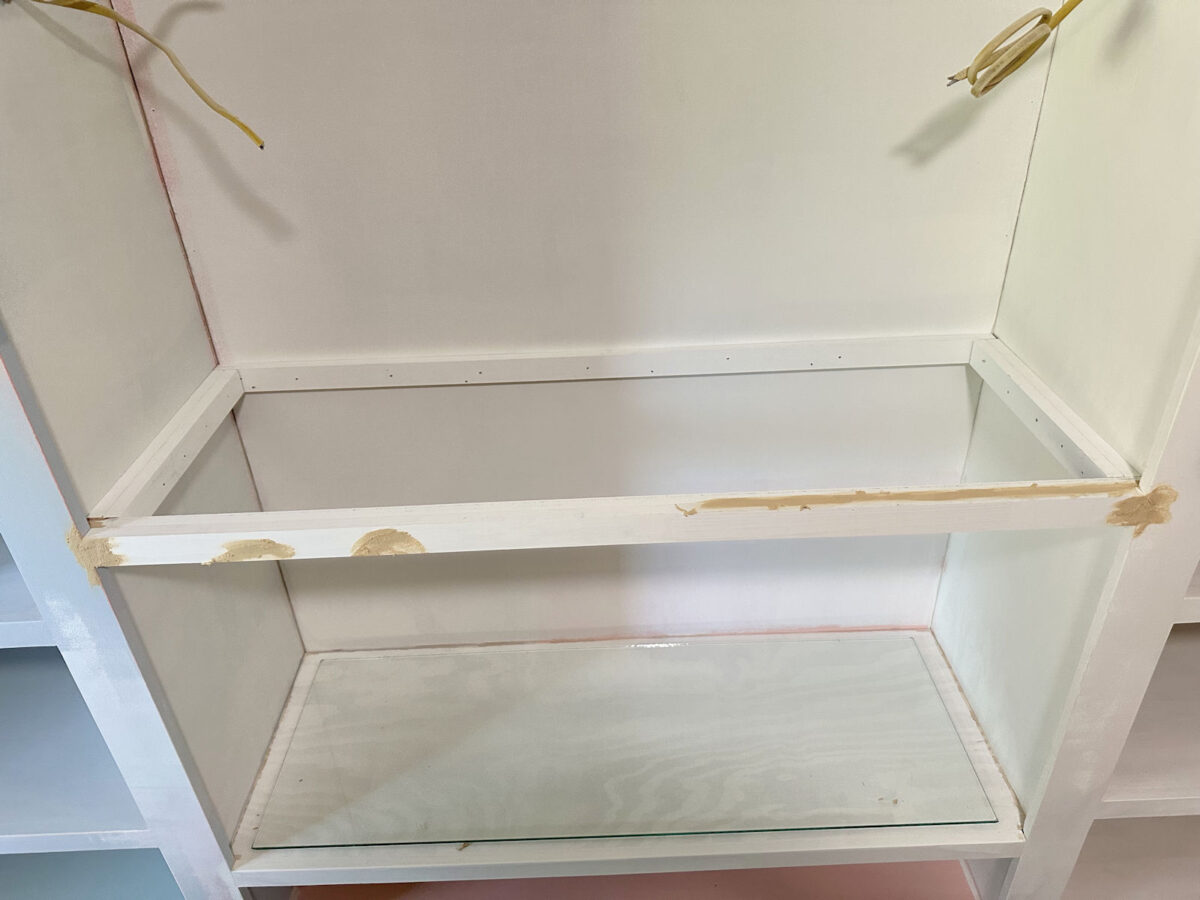
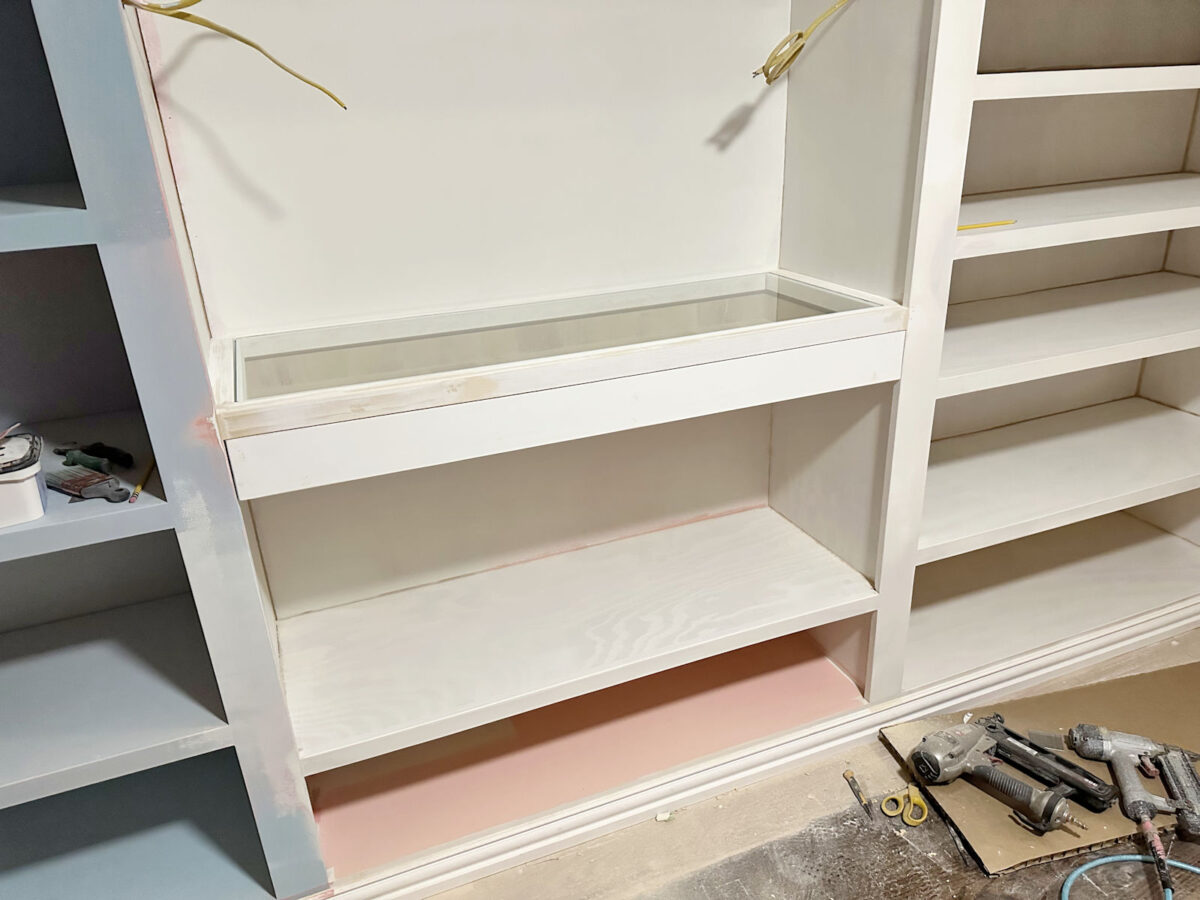
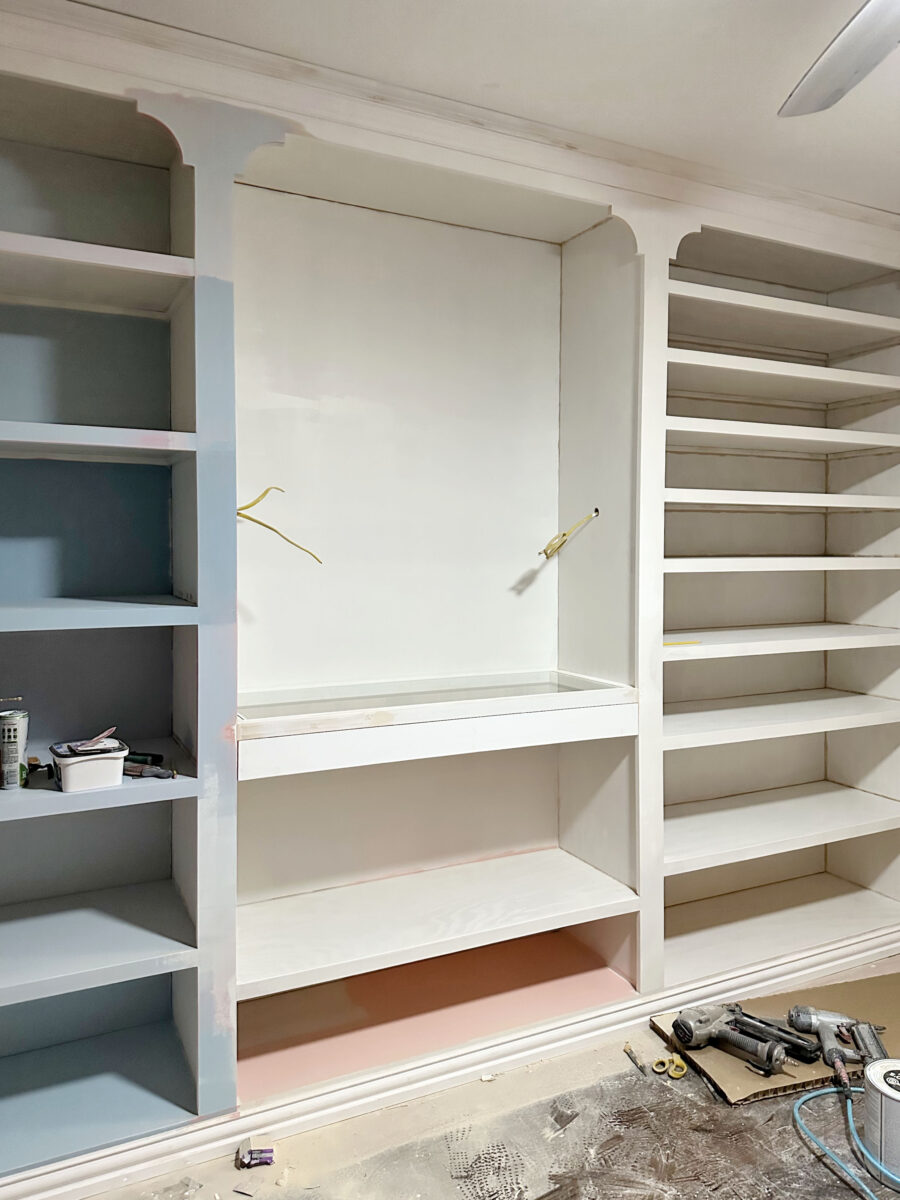
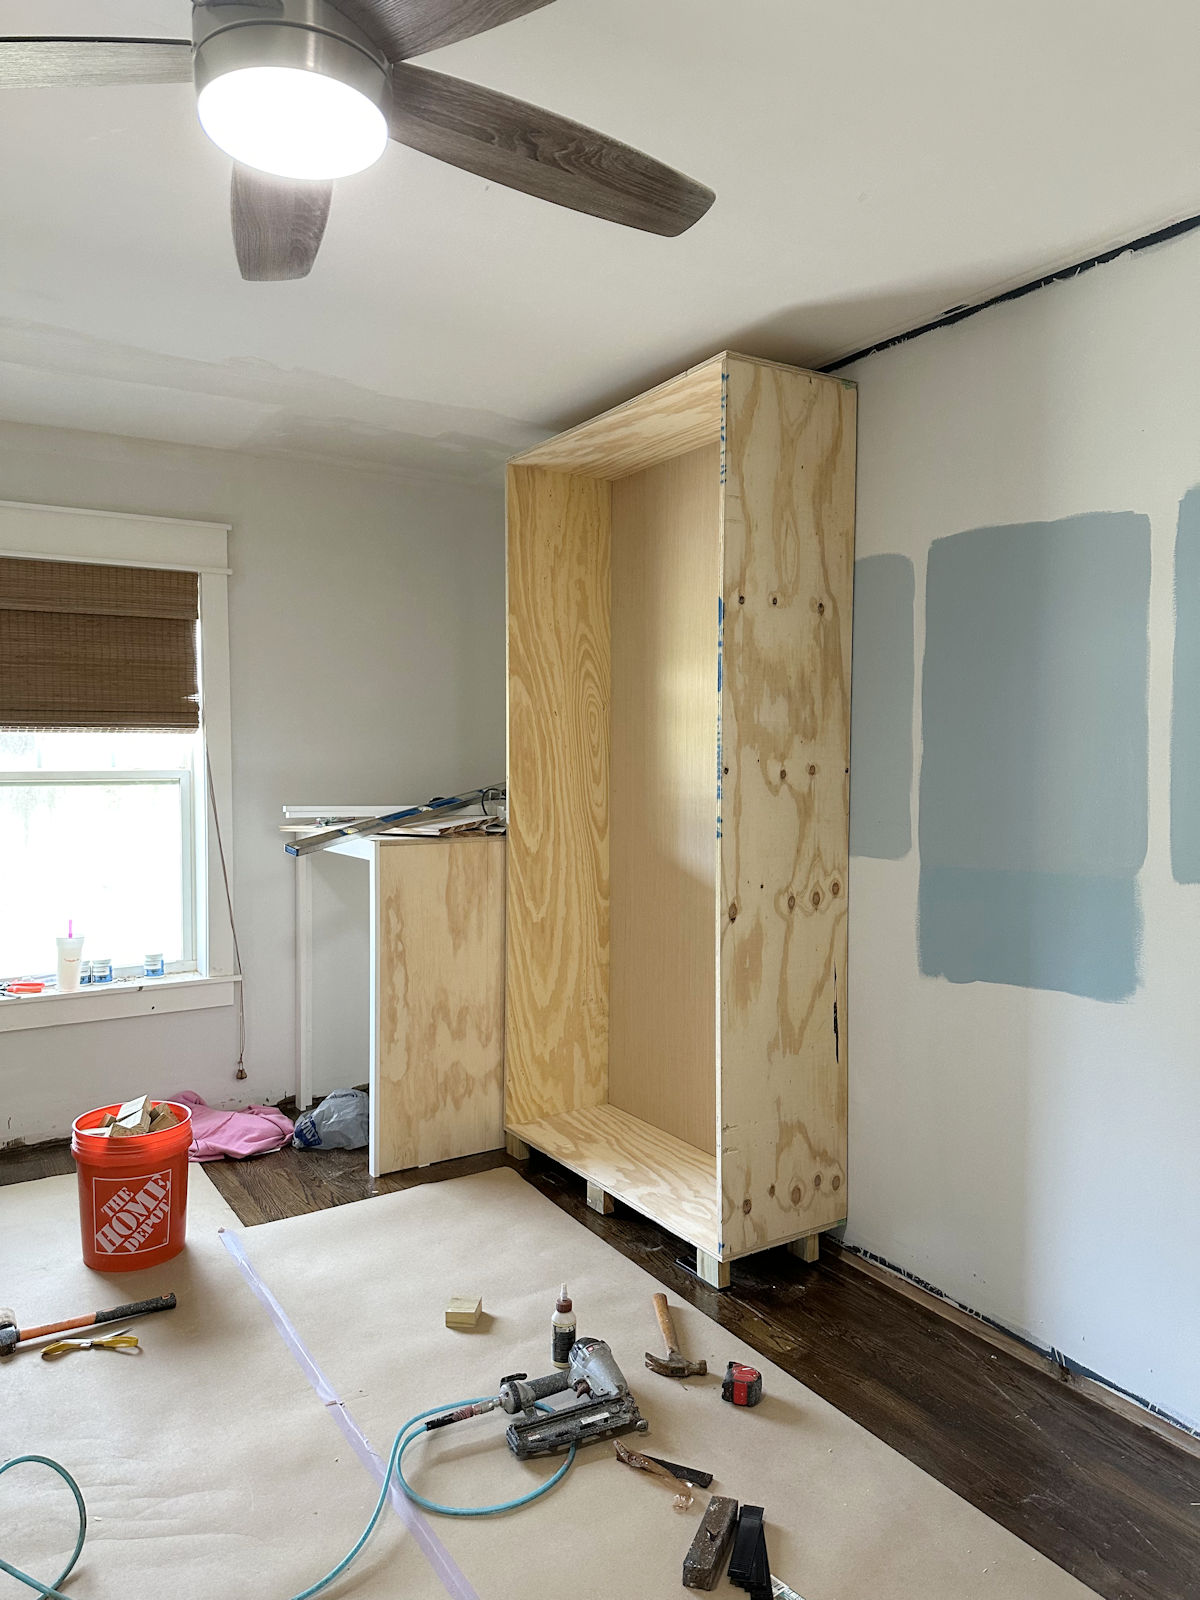
So with that in mind, here’s how the whole setup looks right now.
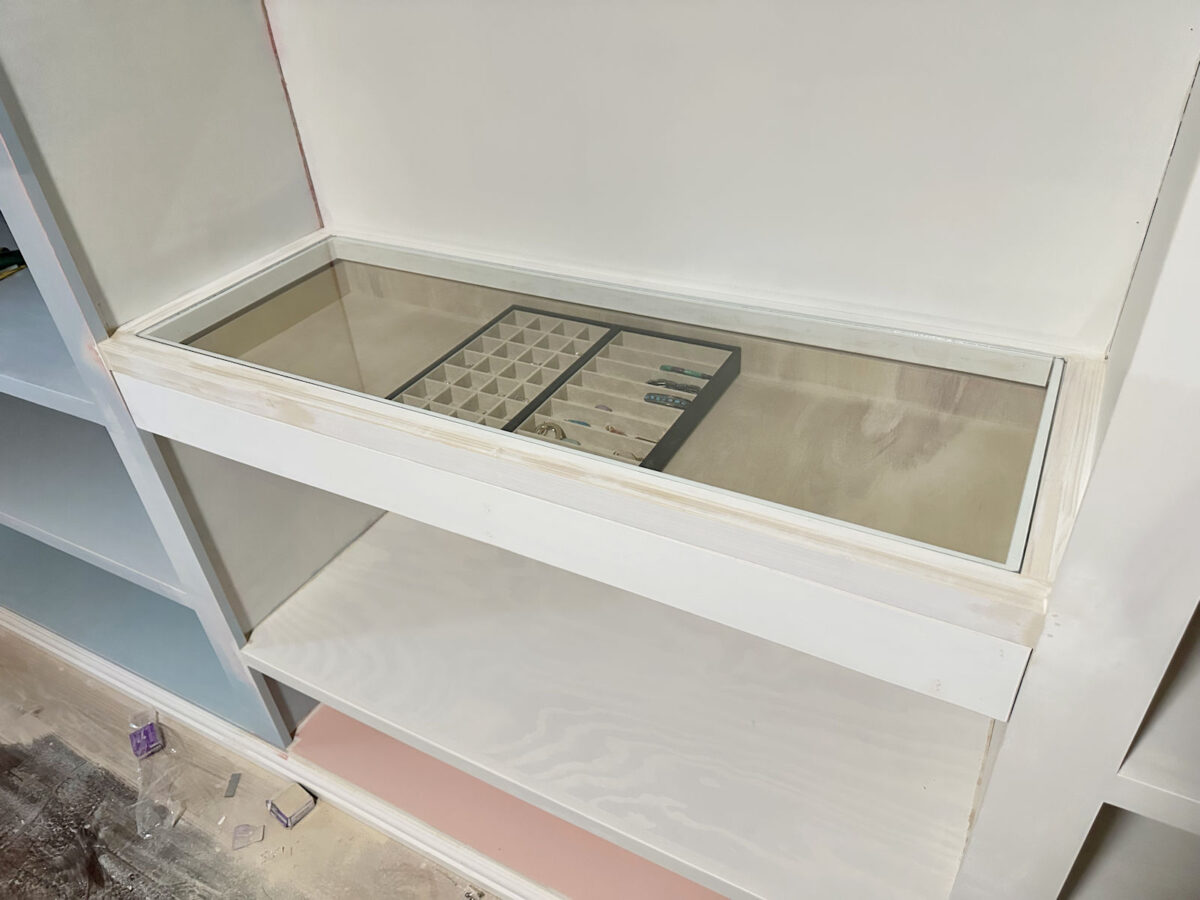
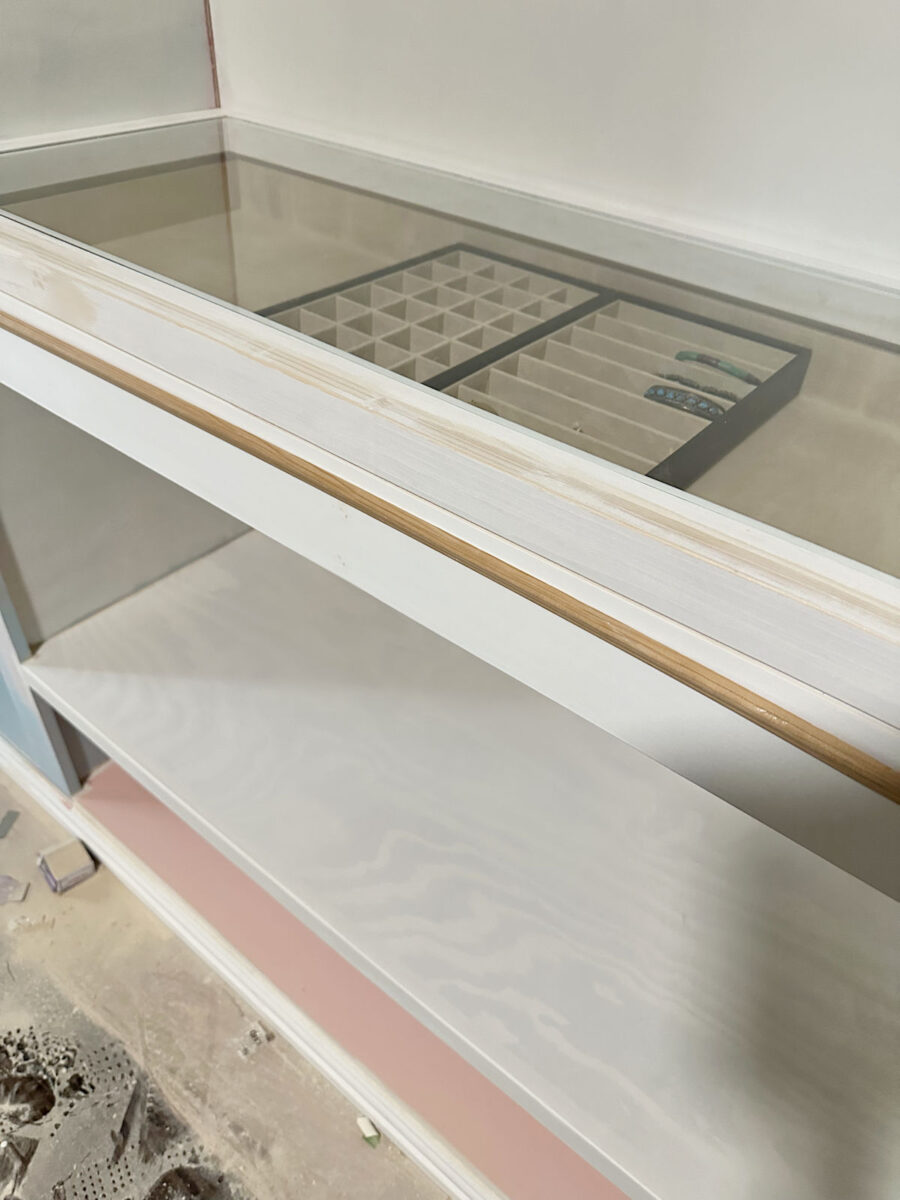
When I finished building the drawer last night, I wasn’t sure if I wanted to add trim to the front. But this morning, I decided that I’ll probably add this tiny trim to the drawer just to give it a little something extra.
And I also haven’t picked out drawer and cabinet hardware for the room, so once I pick that out, I’ll add two pulls or two knobs to the drawer. I can’t decide if I want to use something really special, or if I want to keep it simple with the drawer and door pulls. I’m still looking.
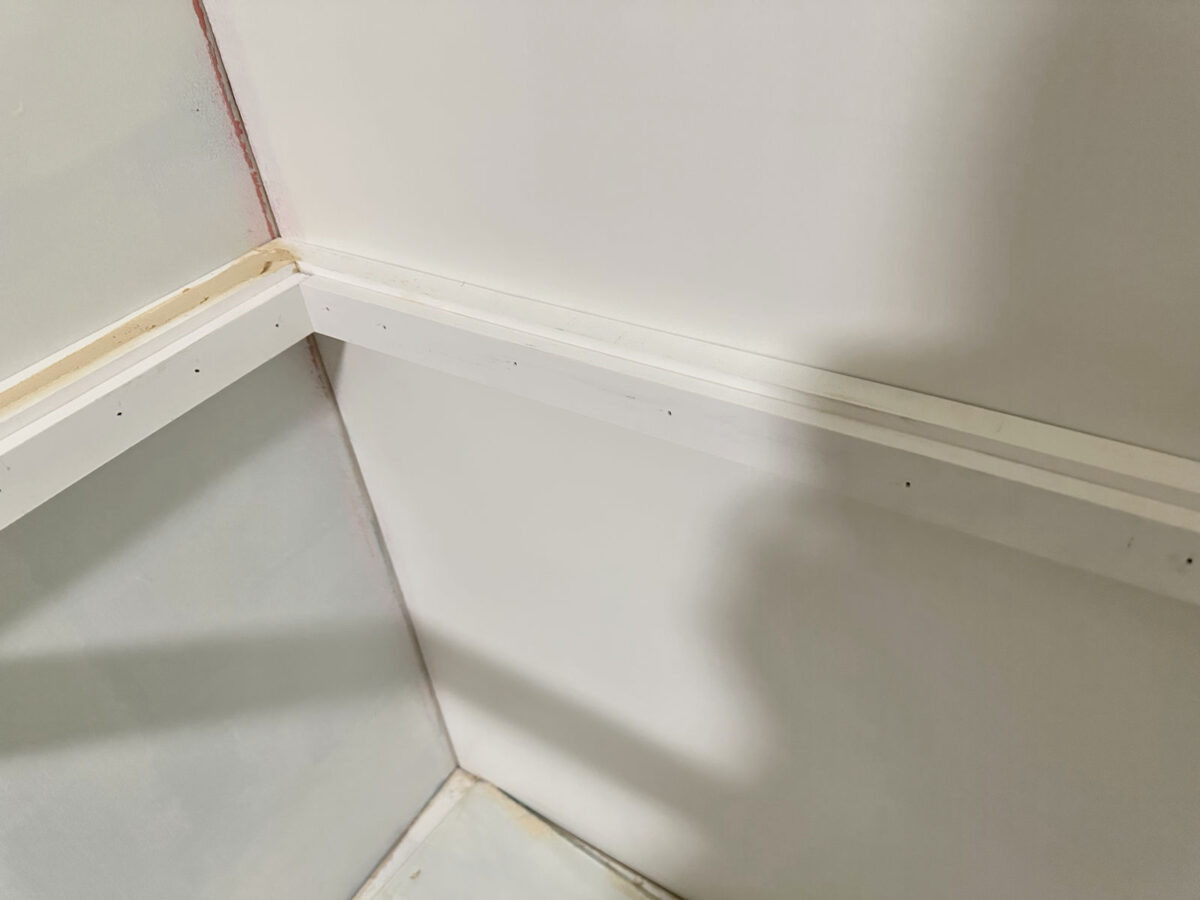
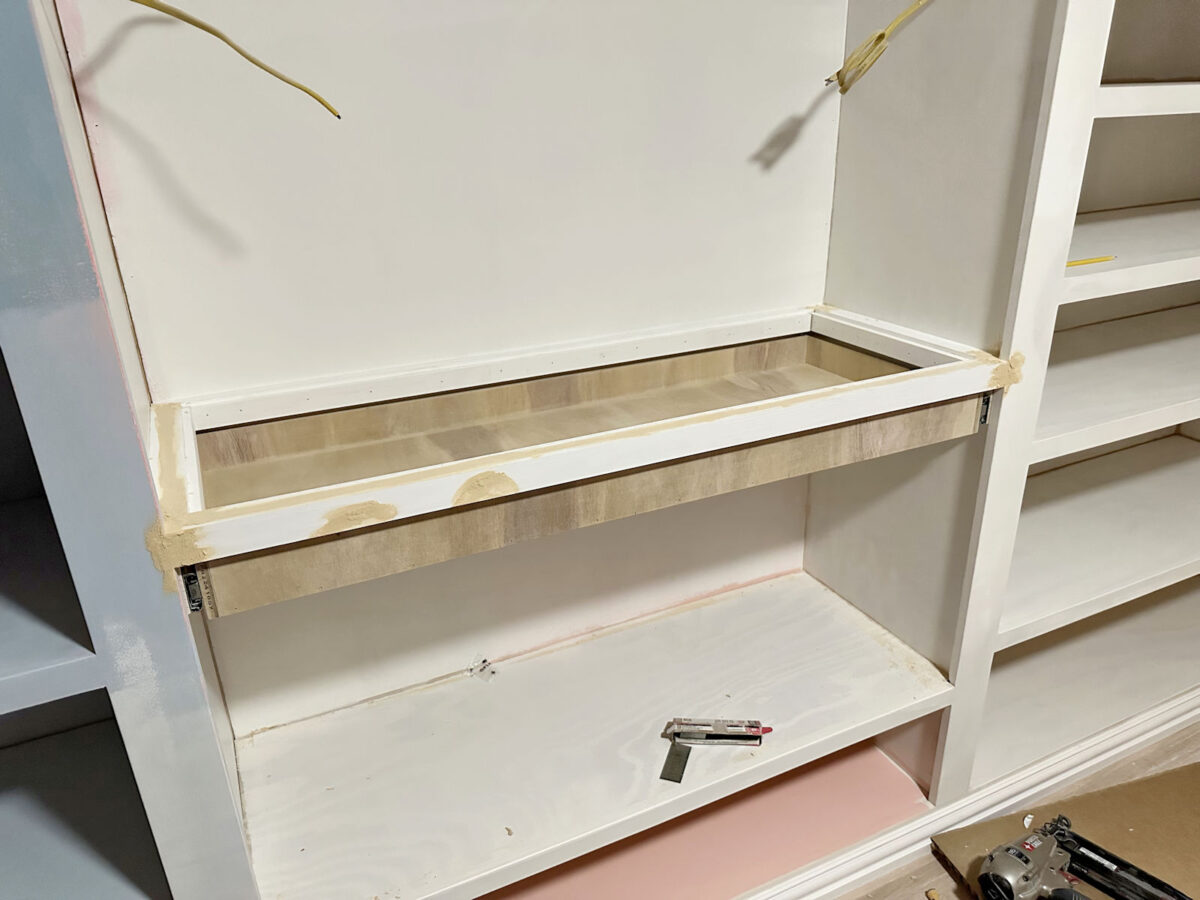
So let me show you how I built this jewelry organizer. I started by determining the height of the glass shelf, and I cut and nailed a 1″x2″ just behind the cabinet trim in that cabinet.

And then using more 1″x2″ lumber, I continued adding the frame around the sides and the back of the cabinets. To construct the entire frame, I used two layers of 1″x2″ lumber on the front, two layers of 1″x2″ lumber on each side, and just one 1″x2″ on the back of the cabinet. I nailed all of these in place using 16-gauge nails in my nail gun. And you can see that the second 1″x2″ piece on the front of the frame sat flush with the front trim on the cabinet.
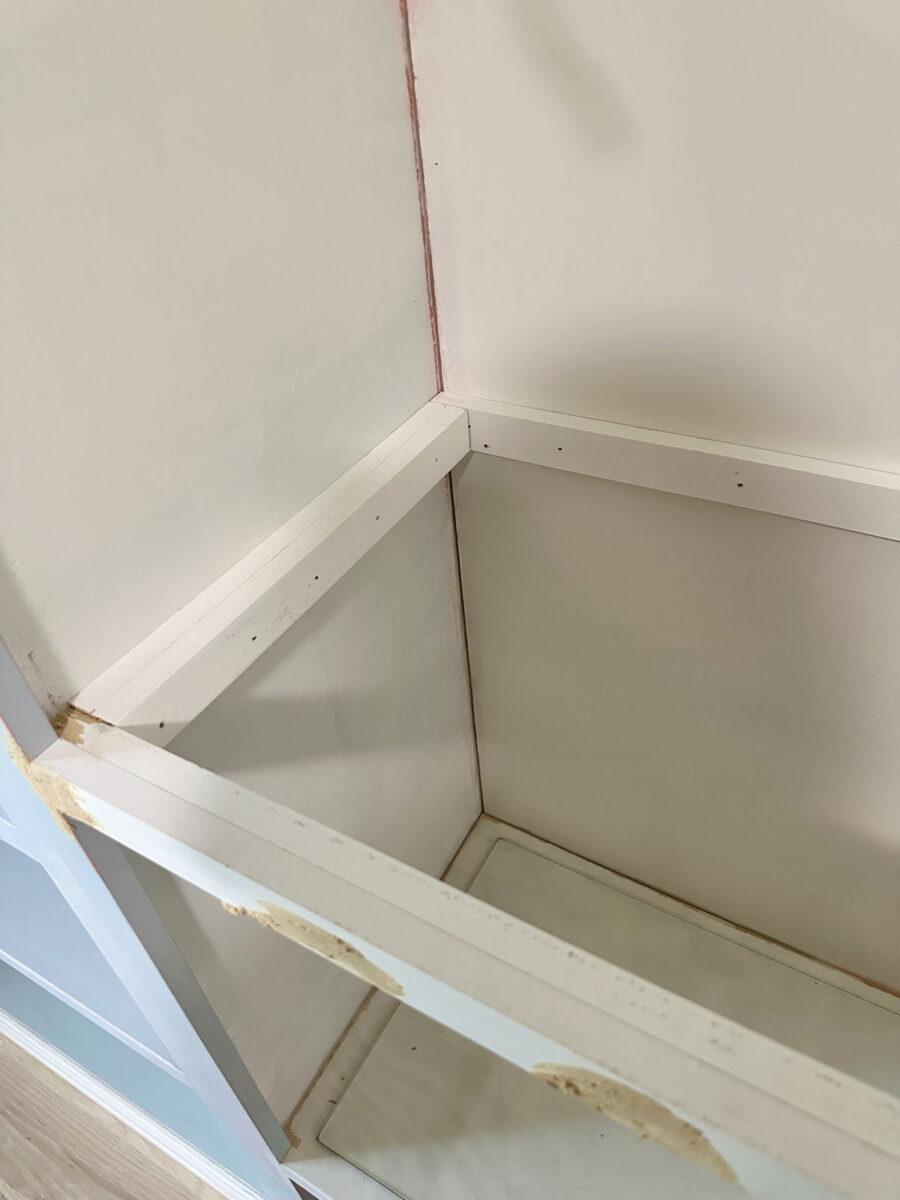
I got a little ahead of myself and started adding wood filler before I took the pictures, but you can still see the general construction.
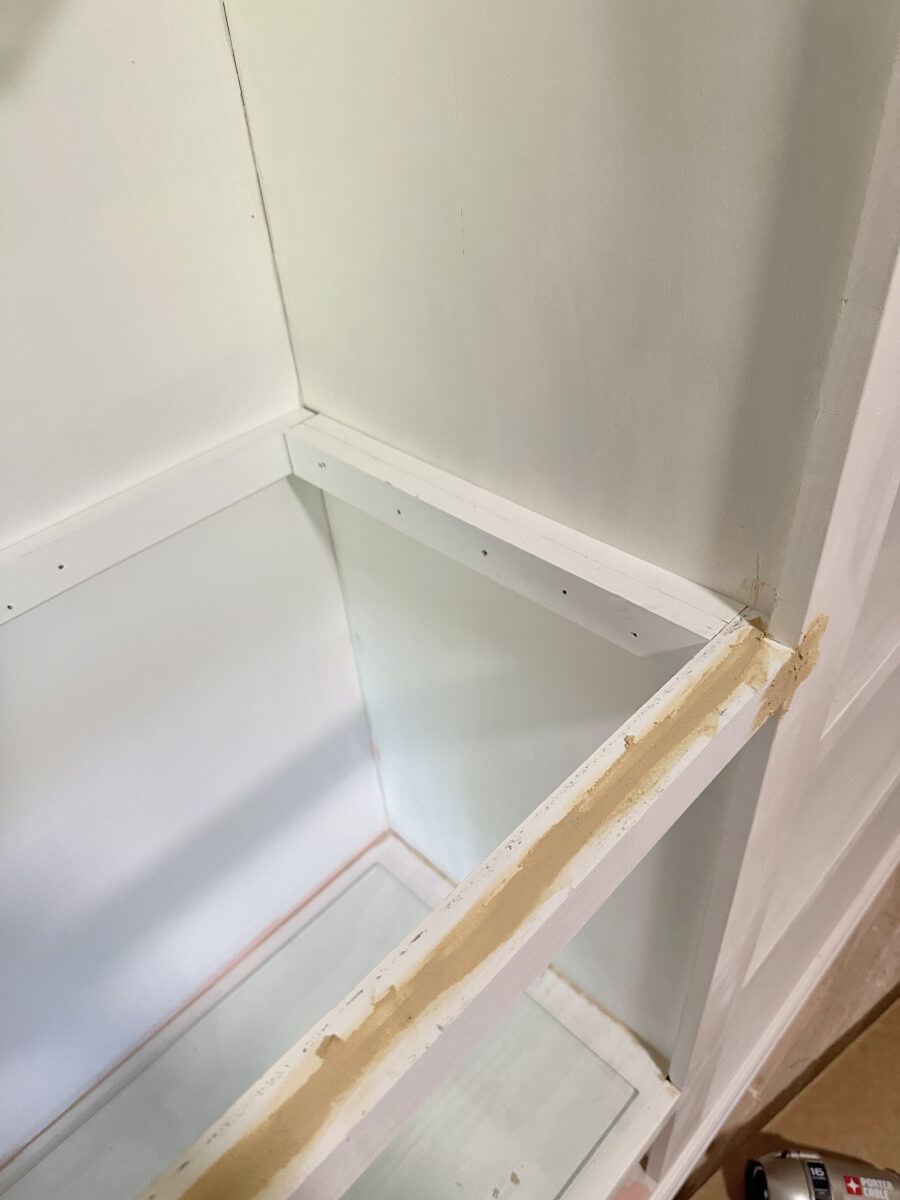
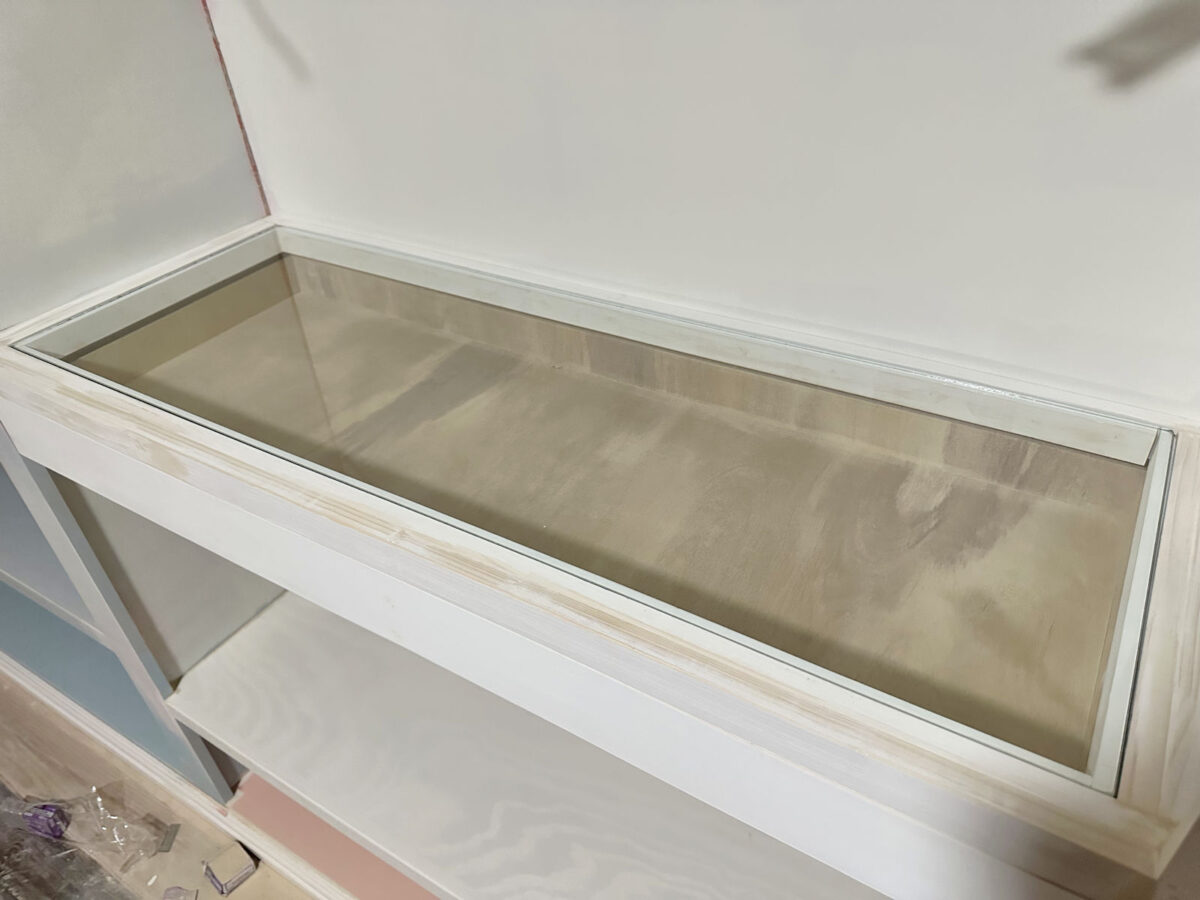
With that basic frame in place, here’s how it looked inside the cabinet. The opening inside that frame is the exact size of the glass that I ordered, plus about 1/8-inch in each direction so that I’d have 1/16-inch wiggle room on all four sides of the glass…
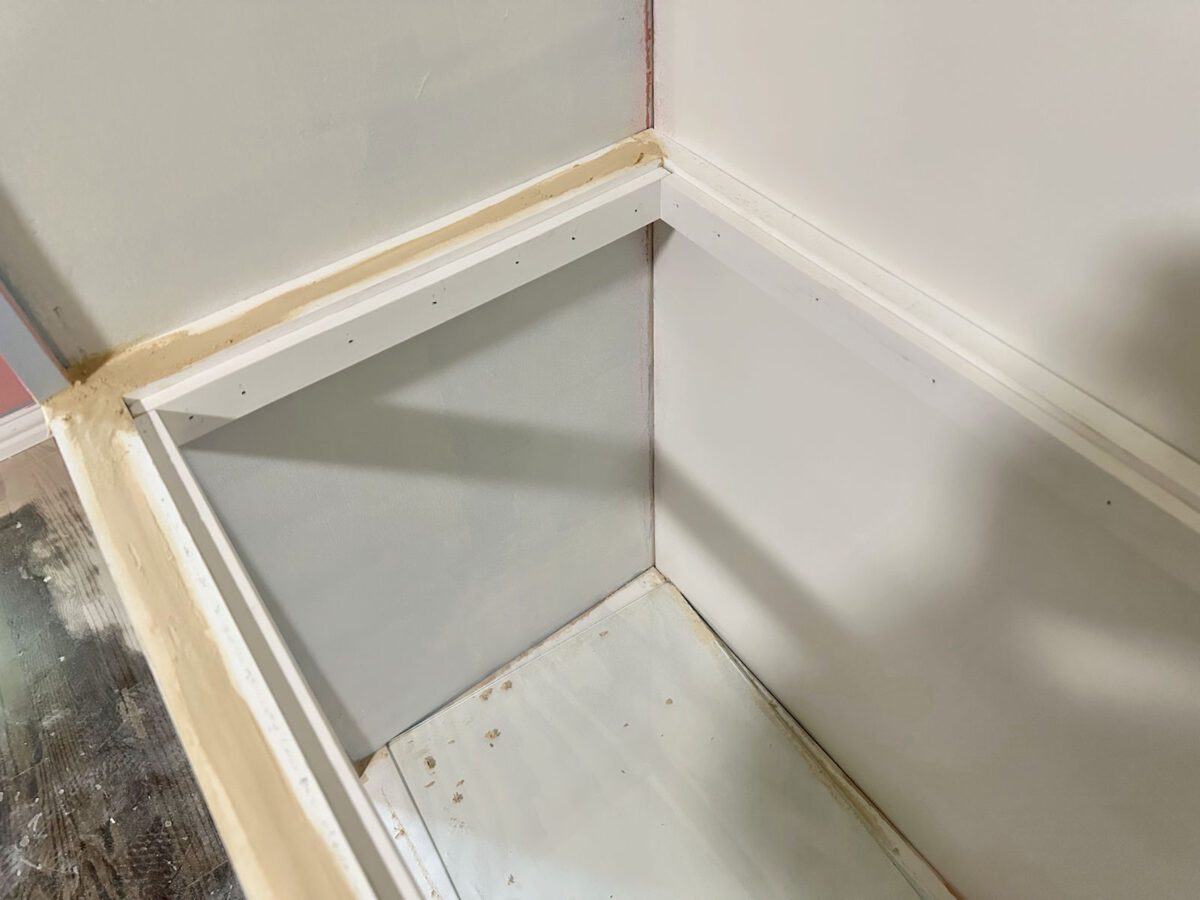
And then I needed to add the support for the glass. For this, I used my table saw to rip pieces of 1″x2″ lumber (which are actually 1.5 inches wide and not 2 inches wide) so that they were 1.25″ wide and 1/2″ thick. I cut those with my miter saw to the correct lengths to fit inside that frame, and then I attached them so that the bottom edges of those pieces were flush with the bottom edges of the frame pieces, leaving a 1/4-inch rabbet on top to support my 1/4-inch tempered glass.
Again, I got a little ahead of myself with the wood filler, but I think you can still see the overall construction. So again, on the front and sides, I had two layers of 1″x2″ lumber (which are actually 1.5 inches wide), and just inside those I attached one layer of strips ripped to 1.25″ x .5″.
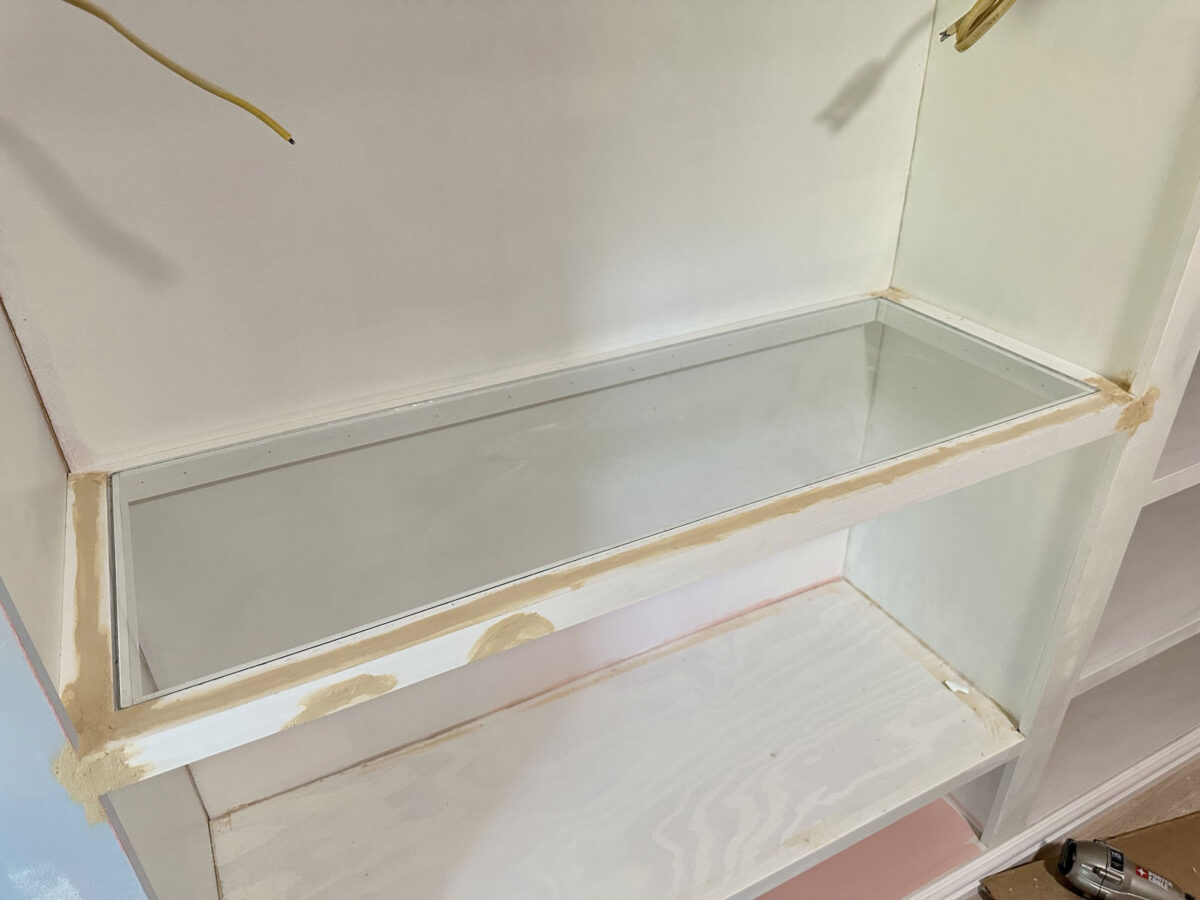
Once that frame with the rabbet was built, I tested the fit of the glass. It was perfect!
After testing the fit of the glass, I removed it for safe storage and built the drawer, which I made out of 1/2-inch plywood.
I didn’t take pictures of the process for building the drawer simply because I’ve built so many drawers in the past that you can refer back to if you need that info.
This is probably my best tutorial on building a drawer: How To Build A Small DIY Writing Desk With Drawer
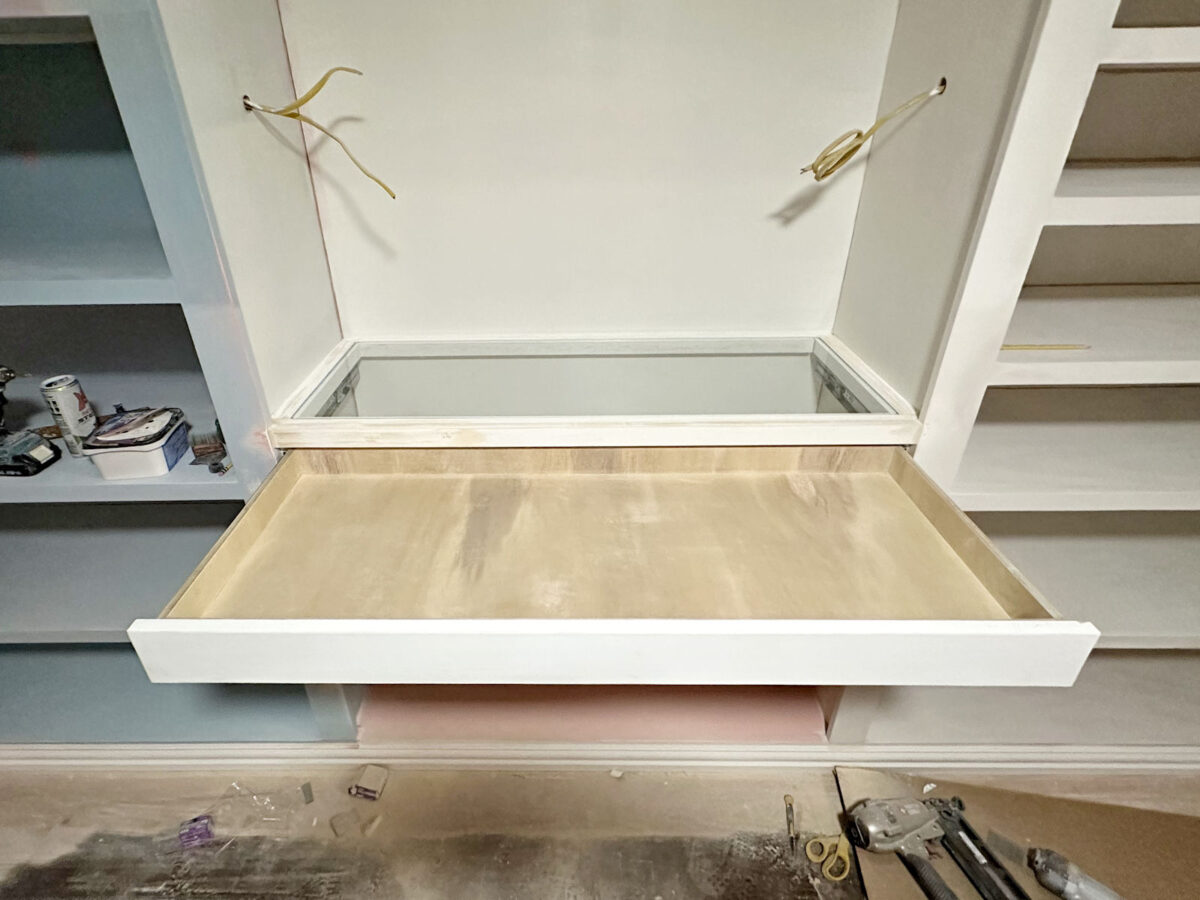
Before building the drawer box, I installed the drawer slides. To make sure that my drawer slides would clear the side trim on the cabinets, I first attached pieces of 1″x3″ lumber (which is actually 3/4″ x 2.5″) behind the front cabinet trim just below the glass countertop frame, nailed in place using 16-guage nails, and then I installed the drawer slides on top of those 1″x3″ pieces. Then I measured the distance between the drawer slides (that distance for this drawer was 42 5/8″), and I built my drawer to fit that width. So the outside dimensions of the finished drawer box is 42 5/8″ x 16″.
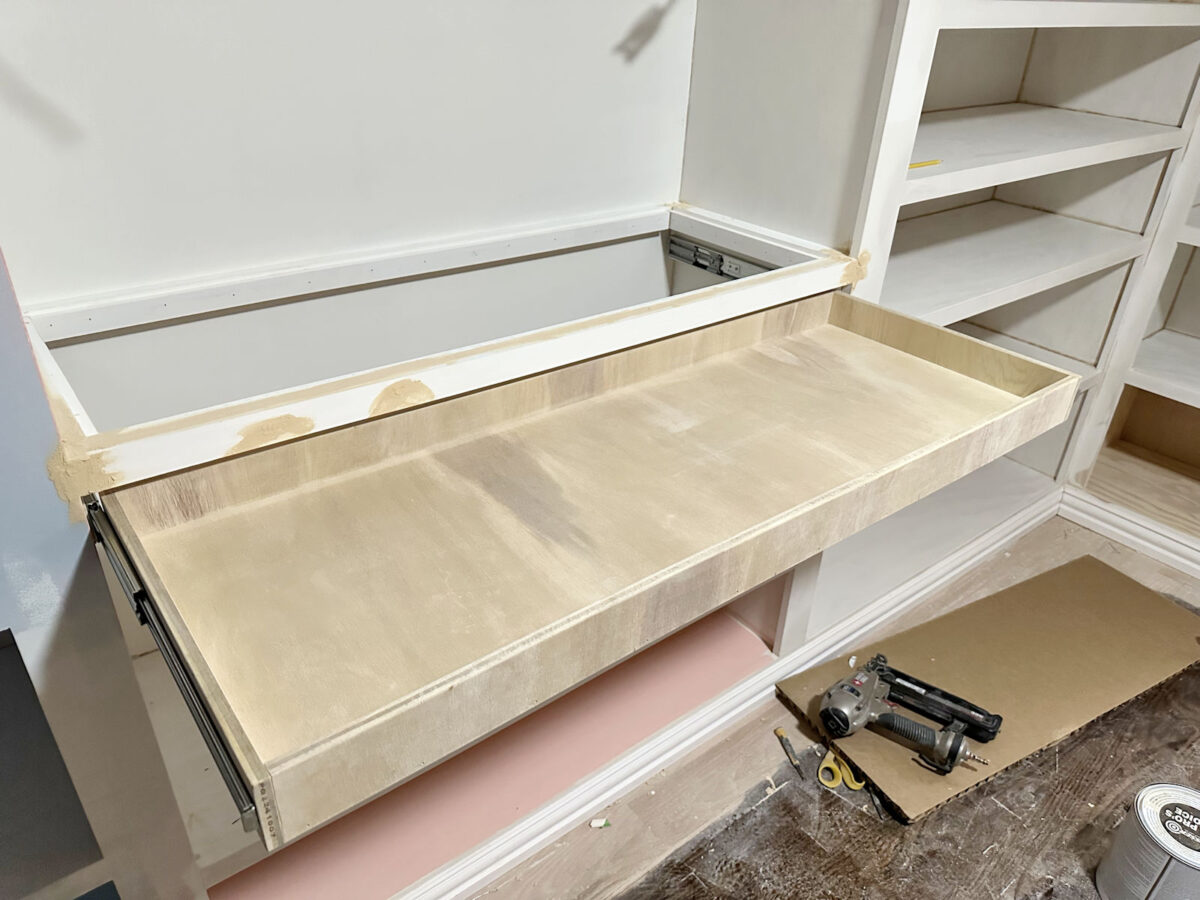
And finally, I cut a piece of 1″x4″ (actual size is 3/4″ x 3.5″) pre-primed lumber to use as the drawer front, and I attached it to the front of the drawer box, first tacking it into place using 18-gauge nails, and then screwing it to the drawer front using 1″ wood screws that are screwed through the inside of the drawer box and into the back of the drawer front to secure it into place.
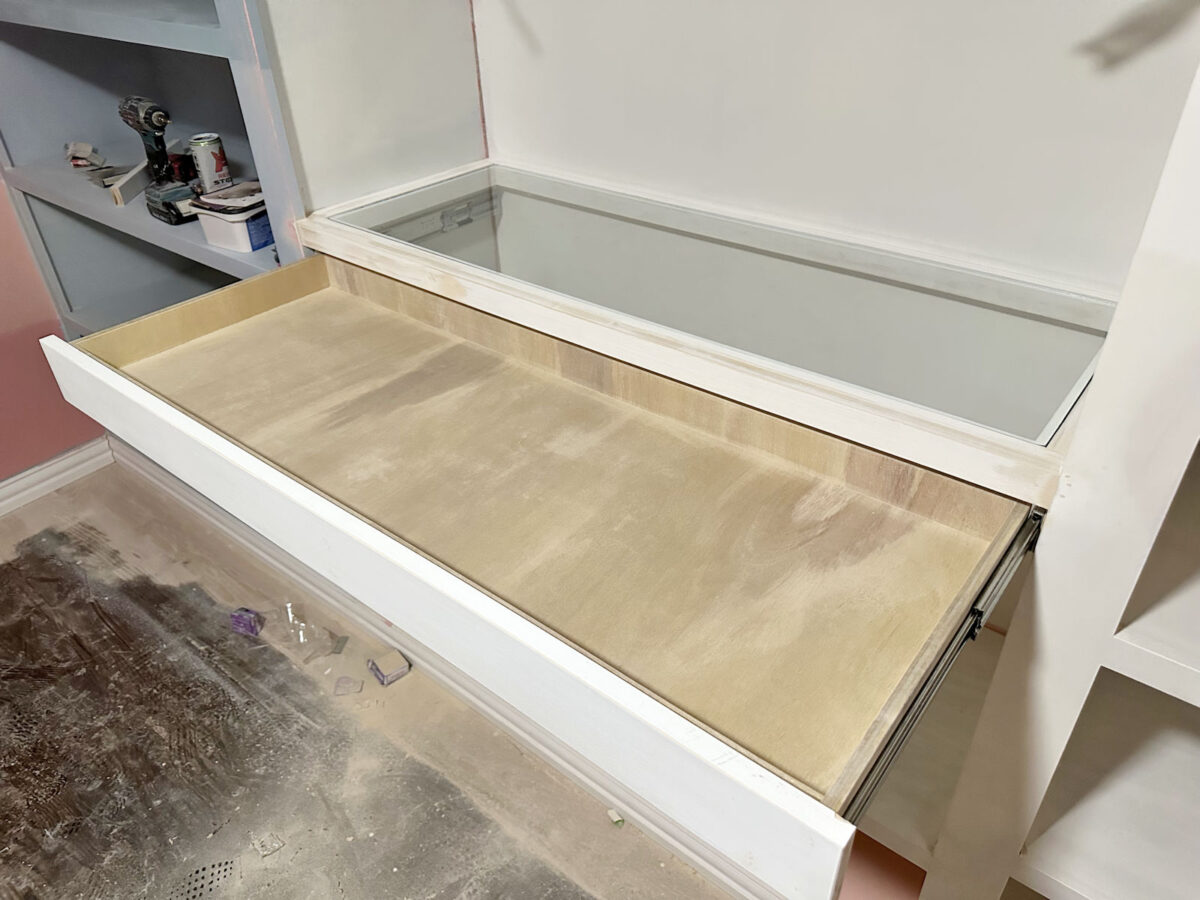
And with that, the basic build of my jewelry drawer with the glass countertop was finished!

I’m so proud of how this turned out. I have to admit that I was nervous about this project because I’ve never built anything like this before, and I knew it had to be just right so that it didn’t look like an obvious DIY project. But it turned out exactly as I envisioned it.
And, of course, it’ll look even better once everything is caulked and painted. I haven’t decided exactly how I want to customize my DIY drawer organizer yet. I know that most custom jewelry drawers are lined with velvet or something fancy like that, but I really don’t have the patience or the desire to spend days of my time covering tiny pieces of wood to create small velvet-lined compartments. It’s just not that important to me. So I’ve considered just lining the bottom of the drawer with velvet or velveteen or something like that (if I can even find a good coordinating color) and then painting the wood that makes up the small compartments in the same color.
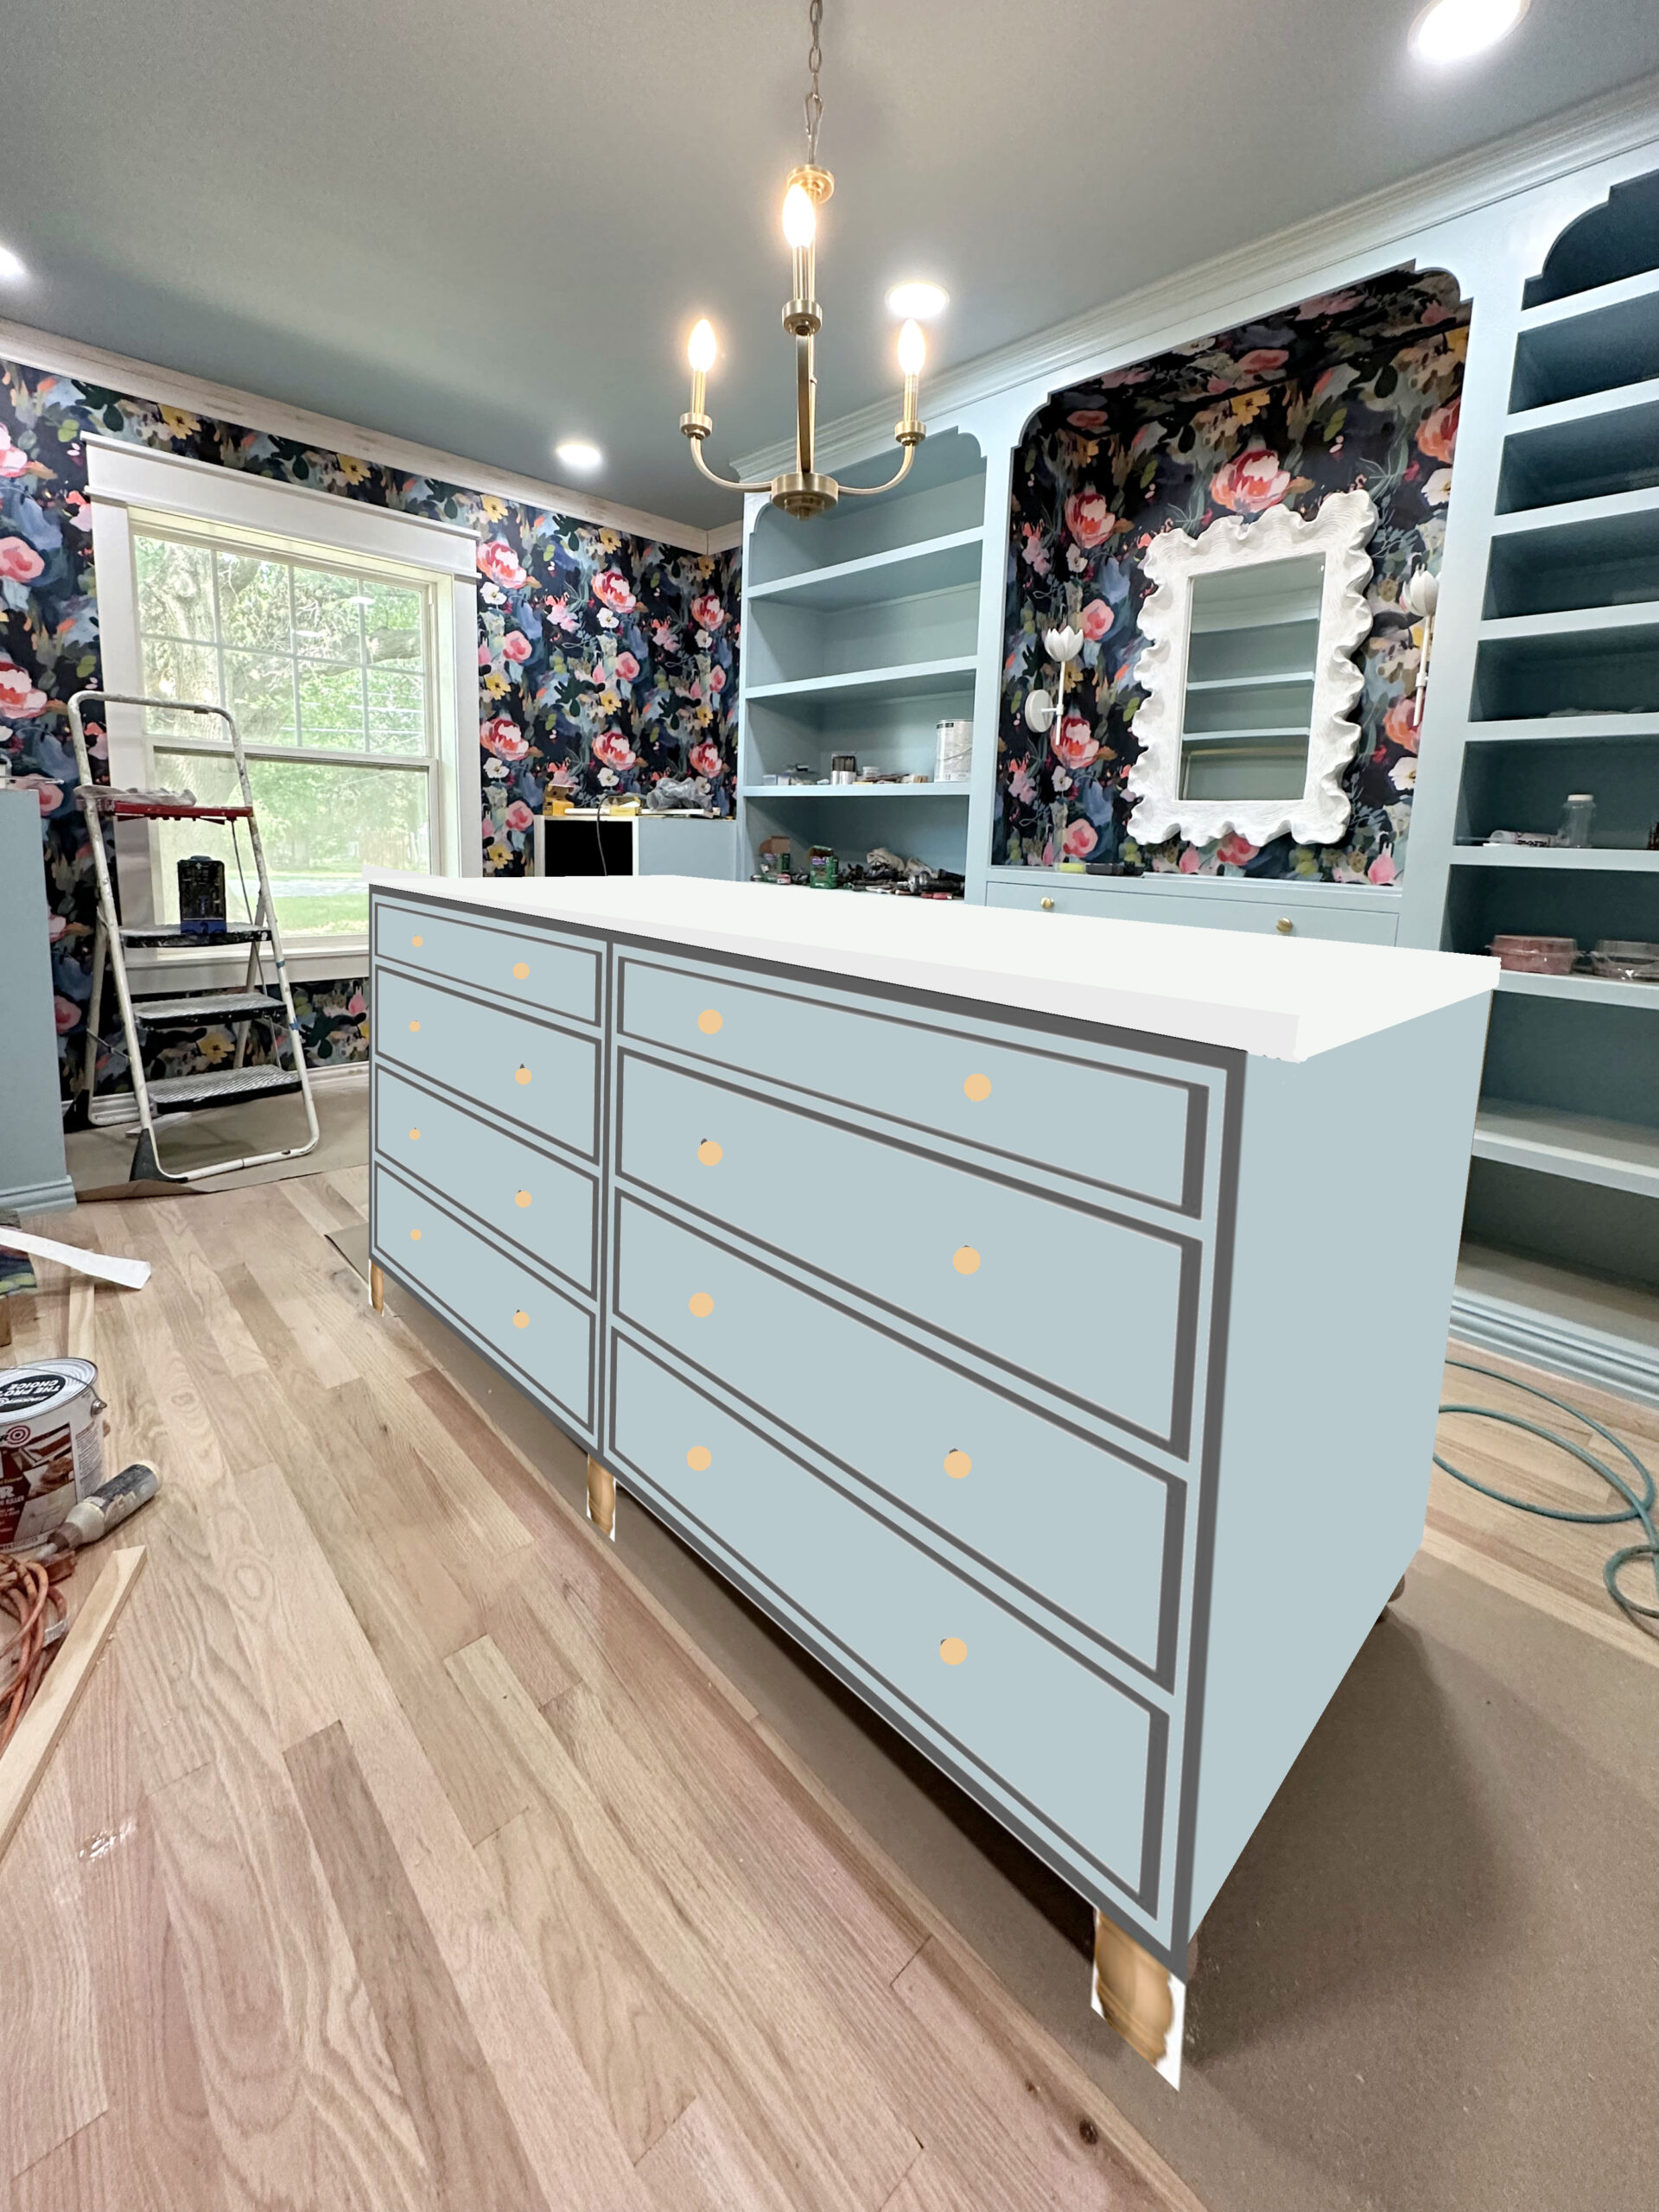
Or I could just paint the whole thing and forgo the fancy velvet altogether. If I paint it the whole thing, I thought it might be fun to paint it one of the corals that I tested out for the cabinets just to add a touch of a coordinating color to this area. After all, the section of cabinet just above this glass-top countertop will be wallpapered, so it might look great to bring that coral color in with this drawer.
I’m so excited about how this turned out. This project was actually so much easier than I thought it would be.
But I do think I need to add some trim to the drawer front just to make it obvious that it’s a drawer. Of course, adding drawer pulls will also make it obvious that it’s a drawer.
And now the final thing that I need to build to finish up my jewelry storage is the necklace storage that will go in the open section just below the jewelry drawer. I’m still trying to work out the details of that. I think I almost have it, but I’m not quite there yet.

And I also need to figure out the details of how I want to finish the inside of this DIY jewelry organizer — how many compartments, how many of each size, what color/finish, etc. But the hardest part is done.
The A2D Daily:

Addicted 2 Decorating is where I share my DIY and decorating journey as I remodel and decorate the 1948 fixer upper that my husband, Matt, and I bought in 2013. Matt has M.S. and is unable to do physical work, so I do the majority of the work on the house by myself. You can learn more about me here.


My vote is to line the bottom of the drawer with velvet. It will be so much more finished looking. I have a jewelry drawer lined with velvet and it’s a more luxurious look. Just my opinion. Your closet is gorgeous already!!!
Kristi, you are such a fantastic teacher! This was such a great little side priject for you, so glad it worked out the way you wanted. It’s looking amazing!
There’s a gaming table company I lurked for a while… I liked it because the table had a “vault” that stored the game/hobby and you could add the leaves on top to make it a dinner table. The table exterior and vault interior were the same finish except the floor of the vault had interchangeable felt. that looked very nice and was relatively easy to do. The vault had a bit of a groove/rabbit around the perimeter to tuck the edges of thick felt into. You could just grab some scrap fabric and wrap it on cardboard cut to fit the bottom. Or line it with paper you toss as it wears.
Hi Kristi! That jewelry drawer is fantastic! Instead of having to “line” all the compartments, you could just cut a piece of velvet or beading mat (in a coordinating color) to fit in the bottom of each compartment. That way you can still have the paint color, but the bottom is soft for the jewelry.
Wouldn’t 1/8″ on each side leave a 1/4″ gap instead of 1/16″?
I added 1/8″ in each direction (length and width) which gives me 1/16″ on all four sides of the glass.
Why not line the drawer with the wallpaper from the bedroom- grass cloth?
It’s awesome. I love it. I am showing it to my husband so we can do something like it, sans the glass. I say paint the interior or wallpaper it. The velvet is nice, but OMG does it collect the dust and is terribly hard to clean. Whereas wood, you can blow that out with the shop-vac. Make the drawer pulls with some of your jewelry making supplies, I think it would be sprinkles on the cupcake. Have you thought about lights??? Those strip lights you used in the water closet project I think would be perfect. I know you have the scones above, but perhaps as a nightlight. As you get older, you will come to appreciate the nightlight effect on everything and everywhere in your home.
Cheers to you and Matt!
Special touches like this really elevate the whole look. I love that you can see into the drawer. Instead of wood trim, maybe a metal gold strip.
I know Ikea has felted drawer inserts for jewelry – I wonder if you could use some of those inserts in your drawer? The dimensions might not line up perfectly, but it may be easier to shave/cut down than to build out and line from scratch?
Either way, it’s going to be beautiful!
So glad it worked out! I would line the drawer with a velvet of your choice, (glued and trimmed to fit) and purchase jewelry organizers as you already have! If you would like, you could anchor them to each other, although I would leave them free, to pick up if needed. For pulls, I am liking something like these:
Sorry! Don’t know what happened to the link, but they are called finger pulls, and are very unobtrusive, mounted to the top edge of the drawer and screwed in from the back!
How fun! What a great addition to your custom closet!
Hi Kristi … i love reading about the progress on your closet. A walk-in closet has always been a dream of mine and this has me fantasizing about turning one of my spare bedrooms into a closet (though mine would definitely be pink lol). One thing I thought of for myself is that I would definitely need some kind of seating. I never get dressed without sitting down at some point (socks, shoes, tights, or even just staring at my clothes for a bit before I decide what I wanna wear, haha ). I can’t remember / find if you talked anywhere about having seating?
I’ll have an upholstered bench and full-length mirror in the foyer.
Just stunning! This closet project is amazing Kristi. Great job! Blessings from NC
Kristi, I’m super impressed with how the glass top drawer turned out! I think painting the interior sides of the drawer with one of the rose/pink colors, or even either of your 2 wallpapers could be fun. I believe you will go ahead with building out the inserts, but maybe consider this idea. If you were to keep the trays you already have, it gives you the option to pull a tray out and place on top of island if you are trying on various bracelets, for example, without having to walk around the drawer that’s been pulled open. You could paint the black part of the trays to match however you’ve lined the drawer.
For the necklaces – could you build a pull out “bar” that consists of a frame with slats that the necklaces hang from. This allows you to see them from below from front to back (or side to side depending on which direction the slats go).
As always…..I’m impressed. 😄 The whole closet is fantastic, but this is the”jewelry” of the room. Love it!
For organization of rings and stud type earrings I do not like the typical jewelry trays which have pretty deep cubbies. I find it difficult to get two fingertips into that tiny space to pick up my piece. They make much shallower trays for “showcase display” which I like quite a lot. They are a flimsy plastic with a velvet type flocking. The flocking does not rub off, and when inserted into a jewelry box (or drawer), the flimsy nature of the plastic is not an issue. They look nice and have the functionality I was looking for. I’ve used the same ones for YEARS and they still look nice. Check out on Amazon “FindingKing 2 Black 50 Slot Pendant Jewelry Showcase Display Tray Inserts”. They have ones sized differently for bracelets and larger pieces too, but I don’t find those hard to grasp in the deeper style trays.
This is such a good idea with the glass top making it easier to see your pieces.
Genius!! If you don’t have a table saw, I bet square dowels would have worked too, right? This makes me want to build my own, but I have no place for it. 🙂
I would honestly not put on the trim… I think it looks so sleek now, and it matches the trim in the rest of the closet, right? Once there’s a drawer pull on, it will look fabulous! I’m voting for fancy knobs for that reason!
Also, I think a velvet lining would be stunning. It would really make it look luxurious and finished. The lint from the dryer is a concern, but it would be a shame to go to all of this work and just leave a painted bottom in the drawer!! A coordinating coral velvet, perhaps? It can always be the last thing in the room if you have to wait on delivery, since the drawer is already built now. 🙂
Thanks for sharing!
Just wondering how you are doing the necklaces? Will they be on a pull out type thing to be able to look for the one you want…kind of like what some tie holders are like?
It will be a work of art inside your closet! So much color and so beautiful. Looking forward to more!
You are the bomb!!!
Amazing as always! Thanks so much for the daily updates – loving your work and learning so much.
Consider no pull on your drawer – IMHO
– it looks so streamlined – no other pulls/handles in the closet
– nothing annoying to catch clothes / baskets of washing on as you pass by
– so long as it’s easy to just pull from the bottom – which it looks like it is?
– kinda a ‘secret drawer’ vibe 🙂
much love to you xx
I turned an antique dresser drawer with a curved front into a jewelry organizer. I used foam board, aerosol glue, and a stretch velour since I could not find stretch velvet. I started by cutting notches into the foam board using a knife to create interlocking slots (one piece goes up and the other down). After dry fitting, I covered the boards with the fabric, used scissors to trim the fabric over the slots, then put the whole thing back together in the drawer. It looks great, has lasted over 20 years, and has done no permanent damage to the dresser.
Several Etsy shops offer custom size jewelry organizers that can be made to the exact dimensions to fit your drawer. You get to choose the size and types of dividers, and they offer many choices of velvet colors too. They’re pricey, though.
I didn’t look on Etsy yet, but I did find another online store that customized drawer inserts for jewelry. I stopped designing one for my drawer when the price exceeded $500 and I still wasn’t through adding compartments. 😒
Wow! I found your post looking for jewelry organizing ideas. Love, love, loveeee your closet, and that jewelry organizer is awesome.