DIY Flower Chandelier — Finished!
The one project I did during my 11-day break was finishing the chandelier for the closet. I absolutely love how it turned out, but I so wish that each of you could see it in person. I have a very hard time capturing the amazingness in a photo because it kind of blends in with the background in photos, no matter what angle I use to take the picture. But in person, it doesn’t blend in like that. But photos are my only option, so let’s get to it.
If you’ve missed any previous posts about this project, you can find all of the posts here: DIY closet flower chandelier — All Posts
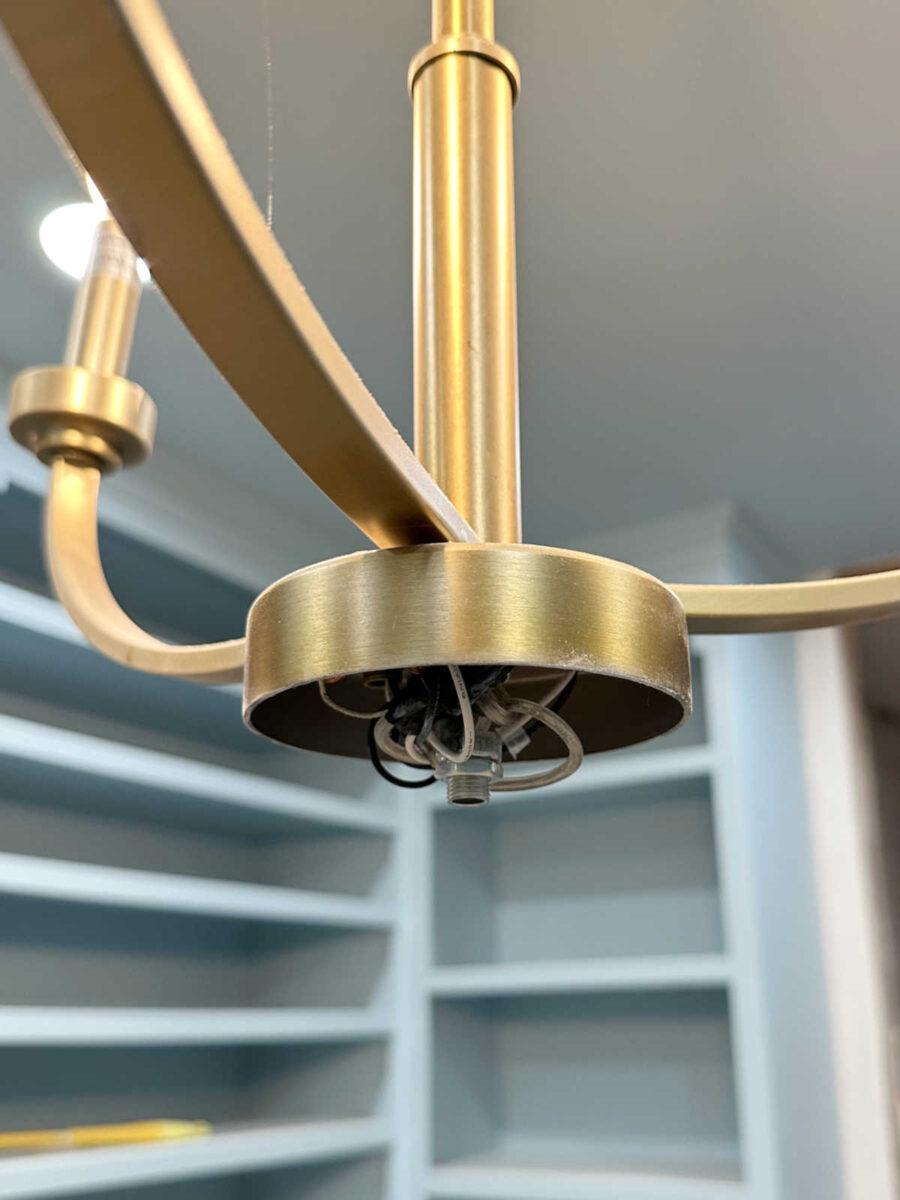
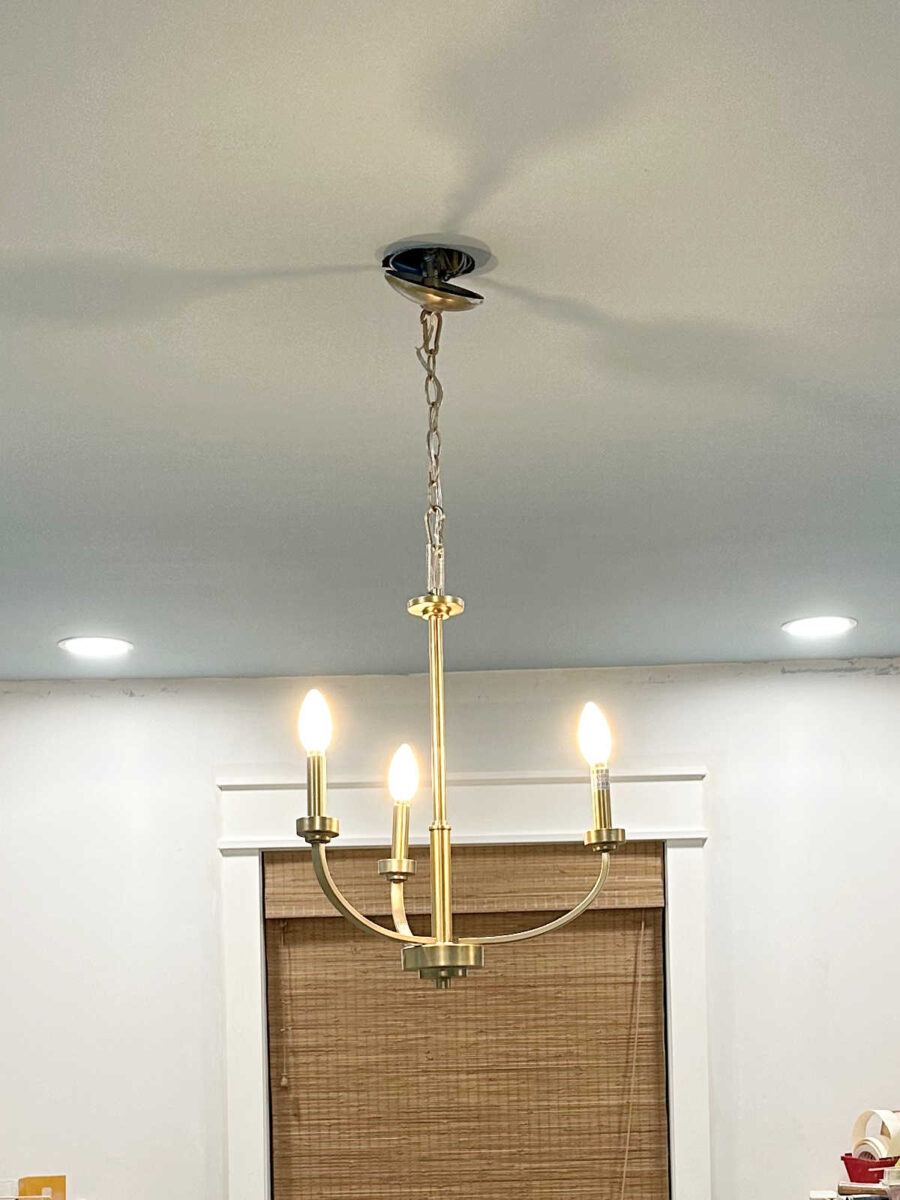
First, let me remind you how this chandelier started out. It was a simple three-arm chandelier, which you can see here.
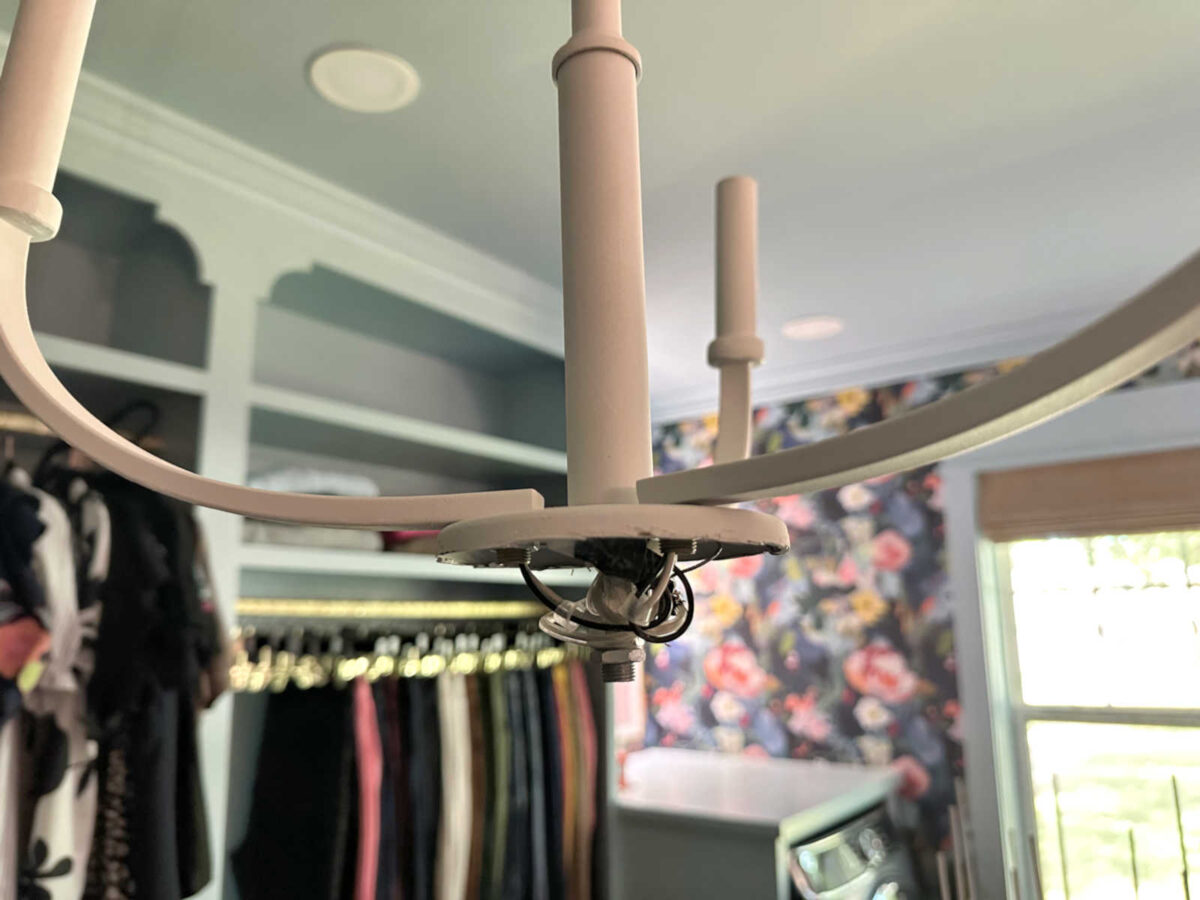
The last time I showed y’all the progress, I had finished the base with all of the “stems” and had painted everything white.

One very challenging thing I had to do was to trim the metal piece around the bottom so that it wasn’t so tall. Here’s what it looked like originally.
But since I had filled up a lot of the bottom metal cap with JB Weld to hold the “stems” in place, there was no room for that tall metal piece to fit into the bottom metal cap anymore.
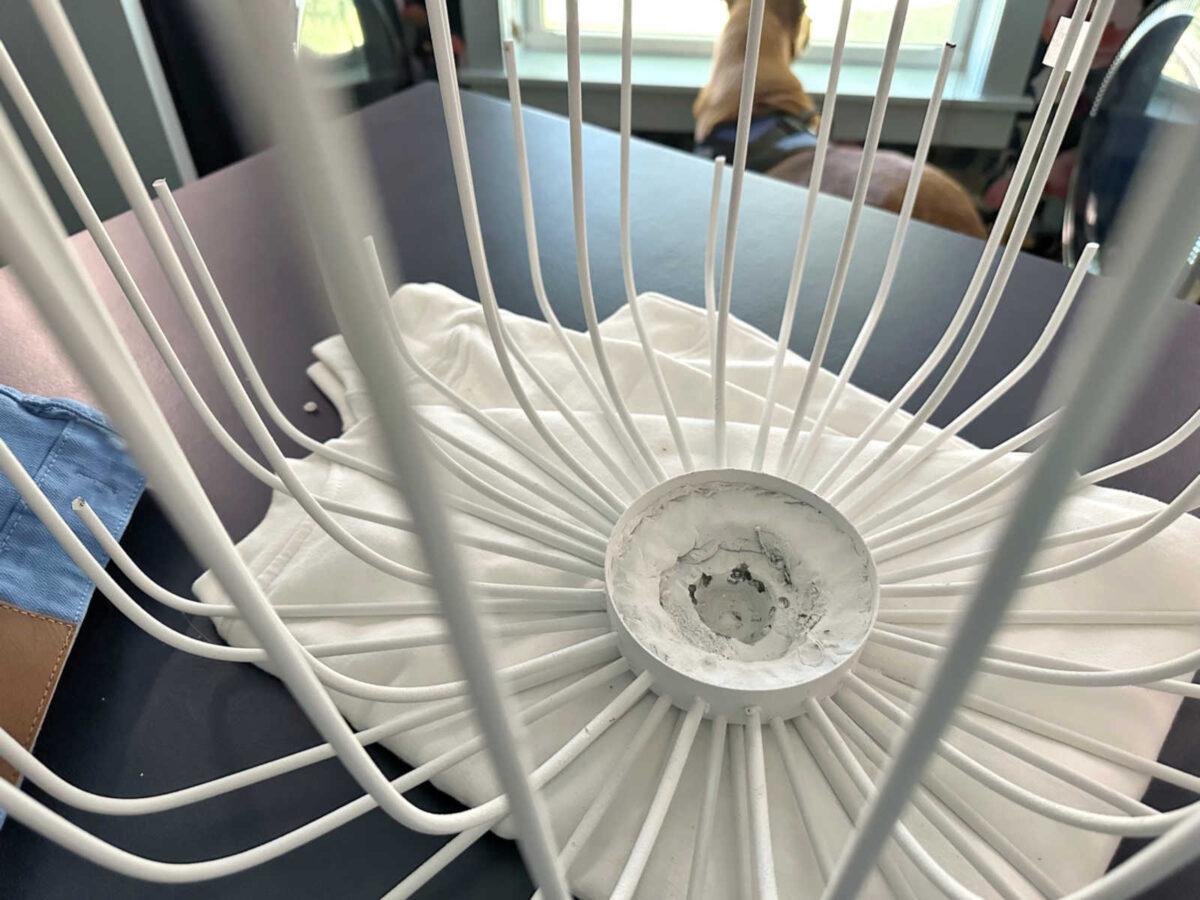
So a lot of it had to be trimmed off. I’m not going to lie. This was challenging. I tried a couple of different methods first. The metal was too thick for a hacksaw. And a handheld grinder was too hard to control to get a relatively accurate cut all the way around. So I ended up using my miter saw. It destroyed my blade, but it got the job done. And once this piece was cut shorter, the two pieces fit together perfectly.
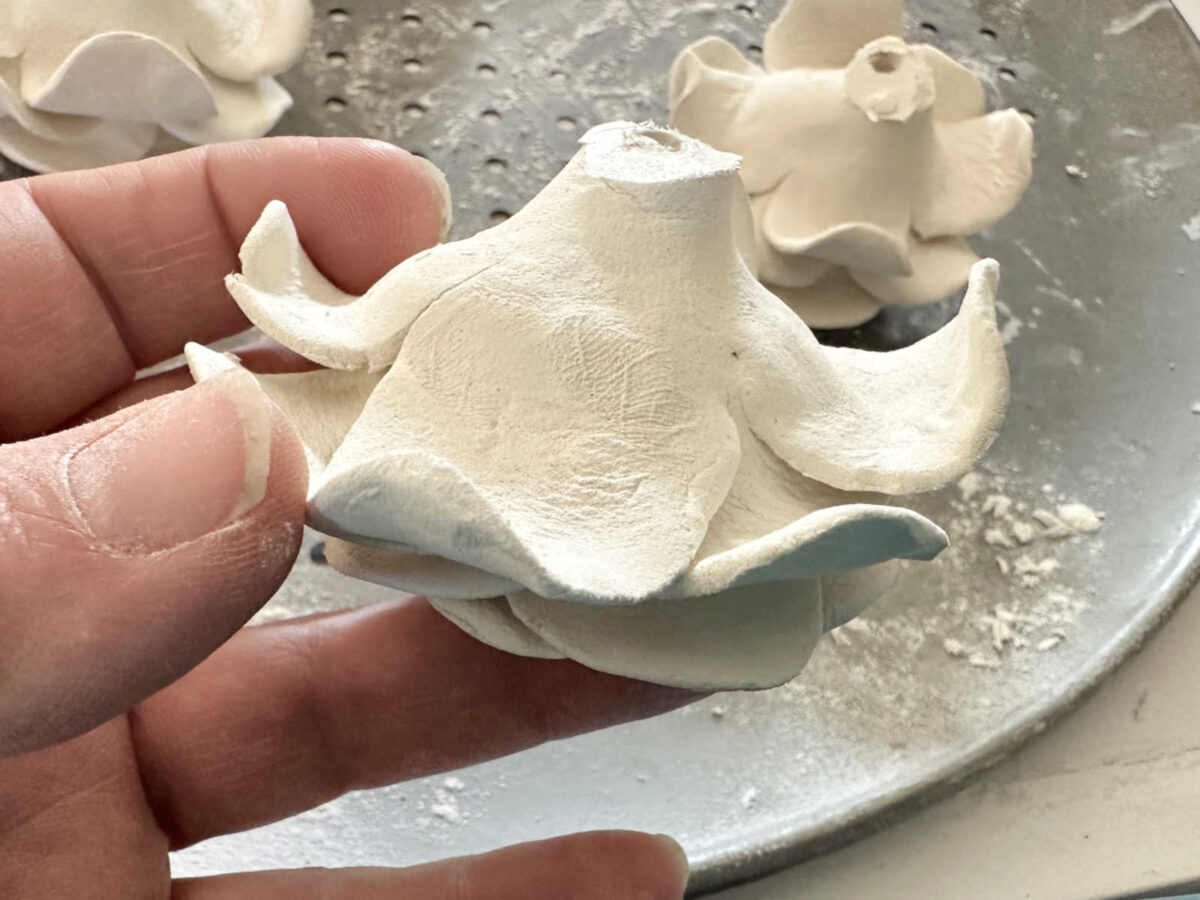
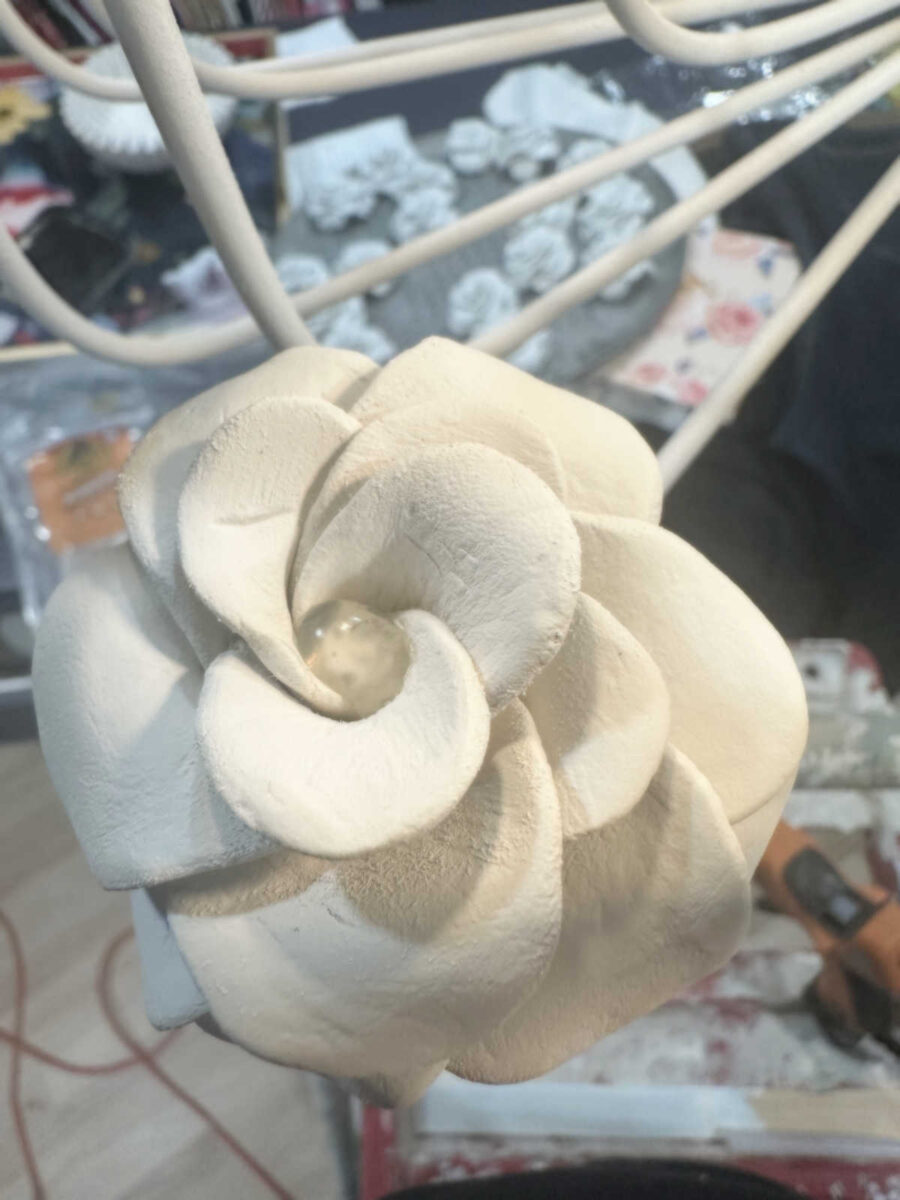
Then I had to finish prepping the flowers. When they were dry, this is what the bottoms of the flowers looked like. This wasn’t pretty.
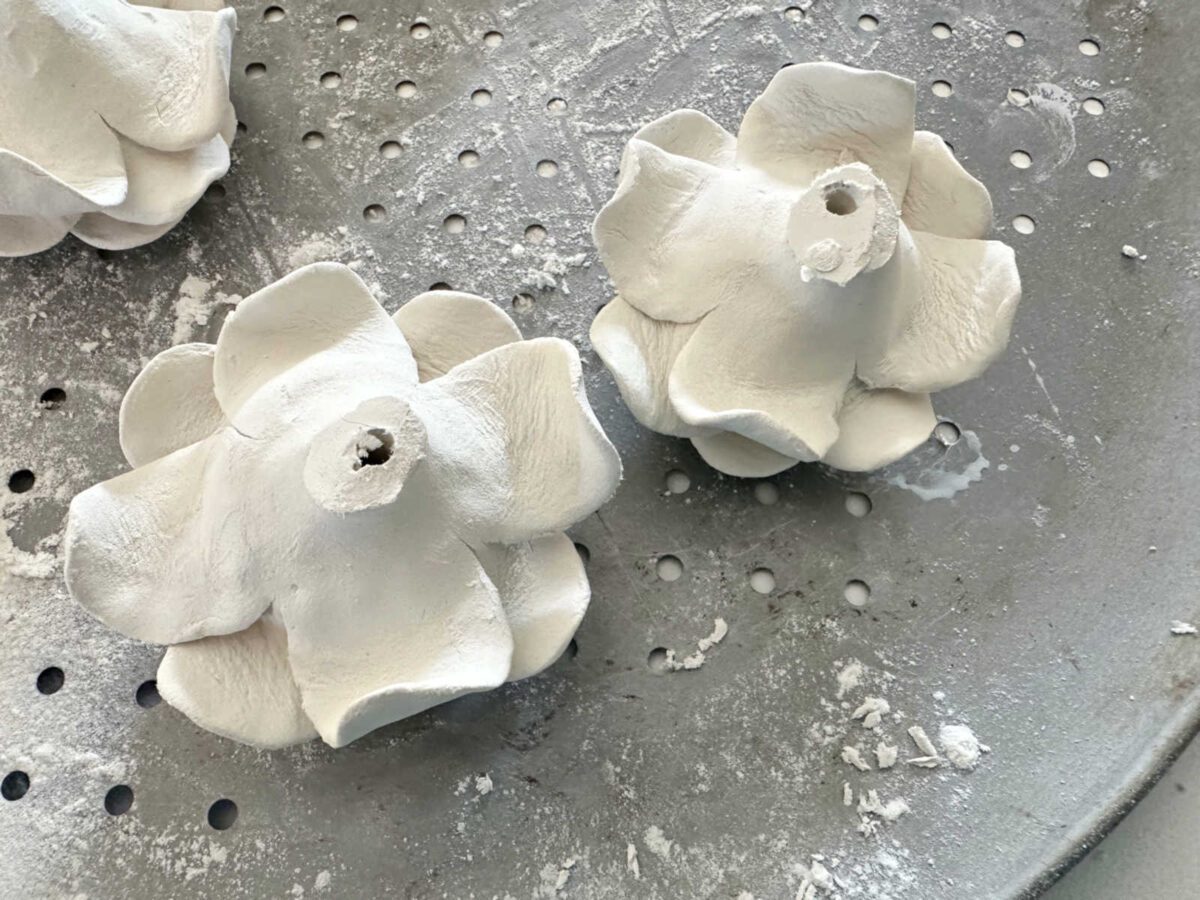
So I needed to remove this flat base on each flower.
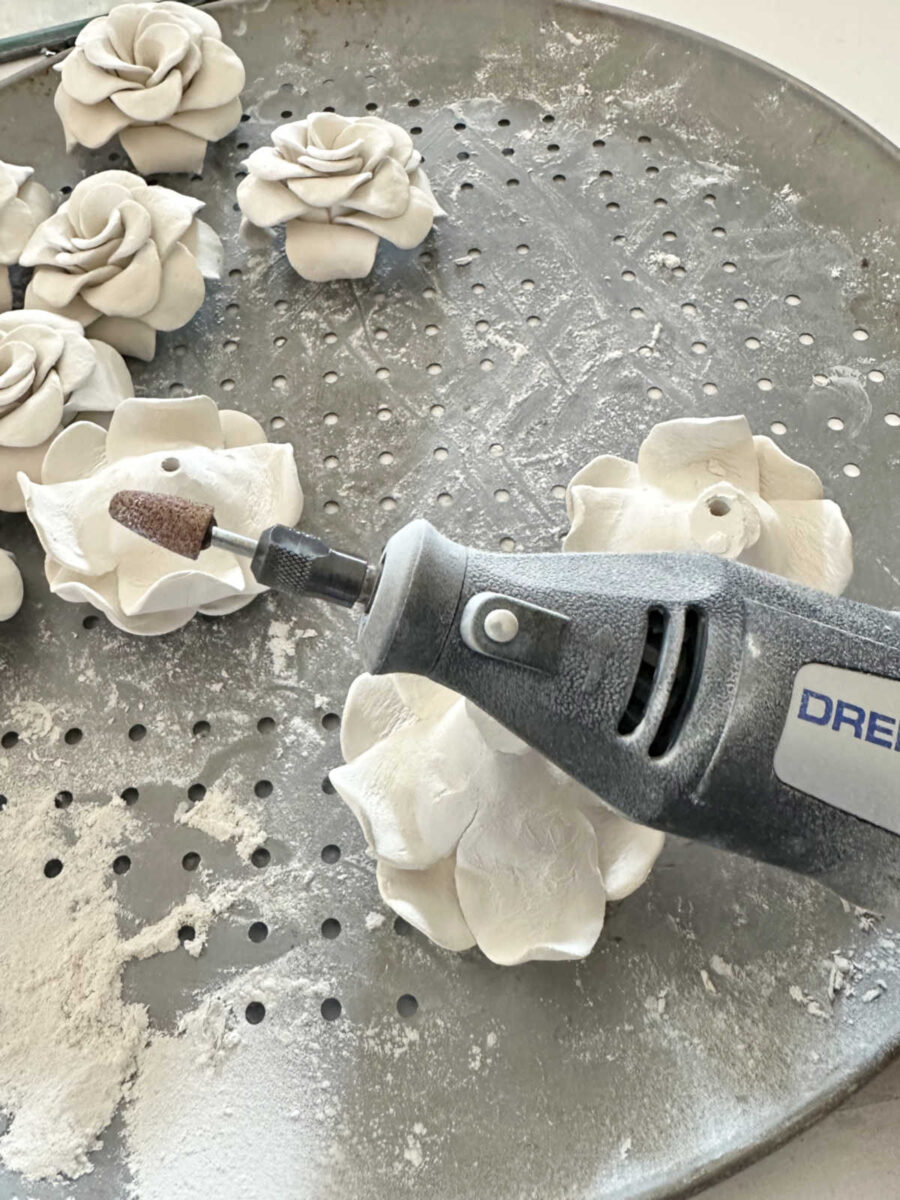
I started out sanding them by hand using 100-grit sandpaper but quickly realized that would take way too long to get through all 48 flowers. So I ended up using my Dremel with this little sanding/grinding attachment. It made very quick work of removing those flat bases from the clay flowers.
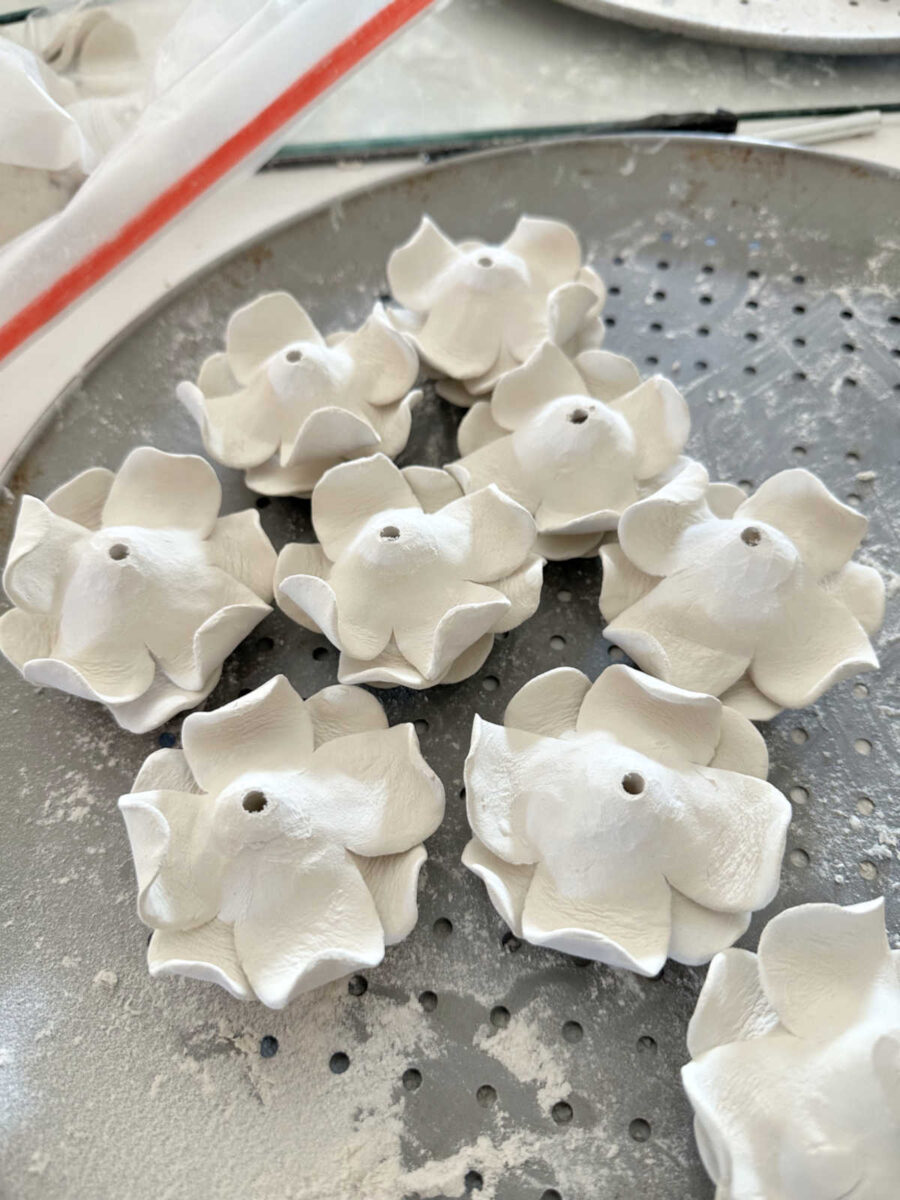
And here’s what they looked like once that flat base was rounded off. Much better.
To attach the flowers to the stems on the chandelier, I put the stem through the hole I had drilled all the way through the flower, positioned the flower where I wanted it, and then filled the hole on top with a bit of hot glue.
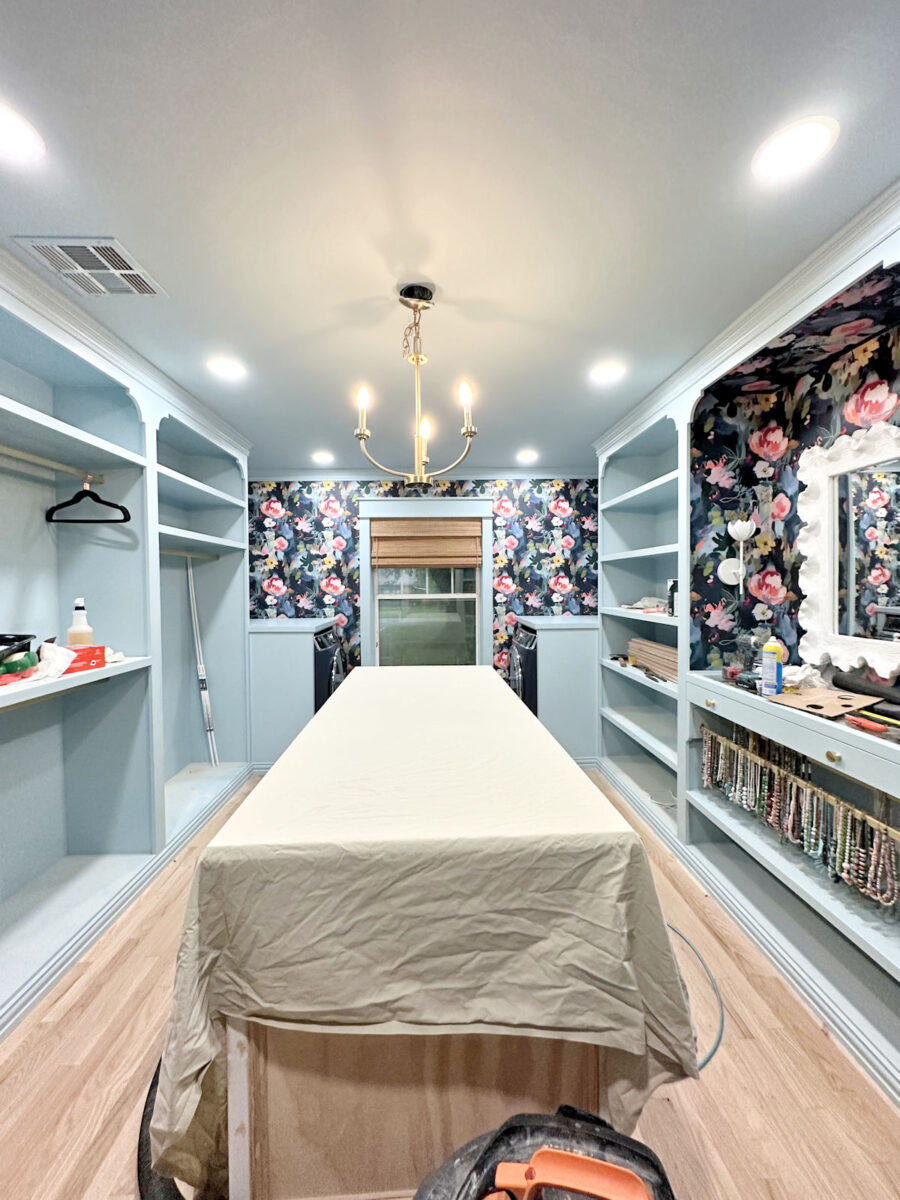
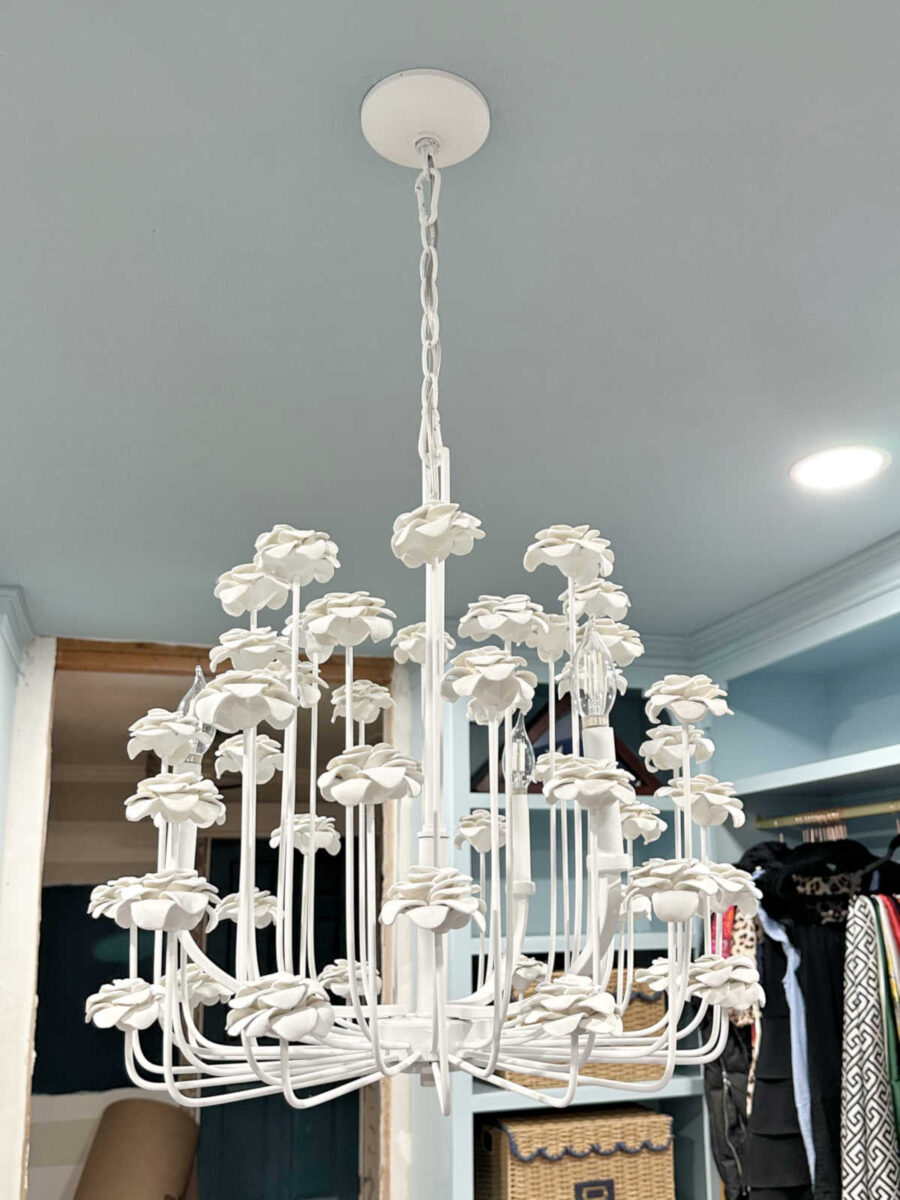
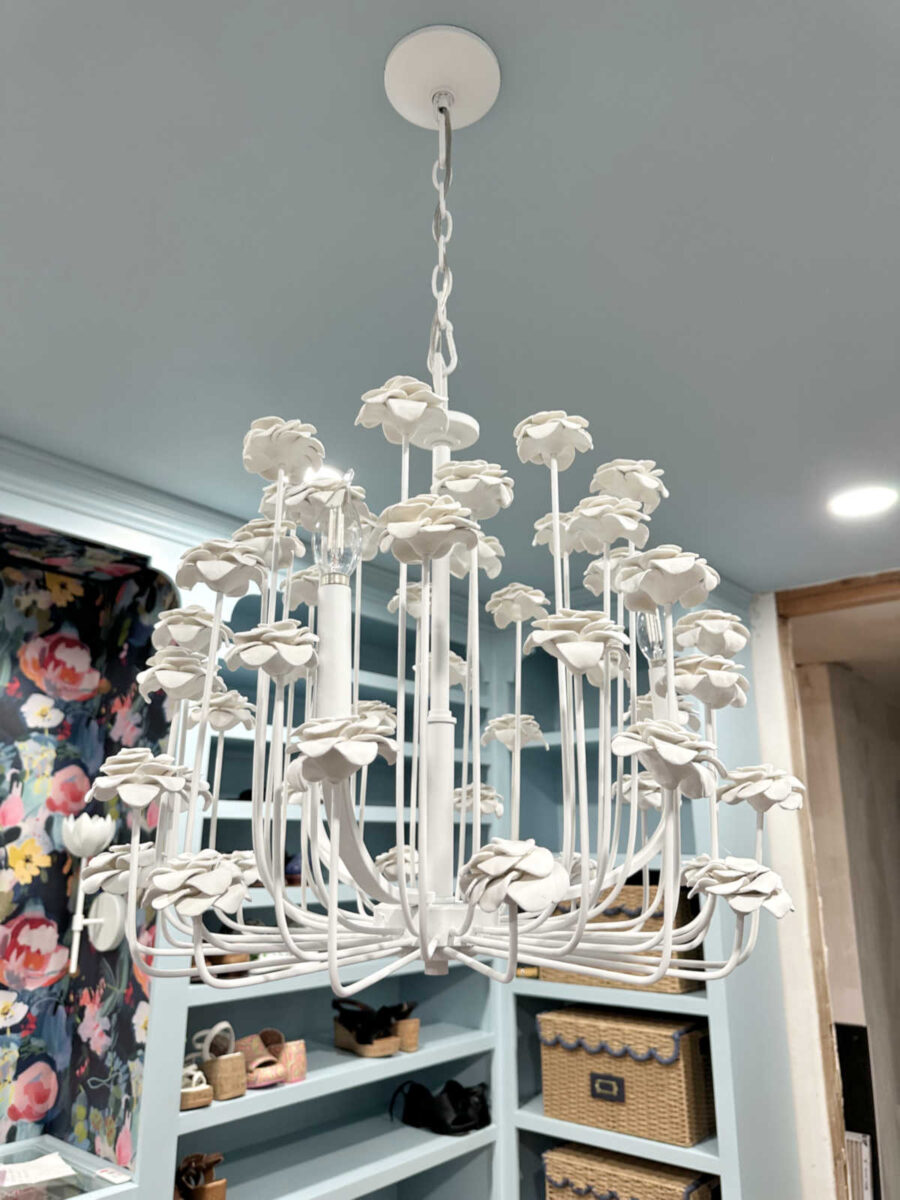
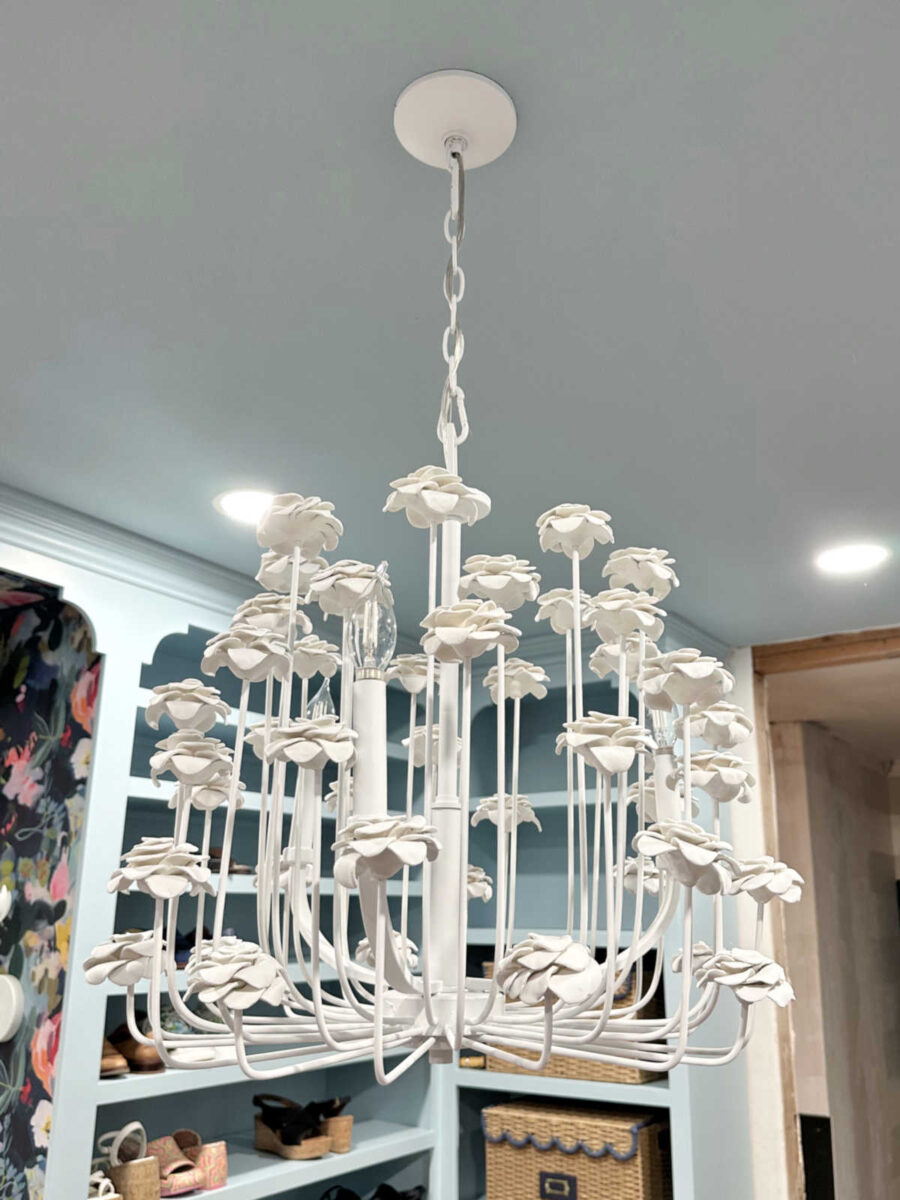
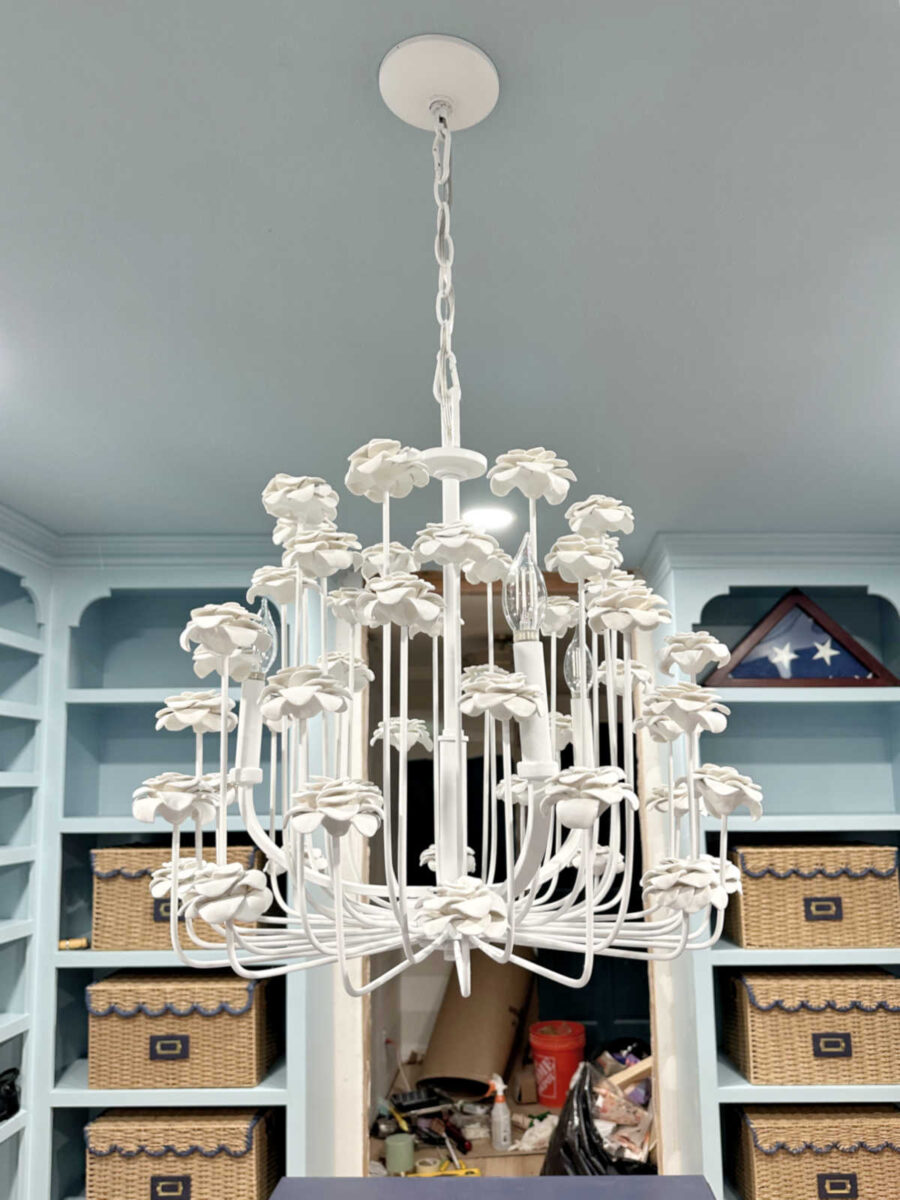
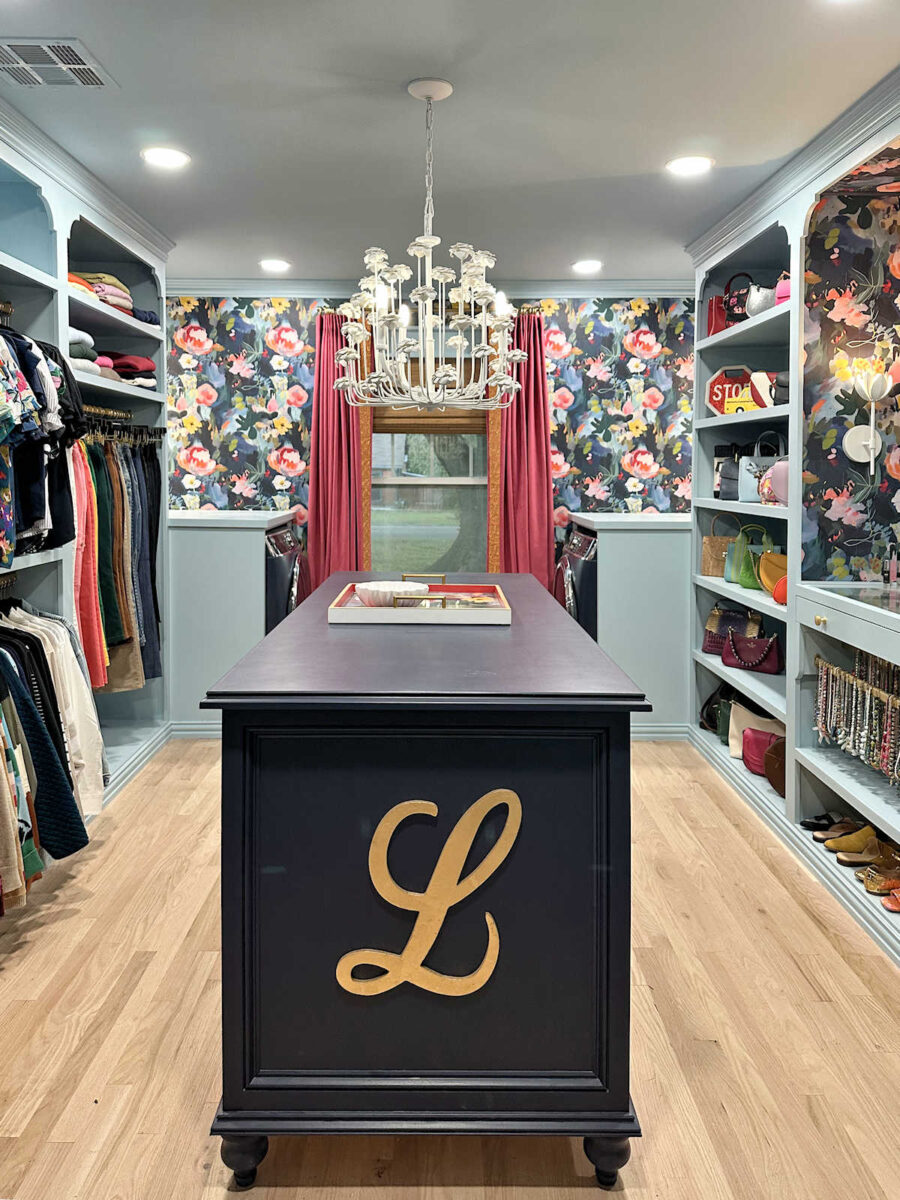
And here’s the finished chandelier! It has bulbs in it, but I unscrewed them because they’re too bright and clear. I wanted frosted 25-watt equivalent daylight LED bulbs, and those were impossible to find locally. I ended up having to order them on Amazon, and I won’t have them until tomorrow. So for now, I’ve unscrewed these bright, clear bulbs.
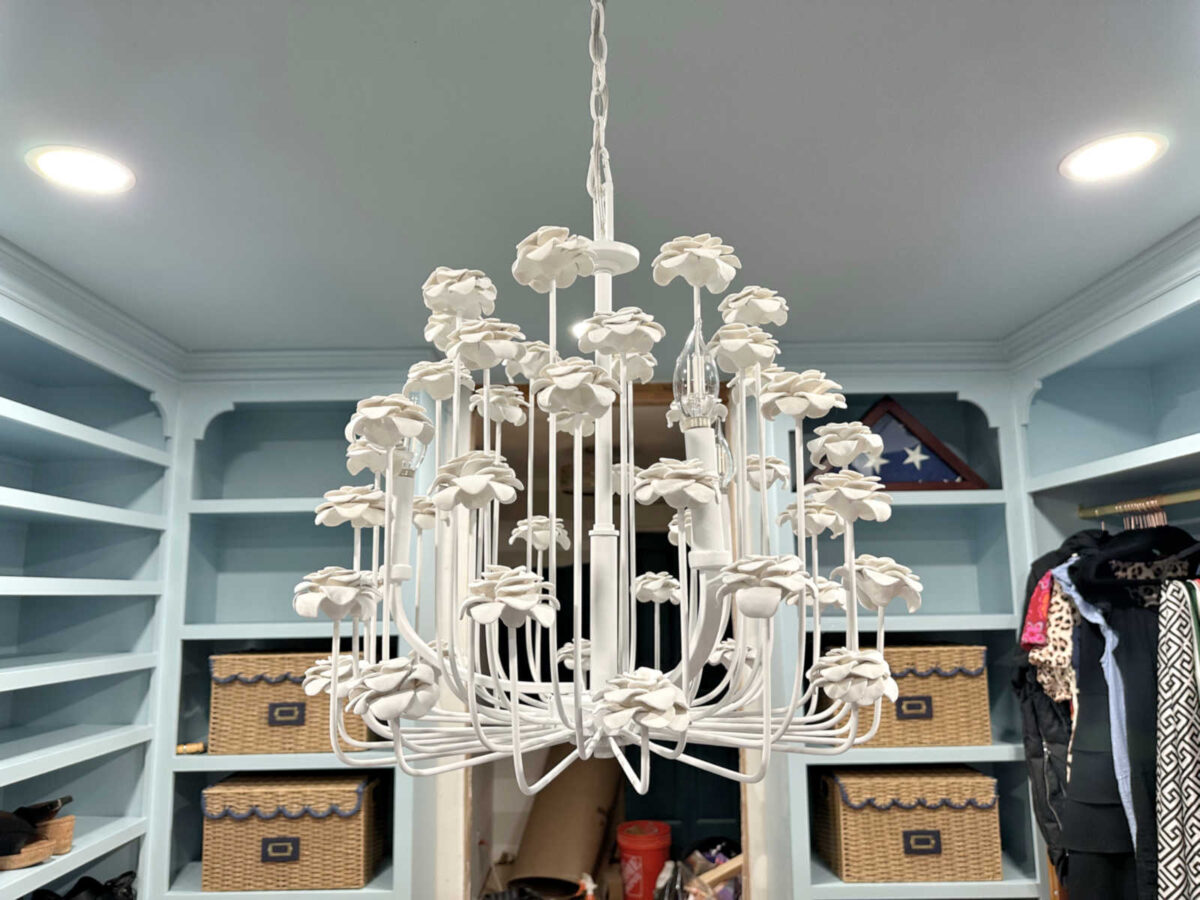
I am so pleased with how this turned out. I just wish y’all could see it in person!
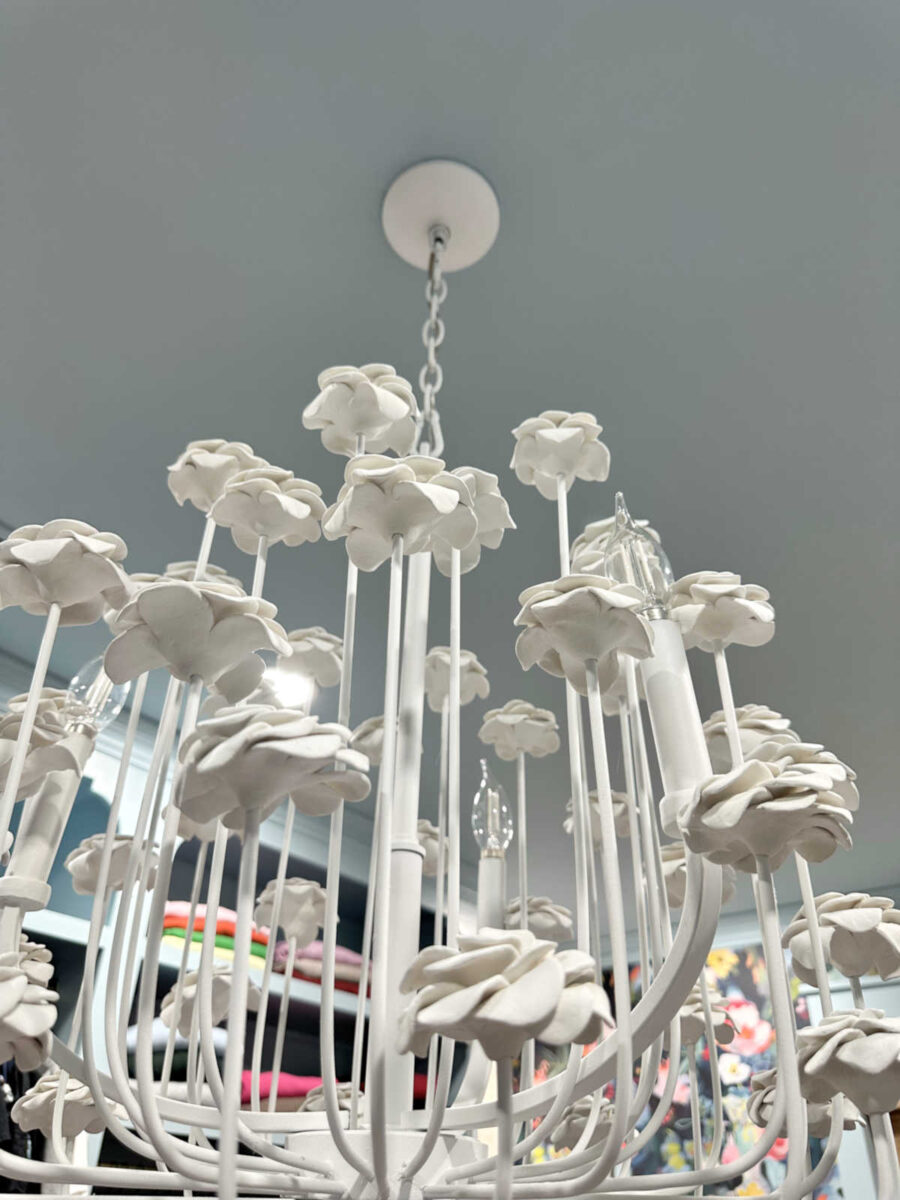
A few people had been concerned about the flowers losing their impact because the chandelier would be seen from underneath and not from the top. It is true that you can’t see the full prettiness of the flowers from above, but I also don’t stand underneath the chandelier because the island is there. This is the closest I get to the chandelier, and I can definitely still tell that those are flowers.
And I hung it as low as I could get away with (60 inches from the floor, which is the lowest that a dining room chandelier should hang with an 8-foot ceiling) so that more details of the flowers could be seen. And I’m so short that 60 inches above the floor, hanging over an island, is plenty high without it being in my way.
But I do think that the flowers are pretty, even from the underneath/beside the island view. And I think they’re still very obviously flowers.
So just a quick review. This was my inspiration for my DIY flower chandelier…

And here’s a before and after of the chandelier I started with and what I created with it.
I’d estimate that this chandelier ended up costing me about $275. That’s quite a savings over my inspiration chandelier price of $2575!
More About My Walk-In Closet/Laundry Room

see all walk-in closet/laundry
room diy projects
read all walk-in closet/laundry
room blog posts

Addicted 2 Decorating is where I share my DIY and decorating journey as I remodel and decorate the 1948 fixer upper that my husband, Matt, and I bought in 2013. Matt has M.S. and is unable to do physical work, so I do the majority of the work on the house by myself. You can learn more about me here.


Duly impressed!
So glad you took that time for yourself. As creatives, we underestimate how important that is! We can even hear in your writing your renewed sense of enregy. 🙂
This chandelier is just incredible!
You should license your designs to a lamp manufacturer. You are the lighting queen!
Very nice, Kristi!
Love it! Can’t wait to see in the completed room.
What a great reward for the time and planning you put into the project. You create things that are difficult for the common DIYer to even imagine. Beautiful closet to uplift your spirit for many years to come.
Of course..it is stunning because you never dissapoint! Great job!
I just love your closet!
Oh, how pretty. I really like the flowers, I wasn’t sure at first, but now seeing them, WOW. A lot of hard work, but considering the cost difference, totally worth it. You are just about to stick a fork in it and call this closet done soon. Onwards and upwards!
Cheers to you, Matt, and the fur babies!
It’s beautiful, Kristi! You are so inspiring. So, glad you got to rest and got a reset. I had a similar experience when I was a young mother (I had 4 kids in 5 years!) I was very overwhelmed to say the least. I was prompted to read a voluminous amount of scripture (the gospels, acts, psalms and proverbs in 10 days!) Once I structured how to accomplish the reading, I was so refreshed and invigorated after. Thanks for sharing that.
wow. Wow. WOW! I. AM. IMPRESSED. That chandelier is so much more beautiful than the original inspiration! It is a true work of art. You are literally a “Kristi of all trades”. Enjoy it for years to come!
Well said
Absolutely beautiful! I like yours much better than the inspiration chandelier! I had hoped you would use frosted 25-watt bulbs so that they would light up the chandelier but not be blinding. Can’t wait to see it with the new bulbs. Good job, as always!
Very pretty and your work is impressive.
Such ingenuity and talent! Dramatic lighting is my favorite way to add the most impact to decorating a room. You never cease to amaze me!
Do you have a picture of it with it on?
That is INCREDIBLE!!!! Oh so beautiful! I honestly think you should sell the design to a lighting company, and make $$$ on each one sold! They would probably figure out a streamlined way to reproduce the light for production to be cost efficient. Someone will copy this, so you should benefit from it….maybe a patent? I have no idea how all that works, but if you wanted to pursue it, I would contact Sherry Petersik of “Young House Love” since they had (or have) their own lighting line! Bravo to you!!!
The chandelier looks fabulous! When you first showed us the inspiration chandelier and the one you bought to build from I was worried it would turn out looking like a bad arts and crafts project. I should know better than to doubt your artistry and skills.
Just beautiful!
Very pretty!!!!!! Great job, Kristi!
Your chandelier is a work of art!
What I want to know is how in the world you used your miter saw to cut that metal piece!
You have truly outdone yourself! That is the most beautiful chandelier ever! I love it.
Perhaps you could sell your plan for $$.
Thank you for sharing all that you have done over the years. I am all the time
sharing your successes with my husband and sister.
Thank you for what you do.
PS Be good to yourself:)
Thank you for sharing! As always your imagination is amazing.
Kristi the hanging light in your closet is absolutely perfect. Sooooo good. Bet uou could sell those like you made gor an easy $2,600. Say anthropology or urban outfitters. Just BEAUTIFUL
Yours is much better than the inspiration!
An incredible work of art! It was well worth the wait, and I am so glad you took a well-needed break. Blessings to you, Matt, and the critters.
That is one spectacular chandelier!
I happened to find a similar to your inspiration pic for not much more than you spent on the diy version (if anybody is interested in something similar without having to DIY):
https://happyarcadian.com/products/hinkley-lighting-flora-26-inch-6-light-chandelier-burnished-gold?currency=USD&variant=48775437779190&utm_source=google&utm_medium=cpc&utm_campaign=Google%20Shopping&stkn=77c9beadd8ad&utm_campaign=Pmax-all-6.20&gad_source=1&gad_campaignid=22697632313
The price in the link you have here is “Sale price$2,578.88.” Kristi spent only $275 making her version.
What an amazing job! I love how you were inspired and then made it your own! 🙂
Your chandelier is a true work of art; your creativity, imagination and dedication is such an inspiration to us all.
So happy to hear you were able to have this break for yourself to recharge. You’re so deserving of it, with all that you do and accomplish everyday. You truly are amazing Kristi in everything you do.
Simply incredibly beautiful!
Your version of the chandelier is actually so much prettier than the inspiration piece. The flowers a just so much more defined and elegant. I wasn’t sure how this was going to turn out but it is gorgeous. Well done; your creativity always amazes me.
Oh I’m so happy for you! This is stunning!
That is an awesome chandelier! I think it’s much prettier than your original inspiration. And the money saved is also awesome. Well done!
Wow!! Bravo!!