D.I.Y. Project:: Sunburst Made Out Of Wood Shims
A lot of times I’ll start a project with one vision in mind, and end up with something completely different. This is exactly what happened last night.
I love sunbursts in just about any shape or form, from traditional to modern, mirror to bamboo. So I’ve been wanting to make one, but was just waiting for inspiration.
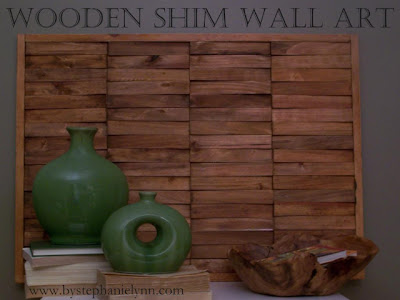
I found it in this project by Stephanie Lynn…
No, I haven’t gone completely insane. I’m aware that that’s not a sunburst mirror. What inspired me was the material she used for that project. Wood shims…that’s brilliant! I never would have thought of using wood shims for anything decorative.
So that’s the material I decided to use for my sunburst. The design I had in mind went something like this…
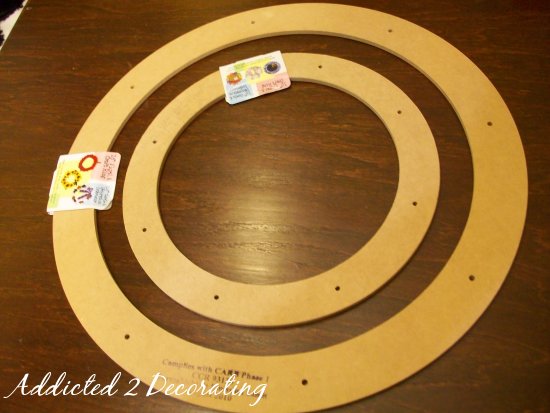
First, I used two of these wood wreath forms from Michael’s…
And then I picked up several packages of wood shims at Home Depot.
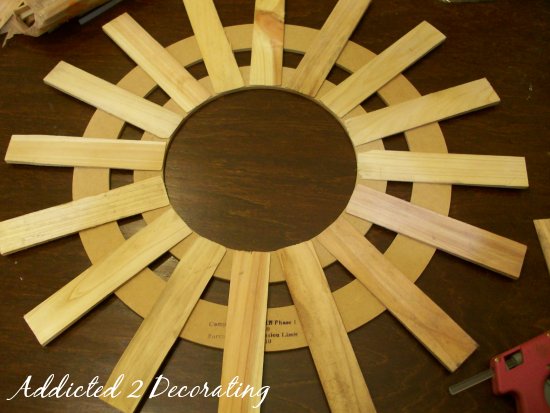
Using my hot glue gun, I started gluing the shim on in a sunburst shape.
The idea was to keep adding layers until I was satisfied with the look. The shims for each new layer would have to be shortened by about 1″ with my miter saw.
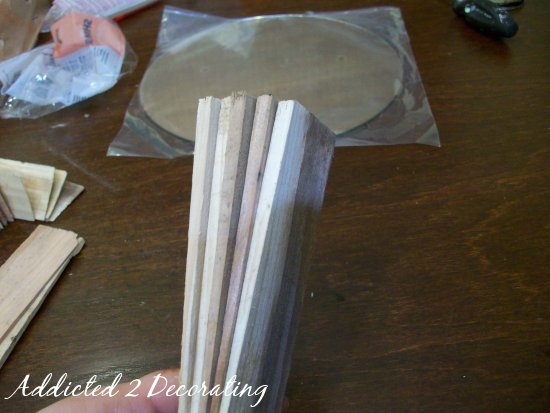
So I counted the number I needed for the next layer and stacked them together to take outside to cut.
When I looked at the shims stacked like that, with all of the thick ends together and the thin ends together so that they naturally form a curve, it hit me. THERE’S my sunburst!. So I started experimenting with different shapes. I settled on this one, and glued them together.
I continued gluing them together in groups of six, and forming a circle with them.
I love this so much more than my original design!! But because this design takes far more shims, I only had enough to get a little over half of my sunburst finished.
Honestly, I’m not even sure how I’m going to finish this out. I definitely want to cut the middle parts to make a cleaner circle, then perhaps I’ll add a mirror…or not.
I just don’t know, but I’m pretty sure I’ll love it when it’s finished!
Edit: For Part 2, and the finished sunburst mirror, click here.






Ooh, I think I could pull something like that off! I think it's going to look great!
That is soooo cool…great idea
WOW! This is such a clever idea. I was planning to do something similar but yours definitely looks better. I may just have to do this!
Wow, just stunning! And such simple materials!
Beautiful! And just my style…I love wall art using wood scraps, dowels etc! Nice work. I might have to make one and spray it bright aqua for my guest room 🙂
I love it! Going to Home Depot later for some spring plants and picking up some shims too!!
That is ADORABLE! Can't wait to see the final-final.
Good grief! Wood shims! Really??? Is there NOTHING you can't find a way to use to make something beautiful??? 😉
I'm looking forward to seeing it when you're finished!
Kristi, That is beautiful! I want to go and make one right now, thanks for all of your inspiration.
That looks fantatic!! I love the way that looks!! And I like how depending on the stain or paint color it could fit a lot of different looks. 🙂
I'm bookmarking this under "inspiration" for later use. 😀
WOW I love this idea!! so cute so far!
On a more stalkerish note (I promise im not a weirdo) I found your blog(SO cute) through the location central because i saw you were from waco! I will be a student at Baylor next fall and am so excited! Love waco and spice village and all that I have discover so far! any recomendations? And will you be availible for dorm decorating in august? 😉
Oh my goodness I LOVE this!!! Im totally going to have a go at it! If it is like my other projects it will take a few years to get done 😉 Thanks so much for the idea!
-Tris
http://www.ChiKKaBoom.blogspot.com
Simply amazing, Kristi!
I absolutely love your sunburst! What a fantastic discovery! I'm curious how many shims you ended up using and how much they cost. I think this will be exactly the color,texture, and size for one above my bed when I redecorate!
LLinKS
I love it! I really need to get on the Sunburst bandwagon!!
OK…I saw part two first and then this one. I actually like both designs. You orginal design is more contemporay. I would stain/paint the wood black or use multiple colors and a bigger mirror. Your finished product is also gorgeous. I am not sure which design I want to try…although your first design does seem easier for someone starting out….
Oh the second is so much better. I am not a big starburst fan, but I love that last one. Amazing.
wow, so cool! im going to have to give this a try!
Oh wait, I just weighed it and it's 7.4 lbs. I did everything the same way except I didn't cover my mirror at all. I am going to try a sawtooth nail in hanger reinforced by gorilla glue. Fortunately no one will be in the guest room for awhile so I can test it out haha!
Brilliant!
Beautiful! And just my style…I love wall art using wood scraps, dowels etc! Nice work. I might have to make one and spray it bright aqua for my guest room 🙂
hey Kristi – i absolutely LOVED this mirror and decided to try it – i used the 33 sections of shims and when i got almost done i couldnt fit the last set because it was too narrow at the top and too wide at the bottom – almost like i needed to put it in the opposite way….did you have this problem? is there anything i should have done differently? thank you!!
No, I didn't have that problem. I'm guessing that since shims are so rough cut, and may differ in thickness, it's not going to be a precise number. I may have used 33, but yours may only require 32. Can you pry it apart just enough to wedge that last one in there?
Kristi, you're a frickin' GENIUS! Your site is now officially my FAV go to site for DIY projects. Love HGTV.com AND BHG.com…but you've officially replaced them for me, as of today! You make ridiculously glamorous, oh so sexy, expensive looking, impossible to do, projects…EASY! I love, love, LOVE all that you've done!
This is my first day on your site and I can't get off of it!!! Thanks sooooooo much! You are taking my DIY projects to the next 30,000 levels (not just the NEXT level). Can't wait to impress and share with my family and friends! Keep up the fantastic work!!! I'll be sure to share my versions of your projects. *crossing my fingers!* lol Take care
Holy cow, that has to be the nicest compliment I've ever gotten on my site! Thank you so much. You just made my day! My week! Possibly my whole month!!! 🙂