Dining Chair To Office Desk Chair Mini Makeover
Well, I didn’t get my velvet green desk chair. I just never could find one that I liked for a price I was willing to pay. I wanted a high back chair that would actually show significantly over a 30-inch desk, and the only two green chairs I found that I really liked had very low backs that would only show about four inches above a desktop. That just wouldn’t do.
So I let go of the idea of having a green velvet chair (or a green chair at all) and set my sights on finding any chair that I really liked, in any color that would go in my studio, that could be used as a desk chair.
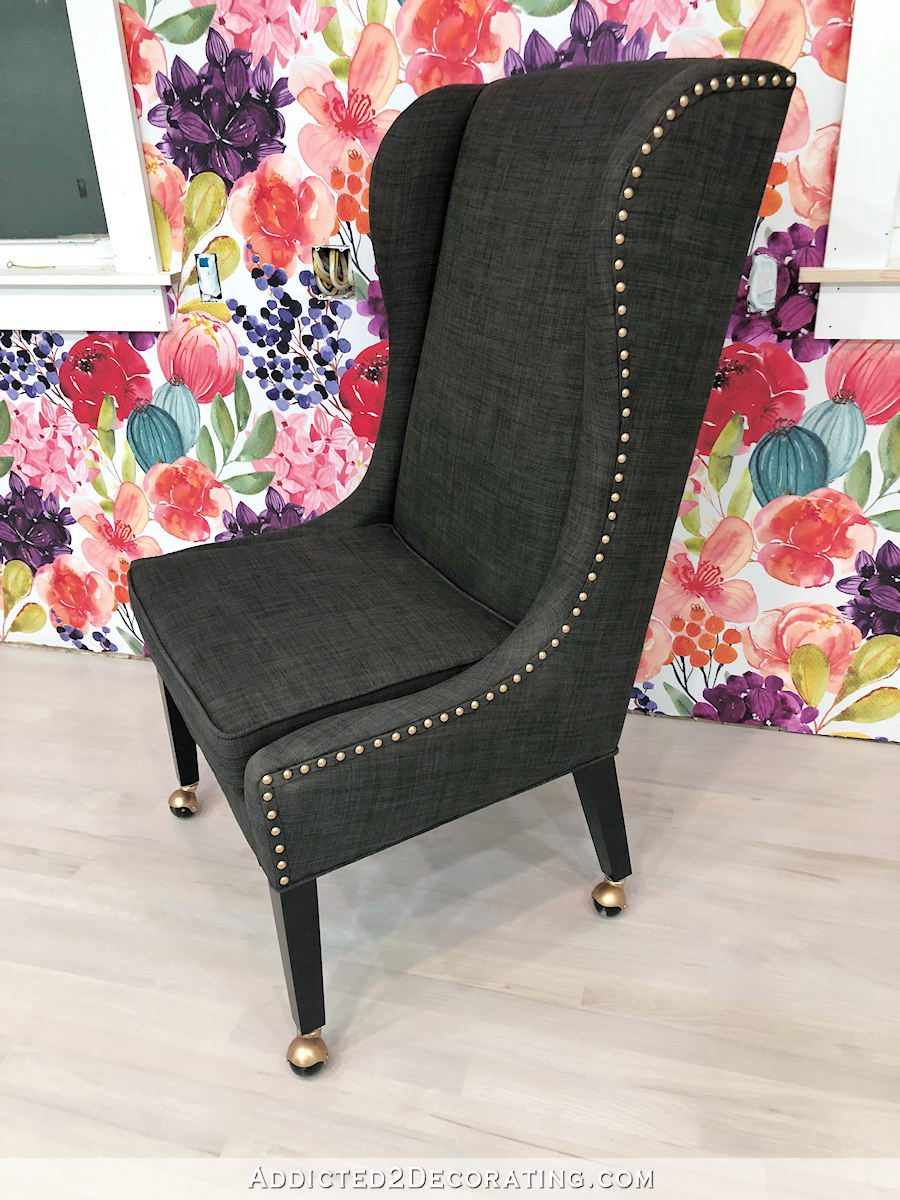
And that’s when I came across this high back, wingback dining chair from Overstock.
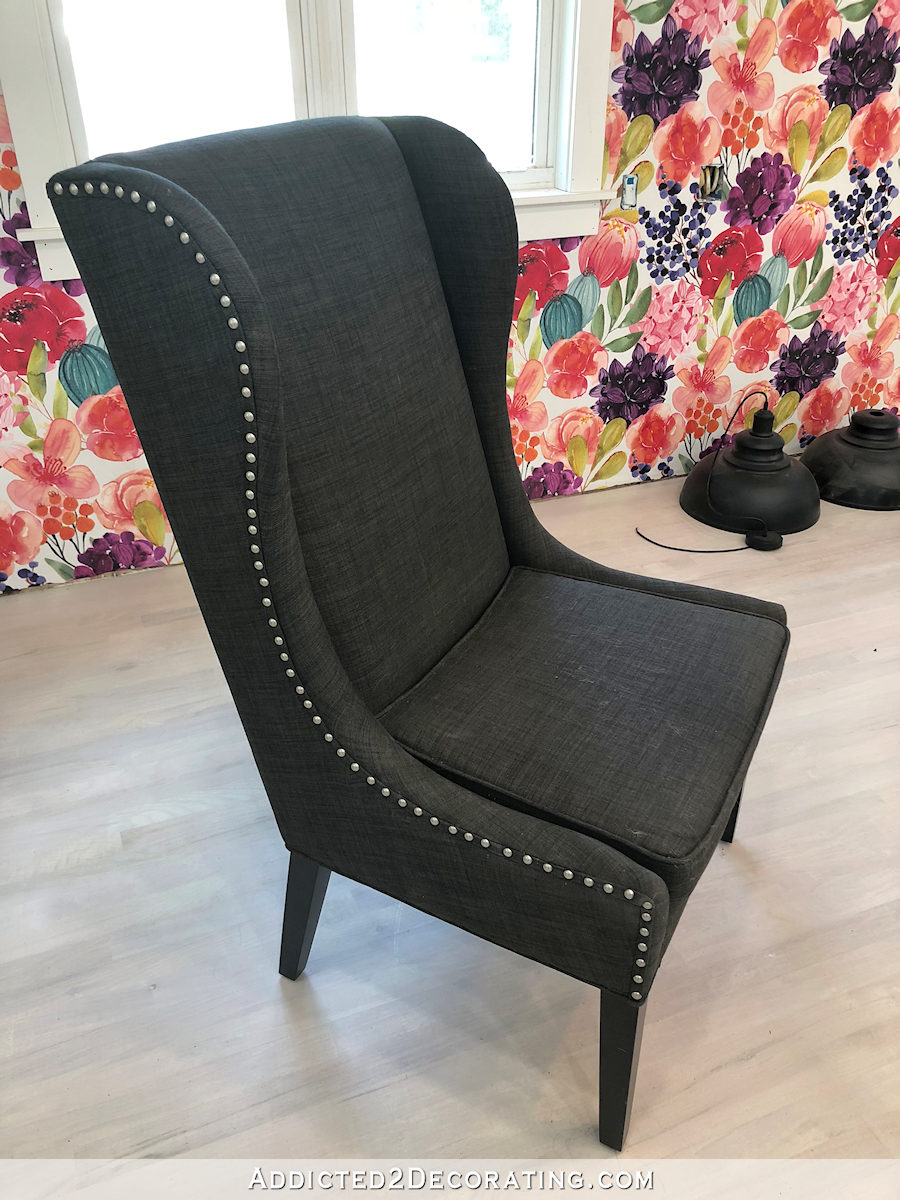
I loved this chair immediately when I saw it! The tall back, the narrow wings, and the nailhead trim all whispered my name. 😀 And it’s comfy! Although I’m short, and I’m always more comfy with a lumbar pillow.
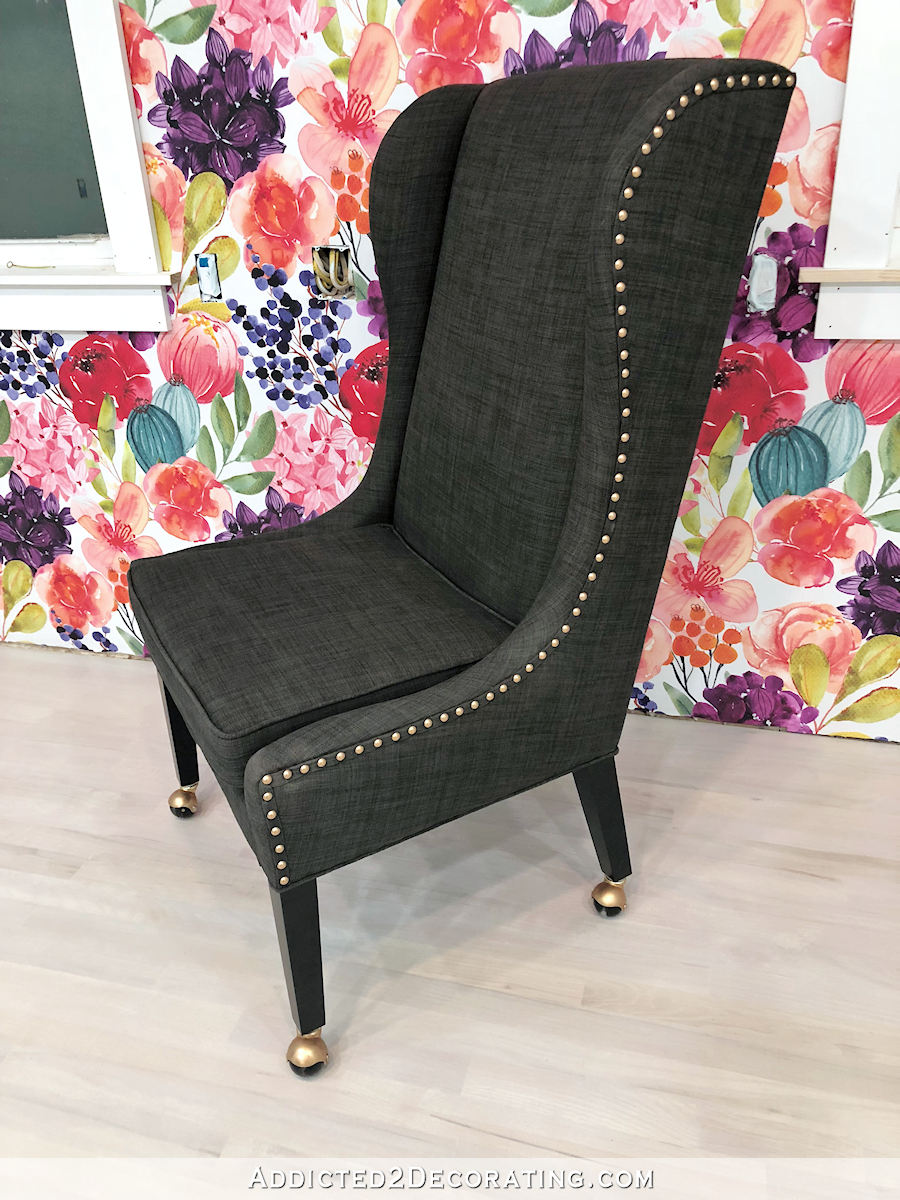
The only problems were that I really needed casters on the legs, and the nailhead trim was silver. So I added some casters, changed the color of the casters, and painted the nailhead trim. They’re subtle changes, but the little things make a difference! Here’s how it turned out…
How to add casters to dining chair or desk chair legs:
I’ve been using the chair just as it is for about two weeks now. It has those gliders that are supposed to glide on hard floors, but they were still leaving marks on my floor, so I decided that casters would be a better option.
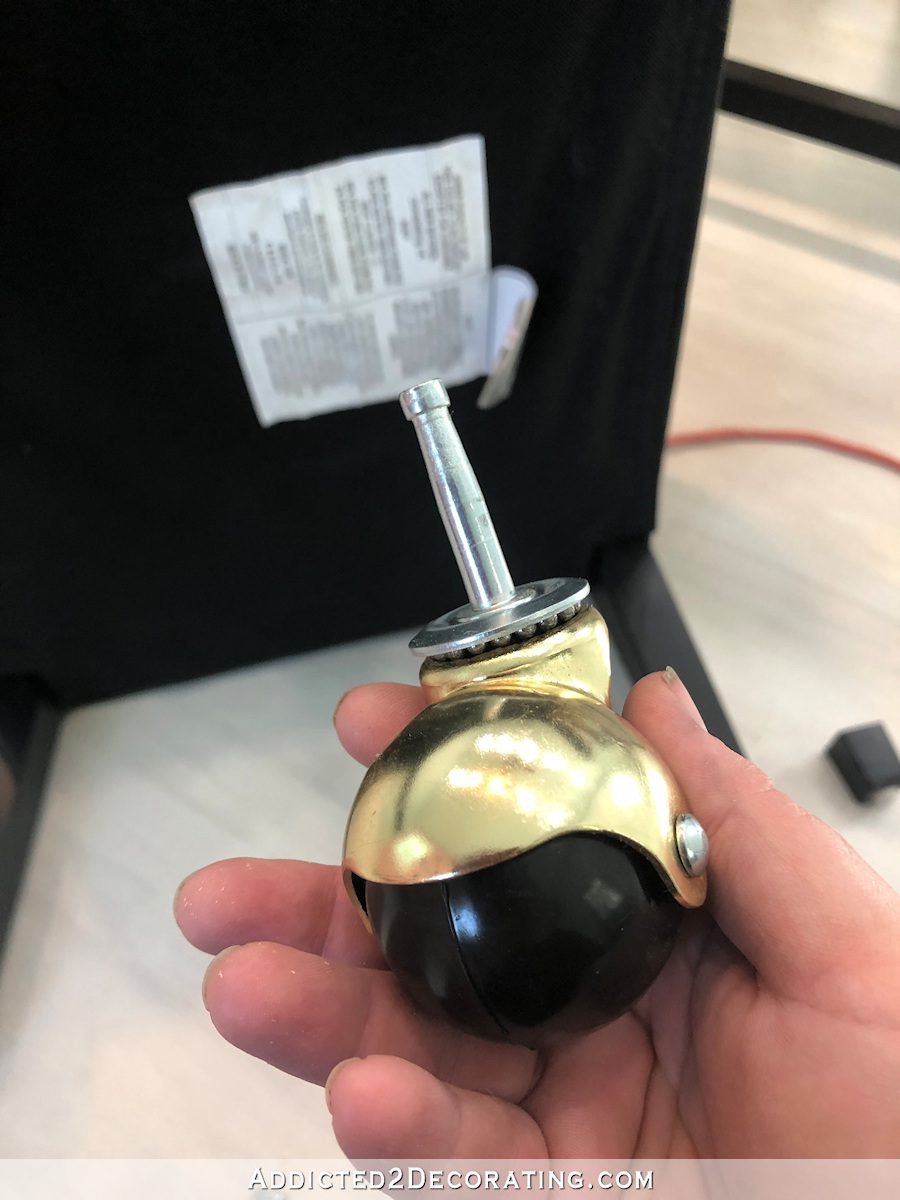
I found these round ball casters at Home Depot…

I could have found prettier ones online, but I didn’t want to wait for a delivery, so I just used the Home Depot ones.
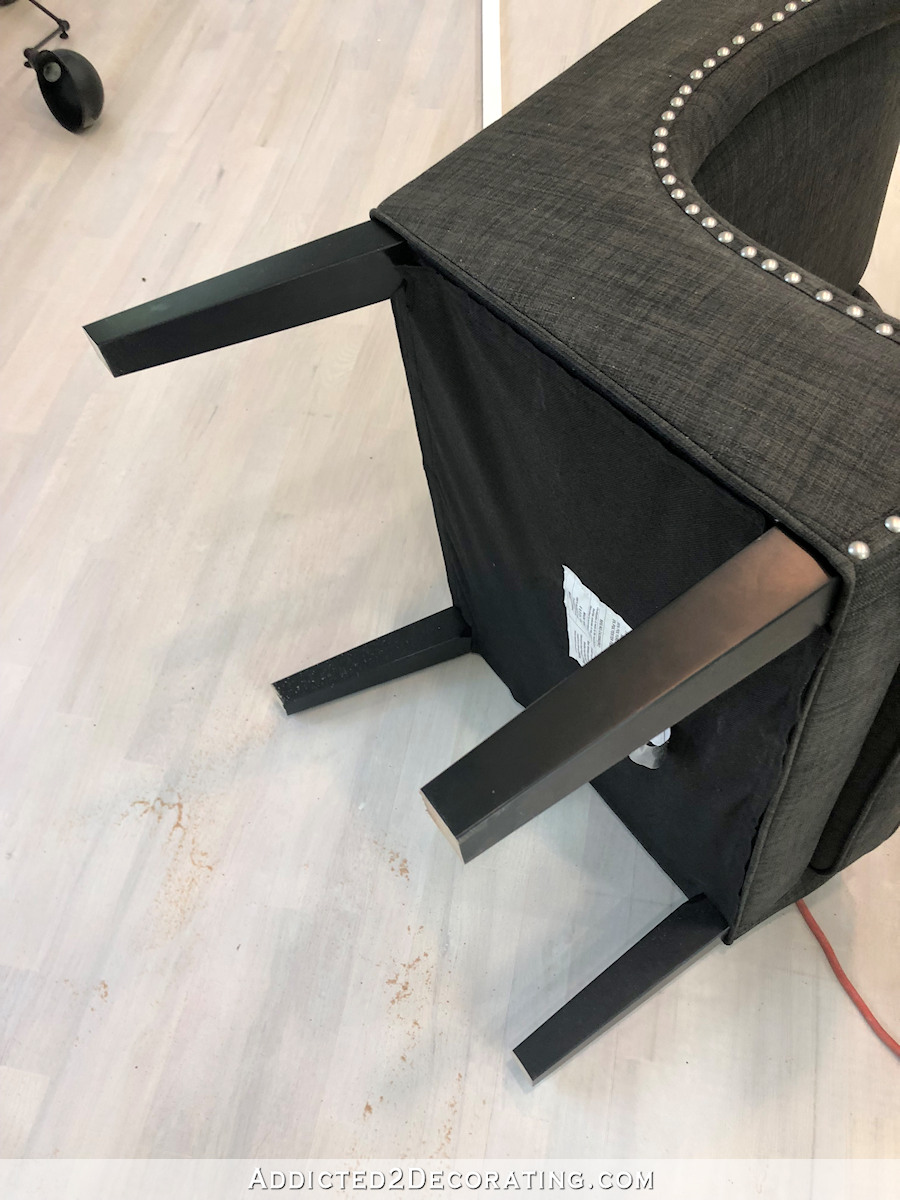
The casters were two inches high, so I used my table saw to rip a scrap piece of wood to two inches to use as a guide for marking the legs.
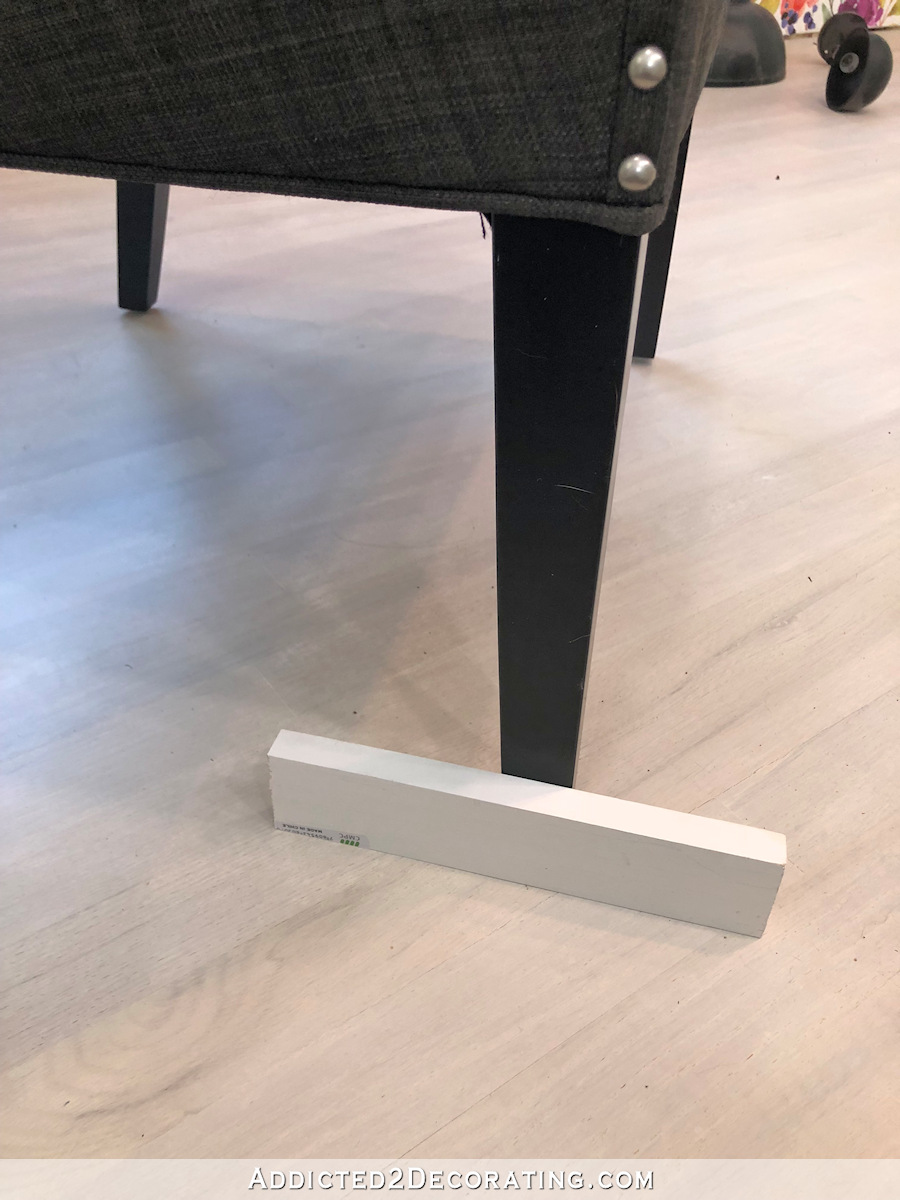
I marked each leg on all four sides with a pencil. Once they were marked, I placed the chair on its side. You can see the pencil marks here…
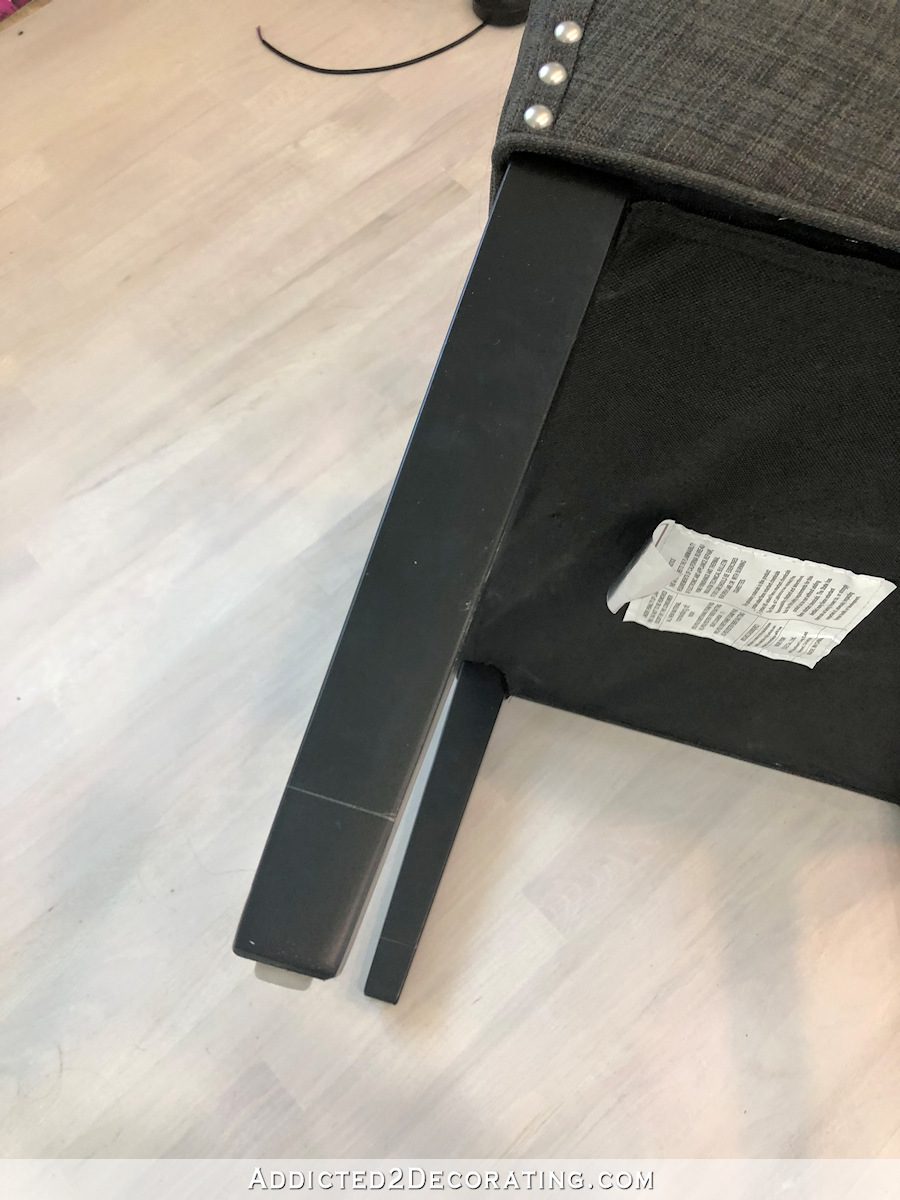
And then I used my jigsaw to cut the legs down.
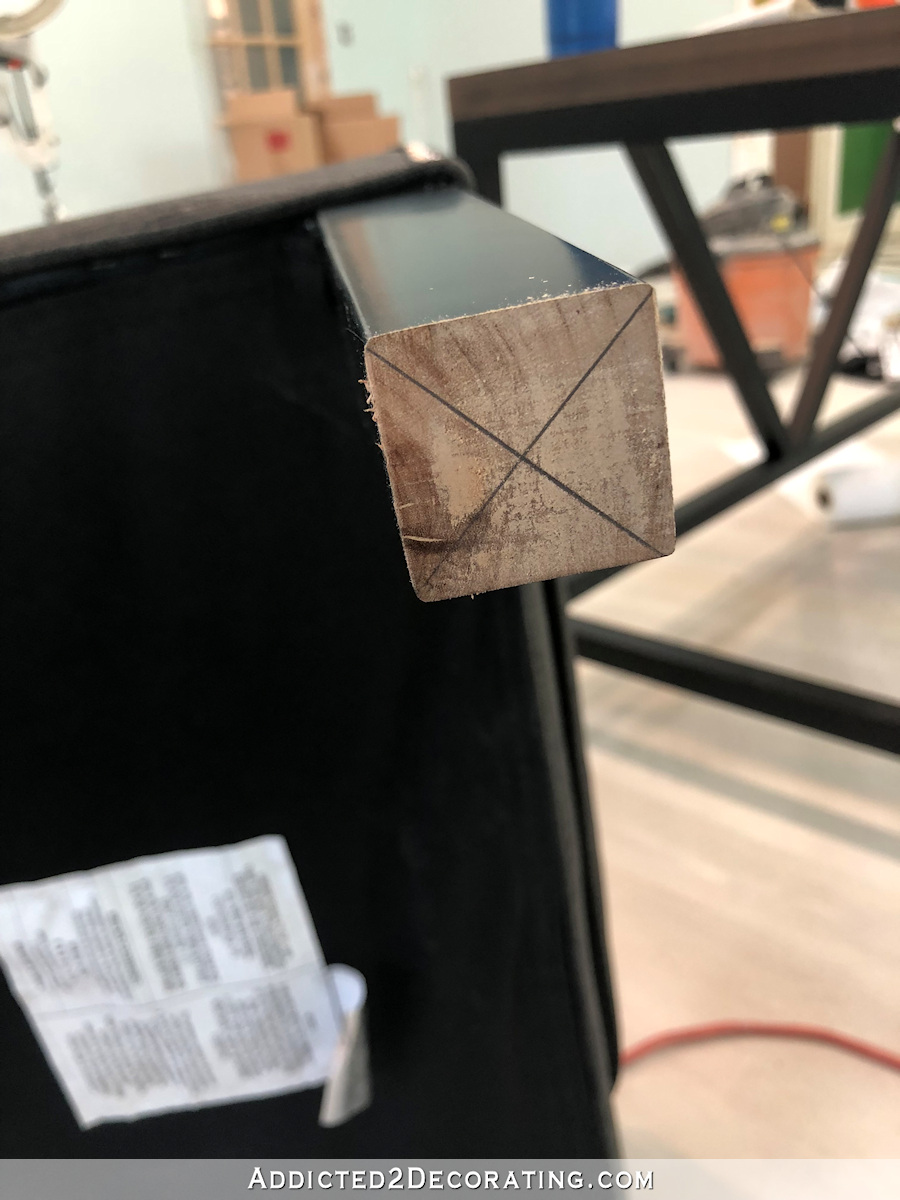
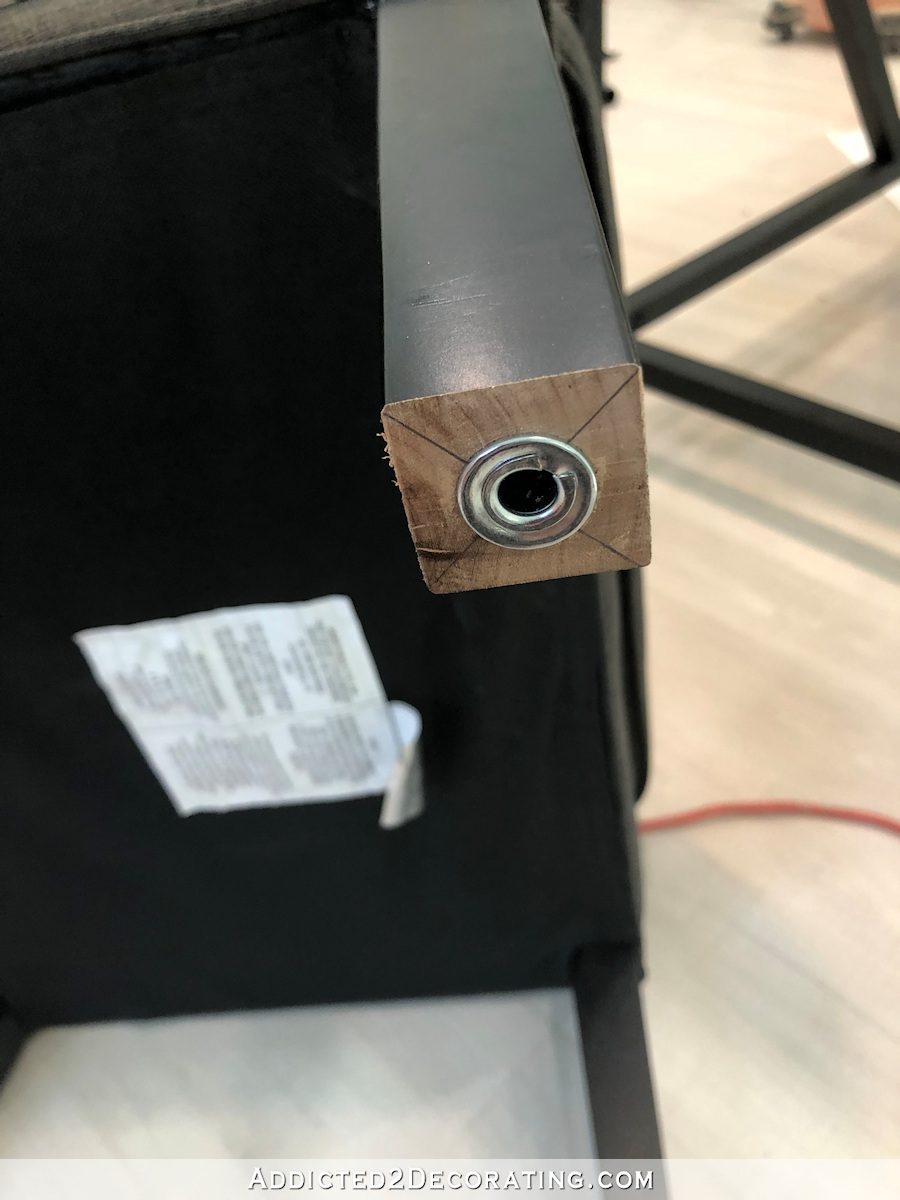
Next, I used a straight edge to mark the bottom of the leg from corner to corner so that I could find the center.
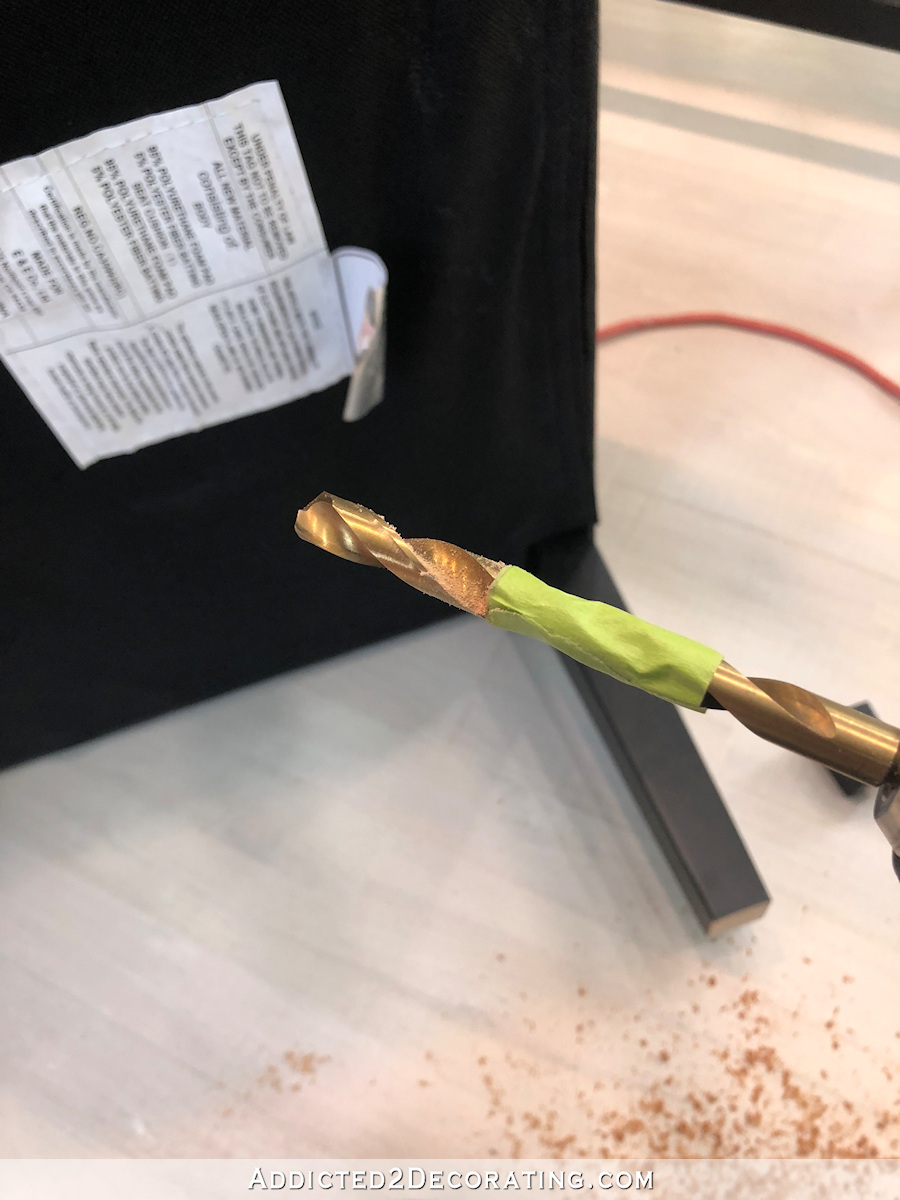
And then I used a 3/8″ drill bit to drill a hole that was 1 1/2″ deep, as per the instructions on the package. I used a piece of painters tape to mark the 1 1/2″ depth.
Then I placed these little metal things (I have no idea what they’re called) into the holes…
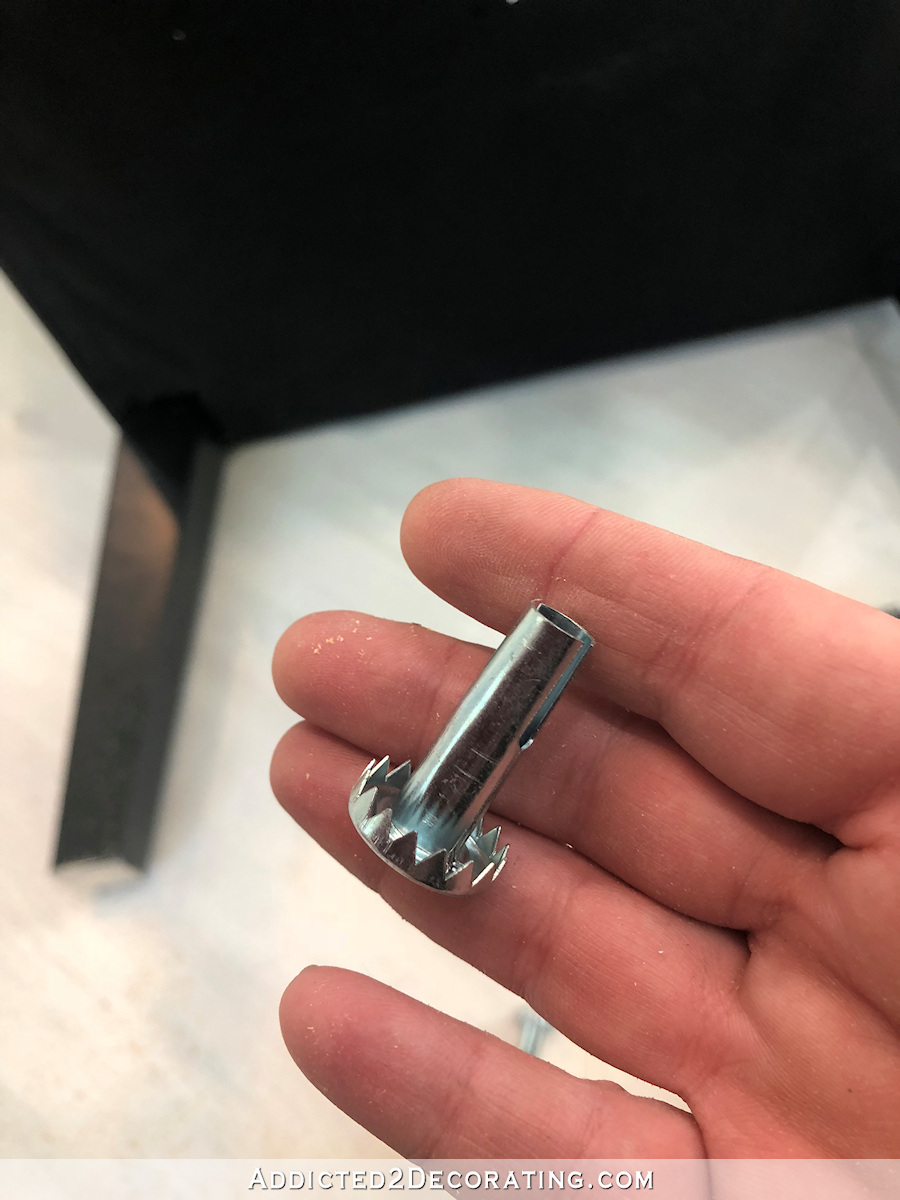
…and used a hammer to hammer them into the wood.
I should mention that those metal things didn’t come with the actual casters that I used, and Home Depot didn’t sell them individually. So I bought a package of white cheap-looking casters that came with those metal things that had the same size stem as the casters I used. I have no idea why my casters didn’t come with them, or why they weren’t available separately.
But once those were hammered in, the stem of the caster just pushes into it and snaps in place.
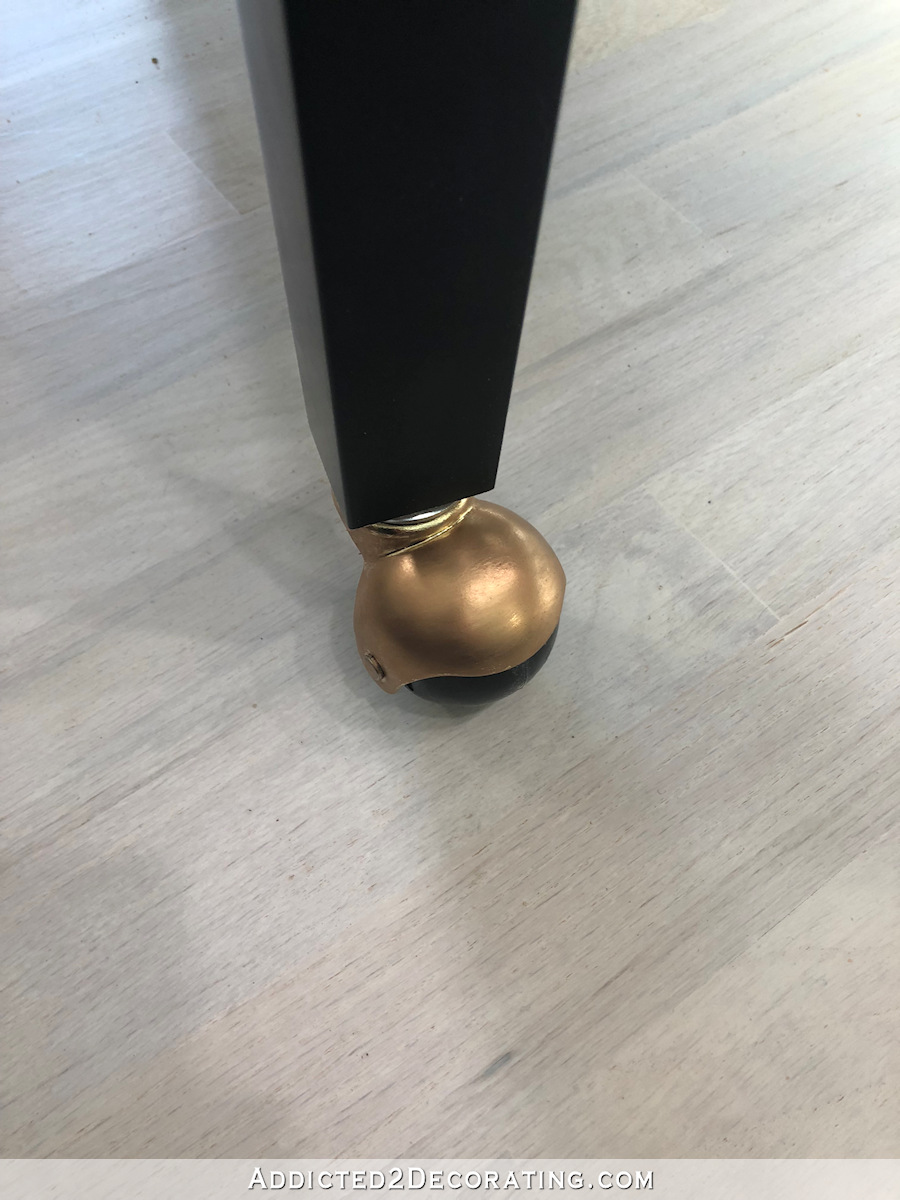
With all of the casters on, the brass looked a little yellow for my taste, so I decided to tone it down a bit.
Toning down the color of brass
This process is so simple with Rub ‘N Buff. It’s a metallic paste wax, and the instructions are in the name. 😀
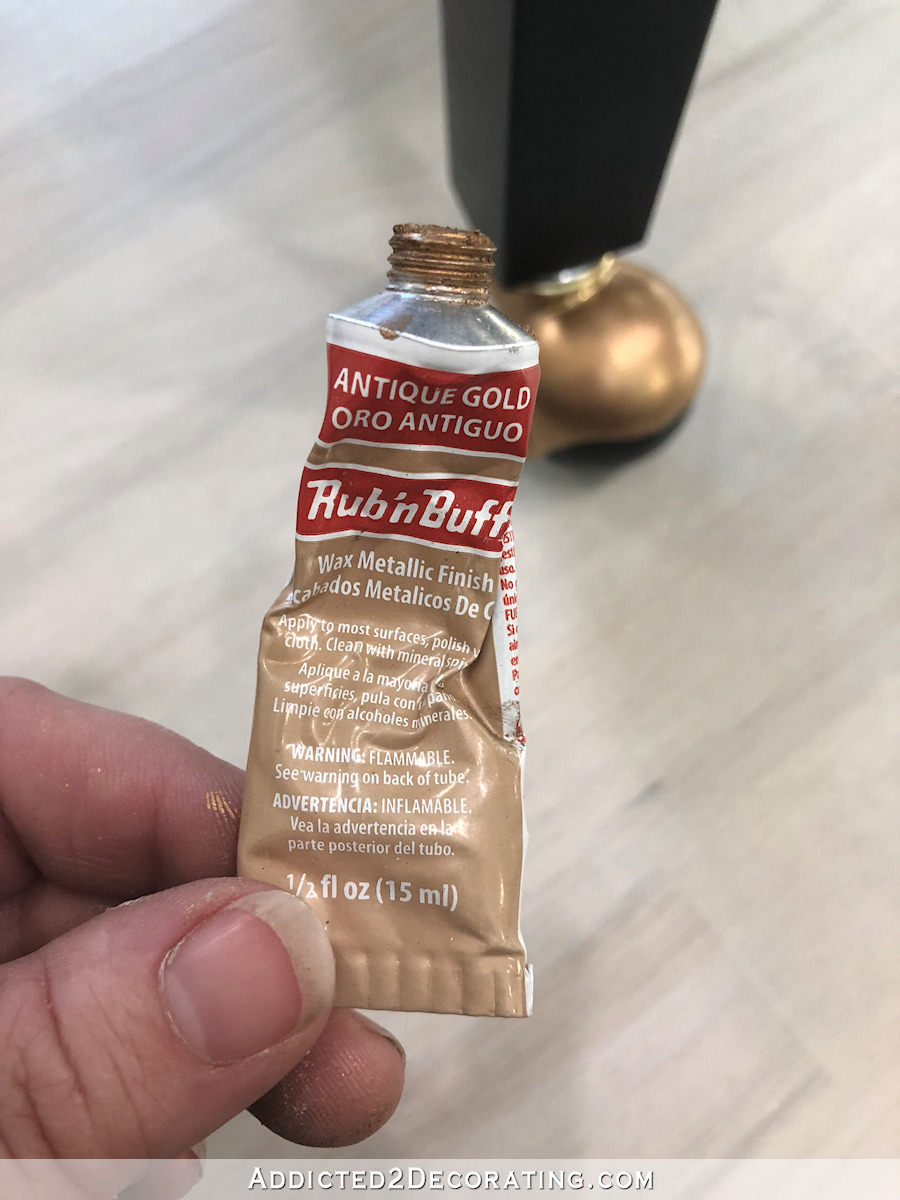
You literally rub it on (I just use my finger, which I’m sure isn’t the healthiest decision), let it dry just a bit, and then buff it with a cloth.
And finally, I needed to change the color of the nailhead trim.
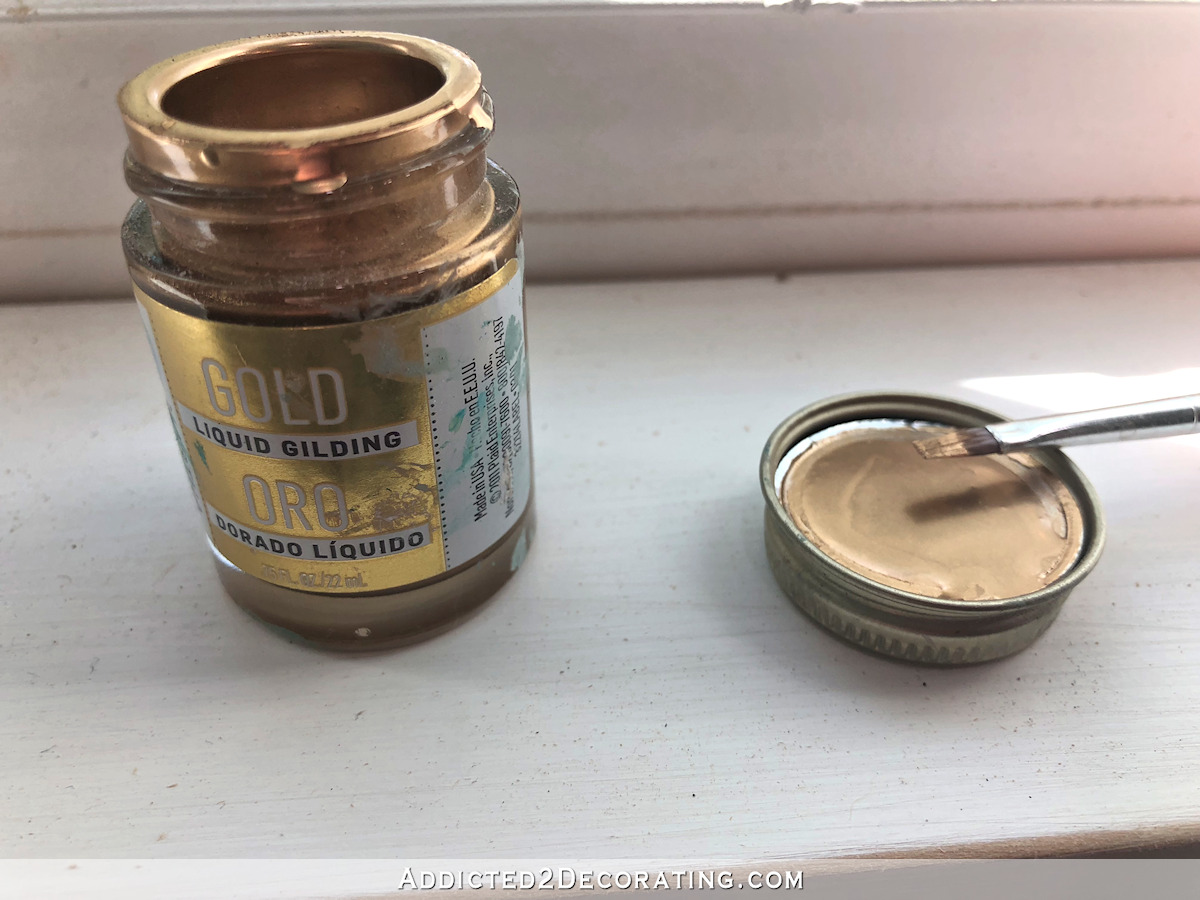
How to paint nailhead trim
This is also super simple, but depending on how big the item is, it can get a bit tedious. Fortunately, this is just a relatively small chair, so I was able to get this done in about 40 minutes.
To change the nailheads from silver to brass, I used liquid gilding and a very small paint brush…
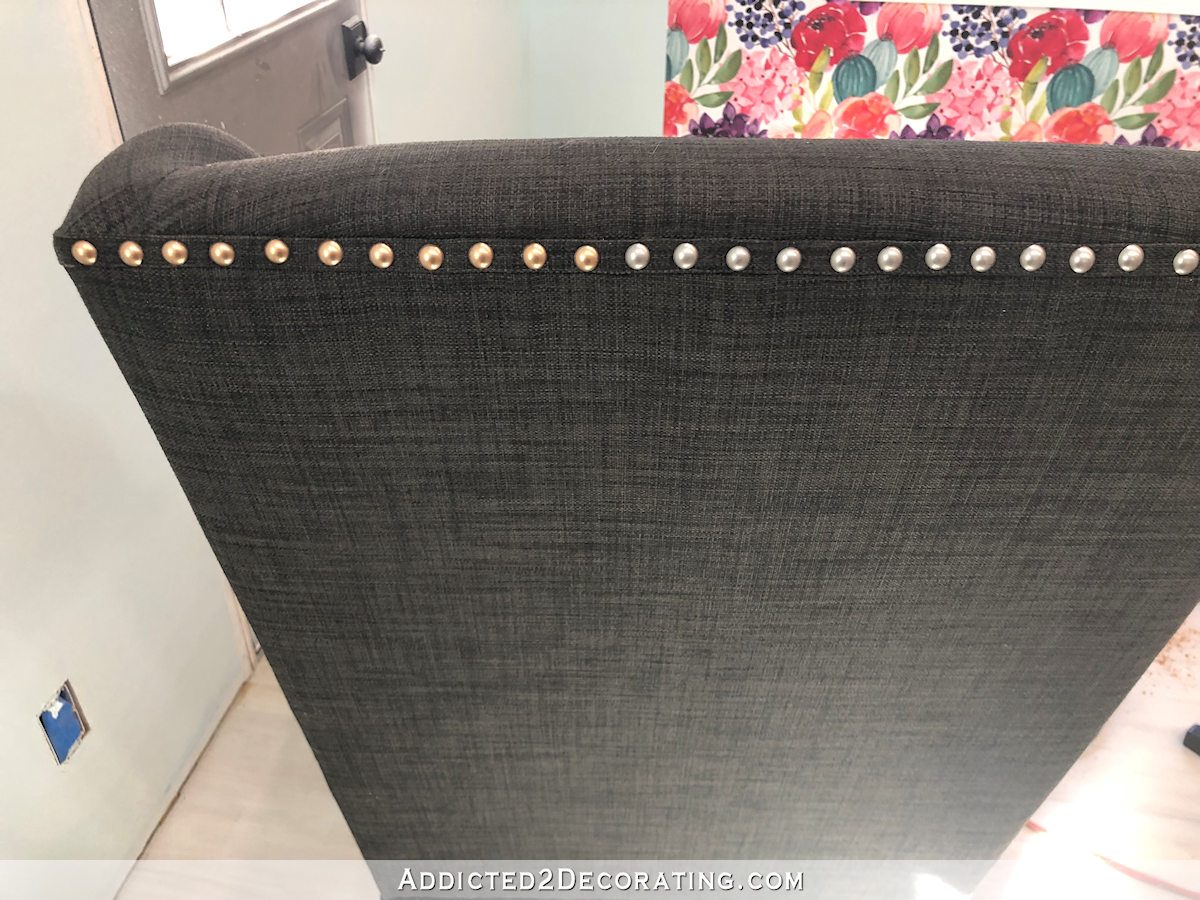
I managed to do all of them without getting even a tiny bit on the fabric. It was actually a much easier project than I had anticipated. You can see here the subtle but noticeable difference between warm brass nailheads on the left and the cold silver nailheads on the right.
Et voilà! My dining chair to desk chair with just a few simple changes.
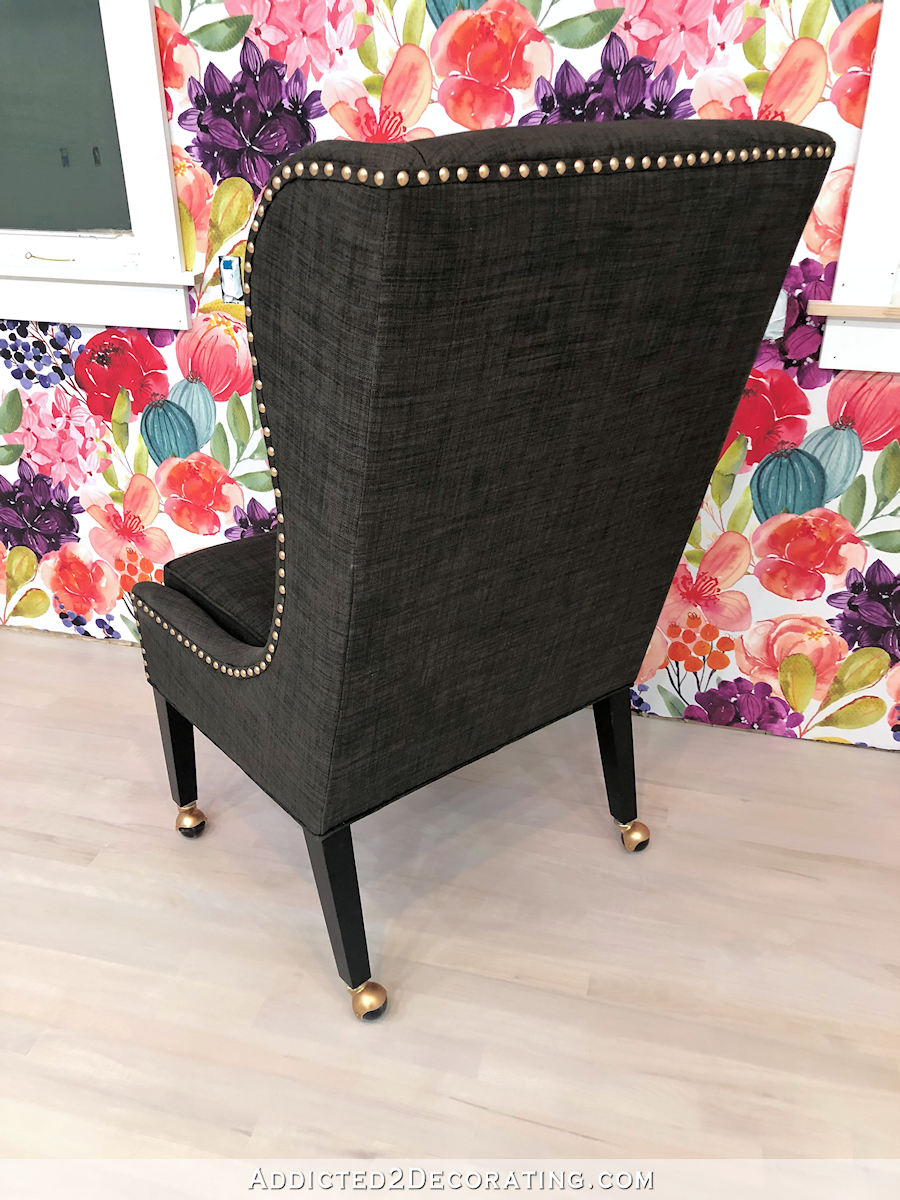
I LOVE sitting at my new desk in my new chair. I may even love it a bit too much. 😀 Now I just need a pretty, colorful lumbar pillow for my desk chair.
Please note: This post contains affiliate links.

Addicted 2 Decorating is where I share my DIY and decorating journey as I remodel and decorate the 1948 fixer upper that my husband, Matt, and I bought in 2013. Matt has M.S. and is unable to do physical work, so I do the majority of the work on the house by myself. You can learn more about me here.


I love it! I love how your eyes work! I don’t think I would have considered changing the color of the nail head trim, but it really does make a huge difference! Personally, I like this better than the green velvet. I think this will allow the wallpaper to stand out more, while the green would have fought with the wallpaper (in my mind). I also think this coordinates well with the back entry. Hopefully a more fun project like this got your mojo going a bit! 🙂
Hi Kristi. Love the chair! I have been wanting to add casters to my desk chair as well, but am concerned that the leg isn’t wide enough to support the casters once the hole is drilled. What would you suggest as a minimum leg width to support casters?
You could probably downsize the casters to fit your particular leg. I’m sure they come in a variety of sizes.
So beautiful!
It is so beautiful; your entire studio is so beautiful …
But I know deep down in the recesses of your overactive and uber -creative mind there’s a thought brewing of “I could reupholster this chair in a sturdy green fabric!”
Okay, I’m running and ducking and hiding now!
You know you’re loved; I’m the self-appointed chairman of the North Dakota chapter of the “Kristi Fan-tastic Club,” but I’m still hiding until the “reupholster” idea solidifies!
I was thinking the same thing! I can just see in my mind that gorgeous green velvet on it! 😍😍
Love it! Who would have thought that such a simple change with the nailheads would make a difference! I would have been so afraid that I would have gotten paint on the fabric. Major kudos to you.
Is it possible to purchase a couple yards, if even that much, of a smaller scale of your wall paper in a fabric? I can totally see a lumbar pillow that matches your wall paper. With piping in one of the colors in the wall paper.
So beautiful! Great work, Kristi! Have you considered making the lumbar pillow in the same pattern as your wallpaper? Or just too matchy-matchy for your taste? Either way it is simply GORGEOUS!
Maybe a green velvet lumbar pillow?
How in the world did you manage to cover those nail heads completely without getting anything on the fabric??? Amazing! (And brave!!!). Love it. It turned out beautifully!
I was wondering that too!
Ferrule, I think. I would only know something like that from watching Norm Abrams. Lord, I thought you were going to pull off those nailheads and replace them and I was cringing, so I did not give you credit right off the bat but I sure do now! Well done!
I use a Rub-N-Buff, too! I love it and have used it on several projects. Your chair is awesome! Anything you have done is absolutely awesome! To see your visions transform into such beauty must be so heartwarming! I am so glad you share your successes, as well as the flubs or speed-bumps you encounter. You are human (although many times you ARE a super star) and it makes me more willing to try projects ( much smaller scale though) of my own. Thank you!
I had to read that twice. Not only did you change the color of the nail heads, but you did it by PAINTING THEM INDIVIDUALLY WITHOUT GETTING ANY ON THE FABRIC. Okay, so please buy a lotto ticket, because with luck like that….
It looks great and while I know you wanted green, seems like a good size for you.
I love your chair! Here is an idea for a lumbar pillow: https://sew4home.com/projects/pillows-cushions/pillow-trio-two-bold-shapes-rectangular-bolster-and-classic-round
I love everything about this chair, the color, the wingbacks, the nail head trim; it speaks my language! You’ve done a fabulous job turning it into the perfect office chair! I could envision a green velvet lumber cushion to go with this chair.
Green velvet lumbar pillow! 😉
FABULOUS of you to change those parts of the chair! Why does everything have to be silver? I asked my husband to put up a hook for me, and of course, he bought a silver one! it won’t look right in the room but maybe I will find some rub and buff myself.
like
So clever of you to upgrade the casters and nailhead trim and it definitely makes a big difference as your half and half photo shows. I like the chair color even better than green. It seems more sophisticated to me, esp. with your upgrades. Looking forward to seeing it with the desk and the lighting fixtures in the setting. A great move!
That chair looks super against your wallpaper! As usual..good job!
The metal things are called INSERT SOCKETS and can be bought separately online.
Ithank you for sharing all of the small things that make the “new” chair so amazing!!! Things so simple that I feel like “I can do this”
Love it! I think it’s great and so happy you love it. Nuff said 😂😋
I love this chair, and particularly with the gold casters and nailheads!
WOW what a change and it looks perfect.
Great chair, especially with your upgrades. It appears to be a good depth for your comfort. Front to back for the seat, I mean. The lumbar pillow will be perfect.
At some point, will you have someone take a picture of you sitting at your desk with your selected goodies in their places on top so we can see the whole finished project? It is coming together beautifully, Kristi.
Thanks for sharing so generously.
Beautiful!
Stunning transformation! Your tutorial is perfect. I have two chairs I have wanted to use in my new home studio but failed to figure out how to transform them.
Very Classy! I love a wingback, as long as they aren’t huge wings!
Kind of a weird question: what kind of jigsaw do you use? I’m not sure mine would’ve made it through the leg with a clean cut like yours. I’m always looking for tool advice from women, as I can manage heavy or large tools well, and mine are aging. Thanks!
Erin, you should look into all the saw blades available for your jig saw. It is the blade that does most of the work! I never thought of blades until I had to cut copes on 45 degree simple crown molding. A YouTube video mentioned the right blade and it made all the difference. Good Luck!
Thanks, Betsy! I hadn’t even thought of that! 😂
It’s lovely!
Are u ok Kristy? No pressure just checking…
All is well here. 🙂 I just needed some time away. It was actually unplanned, but one day off led to another. It’s been much needed. I meant to post a note to my Facebook page, and totally forgot! Oops!! But I’ll be back on August 1st. 🙂
Just what I was hoping to hear! Sorry to bother you! Thanks Kristi 🙂
I’m glad you asked, Mari, because I was a bit worried too. Kristi, I hope your time off has been wonderfully refreshing with lots of relaxation and time with Matt and the pets!
Same here! I’ve been checking daily to see if there’s been a new post, and finally, today decided to investigate the comment section. Glad to hear everything is okay. Breaks are important for both physical and mental health! 🙂
Make your lumber pillow out of some beautiful green silk velvet like one from the seller silkfabric on Etsy. It’s under the title Emerald Green hand dyed silk velvet fabric. (I tried to link it but no go).
I can ‘t tell you how much I appreciate this post…My desk chair is the typical and after a few minutes or hours at my desk my shoulder really hurts (burns) from the stress of sitting in this chair with no support…I am so on a hunt for a chair like yours that I can modify and get me a lumbar pillow…WINNER!!! WINNER!!!!
Are the caster still holding up?
They are! They’re still working out great!