DIY: Storage Cabinet With French Doors (Finished!)
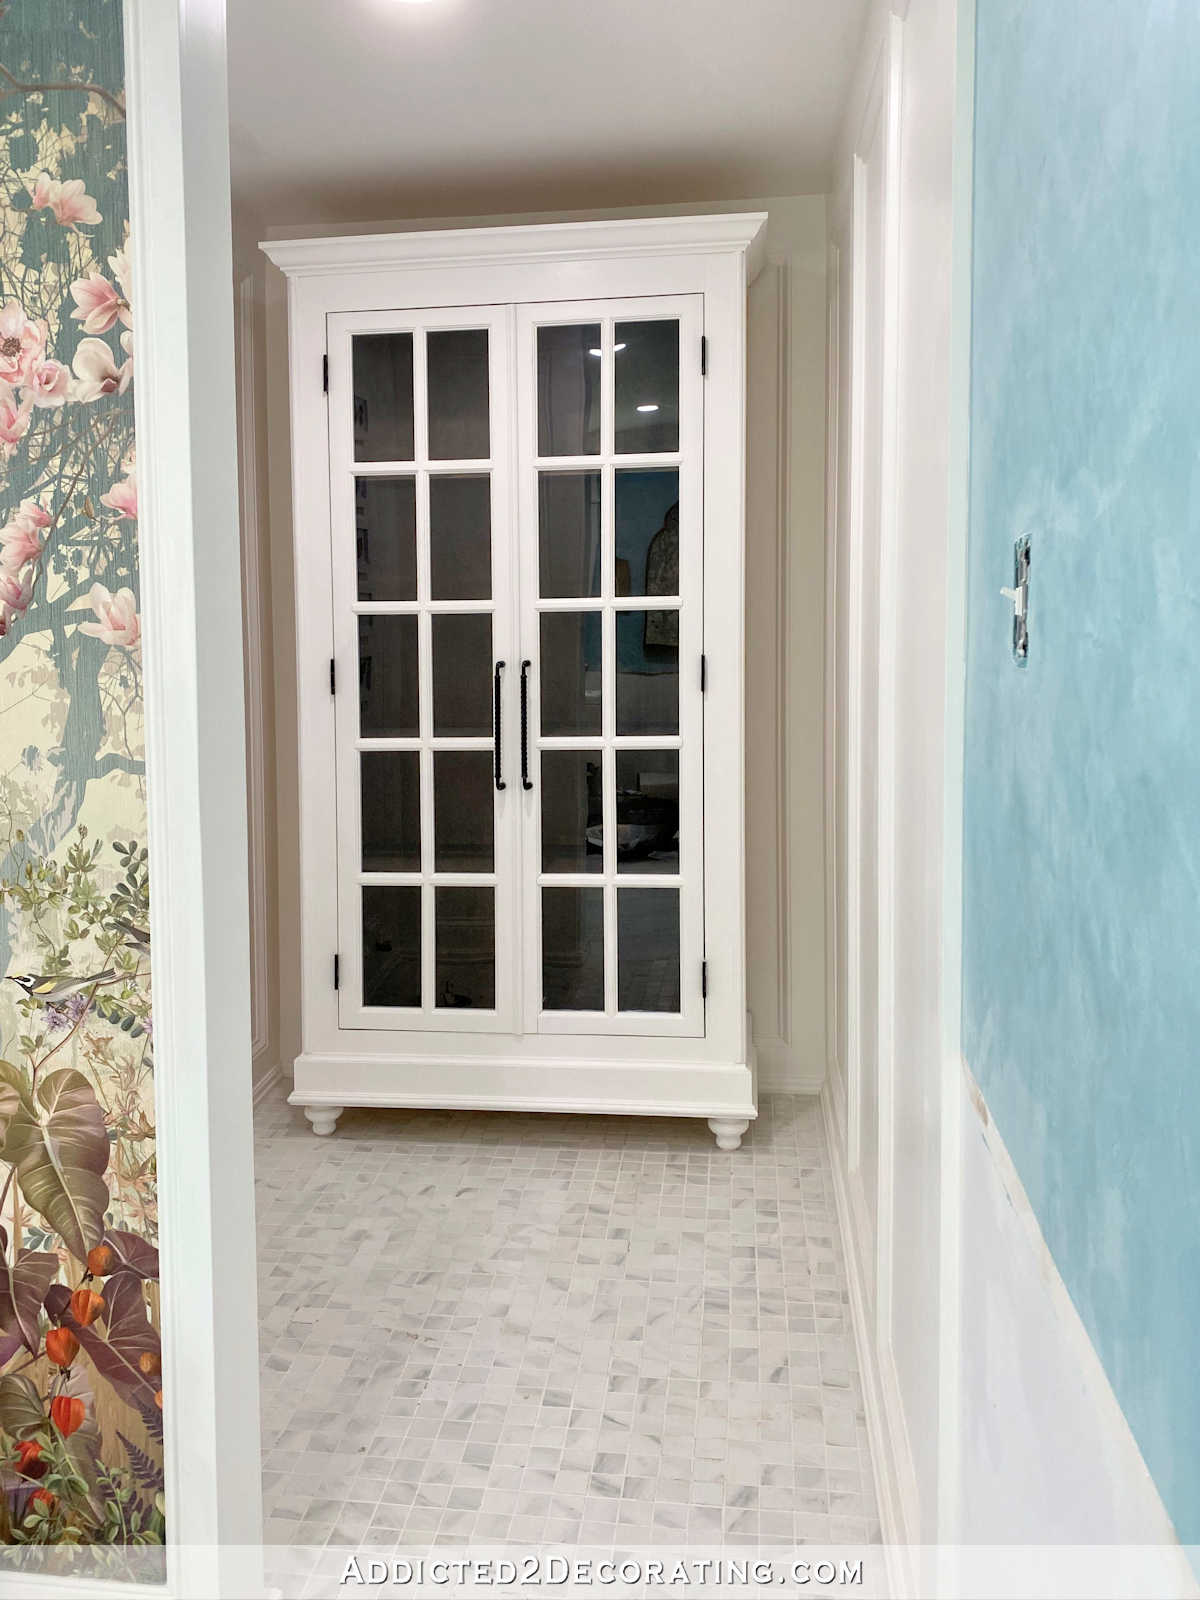
The DIY storage cabinet with French doors is finished! I’m so thrilled with how it turned out. I wasn’t quite sure what I wanted to do with the inside of the cabinet. Paint it white? Paint it a pale pink?
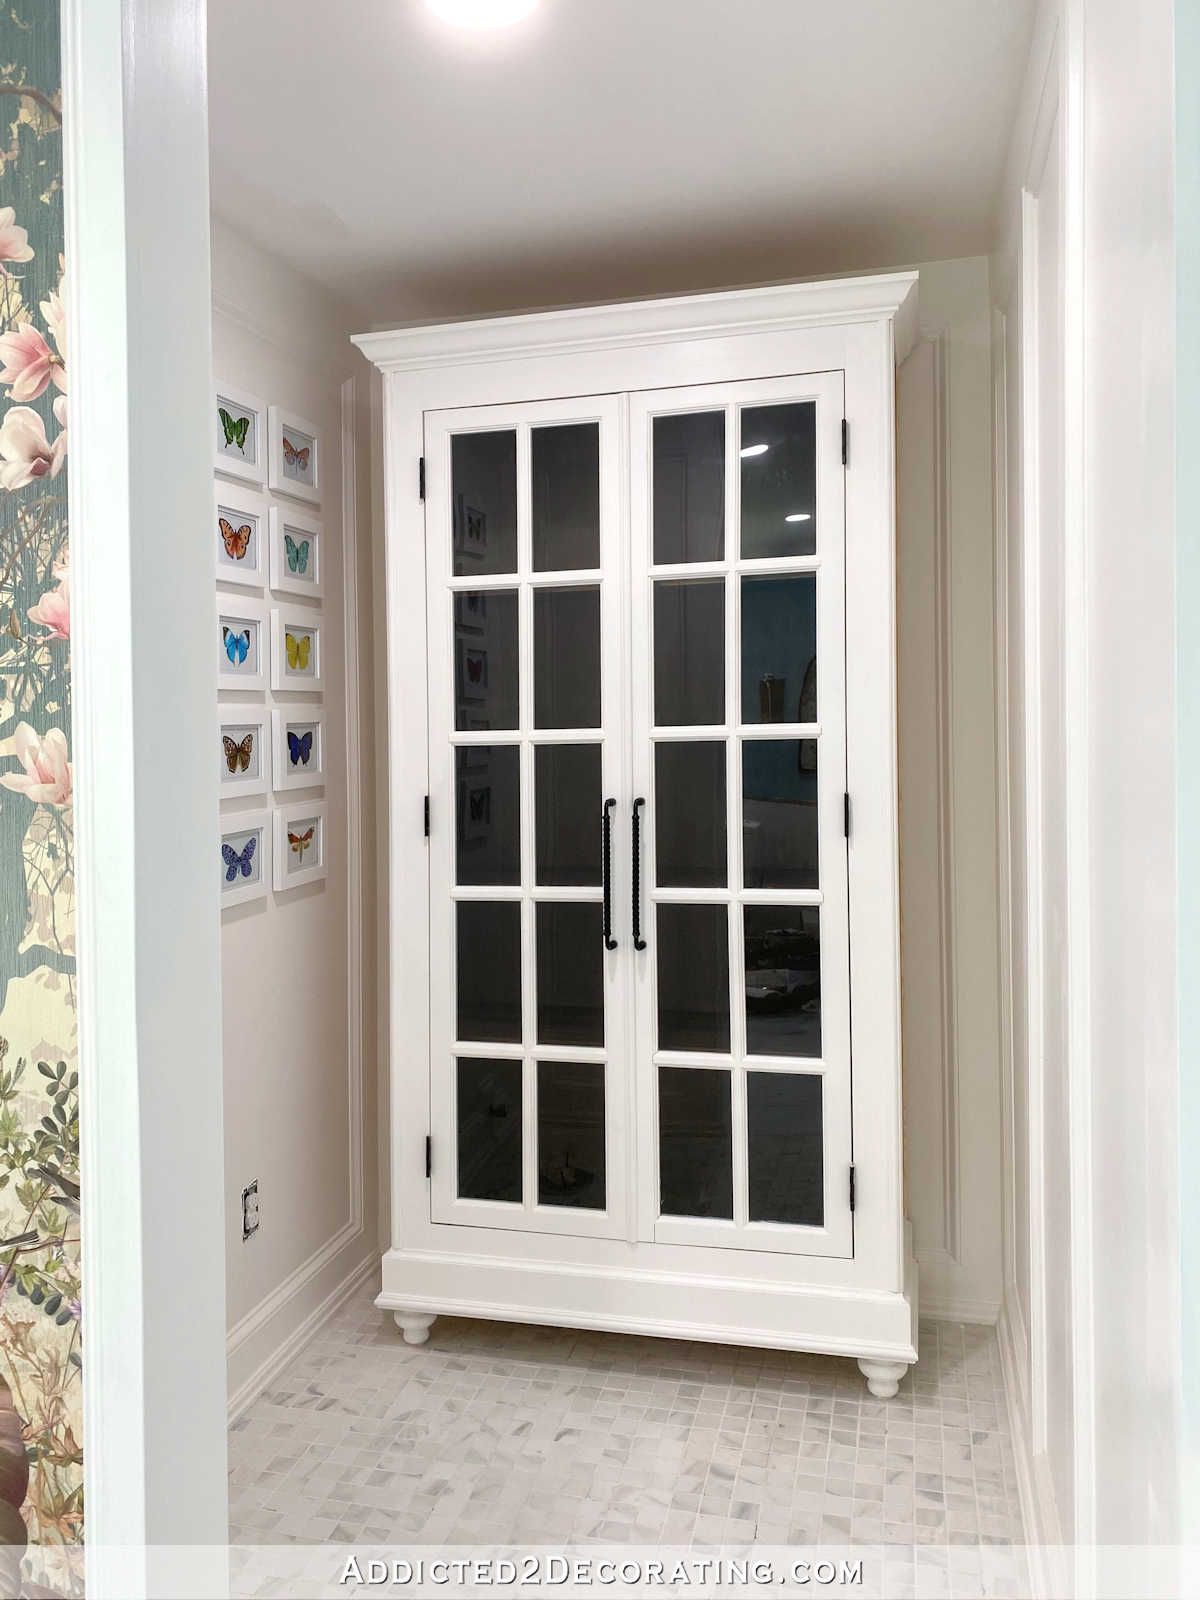
Well, in the end, I decided to go with…STAIN! Here’s how it turned out…
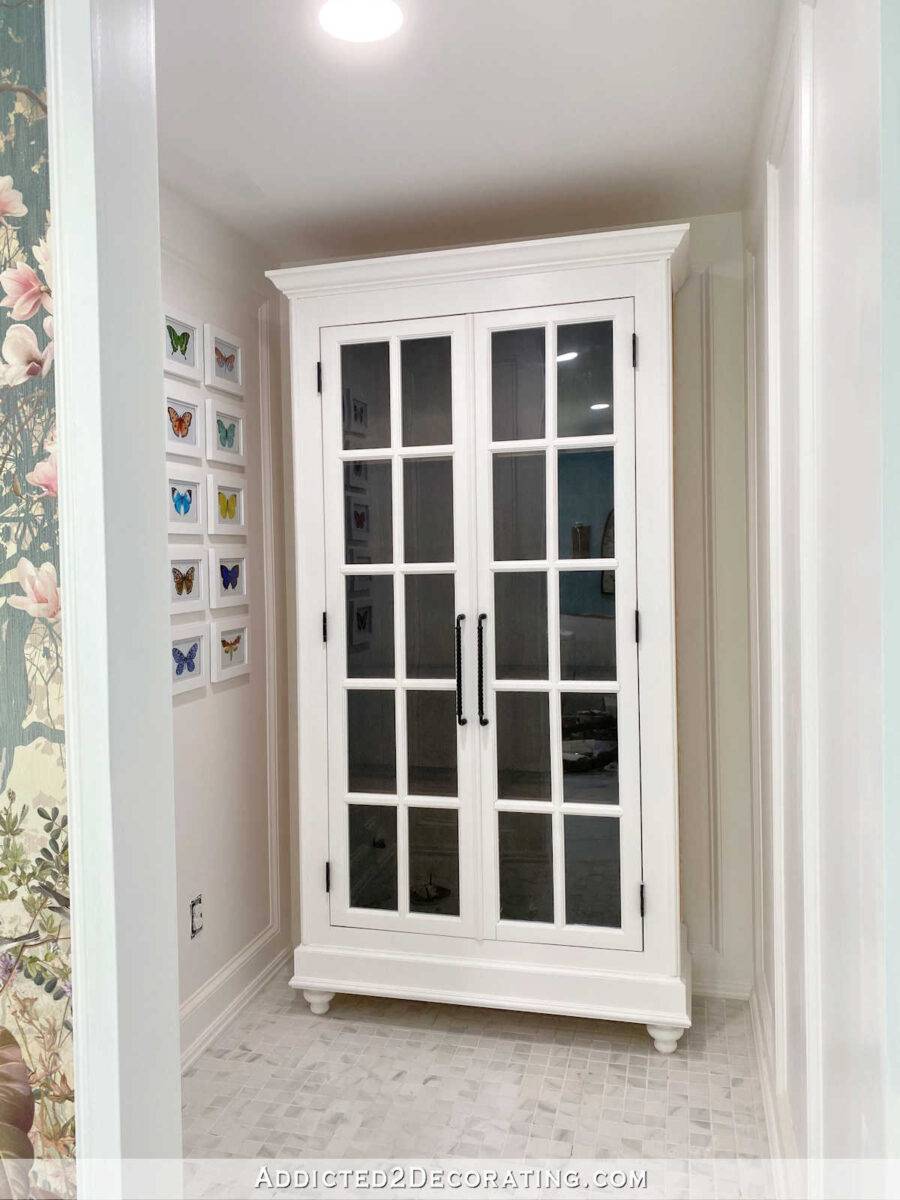
It’s hard to see the pretty interior of the cabinet when the doors are closed, but I’m thinking about installing some tape LED lights, not only to brighten up the inside, but also to act as a nightlight like the ones I put in the built-in open shelves in the hallway bathroom.
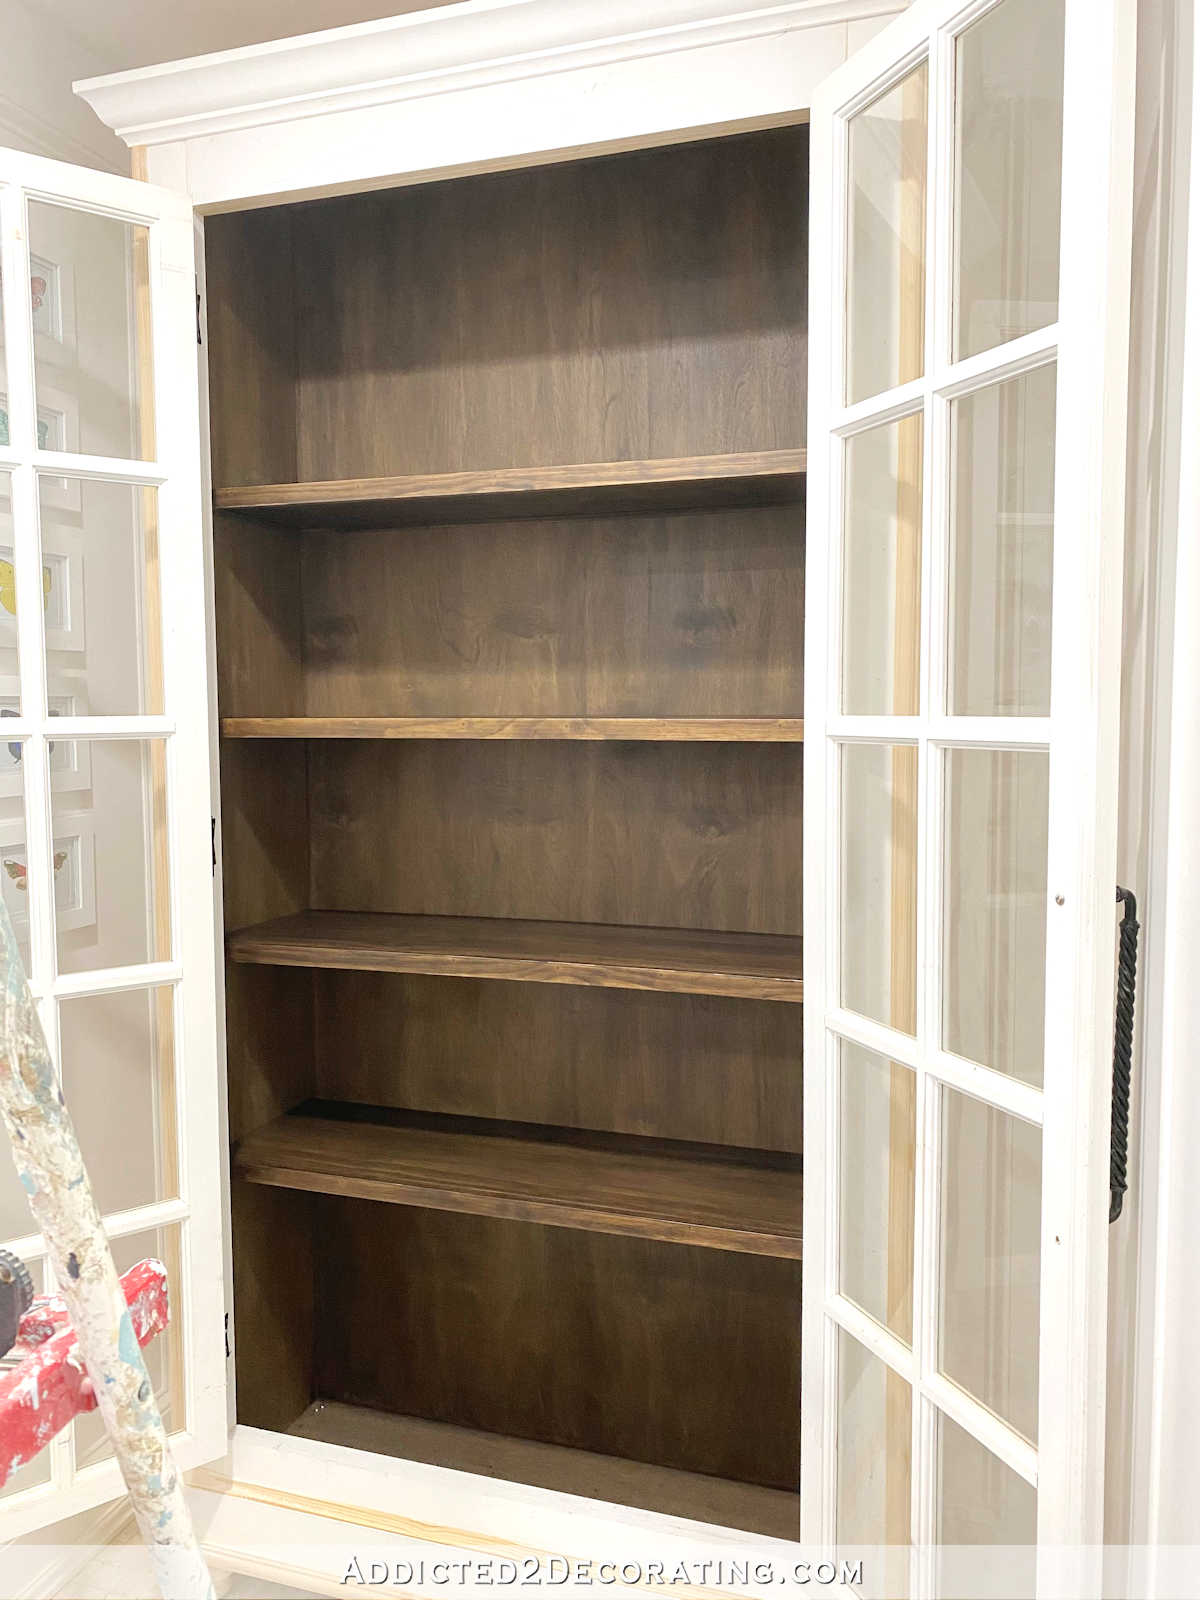
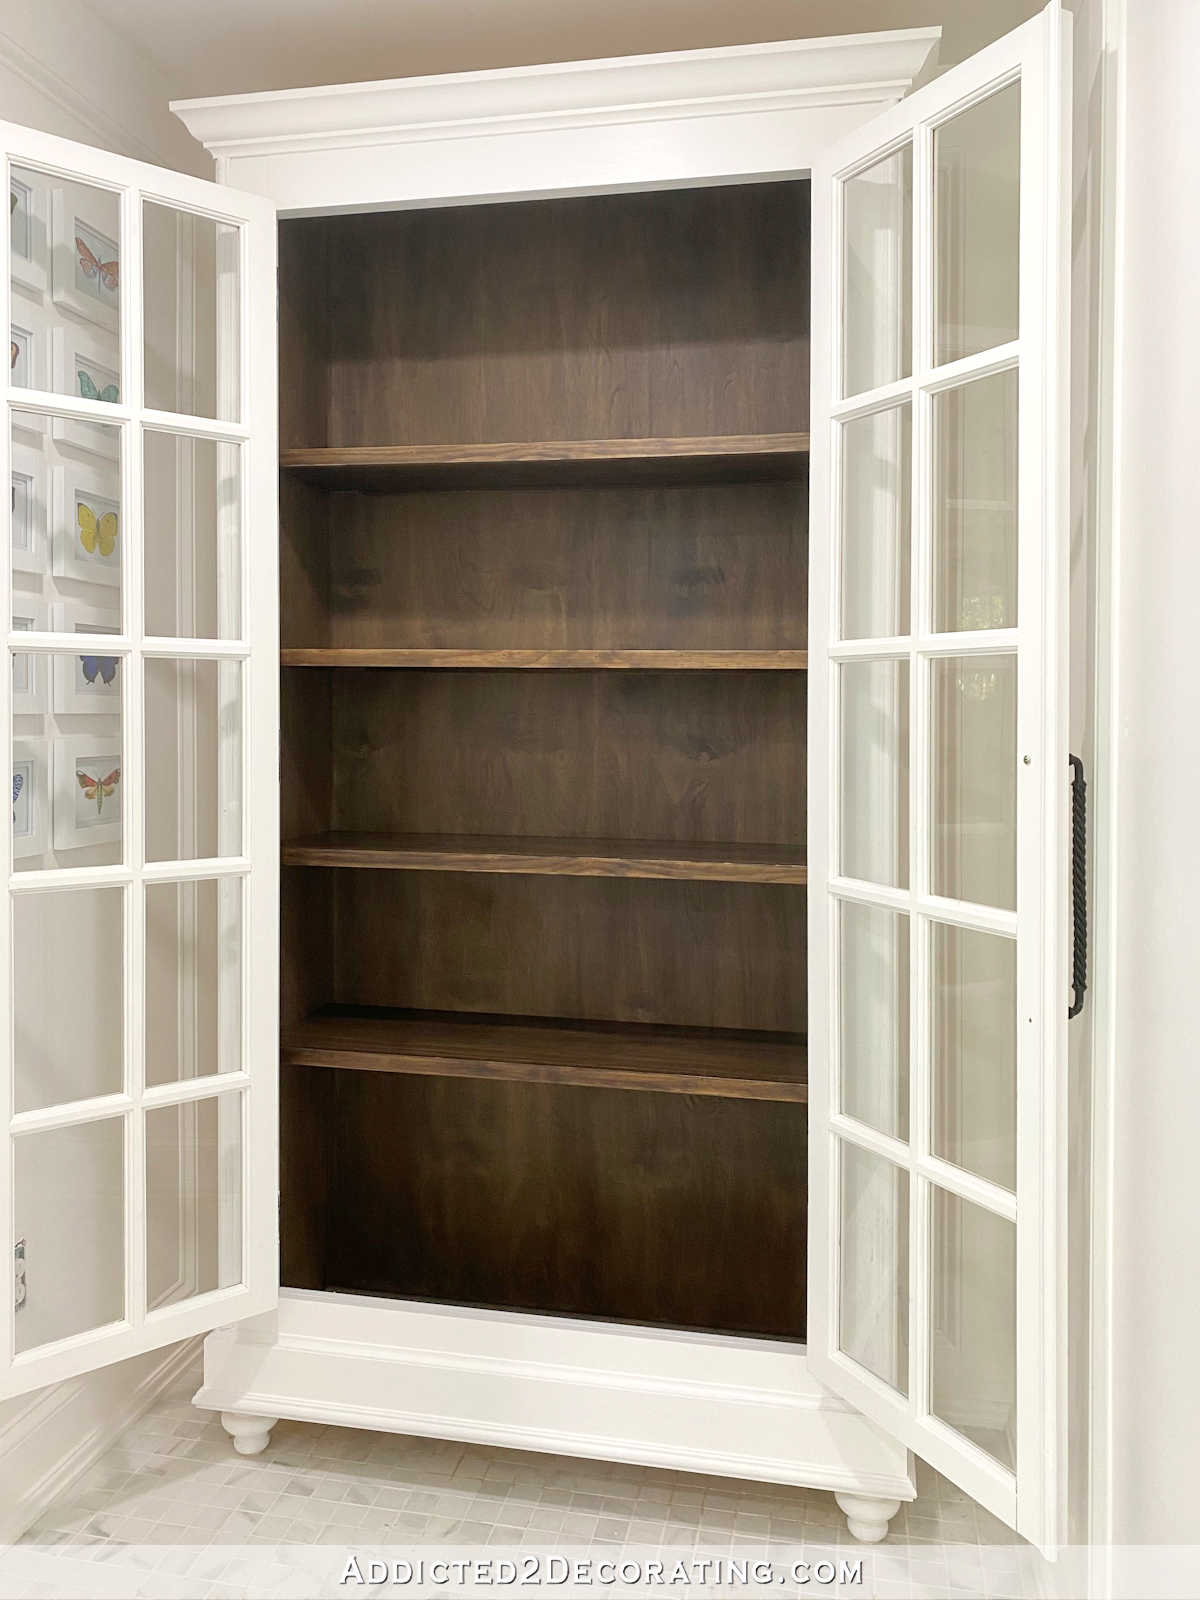
Here’s a look at the cabinet with the doors open so you can see the pretty stained wood inside…
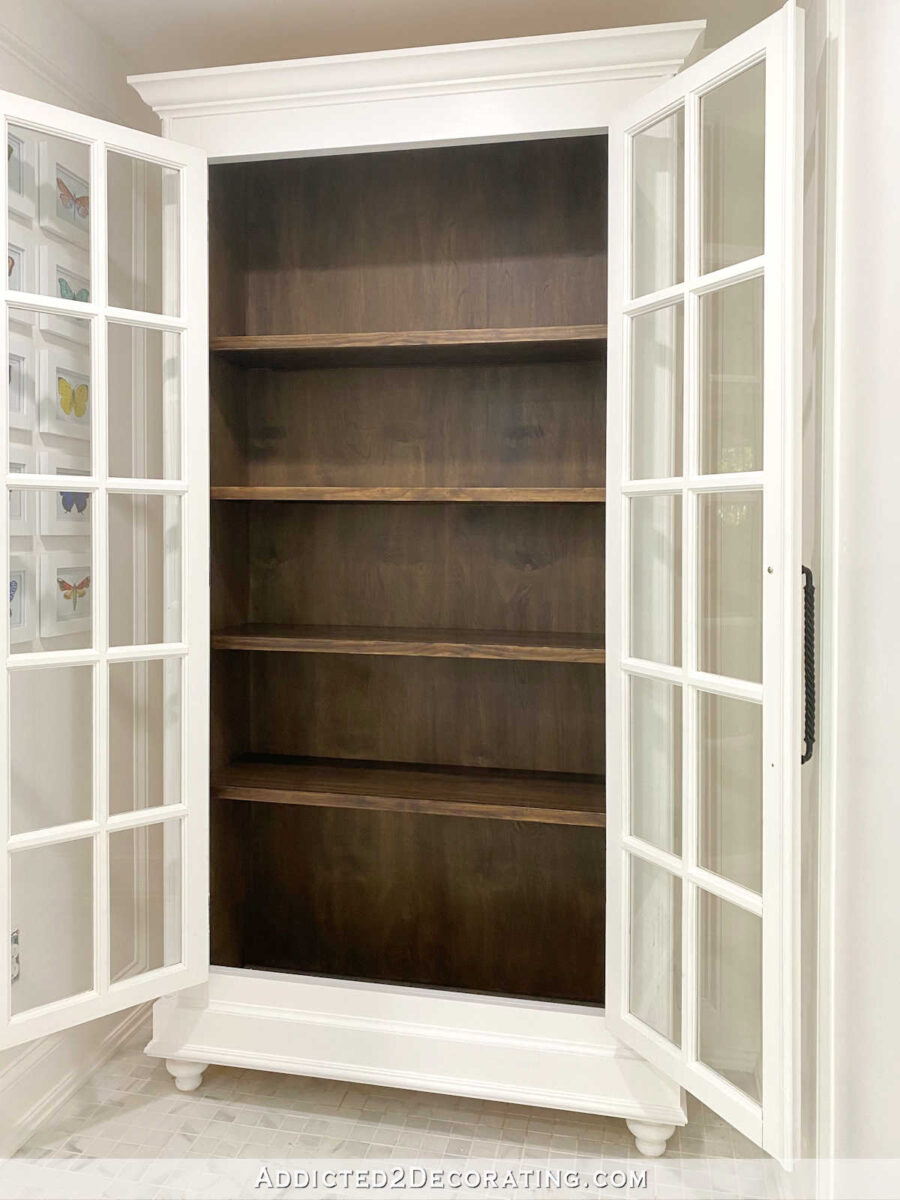
*Sigh* I love it. I’m just so pleased with how this turned out.
Note: This is the final post of a multi-post project. You can see the previous posts here: Part 1 — The basic build; and Part 2 — Trimming out the cabinet.
So at the end of the last post about this project, the cabinet was all trimmed out and ready to be finished.
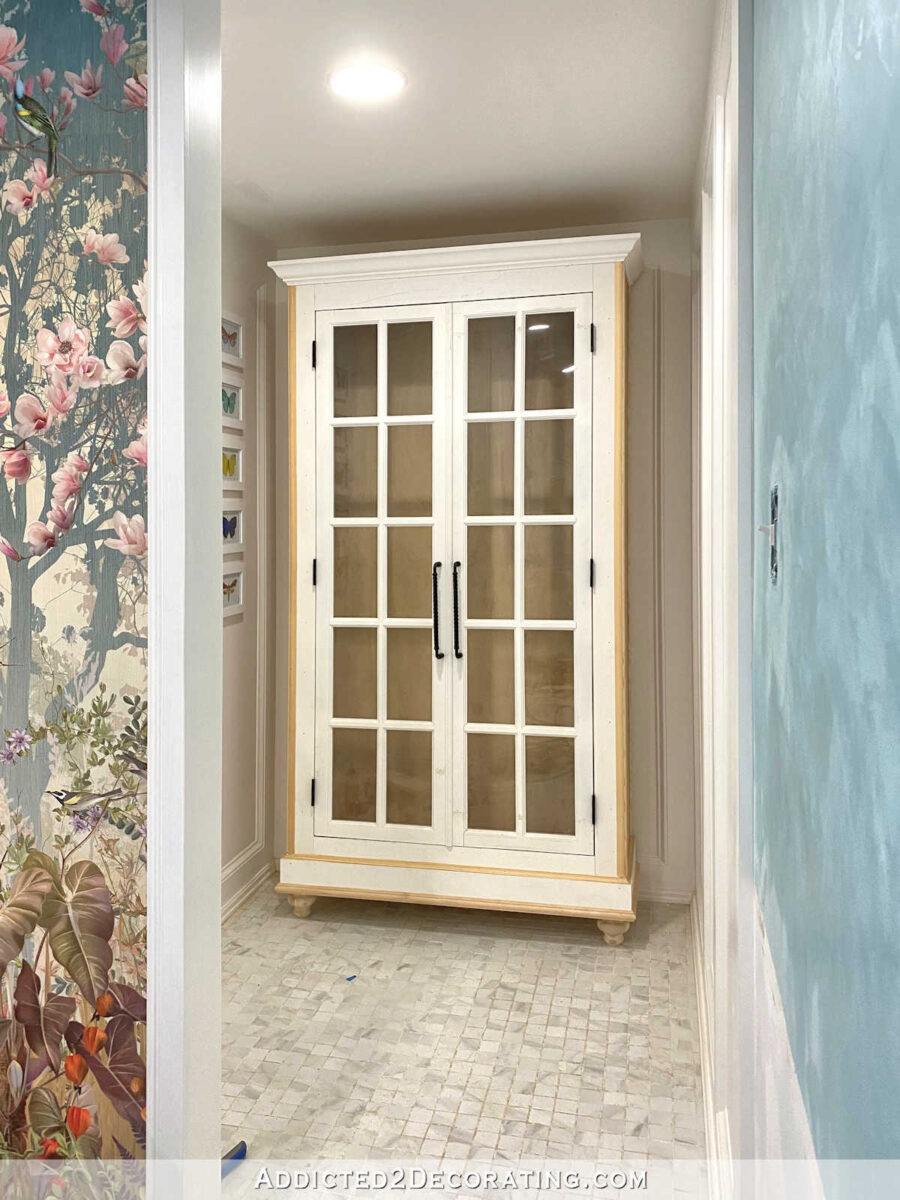
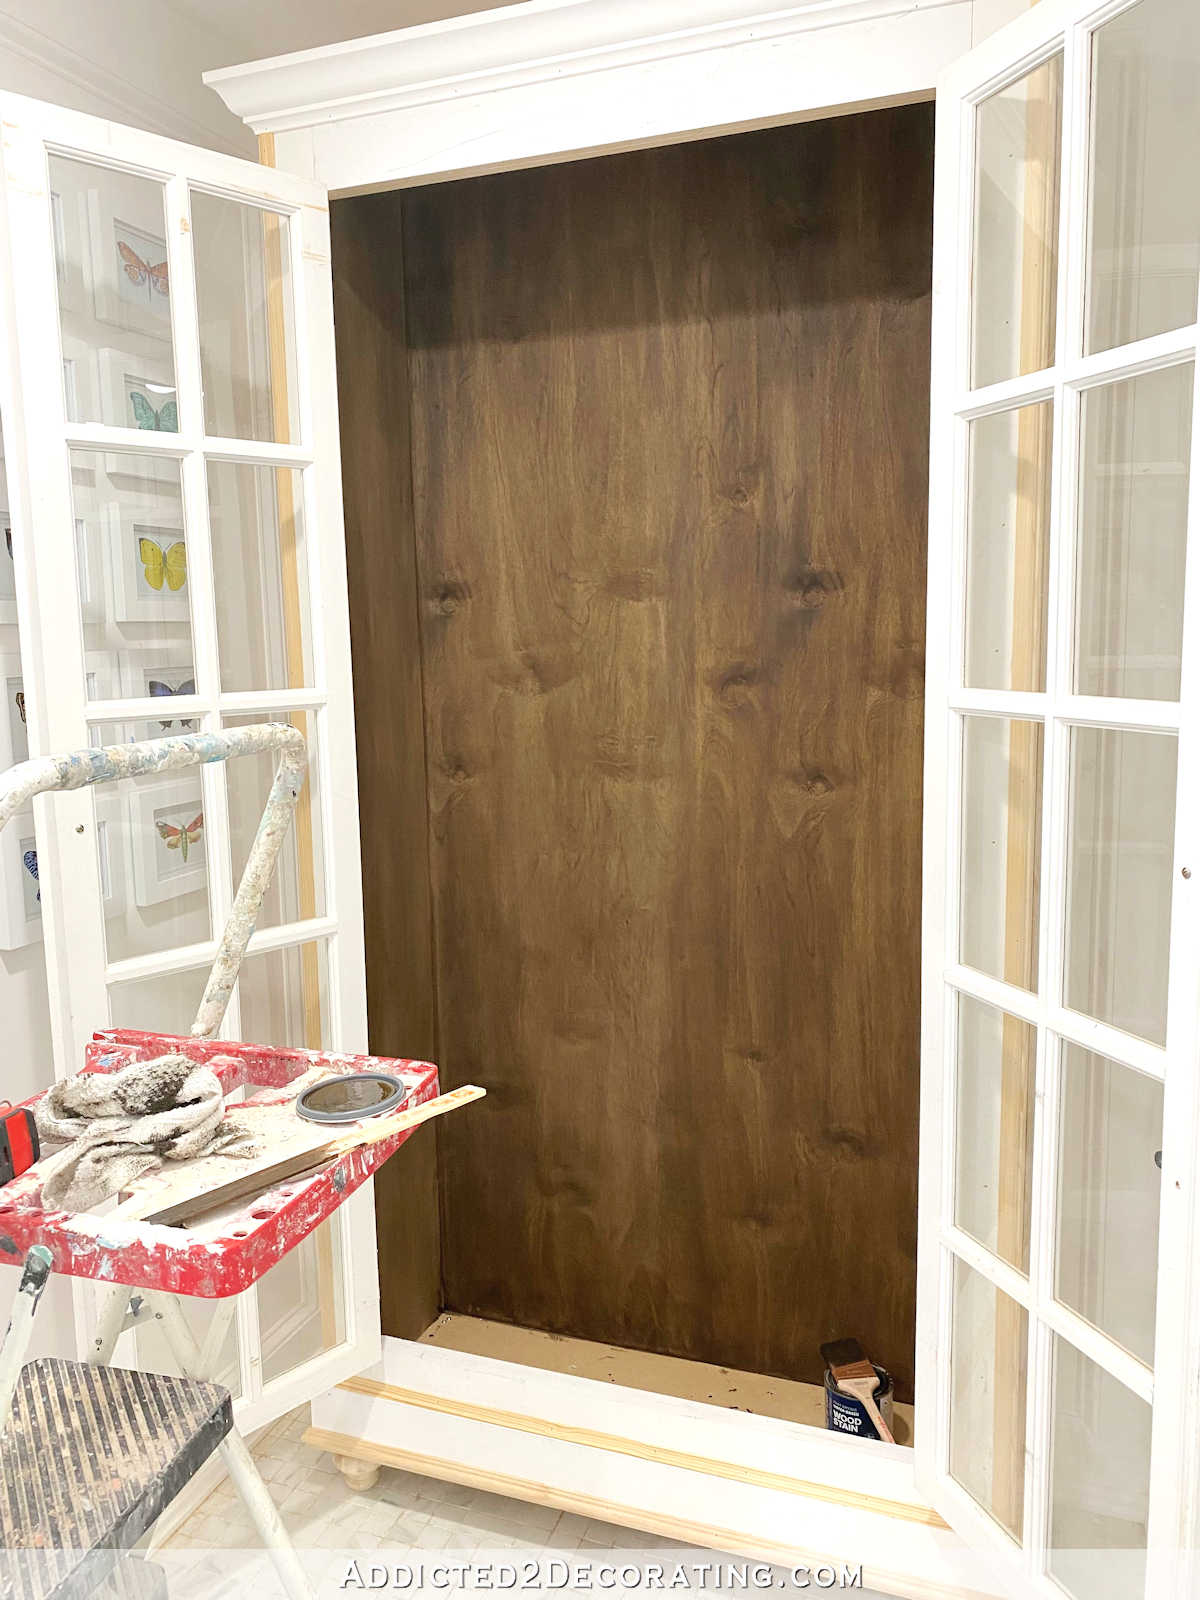
After thinking through the different options for finishes, I finally decided that since I used a pretty plywood for the back, I would try to stain it. The tricky part was that I had used MDF for the sides, the top, and the bottom. So I knew that finding a finish that would work on plywood as well as MDF and give me a somewhat uniform finish on both would be a challenge.
Any oil-based penetrating stains were ruled out immediately, so I headed to both Lowe’s and Home Depot to see what the other options were. To be honest, there weren’t many options at all, so I bought Behr Premium Water-Based Wood Stain in Dark Walnut (affiliate link).
As it turns out, this product is AMAZING!! Seriously, it’s my new favorite stain. It’s so easy to use. It goes on easily, the excess wipes off easily (as in, it doesn’t get sticky), and the finish is so pretty. You can see in the picture below how it did on the plywood back and the MDF side. Honestly, if I didn’t tell people that the sides were MDF, I don’t think they’d ever know.
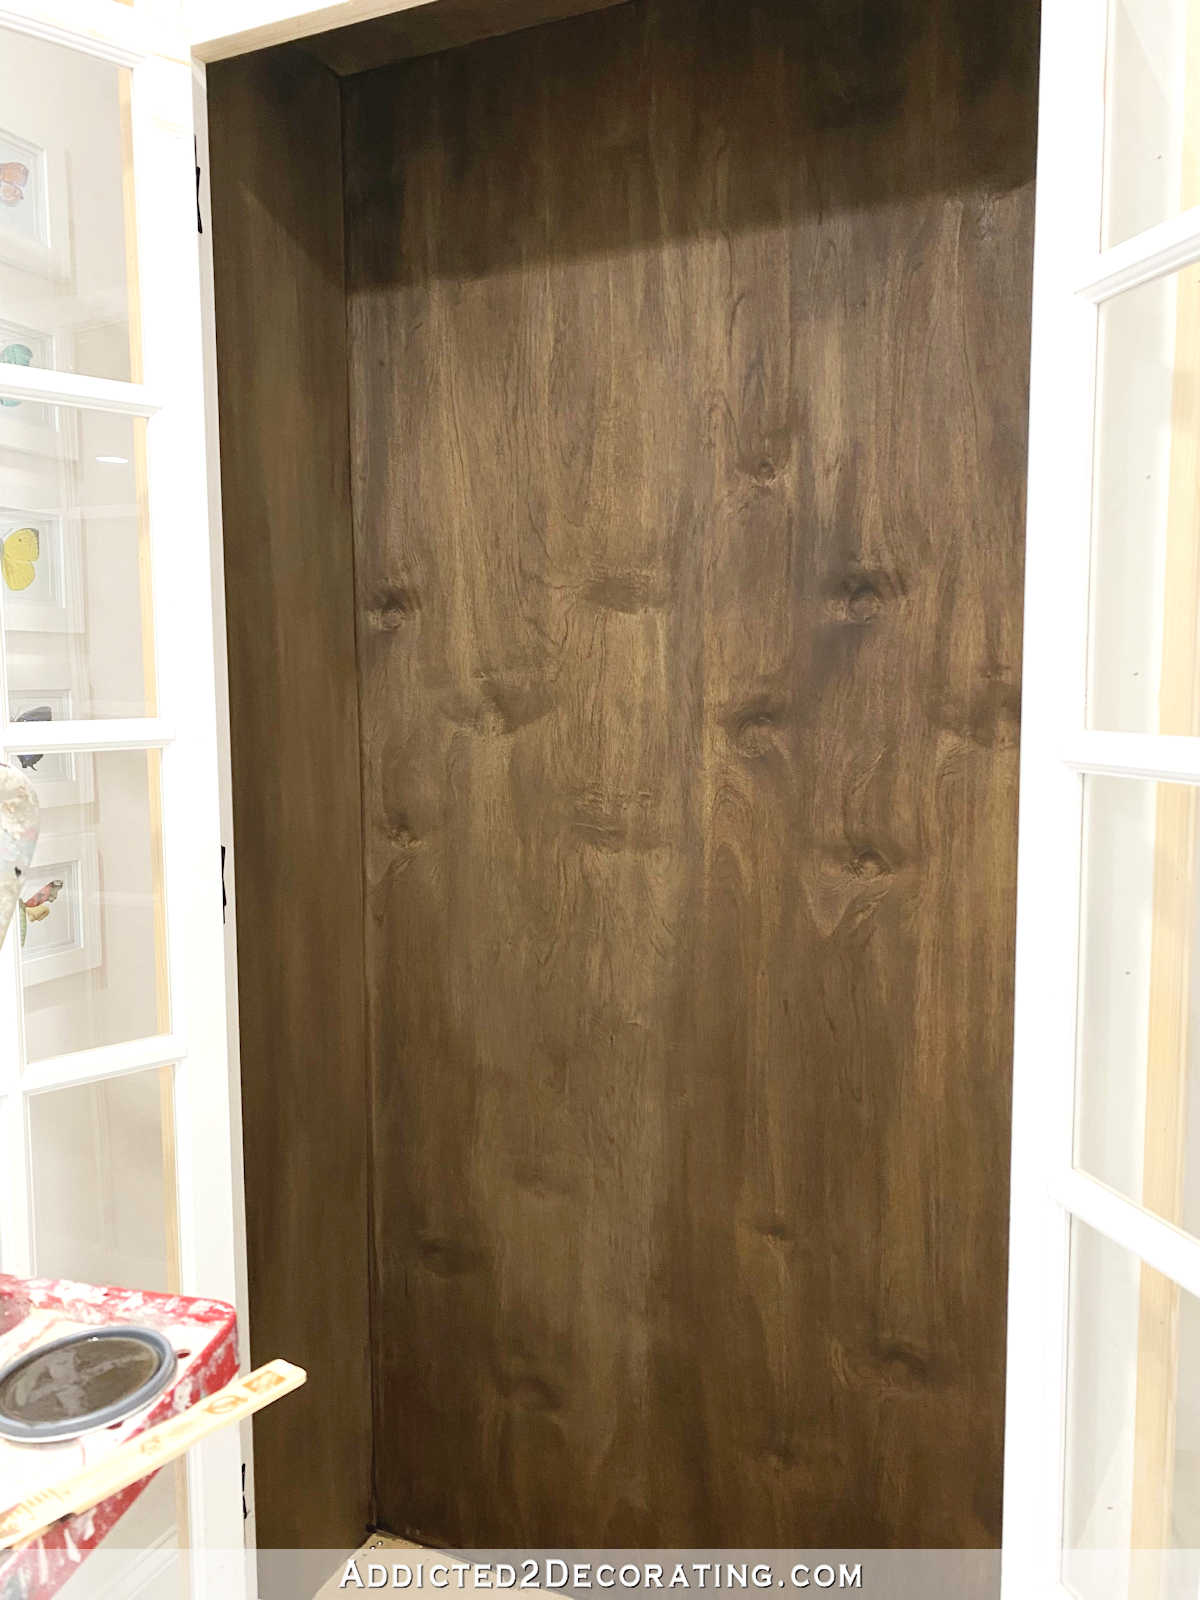
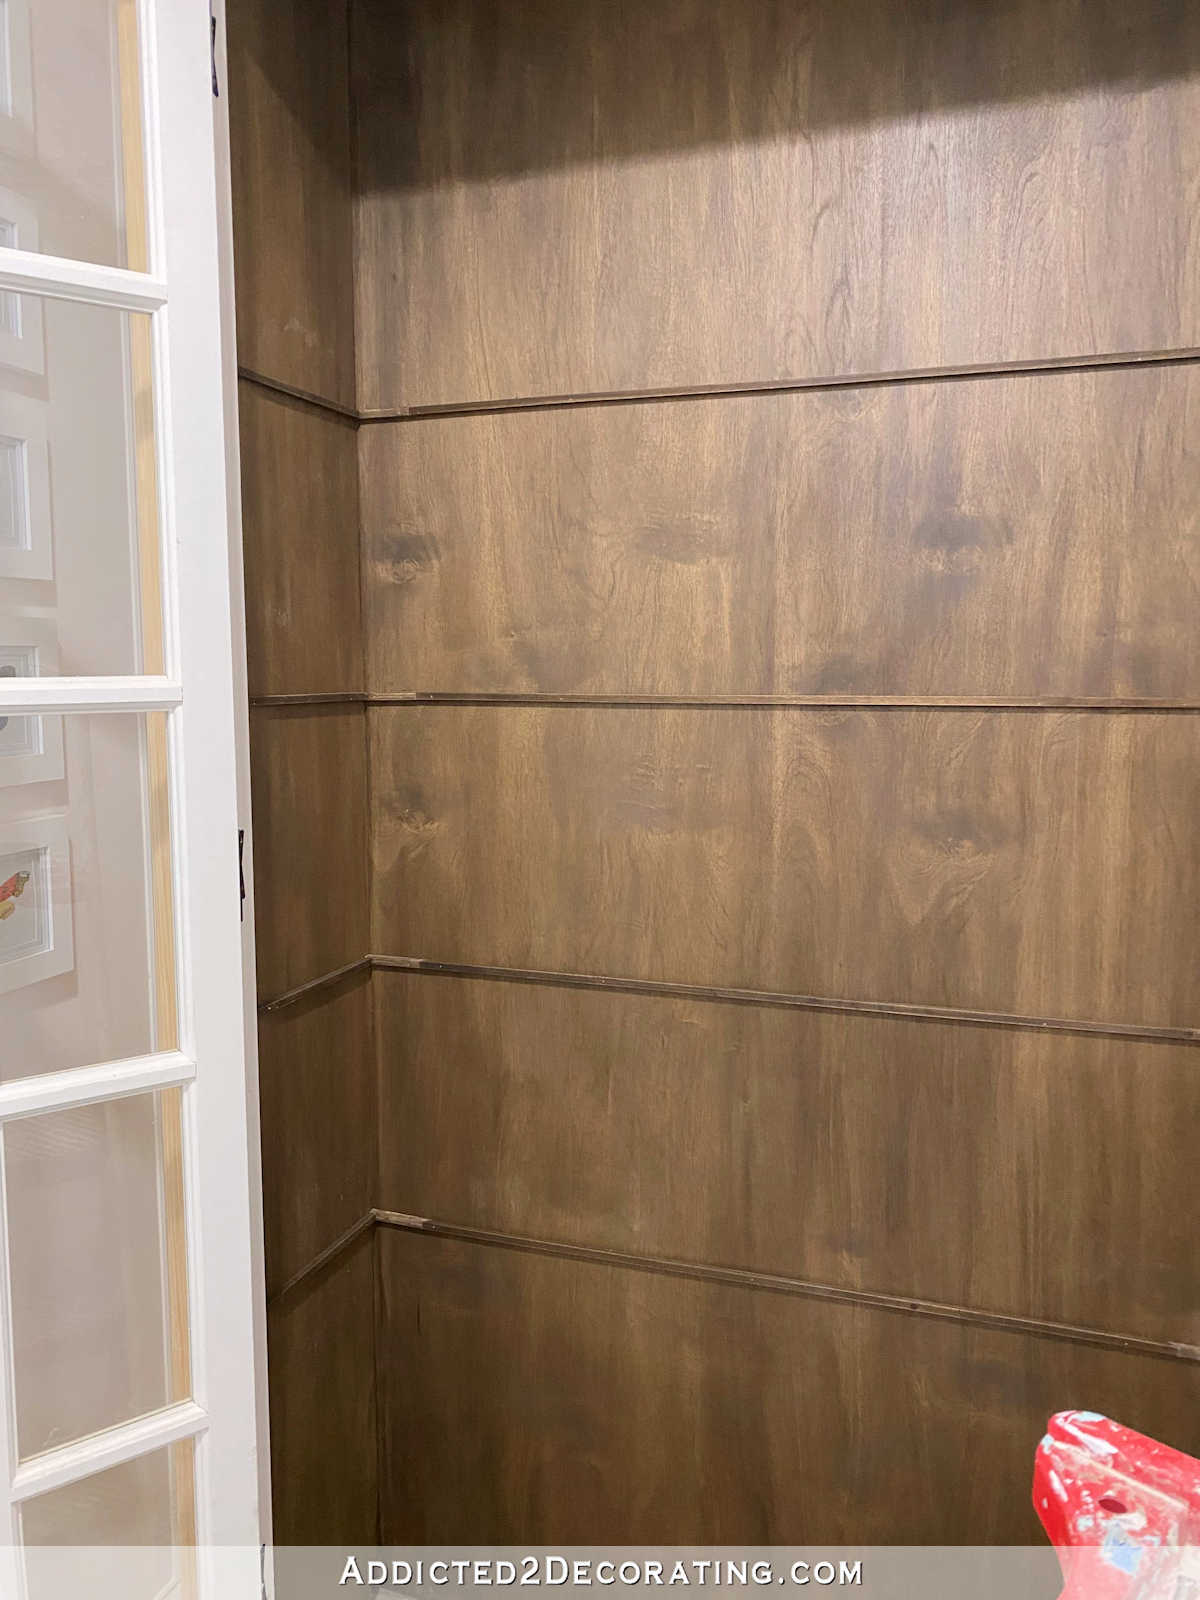
Here’s a view from a bit further back, and before I stained the bottom of the cabinet.
I love this stain so much! It worked on the plywood (which is just sold as “sanded plywood”, so I have no idea what kind of wood it is), on the MDF sides, and on the pine shelves. Everything turned out beautiful.
To install the shelves, I measured where I wanted my shelves to go, and then attached 3/8-inch square dowels using 5/8-inch 18-gauge nails in my nail gun. I couldn’t find the dowels in 48-inch lengths, so I had to use 36-inch lengths and piece them together, which is why the three inches at either end of the back dowels look different. Fortunately, only the top one shows, so I still need to put a little more stain on those small pieces.
For the shelves, I used 1″ x 12″ premium pine (the kind that has almost no knots), cut to length. To give the front edge of the shelves a finished look, and also make them look a little thicker and more substantial, I used 1″ x 2″ premium pine, ripped down to one inch wide on my table saw, and nailed that to the front edge of the shelves using 1.5-inch 16-gauge nails.
Once those were attached, I stained the shelves using the exact same Behr water-based stain.
Here the process I used to finish all of the wood on the inside:
- Brush on the water-based stain, allow it to sit for a few minutes, and wipe off the excess with a rag, and allow to thoroughly dry (about two hours)
- Brush on a coat of General Finishes High Performance Topcoat in a flat finish, and allow to thoroughly dry (about an hour)
- Sand the topcoat lightly by hand with 220-grit sandpaper, but be very careful on corners because it’s very easy to sand off the color on corners.
- Wipe off the sanding dust, and apply a second coat of the topcoat.
Generally, two coats are sufficient. On one of my shelves, after I did the initial stain coat and the first clear topcoat and then sanded, I had some areas that looked a little bit too light. I just went back over those areas very strategically with some stain, let it dry, and then proceeded with the second clear topcoat.
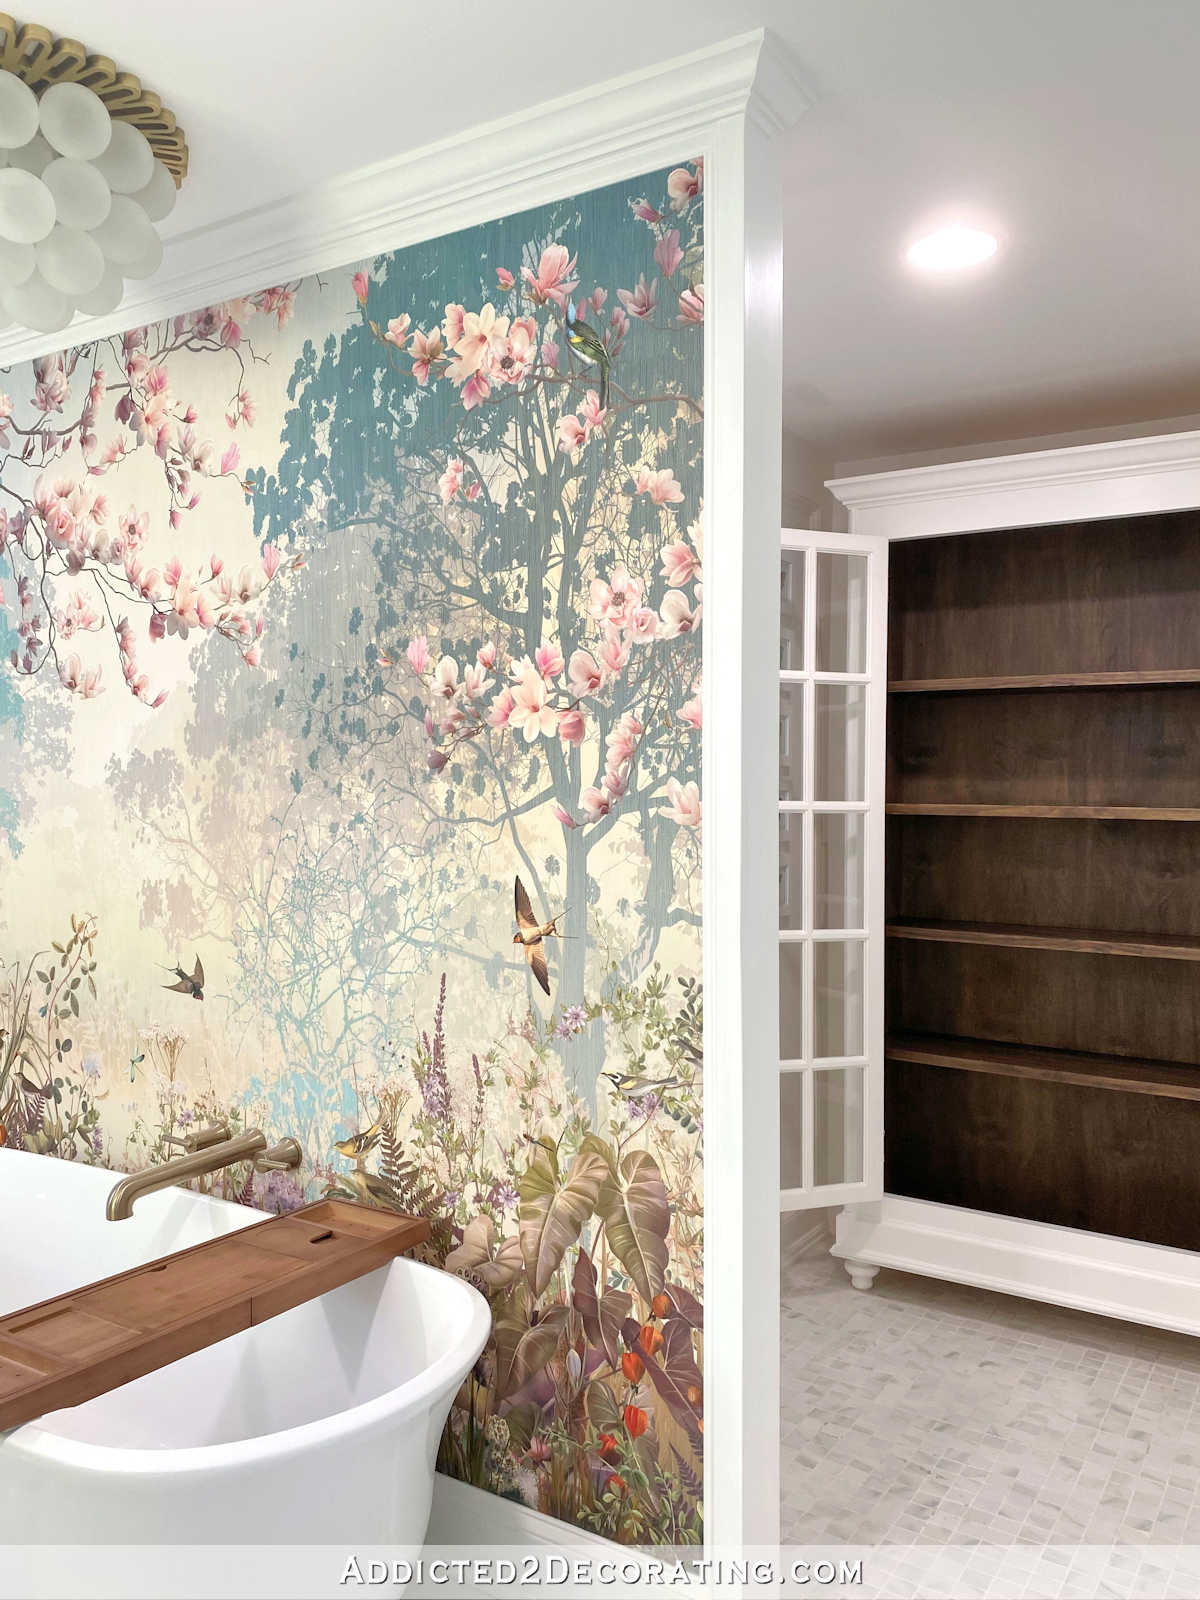
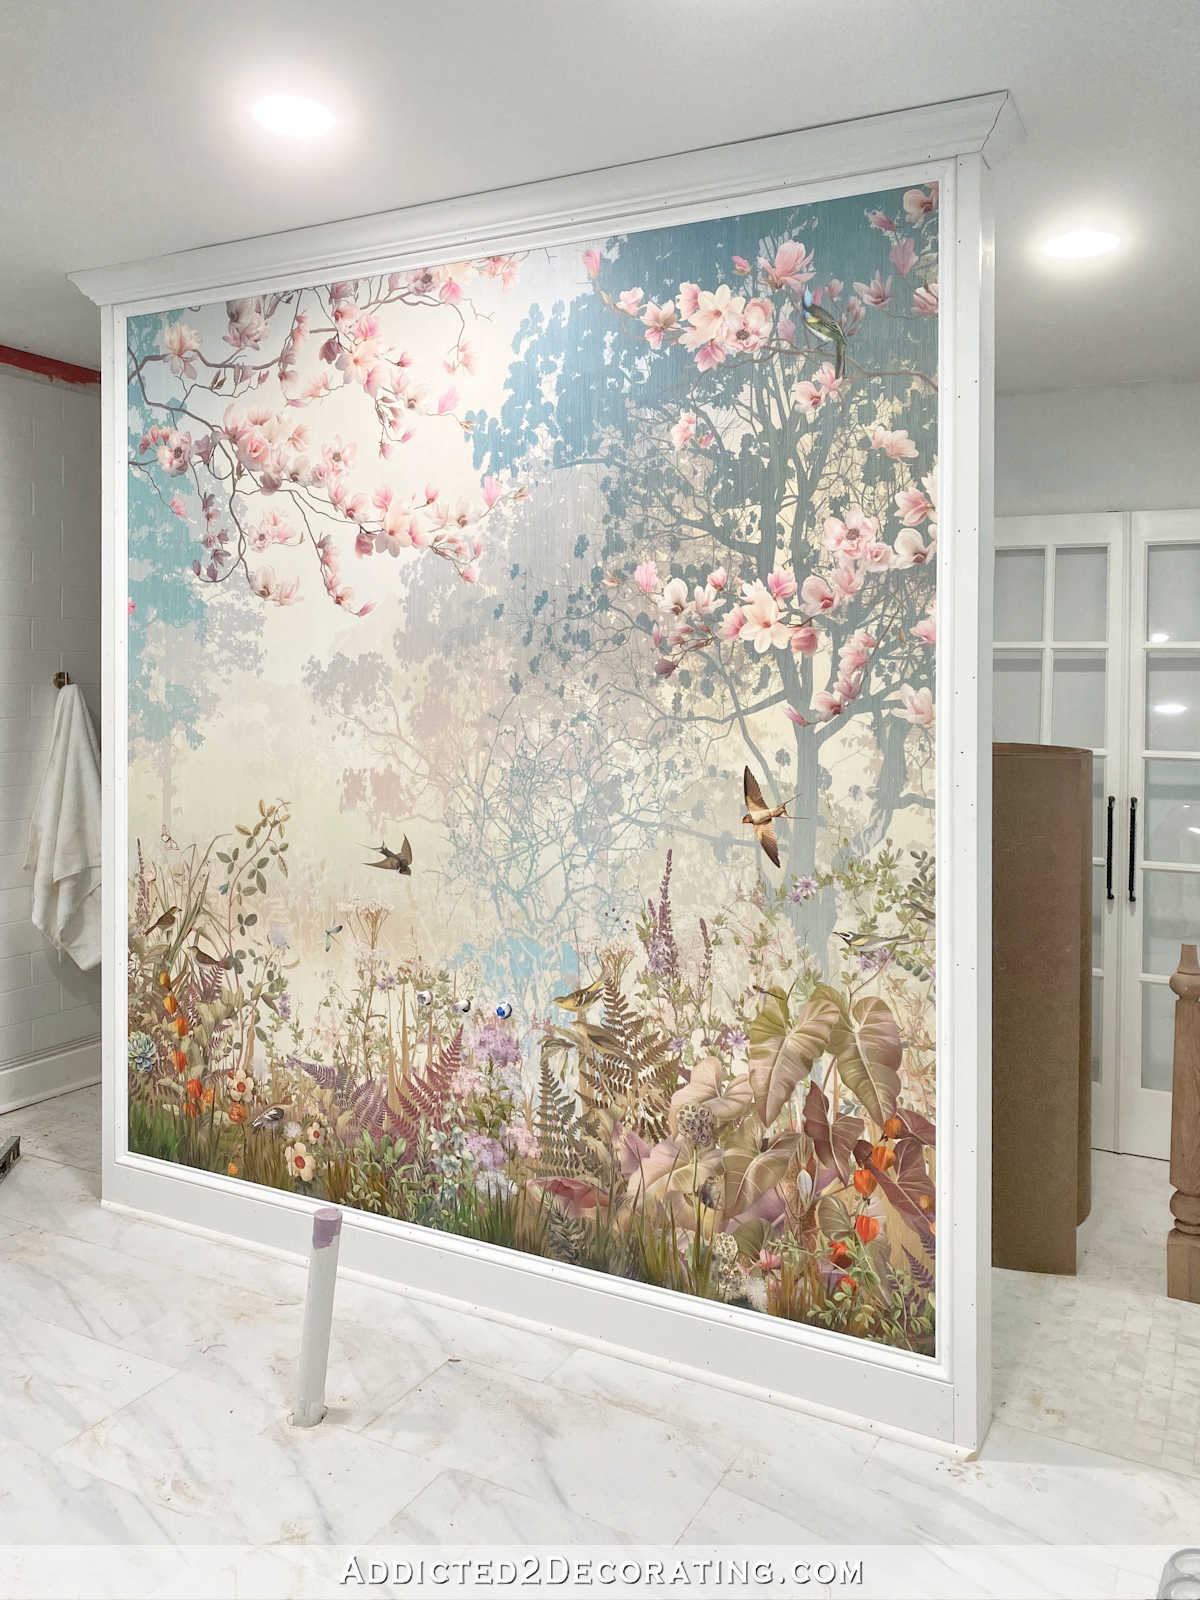
I can’t wait to get some lights in the cabinet so that the interior shows up better when the doors are closed. But even with the inside just being dark I still think it’s pretty.
But that pretty stained interior needs to be more visible.
I really couldn’t be more pleased with how this turned out. I think a stained interior is just what this cabinet, and this area of the room, needed.
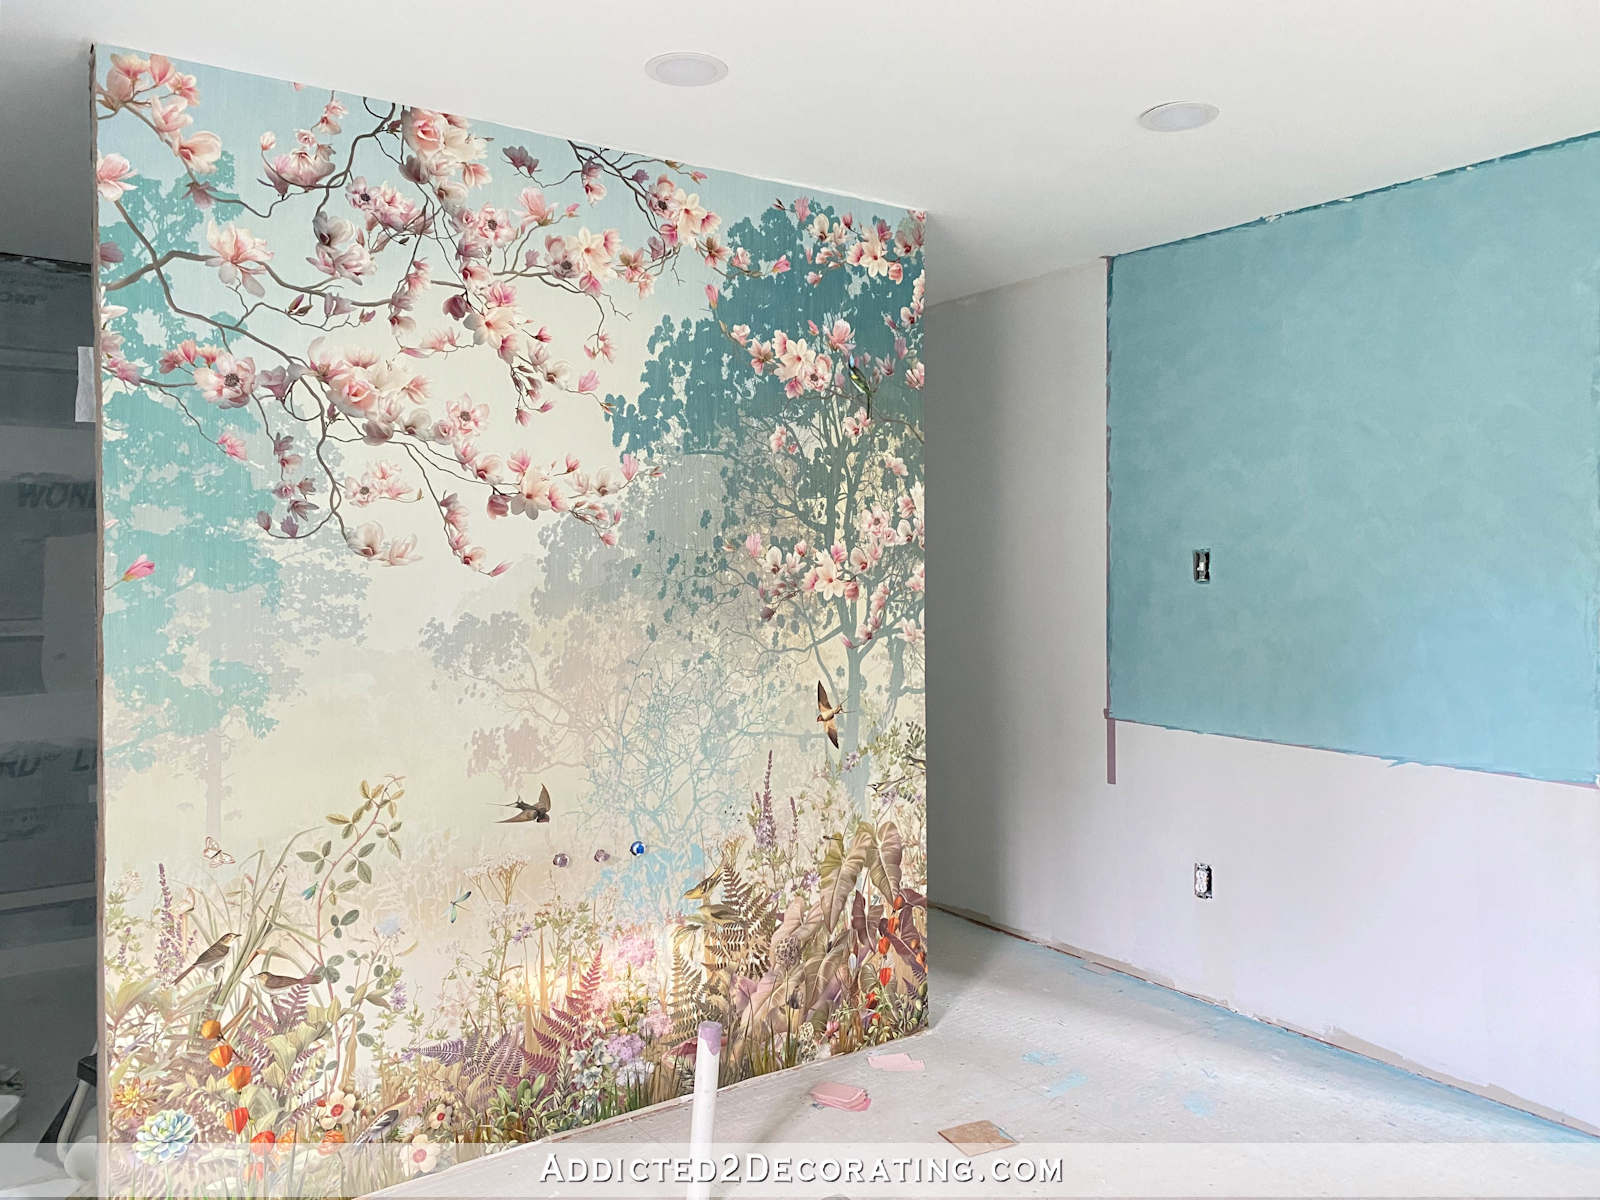
Now I have wood in the shower, wood on the tub, and wood in the water closet. And it goes so beautifully with the lower dark areas of the mural.
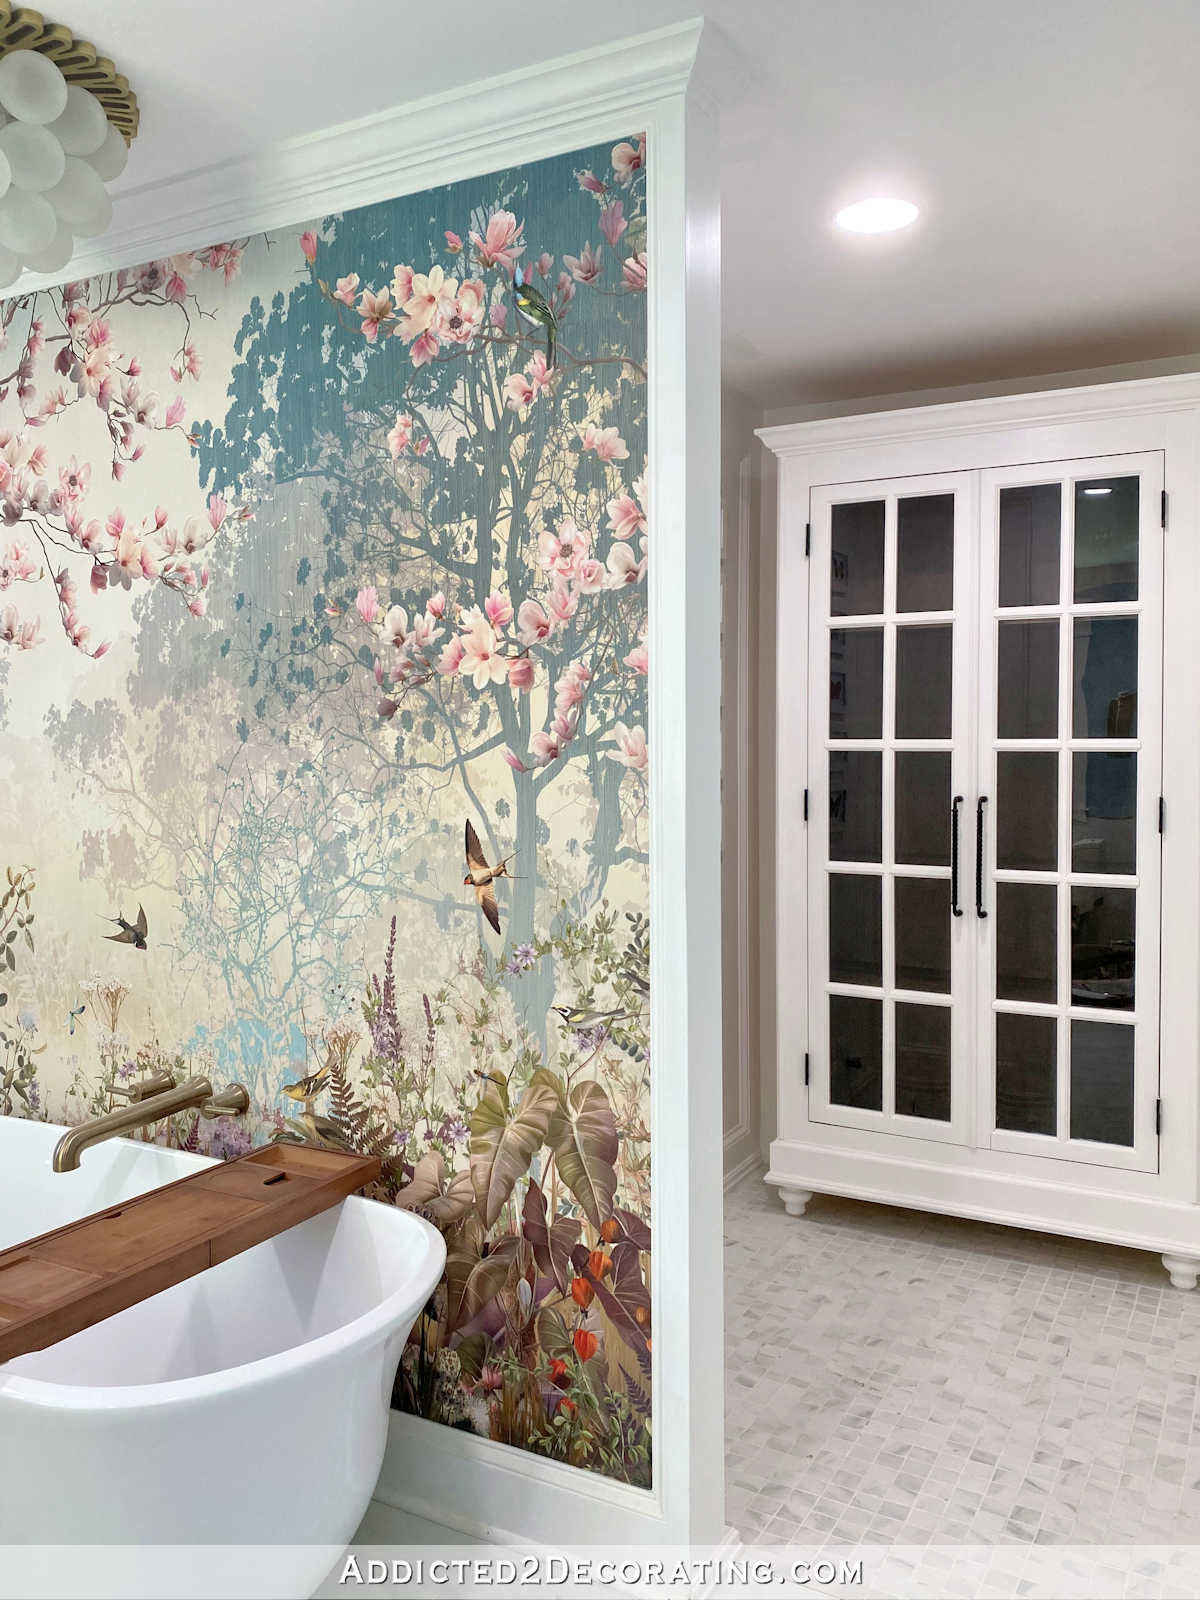
I think the stain was definitely the right decision. What do you think?
That’s a big project marked off of my list! Finishing up the rest of this little water closet should be pretty easy. I have a couple of places on the wall that need a tiny bit of repair and touch up. (Building this huge cabinet in such a small space was a challenge, so some dings were expected.) Then I have some cleanup to do on the floor, and the toilet needs to be installed. And finally, I need to install lights inside the cabinet, and decide what I want to store in there.
And then…finally…it’s time to move on to the main wall. EEEEEKKK!!! I’m so nervous about that!! But the time has come. 😀
Note: This project was part of our master bathroom project. You can see our finished master bathroom here.

Addicted 2 Decorating is where I share my DIY and decorating journey as I remodel and decorate the 1948 fixer upper that my husband, Matt, and I bought in 2013. Matt has M.S. and is unable to do physical work, so I do the majority of the work on the house by myself. You can learn more about me here.

You have once again smacked it out of the park!!! WOW!!! And I just love how it all ties in together. Keep going, you’re on a roll now. Don’t fret about those vanities…you are a Remodeling Goddess!!! Just love how that all came out. Thanks for these beautiful posts.
The stain is beautiful!
Do you plan to add grab bars in toilet and shower areas?
Not at this point. But the reinforced blocking is in the walls in both areas if we ever need to in the future.
I love it also. I am redoing a much smaller master bath and will probably copy your tile choices.
Do you sell the butterfly prints? Perhaps even your edited files? I love them.
Let me see about uploading them somewhere to make them available. I can probably put them in a Dropbox folder and make it public.
I was wondering that as well. It would be nice to piggy-back on your efforts!
Cabinet is utterly gorgeous.
Stunning effort!
I love the stain! That will tie in so nicely with the walnut vanities and the shower accents. And I imagine building such a lovely cabinet has given you more confidence for your vanity build. You do such amazing work!
Looks great. Just asking since it’s such a large cabinet, does Matt still have enough room with his wheelchair to get in & out ok?
To Debbie – regarding the wheelchair question/ comment ^^^^
As if she didn’t consider that. Turd in the punchbowl ..rude…jealous comment. lol
This cabinet is so beautiful! Remarkable!
That’s what I was thinking, Beth–a little bit of nature (wood) in each major area, it will feel so balanced and planned. Lovely!
It’s beautiful, Kristi. Staining the interior of the cabinet added just the right touch of warmth to that part of the bathroom. Question: when installing lighting inside the cabinet, how do you place the light so that it lights up all the solid shelves? If the shelves were glass, the light would shine down through them, but solid shelves won’t do that. I am once again impressed with your mad carpentry skills. EGG-cellent job!
I love the stain—I agree, it makes a different color connection with the mural! Fantastic choice!
YOU are just amazing! I love the French door cabinet! It couldn’t be more perfect in the styling, finishes, utility, and cohesion with the rest of the master bath’s design! And, it’s one of a kind!
LOVE that you used the French doors that came with the house! Like buried treasure found – but, it took the master designer to make perfect use of them!
There’s an allegory here!
Just like God can use us as we are now AND at every stage of our lives – even after we’ve felt ‘set aside’ or ‘dusty’…
The Master has a purpose for each of us! We just need to trust Him to carry out His perfect plan and timing – trust that His plan is the best plan – and that He is able to implement His plan!
LOVE IT!!!🤗
Hi,
I went back and read how you put together the “box” for the cabinet and I am so impressed with your knowledge and talent and patience…… It looks beautiful!! I love it!!!
I have a perfect spot for a cabinet just like yours in our new condo. The previous owner removed the tub in the primary bathroom and replaced it with a bench (ugh).
So now I just have to figure out how I can do this!! Thank you so much, I have been following you for years!! Nancy
That cabinet turned out so beautiful!! Great job!
I love your problem-solving skills. Improvising to compensate for working alone in tight quarters — without messing up other work you’ve already completed — shows another important aspect of your creativity.
I love it!
Beautiful.
Just an FYI. There are outlet covers that also serve as night light. Light comes out bottom pointing to floor. They work fabulously. Have used in house and garage, esp. love the ones in stairwells & halls. Give enough light to get me to light switches or passing a short distance.
Believe I bought mine at Home Depot.
I LOVE the interior stain on the cabinet. Much better than a painted color. As you say, it goes with the brown in the mural. Smiles all around.
I think it’s just magical!
I absolutely love this cabinet, especially now that the inside is stained; such a classy look, and I believe the lights would be perfect. I can’t wait to see what you put in there.
Yep, gorgeous!
Wow, that cabinet is stunning. You did such a beautiful job!!
Oh yes. Staining the interior was exactly the right way to go. It looks so good one could almost leave off the doors and do pretty white linen stacks. Just beautiful, Kristi!
I was secretly hoping you’d use stain. It’s lovely.
It is beautiful! You have such an eye for what enhancements needed. It’s lovely!
Clear winner! Great decision!
Love it!! Pure perfection and a great job! I’m saving this because I have two doors as well and I have wanted to do something with them. Ta-da! You’ve given me my step by step answer. Thanks and it is gorgeous.
Don’t be nervous! It might not be smooth at all times, but we have no doubts you’ll do great on the front wall!
The bathroom cabinet looks great! I like the warmth of the stained wood and I like the idea of some lighting in it. A nightlight is always appreciated in a bathroom for middle of the night trips and it should be perfectly located to not be TOO bright from your future primary bedroom.
I wouldn’t have thought of stain, but it is perfect! Bravo on another fabulous furniture build. 😎
That is just gorgeous, Kristi, and will look even more fantastic when you add the lights. I’m looking forward to seeing how you add those because I would like to add lights to my late MIL’s china cabinet after I paint it. xo
Puck lights! I installed some in my antique Hoosier cabinet. You can mount them with a screw or with thick double-sided tape that they come with. Or don’t mount them at all. Just set them on a shelf or prop them in a corner, hidden. Batteries. Push it and it’s on. Or they come with a remote.
What a beauty! Well done!
We love those little puck lights. Can be used with a remote as well. We’ve put them anywhere inside that has a door: closets, cabinets, pantries, even inside a deep drawer. Push them and they’re on. Or the remote.
Amazing! Looking forward to seeing how the LED lights are installed!
Oh my gosh, Kristi! I love it!
Once I saw that stain interior, I imagined you staining something else in the future
one of those beautiful new teal stain colors that I see on thumbnail ads on my social
media. Have you seen teal shaded stain? I know how much you love teal, I can definitely
see you creating a project to try color stain on. Love, love, love the cabinet and the whole
bathroom build in general.
It looks amazing, but I am a bit sad that it looks like it covers that last row of butterflies.
Rockstar, period!