DIY Aircrete Faux Stone Facade, Part 2 — Building The Silicone Molds For Pouring Fake Concrete “Stones”
Yesterday, I made really good progress towards my goal of creating my own DIY faux stone facade for the skirting area of the front porch. I still haven’t actually poured any of the concrete stones (more on that later in the post), but I did get some of the silicone molds finished and ready for pouring the concrete. (I’ll actually be making aircrete.)
Note: This is a multi-post project. You can see all of the posts about this project here: DIY Aircrete Faux Stone Facade Archives
Or you can see the previous post here: DIY Aircrete Faux Stone Facade, Part 1 – How To Make Silicone Molds For Pouring Concrete
Just to recap, yesterday I showed you how I used the actual stone on the front of my house…
…to create a silicone stone textured mold…

…that looked like this once it was dry and pulled off of the stone.
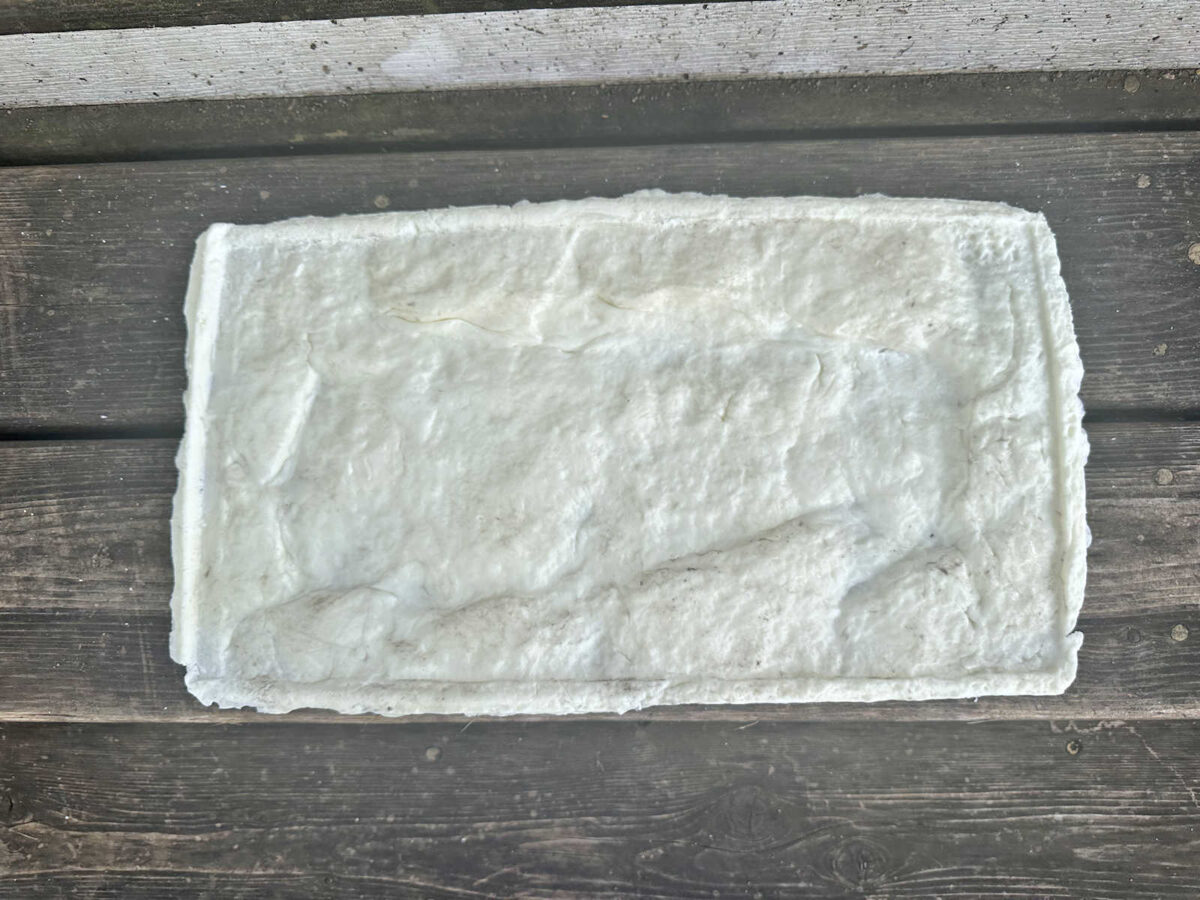
That part went really well, but as you can see, those textured silicone mats that I created don’t give me anywhere to actually pour concrete. If I tried pouring concrete onto that mat, it would just run over the sides. So creating those mats was just step one towards having actual molds that I can use for pouring concrete. Now I’ll show you how I turned that mat into an actual mold.
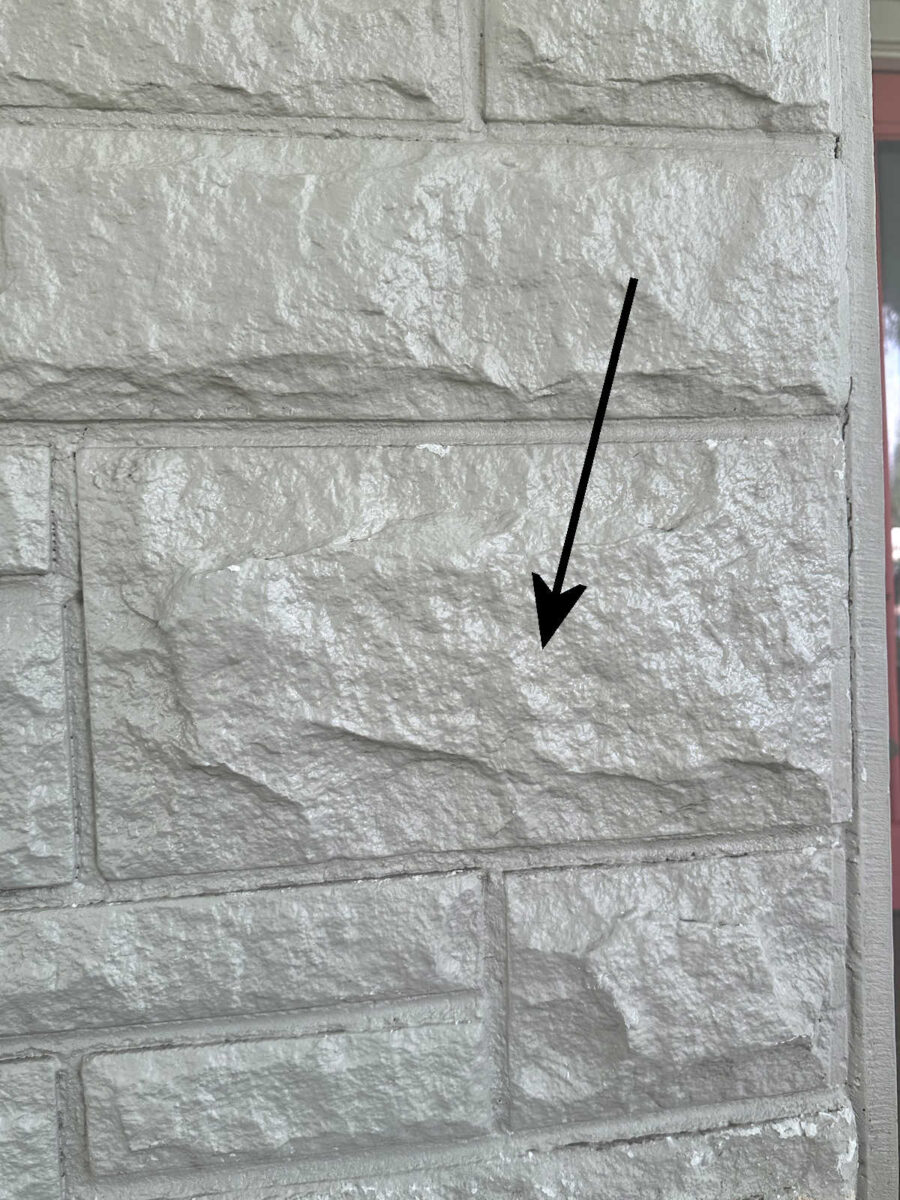
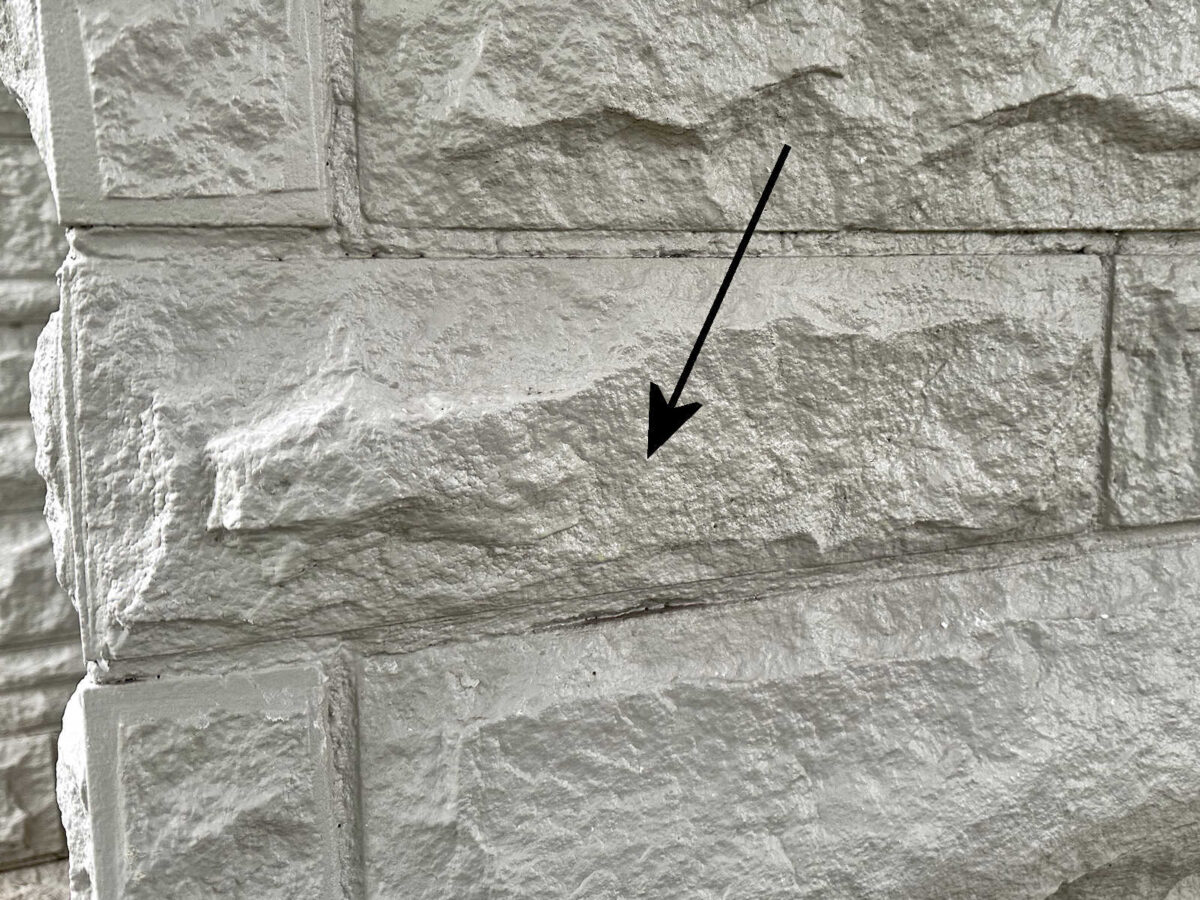
For the purposes of this post, I’ll you the mold I created using the textured mat that I made using this specific stone on the front of our house. You can see just how textured this stone is.
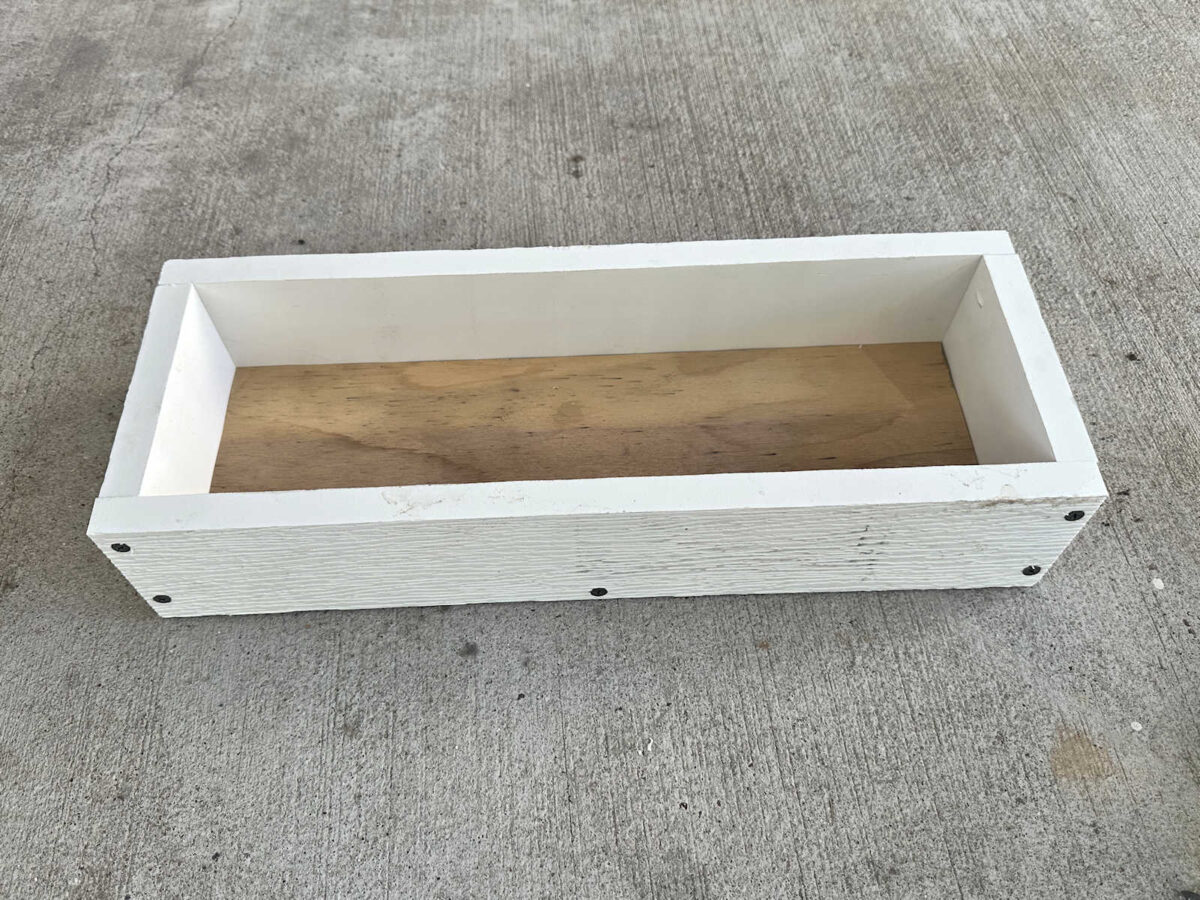
I measured the textured part of the mat and determined that I would need the finished inside measurements of the mold to be 5″ x 16″. So I cut a piece of scrap plywood to that exact measurement on my table saw. Then I cut sides out of PVC boards. I used PVC because I already had these on hand, so I didn’t need to buy any extra supplies. But you can also use melamine-coated plywood for these areas. I used 1″ x 4″ boards and cut the end pieces to 5 inches wide, and then I cut two pieces for the long sides to 17.5 inches.
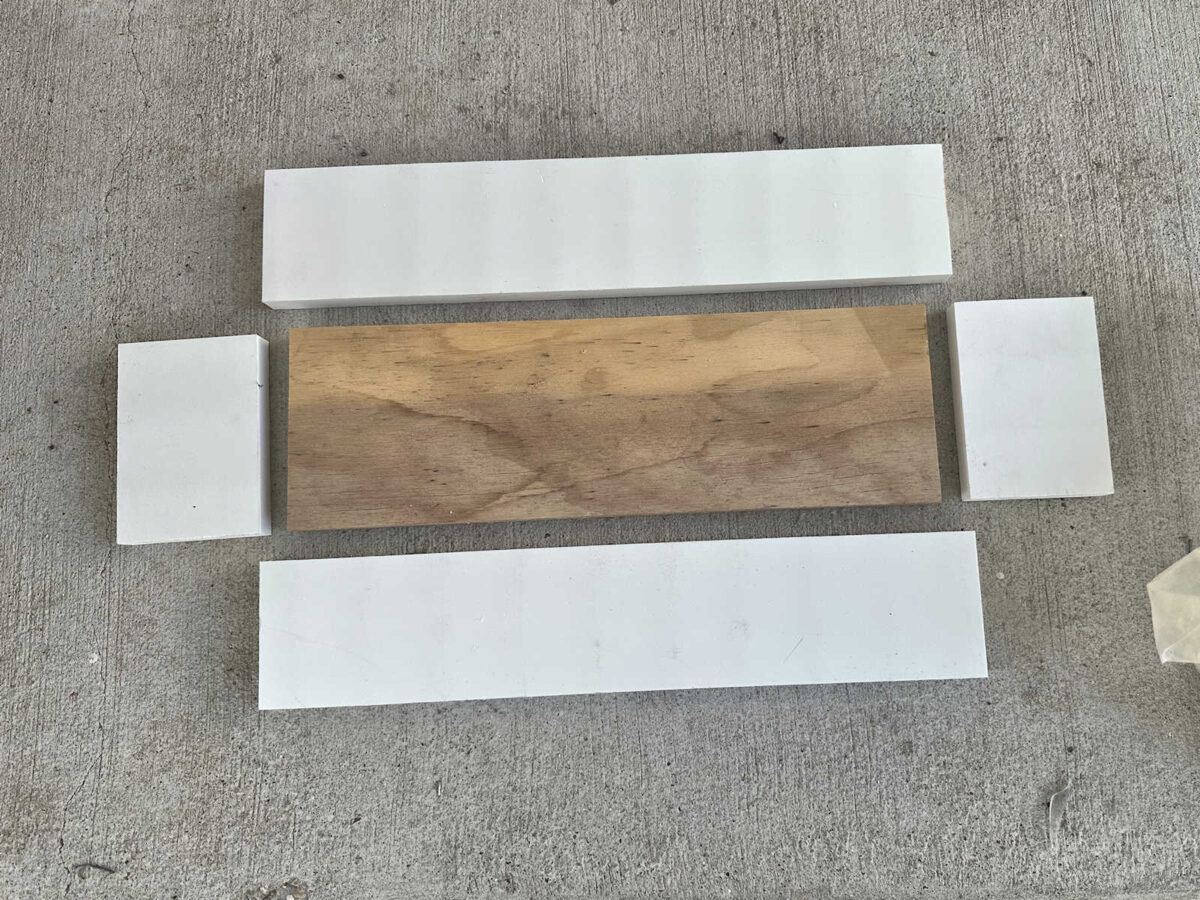
I screwed all of those pieces together to create a very simple box. I didn’t use any adhesive to build the box because I’ll need to be able to take this box apart very easily to remove the concrete “stone” after it’s dry, and then I’ll need to be able to put the box back together very easily to pour the next one.
Once my box was put together, I trimmed my silicone textured mat to fit inside the box. This silicone cuts very easily with scissors, but I also used a utility knife with a new blade on it to do some of the cuts. Both worked really well, and the silicone was very easy to trim.
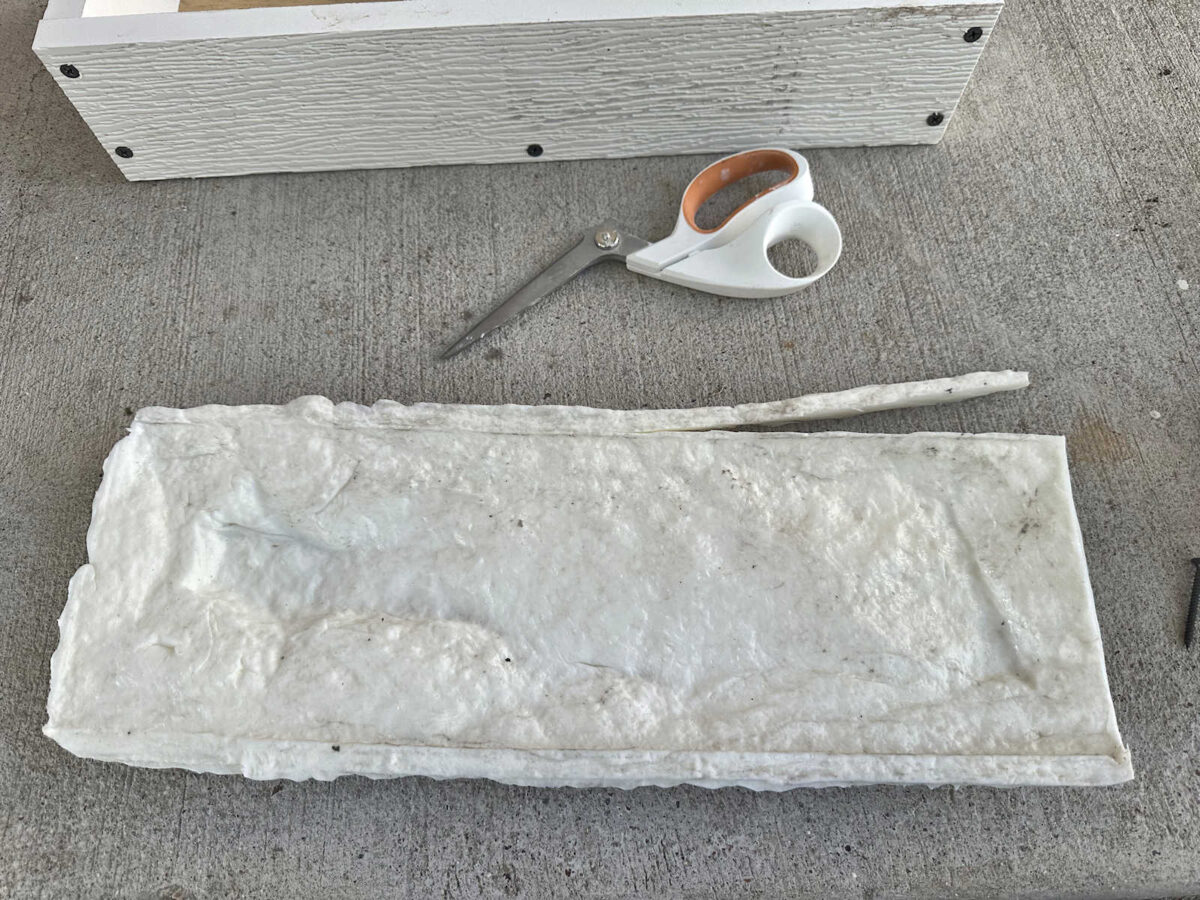
I cut a little bit at a time to make sure it was kind of a snug fit. You can always cut off more, but if you cut off too much, there’s really nothing you can do about that.
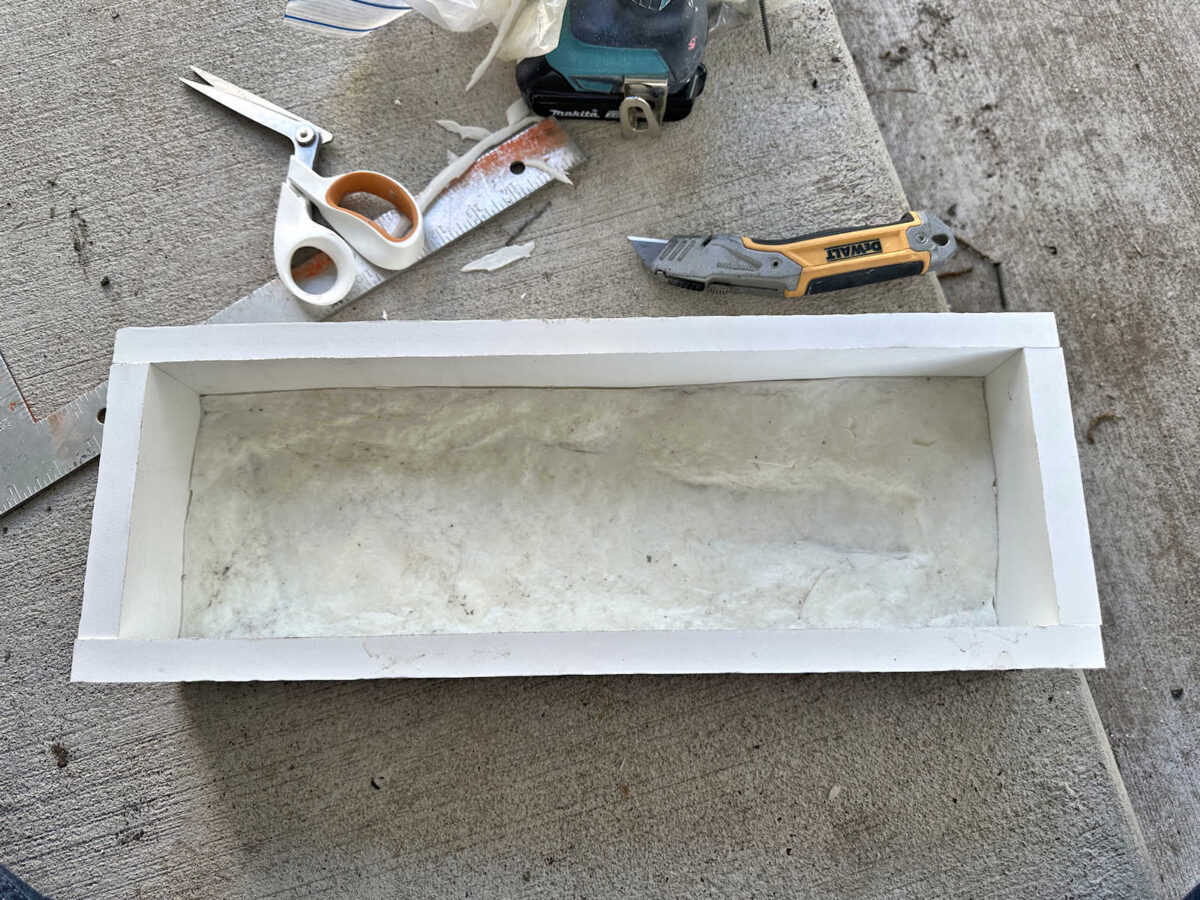
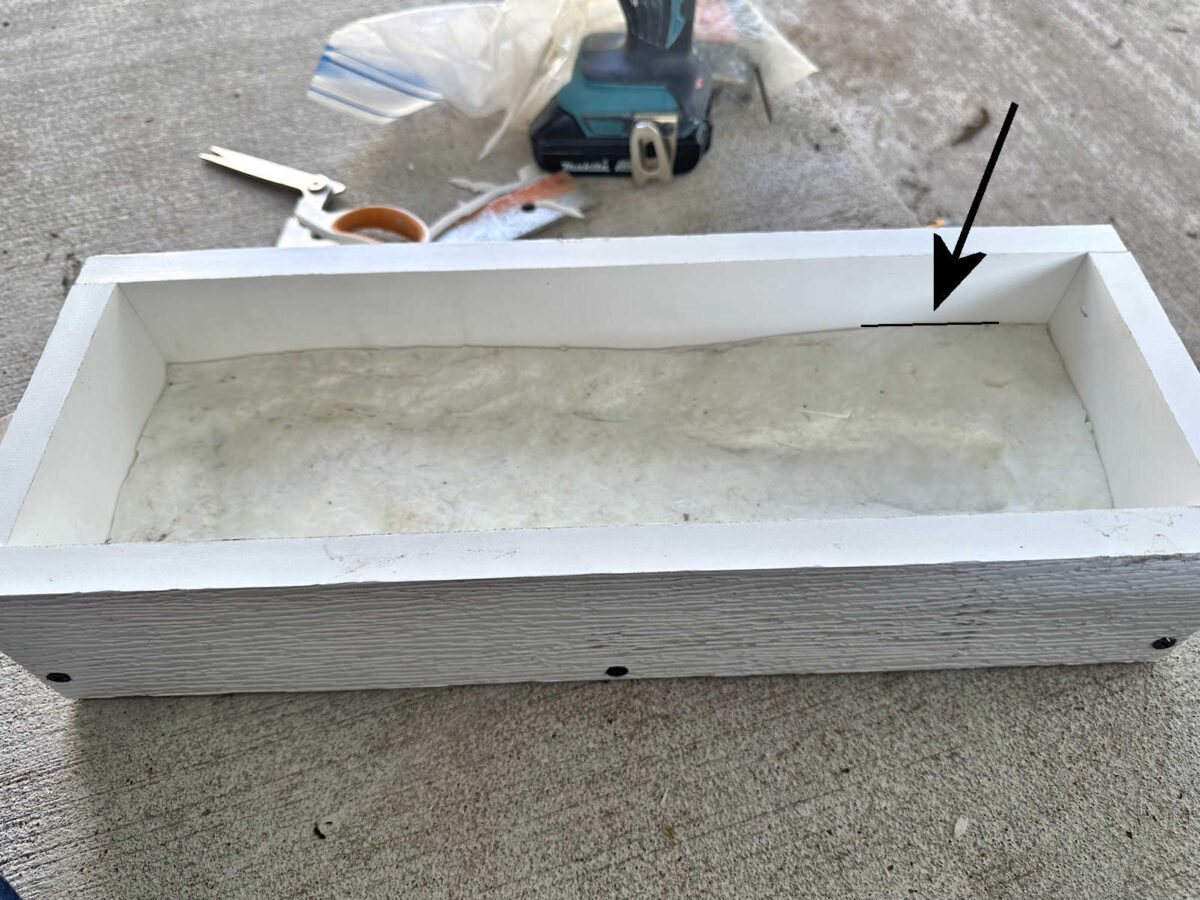
Once I got it cut to fit, I had to do some adjustments. You can see how wavy the silicone mat is on the edges.
How to build a mold with a DIY textured silicone mat for pouring fake concrete (aircrete) stones
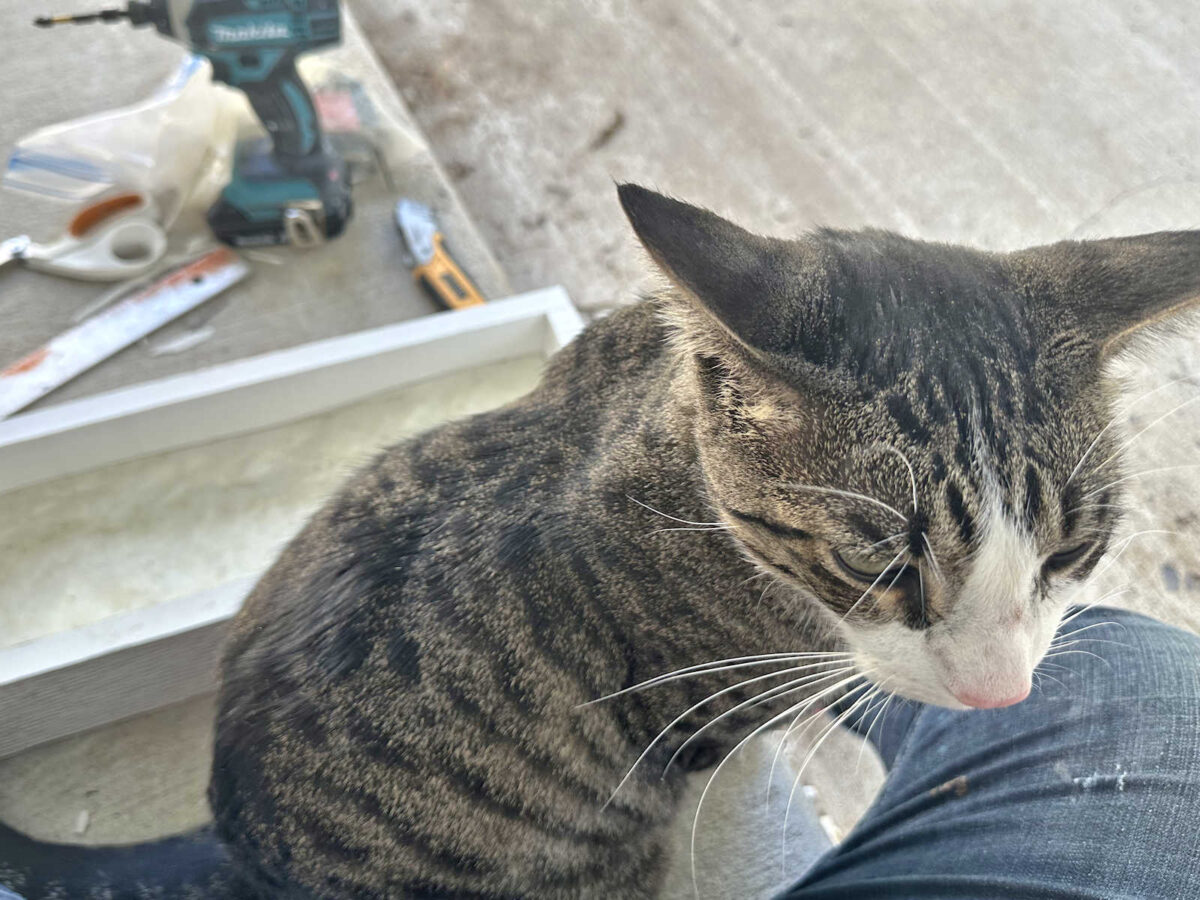
And of course, this guy made my project a bit slower and more challenging. He doesn’t really understand that I’m outside to work on projects. He always thinks I’m outside to pet him and let him sleep on my lap. 😀
Anyway, back to the project…
The reason it’s wavy like this is because the backs of my silicone mats aren’t flat. I actually tried to make them flat. On the first one I made, I tried putting the silicone/cornstarch ball on a piece of plywood and then pressing it to the stone, but that didn’t work out at all. Not only would that have required about twice the amount of silicone per stone (and silicone caulk isn’t cheap!), but I wasn’t able to apply enough even pressure to get the silicone pressed into all of the texture and crevices on the stone. That process may work on stones that aren’t so heavily textured and don’t have so much high relief on them, but for these stones, it was a no-go. So I ended up abandoning the plywood/flat back plan, and I just used my hands to press the silicone to the stone. That resulted in this very irregular and definitely not flat backside on each silicone mat.
So I had to add a step to make up for that irregular backside on the silicone mats. First, I used a fine Sharpie marker and marked the highest point. And then I removed the silicone mat and marked a continuous line at that height all the way around the inside of the box.
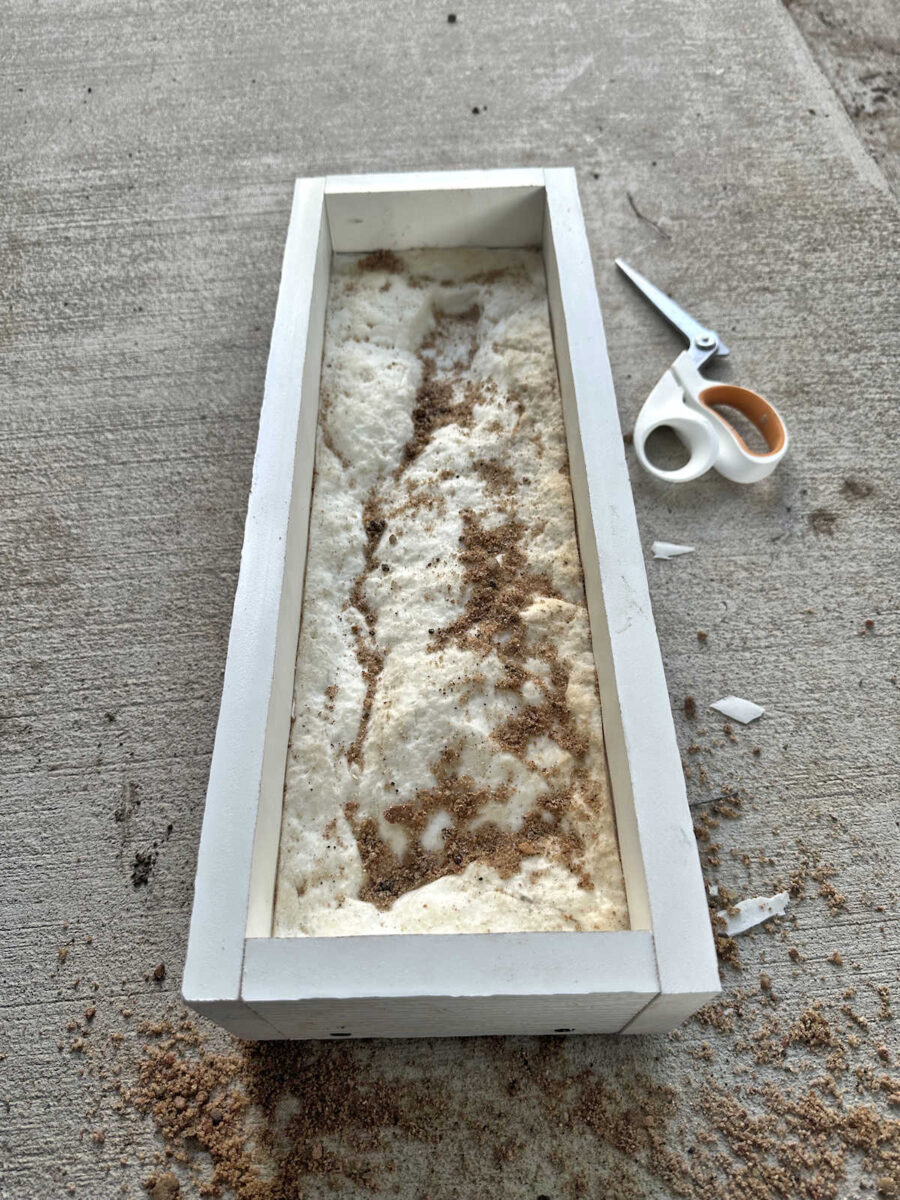
And then I used paver sand to lift the low areas. I just used a butter knife to slide between the box and the mat so that I could lift the mat in the low areas, drop some sand under the mat in that area, and then push the mat back down onto the sand. It was a messy process, but I continued this all the way around until the edges of the mat lined up with the black Sharpie line all the way around the mold.

Here’s a look at it leveled with the line all the way around the box from another perspective.
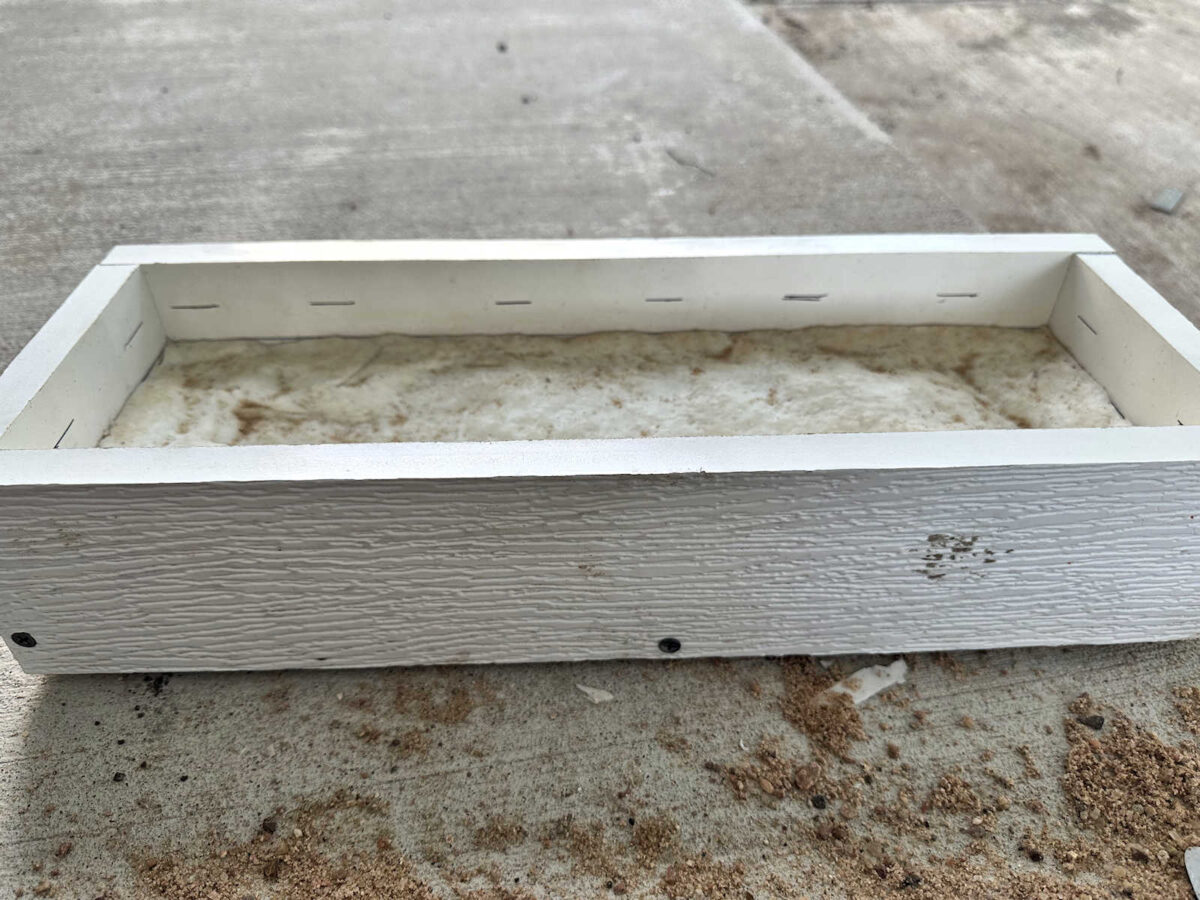
Once I had the mat lined up all the way around, I realized that I should have taken the opportunity when I had the mat out of the box to draw a second line 3/4″ above the first line to indicate how far up I would pour the concrete. I forgot to do that, and there was no way I was going to remove the mat after getting it just right, so I did my best. But this would have been so much easier to do before I added the mat and the sand.
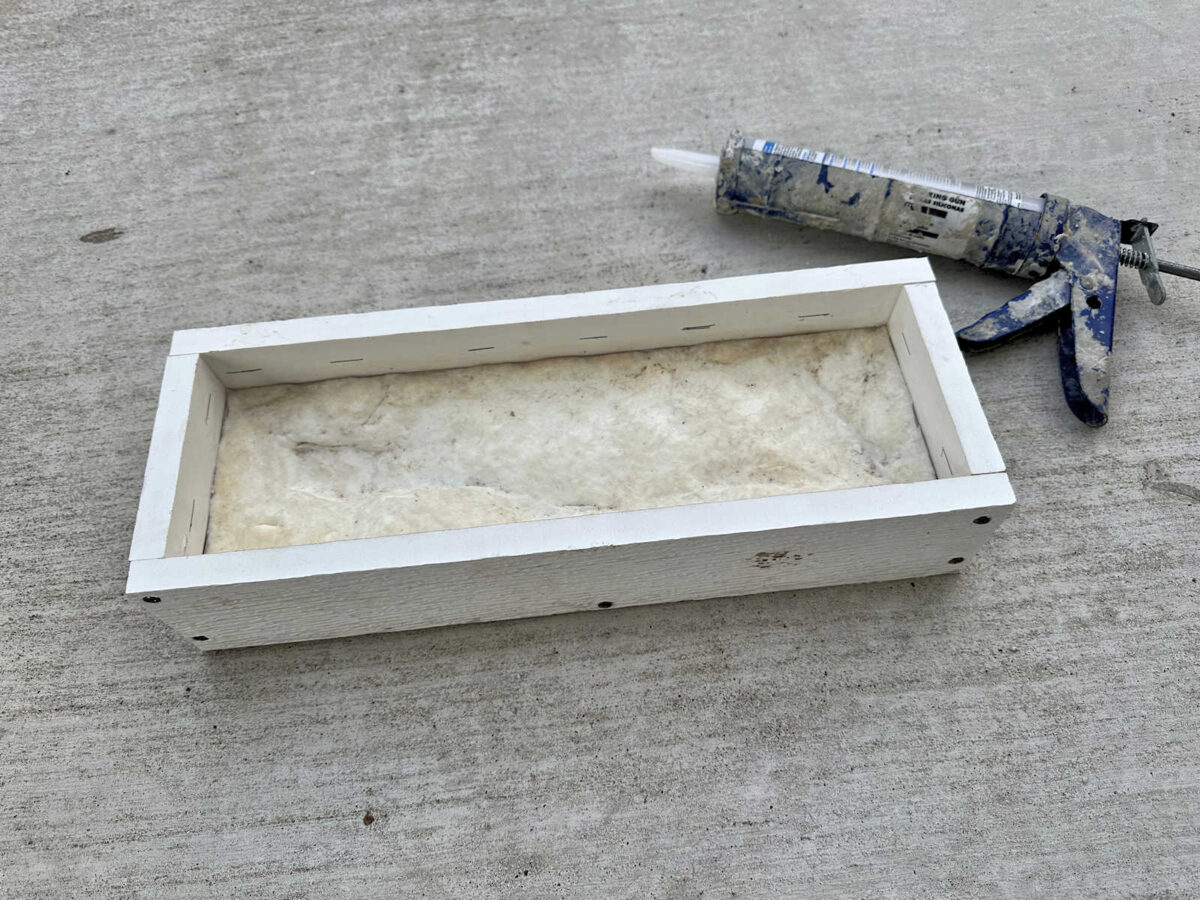
After removing the extra sand with my shopvac, the final step to prep my mold for pouring the concrete was to add a bead of caulk in the corners of the box as well as where the mat meets the box. I used silicone caulk for this, but I think this was a mistake. This stuff dries so slowly!! So I think from here on out, I’ll be using a quick dry siliconized latex caulk for this step. I can’t wait several hours for caulk to dry between pourings.
So that’s as far as I got yesterday. I have a couple more molds to build today, and then I’ll be on to pouring the actual concrete (aircrete) “stones”. I’m hoping I can get some poured before the end of the day today.
I was going to pour some yesterday with the molds I’ve prepared, but I think I’m going to make a change in the aircrete mixture that I was planning to use. I’ll share more about the process when I get some made, but the formula I’m using for the aircrete specifies using Portland cement, so that’s what I bought. The problem with Portland cement is that it takes 24 hours to dry. I can’t pour six stones a day. I’ll never get this project done at that rate. I need a quick-drying concrete. So I’m going to test the aircrete formula using Rapid Set Cement All, which sets in 15 minutes and can be demolded in an hour.
I don’t know if it will work because I have no idea if the additives that make that product a quick set cement will work with the aircrete formula. My brain isn’t wired for chemistry, so those additives might affect the aircrete process. I have no idea, but I’m going to test it out and see if it will work. I sure hope it does because I need these stones to dry very quickly!
More About Our House Exterior & Yard

see all exterior &
yard diy projects

read all exterior &
yard blog posts

Addicted 2 Decorating is where I share my DIY and decorating journey as I remodel and decorate the 1948 fixer upper that my husband, Matt, and I bought in 2013. Matt has M.S. and is unable to do physical work, so I do the majority of the work on the house by myself. You can learn more about me here.

That is an incredible amount of work. I hope it works out for you!
I started following you years ago on FB and I’ve always been amazed at your willingness to tackle the most labor intensive projects. I wish I had your skills and patience, your work always turns out beautiful.
First, I think this is ingenious! But I wonder…would it have been easier to make larger sections of the stones instead of one at a time? For example, not sure off hand how high your space is, but make a 3’x3’ mold so you can create sections instead of one stone at a time?
That wouldn’t be possible with this method. The silicone would dry out way before I’d get such a large area covered. Covering such a large area would require a completely different method, but I can’t think of what that would be.
I love your processing of new ideas! You always do your research, yet you bring your own twist to the idea. I’m in the process of building a small paver patio and watching you make steps helped me immensely, and I thank you for it! I will be pouring my own pavers and I’m very interested in the aircrete.
Have you seen the cement edging and pots Siloe Oliveira created? I can see you going down that rabbit hole! His YouTube is Suburban Homestead. He experimented with different molds, and his latest creation used a moldable cement clay. https://www.youtube.com/watch?v=nKI7oNsHITI&t=1088s He has a very different approach than you do, I learn so much from watching you both.
So excited to see what you will create!
Part of me thinks “she’s covering the skirting of the porch in the hardest, most tedious way possible” and part of me see how ingenious it is. It’s not something I’d do, but you go girl, it will be wonderful.
Hi , it is going really well, what you have done so far,but I have a question? Are you worried that it might flatten out to much with the weight of the concrete? Some people that I have seen do molds add sand under the mold between the the board and the mold. Curious to see how it turns out.
She added sand. 🙂
The things you think of amazes me, like using screws so you can use the mold again.could you put olive oil in the corners so it would slip out? I’m anxious to see a finished block. I know you are too.
Happy pouring!
I’ll be using olive oil to coat the whole thing before pouring the concrete. I think it’ll work well as a mold release, and that way I won’t have to buy another product.
Kristi, you are a genius! I love to watch you solve these problems. You’re so clever.