Decorative Mirror Made With Wood Shims
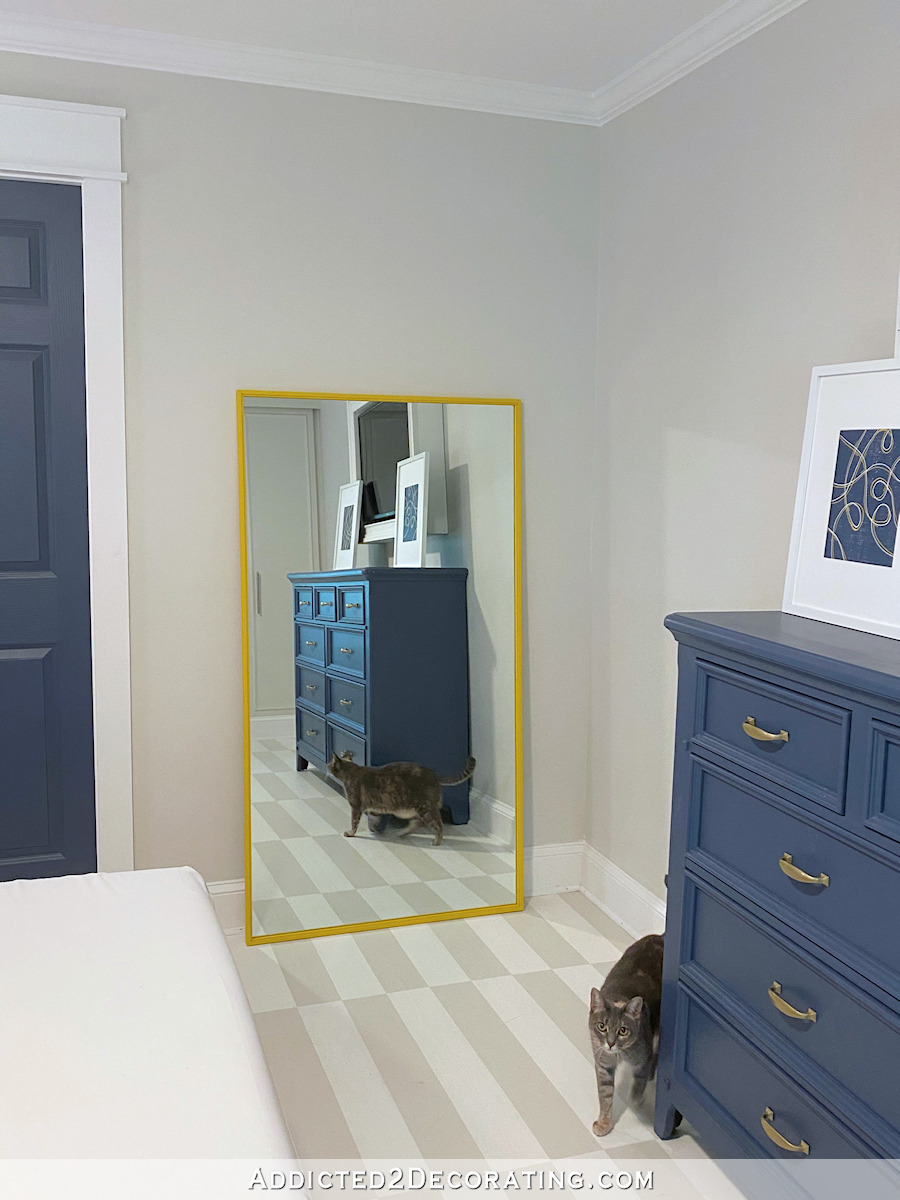
The other day, I was looking through a house tour on Apartment Therapy and stopped in my tracks when I saw this picture…

That mirror! I absolutely love that mirror. I wish I could see a close up picture of it, but if I had to guess, I’d say it’s made of vintage wood yardsticks.
Well, I immediately wanted to make this mirror, but I knew I didn’t have time to scour the city (or Ebay or anywhere else) for wood yardsticks. So I decided to use the next best thing…wood shims, of course!
So here’s my version of the above mirror, made with wood shims…

It’s a pretty close copy to the inspiration mirror, don’t you think?!

I love how it turned out. And I like how the wood shims are varied heights. It gives the mirror an interesting textural quality.

It wasn’t difficult at all to make, but it was very time-consuming. From start to finish, it took me about six hours, and cost about $35. Not too bad for something that measures about 38” in diameter! That’s some pretty substantial wall décor!

Project Cost:
Approximately $35
Tools & Materials:
- Two packages of long wood shims (approx. 16 inches long, 42 per package),
- 1/2″ MDF (I used 2 pieces that were 24″ x 48″ each),
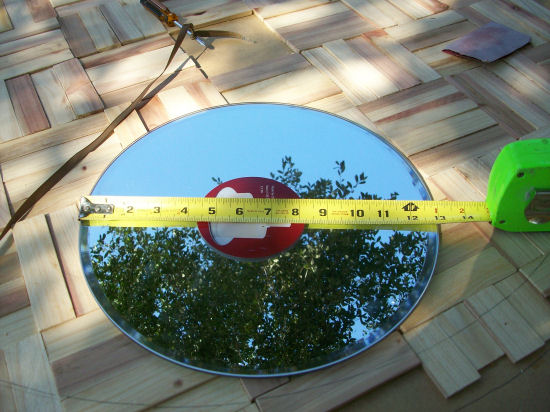
- Round mirror, the size of your choice,
- Wood glue,
- Stain,
- Chop saw/miter saw,
- Electric sander w/150 grit sandpaper,
- 150 grit sandpaper for manual sanding,
- Drill with tiny drill bit and 1/2″ drill bit,
- Pencil,
- String.
Instructions:
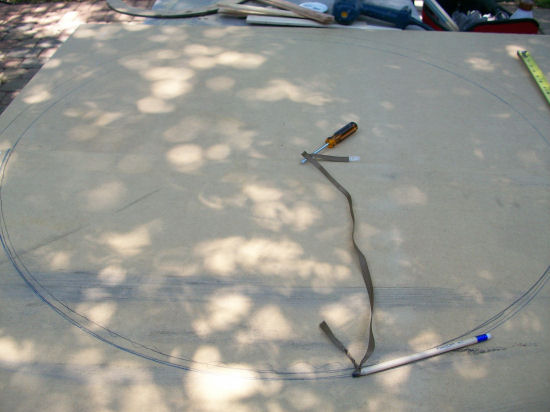
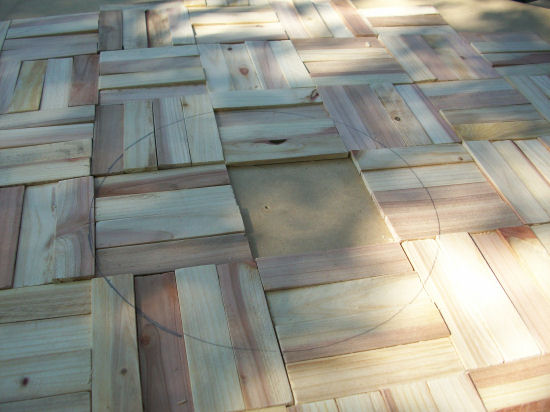
To begin, I placed my two pieces of MDF side-by-side on my work surface. (Note: You can use one large piece of MDF, and then you won’t have to piece them together. I use the 1/2 sheets of MDF simply because that’s what will fit into my car.) Then I drilled a hole around the middle, and used the ‘ole pencil and twine trick to draw a circle the size I wanted my mirror to be.
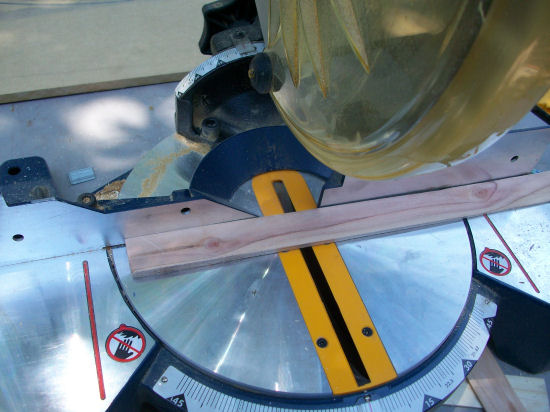
Next, I cut all of the wood shims into 5″ long pieces. I got two pieces out of each shim, but out of some of the thicker shims, I was able to cut three 5″ pieces.
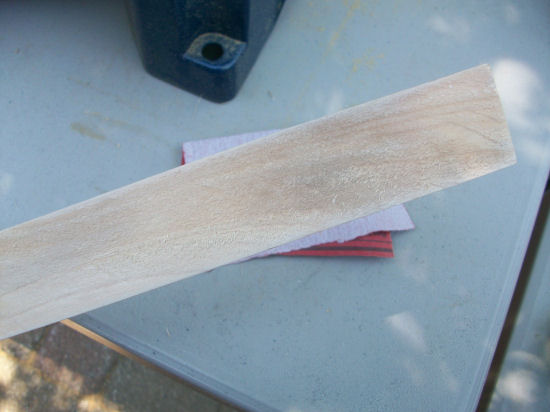
Wood shims are generally very rough…
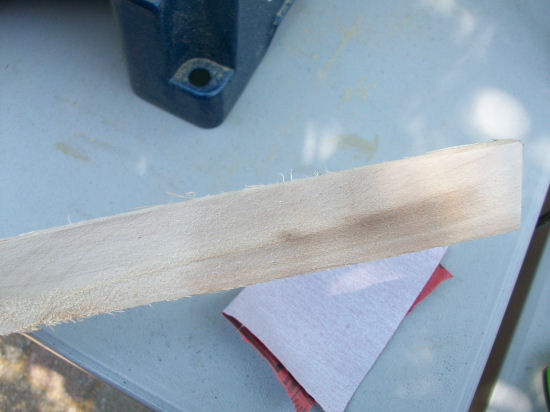
…so after I cut all of my 5″ pieces, I gave each one a quick sanding with 150-grit sandpaper.
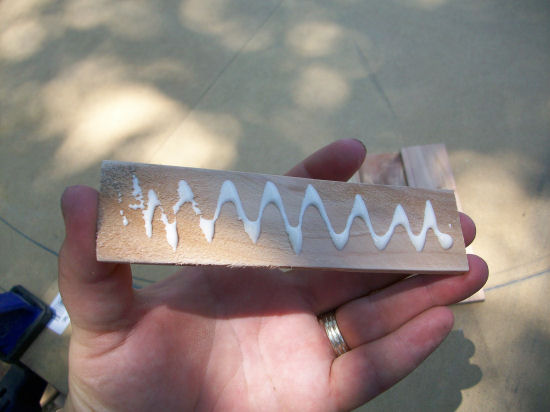
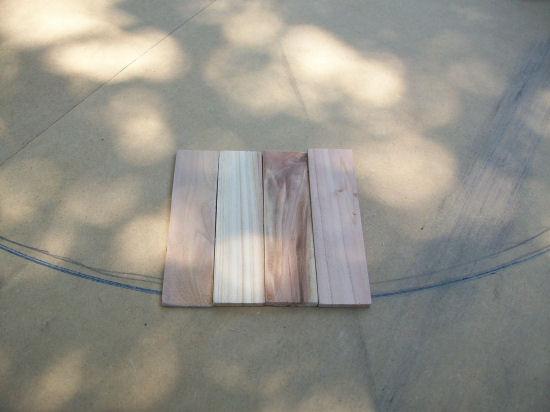
I then used wood glue to adhere each strip onto the MDF.
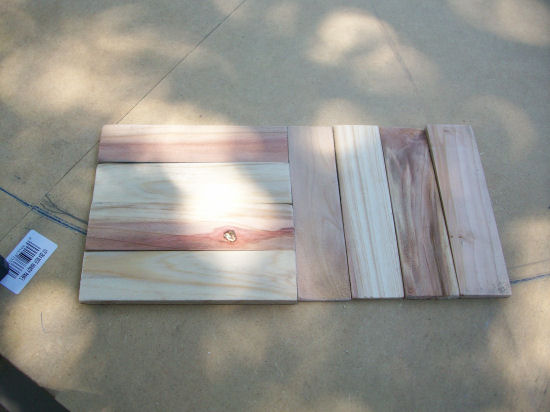
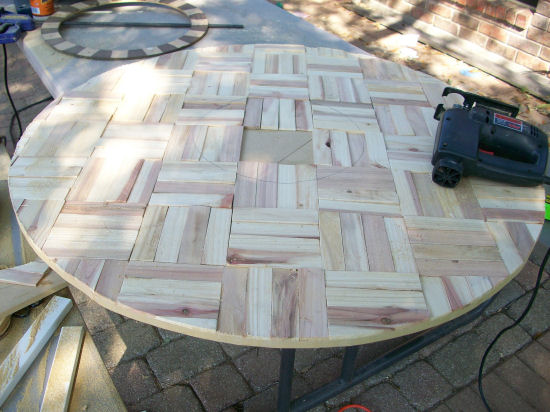
I adhered the strips to the MDF in groups of four.
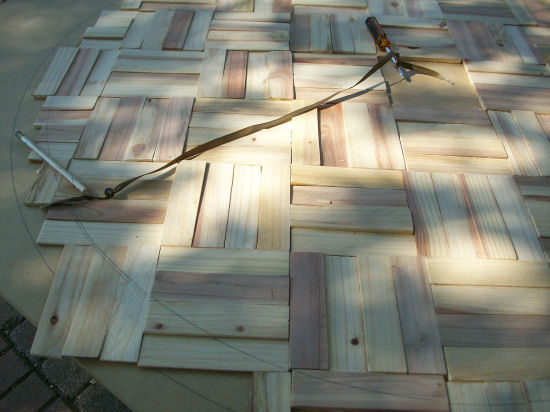
And then with the next four strips, I changed direction. I continued adhering groups of four strips, alternating directions with each group. I didn’t bother to adhere strips to the very middle, since that part would be cut out for the mirror later.
After I had all of the area of my circle covered with wood shims, I used the pencil and twine method again to re-draw the circle. I marked right on top of the shims.
Next, I measured my mirror and subtracted two inches from the measurement, and used that measurement as the size of the circle to draw for the center mirror hole.
I used my jigsaw to cut out the circles. I went pretty slowly just to be sure I stayed on the line.

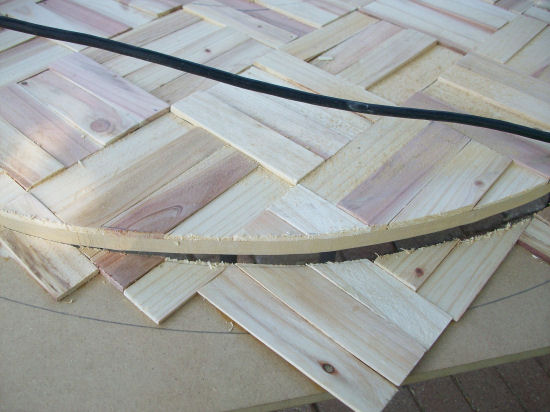
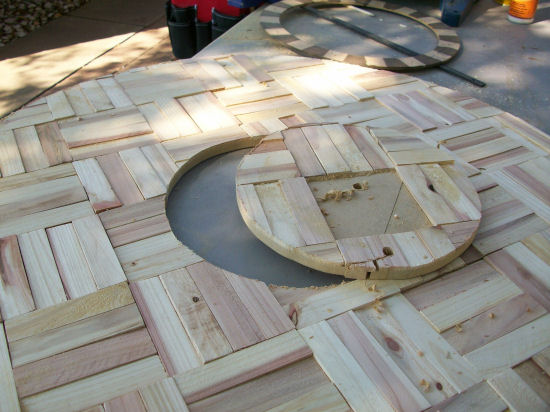
When the outter circle was completely cut, the mirror began to take shape.
Next I used my drill with the largest drill bit I had (1/2″) and drilled a starter hole so I could cut out the middle piece. As you can see, I originally drilled right in the center, then decided it would be easier to drill the hole closer to the pencil line.
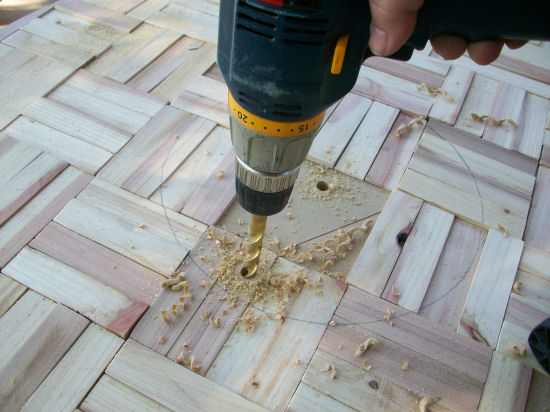
The 1/2″ hole was big enough for my jigsaw blade to fit through to cut out the center circle.
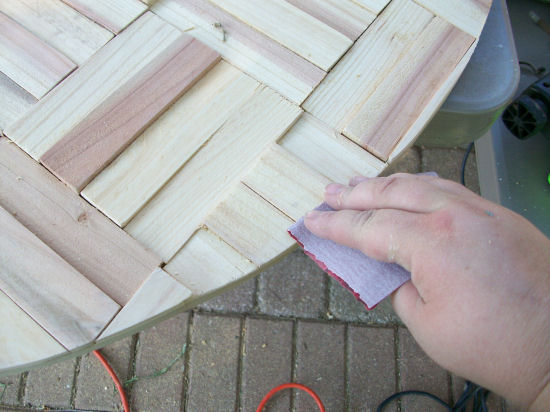
The jigsaw left the edges rough, so I used my electric sander to smooth everything out. I also used it to smooth out any imperfect cuts where I didn’t follow my pencil lines perfectly.

The electric sander worked beautifully on the edges, but I still had to sand the top edges of the shims manually since the electric sander wouldn’t have worked with all of the varying heights of the shims.
When everything was sufficiently sanded, I stained the whole thing with a bristle brush (which is the only way to get stain down into the cracks and grooves), and then adhered the mirror to the back with epoxy.
And it’s finished! A beautiful, textural wood shim mirror that will make a big impact in any room.


Helpful Hints:
- Be careful not to get wood glue on top of the shims! Wood glue won’t accept stain, so any glue on top will be noticeable.
- Don’t use any really thin pieces of wood shim along the cut lines. The very thin pieces of shim tend to splinter and break when cut with a jigsaw.

Addicted 2 Decorating is where I share my DIY and decorating journey as I remodel and decorate the 1948 fixer upper that my husband, Matt, and I bought in 2013. Matt has M.S. and is unable to do physical work, so I do the majority of the work on the house by myself. You can learn more about me here.

wow! that is awesome, it looks identical to the original. Love it!
I agree. Wow! That's fantastic. Just like your inspiration!
LOVE IT!! Fantastic job! I will be filing this one away in my DIY file. 😉
I'm impressed! Very impressed! Your mirror looks amazing and I agree…$35 for such a substantial piece of wall art. Great job!!!
Shut the front door — that is awesome with a capital "A" — you rock.
This is a pretty awesome mirror.
Granted pretty much everything you do is awesome.
Have a splendid weekend.
Rashon aka Mr. Goodwill Hunting.
everyone is going to be taking apart their sunburst mirrors to do this now! uh oh, i see a new trend! it looks FABULOUS!!
Love it!
LOve this style. Thanks so much for sharing
Wow! I don't know which one I like better, this one or the sunburst one. Both are equally amazing. I can't wait to see what you do next. I think you out did yourself.
Well done!
Absolutely gorgeous!! Thanks for sharing!
Meredith
http://hautetosew.blogspot.com
I've put together a round up of great wall art ieas on Craft Gossip today and included your post. 🙂 You can see it here
http://homeandgarden.craftgossip.com/25-awesome-wall-art-ideas/
If you would like a Craft Gossip badge showing you've been featured, you can grab one here 🙂
http://homeandgarden.craftgossip.com/grab-a-craft-gossip-button/
awesome job!! looks just like the original! Now you have me thinking…. would wood shims work to make a backsplash in my kitchen???
I'm not sure if I would do that, Catherine…unless you have one of those kitchens that's just for looks, but never gets used. 🙂 If something splashed on it, it would be a major headache to clean with all of the cracks and crevices. BUT…Now YOU'VE got ME thinking. This would make an INCREDIBLE wall treatment in a low-traffic area!!! If it's really well sealed, you could use a vacuum cleaner to "dust" it every so often. I think that would be stunning!!
ABSOLUTELY STUNNING! Love it just as much as your inspiration … I wonder how much the A.T. mirror would sell for? I'm clicking to follow you so I don't miss your next shim project!!! jules
This is gorgeous! You did such a good job. Thanks for sharing.
Wow, what a lot of look, Kristi! I'd say the time investment was well worth it. The staining really gives it an aged look.
Very nice, you did a great job with the mirror. Well done!
You are beyond awesome! They way you recreate these projects is amazing.
It looks amazing! Great job! And I do just like to read how to's 🙂
You've been featured at my Hookin up with HoH Link Party!
Congrats!!
Girl, you are simply amazing. I love this. Can't wait to see it hanging somewhere!
I would love for you to link it up to my party that is running now. Any linky goes.
http://bacontimewiththehungryhypo.blogspot.com/2011/06/any-link-goes-party-running-now-summer.htmlCome strut your stuff.
Come strut your stuff.
Kristi – this mirror is fabulous. Love the idea of using shims – they are so great to work with and super inexpensive too. Fantastic job….I think I need one of these. ~ Stephanie Lynn
WOW! I'm dying…this is beautiful!! love your blog, just found it and following so I don't miss anything
kl
wow! super impressive 🙂 come on over and link up to MMM!
http://www.creatingreallyawesomefreethings.com/2011/07/making-monday-marvelous-63.html
I love, love, LOVE this! How would I hang it? What sort of hanger thingy (that's a highly technical term, by the way 😉 would you use on the back of the mirror? This is soooo awesome!
Sherri, I would use a Hangman hanger, which you can find at Lowe's. I think Home Depot also sells something similar now, although I believe it has a different name. It looks like this: http://www.hangmanstore.com/Hangman-Products-Z-Hanger-p/z.htm
You’re so talented! I actually your picture of the outside ring completely cut as a tabletop for a side table.
Turning ordinary into extraordinary!
what is the stain brand and color you used? I find that pine doesn’t usually look so fantastic when stained, but yours does!
Thank you
Mary, I actually didn’t use plain stain on it. I used Waterlox (simply because I had some on had) that gives wood a gorgeous amber tone, and I mixed in about a tablespoon of MInwax Special Walnut stain before applying it. Waterlox is one of those products that most people don’t just happen to have on hand, but I imagine you could achieve a similar look using polyurethane mixed with a bit of stain. Just be sure you’re using polyurethane, and not the water-based sealer!!
Did you glue/fasten the two pieces of MDF together before starting or was gluing the wood shims all over including the cracks enough to hold the pieces together? Thanks!
I have just discovered your site and absolutely love it.
I am inspired to duplicate the mirror and I followed all of your instructions, but I have a single question on the mirror.
You state “Next, I measured my mirror and subtracted two inches from the measurement, and used that measurement as the size of the circle to draw for the center mirror hole.”
Why did you subtract two inches from the size of the mirror?
Any additional informaton on this subject would assist me in finalizing your project.
Thank you and keep up the great work.
I love this mirror! Beautiful and clever!
Lance, 2″ will allow a 1″ overlap around the circumference of the mirror, for gluing the mirror to the back of the mdf.
Gorgeous piece, I just love the idea and what an impact it makes in the room. Pinning this for my next holidays =)
I am also your newest follwer!
Anja @ cocalores.blogspot.com
this is seriously one of the most gorgeous DIY projects I have seen! Great job! I plan to do this for my dining room as soon as it gets warm:)
That is beautiful!!!!
Love it! Would you mind telling me the stain you used?
I really don’t remember. Sorry!
Love this and am planning to make this in the next few, weeks as soon as I can find a mirror. Do You Know the dimensions Of The Mirror you used and also where you found it?
Thanks so much!
It was either 10 or 12 inches, and I got it at Michael’s.