How To Create Your Own Custom Wallpaper Pattern (With Virtually No Artistic Ability Required)
Today, I want to show you how to create your own wallpaper design that you can use in your home or on other creative projects. Of course, I’m working on a wallpaper design for my studio, but this is something virtually anyone can do with no artistic ability required.
What I really want on the front wall of my studio is a bold, colorful watercolor floral wallpaper. But after months and months of searching for the perfect pattern with no success (believe me, I’ve searched all major wallpaper companies, Etsy, Bluebellgray, Spoonflower, and on, and on), I’ve finally decided that my only option is to create my own custom wallpaper pattern.
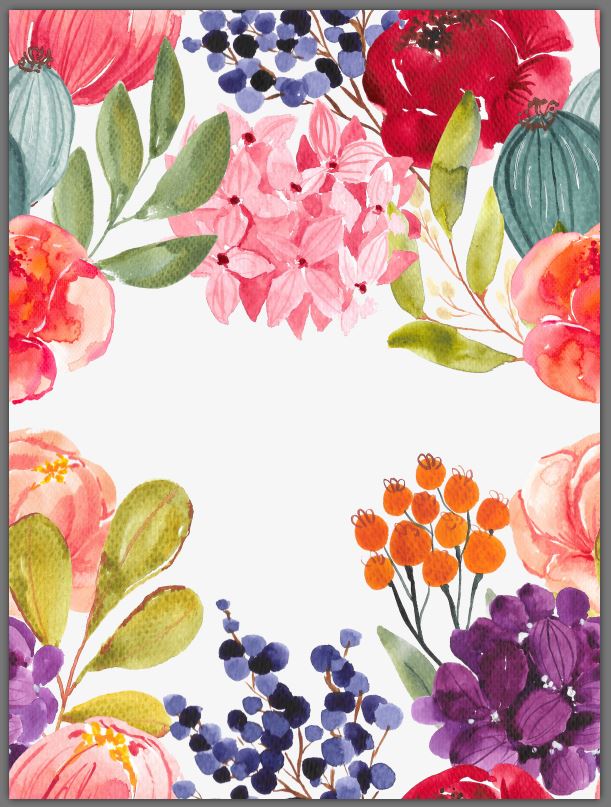
I knew I wanted something really bold (like really, really bold) with very little negative space. Rather than precious bouquets of flowers neatly bundled with lots of blank space between them, I wanted it to look more like an explosion of flowers all over the wallpaper. I made a couple of designs, and this is the one I liked the most…
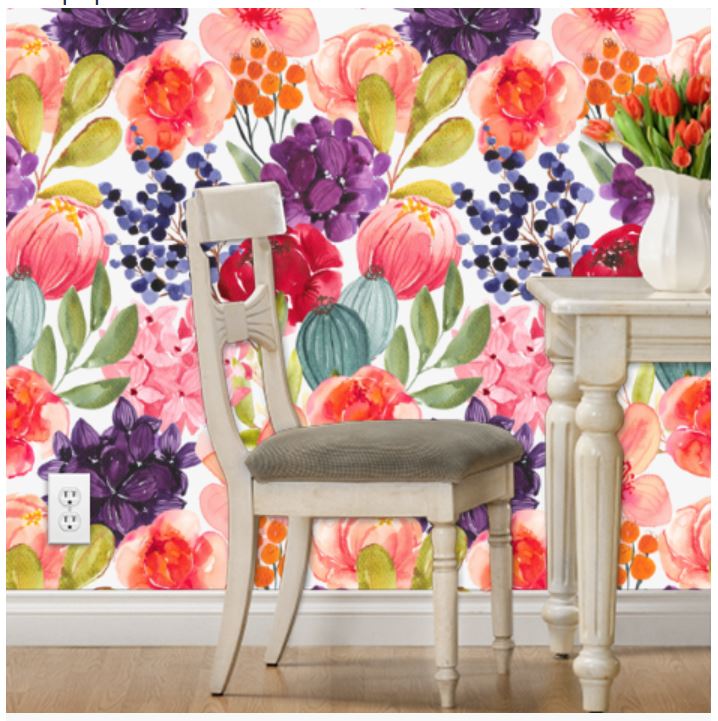
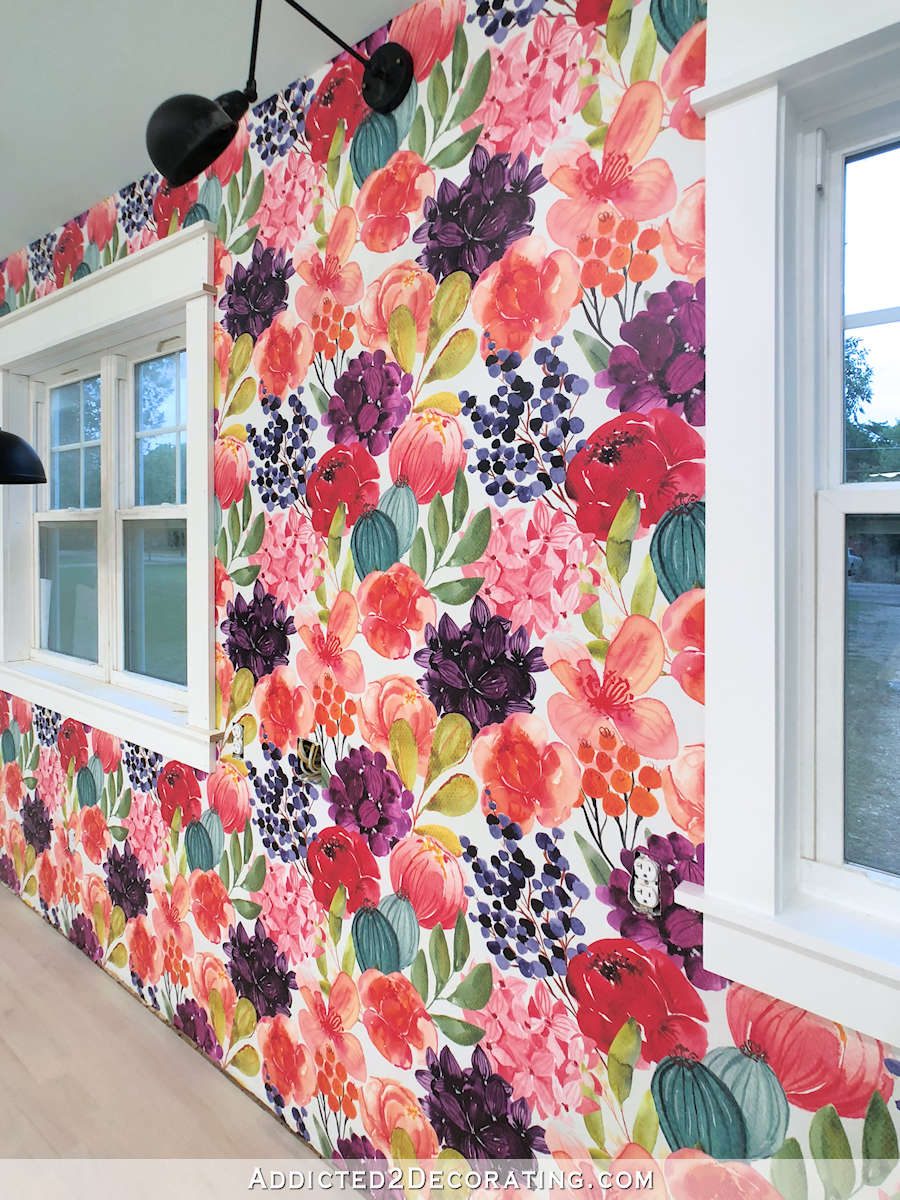
See what I mean about an explosion of flowers? 😀 There are no precious little bouquets of flowers on that wall!
I’ve shown y’all before how to turn a very simple acrylic painting into a repeatable wallpaper design, but that’s not what I want for my studio. And while I’m sure that either my mom or I could do the watercolor artwork for wallpaper I envision, neither of us really has time to do that right now.
So I decided to head to my favorite online source for creative elements — a site called Creative Market. They have all kind of things like fonts, photos and graphics that can be used to create an endless number of items. I just searched for “watercolor flowers” and found loads of options.
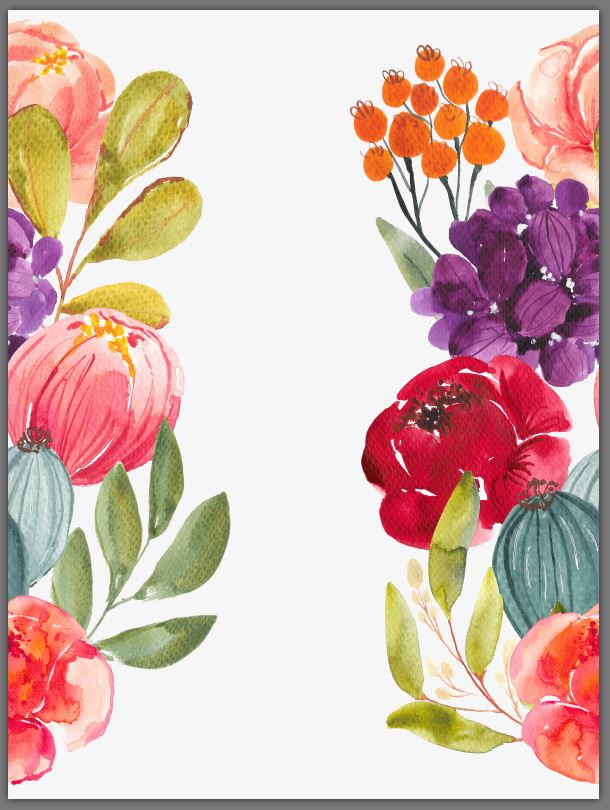
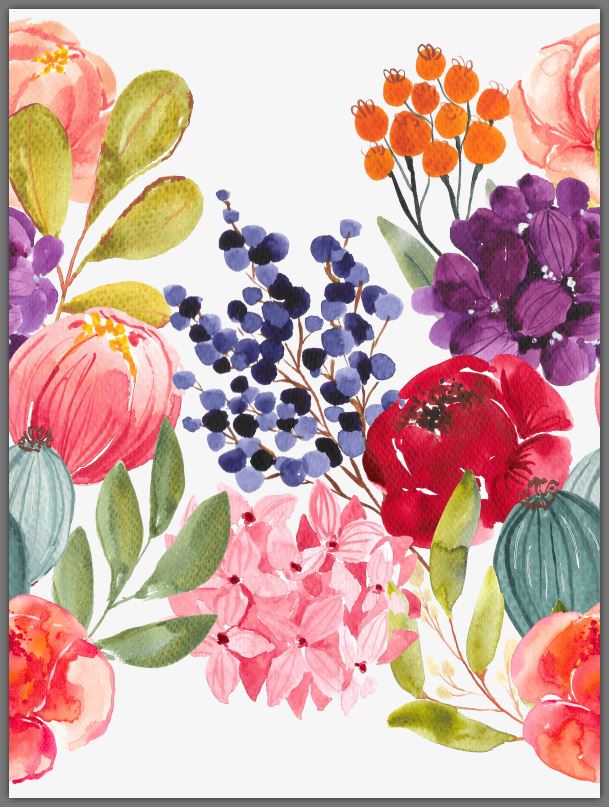
I finally narrowed down my purchase to two sets of watercolor flowers and fillers by the same artist, Charushella. I bought this Forest Queen set, and this Clementine set. And then I opened up my photo editing software and started playing around with my favorite flowers.
When you purchase these, they come as a package of individual graphics. For example, the Forest Queen package comes with these elements…
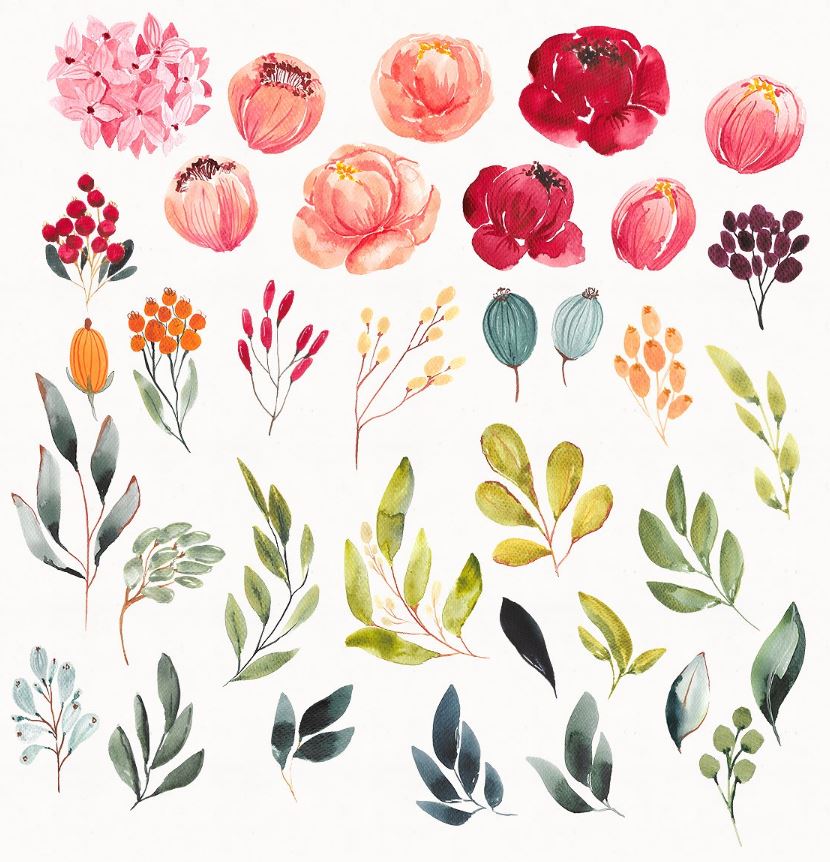
The sets I bought also came with several pre-made bouquets, borders, and repeatable backgrounds.
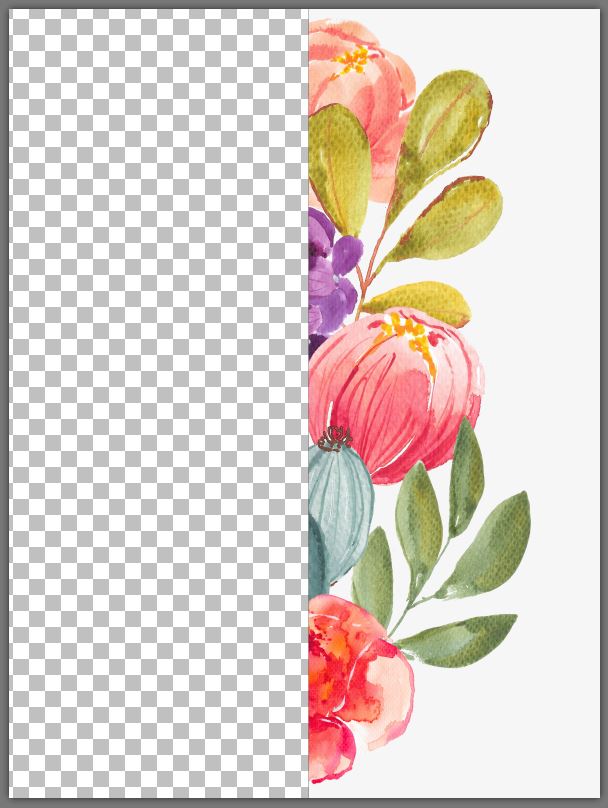
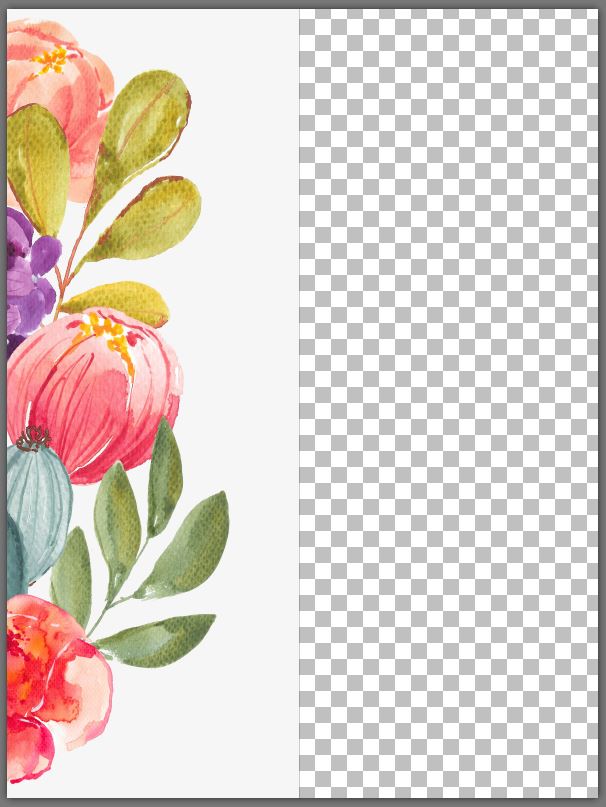
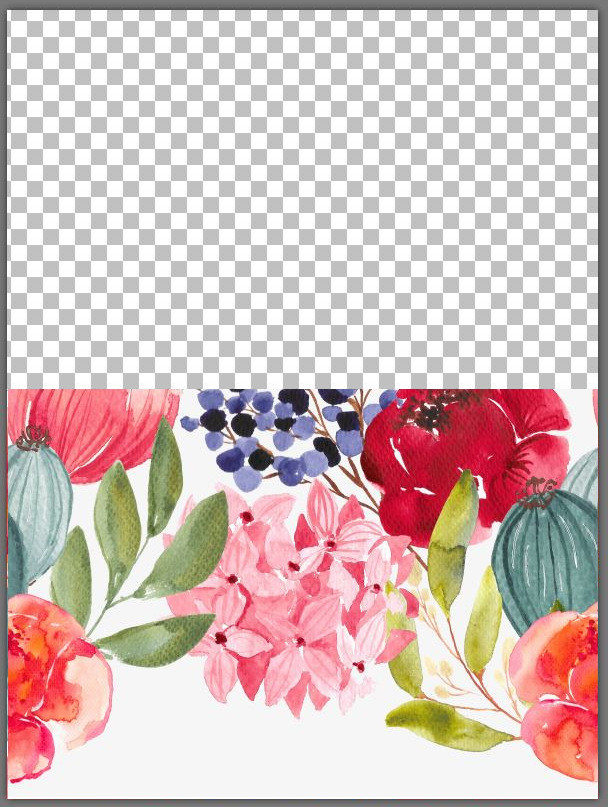
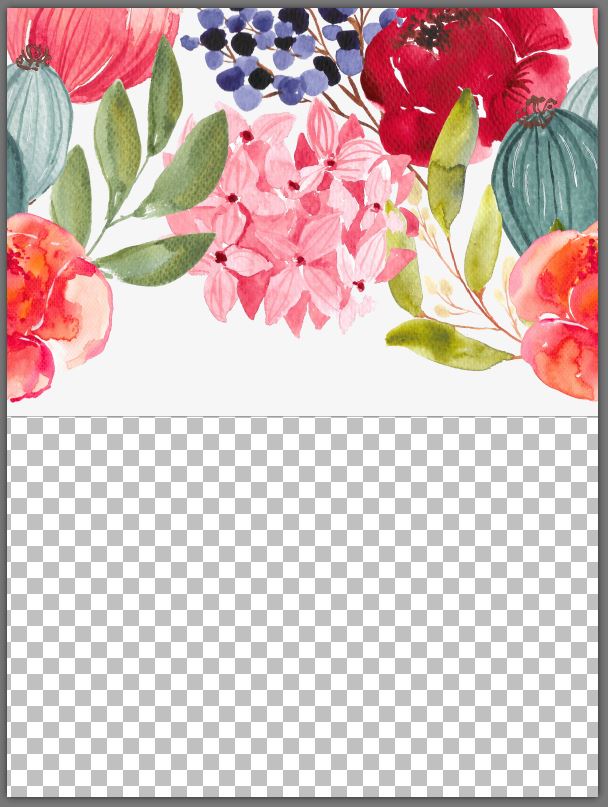
These sets come as a bundle of individual files, and they’re all saved as .png files with transparent backgrounds. For example, when you open up an individual file, it’ll look like this in your editing software…
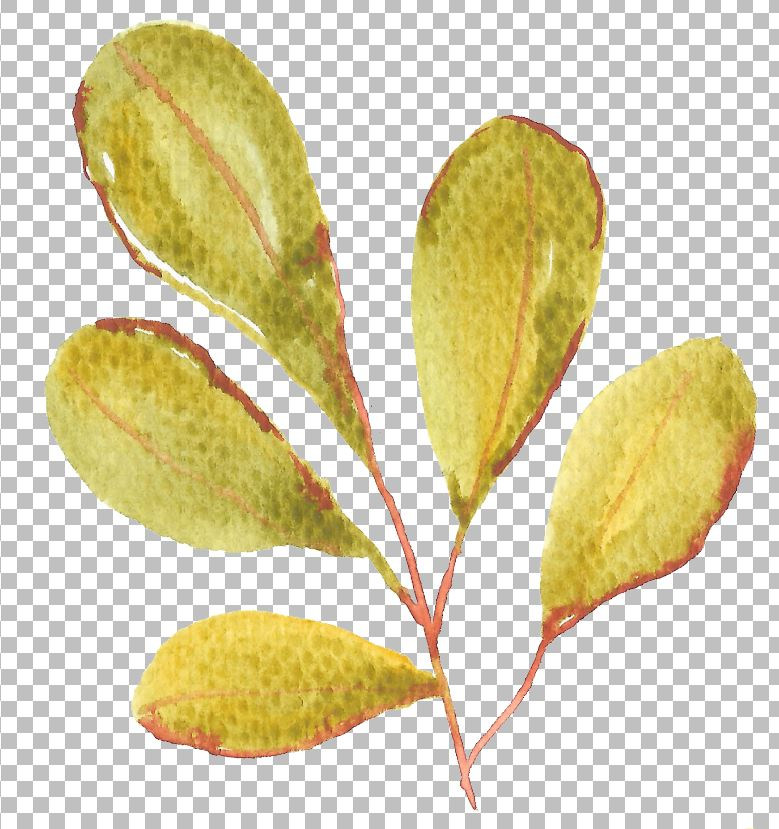
That checkered background means that it’s transparent, which means that you can layer the different floral elements on top of and around each other without having to worry about backgrounds getting in the way.
Creating your own wallpaper design with a seamless repeatable pattern
To create a wallpaper pattern, you’ll need to use a photo editing software that allows you to create layers on one image and manipulate each layer separately. Of course, Adobe Photoshop has this capability. I personally use a very reasonably priced program called Corel Paintshop Pro.
Step 1: Open a new large image, and add design elements to the middle of the image.
To create something as large as wallpaper, you’ll have to work with a very large image. I opened up a new image sized to 24 inches wide and 32 inches high because I like very large repeats on wallpaper. And then I started arranging some of the flowers and leaves in the center of the image.
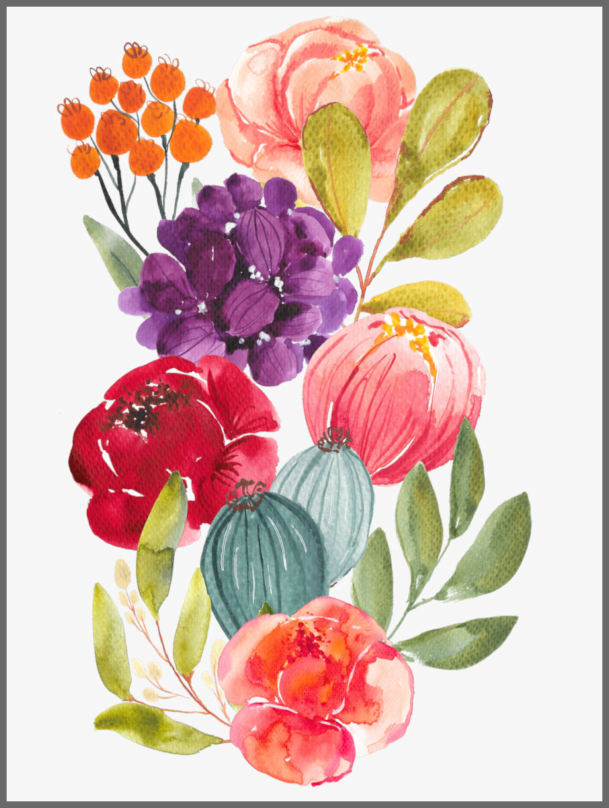
Once I got them just like I wanted them, I flattened the layers (Layers –> Merge Visible) so that everything was all on one layer, and then moved on to the next step.
Step 2: Cut the image in half vertically, and move the left side to the right and the right side to the left.
Using the “select” tool, I cut the image in half vertically, and then cut (ctrl + X) the selected half and pasted that to a new image (Edit –> Paste As New Image) so I wouldn’t lose it. This is what the image looked like with half of it cut away.
Then I moved the half that remained all the way over to the left edge.
And then I copied (ctrl + C) and pasted (ctrl + L) the half that I removed back onto this image as a new layer, and moved it all way to the right edge.
Step 3: Fill in the center blank area with more of the design.
Next, I filled in the center blank area with additional watercolor floral elements…
This took a little bit of erasing using the eraser tool since the floral elements on the left and right had already been flattened into one layer and were no longer individual layered elements. So using the eraser tool, I erased certain areas to make the new floral elements appear layered with the side images.
Once I got them arranged just right, I flattened the image again (Layers –> Flatten Visible) so that it was all one layer.
Step 4: Cut image in half horizontally, and move the bottom to the top and the top to the bottom.
This is just like I did before, only this time I cut the image in half horizontally. Using the “select” tool, I selected the top half of the image, cut the selected part (ctrl + X), and pasted the cut part as a new image (Edit –> Paste As New Image) which puts it in a new tab so I don’t lose it.
Then I moved the bottom half to the top edge…
And pasted (ctrl + L) the other half back on as a new layer, and moved it to the bottom edge.
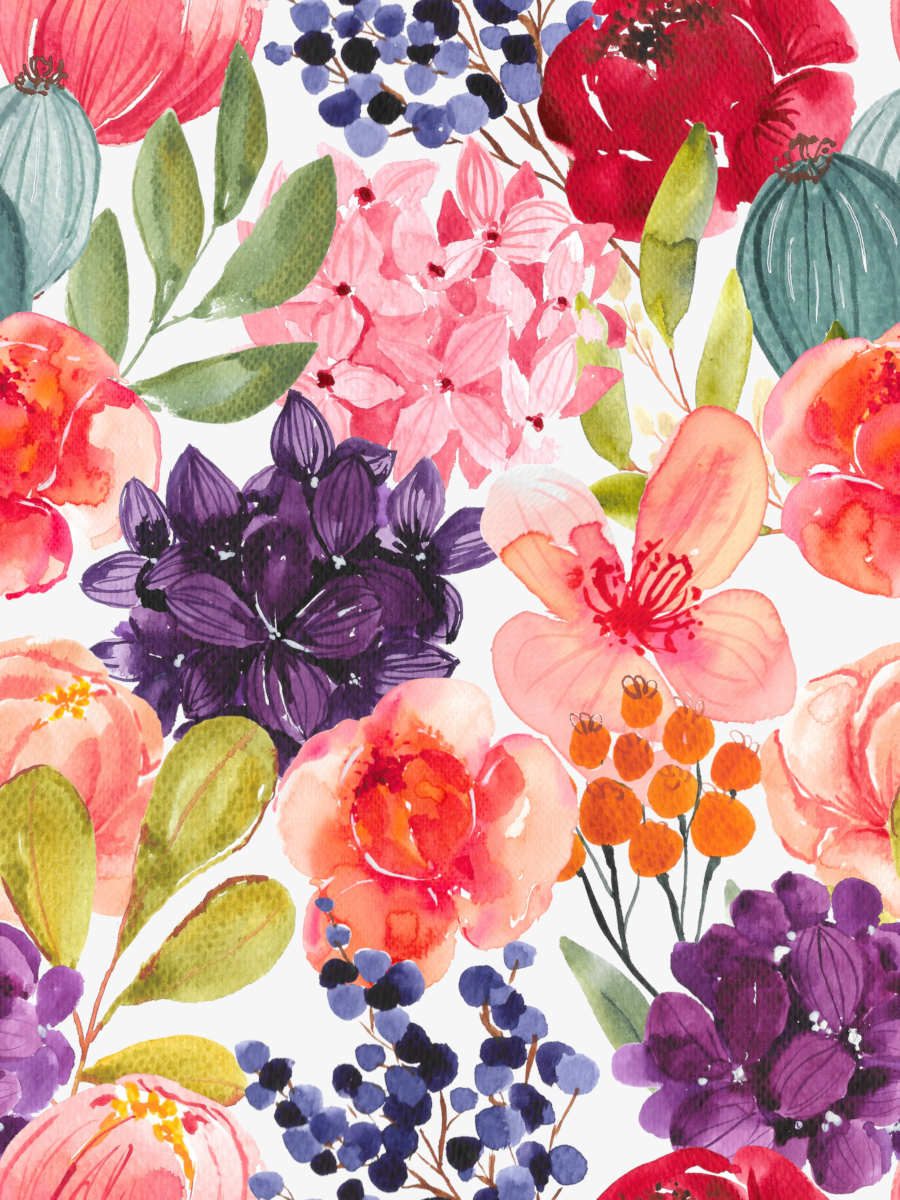
Step 5: Fill in the last blank area with more of the design.
And once that last blank area is filled in, you now have a repeatable design that can be used as wallpaper, fabric, wrapping paper, etc.
Once you have your design finished and saved, you can upload it to Spoonflower and use their selection options to get it sized just like you want it to fit on the wallpaper (or fabric).
So there you have it! You don’t even have to have artistic ability to create your own custom wallpaper specifically designed for your room. Let someone else do the creative stuff for you, and then you can just arrange the elements as you want them on the wallpaper.
Now just a word about purchasing and using other people’s artwork. First of all, pay for the graphics you use. You can probably find all kinds of free graphics online that can be used like this, but more than likely, those graphics were stolen from an artist. Artists deserve to get paid for their work, and graphics like these are generally very reasonably priced. So please pay for them and support an artist.
Also, please note that when you make a purchase, you’re not actually purchasing the artwork. In other words, you don’t own the artwork outright to then use in any and every way you want. What you’re purchasing is a license to use the artwork in a specific way.
For example, I originally purchased this artwork to create wallpaper. However, you might recognize that I used lots of these watercolor elements in my recent website design. All of the watercolor floral elements you see on my new site design are from these packages that I purchased. So since I chose to use them in that way, that one license allows me to use them in my Addicted 2 Decorating branding, but any other usage would require an additional license. So if I do end up actually creating and using wallpaper made from these watercolor flowers, I’ll be purchasing an additional license for each watercolor set that I use.
Please also note that if you want to use things like this to create something that you offer for sale, that generally requires a different license other than the inexpensive standard license. In other words, I can purchase a standard license and create some wallpaper for myself to use in my studio, but I can’t put that wallpaper on Spoonflower and offer it for sale to others. That would require a much more expensive and broader license.
So when purchasing artistic elements like these, just be aware of what kind of license you’re purchasing, and how those elements can be used. This just ensures that artists get paid properly for their work, which I think we can all agree they deserve! 🙂
Links to other posts and helpful sources/products mentioned in this post:
Want to see how to turn a very simple acrylic painting into a repeatable pattern for wallpaper, fabric, wrapping paper, etc? I show you how here..
- Creative Market – Where I purchased my floral watercolor graphics, and my go-to place for fonts and other creative elements.
- Charushella – The Creative Market shop where I found my watercolor floral graphics.
- Forest Queen and Clementine – The two floral watercolor sets that I used in the wallpaper shown in this post.
- PaintShop Pro (affiliate link)- The photo editing software I use to edit all of my photos. It allows you to create layers on one image that can be moved and edited individually, which is necessary for layering the different elements used to create wallpaper and fabric patterns.
- Spoonflower – Where you can upload your own custom designs for fabric, wallpaper and wrapping paper.
Update:
This wallpaper is available for purchase! You can click here to find it on Spoonflower.
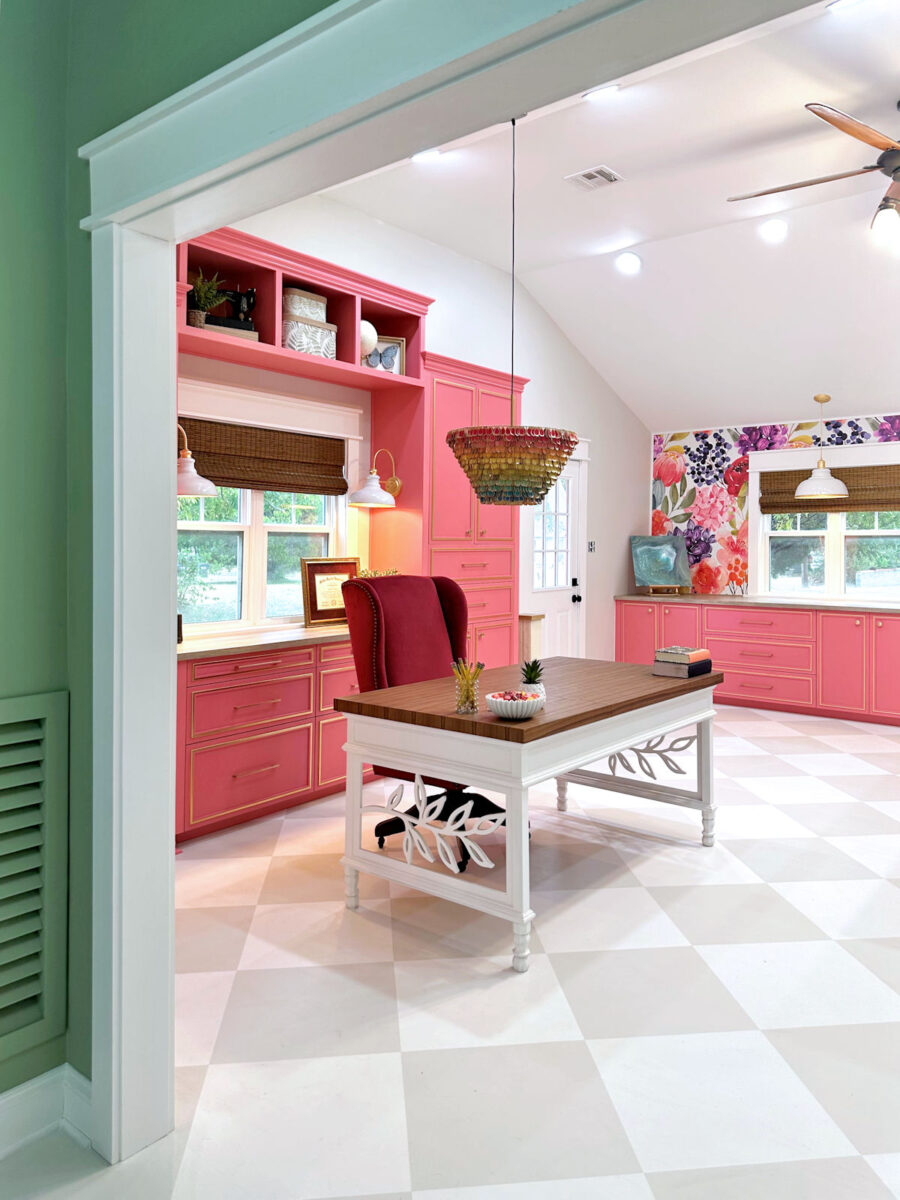
I’ve installed this wallpaper in my studio, and it’s amazing! Here’s how it looks in my studio…
More About My Studio

see all studio
diy projects
read all studio
blog posts

Addicted 2 Decorating is where I share my DIY and decorating journey as I remodel and decorate the 1948 fixer upper that my husband, Matt, and I bought in 2013. Matt has M.S. and is unable to do physical work, so I do the majority of the work on the house by myself. You can learn more about me here.

Wowzers! That is so bright and pretty and would look great somewhere in your studio/powder room.
Wow Kristi! Once again you amaze me! Is there ANYTHING you DON’T know how to do?
Thank you for looking out for artists!
Gimp is an open source software, available at no cost, and works much like photoshop, aside from a few bandaid type filters.
OpenOffice is another open source application that is free and is essentially MS Office.
Awesome and relatively concise explanations here of the how-to AND the why, Kristi! I’m a fan.
Great tutorial – thank you!
I looooove that wallpaper! It is sure to make you smile every time you see it. Can’t wait to see it up!
I am not usually a floral person, but I absolutely love what you have created. Such happy colors.
Oh my gosh….you did it again. Absolutely beautiful. Can’t wait to see it finished.
Fantastic wallpaper design and thank you for supporting artists!
Love! Looks like you also used those graphics for your new header/logo. 🙂
And, again, your writing skills show. Such an easy to read tutorial!
That’s beautiful! When you say that you are planning on installing this on the studio front wall, does that mean the wall that you will see when you walk in from the exterior door? Or does that mean the wall you see when walking in from the breakfast room?
I only ask, because this is SO different from the color schemes you ultimately ended up with in your other rooms, I’d just hope that if you can see it from the breakfast room, it won’t begin a cascade of do-overs because it can’t tie in to the other rooms.
The pattern you created is absolutely beautiful, though, and that website is FANTASTIC. I think this is just what I needed. I wanted to create a gallery wall of under sea creatures or flowers or something fun at the end of my hallway. I had been looking on that website where you got your bird photos but nothing was jumping out at me.
Could I make a humble suggestion- one of these days when maybe you don’t have too much progress to show, could you put together a blog with your favorite websites for DIY? It seems like you have an “in” on the deep, dark interior design web for fabric, hardware, all kinds of things. I’d personally love it if you shared your resources all at once one of these days!
This is great info and instructions for wallpaper. You have, once again, amazed me! Your choices have you all over them. It will be a perfectly happy and engaging space every time you enter.
It’s going to be beautiful when it’s up!
Be Blessed.
You are really amazing. Thank you for this post.
I love this wallpaper! I can’t wait to see where you use it!
Phenomenal. Freakin’ phenomenal. Such vision & amazing talent. Thank you so much for sharing it with us.
Thanks, Kristi for a great tutorial post! I just made created a custom baby blanket for my new niece using Spoonflower. I loved designing the fabric to make her something very special.
I’ve been thinking about trying paper or fabric for my dining room curtains and you just saved me a lot of trial and error. 😘
Have you checked out Rifle Paper Co.?
I love your graphics choice! Those colors are beautiful. It doesn’t fit anywhere in my home, but it makes me want to create a room just for a big, bold, design like this. And thank you for the great tutorial. I’ve been searching for fabric to make draperies for the sliding door in my dining room but, like you, haven’t had any success at a reasonable price point. This is a very promising solution. Thank you!! (p.s. I can’t wait to see this in your studio!)
Thank you for explaining how important it is to PAY for the designs from the artists. They work hard to put out things that people will want, and deserve to be compensated, after all if you could do it yourself, you would not need them.
And don’t kid us, YOU are an artist with your designing eyes! This is gorgeous and will look amazing. I for one can’t wait to see your wonderful/to die for, studio completed.
A great tutorial, also! I need to check out all those web sites!
Yes Amen to that! All artists need to get the credit and pay we deserve for our works! 😁
And I think Kristi is trying to tell folks not to write off trying this just ‘cause they’re not “artsy”…many folks have more of a design sense then they realize, and I love how the tutorial frees this idea up!
WOW, this Makes my eyes twinkle with delight. It simply makes me smile.I LOVE COLOR
Bless your heart. That’s all I can say. Bless your heart. I am too damn old and untecheducated (a word my grandson made up for me) to follow one damn thing you said and I am happy with that. Bless your heart. You go for it! 🙂
You never cease to AMAZE me!!
Thanks for supporting other artists and the comments.
Cant wait!!
astonishing what you can do! I’m over the moon for this design.
Probably a stupid question, but did you place the chair and table in the photo to give us a reference for the size of the flowers? Am I remembering that the wall that this is going on will have your desk and some shelves on it? Will a lot of the flowers be covered up with stuff that goes on said shelves and desk? Asking because it seems a shame to cover up something so pretty.
That is absolutely stunning! How could you not be happy in a room with that wall?
Why not take that design and use it to decoupage your vanity in the bathroom
I love this as wallpaper! Thank you so much for giving us this link. They had peonies. Peonies! I love peonies. And, I love your blog.
I love this, it is beautiful. You should add this to Spoonflower to sell and make a commission. I would definitely buy this I have the perfect wall for it.
That print just makes me happy! Very nice. I look forward to seeing the work on the studio progress!
You are do talented and hard working! Love your results.
Love what you designed! Don’t understand a fig of the directions, because this old brain doesn’t get tech-y at all, but that’s okay. I think it will be awesome for the studio.
Another great tutorial, and happy that you are giving a shout out to artists out there who do work for which they deserve to be paid. I’m sure you’ve heard of muralsyourway.com; they create custom mural wallpaper, either theirs or your own design. I’ve had the opportunity to see several and hang one myself so I’ve become a fan. Looking forward to seeing yours become “real”!
GORGEOUS! I want a fluffy comforter out of it!
LOVE, LOVE, LOVE, LOVE!!! I’m not even normally a fan of wallpaper but this is crazy good, and I’m so glad you shared the tutorial. Gracias!
I love the tutorial – this is pure Kristi 🙂 as in a complicated process explained so that it is easy to understand and copy. many thanks! And i actually like the result, too, even if this were normally never my choice… I particularly like the colour combination and am really curious about how this will look in your studio (it will surely make you smile a lot in there!!)
I love this idea of customizing your own wallpaper, thanks for sharing! Some fabric companys are turning their fabric prints into wallpaper. https://www.hawthornesupplyco.com/wallpaper-all
Absolutely beautiful and absolutely perfect for your studio! I’m excited for you to finally get your studio. You deserve it, girl! I love your blog and appreciate your in-depth tutorials with plenty of pictures! Thanks for the regular postings and letting me follow along ! You give me courage to go bold with color!! Thanks again for your blog!
😍😍😍
Love, love, love the colorful watercolor design!! Really inspiring! It sure will make you smile in your studio! And great tutorial – got my creative juices flowing. Now to work out my own wallpaper design.
Looks beautiful and fun! Perfect for your studio. While reading this, it occurred to me that you might enjoy an artist that I follow on Instagram. She, like you, is not afraid of color! https://www.instagram.com/barij/
Can I just say that your tutorial is even easier to understand than the one on Spoonflower’s site?
Thank you for giving credit to the artists! And thank you for the simplicity-easy tutorial! It was a good refresh for me since I was wondering how to do the repeating wallpaper design.
I think this tutorial would also be great if you wanted to recreate some vintage-style wallpapers or ressurect a beautiful design that’s in only one roll.
One could even redraw a vintage wallpaper design in vector software and use this tutorial to recreate in the look/colors you want!
Very cool.
I also thought you might enjoy seeing the bold vintage wallpaper and pretty, colorful, traditional style of this 1950s time capsule home in Gladewater, TX.
https://www.tracymcknight.com/-/listing/300724337/408-N-Main-Gladewater-TX-75647
The bold wallpaper there is lovely!
And yours. 😁
I’m somewhat familiar with Gimp and took a class that included instructions on using photoshop, years and years ago. I AM a tad confused about using the eraser to add flowers in the center. Is there a site where I could learn more?
Thankyou, that was very helpful in getting me started on my spoonflower career
Is your design for the guest room available to purchase? Thank you!
It’s not available as wallpaper. I do have the image file available free of charge for you to use as a pattern for your own personal use. You can find it here: https://www.addicted2decorating.com/two-wall-design-patterns-free-downloads-guest-bedroom-flowers-and-original-entryway-vines-and-birds.html
Thank you so much for this. I want to create my own wallpaper and this has really helped ❤️
I cannot tell you how much I love this wallpaper and absolutely adore your including information on proper usage of the artwork. *chef’s kiss*