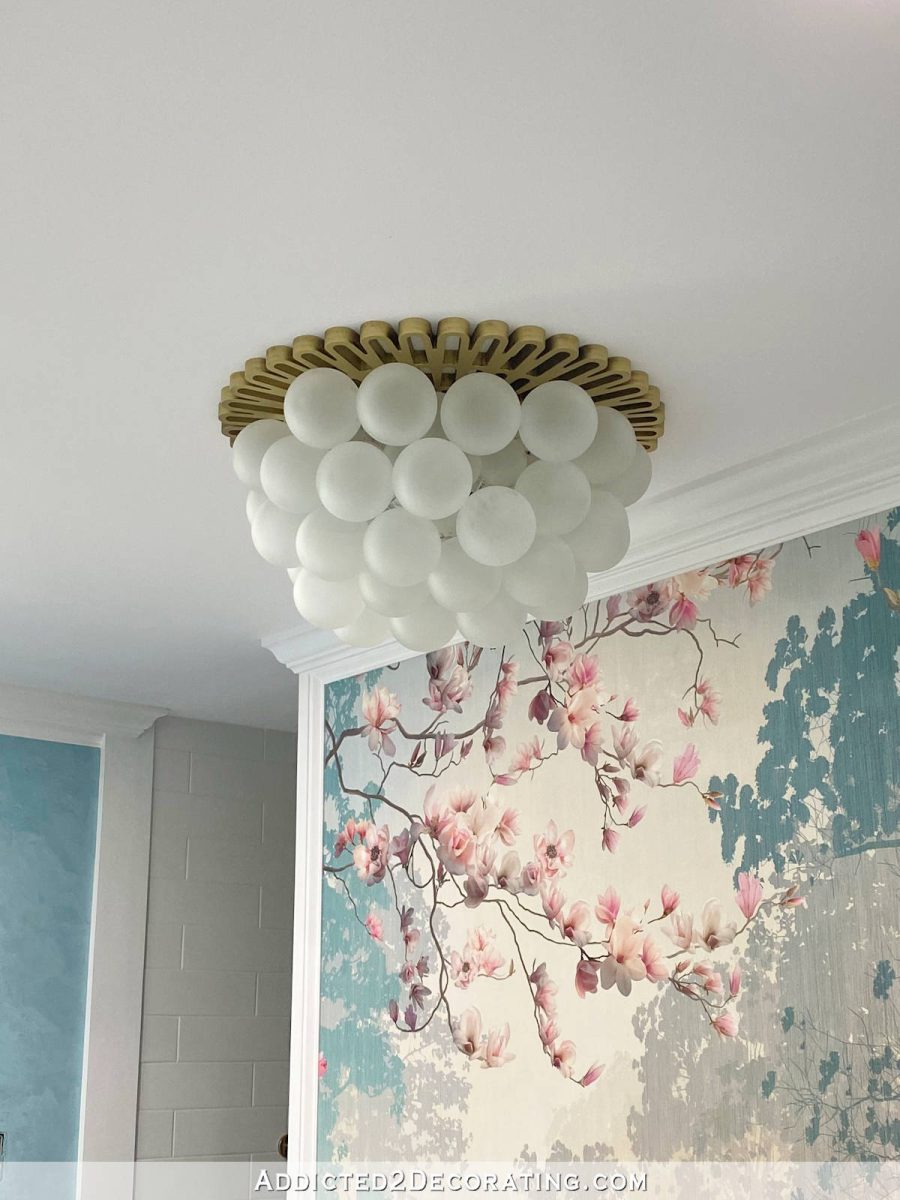
DIY Lighting: Flush Mount Glass Bubble Chandelier
I’ve been dreaming of a glass bubble chandelier over my bathtub for many months now, and I finally have it. This is a DIY light that I made myself, and I did that for two reasons. First, I wanted a large flush mount bubble light (not semi-flush mount, but actually flush mount), and those are virtually impossible to find. But the main reason I decided to DIY this light is that I didn’t want the actual decorative part of the chandelier to have any electricity running to it. I know that’s strange, right?
The reason for that is because this is going over my bathtub, and it’s against building code to put a chandelier over a bathtub. So I had to get a little creative with this and find a way to get the look of a chandelier without the decorative parts that hang below the ceiling being wired. In other words, a person could stand in my bathtub while it’s completely filled with water and touch any part of my chandelier, and it wouldn’t shock them because my chandelier is nothing more than a ceiling mounted decoration hanging around a recessed light. The recessed light provides the light, but it is not touching or connected in any way to the decorative part of the chandelier.
So here’s how my DIY glass bubble chandelier turned out…
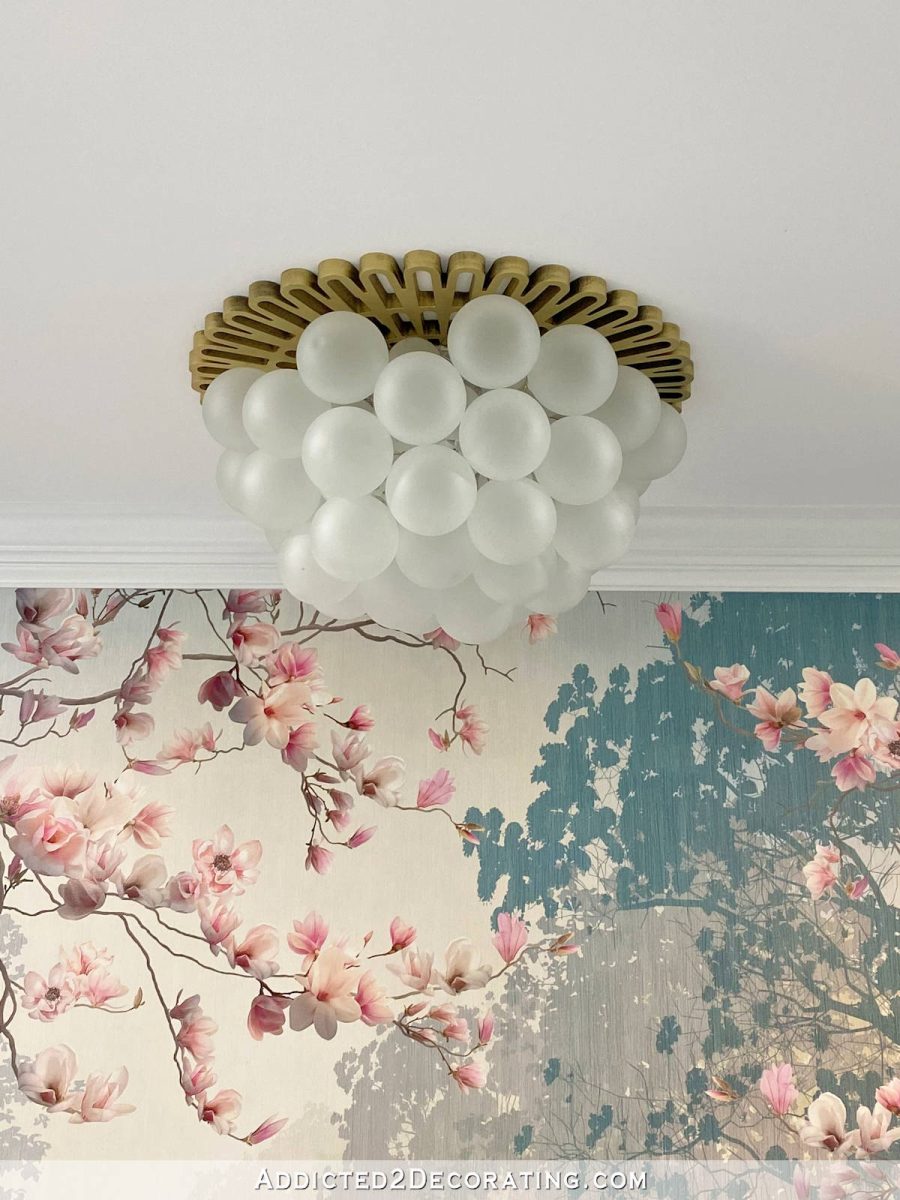
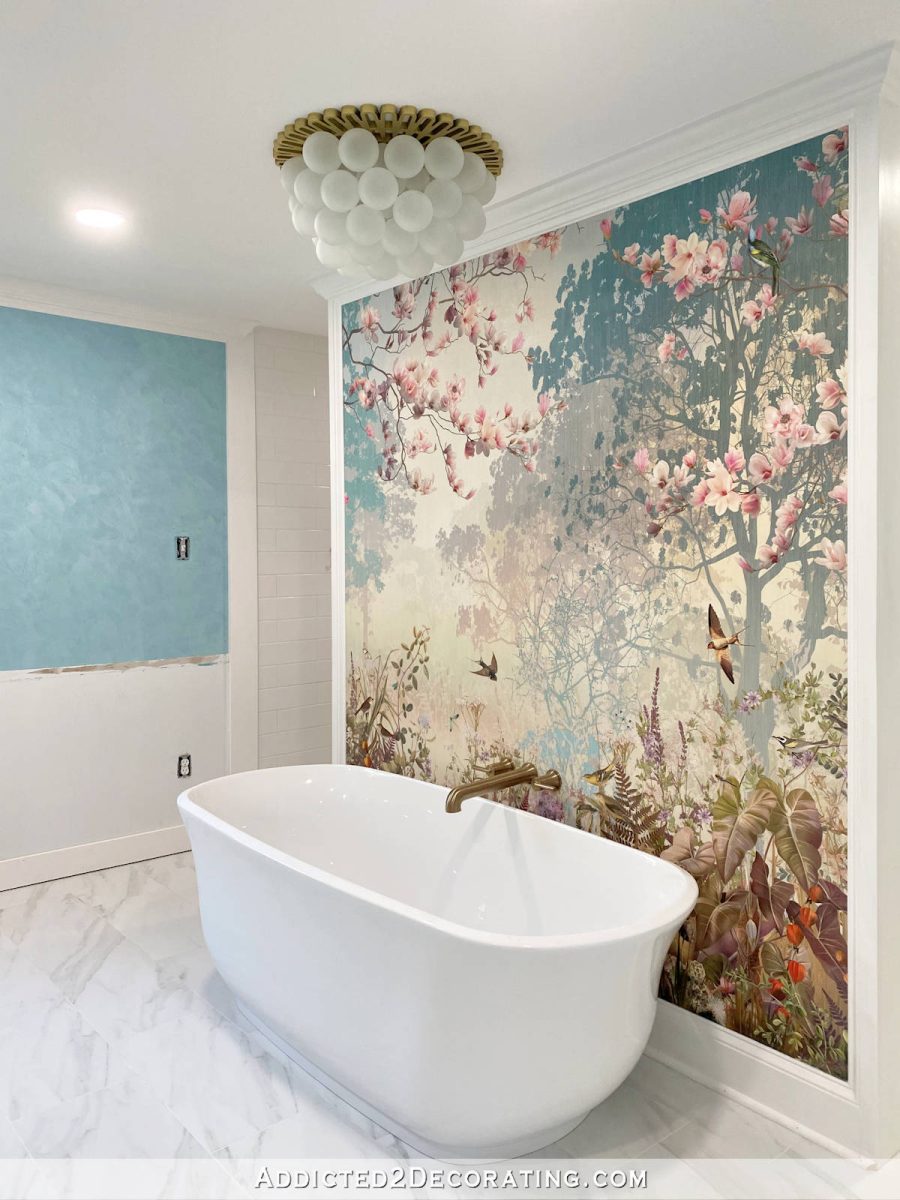
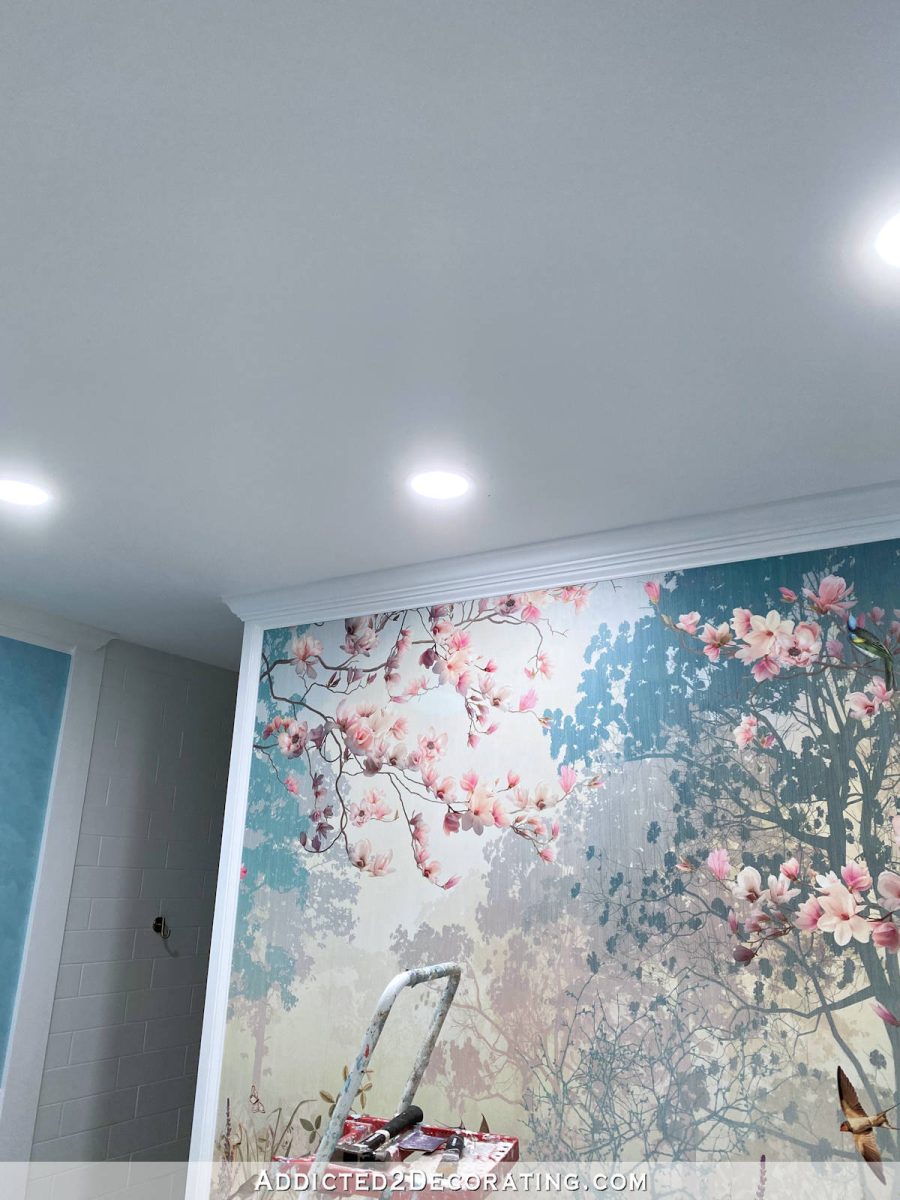
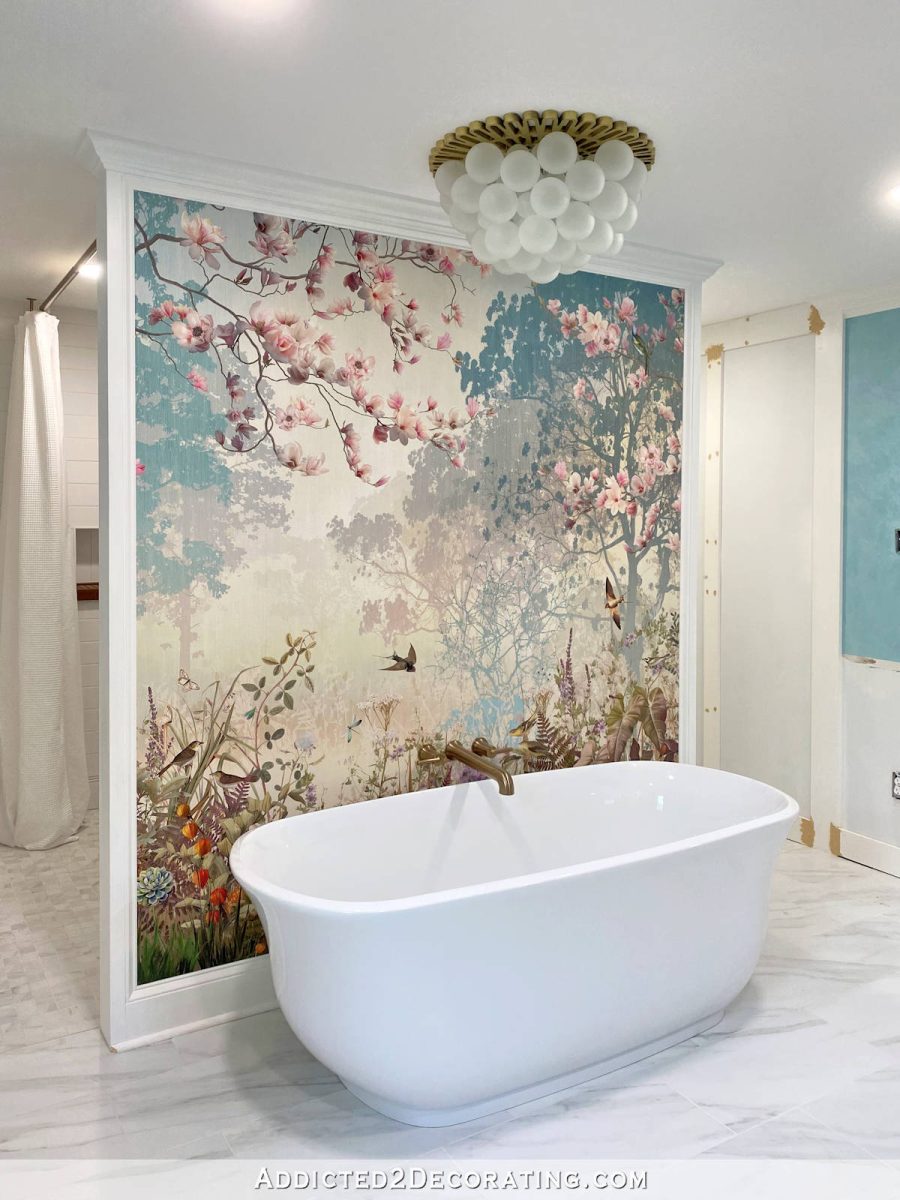
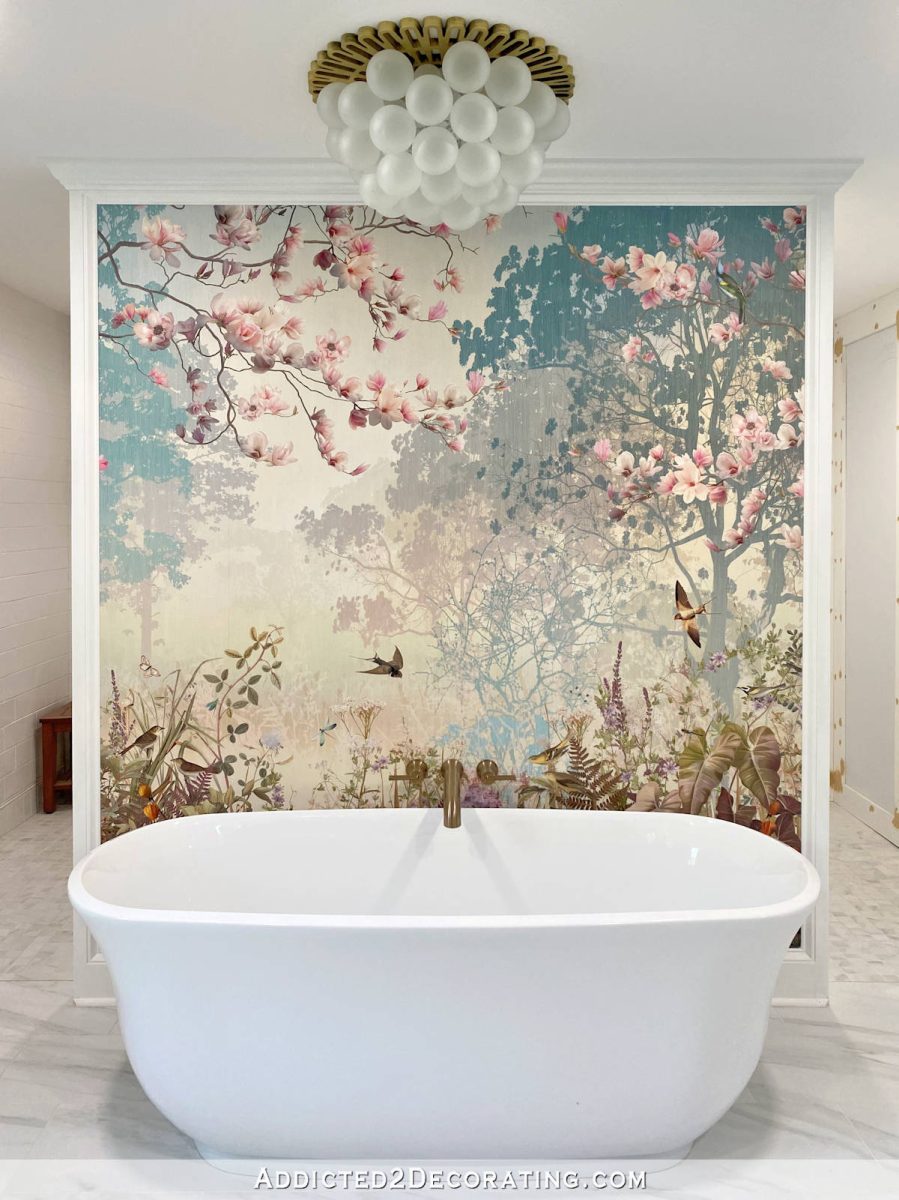
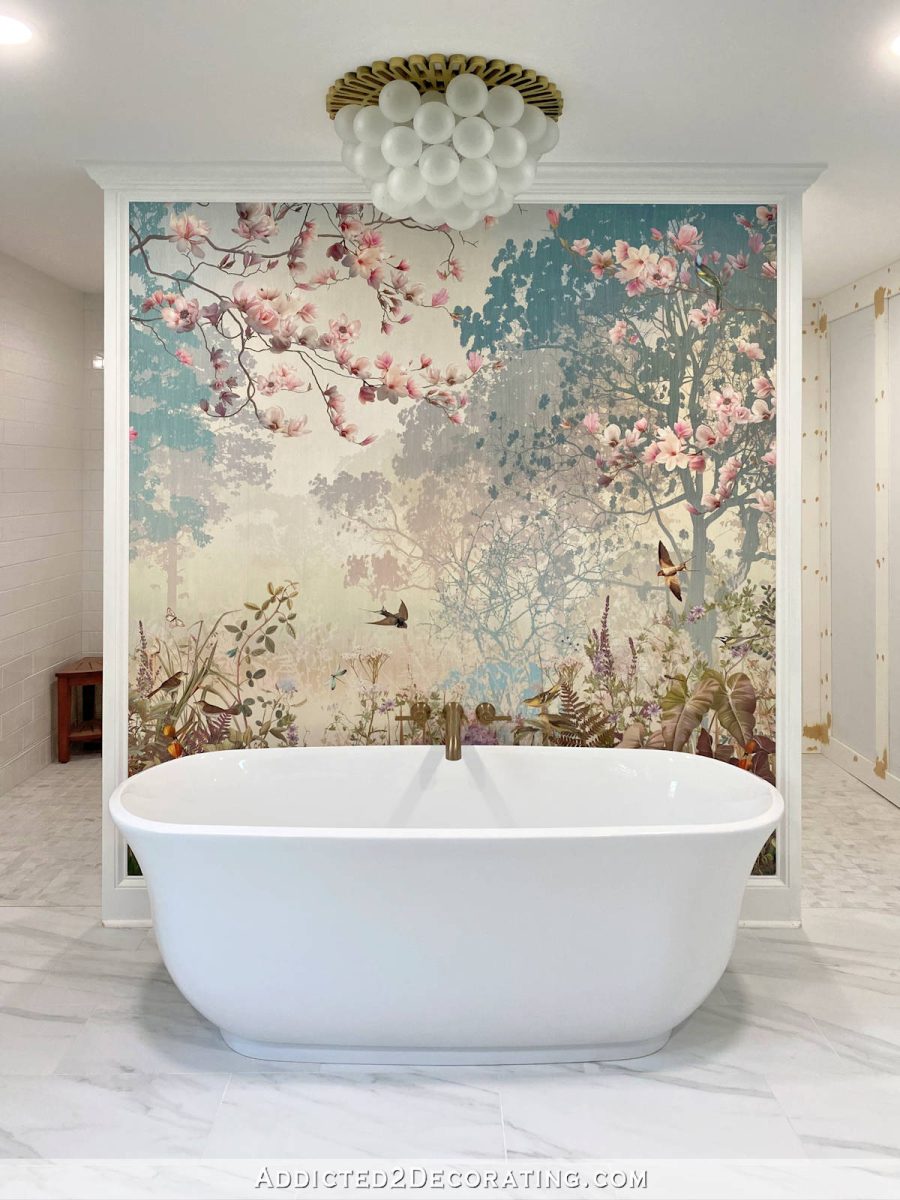
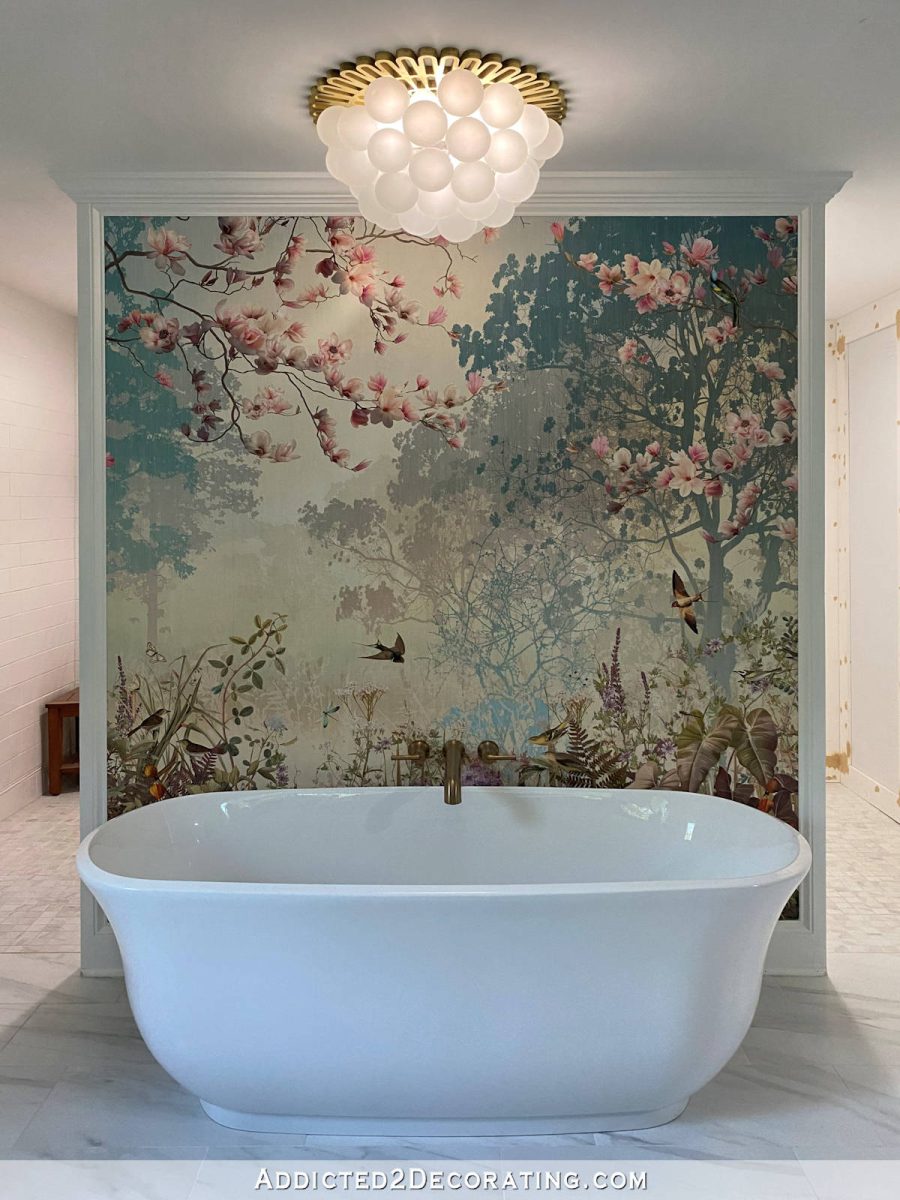
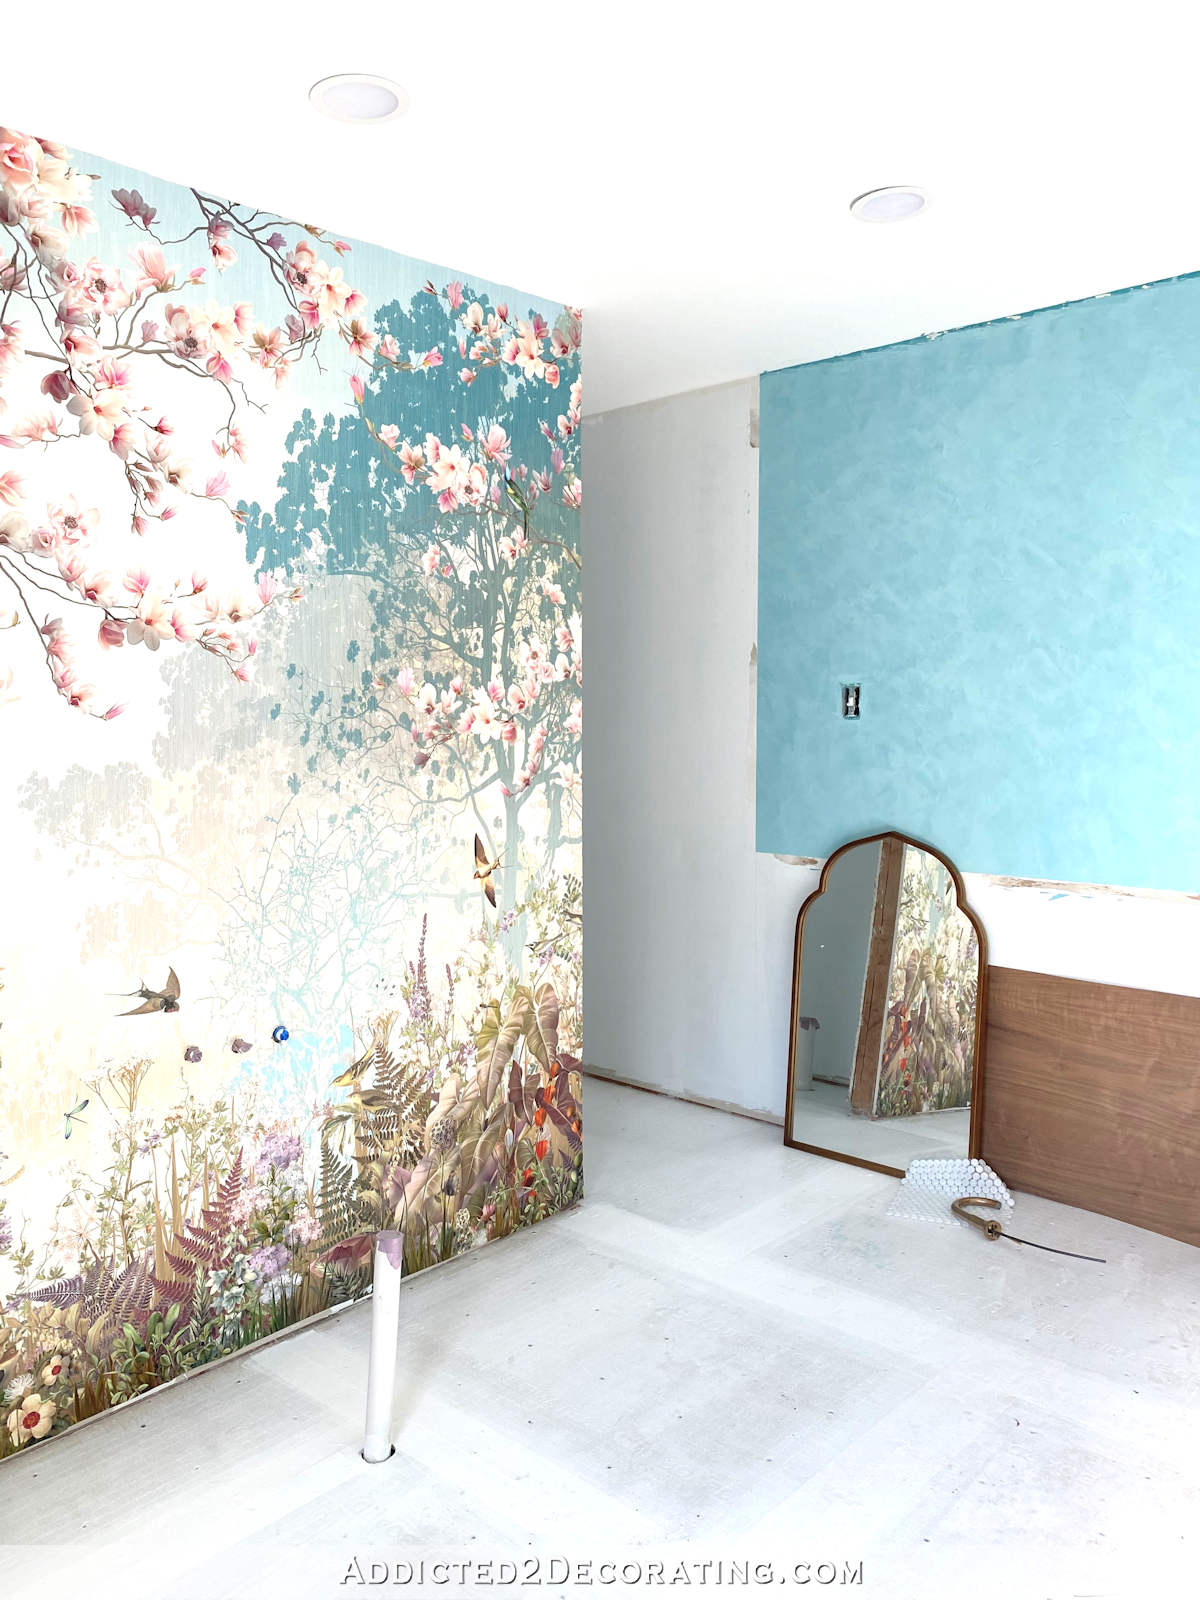
And here’s the whole view with the bathtub, the mural, and the chandelier (with an unfinished wall on the left side)…
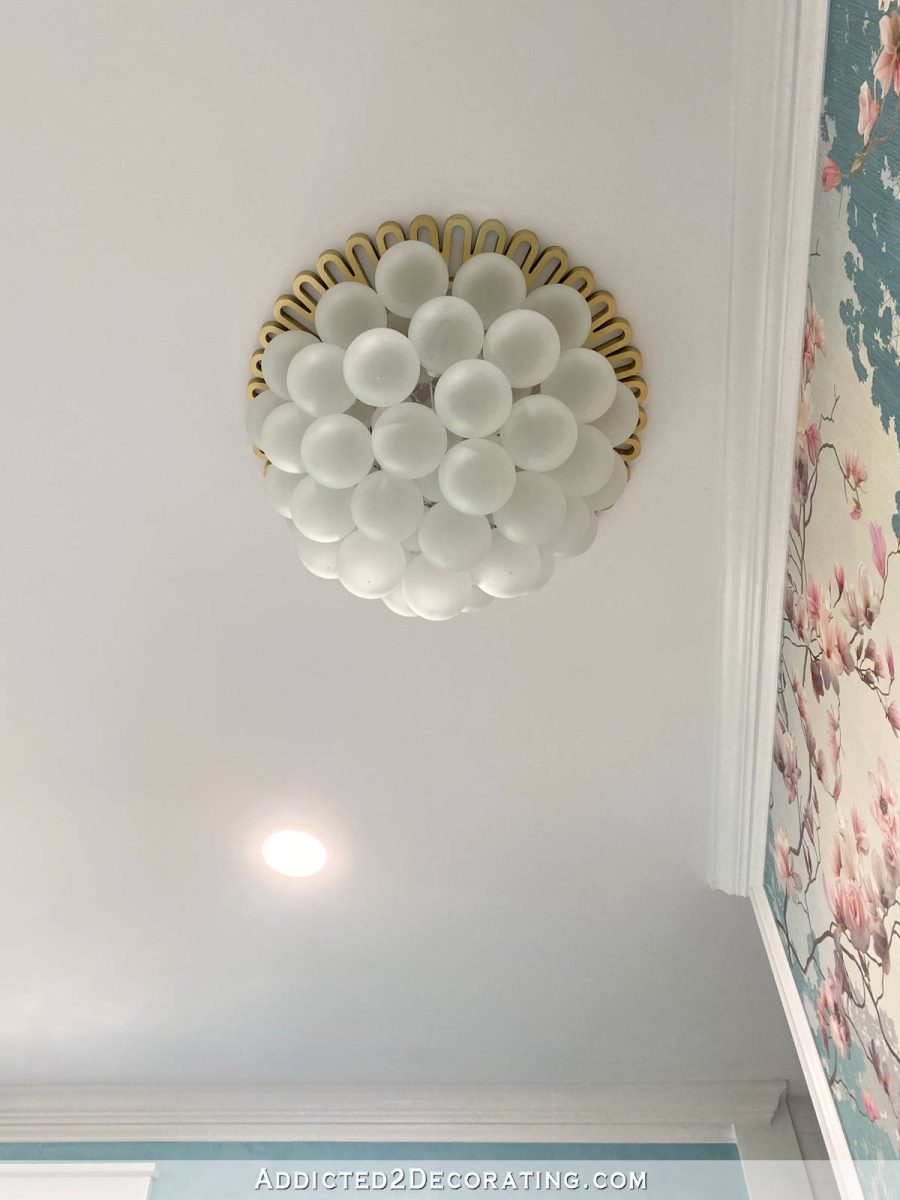
And again, all of those glass bubbles are hanging around a recessed light, which does work, and does provide light through all of those glass bubbles. Here’s what it looks like when that recessed light is turned on and the other recessed lights are turned off…
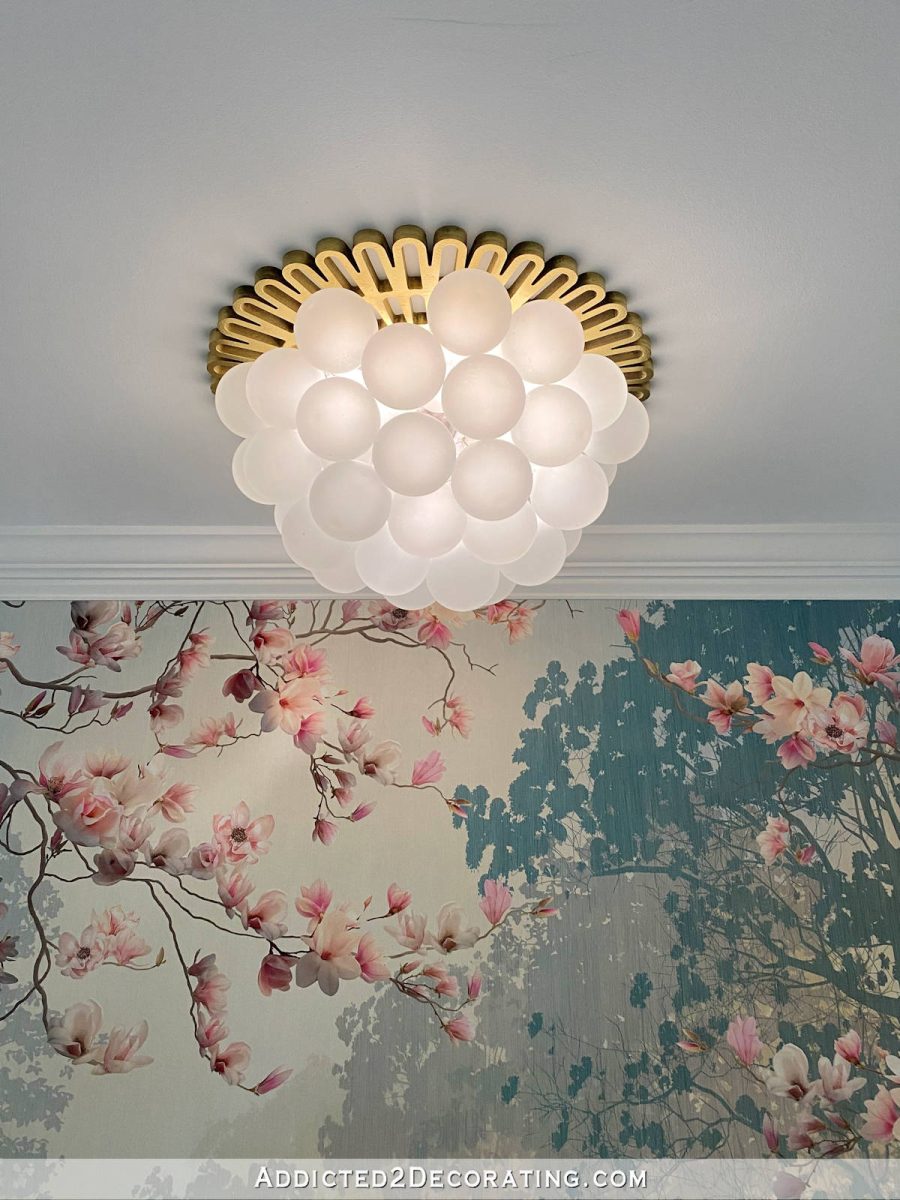
It’s such a pretty glow of light, which is the perfect amount of ambient light when I want to take a bubble bath at night.
So let me show you how I made this DIY glass bubble light.
*This post contains affiliate links.
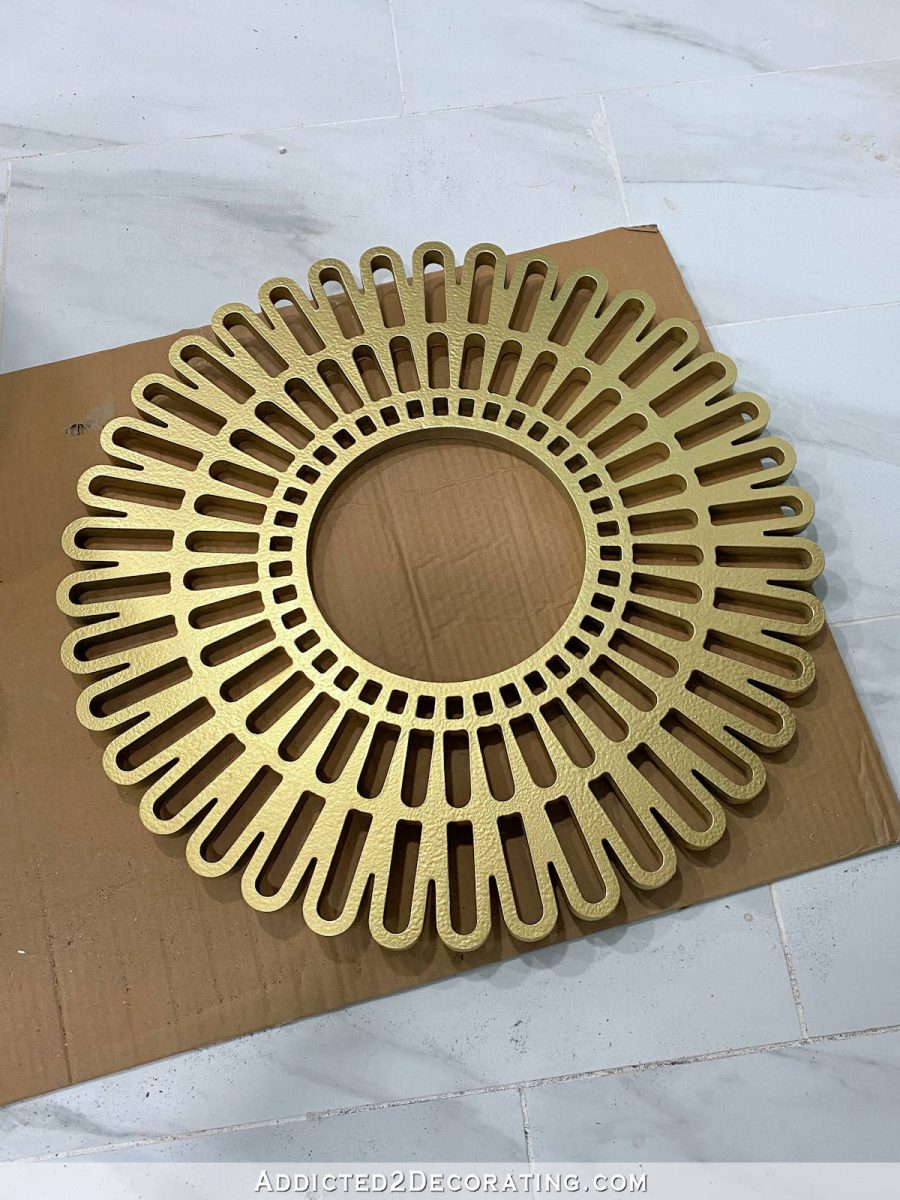
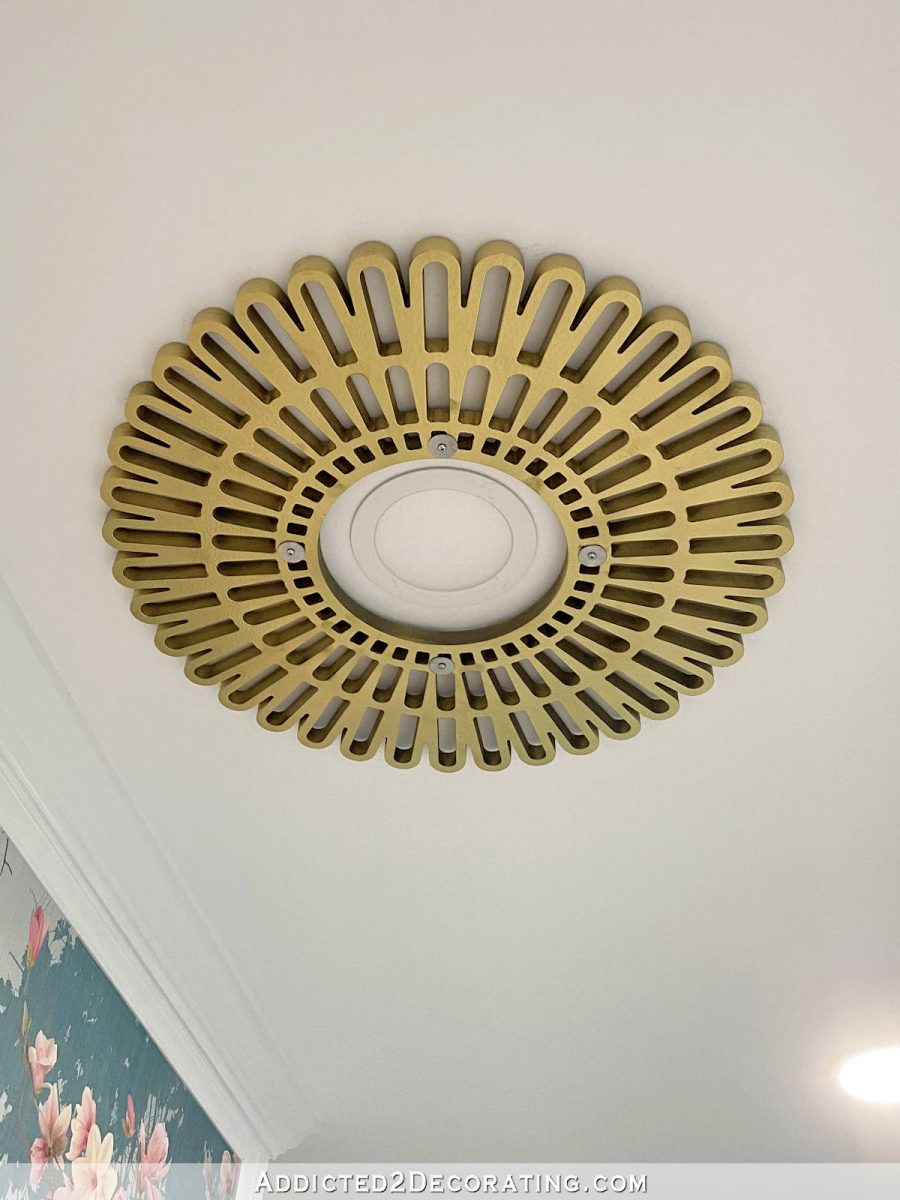
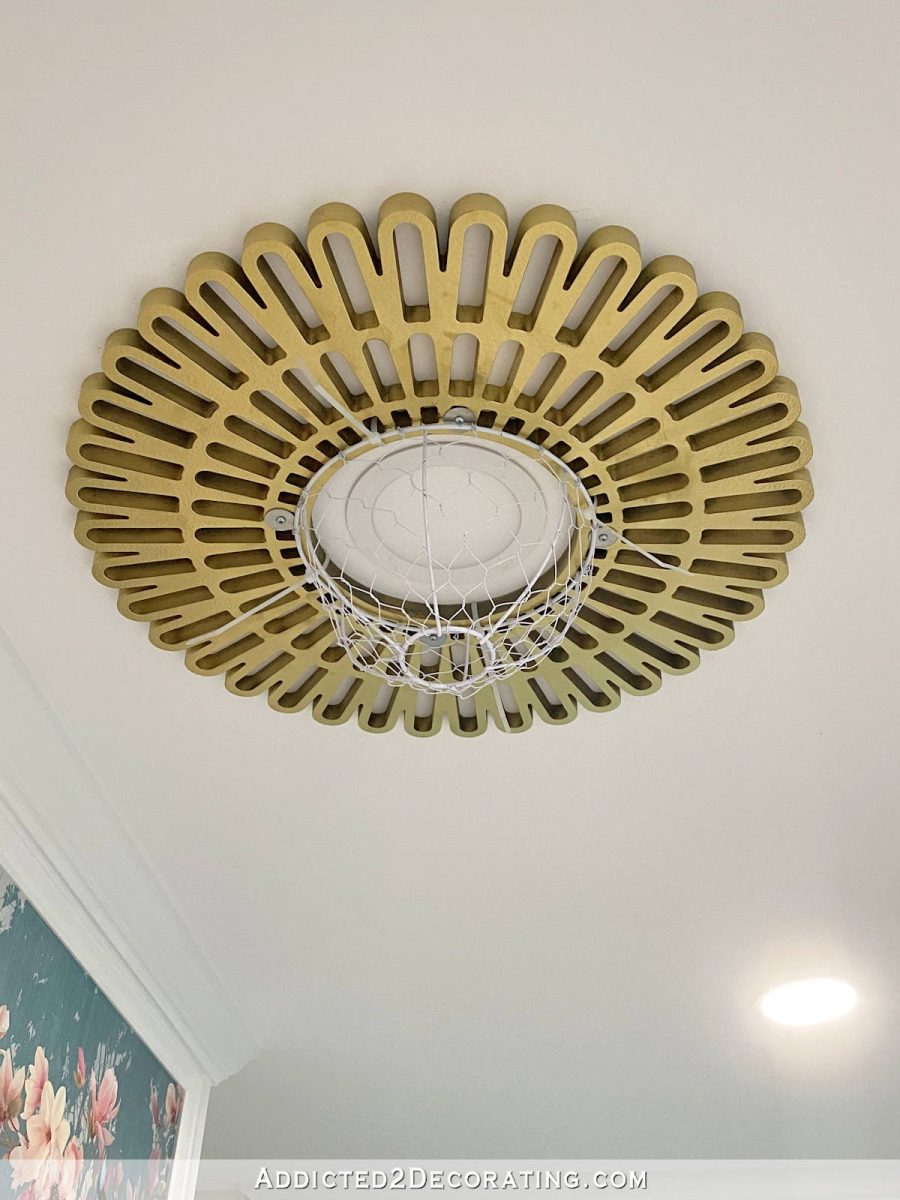
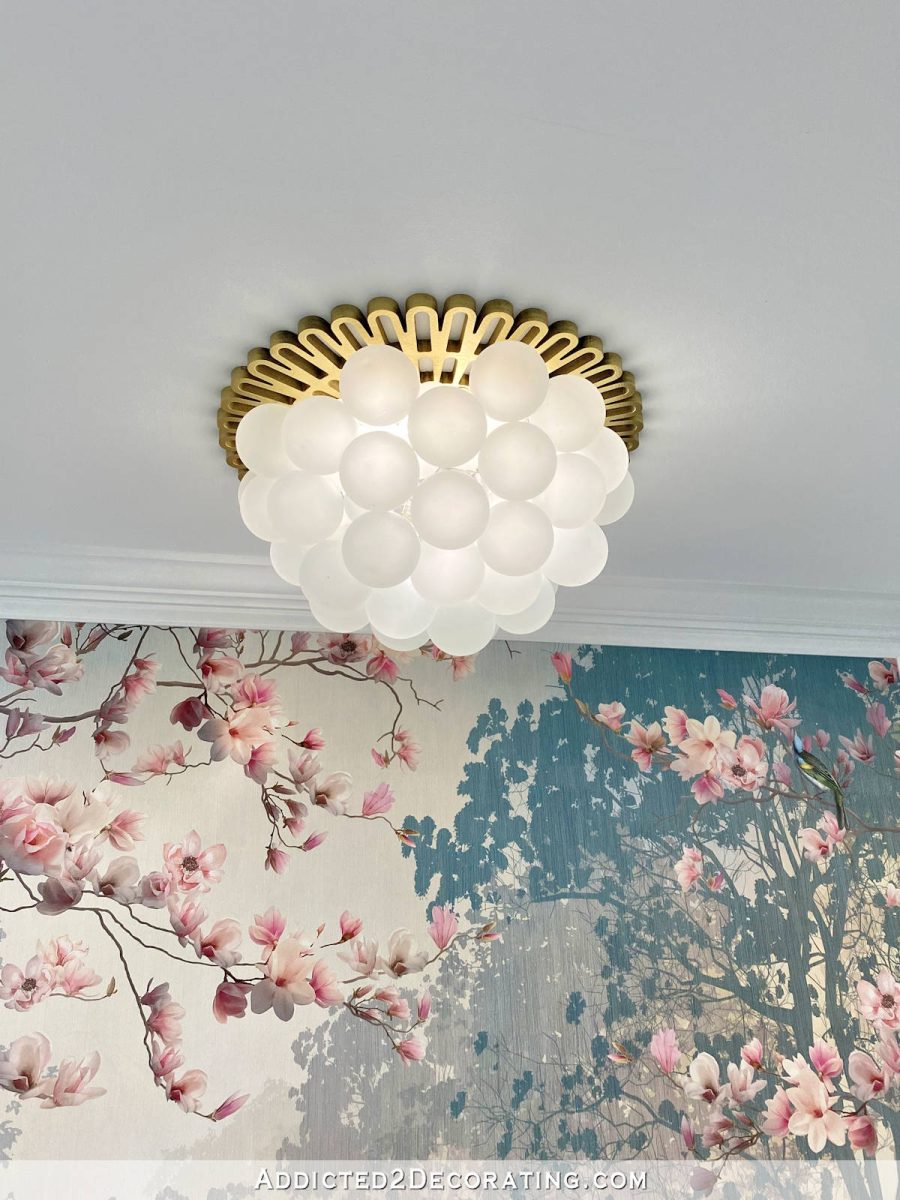
First, I started with a ceiling medallion. I purchased this one from Wayfair, and I selected the antique brass finish in the 24-inch size.
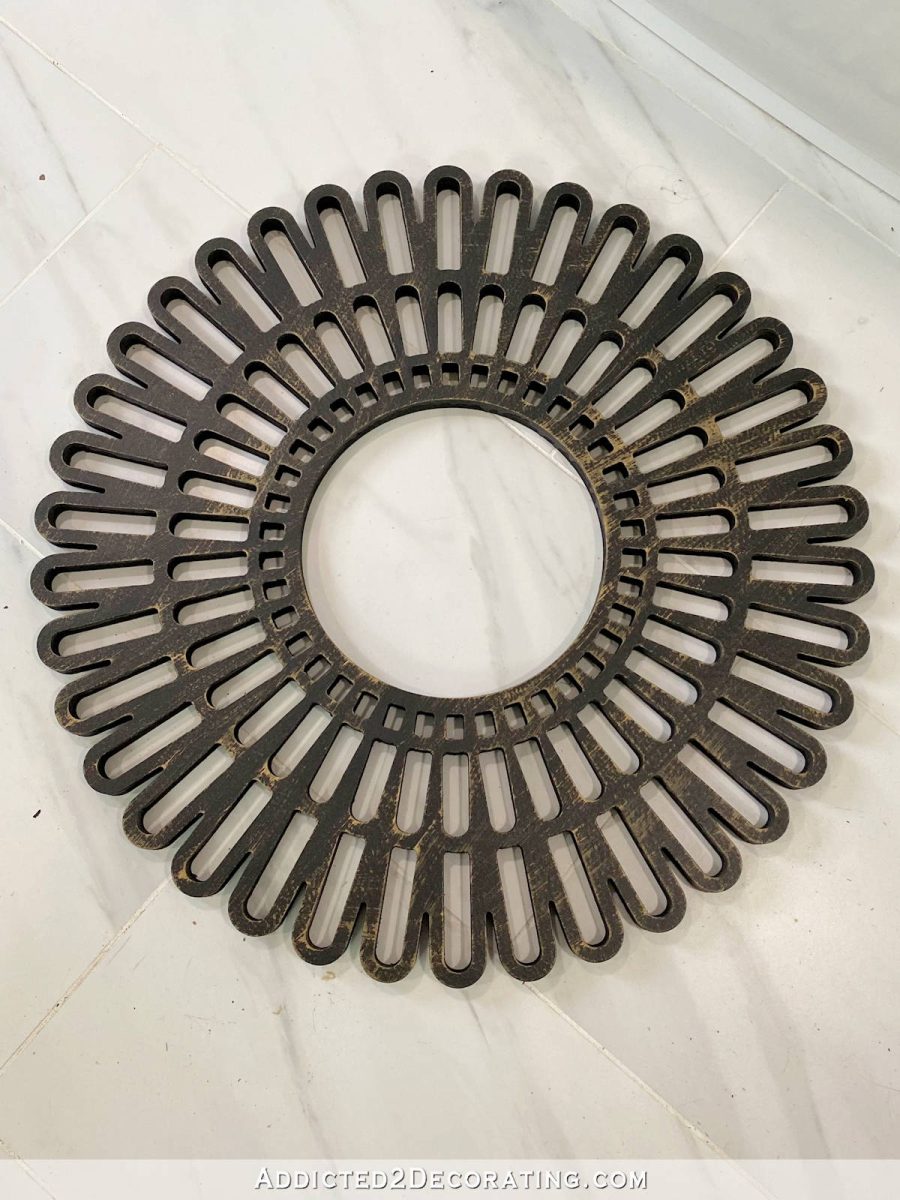
As you can see, the color of the one I received is nothing like the color of the antique brass medallion on the Wayfair website, even though the one I received was labeled “antique brass” on the back. Oh well. That’s nothing that a couple of coats of spray paint can’t fix. This is the spray paint I used…
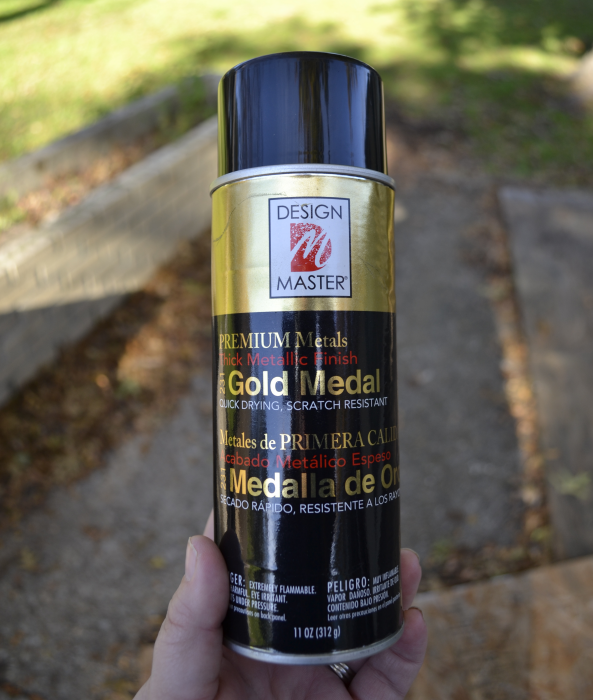
That spray paint was perfect, and I had a perfect gold medallion to start my DIY bubble chandelier project…
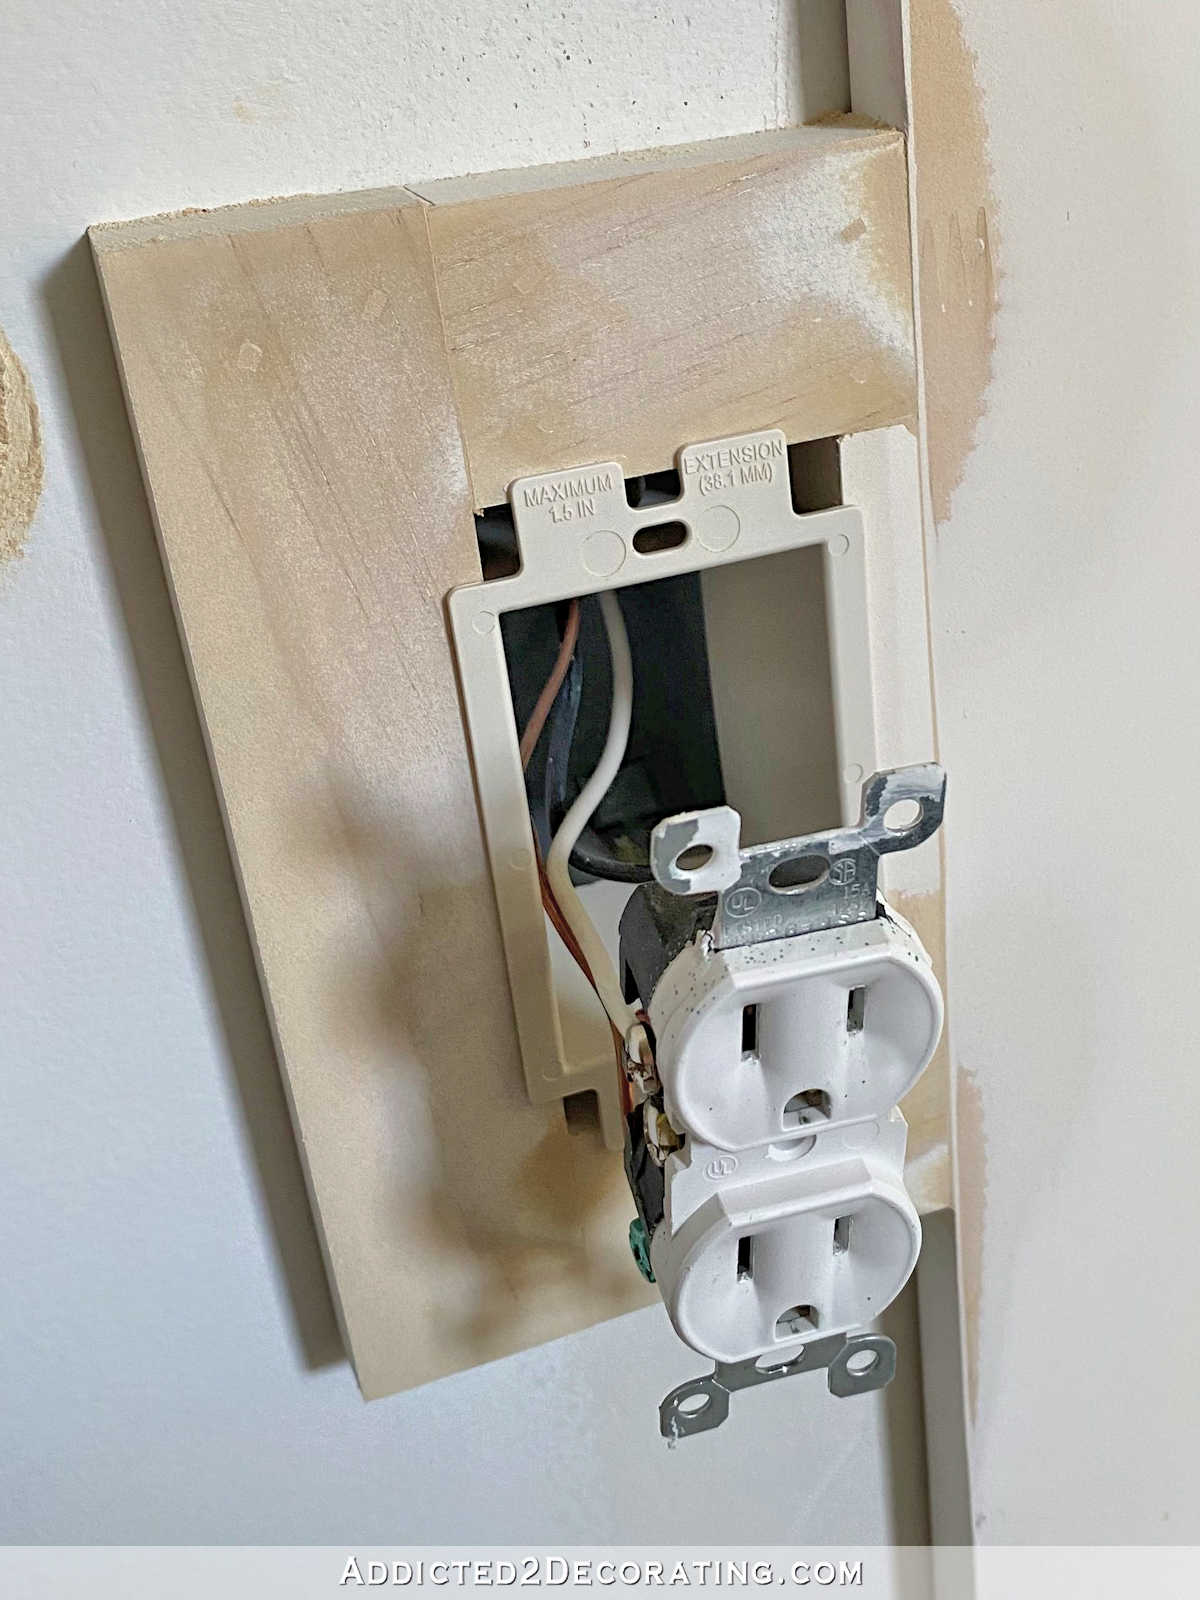
Here’s a look at the light above the bathtub. As you can see, it’s just a normal recessed light, and I had it wired on a separate switch from the other recessed lights in the room.
It’s an LED light, and the box said that it’s supposed to last for 14 years with regular use, so I shouldn’t ever need to get to the light. There are no bulbs to change, and I’m sure I’ll get tired of the bubble light long before the LED light stops working.
To install the medallion, I used washers, 2-inch screws, and drywall anchors to screw the medallion onto the ceiling through the small holes. I didn’t screw them tight to the ceiling at this point. I left them a bit loose so that I could attach the form onto which the glass bubbles would be hung.
And the form that I used was a flower basket that I found on Amazon.
I planned this chandelier back in the fall of last year (2021). That’s when I bought all of the “bubbles” (which are frosted glass Christmas ornaments), but I wondered for a long time exactly how I was going to attach all of the bubbles.
Then one day a couple of months ago, I saw an Instagram reel from Chris Loves Julia of their bubble chandelier (which cost about $2500) being installed and put together, and when I saw the form to which those glass bubbles were attached, I thought, “Oh my gosh! That looks exactly like a hanging flower basket!”
So that’s exactly what I used. And I just attached it to the ceiling medallion using zip ties, which you can find in the electrical department of the big box home improvement stores. I simply zip tied the hanging flower basket to the ceiling medallion, cut off the excess plastic tie, and then tighten up the screws the rest of the way so that the ceiling medallion was snug against the ceiling. Then I just used some gold acrylic paint that I had on hand to paint those screws and washers before moving on to the next step.
Next, I used standard size frosted glass Christmas ornaments (about 2.5″) around the top of the basket. I just used the little hangers that come on the ornaments to attach them to the wire basket so that they would snug up to the wire basket as close as possible. This took some patience, especially since the hole on the bottom of the wire basket was too small for me to fit my hand inside. But working slowly and patiently, I got them all attached.
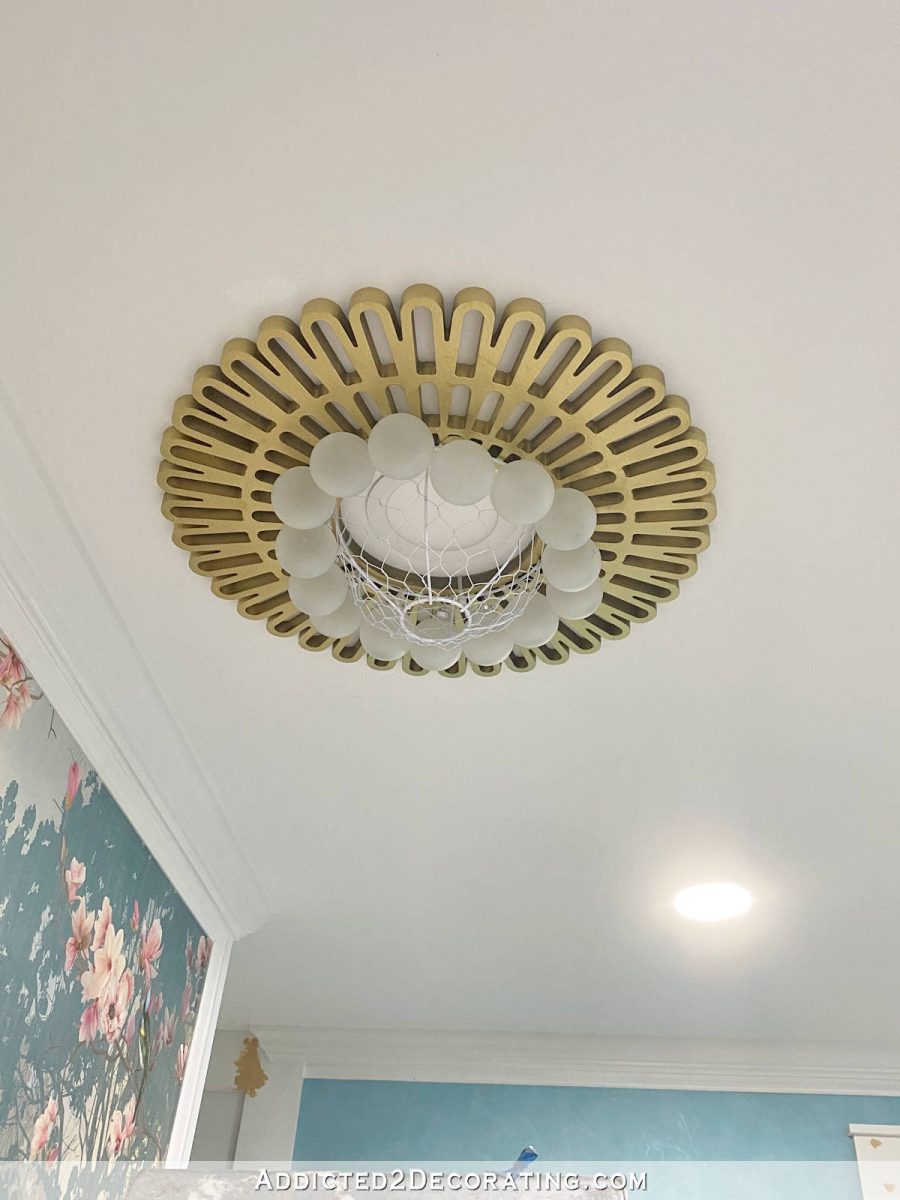
And then I continued with another row, and then another, to cover as much of the wire basket as possible.
Once I had the basket covered up close, then I started adding the large 4-inch ornaments. Again, I bought these last fall at Hobby Lobby when they were all on sale about 40% off. (I would only recommend buying them on sale during the fall/Christmas season, because if you have to purchase them in the off season, you’ll pay a ridiculous price for them.)
To hang the large ornaments, I started out by hot gluing all of the little metal pieces (those metal pieces that the wire hangers insert into) onto the ornaments. That way I wouldn’t have to deal with them pulling off during installation.
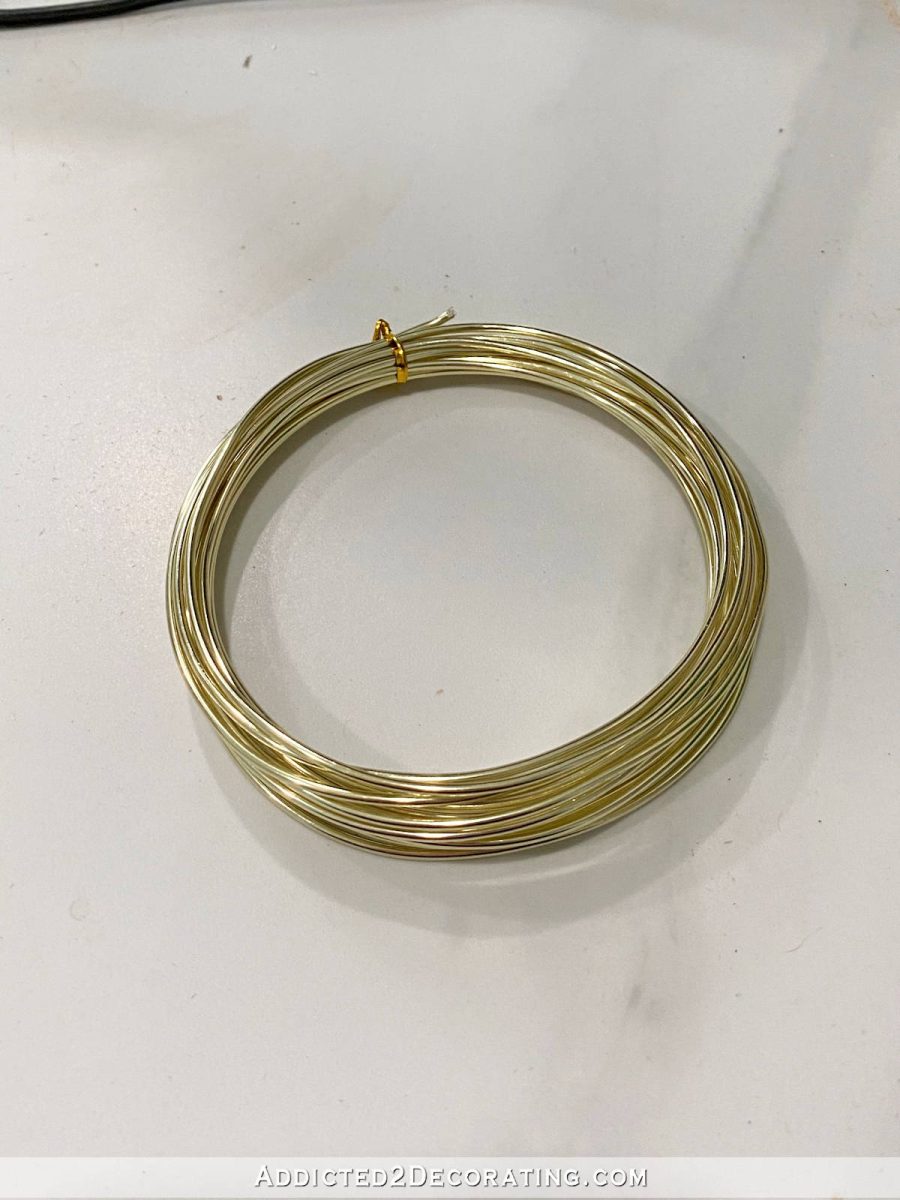
Then I made hangers using some 12-gauge craft wire that I bought at Michael’s. I didn’t necessarily want gold. White would have been better, but this was the only color they had, so I went with it. And in the end, it didn’t really show up on the finished light anyway.
Using my needle nose pliers that have a wire cutter on them, I cut the wire to about 3.5-inch lengths, and formed one end into a loop that hooked onto the little wire loop on the ornaments.
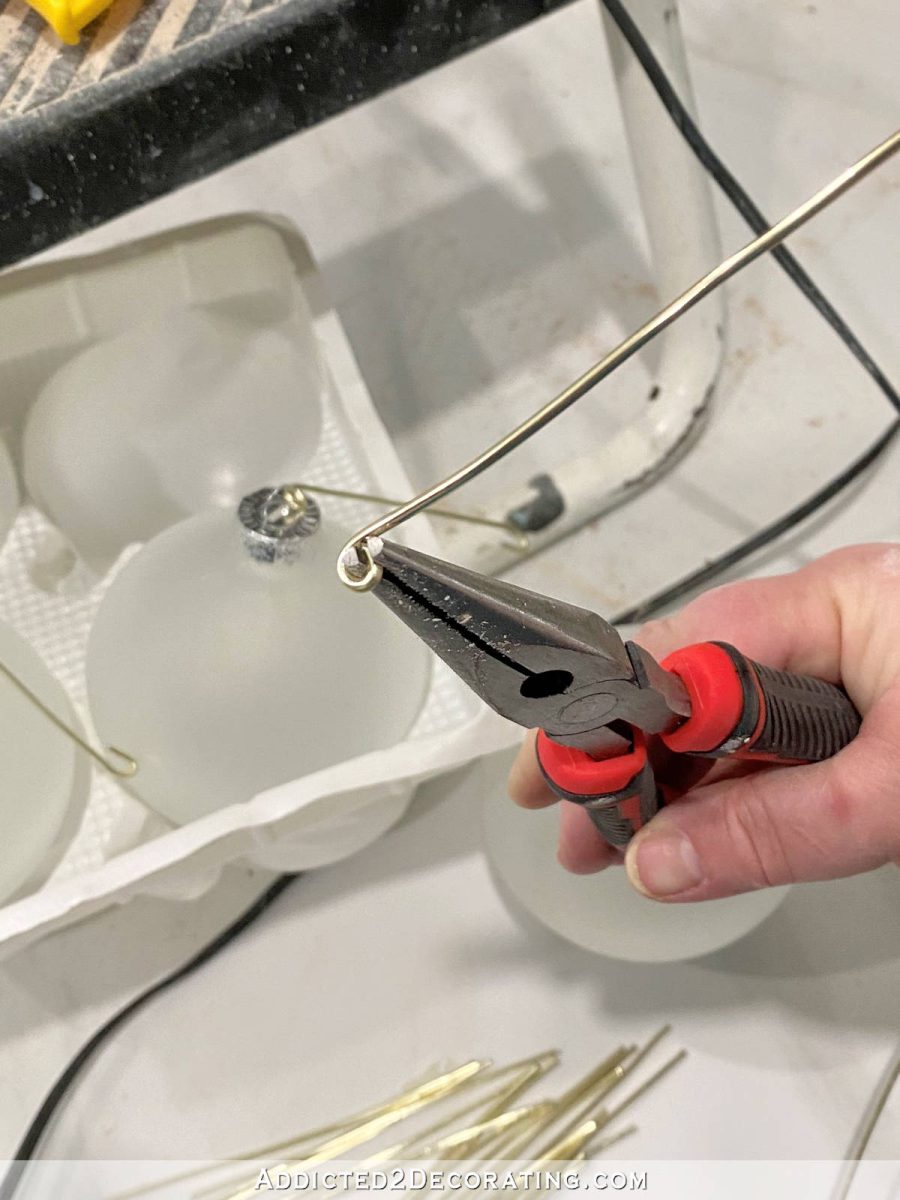
Once they were attached, I squeezed the loop together to hold it securely onto the ornament.

And then, still using my needle nose pliers, I formed the other end into a hook that would attach to the wire basket.
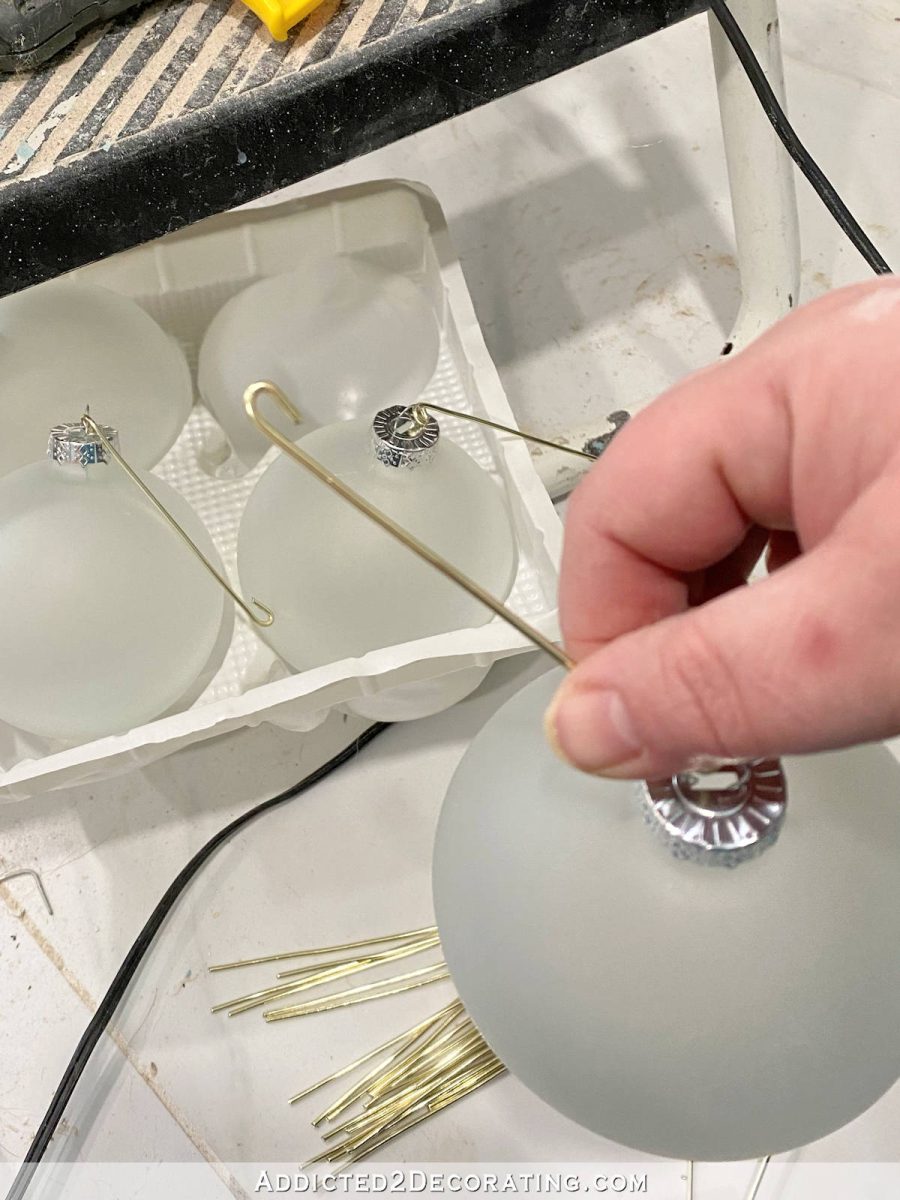
Once I hooked each large ornament onto the wire basket, I used my needle nose pliers to squeeze the hook so that it wouldn’t slip off of the wire basket. I won’t lie. This was easier said than done, especially as the light became more and more filled up with bubbles, and it became a very tight squeeze to get my pliers in between all of those ornaments. But I did my best, and it took a whole lot of patience, but I finally got them all attached.
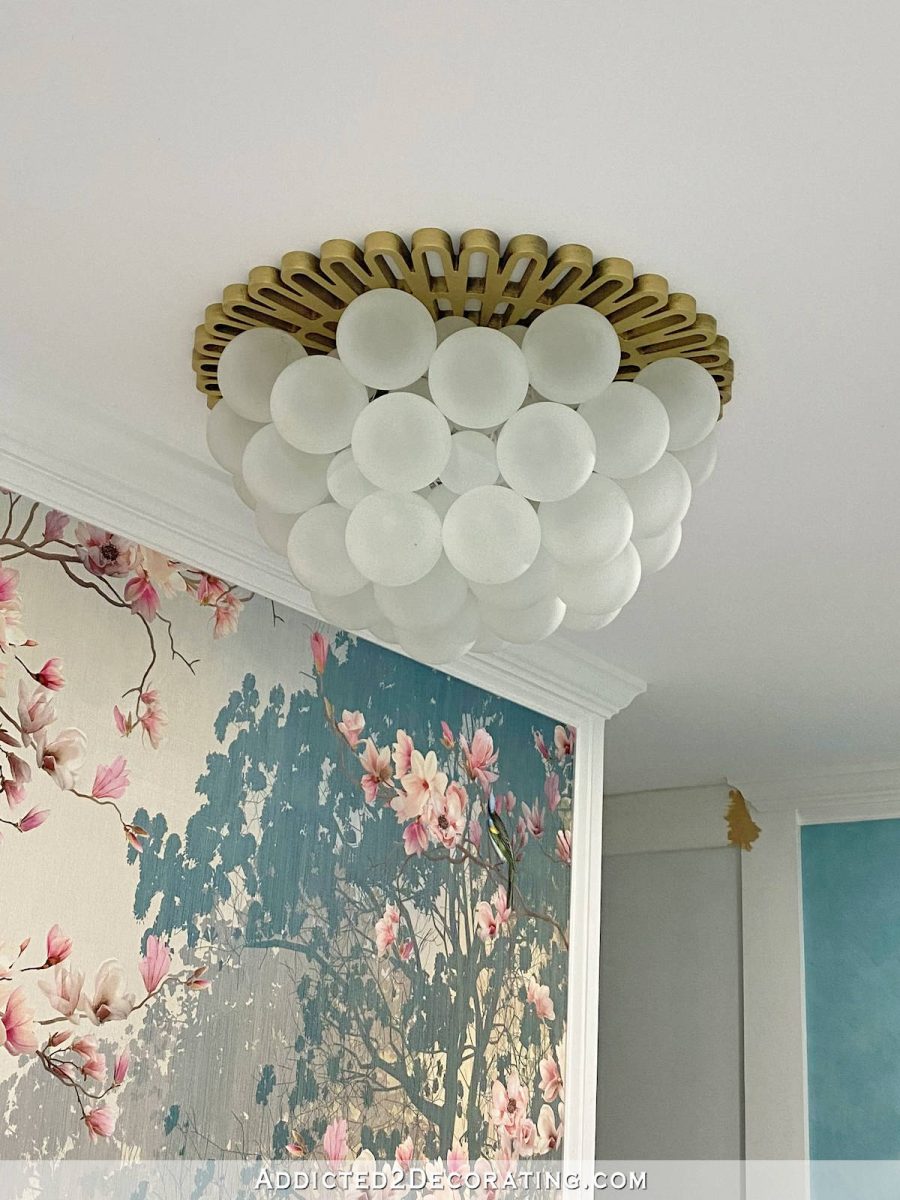
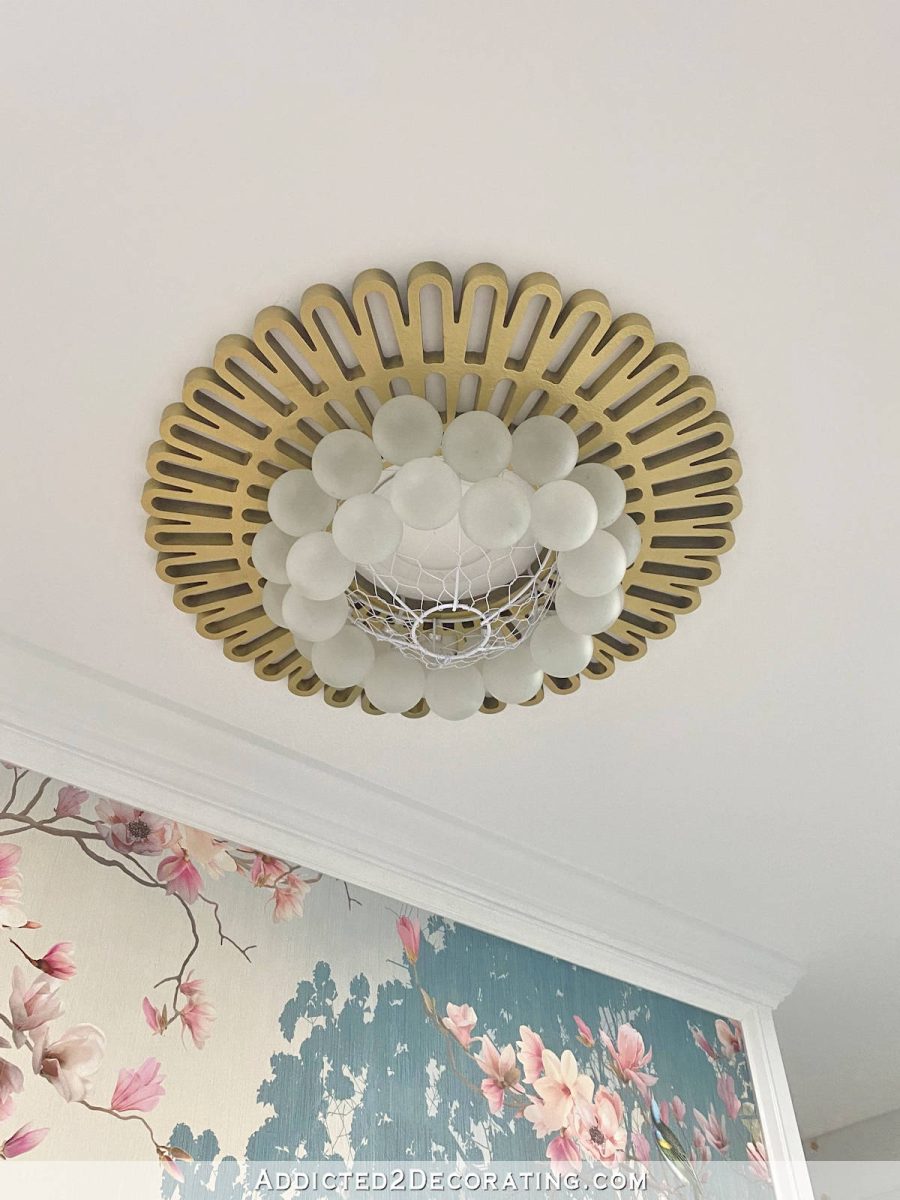
In all, I used about 36 of the small ornaments and 34 of the large ornaments to create the whole chandelier. The ceiling medallion is 24 inches in diameter, so that gives you an idea about the size.
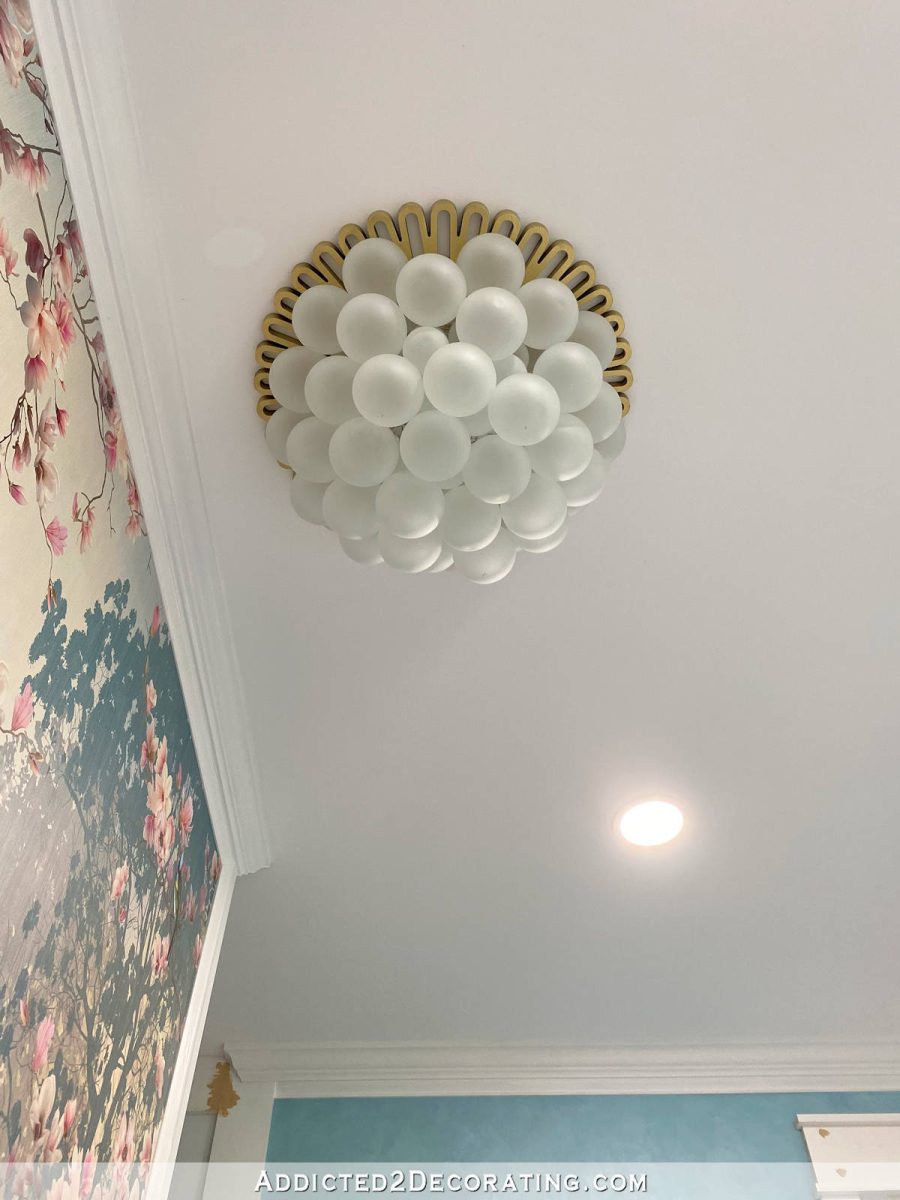
I’m pretty darn excited about how it turned out. It actually turned out much better than I had envisioned, and it fits the needs of this space. It hugs the ceiling, and since these decorative parts aren’t connected to electricity at all, there’s no building code violation. But I still get that pretty chandelier look above my bathtub, and when the recessed light is turned on, it has the prettiest glow of light coming from the chandelier.
And speaking of bathtub, here’s the view from underneath. This is the view that I get of the light as I take a bath in the tub.
And here’s the other direction…
I’m seriously so proud of how this turned out.
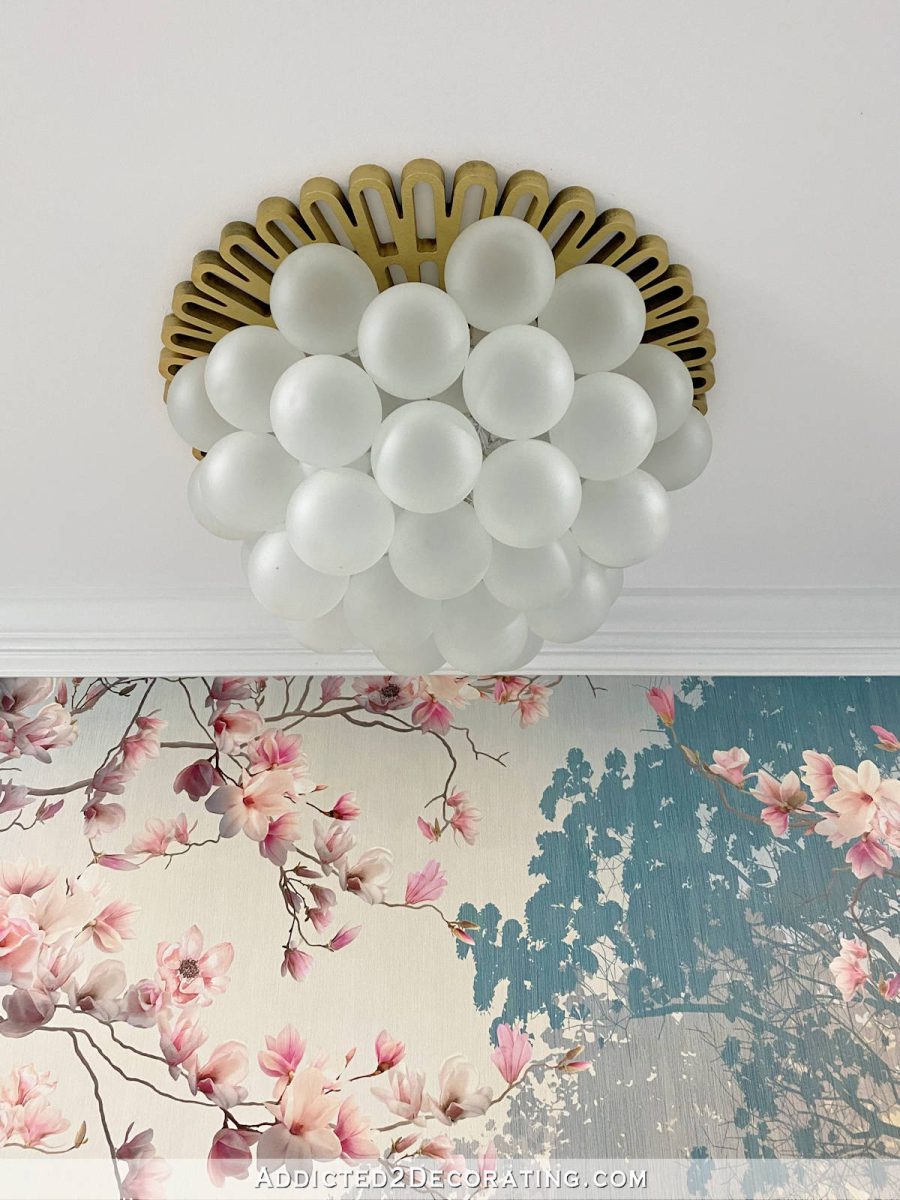
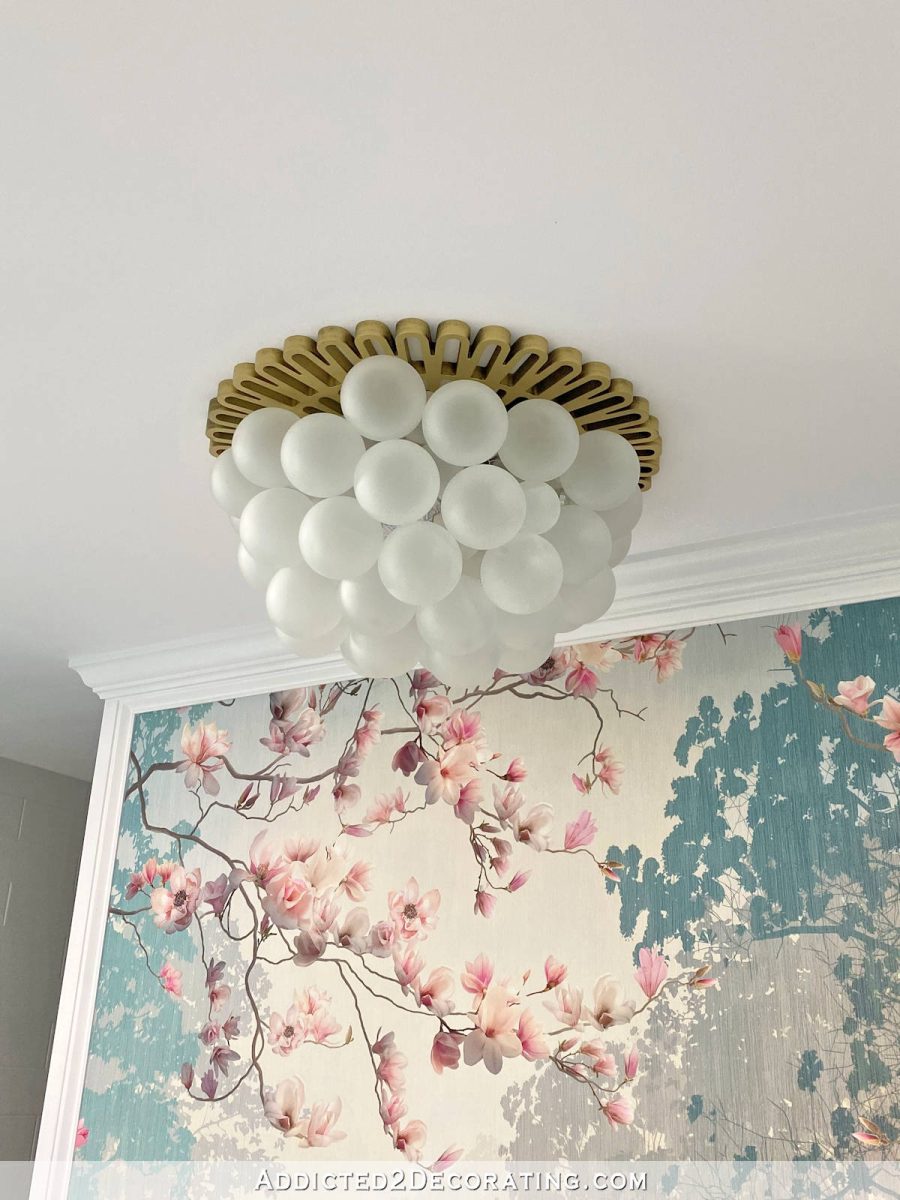
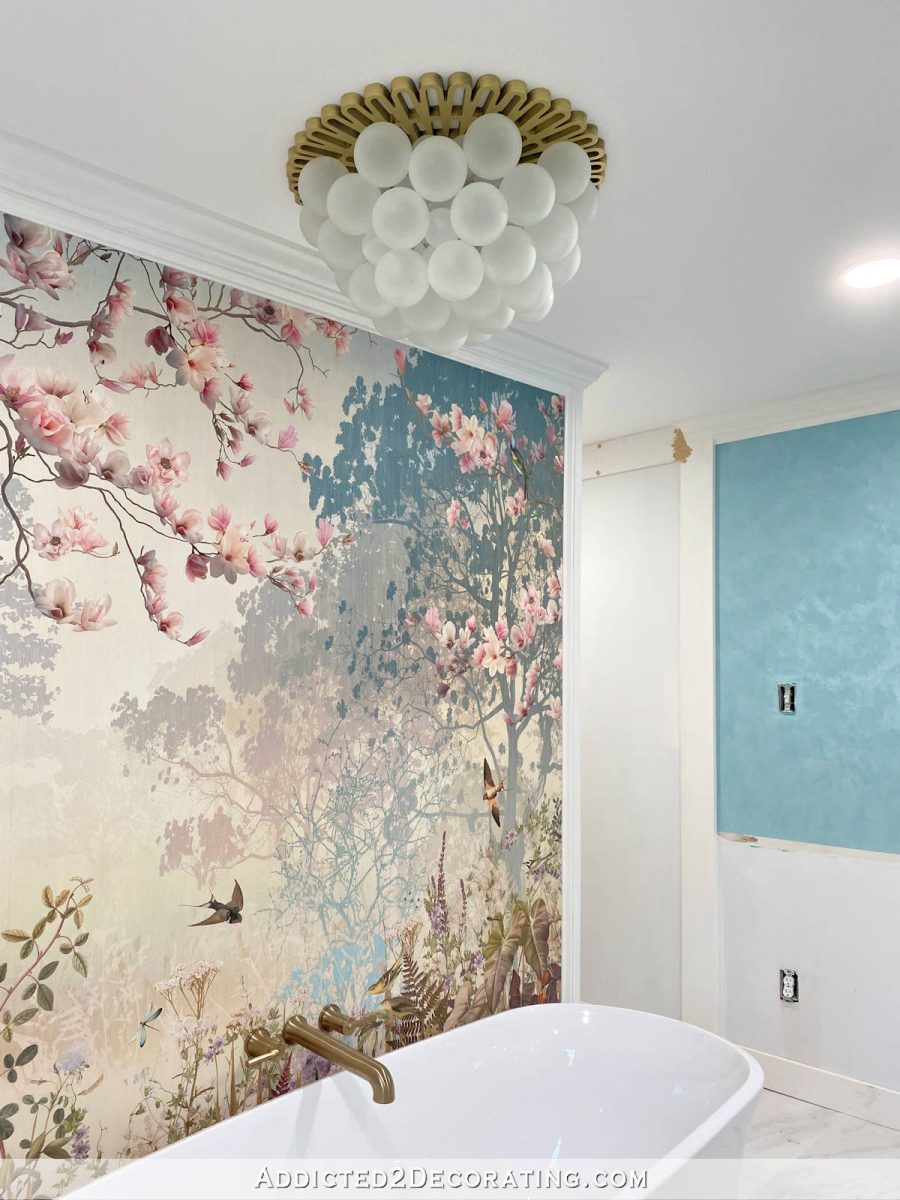
Here’s the whole view. Please disregard the unfinished walls in the rest of the room. 🙂
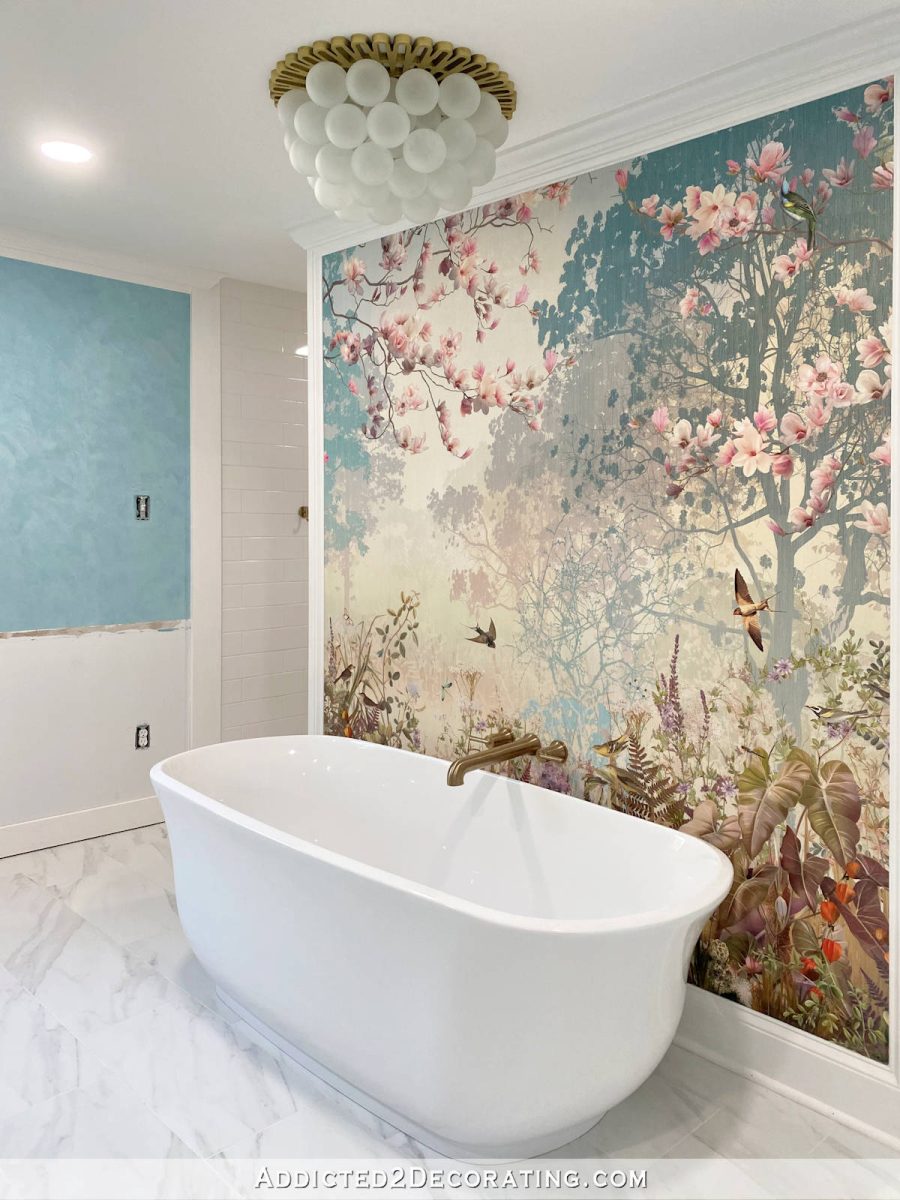
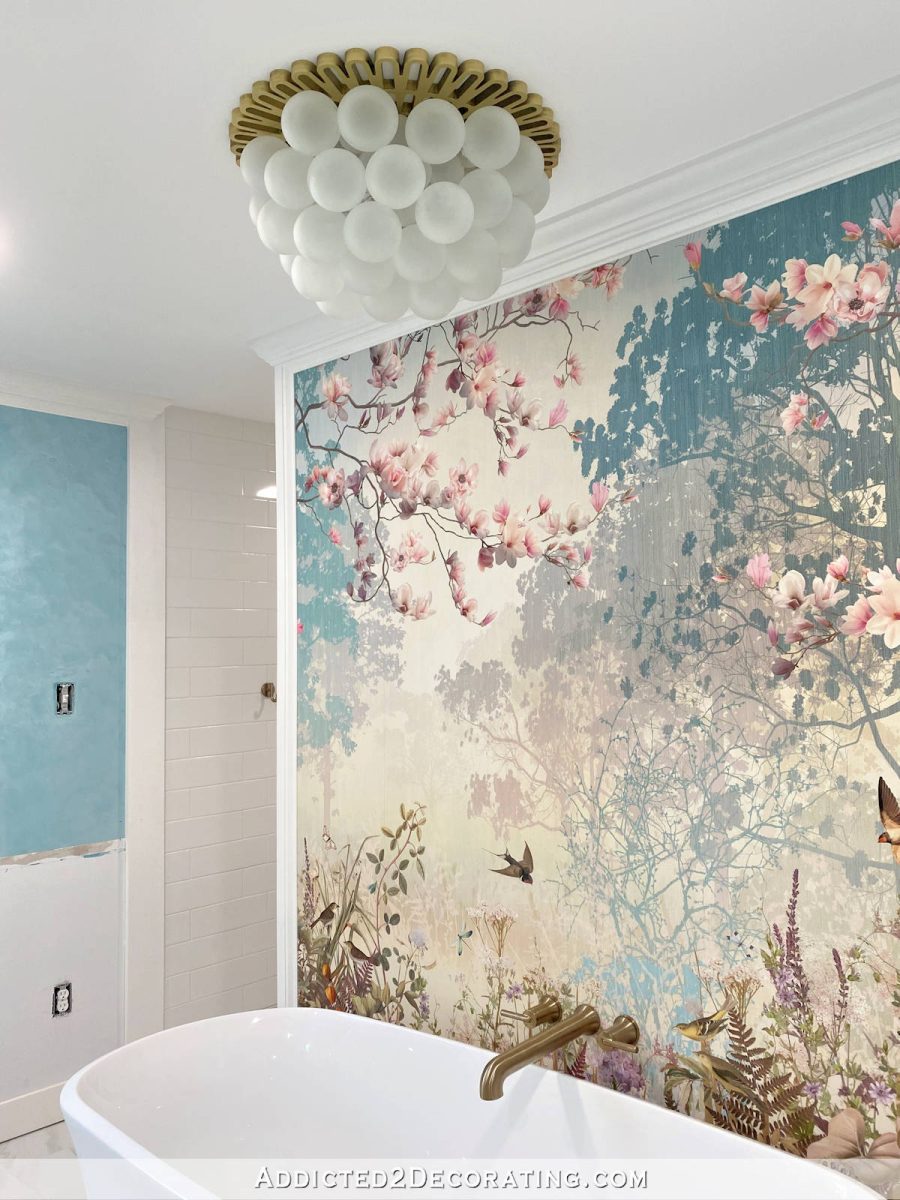
And here are a couple of closer pictures. I tried to get the faucet and the chandelier in one view…
It turned out pretty great, right? I love it!
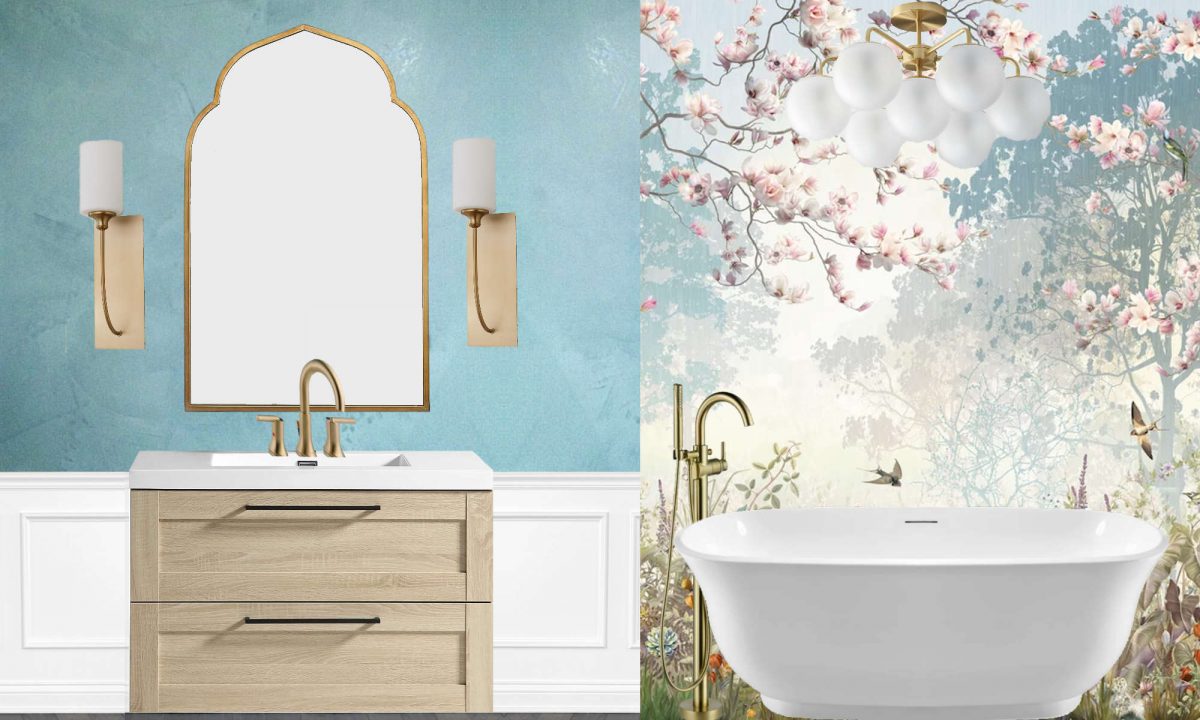
I actually think my little DIY glass bubble chandelier is much better than the one I had in my original mock up of the room, which was one from Pottery Barn (I think).
Again, here’s how the chandelier looks when the light is turned on. It’s such a pretty glow. This is with the other lights turned on as well…
And this is with the other lights turned off…
Here’s the full view of the light turned on with the other recessed lights turned off…
That’s pretty good for a DIY bubble light, right? I had tried the bubble light without the medallion before (which you can see here), but I wasn’t really liking it. That’s why I considered some other options, like tinting the bubbles a color to contrast with the ceiling.
But in the end, all it needed was a medallion, and this one in particular was suggested by a commenter on a previous post. I think it’s perfect! And thanks to that medallion, the original frosted bubbles turned out to be perfect. I love that they kind of give the feeling of a cloud above the tub.

Addicted 2 Decorating is where I share my DIY and decorating journey as I remodel and decorate the 1948 fixer upper that my husband, Matt, and I bought in 2013. Matt has M.S. and is unable to do physical work, so I do the majority of the work on the house by myself. You can learn more about me here.

It is beautiful. Would never know it’s DIY. And you stayed true to code!
It’s beautiful!!! What a perfect solution to the code situation. Genius!!
I love this so much!!!
Gorgeous and looks so peaceful.
Gorgeous! I love seeing it with the light on!
Love it!
Beautiful! Well done!
You are the most intensely creative, persistent, talented person ever, Kristi! This is a spectacular addition to your almost-finished bathroom!
Your chandelier is perfection, Kristi!!
Beautiful!!!! I’m so impressed!! Wow!! Gorgeous! This is my absolute favorite room I’ve ever seen. Can’t wait to see it completed! Great work!!
Beautiful, perfect. Genius that use of recessed lighting.
You are so creative and talented. This is perfection. Lovely!!!!
It’s very pretty. Do we want to know what happens if the bulb needs changed in the recessed light?
There isn’t a bulb. It’s an LED light, and it’s supposed to last for 14 years with regular use. I’m sure I’ll get tired of the bubble light long before the recessed LED light stops working.
I love it!!!! You are so smart to figure out how to do everything!!!!
Glad to see the medallion pulled it all together. Great job!
By just seeing how a high end thing goes together. You saw how to re-create it for your needs.
A tip for many is to find the instructions and install information before purchasing. You can really learn a lot. You can find if it’ll work for your needs, and determine any extras required to install to minimize side trips/projects.
You can determine If you have the skill to install it, what’s generally normal, if you need to call a pro before turning anything off. If you can’t find that information before purchase. you might not be satisfied.
This is amazingly beautiful!
Could you post a pic of the Pottery Barn inspiration light, please?
There’s a photo right after she mentions it.
I added the photo of the mock up after reading your comment. It shows one of the lights I was considering.
Brava! Delightful!! Congratulations!!!
Absolutely awesome as usual! You continue to amaze. I say that because not only are you so talented to finish which ever project beautifully, your problem solving skills to get there are excellent. You see, I have found out that is exactly where my weakness lies so I love to see how you tackle it all with your tenacity.
The medallion makes a huge difference! Wow!!
Your bathroom is just so special. Every detail is so custom. I’m pretty sure I’d be in there with a good book and bubbles every night.
I am in awe! You did such an amazing job!
You – Are – A – Genius! I had no idea how it was going to be lit – I guess I forgot. We will be selling our house in about a year and we have a fancy tub chandelier that would NOT be to code – we put it there and had no idea. So, we need to change that out, but oh – your idea is going with me to the next house! I love it…wonderful job…your brain is SO inspired. 😍
You hit a home run!!!
Absolutely stunning, and what an awesome work around for a beautiful light above the bathtub and not violating code! Seriously, always so impressed.👏👏👏
This looks amazing 🤩. You are a genius 👍
That is totally amazing!
Love it!!!
But I keep wondering how to change the bulb! If the lighting is LED that’s such a long way off it almost doesn’t matter. But if you did it again do you have any thoughts on how to make the bubble unit easy to remove without damaging it, in case you need to access the fixture?
I honestly don’t know. The only thing I can think of is to use some sort of hooks rather than zip ties to attach the basket to the medallion. But even then, it would be a two-person job to remove it and then re-attach it.
I definitely would not have done this had this been any other kind of light other than an LED. I think this particular LED light is supposed to have a 14-year life, or something like that. So I’m sure I’ll get tired of my bubble light long before the light ever needs to be changed.
I am wondering if you just change out the whole LED fixture? I have the snap in LED recessed lighting and I don’t see a way that you would replace the bulbs. So the fixture could probably be accessed from the attic too.
Bravo!
Seriously, you are a genius!
The medallion definitely is the correct fit in style and size. You should be really proud of your vision turned accomplishment.
Kristi, this is spectacular! I am amazed by your vision, your tenacity and your attention to detail. You are making a beautiful home and this bathroom is a showstopper. Thanks for letting us watch your process!
Absolutely Stunning!! Kristi, you are blessed beyond words with creativity! Love you your ideas and creations ; )
So pretty and I agree the painted medallion matching the other fixtures ties it all together and gives the light more of a presence. Question: did you end of spraying/painting the bubbles? I may have missed something but last I saw you were trying different inks and iridescent spray paint on the ornaments.
No, I ended up using them in their original color. They’re the frosted white Christmas ornaments. Once I got the medallion up, I realized that that’s all it really needed to give the light definition from the ceiling.
Wow! You did a bang up job on it. It is gorgeous! And great to know how to build one, too!
Kristi, I have never seen a bathroom with the bathing area as beautiful and as awesome as this one you have created. I truly admire your ideas, and your determination to create your ideas to your perfection. You taking the time to rethink things when your creations do not please you, and redoing it all if necessary until you get it the way you envisioned it is just genius. Your talent is incredible.
Genius. And beautiful.
Your bubble light is fabulous! You are so creative!
Genius!! And gorgeous. You are my absolute hero!!
It is beautiful! You have such creative ideas! Only one question… how do you go about cleaning the bulbs?
I’ll probably buy the smallest feather duster I can find to clean in and around the bulbs.
Kristi, it’s beautiful and honestly you are so clever and have the coolest ideas.
You SHOULD be proud! It’s exquisite!! I don’t know how you think up all your DIY ideas. This is shaping up to be such an elegant, bespoke room. Can’t wait to see the final reveal.
Lovely! You have such a talent!
You get an A+ for creativity, effort and patience. Job WELL DONE! Love it.
Kristi, you are so talented. This light is beyond stunning. I love it.
Cindy
I really like bubble chandeliers but wasn’t sure how you were going to pull this off and it look right. Then when you were considering tinting the bulbs I was even scratching my head a little more. That said, based on years of experience following you, my money was on you pulling it off and boy did you pull it off. This is beautiful, absolutely beautiful and you stayed within the building code. You continue to amaze me even after 7 or 8 years following you. You have an eye for color and decorating, an analytical mind for figuring things out, the skills to build, paint, create, tile, refinish, craft and the guts to try anything. You are so much fun to follow 🙂
Fantastic idea and execution!! I absolutely love it.
You are brilliant – as usual!!!
I love your bubble chandelier, but I have to say I think the medallion detracts from it. Just my opinion on this because, overall, I love your work.
Really unique and beautiful!
🙌🙌🙌
This is the kind of thinking I most deeply admire! Creative solutions that are one of a kind and so, so satisfying. Amazing work.
YOU ARE SOOOOO DARN CLEVER…! And… ALL THAT MATTERS THAT IT BRINGS A SMILE TO YOUR HEART….! Sincere good wishes for enjoying an abundant number of very relaxing bubble 🫧🫧🫧baths… under your most clever bubble light… You Go Girl…!
Beautiful!!!! Hope you het ro enjoy this soon!!!
Beautiful, effective and ingenious. I so admire your amazing imagination and determination to create.
Seriously AWESOME 🤩
I’ve got to hand it to you, you nailed this one! So creative and ingenious, the way you didn’t even break safety code!
It is stunning! Prettier than any bubble light I have ever seen! Bravo!!!
I have to say, even though it’s not something I would do, it’s SO PRETTY! I love that you know what you want and you do anything to make it happen. It turned out awesome, and I’m so glad you got what you want!
I have to say, even though it’s not something I would do, it’s SO PRETTY! I love that you know what you want and you do anything to make it happen. It turned out awesome, and I’m so glad you got what you want! Bravo!
That turned out beautifully!! I love it!
You are amazing! The chandelier is beautiful!
Seriously, Wow!!!
Just amazing!
You are like a terrier on a pant leg! Once you get something in your head you run with it! I love your tenacity. And that tub? I’m so in love with it,mit like a piece of art in the room. I’d be in there till I was pruney from head to toe🤪
The whole mural wall, literally from top to bottom, is pretty dang amazing.
fabulous, love it, so ingenious and so more beautiful than Pot. Barn!! Congratulations!
I’ve followed you for a few years now and you NEVER cease to amaze me!
Your imagination and resourcefulness are amazing! Yes, you should be extremely proud of this dreamy Bubble light! 🥰 You go girl!👍
Absolutely perfect!!!!! Do you care to break down the cost of this DIY?
You’re brilliant, Kristi! I thought a light blue on the ceiling was the way to go and feared the ceiling medallion would look clunky but the whole thing is perfection. Bravo!
Wow! The medallion really made the whole thing. Love it!
Gosh, you are just crazy talented! I’m loving the whole room.
Oh my! You are a creative problem-solver of the first order. And the medallion is the refining touch that ties everything together and makes it complete and commanding.
This is off the subject but I love how you can see the birds in your mural since you redid the mural and hung it higher.
Yes! I was just admiring this yesterday, and was so thankful that I took the time to redo it. I love how those two birds in particular look as if they’re admiring the pretty faucet handle. 😀
Genius! Form Function BEAUTY! Great job! One of best diy hacks ever! Love it!
WOW. I had my doubts about a bubble chandelier, but you’ve knocked it out of the ballpark again. It looks like a cloud of bubbles escaped from the tub and is caught on the ceiling, lol.
Your vision, and the ability to make that vision into reality, is amazing. Enjoy your beautiful new bathroom/spa!
Genius! That is beautiful and so, so smart!
Insanely clever!
You are so flippin creative! I would never have guessed you diy’d this light fixture. Its spectacular and I’m so happy you got exactly what you wanted. Beautiful job!
Oh YES! ❤️
This was such a clever project Kristi! It is absolutely perfect over your tub and – WOW – it is gorgeous when it is on! The ideas you come up with never cease to amaze me.
To be honest when you first mentioned and showed ideas for the bubble light I wasn’t into it at all. Now?? I’m at a loss for words. Wow…just wow!!! ❤️
If your master bathroom isn’t in some home magazine (once the bathroom is complete) – I will literally be shocked. Your design was beautiful to begin with, but the end results are out of this world! Could a paid designer have come up with something like that for a client? Mmmm, I’m not so sure. That bubble chandelier is genius!!
Kristi, I always thought you were amazing, but this bubble chandelier clearly demonstrates that you are A GENIUS. Wow. Just WOW. I have loved bubble lights but this has to be the best, most creative use of materials plus hard work and vision EVER. It is sublimely beautiful and I wish you many happy hours of sitting in your tub and looking at your miracle above. Thank you!
This is genius!
You, my dear, are absolutely brilliant.
Sensationell! What is the brand of the tub?
Love love love your whole room & your blog- I’m hooked. The light fixture is brilliant!
2 questions- can you share name & details of wallpaper as well?
Also, any ideas- I trying to make a Capeze shell flush mount light fixture to cover outdated light fixture 25” in width over bathroom mirror- any ideas?
Right now I’m using dollar trees gold baskets (3) wired together for the frame
The wallpaper is called Sparkling Garden from Photowall.com.
Are you looking for ideas to create the look of capiz shells? I’ve made a faux capiz shell light before, and I cut my shell shapes out of this frosted window film: https://www.homedepot.com/p/Gila-4-ft-x-6-5-ft-Frosted-Privacy-Window-Film-PFW486/100155257
Amazing!
Oh my goodnes! That is so beautiful and such a clever idea!
Absolutely brilliant! It’s so beautiful. You are a genius 🙂
You are amazingly talented and creative! I wish I had seen this before purchasing the bubble chandelier for my daughter’s room. It turned out beautifully!
this really is brilliant. Great Job Girl!
Wow! You are so innovated, creative and talented! Recently found your blog and I am enjoying it it immensely.