Metal Orb Pendant Light
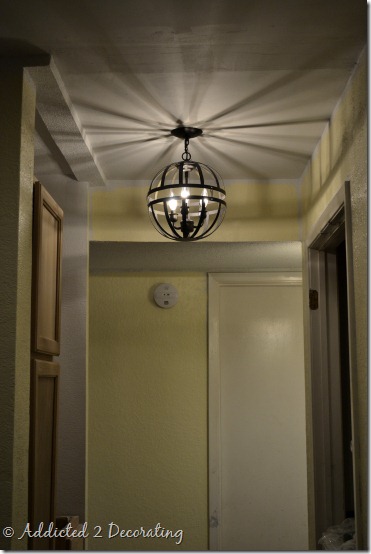
I just finished installing my DIY hallway light, and didn’t want to wait until tomorrow to post it. I’m thrilled with how it turned out!
I managed to shorten it 4.5 more inches, so now the clearance between the bottom of the light and the floor is 6 feet 7.5 inches. It’s not the ideal 7 feet, but it’s good enough.
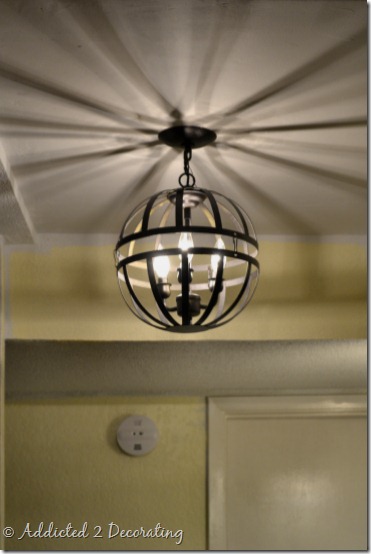
I also ended up painting it with oil-rubbed bronze spray paint, which turned out looking really dark…almost black. Doesn’t matter. I love the dark color against the creamy yellow walls!! (I still need to finish the cutting in on the walls. Thank you for kindly overlooking that unfinished detail.)
This might be silly, but I not only love the light. I also love the crazy shadows it casts on the ceiling. And I’m so thankful that it doesn’t cast crazy shadows on the walls and the floor.
There’s lots more to do, but at least I can check this project off the list, and now I can do the rest of the work in a well-lit hallway!
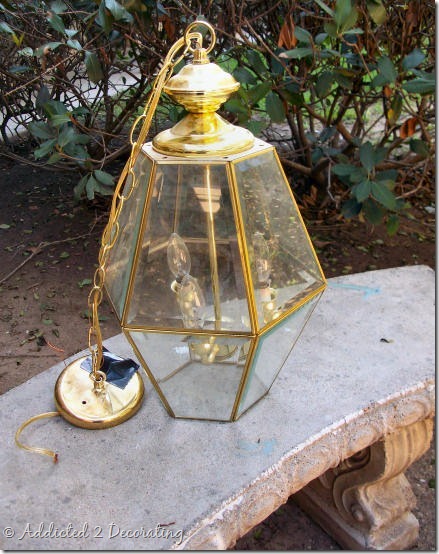
For anyone just now joining in, this light started off looking like this…
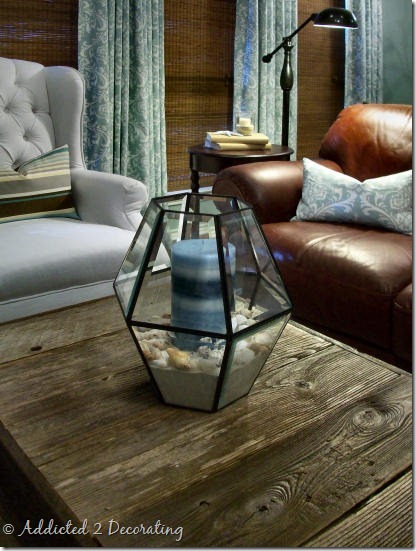
And now from that one light, I’ve made a candle holder for John & Alice’s family room…
and then to the remaining chandelier parts, I added two 12” metal hanging baskets from Home Depot…
and used them (sans moss, obviously) to form a “cage” around the chandelier for my hallway.
Waste not, want not!
By the way, I totally believe in giving credit where credit is due. This is not my original idea. I completely ripped this idea off of the amazingly creative Mandi at Vintage Revivals.
Addicted 2 Decorating is where I share my DIY and decorating journey as I remodel and decorate the 1948 fixer upper that my husband, Matt, and I bought in 2013. Matt has M.S. and is unable to do physical work, so I do the majority of the work on the house by myself. You can learn more about me here.



It looks amazing!! Well done!
Amazing! And I too love the shadows on the ceiling!! =)
Okay, how did you make the cage around it? Awesome projects:)
You never cease to amaze me with your creativity and talent and PATIENCE!!! I admire you! 🙂
That has to be the most ingenious lamp DIY I've ever seen. I absolutely love it! (It would look great in my entryway…) Wonderful job!
That is so cool! And by the way, I love the drawer lining you did in an earlier post! Can't wait to find something cool for my drawers :). I'm really enjoying your blog!
Love, love, love it!!! You did GOOD! And the shadows on the ceiling give such an elegant, dramatic look. You are amazing.
I just took down our foyer light which is almost EXACTLY like your original one. Ours seems a little big longer, but the same basic shape. It is now sitting in the basement – cold and alone. You have given me a good idea and one I may tackle.
Looks terrific!
I love the shadows it creates too… plus, also like you, I love the black against your walls. If you hadn't pointed out the uncut walls I don't know if I would have noticed them. Too busy looking at the fixture!! 🙂
Victoria
That looks so great! I love the shadows too!
Looks great! I recently painted my foyer light fixture oil rubbed bronze! Love it!
It looks awesome!!
Now, that's creative! Looks great!
Beautiful! I'm big on light and shadow, and really want to try this.
I would love to win the TopStar stool,the design is great and red is one my favorite colors.My work area is small so the size of the stool is good,plus the TopStar stool just looks like fun!
Thanks for post.
Height Adjustable Desks
Before you go for the lighting in the hallway, it is better to have a look at its surfaces. Observe the wall finishing carefully, its floor coloring, ceiling types, etc. This significantly decreases the illumination from the window present there.
Well proper room lighting does not only involve lights, but also it includes the color of room and the complements needed to make it more lively and bright.
Well proper room lighting does not only involve lights, but also it includes the color of room and the complements needed to make it more lively and bright.
Well proper room lighting does not only involve lights, but also it includes the color of room and the complements needed to make it more lively and bright.
When you created this furniture it's such a very beautiful. And i will want to try to make this type of furniture for my home the help of your blog because your designing is too different and very beautiful that's why i will try to make.
Turned out great!
Wow. That looks pretty darn awesome!
Ah! That is so brilliant!
AWESOME. I love it, so unique. Even the crazy shadows are cool. 🙂
Visiting from HOH.
It looks great… now you just have to remember not to invite anyone over 6'6" over and you will be fine. :o)
Fortunately, the tallest person I know is 6' 7", but he lives in Arizona and has never been to my home. Everyone else I know is…well…normal height. 😀
This is so cute! Great job!
This looks awesome!!! I love the candle holder, too! Good job : )
Looks great! I just hung mine today! I love the shadows it puts out on the ceiling. Great Job 🙂 I'll post mine next week! Love Mandi's ideas!
It's awesome! It looks so high end. I like the shadows, too. 🙂
So cool! I'm pinning it and will probably copy you. 🙂
Really well done! I love that you re-purposed it in two ways! Might have to use this in our hallway as well… 🙂
Wow Kristi, I know this isn't your original idea, but still, you followed through with something cool you saw and made it! Looks awesome.
That light looks fabulous! I was just looking at all the brassy fixtures at a thrift store this morning, dreaming a new life for them! Now I'll have to go back and rescue one of them!
It's brilliant! I'm thinking to do something similar for my hallway :). Looks awesome!
Hi Kristi, Your light is fabulous!!! I love the shadows it creates too. I used a different type of basket and it creates a water effect on the walls that is really pretty. To see the original that Mandi got the idea from check out mine. http://anythingologyblog.blogspot.com/2011/06/metal-hanging-planter-light-2.html
I love the shadows!
It (and it's shadows) looks fabulous (and expensive!) congrats on your light, I love the candle holder also;) Sally
amazing!! I need to create something I am inspired!
Oh, wow. That is the most amazing room I have ever seen. You did a fantastic job. I can't even pick a favorite thing.Kristin It's brilliant! and you done a perfect job here … lovely room ideas 🙂
wall vintage posters
That light is fabulous! I'm wild about the shadows it casts! I want to copy for my entryway….Great job.
Shut.the.front.door! You mean I’ve been living with an ugly brass fixture in my entry when I could’ve had this!? Going over to check out Mandi’s now!
I think you are just awesome, I wished you lived in Idaho …. would love to have you redo my home. Your taste is just like mine and your so talented. Love your Blog
Amanda:)
Thanks so much, Amanda! 🙂 So glad you found my blog!
I just love this project! It is so clever and easy, plus turning the old light fixture into a candle holder is double the awesomeness! I’m shopping garage sales for an old fixture so I can create this. Thanks for the inspiration!
Love this, can you include a step by step?
Awesome projects: You never cease to surprise me with your creativity, talent, and endurance! I admire you. I absolutely love it! Moreover, really enjoying your blog. You have given me a good idea that looks so great! I love the shadows too!
Both are incredibly cool! I absolutely love your ideas and enjoy your posts!!!!!!!
2 thumbs up! ~:0)
ok THIS IS before my time. I joined at kitchen time. How are the plant holders connected? there is a space between them. This is so freaking cool.