DIY Bathroom Vanity – Finished!
My DIY bathroom vanity is finished, and I not only got the thing completely built, but I also made my final decision on colors. Here’s how the vanity turned out…
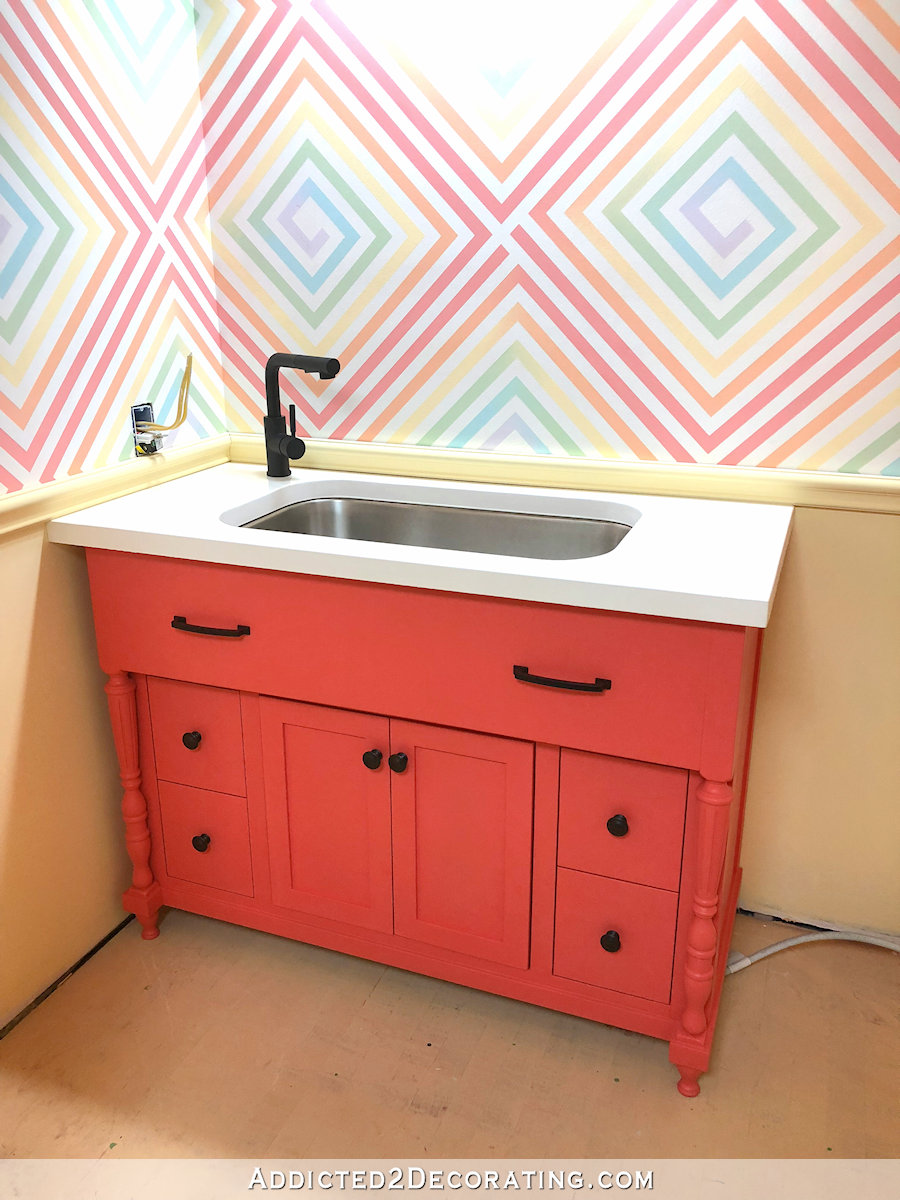
I had a very hard time getting a picture with accurate color. It’s not quite that orange. Or bright. Hopefully I can get better pictures when this dark, rainy weather goes away and the sun reappears. The bathroom has a window, so it does get natural light on bright days. But this morning when I took these pictures, it was still really dark.
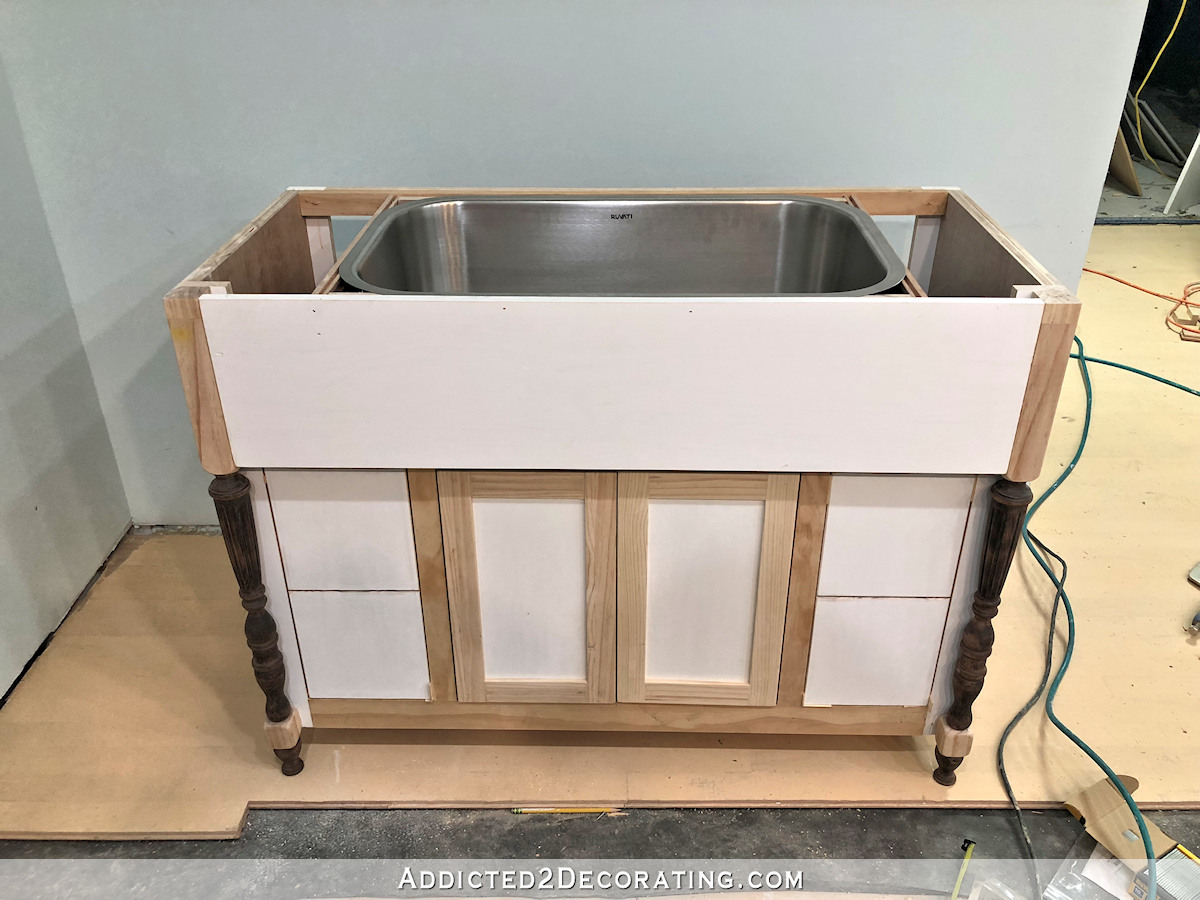
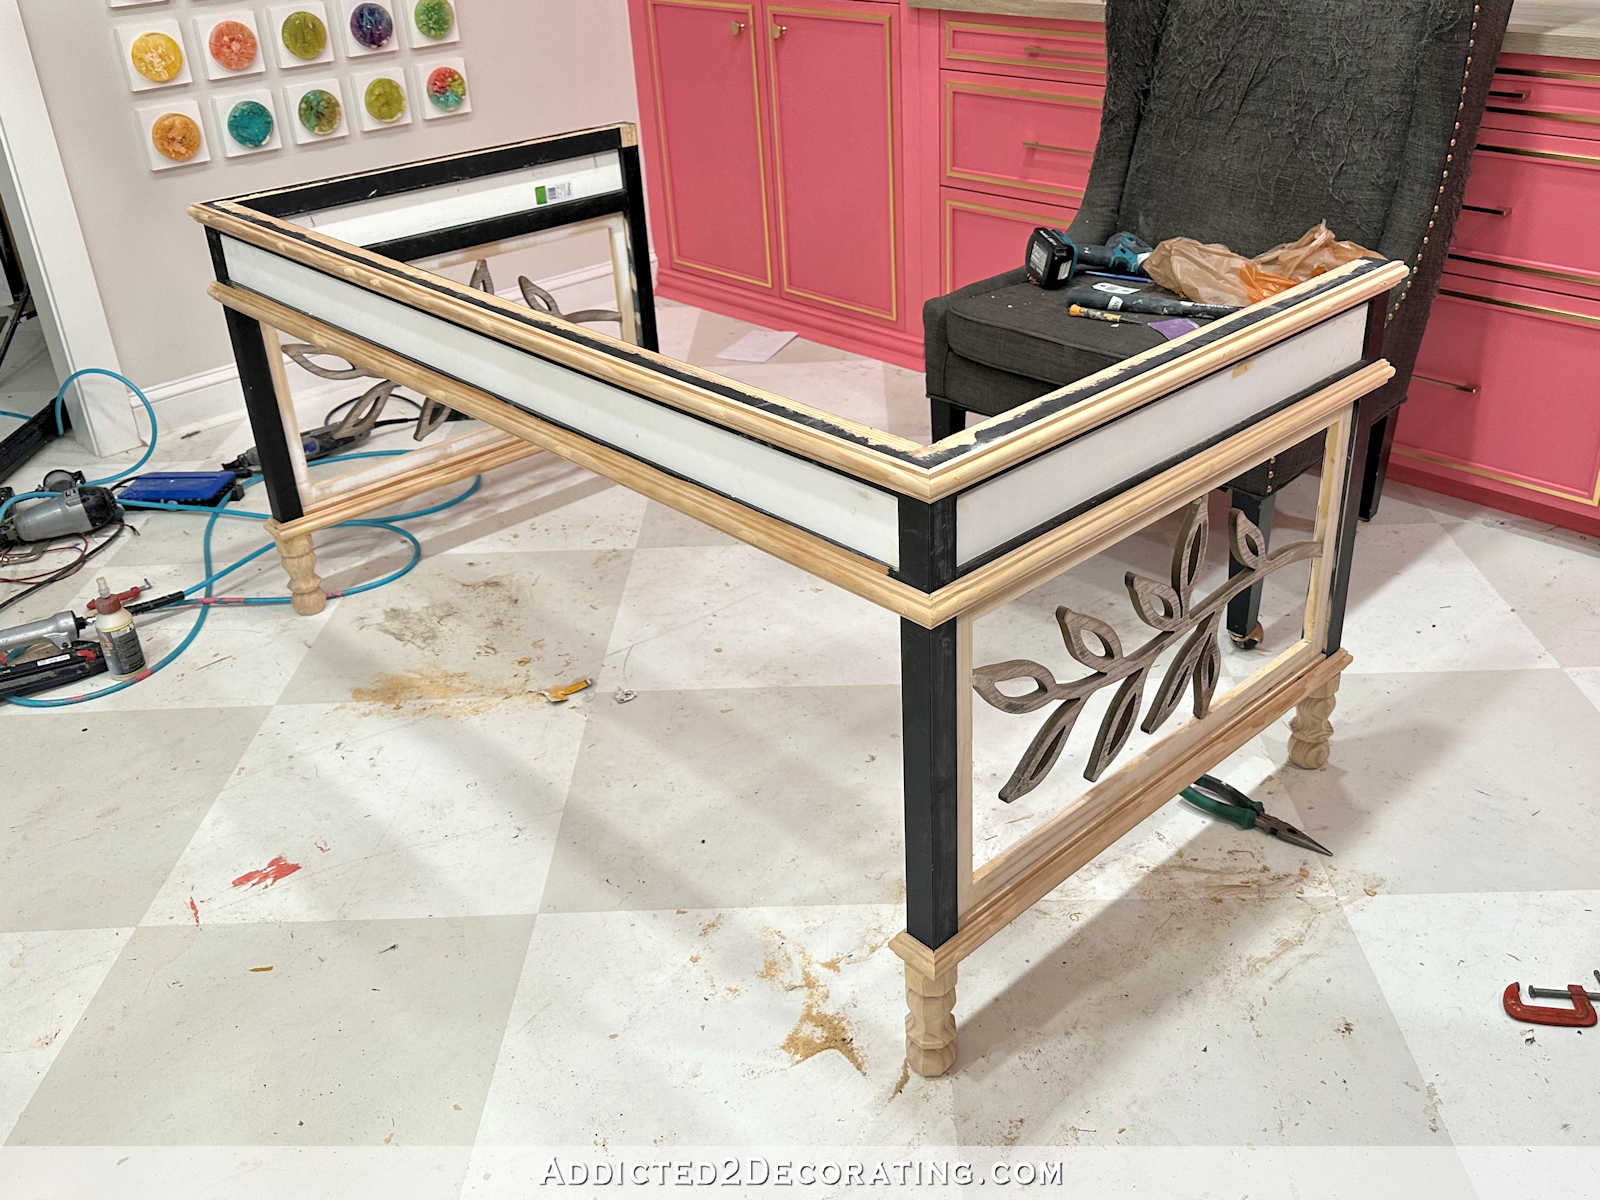
So let me back up a bit. When I last showed you the process of building the vanity, I left off with it looking like this…
If you missed the first post about the building process, you can check it out here…
Almost every part of the building process was done at that point, but I still had two things I wanted to do: (1) add trim around the bottom edge, and (2) dress up the back feet.
For the trim around the bottom, I used a 1″ x 2″ piece of lumber and ripped the thickness in half using my table saw. Then I cut it to fit, mitering the corners using my miter saw, and then attached it with wood glue and 1-inch 18-gauge nails.

That trim gave a finished look around the bottom edge.
I decided against dressing up the back feet. The left one can’t even be seen, and the right one is far enough under the vanity that it doesn’t draw attention either. So I just left them as they were.
To finish up, I filled all the nail holes with wood filler, sanded everything smooth, and then caulked the cracks. Then I used my favorite primer — Zinsser oil-based Cover Stain — to prime the unfinished areas, sanded the whole thing with 220-grit sandpaper, and then painted.
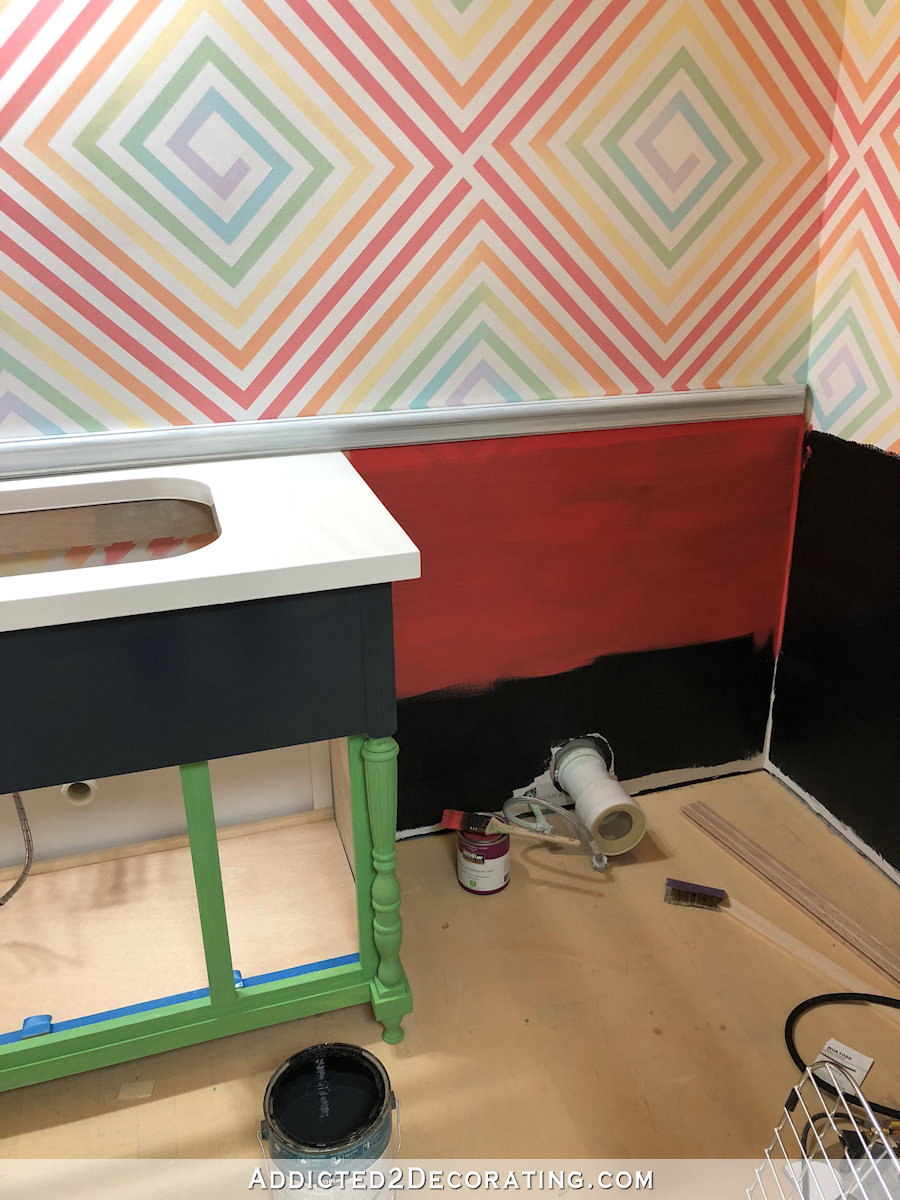
I originally painted it green, which I mixed using Behr Hills of Ireland mixed with Behr Polar Bear…
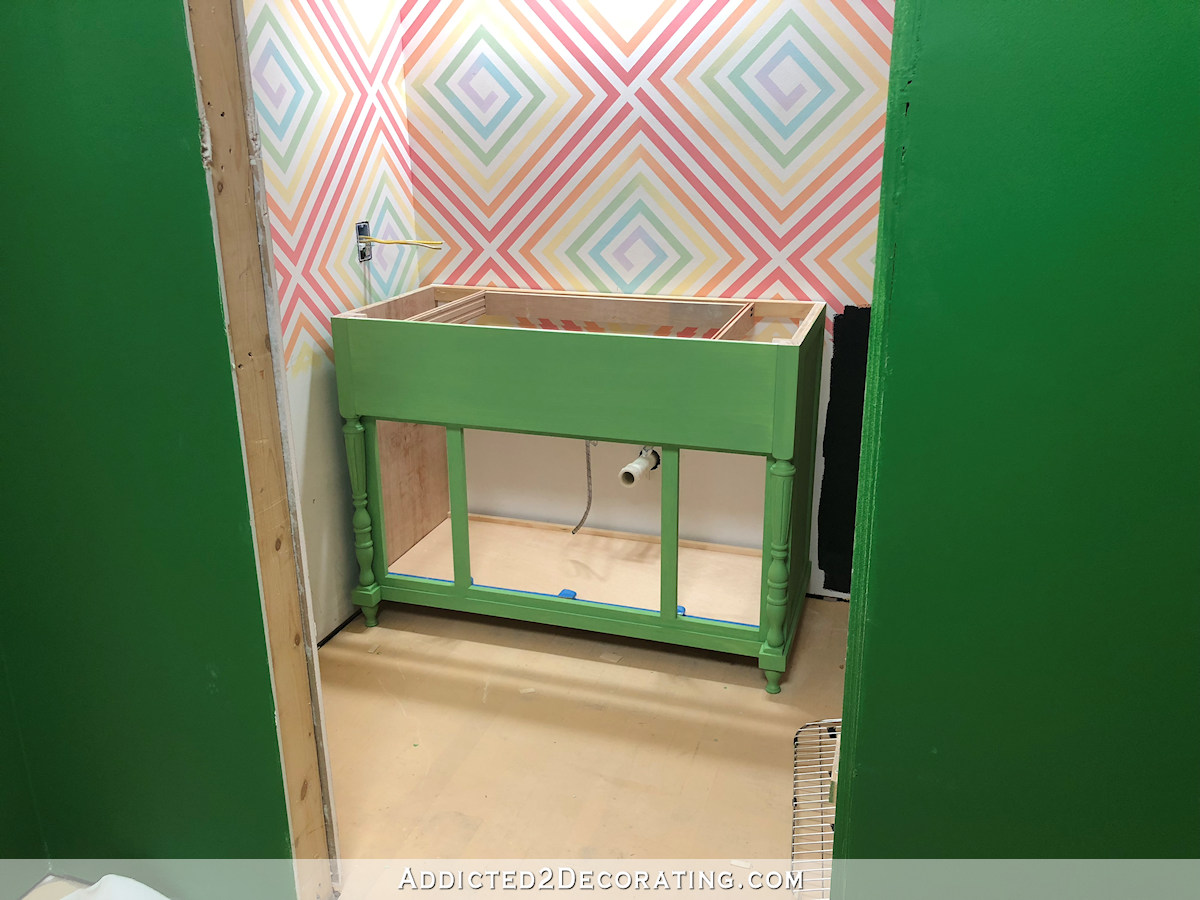
But I couldn’t make a decision on the wainscoting color that would go with green. Black seemed too jarring. The dominant opinion seemed to be white, but I just couldn’t make myself love it. The white just seemed so dull to me.
So I tried out some of the other options that y’all suggested. First, I did a mock up of a green vanity with the pink used on the wainscoting…
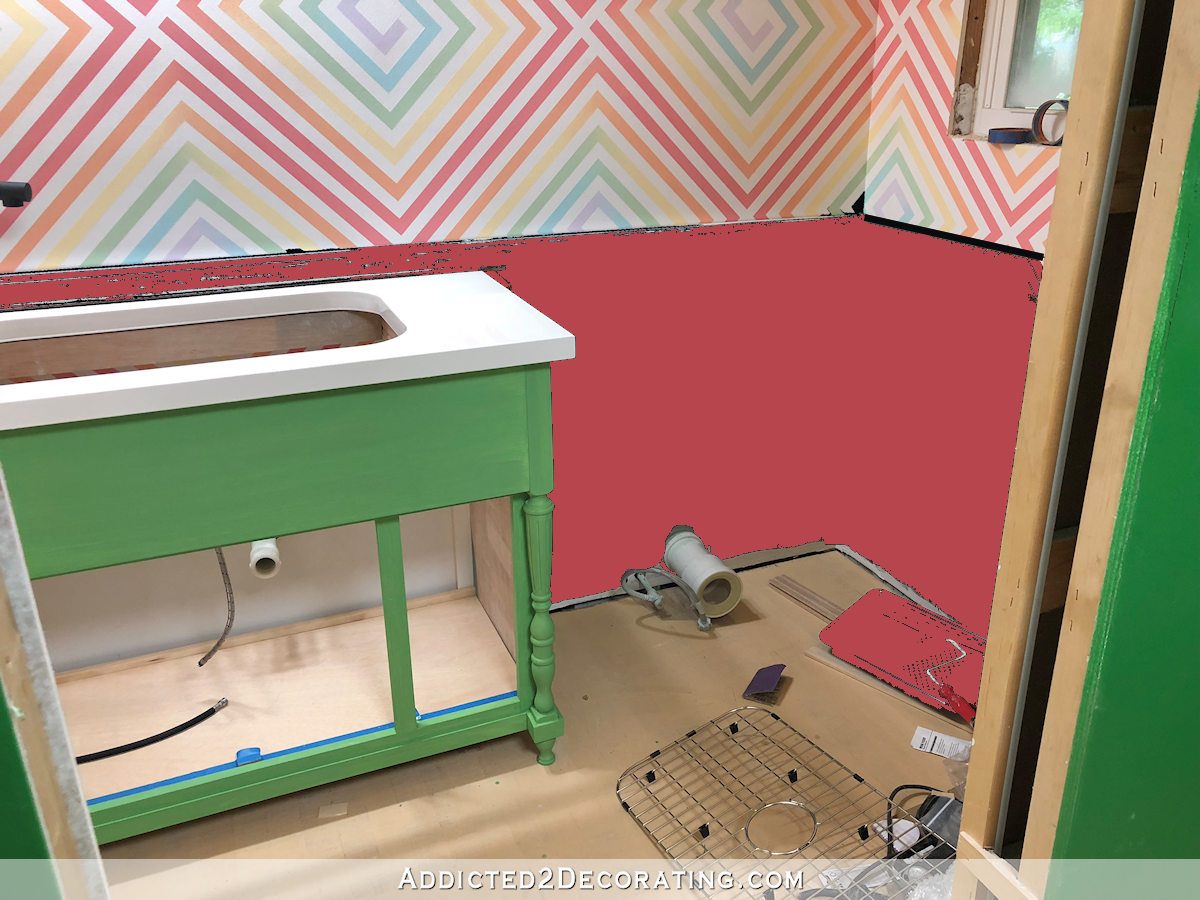
It was cute, but a little too…I don’t know…Mary Engelbreit? I’m not sure, but I just didn’t love it, and the lower walls seemed overpowering in that color.
Then I tried the vanity in black. The black vanity was a hard no for me. I liked the green vanity with the black wainscoting combo about a thousand times more than I liked the black vanity with white wainscoting. I even tried the black vanity with the pink wainscoting, and it was still a no.
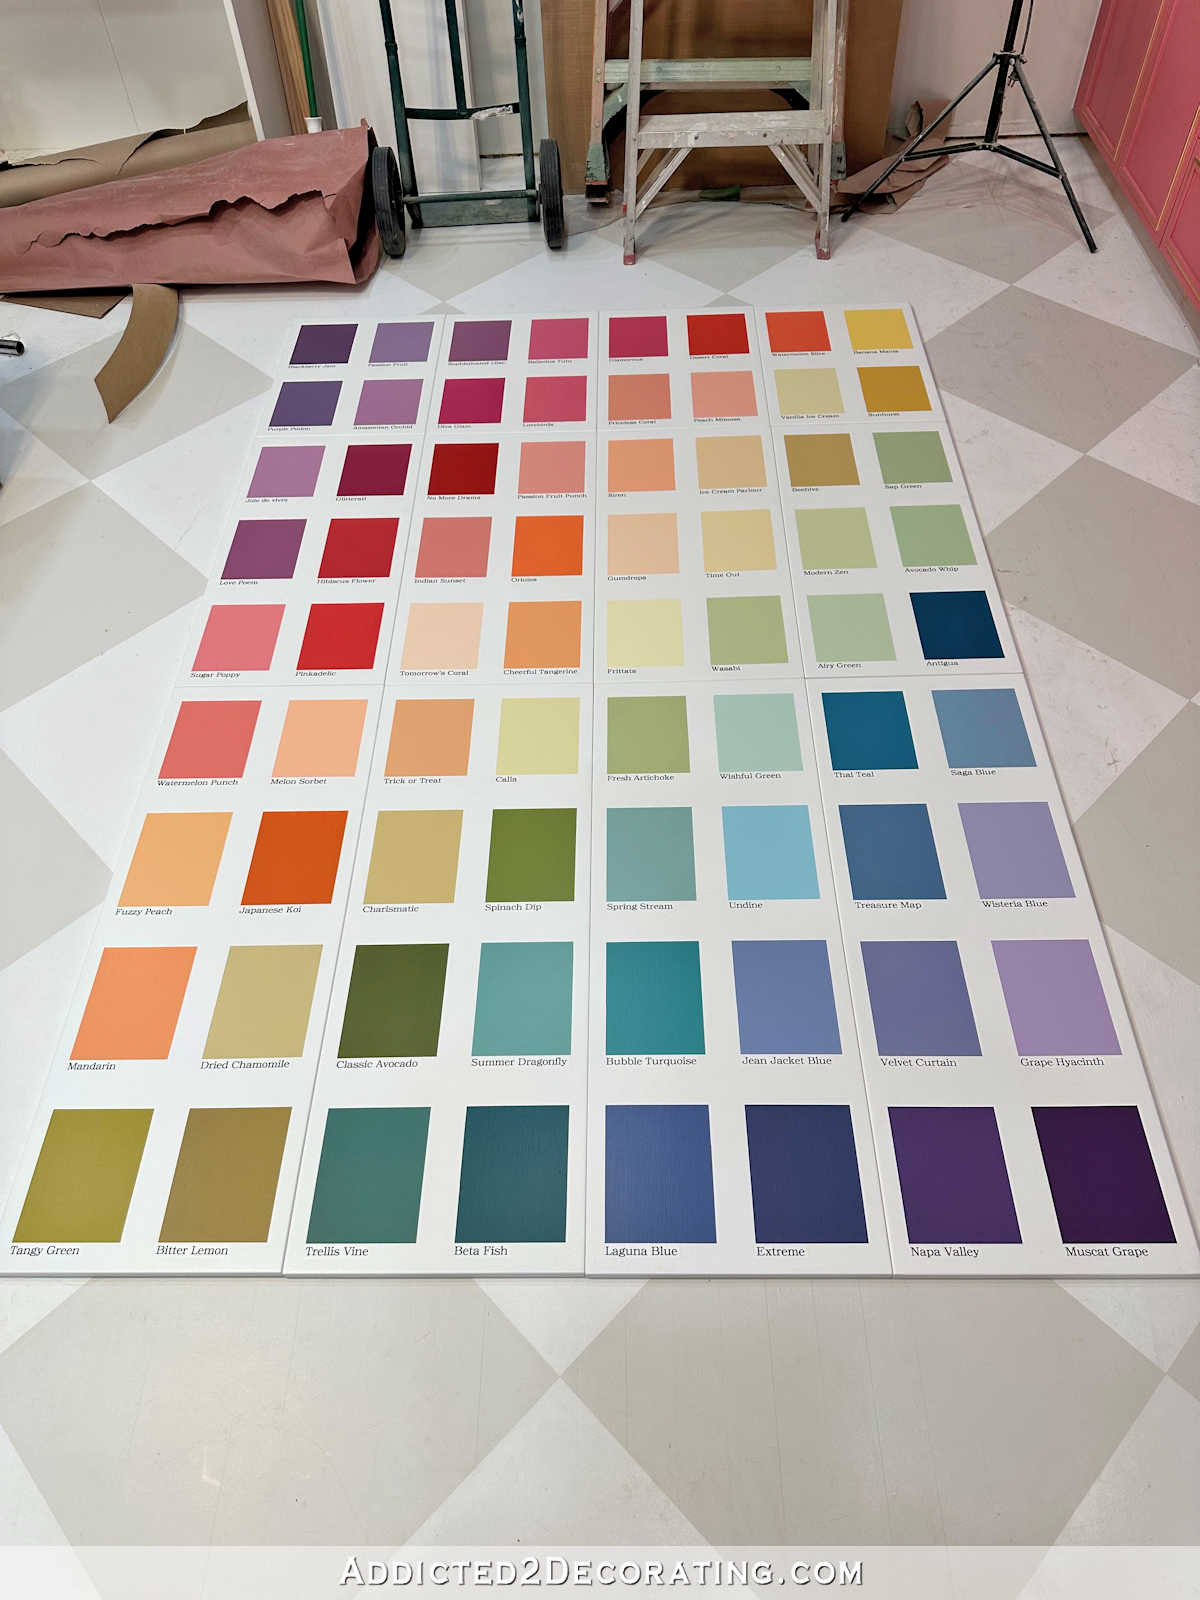
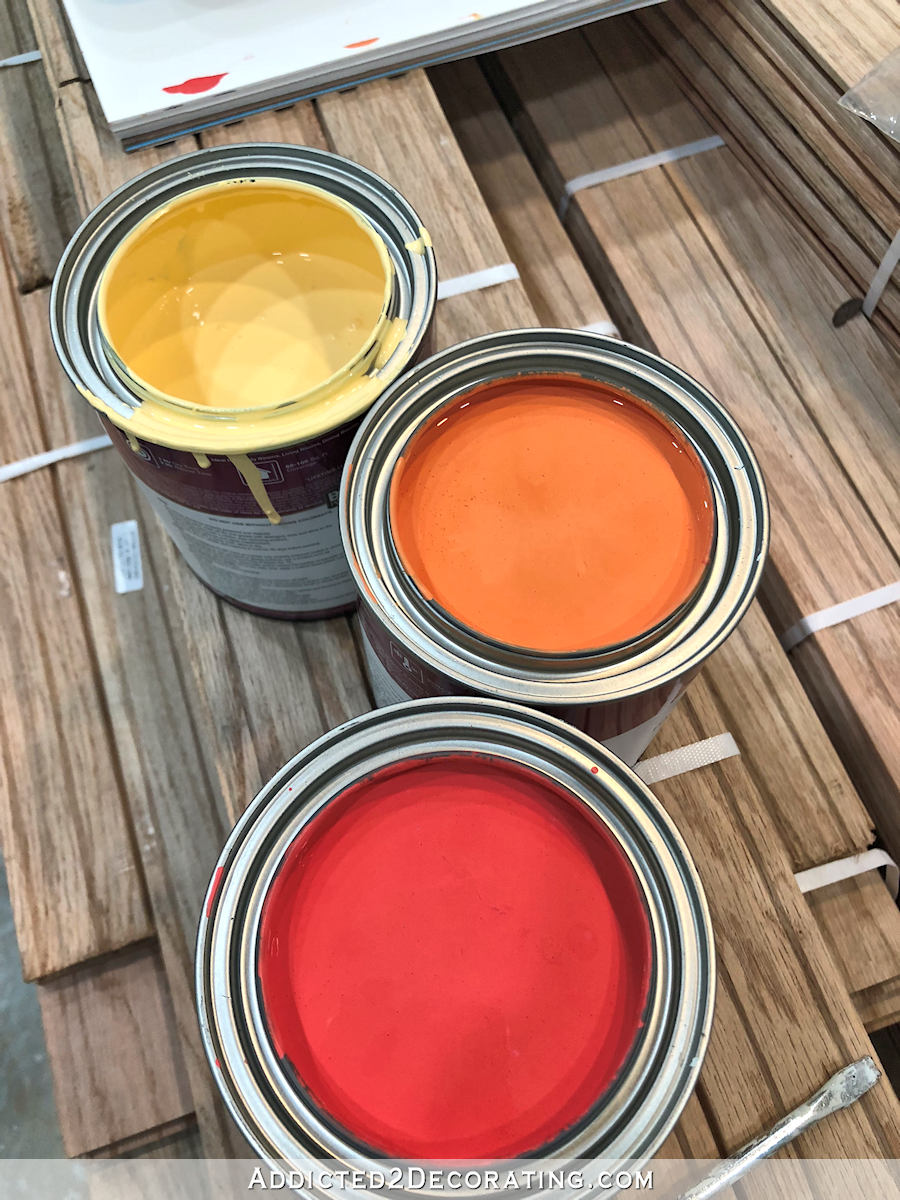
Then it dawned on me to try the reddish-pink color (Behr Roulette) on the vanity, and at the suggestion of many of you on my last post, I tried the light yellow (Behr Marsh Marigold mixed with Behr Pure White) on the wainscoting.
That was the winning combo for me! The walls are still far from finished, but I did manage to get the vanity finished, even though it took about three coats to get the black and green covered. I was a little nervous after the first coat…
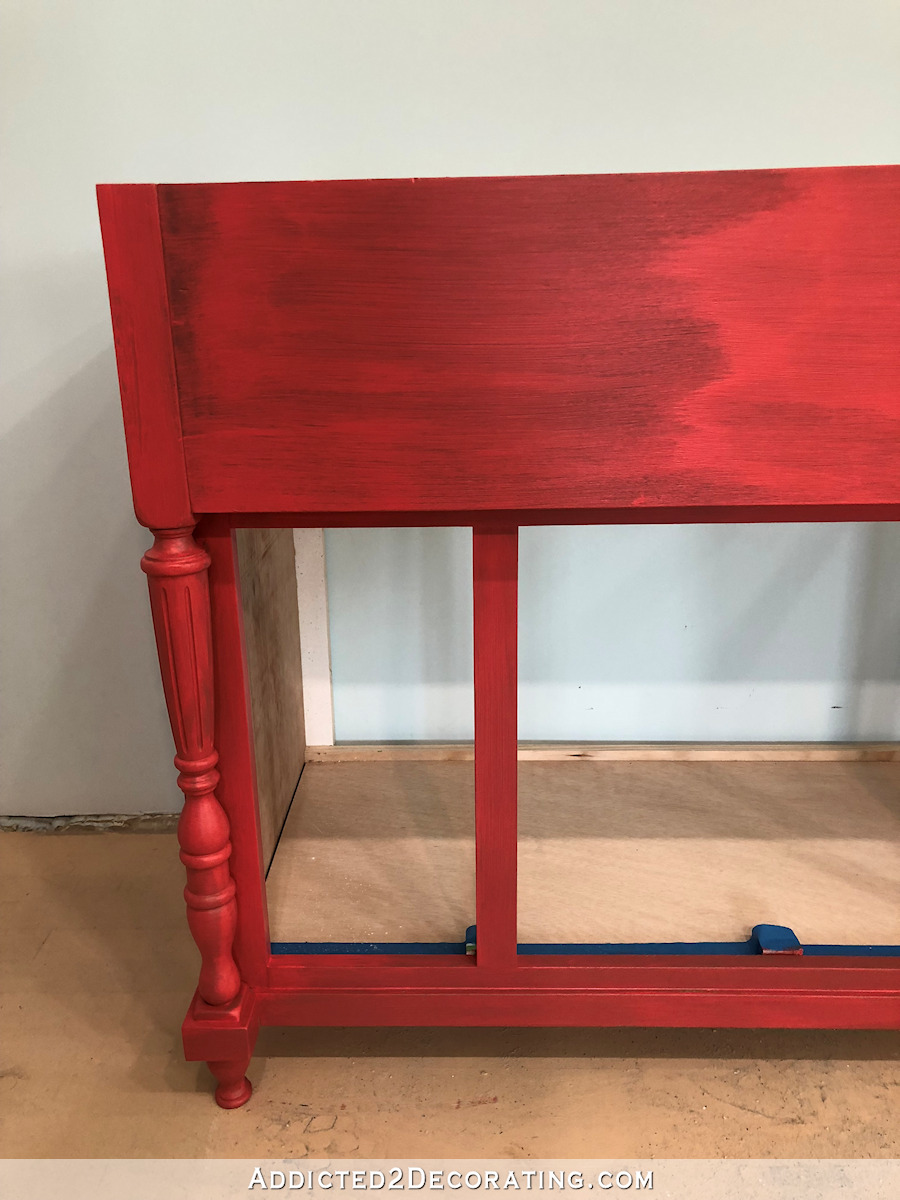
But after trying to brush the first coat on, I decided to use my Critter sprayer for the next two coats. That made the job so much faster and easier.
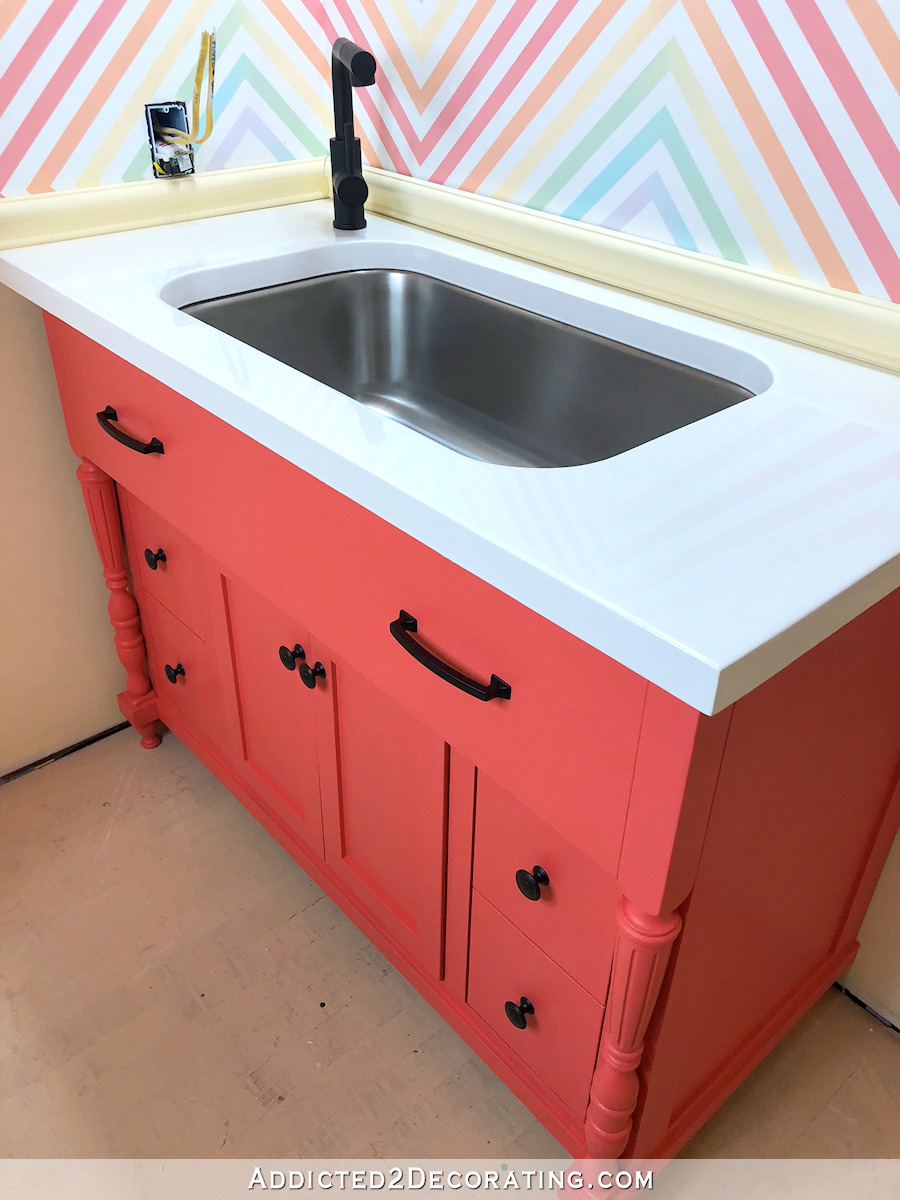
I built the vanity to accommodate a standard-size kitchen sink. It’s an unusual decision for a bathroom, but since this bathroom is in my studio, I wanted more of a utility sink instead of a standard bathroom sink. And then I needed a kitchen faucet to go with the kitchen sink. I’m going to love having that big sink in here!
I made the countertop myself using MDF that I painted and then coated with resin. You can find the details on that project here…
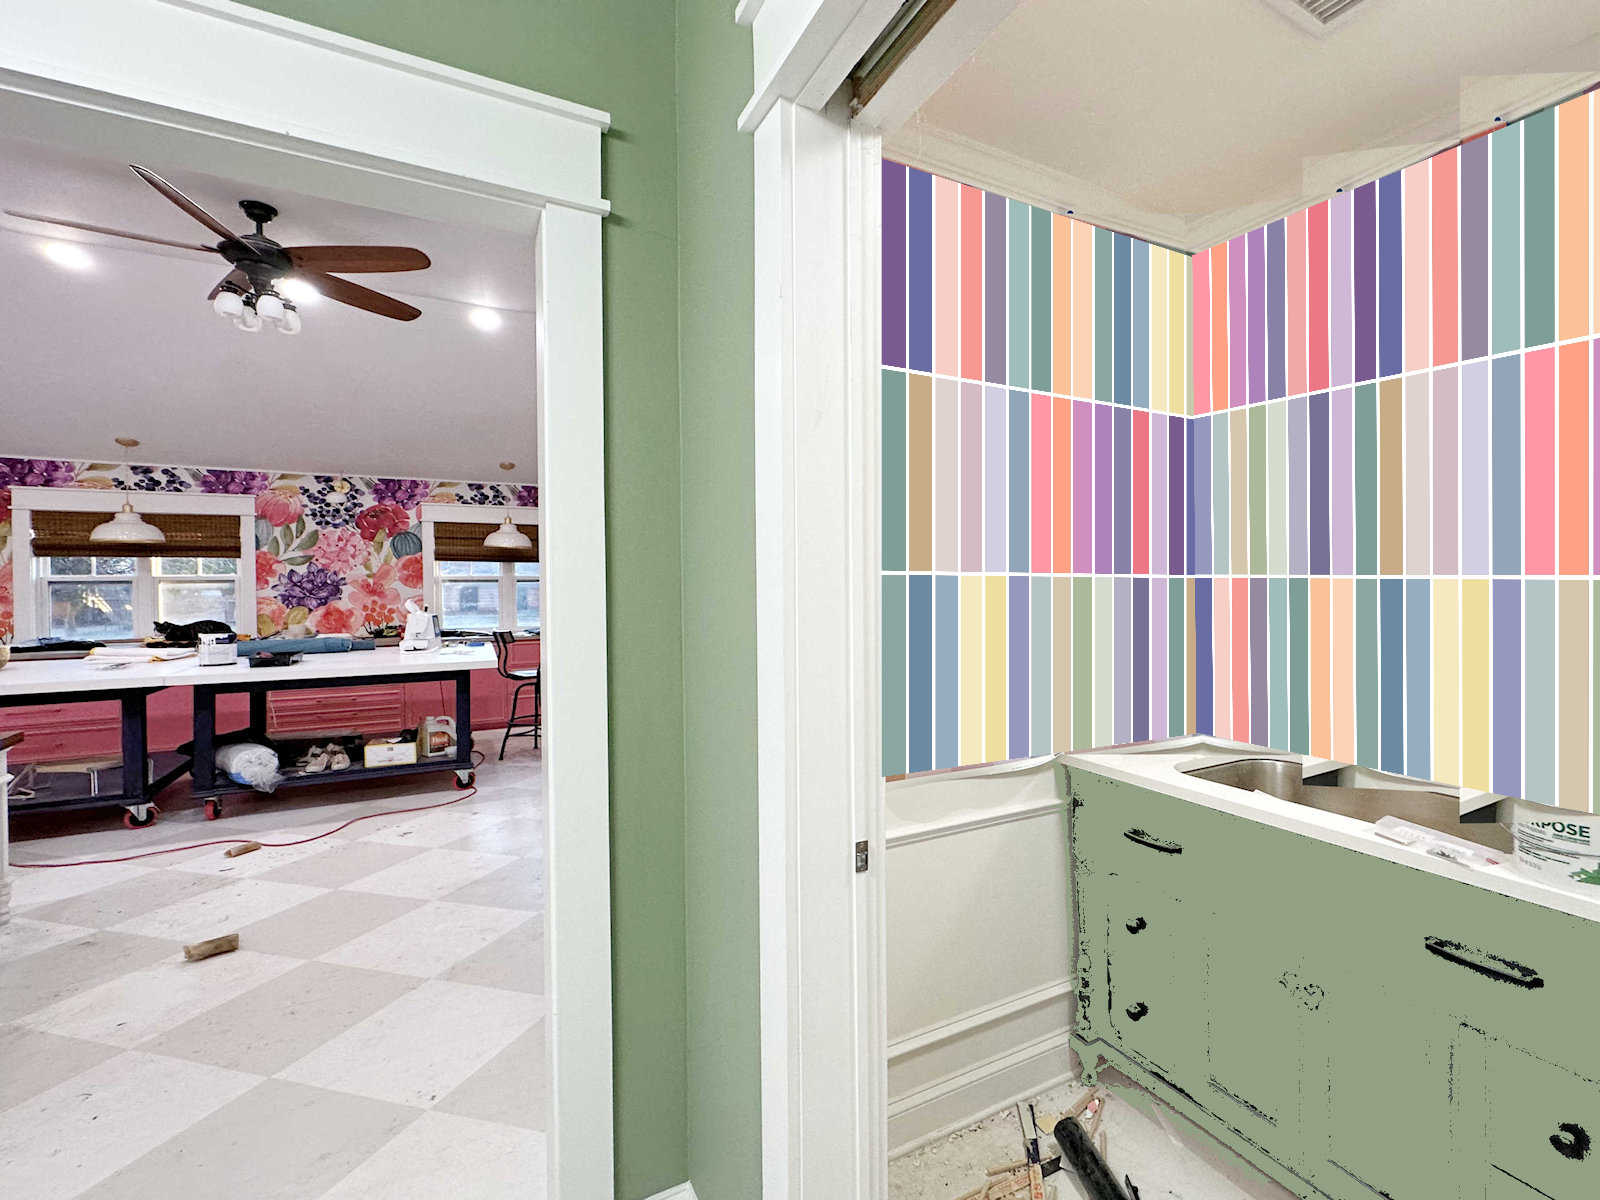
The bathroom is coming along, but I still have quite a bit to do in there. Most of it is installing trim — crown molding, window casing, door casing, baseboards, chair rail and picture frame molding on the wainscoting. But the floor is the biggest unfinished project. Before I can finish the bathroom floor (which is still covered in full-trowel wood filler), I have to install the rest of the flooring in the studio, and then rent the big sander and get the whole floor sanded and finished.
Until that’s done, I can’t actually install the sink and faucet plumbing or the toilet. That means that this bathroom won’t be functional until the flooring is done. I should probably concentrate on that next and just get it done, right? Right. 🙂

Addicted 2 Decorating is where I share my DIY and decorating journey as I remodel and decorate the 1948 fixer upper that my husband, Matt, and I bought in 2013. Matt has M.S. and is unable to do physical work, so I do the majority of the work on the house by myself. You can learn more about me here.

I love it!!!! Can I ask, do you have to caulk between your counter and where the sink meets? I don’t understand how undermount works???
I’ve been following your posts on this project. I am wondering if is for a daycare center in your home? I think it is delightful.
Please go back and read some of Kristi’s past posts. She is an interior designer and has been remodeling her own home one project/room at a time. She’s really awesome and absolutely one of the hardest working bloggers I’ve seen! This is for her studio, which is converted from the home’s previous garage…and is also part of the back entry to their home from their new carport with a ramp for her husband, Matt’s, wheelchair. And…you are caught up! Go look at the previous projects! It all makes sense when you ‘get to know’ Kristi through her blog!
I just really like color, and lots of it. And as this is my studio bathroom (think: art studio) and my husband won’t be spending a lot of time in here, then I decided to be a bit freer with color in here than I am in the rest of the house. Although, I have used a lot of color in the rest of the house, but it’s a bit more restrained.
Generally an undermount sink is attached to the bottom of the countertop with screws and metal clips (in wood countertops) or super strong two-part epoxy adhesive (for natural or manmade stone countertops), but regardless of the type, you’re also supposed to use a bead of silicone caulk between the sink and the countertop to prevent leaks.
Perfection!
That’s the oddest color green I’ve ever seen but I love it! I’m so glad you kept playing around with it as I loved where you were going with the combo but it was a bit harsh. This. This is beautiful!
Good Job Jayme. I knew Kristi would pull something surprising out of that hat with this one !
YES!!!!!!! Now I can be honest and say that I wasn’t thrilled with your choice of green or black. This color makes the whole room a very “happy” room. LOVE IT!!!
I completely agree! Love the new colors!
LOL, same here, Linda! I didn’t want to give an unsolicited opinion about the green, so I kept silent. But this is just a total YES!!!!
I completely agree! This room IS “happy”! Congrats, Kristi! You hit this one out of the park!!!!
It is beautiful. You made a great choice.!!
I audibly gasped when i saw the first photo in the post. Perfect color choices that i never would have thought to try. Works great with the walls and really gives a nice pop of color while still giving a place to rest. Love it and the buttery yellow trim.
Me too Stephanie! I am in love with what Kristi has done!
And Ms Kristi…once again you have turned an indecision into something stunning!!! Brava!
Happy, cheerful, colorful and fun! Love it❤
I am so glad you went with the coral/pink! The green just did not seem right. As always I am amazed at your work. And I love the big sink!
Love it, love it, love it! Great decision, as always!
Love the color on the vanity. Really makes the wall pop.
Ah ha! Indecision meant “reconsider”! 😀 looks terrific!
Fantastic! BTW, I think more bathrooms should have a kitchen sink in them. So much more practical for quite a lot of things.
As soon as I saw the picture I said “I knew it!” in my head! That color is so much more you!
This is so beautiful! Can’t wait to see the whole studio finished.
Wow! Love your color choices! Spot on! I can’t wait to see the finished studio.
I <3 it Krisite…
Oh, I love it! I had wanted to suggest that color for the vanity, but I thought you were so strong on the green. I love that it looks like the colors in the wall design, and the softer yellow for the wainscoting is SO nice! Now I think it is VERY eye pleasing, and the gorgeous wall decor that you worked so hard on, is a true focal point. I think the black accents – cabinet hardware and faucet are perfect. AND, your toilet will look less noticeable against the sweet yellow walls. Can’t wait to see it “all together.”
Kristie I have a question regarding the butcher block counter top, are the boards laying flat or on their sides.
There isn’t a butcher block counter top here. Kristi used 2 layers of MDF glued on top of each other, when finished it was coated in resin.
I have made two butcherblock-style countertops, but those are in the hallway bathroom and the pantry. Are you referring to one of those? The countertop in this bathroom, as Luisa mentioned, is solid MDF with a resin coating.
It is so, so pretty! Love it!
Looks good! I like the color choices. Now to forge on to the floor – that will be a huge job but I know you are up to it.
That vanity is beautiful! It turned out GREAT! The design and the color!! Can’t wait to see it all finished!! 🙂
Now I can feel free to say, “Goodness, I am so glad you changed the colors!” ~;0) lol
It looks wonderful!!
It’s perfect. Looks great!
yes! yes! 1000x yes! The best thing about your blog? That you show the options you didn’t go with as well as the final decision. Not only does it give me confidence to try something myself and not worry about making “mistakes” but it also give me a chance to look at your process and see what colors/designs appeal to me. I may sometimes have preferred your earlier versions (it it were for my house) over your end result but that’s what makes us unique!
I absolutely love this! 👍👌 Bold use of a beautiful color! And love the yellow for the wainscoting too! I love that you werent afraid to paint the vanity in the different colors to try them out! You really inspire!
Perfect!
GORGEOUS! I love how you always keep on going till you get it just right. <3
That is lovely!
Just a thought, can you put a piece of glass/plexiglass as a backsplash to protect your stripes? You would just weep if the first time you washed a brush it splattered on your great design. It is sure not something you would want to be having to patch.
I plan on clear coating the trim and the walls with General Finishes clear topcoat. They’ll be very durable and washable once that’s done.
I love your final color choices!!
Oh, the coral is so much better than the green, it really plays well with the wall colors. The vanity design and color are just so happy now, lol. Glad you found this combination, looking forward to getting the floors done and the bathroom completed.
You constantly surprise me and I love it! This color on the vanity is bright, beautiful and goes well with all colors around it. A light yellow wainscoting will look great with that. Also, loving the sink size and raised faucet that will work well with any kind of clean up.
YES! YES! YES! Looks amazing!!
Love it!! Great choice in color – for the vanity and the lower part of the wall!
It looks wonderful!! Love to follow your process, thanks for being so elaborate about it, it helps with my projects!
I like it so much better! These colors are a team that plays “together,” whereas the dark green and black were teams that played “against” each other, if you see what I mean. Much happier! And it seems so much more you. Now I’m looking forward to seeing how it all comes together with the hall and studio. Well done!
So much better. You may end up changing your mind on the green entry….knowing you.
Love your color choices!!!! You do amazing work girl!!!!
Love it!
I’m glad you got rid of the green cabinet and the black wainscoting! I love it now!
That is just about the prettiest vanity I’ve ever seen. I didn’t think the green worked so well in there. But this is just perfect.
I imagine you are doing bright white base trim, right? Have you considered what it might look like to do the chair rail in the same as the base molding? I can’t visual if it would tie in nicely, or if it would chop up the wall!
I’m actually planning on doing all of the trim, from the chair rail to the baseboards, in the yellow color. I don’t like the look of wainscoting chopped up into different colors. And since the wainscoting will have picture frame molding (for purely utilitarian purposes, but hopefully it’ll look nice) and it’ll be painted yellow, I want all of the wainscoting molding to match. But I think the yellow will look nice against the whitewashed floors.
I saw your backsplash on Instagram too, I think it’ll all look very nice!
OOOH that looks fabulous now. I really love it. So much better than the dark green or black. Looks happy and inviting.
I just recently found your blog. Although by no means new to DIY blogs, I have never found anyone to be so inspiring. I look forward to each new post. My husband and I have been partners in renovations for many years, I have acquired some skills along our journey but often find myself hesitating to jump into some projects on my own. You have completely changed my attitude. Thanks so much.
I love hearing that! The best way to learn and improve your skills is the toss aside fear of failure. Making mistakes is the absolute best way to learn. 🙂
Victory. It all seems in balance…. showcases craftsmanship of vanity and gorgeous stencil. Plus delightfully cheerful. Love it.
I have surrendered to tech gods when it comes to accurate representation of color on screen. I was recently holding SW paint chips up to screen with SW corresponding color chips. Good grief, definitely not a match. Also shared pics to family of dining set I refinished… the blue is close to navy but in pics looked nearly cobalt or much brighter. I’m guessing that your green looks measurably different then on my screen.
Would love to do this to my granddaughter’s bathroom! Very cute and sweet!
Oh yes…showed her the pic and she gushed….oooo Grammy, it’s like Candy Land! Your workmanship is most excellent!
Oh my! Absolutely perfect! I love this. Much much better than the green vanity with black wainscoting! Your black faucet, light etc, will be the jewelry in that small room. I am sooo in love with this!! This color vanity also shows off the turned legs much better!
You have the absolute BEST taste in color! I would have never, ever been able to put this room together and quite honestly when I saw the original post with the wall design I was questioning it. But after all these years, I should know better than to question ANYTHING you do! I absolutely LOVE IT!! PERFECTION and magazine worthy. Great job!
This looks amazing!
The reason those colors look best is maybe because they dominate in the wall pattern. There are only very small amounts of the green/ blue in that geometry. It looks sweet!
Love those colors! They are all my favorites! I am now so jealous- of your talent and of your industry.
Awesome!!! Love it.
Oh Kristi, it’s just beautiful! So glad you painted the vanity coral, that’s always been one of my favorite colors of yours. And the pale yellow wainscotting is just perfect. Great job!
This.IS.AWESOME!!! While I liked the green vanity (guess I’m one of the few!) This is sooo much prettier, and the wall color goes so nice with your upper walls and the vanity. You are one smart cookie! And always surprising in the best way! Now get the floors done so you can progress towards the finish line!
A definite home run. The vanity compliments the wall without taking center stage. The yellow below is absolutely perfect to tie it all together seamlessly without an abrupt defining of upper and lower wall. I am still voting for a plexiglass glass surround to protect your hard work. I am a fellow diyer and I know how careless we can get at paint brush clean ups mostly because we are very tired and not focused at the end of long project days. The protective surface may not be as aesthetically pleasing but so much better than a ruined wall
Ok after looking at your photo again there is no room for a backsplash.
Do you think a big ole mirror will help protect all that hard work? Maybe a flat poly?
I plan on doing a clear coat of General Finishes topcoat on the walls and the trim, so it’ll all be very durable and scrubbable once that’s on.
I have used general finishes satin and high gloss over white panted Furniture and it did have a yellowing effect sometimes. Not sure if these were tannin effects or just the fact than no poly water based or not is positively clear over time . The flat out flat has a white based flattener in it so I haven’t had it yellow but of course it is not a scrubbable protective sheen. I would definitely do some testing . Over a period of time I have found all clear coats (water or oil )yellow some but by that time you will be ready for a change.
Or maybe a beveled glass backsplash to protect it not take away from the wall
Sorry I see now there is no room unless you lowered or raised the chair rail.
Very bold, very colorful, very unique. Love it!
LOVE that color! We had a whole wall in that at our last home that we covered floor to ceiling with large oil paintings. I lived there almost 20 years and never tired of it. My husband’s grandmother said it was the color of tomato soup, ha. the yellow wall behind it will make you SO happy, I had a yellow bedroom off that coral wall that was my studio and I used to love to just sit in a chair and look at the 2 wall colors together. beautiful.
Love it – just beautiful as usual!
JoAnne
I just knew that white wainscoting wasn’t going to work for you, and I also knew you’d work it out on your own! I love your new choices and how great the vanity looks with the hardware installed!!
Beautiful – enough said!!!
Love it!
Kriste.. I am referring to the other bathroom .. you did with the butcher block counter top. I didn’t know it the 2×3 was flat or on its side. I love the above bathroom. I was thinking of doing butcher block in my kitchen .
love it!!! i think this was a stellar choice in that it will go well with your wallpaper from spoonflower. I love your ability to make each room its own but it also flows well with the others in yourhome. Its a treat to read your blog!!!
I LOVE the new look on the vanity and the finish looks amazing! That critter is a nice tool! BUT, the lower walls… is that the final color? It is sooooo….. ick. Tan/beige looking. Blah. Not you.
Good luck with the floors and looking forward to future progress!
It’s a soft and fresh yellow, and very obviously so in person (and in the pics on my computer).
Ok. It’s coming off as a tan on my end. As long as you love it is all that matters! Just pastels and Kristi are not what I picture going together. I love your bold use of color and creativity and it’s the reason I keep up on your blog. Not meant to be RUDE like the lovely lady below wants to call me.
That has to be your computer. It’s a very soft beautiful yellow on mine! And besides, how rude!
Everytime I come back and look at this….I just love it more! Stunning!!
It’s interesting to read remarks. IMHO I think there is some confusion that the only way to create dramatic results is through intense, deep colors. You love color, you love dramatic but again, IMHO you achieved that with your stencil, paler yellow and coral. It’s incredibly bold even without being black and the Kelly green. It’s fresh and fun. Nice to see all your exploration, gives me greater understanding of what I’m trying to achieve in decor. Certainly a lot more comfortable doing more my own trial and error process.