Bubble Light Options – Experimenting With Alcohol Inks And Spray Paints
My ceiling medallion finally arrived for the bubble light that I’m making in our master bathroom. So yesterday, I took some time to experiment with different finishes for the bubbles (which are Christmas ornaments).
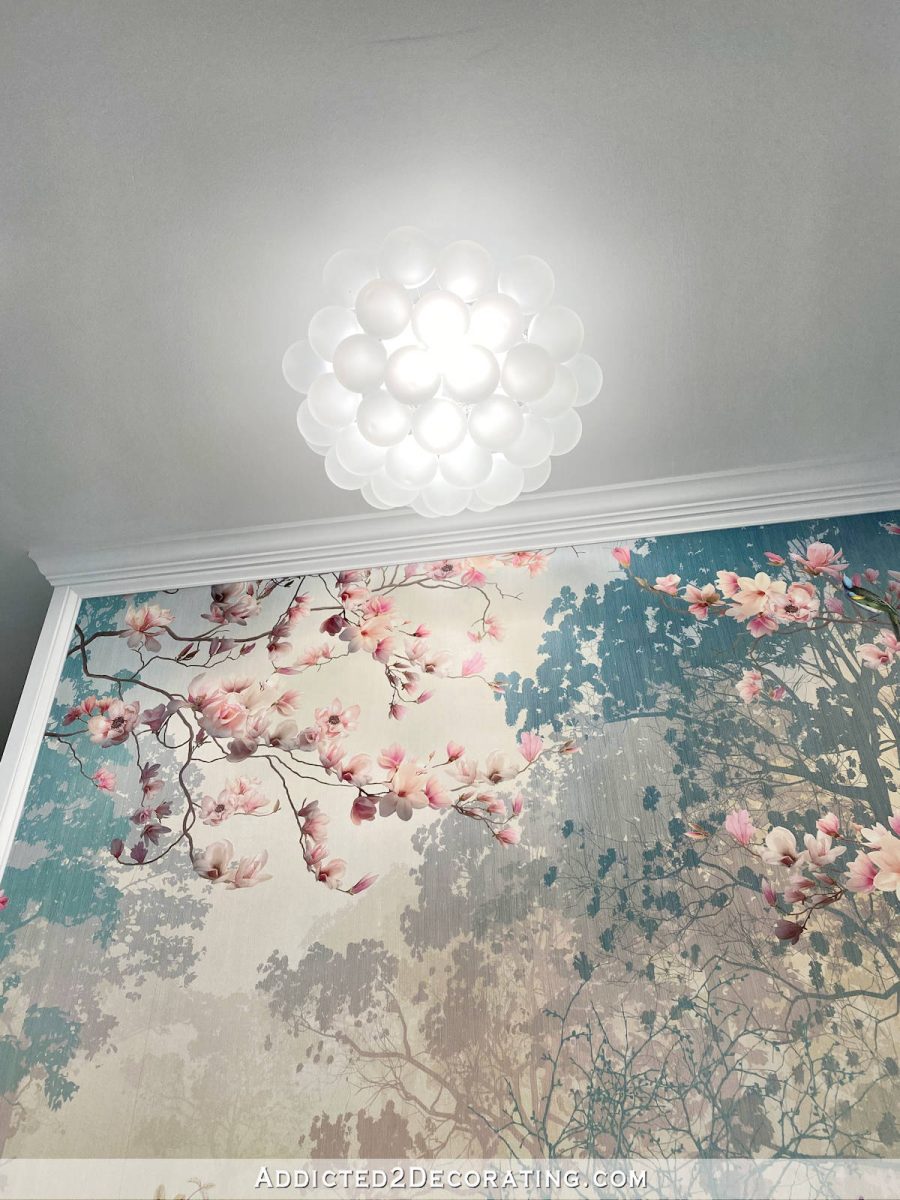
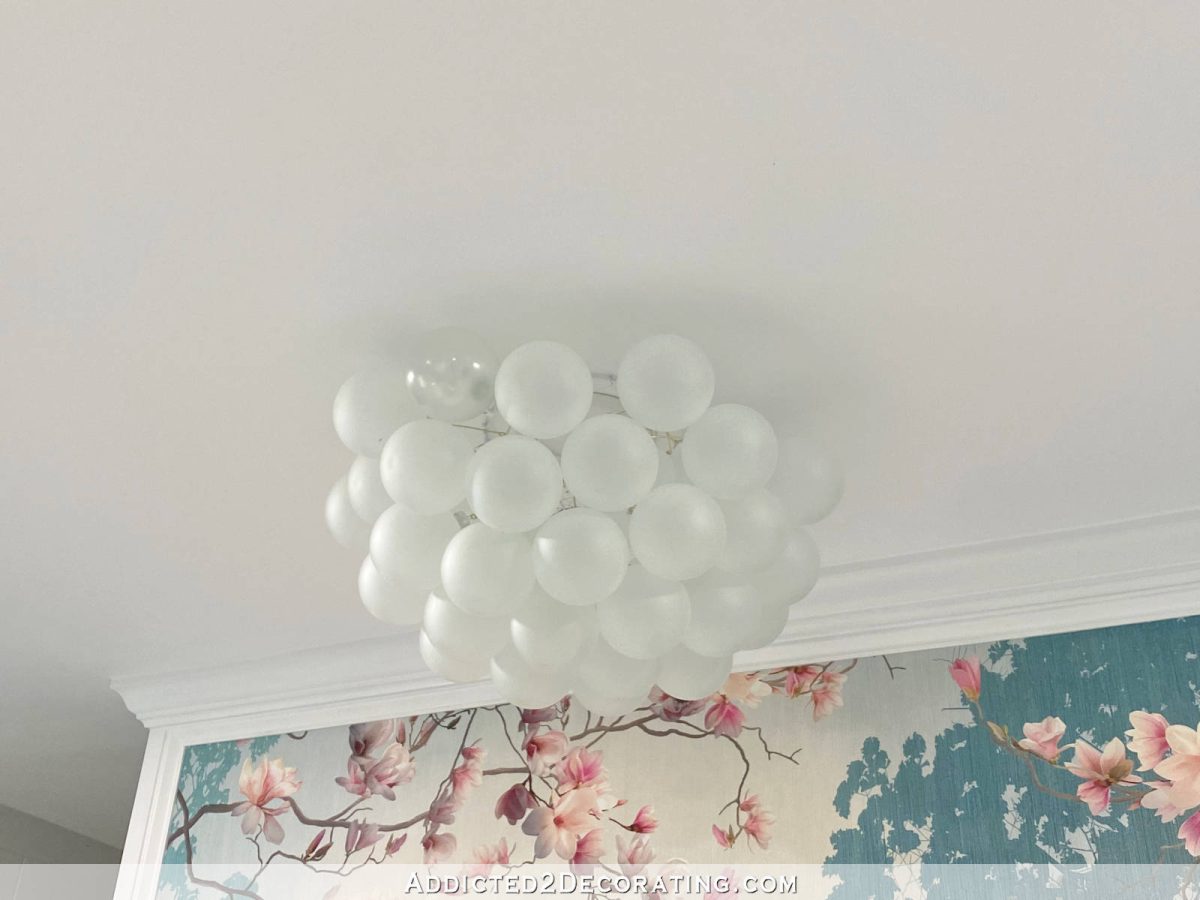
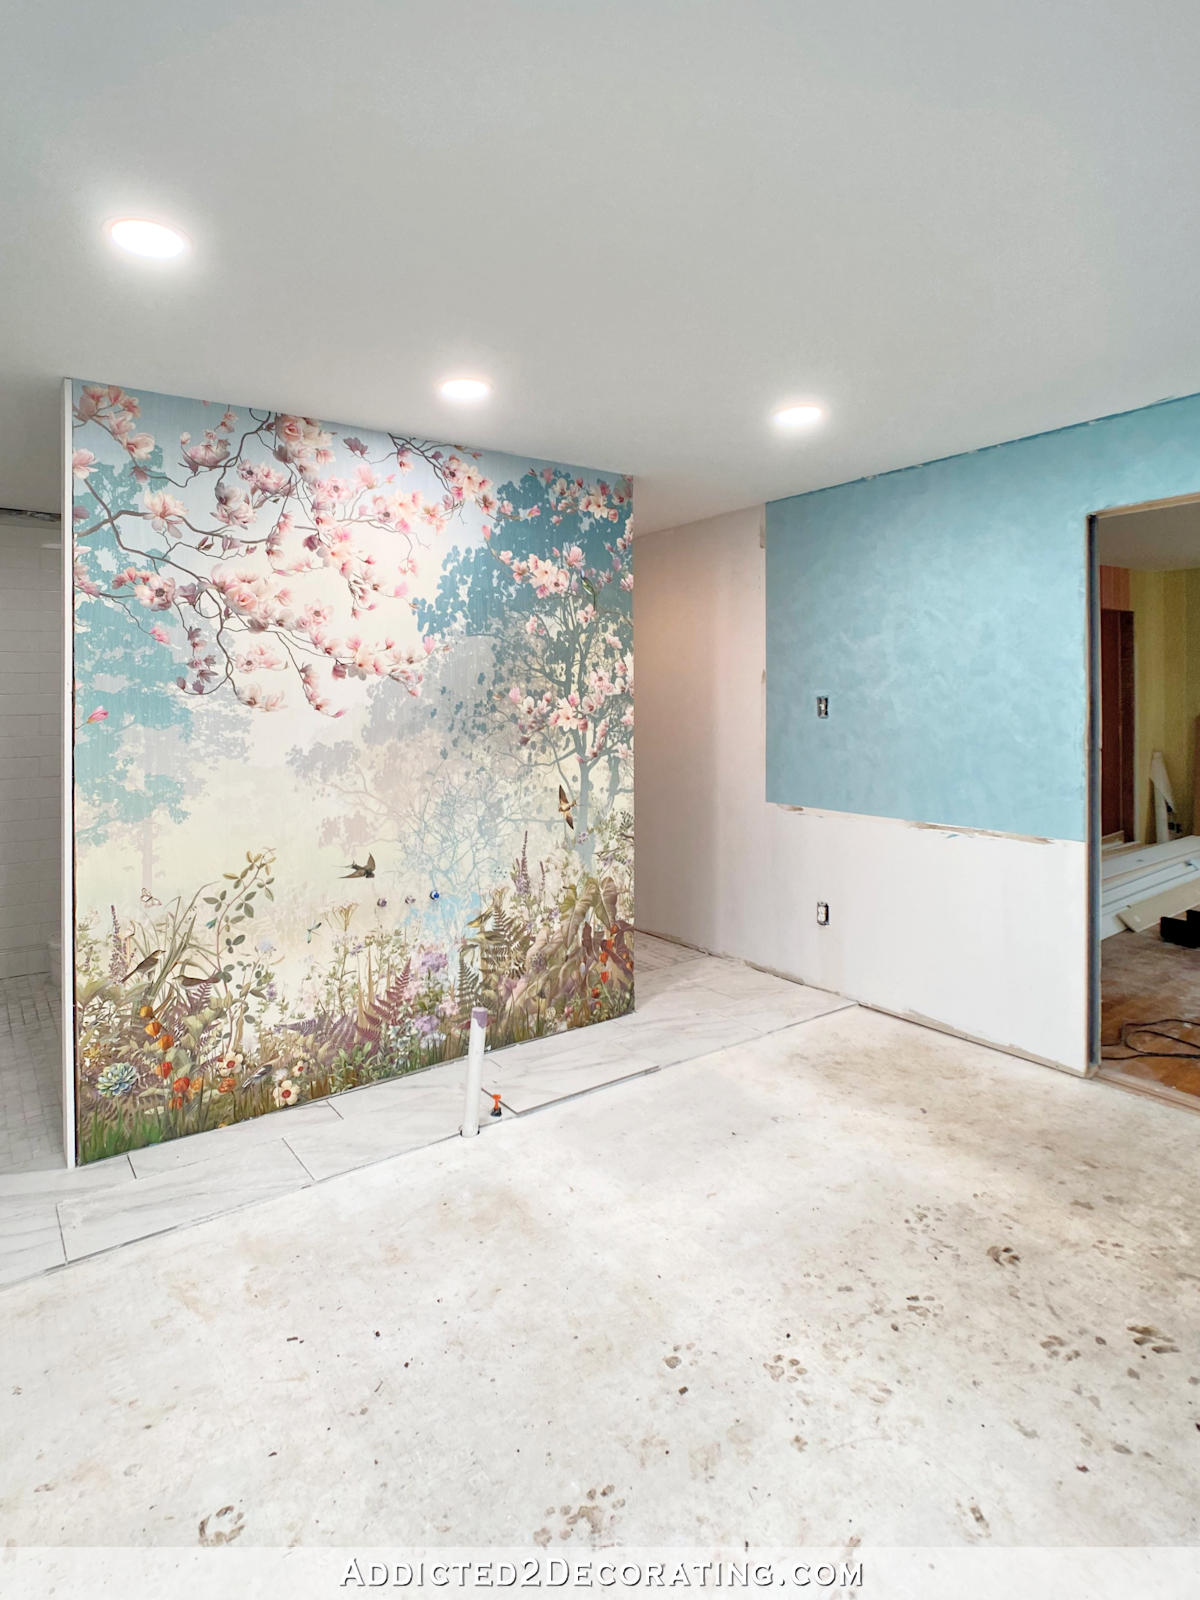
I can’t say that I have it all figured out yet, but I can say for sure which option isn’t going to work. Here’s what the light looks like in its current state. It’s just all 4-inch frosted ornaments. I didn’t buy enough, so I had to place another order and wait for those to arrive. And then I decided to add a ceiling medallion, so I’ve been waiting on that to arrive. But here’s the general idea…
The new ornaments that I ordered were listed as “clear frosted”. That’s a bit confusing because they can either be clear or frosted, but they can’t really be both. But I took the “clear” to mean that they were white. Without color. They had taken clear ornaments and frosted them.
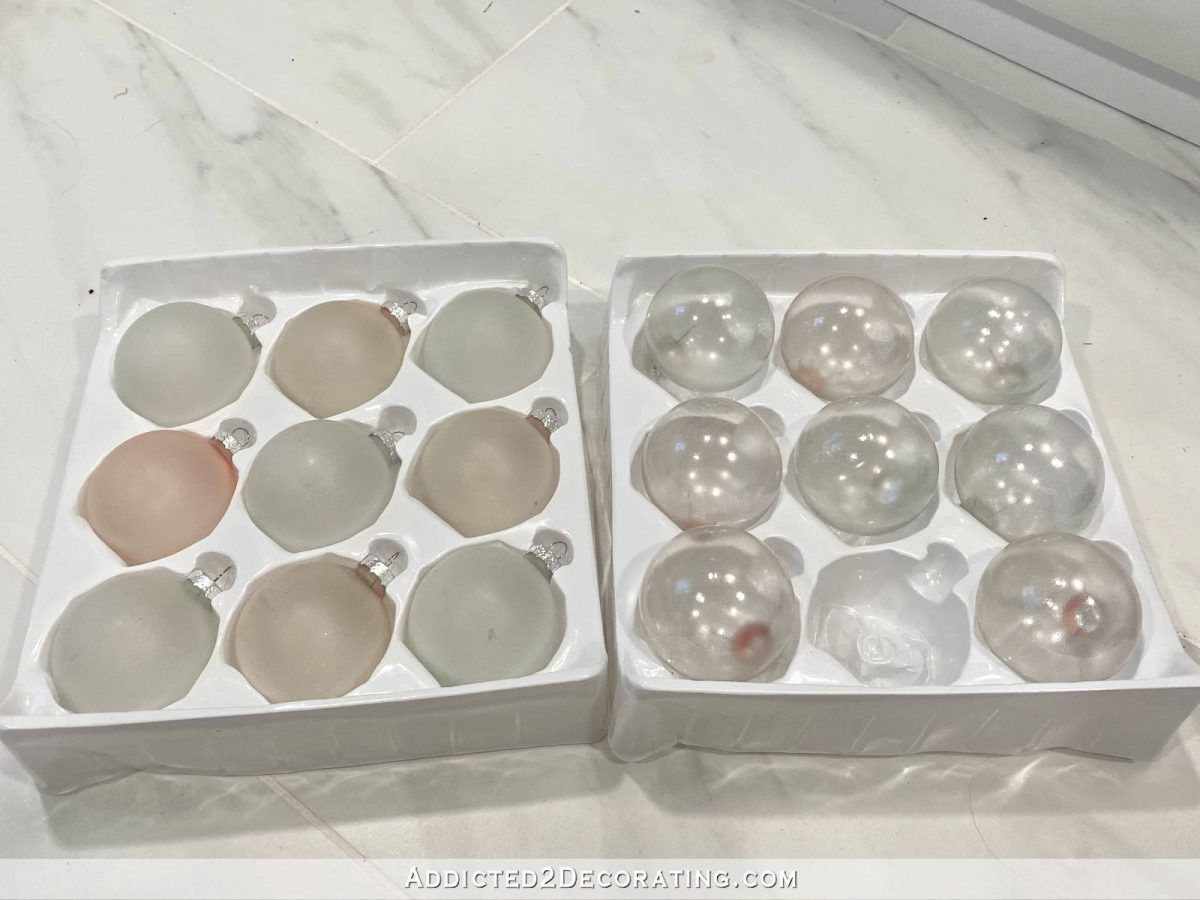
So imagine my surprise and disappointment when every box looked like this…
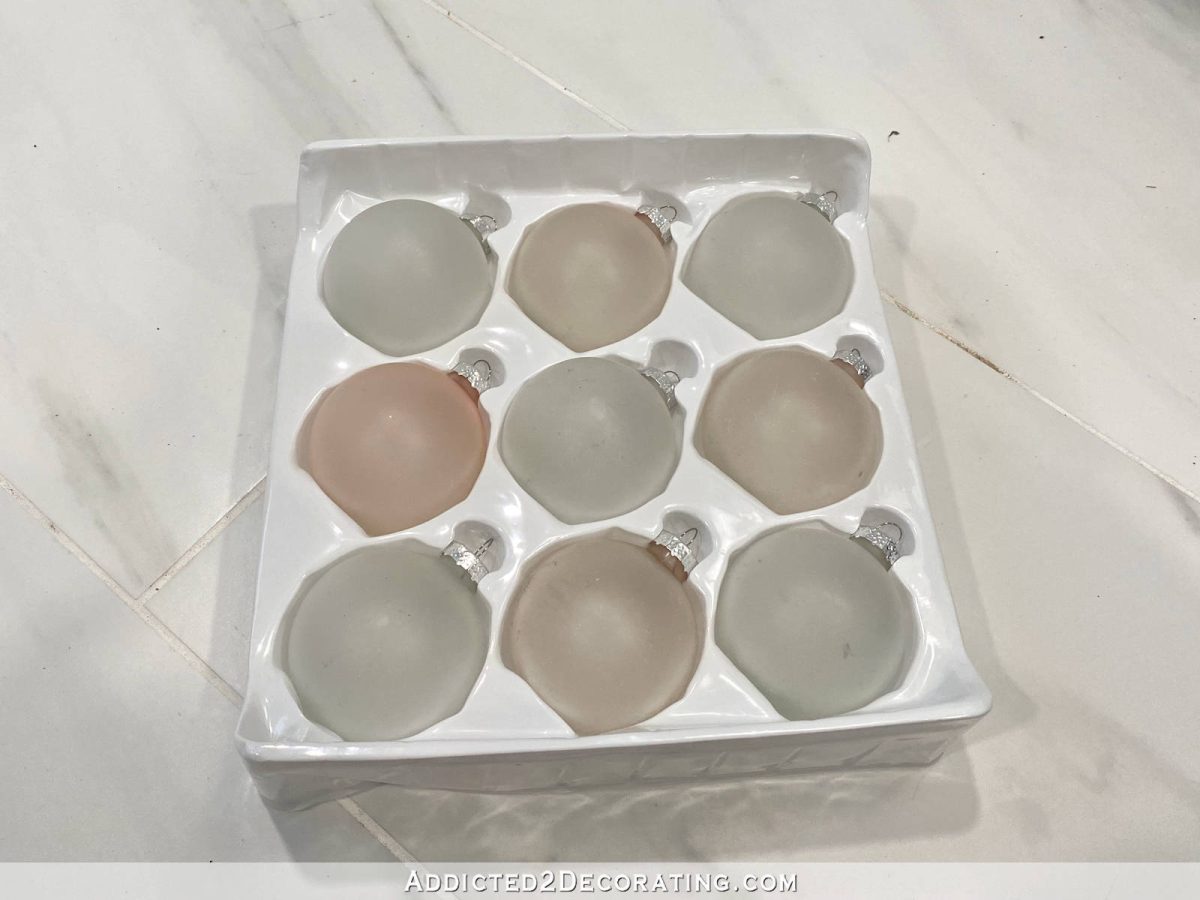
There are five white and four pink/peach ornaments in every box. But I thought that the pink/peach ones might be good for me to experiment on. So many of you suggested that I try a very light pink, and the only way I could think to do that in a way that would not turn the bulbs opaque is with alcohol ink.
So I tried all of the pink alcohol inks that I had on hand, and…well…it didn’t work out.
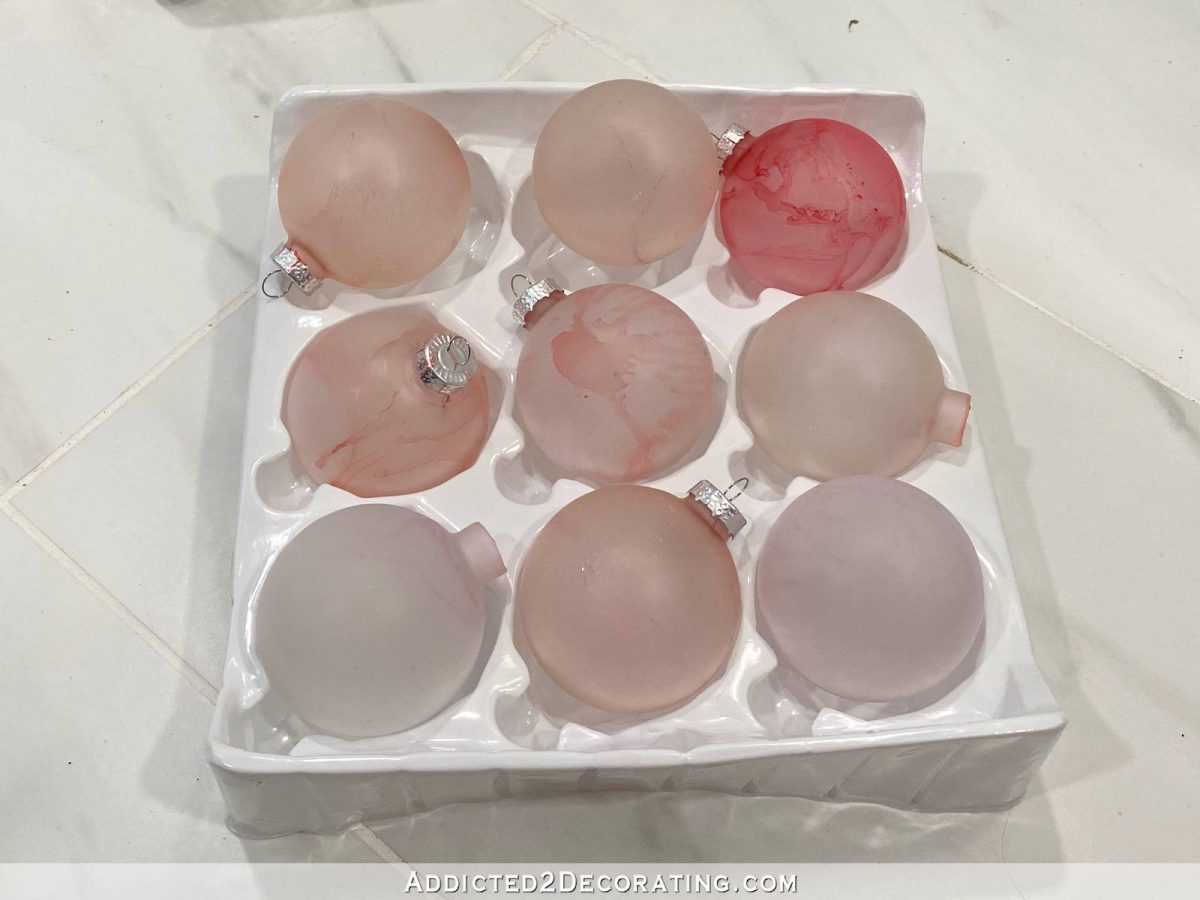
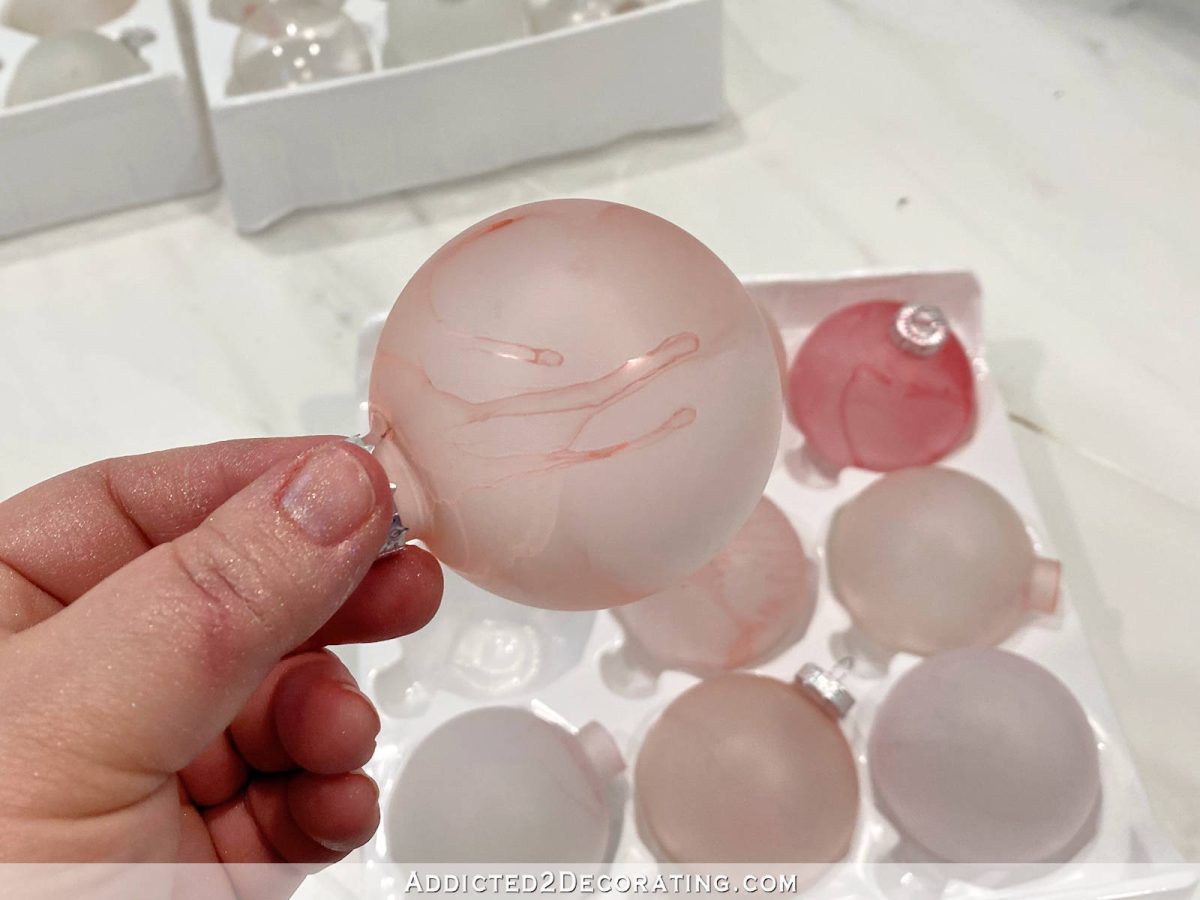
The ones that look really splotchy are ones where I tried putting a few drops of alcohol ink directly onto the bulb, and then pouring a bit of isopropyl alcohol over it to even out the ink and give the bulb a wash of color. They all looked beautiful until I turned them over, and then all of the ink and alcohol that had collected in the little cap ran down the bulb and created those lines. It was a big mess.
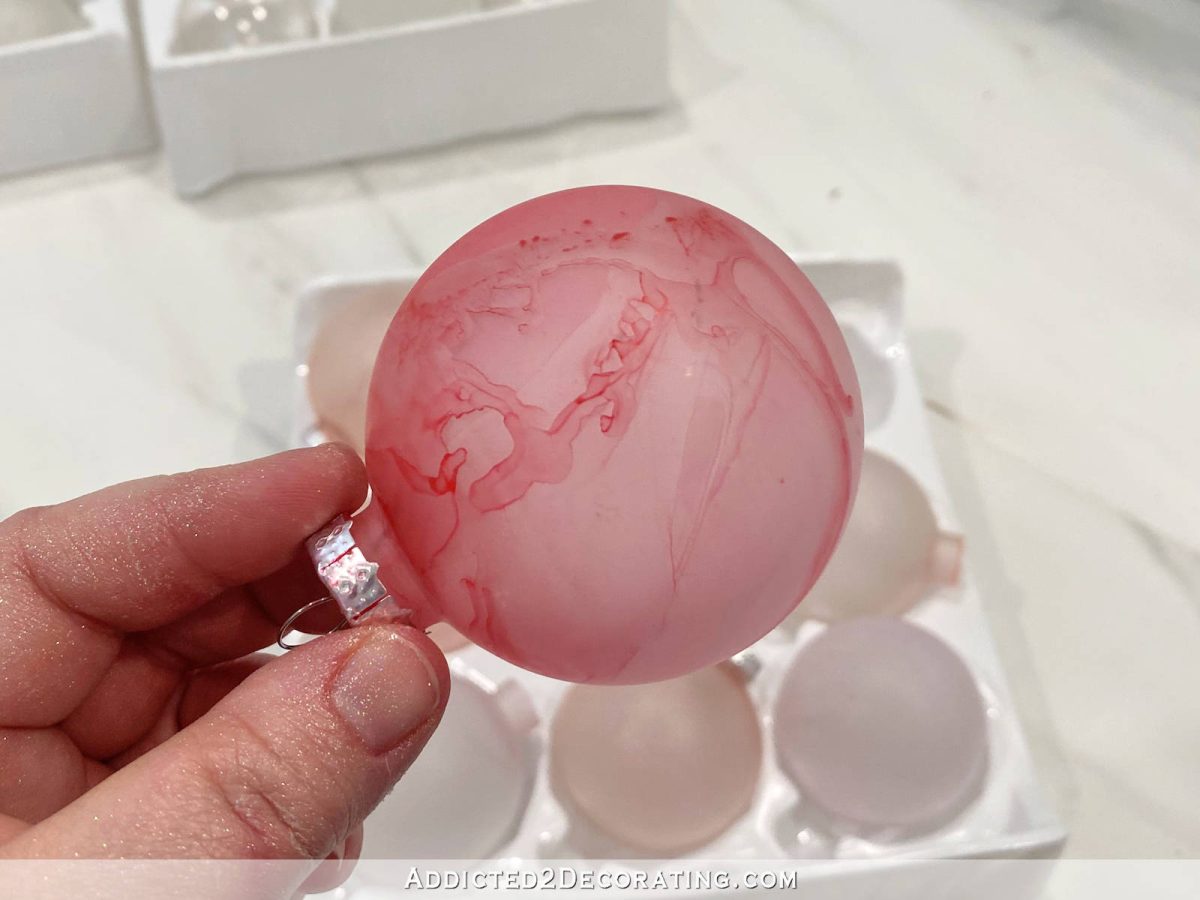
The ones that look a little smoother are ones that I tried to color by mixing up some alcohol ink diluted with isopropyl alcohol in a bowl, and then rolling the bulb in the color wash. Then I used my hair dryer to dry them as quickly as possible to avoid runs. It worked much better, but they all had at least one run on the last side to dry. And I just couldn’t get any of the colors to look right.
So I abandoned that idea and headed to Michael’s to see what they might have that could work. I found some Mod Podge Iridescent Acrylic Sealer. I was excited to try that out on the bulbs and see just how they would look with an iridescent finish.
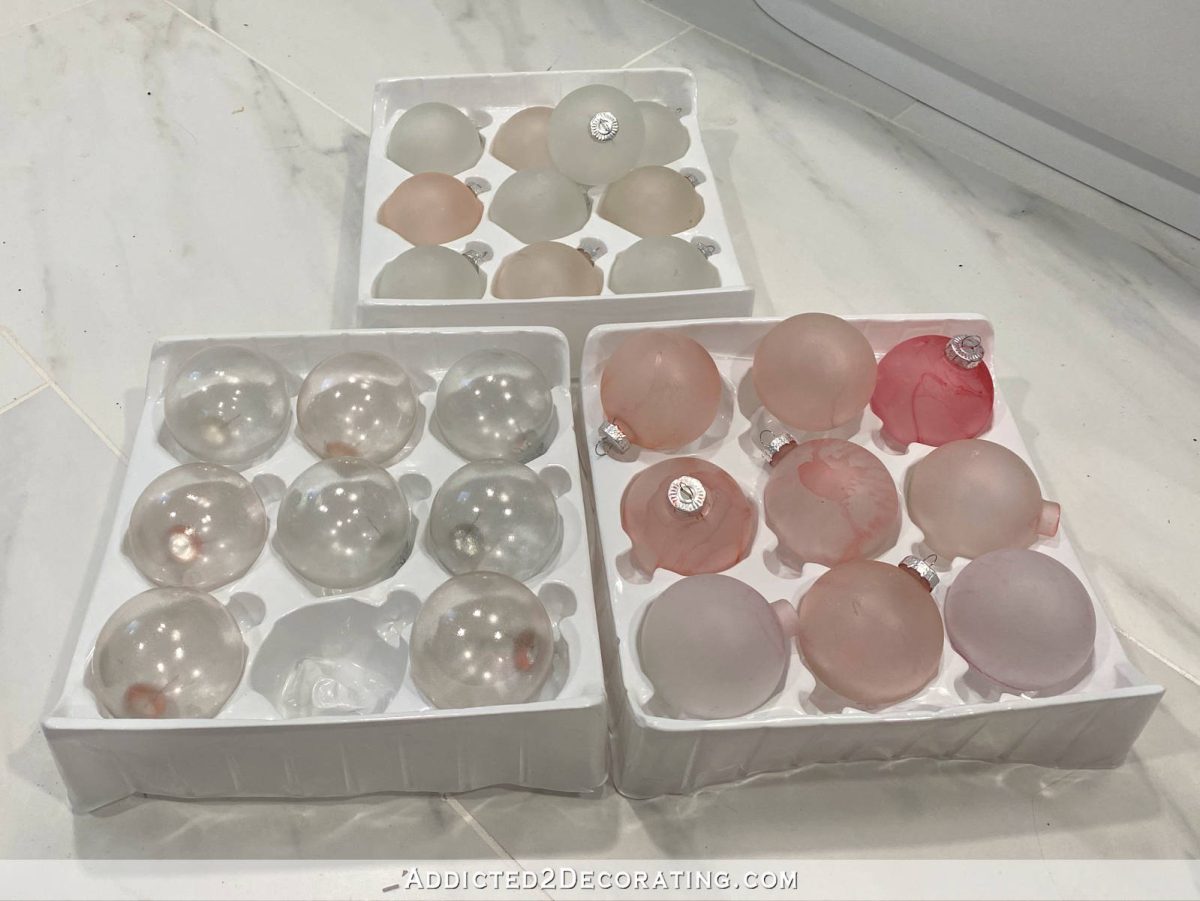
Interestingly, here’s what the spray did to the bulbs.

Isn’t that crazy? It turned them from frosted back into almost clear. And I actually love how they look. I don’t really see the iridescent quality of the spray, though. Here’s the original look on the left, and the look after being sprayed with the iridescent spray on the right.
Out of all three looks — the original, the alcohol ink (if I could ever get a smooth finish), and the iridescent spray, the ones with the spray are my favorites.
They definitely look more like actual bubbles, but I just wish the iridescent spray looked more iridescent.

I guess you just have to keep spraying in order to build up layers of the tiny glittery iridescent particles in the spray, but at that rate, I’d need about 10 cans of the spray in order to get them to actually look iridescent.

So I just have to decide if it’s worth it to spray all of them, or if I should just stick with the medallion and the original frosted bulbs.
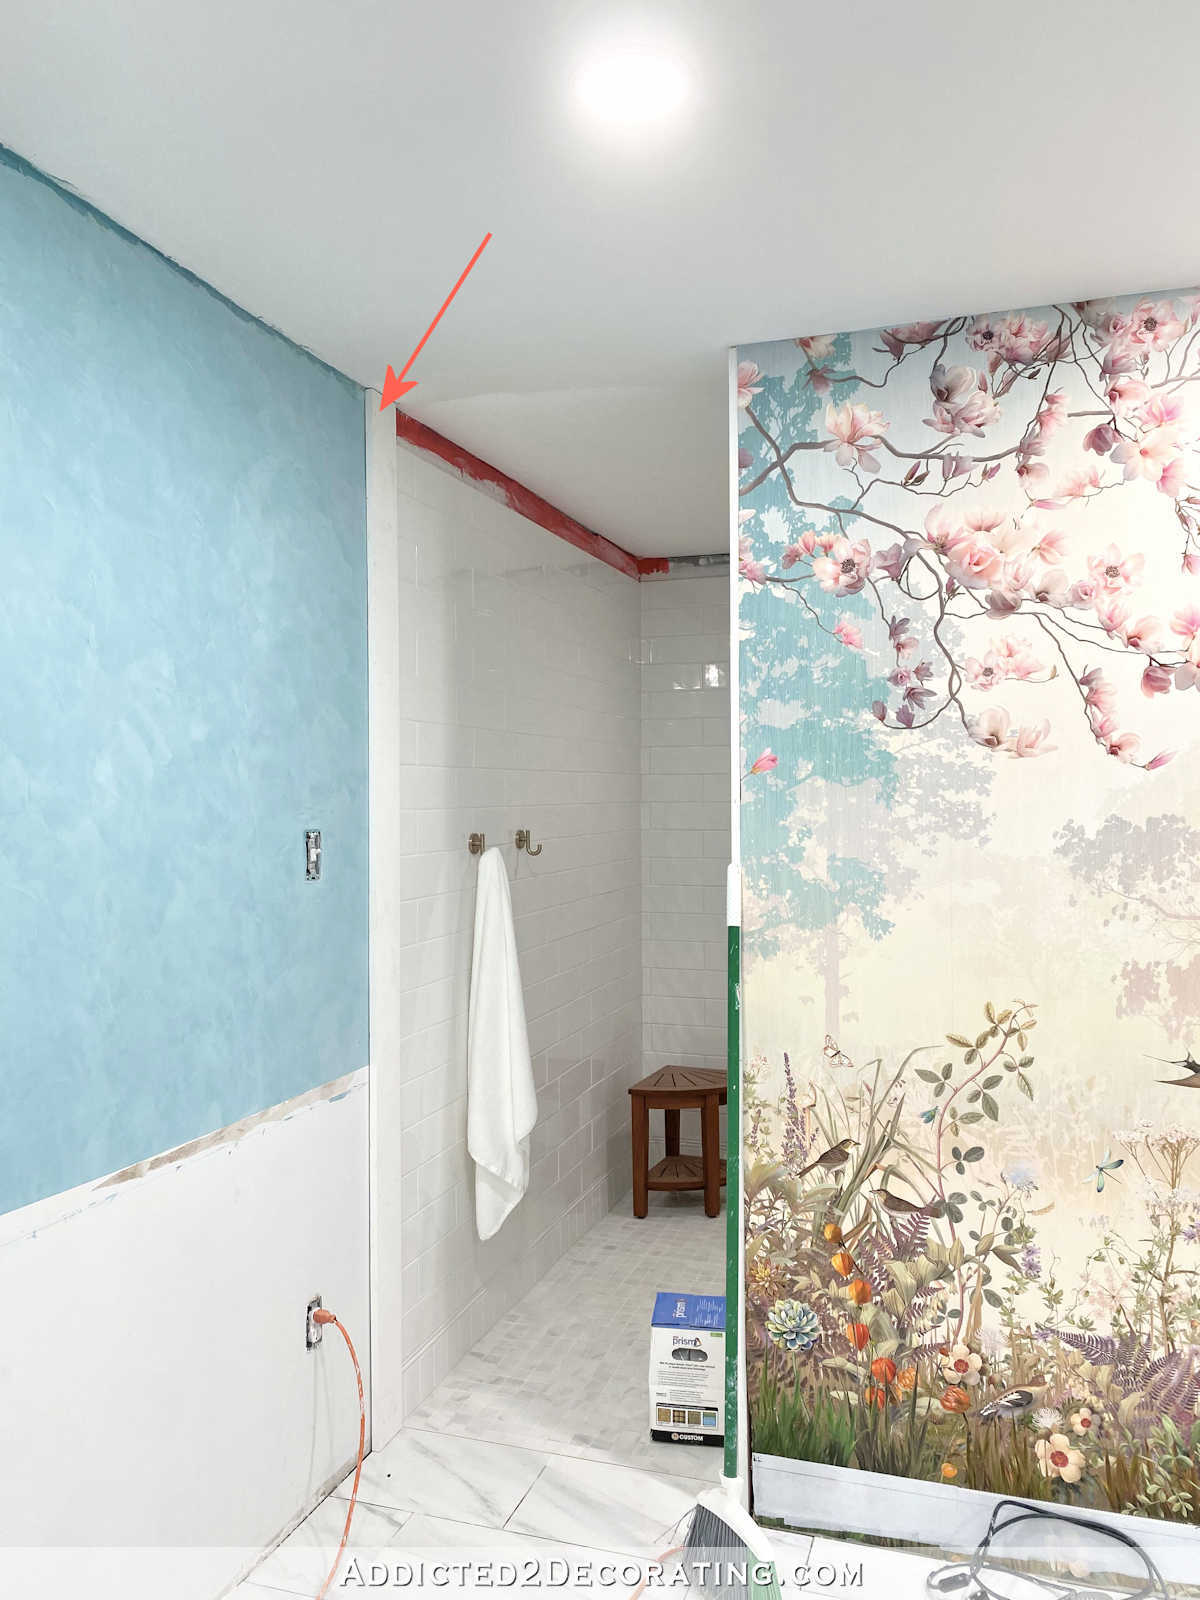
I did spray one of the big bulbs, and it did the same thing. It turned it more clear and shiny. Can you see it here? Without the medallion, it kind of blends right in to the ceiling. It’s on the left.

And here it is on the right. I do really like that it looks more like an actual bubble.

I don’t love that it’s more see through, though.
Anyway, here’s the medallion that will go on the ceiling. I ordered the antique brass finish, and this isn’t quite what I imagined antique brass looking like. It’s not what the picture showed.
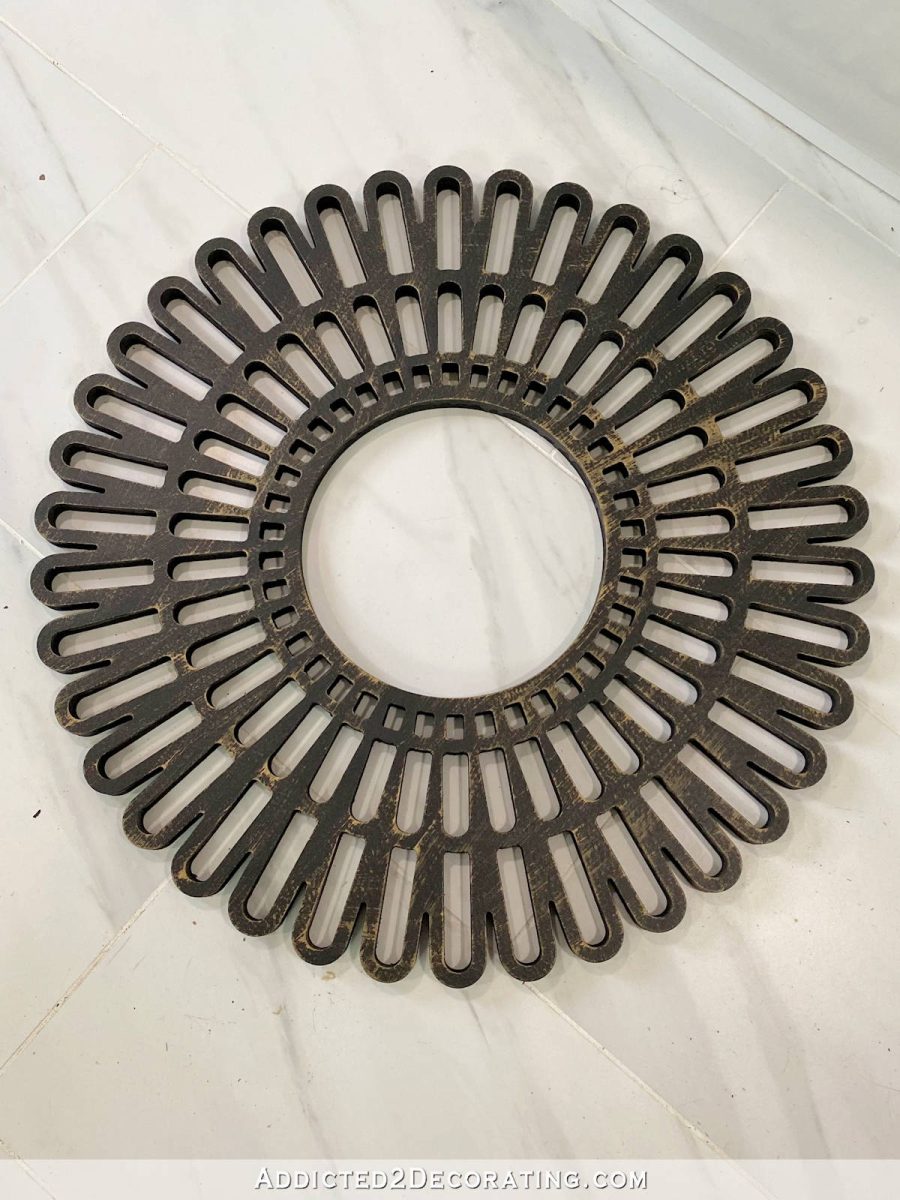
I mean, it just has the tiniest bit of antique brass finish on it, but it’s mostly black.
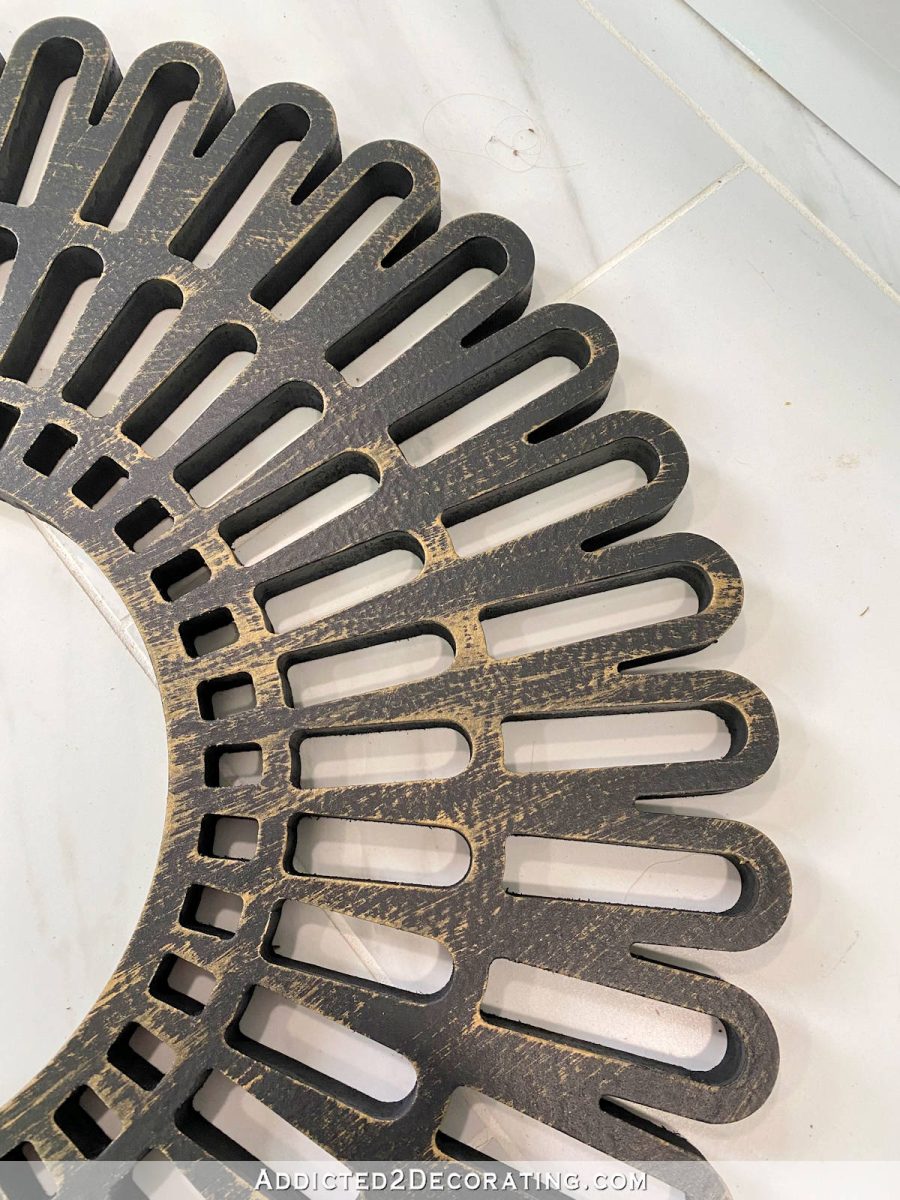
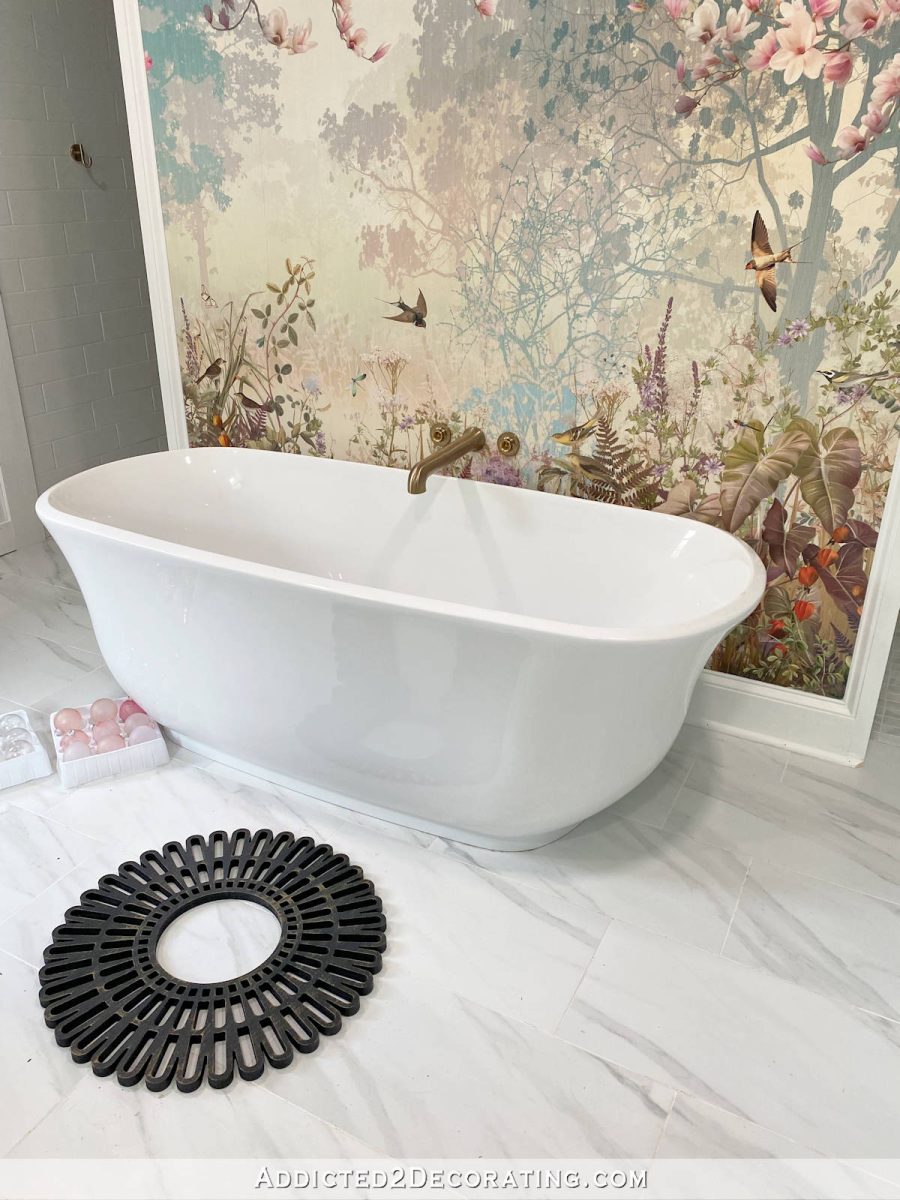
It’s not a huge deal. It’s nothing that a bit of spray paint can’t fix. But I do want it to be closer in color to the faucet and other plumbing fixtures. (I removed the faucet handles to make some adjustments. That’s why you don’t see them there. 🙂 )
So as of right now, I do think I’ll continue on with the iridescent spray. I just really wish it was more iridescent! Any ideas? There’s not a whole lot of iridescent sprays out there. I think I found maybe two brands, and this one was rated higher than the other. Everything else I found was a brush-on product, and I really don’t want that. So how in the world can I get a subtle iridescent finish on these while keeping them translucent enough for light to shine through? That’s the dilemma, and that’s what I need to figure out.

Addicted 2 Decorating is where I share my DIY and decorating journey as I remodel and decorate the 1948 fixer upper that my husband, Matt, and I bought in 2013. Matt has M.S. and is unable to do physical work, so I do the majority of the work on the house by myself. You can learn more about me here.
I would spray the inside with iridescent let dry 80%, then use a powered color or flour to frost the inside extra to stick to the fresh iridescent. but it’d probably be blobby. Light bulb makers don’t use paint, it’s a powder on the inside. I’d look for some fine pearlized power from makeup or pigmenting things to experiment to get an even finish. Also oil looks iridescent, maybe frost the inside and see if you can put a thin gloss of something on the outside to mimic an oil slik.
Story on finish shenanigan’s.
I am re-doing a hanging entrance sign. It looks like a cast brass plaque. Its actually a lightweight closed cell dense foam. It fell from stripped holes and got weed whacked…I filled the damage with a JB Weld wood-like resin product. Then re-carved it and sanded with the Dremel. I’ll need to send you an email with the pictures on the gold/brass-look experiment I got going on over here. I had everything going perfect, from using a sharpie branded paint pen on black spray painted surface. Then put sealer on my sample and my metallic color turned more opaque from the sealer re activating my black spray paint. So then I tried some metallic spray over fresh black, to reduce the shine to get what I want. I wanted to use rub n buff but my sign’s for the outdoors.
TMI geeky stuff: There’s a little science to irridecence. You get that rainbow from how light reflects or passes through a thing. Its able to divide the white light into different wavelengths so you see a rainbow of color. Oh on playing with finishes. Try Aquanet, it’s pretty much spray plastic. Hobby 3Dprinters use a layer of Aquanet on their surface to enhance the stickyness so the print doesn’t peel off the print bed while cooling and shrinking.
The bubble light I’ve been crushing over is $2300, crazy! I think the spray is the answer and I think when they are all sprayed you will have more impact than the single one you sprayed. Also medallion is going to be hard to see unless it is lightened and reflective.
Anxious to see it finished. Love it.
I think the link that Stephanie posted are beautiful if you don’t mind ordering more. Especially after the medallion is painted. I bet you can use the existing ones on a later project.
I kind of love the light as is especially when lit and I think adding the medallion will give it contrast on the ceiling. I think the only way you will truly get the iridescent look is if you buy ornaments that already have the foil film on them like these https://www.christmascentral.com/6-piece-iridescent-ball-christmas-ornament-set-3-25-80mm-32625522/
I would be concerned that if you go with a clear ball you might see too much of the medallion and looking at the light from below it will look dark.
To me, the iridescent ones in this link are perfect. Problem solved!
WOW – those are perfect and look like bubbles! Great find Stephanie. If Kristi keeps experimenting maybe a few more coats would do it – what about painting the base white so it isn’t as see-through? Are they just mounted on a lighted globe, or are small LED lights going inside each? I can’t remember if I read about that part. Will any of this coatings have an issue with heat from the bulbs?
Love these much better.
I love your Idea. I clicked on the site you gave and those bulbs are absolutely beautiful as they are. They look like perfect soap bubbles. I’m glad I read your comments.
Yep! These are perfect!
So beautiful! These are perfect!
I was going to suggest super fine iridescent glitter blown onto the still wet spray, but I’m not sure how that would work. Or a jar of iridescent or pearlized glaze, also sprayed on, though it is meant to be brushed…I think it might work in an air brush or paint sprayer if diluted. I have a jar of iridescent acrylic medium that is supposed to be added to any acrylic color or used as an accent. I haven’t tried it yet – that project is still on the back burner.
I’ve used Mod Podge and food coloring to make faux seaglass before. Just pour it inside, swirl, pour back into a spare container, and bake in a low oven to dry!
A Pinterest search for “faux seaglass diy” may yield some better instructions!
Yes … I did this as well … it worked really well and they still look great years later. Maybe adding some superfine iridescent glitter to the Modge Podge would work.
For the medallion, try a jewelry cleaner in an inconspicuous area. I use Weiman silver cleaner, the liquid, from Amazon to clean off antiquing on my jewelry when its too much. It lets the original metal show back through. Hope that helps and works. It has worked on all types of metals for me so far.
I really enjoy the lightness of the frosted look you had, originally. To me, it feels more cloud-like, more fluffy, more whimsical, and looks great with your ceiling. I think with the medallion maybe a bronze or gold color to match your other hardware, that light and fluffy look will look perfect as is and not need anything else. There’s a lot going on everywhere else. I feel like adding more to the light bulbs might be overworked?
I was also going to recommend trying iridescent glitter. I used it at Christmas time on poinsettias and berry branches around my front door. I used a spray glitter; and then sprinkled glitter on top of that while it was still wet.
I prefer the frosted balls. I wouldn’t want to see the wiring and light bulbs through the iridescent balls. The medallion is very pretty. I like the current finish and don’t think it has to match the plumbing fixtures. But, like you said, you could easily pray paint it.
Maybe try something labeled “pearl” instead, it may give you that white-ish + irridescent look you are striving for? Not just the thin coating you are getting with the product you are using now? My 2 cents LOL
or even an abalone (sp?) type product? is there such a paint product? idk but that would produce that type of coloration no? my brain is in overdrive right now! LOL
How about spray adhesive with iridescent dust sprinkled on? There are millions of iridescent powders used for auto finishes, art, etc.
Several variables you could go with.
1. Work from inside the globe, twirling it around to get a more even spread.
2. Use the Iridescent spray to clarify each globe before decorating.
3. Look at products for other crafts, like Dye-na-flow paints. Like water but acts like a dye on fabric. Sinks into fabric.
Can also be used on a hard surface.
4. Consider adding strips of Iridescent mylar to the inside of the ball after running it thru a paper shredder (not the cross cut confetti type). Making strips keep them puffed up as they curl in the ball.
Just had a brain fart! Get PVA glue. Thin with a little water, swish around inside the globe, dump some Iridescent glitter in, shake it around and dump the excess and allow to dry upside down so anything can drain out the hole.
Frosted!
I see nothing wrong with the alcohol ink ones! I did the same thing with a wall sconce, and I love the results with the streaks ~
OMG!!! I completely forgot all about the mica powders that they apply on nails…sooo shimmery and pearlescent!! It applies over a base coat then buffed to a high shine and blam! its gorgeous!! A little goes a super long way and it can be sealed with a clear coat! here’s a link …its also so easy peasy to apply…. https://www.amazon.com/Holographic-Rainbow-Mermaid-Pigment-Manicure/dp/B06WLHCNY7/ref=sxin_14_pa_sp_search_thematic_sspa?crid=18ID2Y3EMEZRL&cv_ct_cx=nail%2Bart%2Bpowder%2Bpigment&keywords=nail%2Bart%2Bpowder%2Bpigment&pd_rd_i=B07D5C12C2&pd_rd_r=c03354b8-178b-4b54-8eda-0debaf16088a&pd_rd_w=u89af&pd_rd_wg=AnkbK&pf_rd_p=9dca4024-3e25-44da-8740-13759fcb9369&pf_rd_r=XT3WEPMFSMC12JN807NF&qid=1653073493&sprefix=%2Caps%2C68&sr=1-3-a73d1c8c-2fd2-4f19-aa41-2df022bcb241-spons&spLa=ZW5jcnlwdGVkUXVhbGlmaWVyPUExM1I0N1FNTEtIWERFJmVuY3J5cHRlZElkPUEwMTY1NjA2Mk1GSzZXWlNGMEJPNyZlbmNyeXB0ZWRBZElkPUEwODg5MjA4MjhER0dNRTFMWFVXQiZ3aWRnZXROYW1lPXNwX3NlYXJjaF90aGVtYXRpYyZhY3Rpb249Y2xpY2tSZWRpcmVjdCZkb05vdExvZ0NsaWNrPXRydWU&th=1
I like the clear-ish bubbles with the lights off because they look like bath bubbles floated up to the ceiling but what does it look like when the light is on?
Have you considered using a colored light bulb or actually coloring the bulb yourself as opposed to changing a perfectly good fixture you’ve put together? Personally I like it the way it is but with a warmer light shining through. From the pictures you’ve posted it seems you’ve a “cool” bulb.
As always, it comes down to personal preference. For me, it would be frosted, hands down. People are often drawn to sparkly clear glass lights. The way they reflect light is beautiful. Problem is they don’t stay that way. Frosted hides dust way better than clear. This isn’t going to be an easy light to clean, even though the light is high up, you will see the dust because there is nothing to camouflage it. And when you do occasionally dust it, will the new spray finish wipe off?
I would pour iridescent or pearlized paint— or the liquid additive that goes into acrylics used for pouring— into the ornament and then swish it around and drain the excess. Kind of like reverse painted art glass vases. It’s going to look great!
How are you making the bubble light? What are you attaching the ornaments to?
She made a supportive structure out of chicken wire.
Does the black on the medallion come off with solvent?
Have you tried thinned iridescence fingernail polish on the bubbles?
Have you thought about using the glass glitter you used for the art work in the sitting room. You would need to make sure it didn’t flake off, you don’t want fine glass in your tub … LOL. But you had to do that with the art work also.
What would happen if you tinted some plain old pva glue pink and used it on the inside of the bubbles?
I really like the frosted bulbs as they are, honestly – i think it diffuses the light nicely but hides anything underneath. I think adding the medallion (after you fix the color) will be a perfect addition to the frosted bulbs without taking away from the mural and surrounding colored walls <3
Looking so good in there – such a creative idea. (I'm wishing I had a canned light over my tub right now!)
Ok, I’m going to say something crazy, probably irrelevant, but it might give you ideas. Ages ago I remember doing a little papercraft I downloaded from my printer’s website; it was supposed to be a dodecahedron calendar (you printed it, cut it, glued it so it became a 3D thing and put it on your desk). I did the first one and then decided I wanted it to look more magical or whatever.
So then I printed it on a transparency, got some nylon bag in a pretty colour (should have seen the weirdo out inquiring the shopping bags’ colours), folded it, and cut it in countless stripes (kinda like the paper straw filling we put in packages, but transparent and pretty and glossy). And then I filled my hollow, transparent, was-supposed-to-be-paper, 3D shape. It looked awesome!
Bottom line is… fill the baubles with something? I guess? Not sure, it’s just that those transparent ones reminded me of that… 😀 😀 😀
Oh, forgot, if you are painting, perhaps push the bauble down into a bucket with the paint, then hang it – it is a bauble after all, it has the hanging part built-in. Kinda like cake pops are covered. It would create sort of a drip point at the center, but lots of painted spheres have that. You can also blow a bit of dust while they are still wet. And I had forgotted a second thing that I meant to write here, but I re-forgot it… oh well, not too much brain left today…
And as soon as I hit post… there’s membranes you can apply onto objects, heat them with a hair-dryer so that they wrap around the object you are covering. But they would form lines, kind of like seams. But if they are colourless and just to give an iridescent look, perhaps it would be ok. And if they don’t work, maybe cut them as per post #1?
That’s all now, for real!!! 😀
Can you dilute an iridescent nail polish?