DIY: Storage Cabinet With French Doors (Part 2 — Trimming Out The Cabinet)
Progress on the DIY storage cabinet with French doors moving forward for the water closet area of our master bathroom. I got the whole thing trimmed out, and now it’s ready for all of the finishing — wood filling, sanding, caulking, priming and painting.
Note: This is part of a multi-post project. If you missed the previous post, you can find it here: DIY: How To Build A Storage Cabinet With French Doors (Part 1 — The Basic Build)
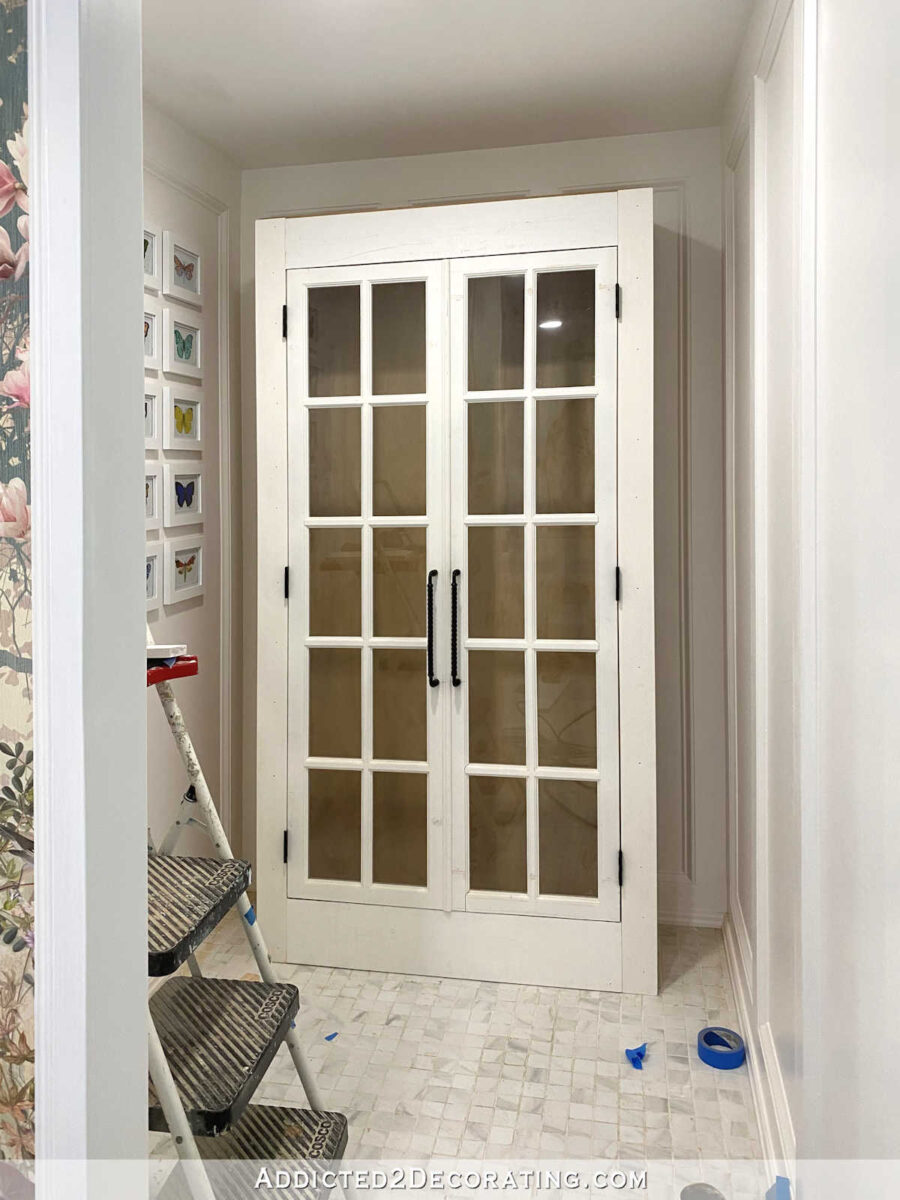
If you’re all caught up, let me show you how I went from this very basic and plain cabinet that I had built at the end of Part 1 of this project…
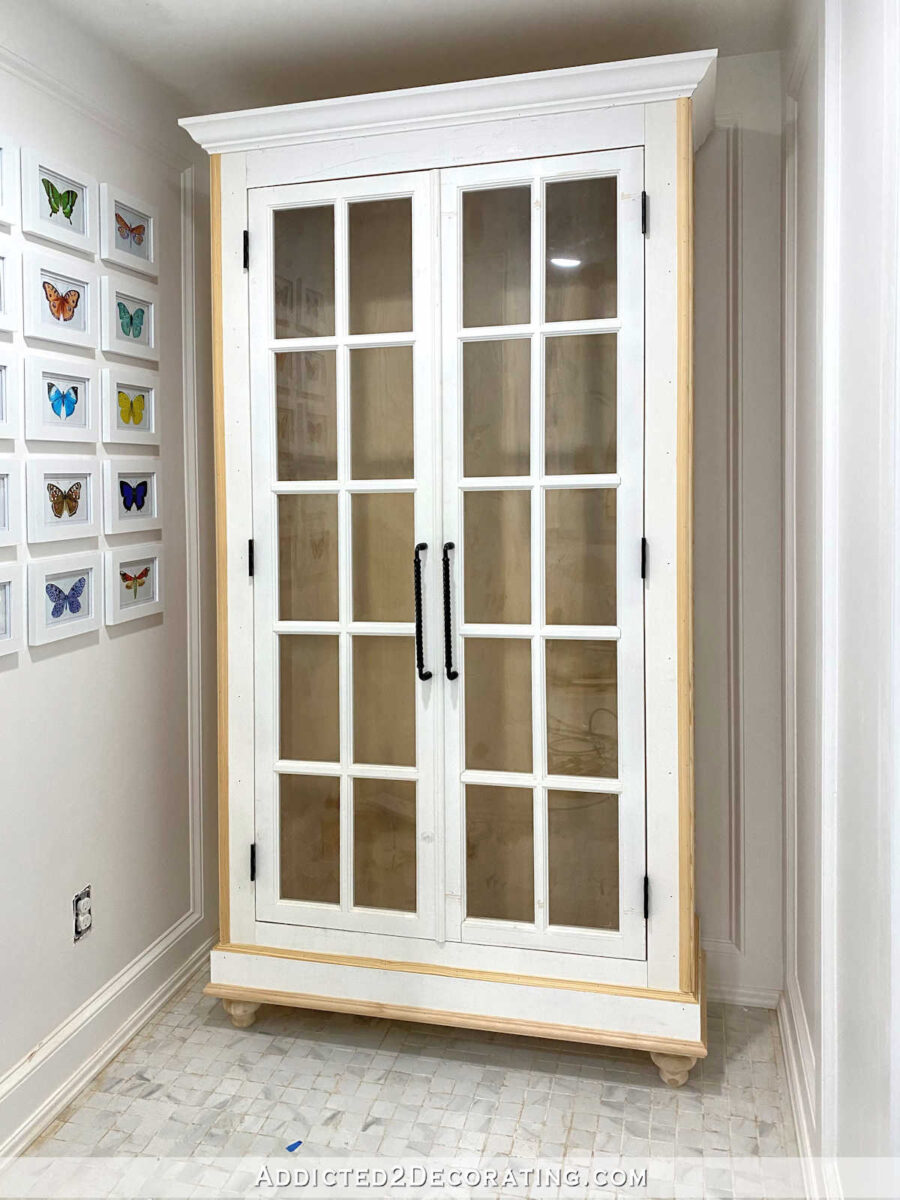
…to this trimmed out cabinet that is now ready for finishing and paint.
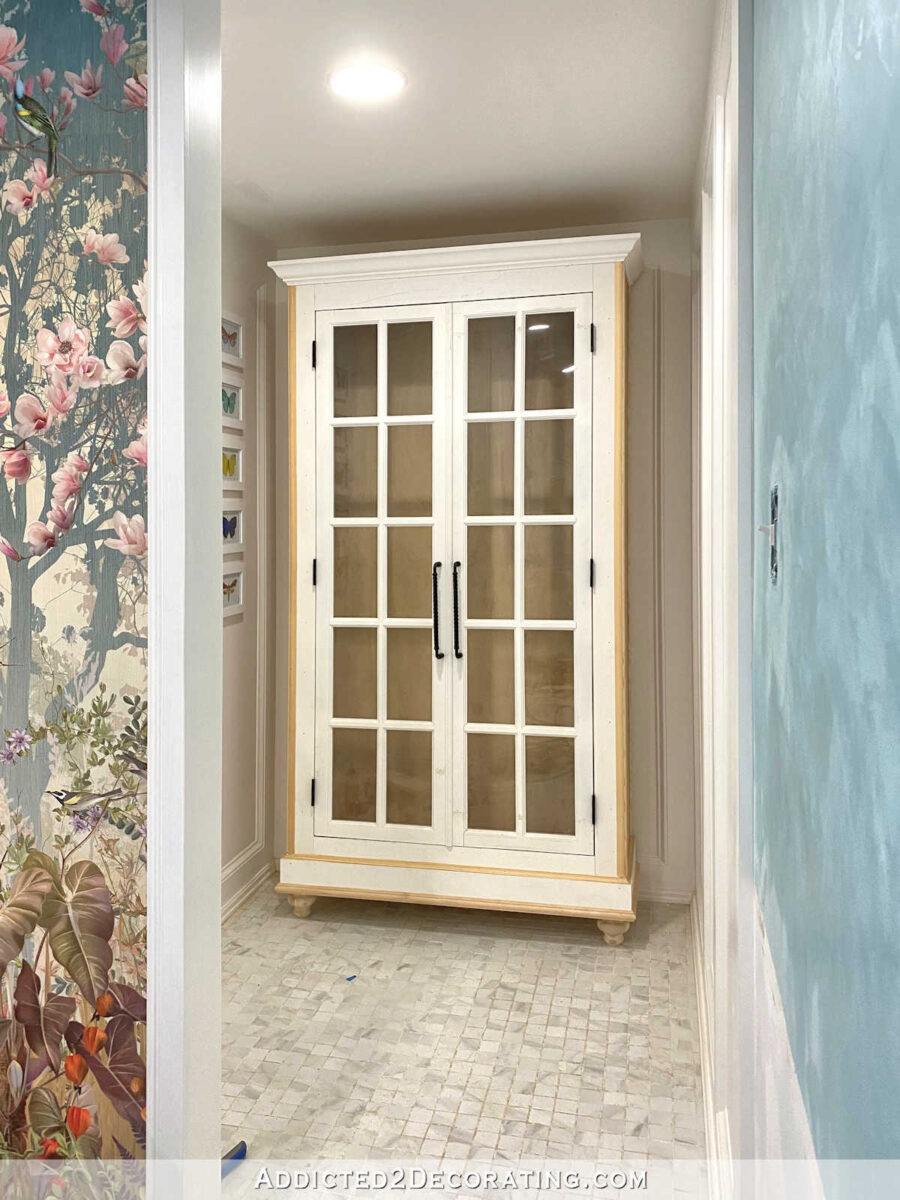
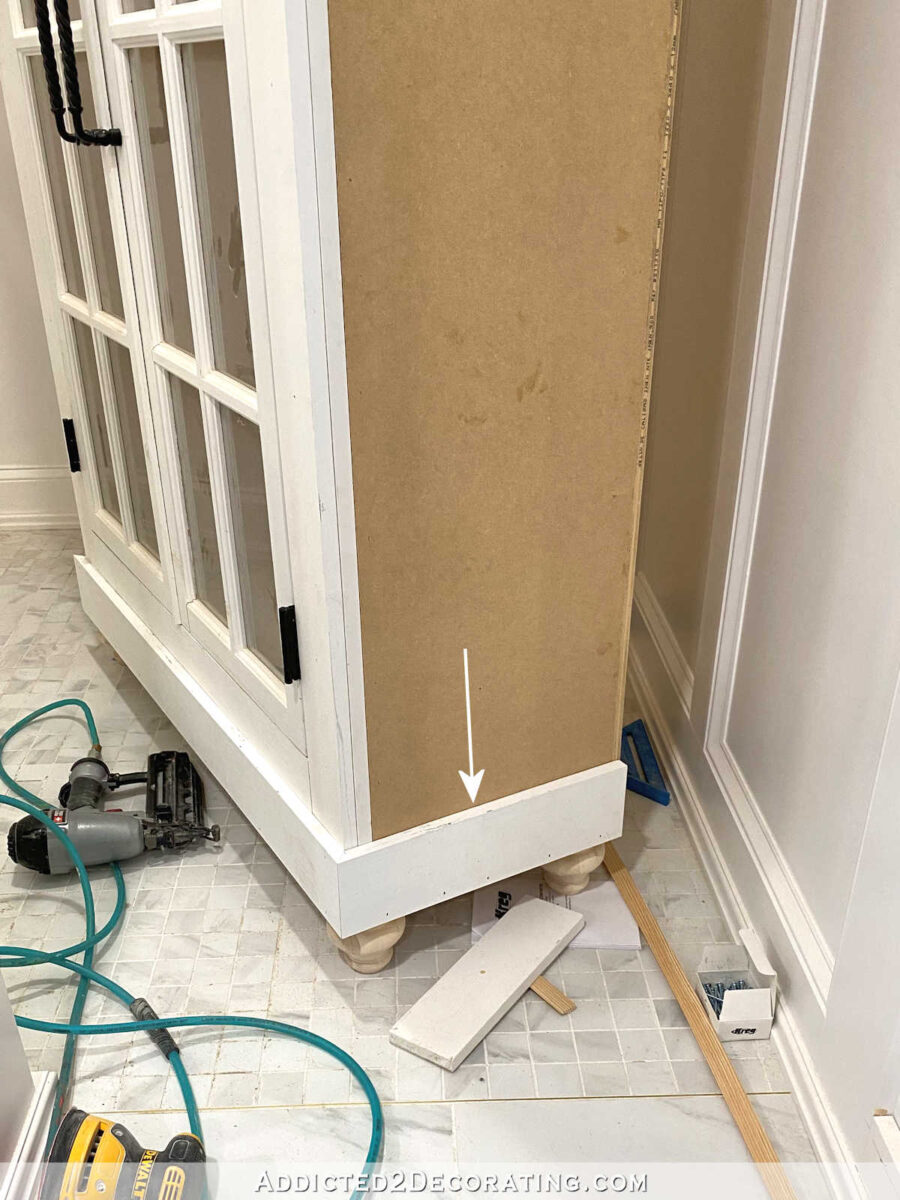
1. Add the furniture feet
I decided that I wanted the cabinet to be off of the floor, so I purchased four of these furniture feet from Home Depot (affiliate link). These feet come with a threaded post already inserted into the top, and the easiest way to attach them is by screwing these heavy duty top plates (affiliate link) to the bottom of the furniture, and then screwing the decorative foot into that plate.
However, I was working by myself in a very limited work area, so there was no possible way I could screw those top plates onto the bottom of the cabinet. So instead, I removed the threaded post from the feet using some pliers and just unscrewing it from the foot, and then I lifted each end of the cabinet up just enough to get the feet underneath. I wasn’t too concerned about perfect placement initially. I just needed to get all four feet under the cabinet so that the cabinet was resting on the feet.
After I had all four feet under the cabinet, I could then move them into place. I won’t lie. This wasn’t easy, and it took some patience, but I finally got all four feet into position. Then I secured them into place by using 2.5-inch screws, and screwing those through the inside bottom of the cabinet and into the feet. I ended up using two screws per foot.
2. Trim out the bottom of the cabinet
To trim out the bottom of the cabinet, I started by cutting 1″ x 5″ pre-primed fingerjoint boards and attaching them along the bottom edge of the cabinet. I used my miter saw to cut these pieces, and they have straight cuts along the back edges of the cabinet, and mitered cuts along the front corners of the cabinet. I attached them with wood glue and 1.5-inch 16-gauge nails in my nail gun.
Next, I used cove molding (you can see what that looks like here) along the top edge of the 1″ x 5″ board. I cut this with my miter saw as well, making straight cuts along the back edge of the cabinet, and mitered cuts on the front corners. I attached this with 5/8-inch 18-gauge nails in my nail gun.
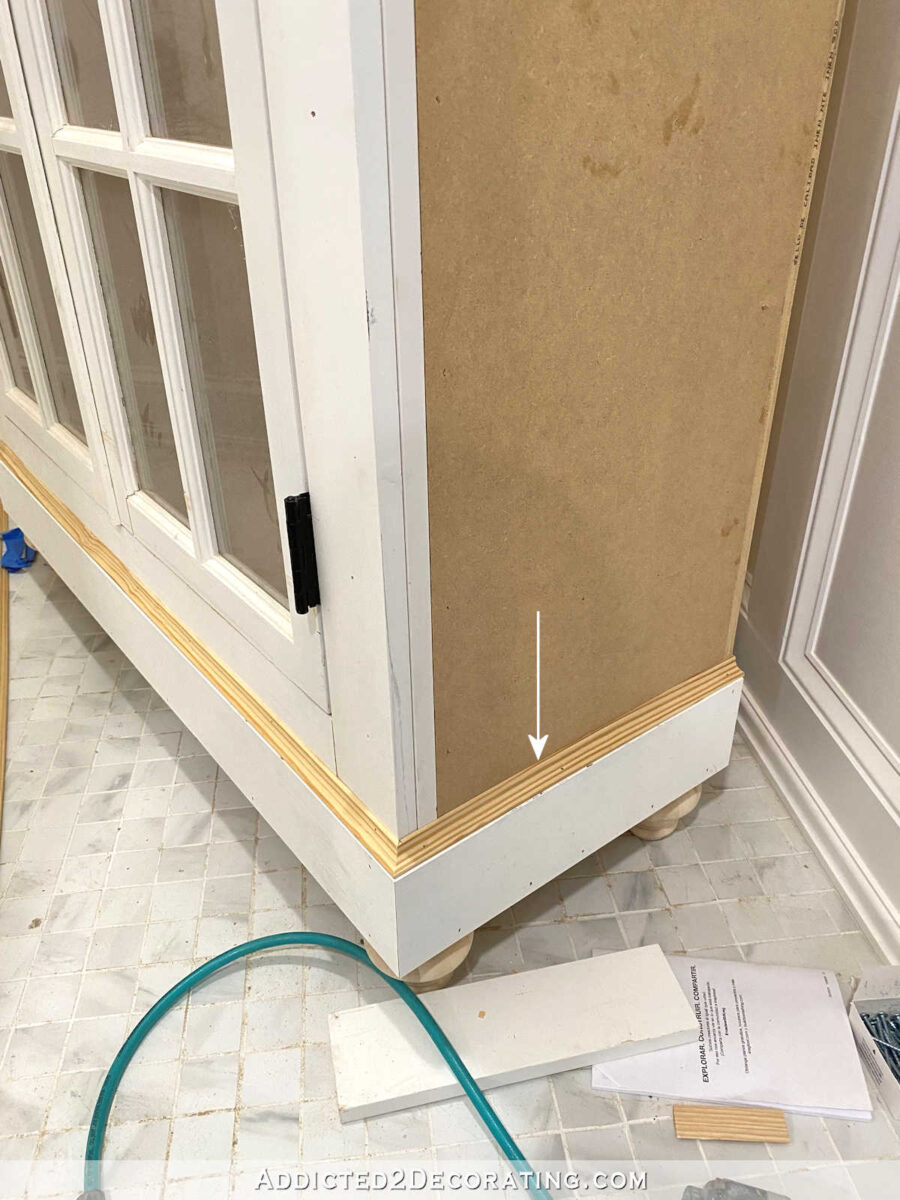
To finish out the bottom edge, I cut and attached this 1 3/16-inch cabinet trim right along the bottom edge of the 1″ x 5″ board. I attached this using 5/8″ 18-gauge nails.
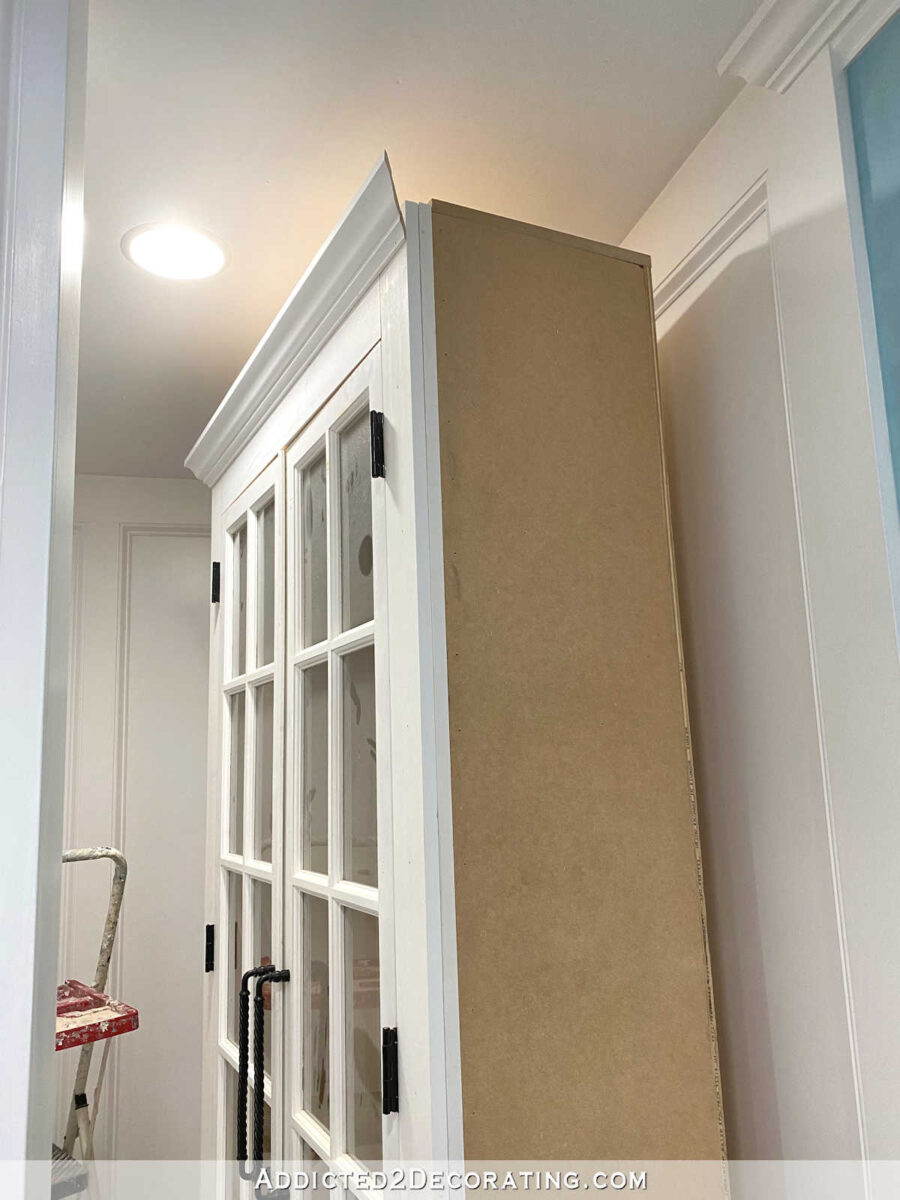
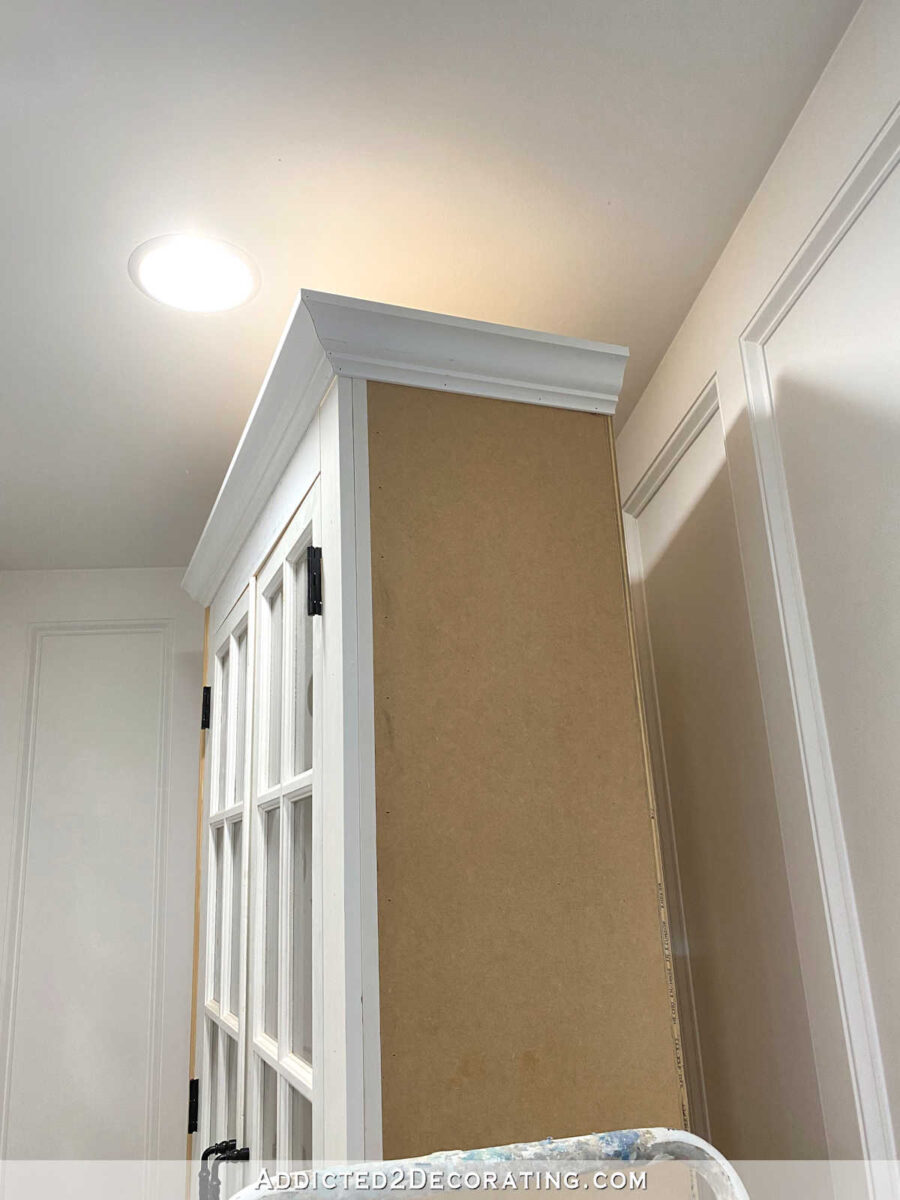
3. Attach the crown molding
To finish the top of the cabinet, I installed this crown molding (affiliate link) all around the top. When installing crown molding, I always use my Kreg Crown Pro Crown Molding Tool (affiliate link). I used to absolutely hate installing crown molding, and I’d end up with a huge pile of wasted crown because I just couldn’t figure out the cuts. Ever since I got the Kreg Crown Pro, I find cutting crown molding to be quite easy. I won’t go into detail in this post about how to use the Kreg Crown Pro to cut crown molding, but if you want more details, you can see this post where I explained the process.
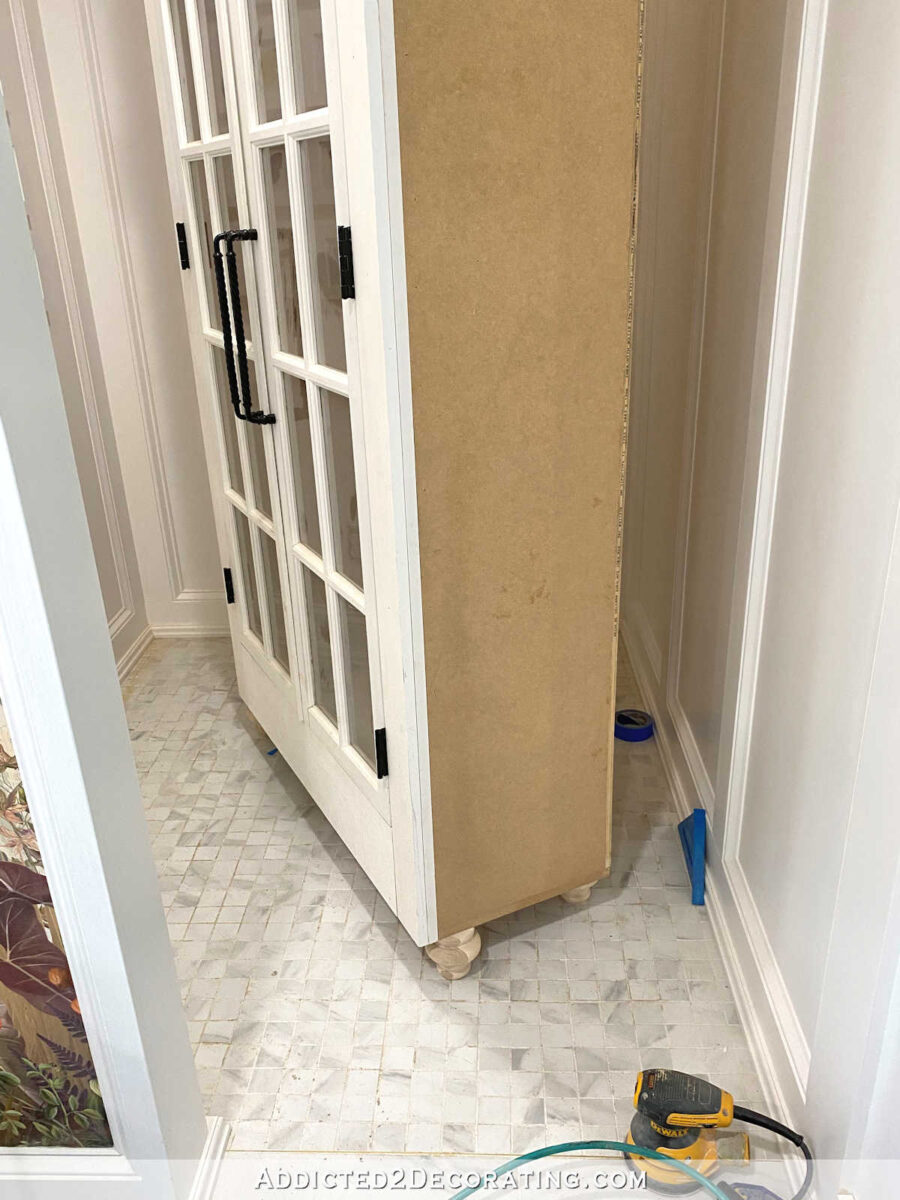
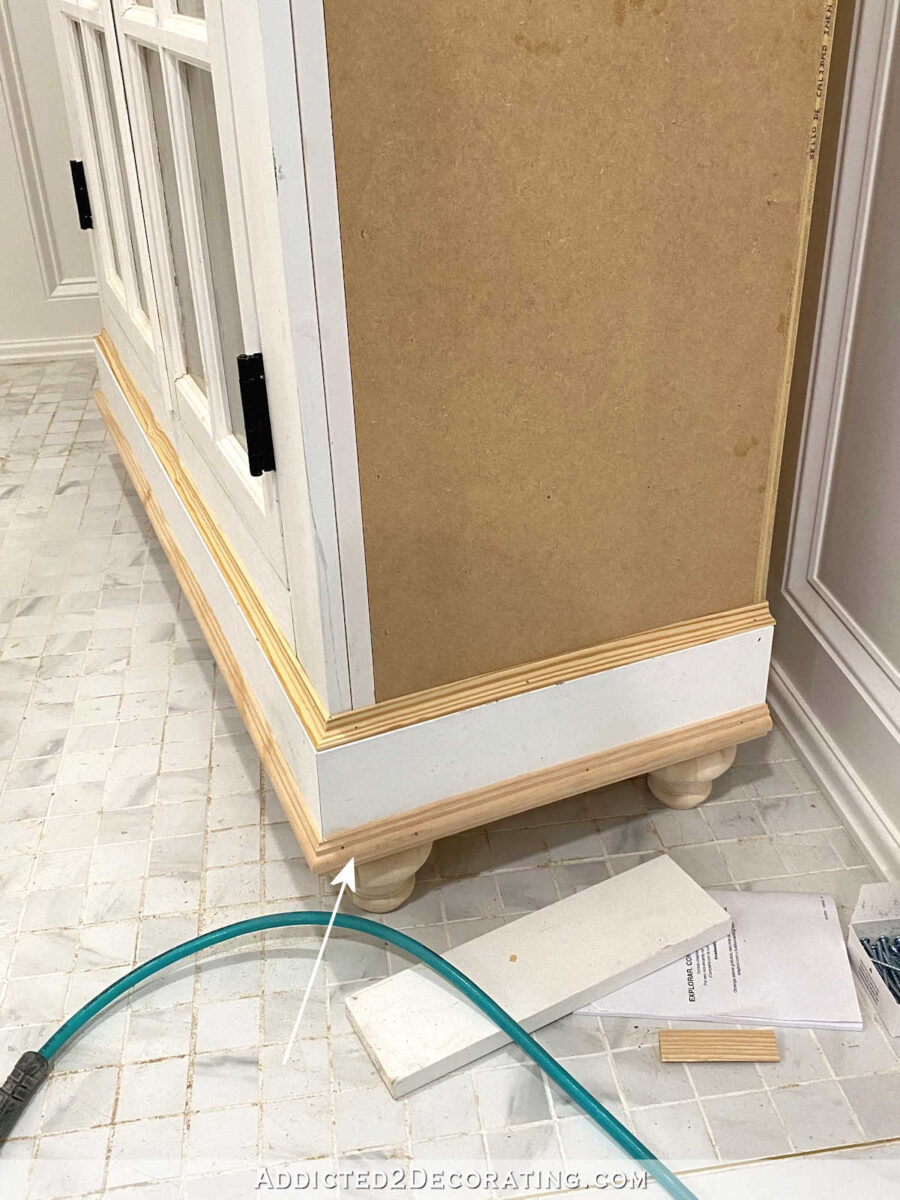
4. Trim the ugly and raw edges
The final step to trimming out the cabinet was to add this smaller cabinet trim (affiliate link) to cover over the raw and ugly edges. I attached these with 5/8″ 16-gauge nails.
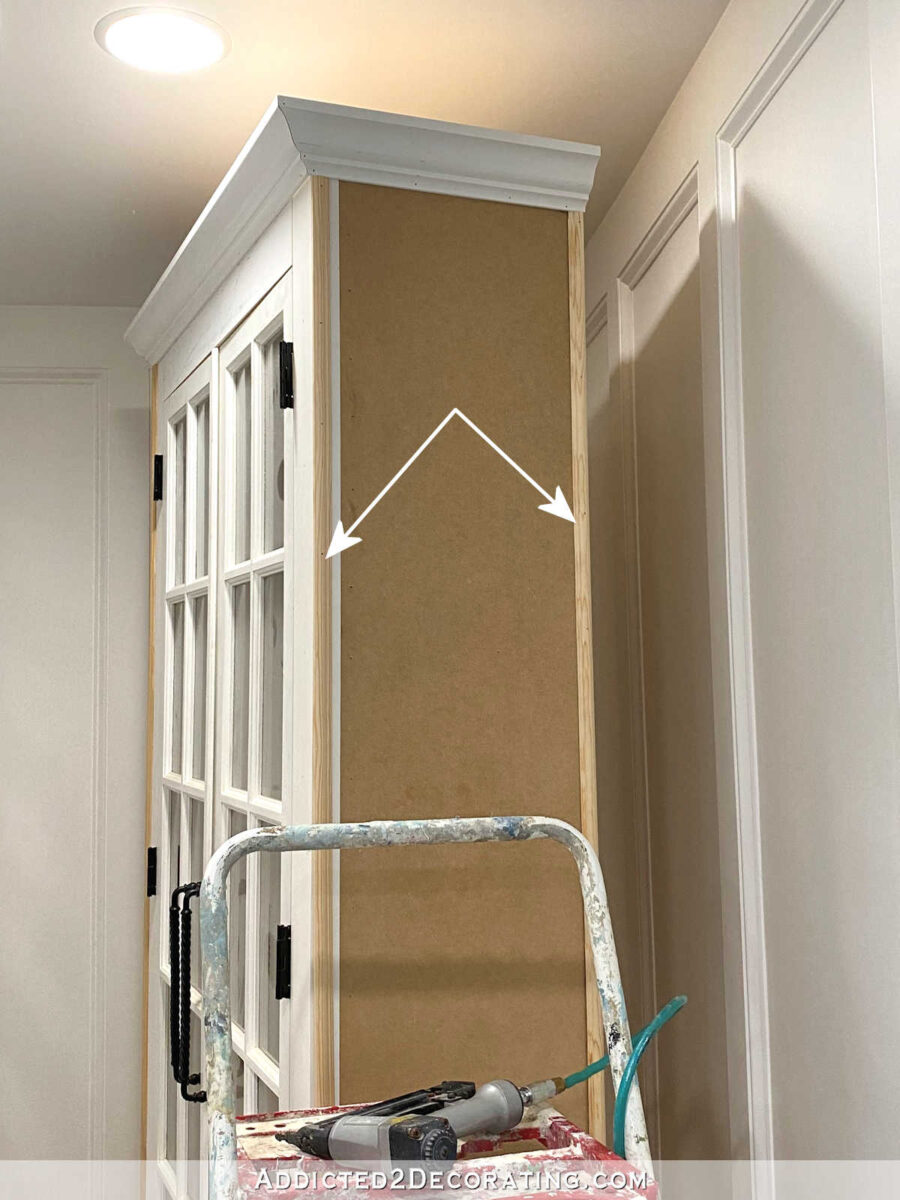
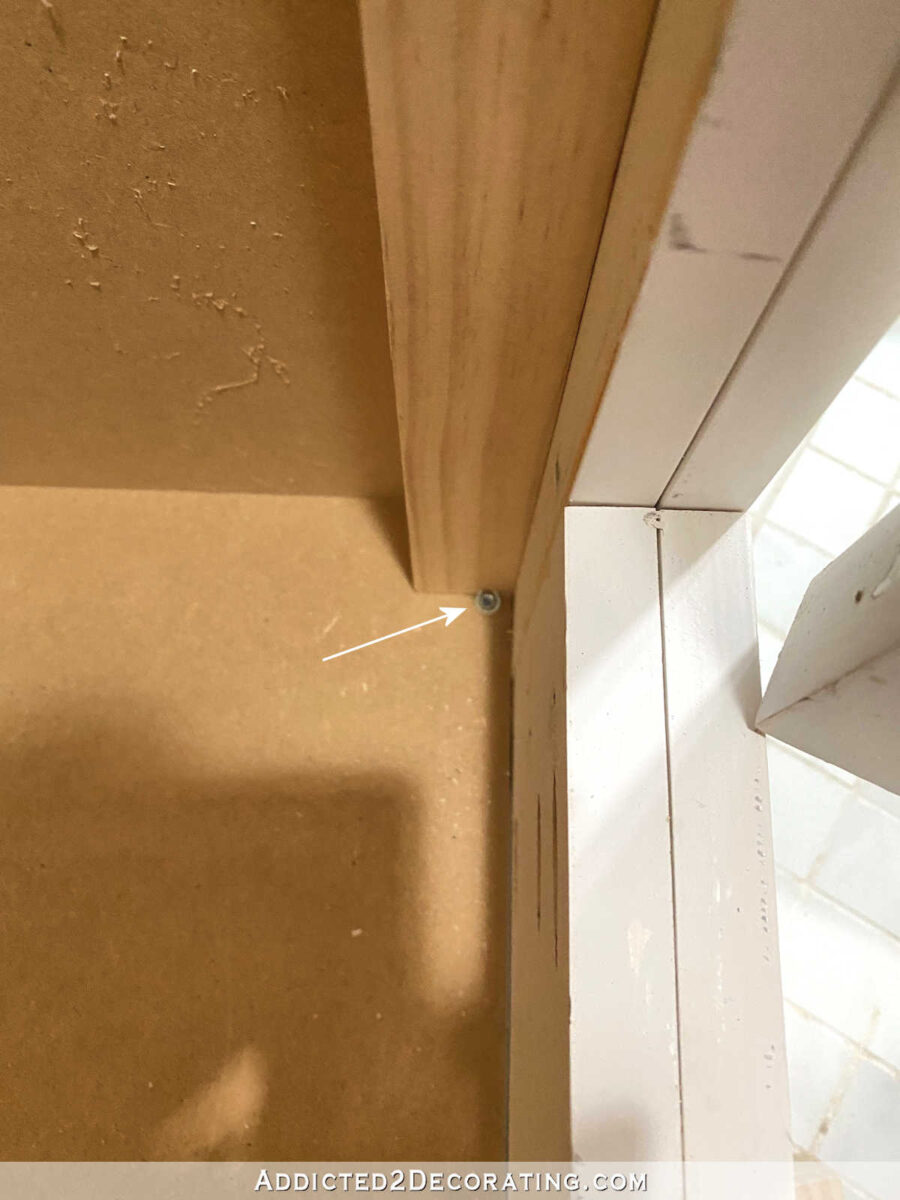
On the front side edge, that piece would have normally covered over all of the joints. However, if since I doubled up on the face boards for this cabinet (which I did because I used actual 1/5-inch-thick interior doors for this cabinet and I wanted the face board to be the same thickness), that means that my side trim along the front edge didn’t cover all of the joints. If I had used a normal single thickness face frame, this wouldn’t have been an issue. And if this cabinet were going to be in a place where the sides would be plainly visible, I might have come up with another trim solution. But since the sides of my cabinets don’t really show at all in this small room, I decided not to worry about it.
And finally, I attached another piece of that same trim along the front side edges. This will all blend in much better once everything is painted the same color.

And with that, all of the trim was finished, and it’s now ready for the finishing process, starting with wood filling and sanding all of the nail holes.
I do still need to install shelves inside, but I want to prime and paint the interior first, and then paint the shelves and add them afterwards.
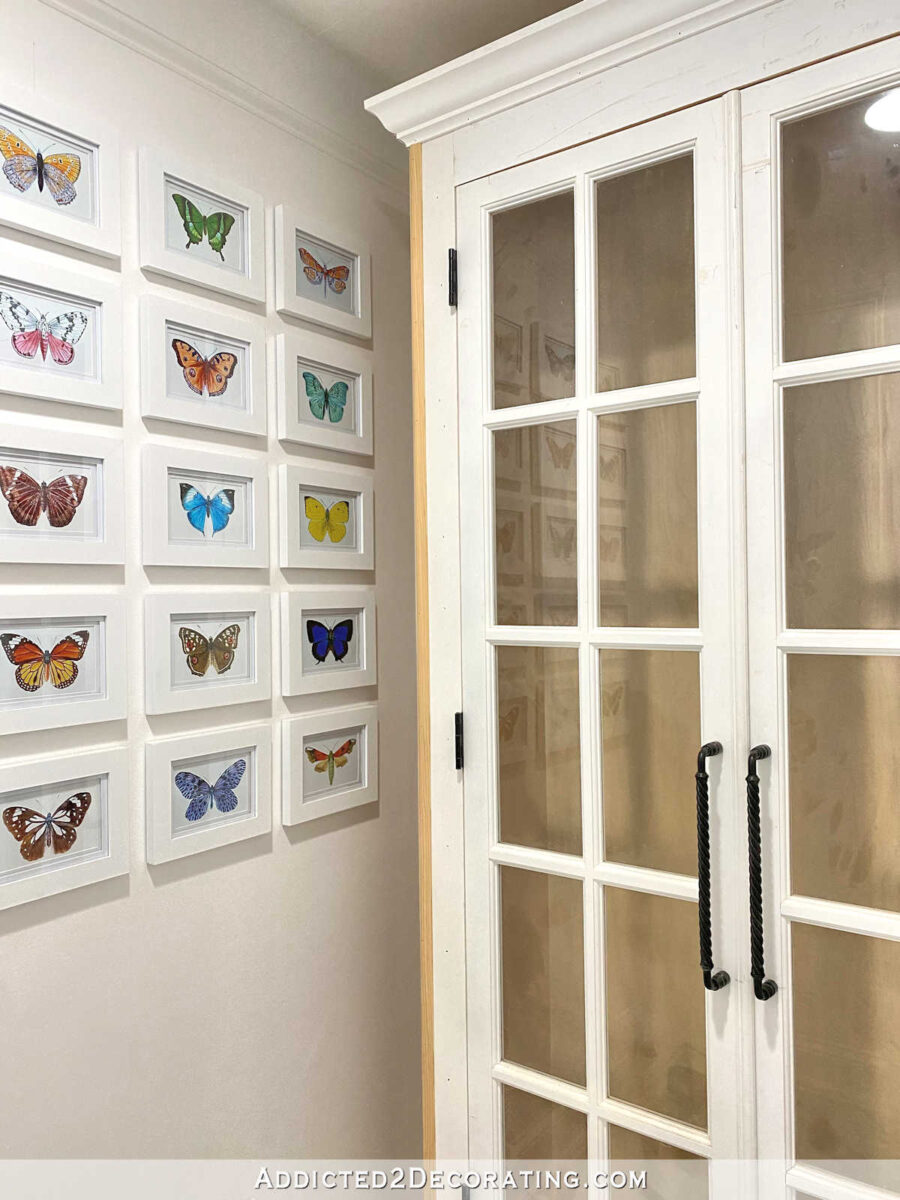
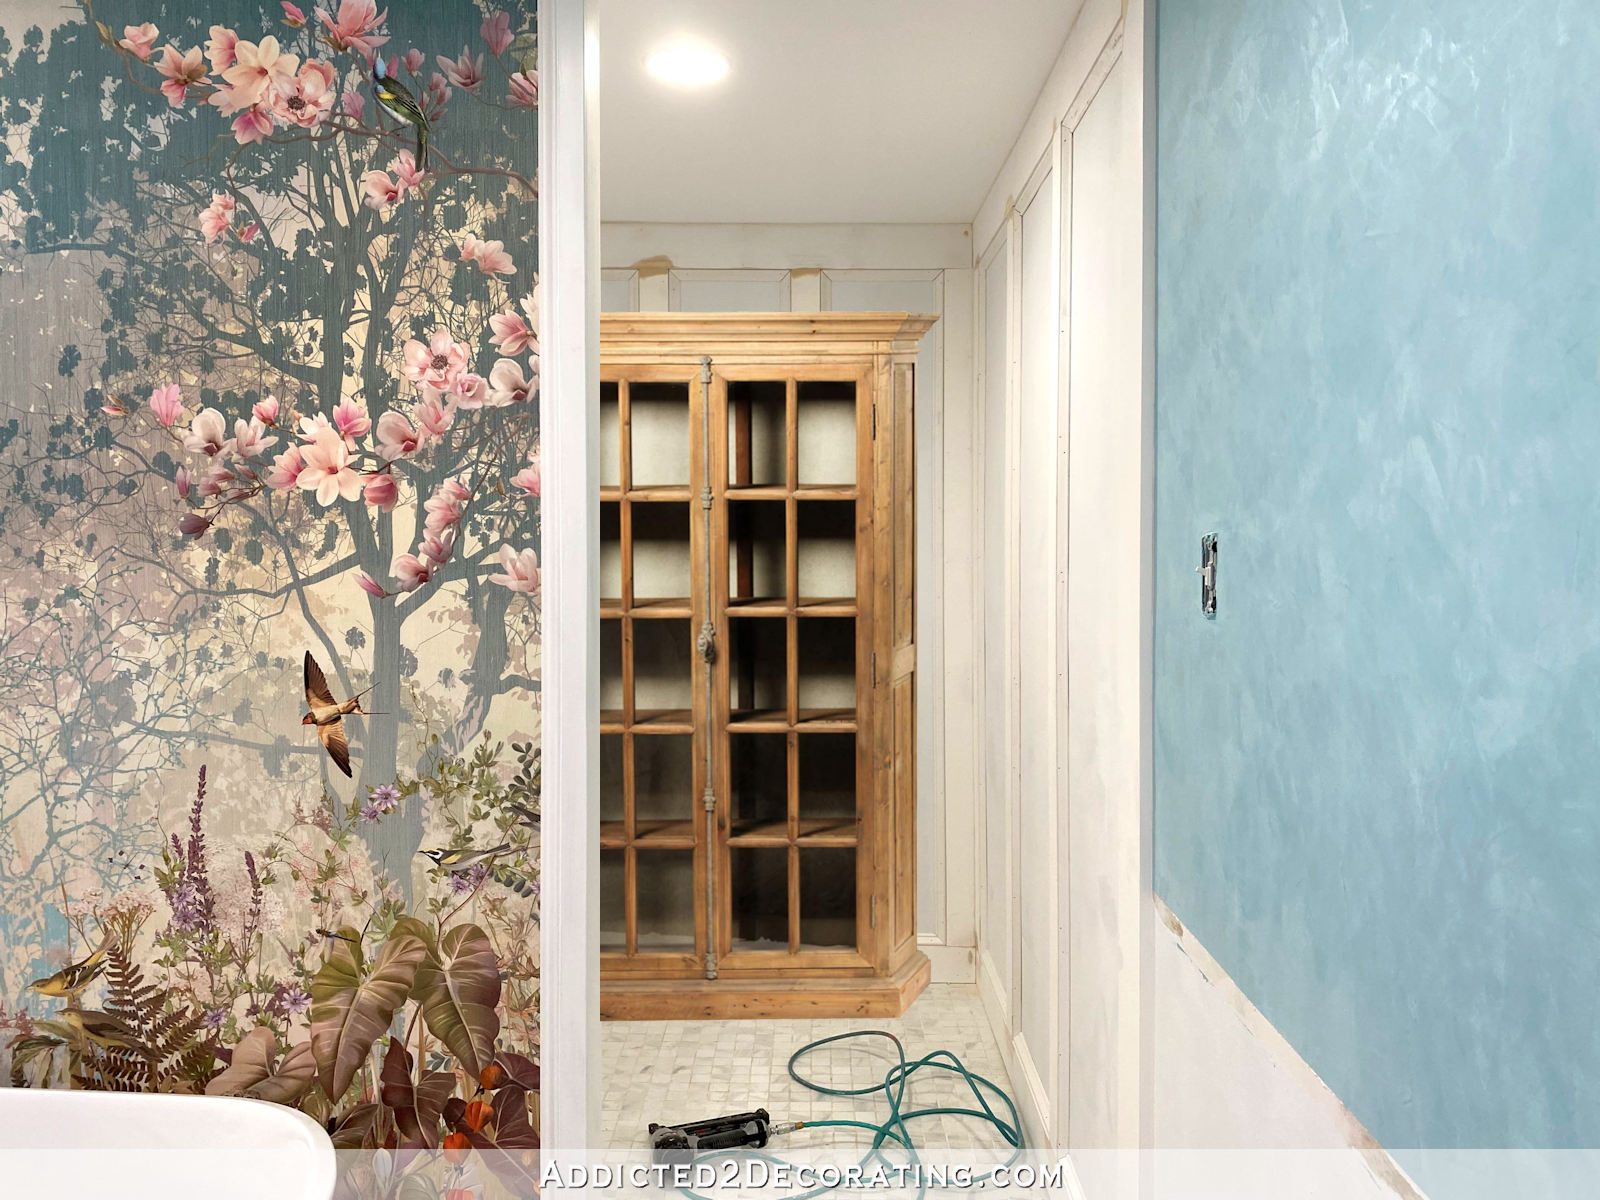
Someone asked me if the cabinet was covering the last column of butterflies. The cabinet does stick out enough to where the front edge of the cabinet is about even with the inside edge of the right vertical frame piece. That might bother some people, but it doesn’t bother me at all. There’s never a time when someone would be so far into the room, and so far on the other side of the cabinet, that that last column of butterflies would be covered up. Since the butterflies will always be viewed from an angle, they’ll always be completely visible even with the small overlap.
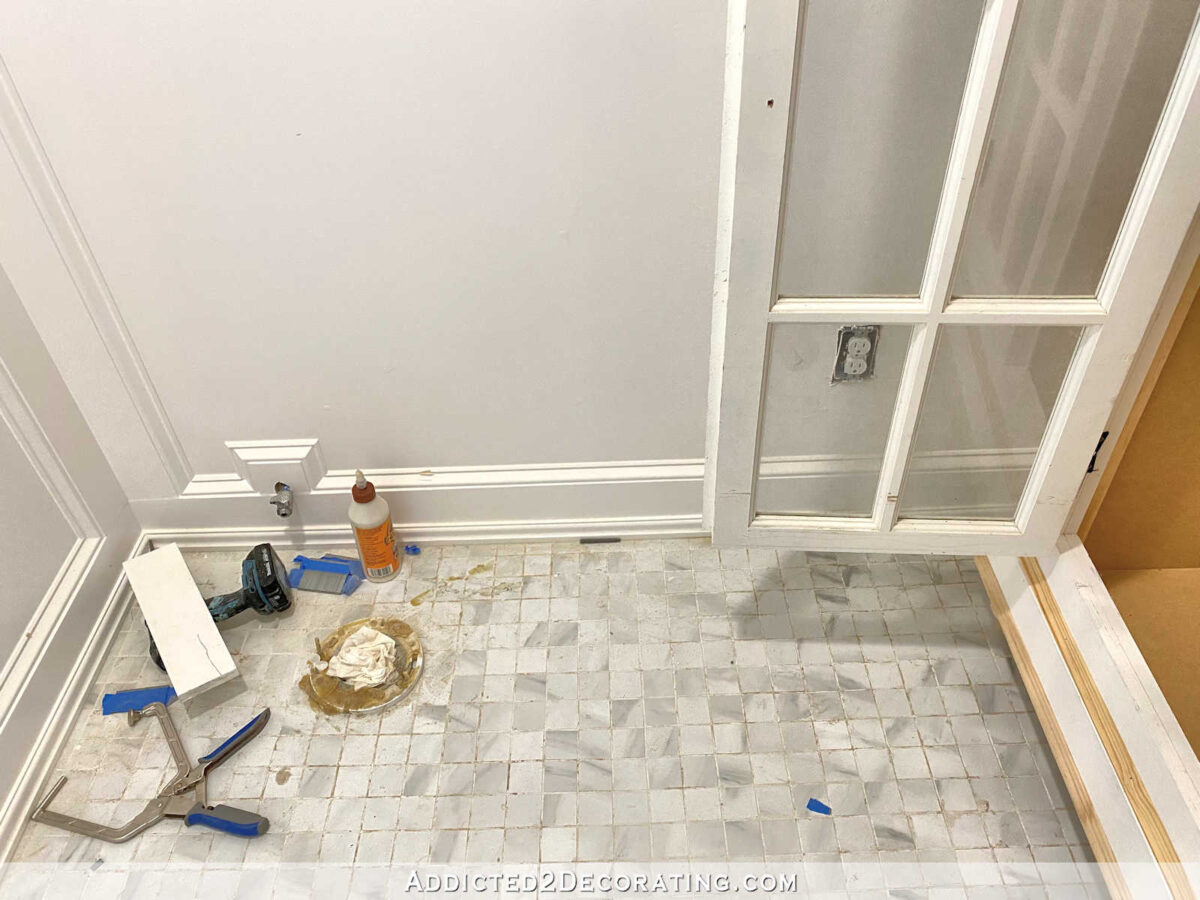
And then I had a person express concern that the door wouldn’t open all the way once the toilet is installed. There’s actually plenty of room. You can see where the toilet will go (don’t worry…that’s a brand new wax ring in an area where a toilet has never been used, so it’s really not as gross as it looks 😀 ), and when the door is open, there will still be about 13 inches between the edge of the door and the toilet. So there’s plenty of room.
So here’s what the cabinet looks like now that it’s all trimmed out.
My goal is to get it finished this weekend so that I can show you the final cabinet on Monday, but I make no promises. 🙂 I’m going to do my best, though.
Note: You can find the final post about this project here: DIY: Storage Cabinet With French Doors (Finished!).
This project was part of our master bathroom project. You can see the finished master bathroom here.

Addicted 2 Decorating is where I share my DIY and decorating journey as I remodel and decorate the 1948 fixer upper that my husband, Matt, and I bought in 2013. Matt has M.S. and is unable to do physical work, so I do the majority of the work on the house by myself. You can learn more about me here.

I love your use of trim!! Thank you for your detailed posts!
That looks super! And I feel quite certain that if I were to attempt something similar, I could do it. Your tutorials and accompanying photos are always spot on! Easy to follow and very clear. Great job!
Looks great!
I’m so glad you put feet on the cabinet, it made all the difference!
It’s looking so good. I’m almost to this point on a Murphy bed, cabinet/shelving wall. I bought and used a Kreg crown molding jig finally and love it! No waste at all. How did I ever live without it? I used to say there were two things that husband and I couldn’t work on together without killing or divorcing each other. Crown molding and wallpaper hanging. Now I can take crown off that list! Ha
It’s beautiful! Your attention to detail is just incredible! Are you going to be frosting the glass doors to hide regular bathroom “clutter” or are you planning on using baskets etc?
I never would have thought of going through the inside bottom to attach those feet. So talented you are.
I generaly love a nice built in. But this free standing cabinet is just what this space called for. As per usual you nailed it! No, pun intended…
Sheila F.
This is just lovely!
I love this!!
Your best is good enough for me. Well done, again!
Absolutely beautiful. I am curious on how you are going to get this painted. Such a small space.
Amazing!! Your talent is endless! I Love it!
That is going to be beautiful!!! All white, right? 🙂
Sensational!! I wish I had your skill and endeavour, my home would look exactly as I envisage it could be.
Well done 👏👏
you are such a wiz at these builds!! I think you should feel like a peacock and be ready to build your vanities after this. Beautiful work!! I do think those pretty butterflies are a bit squished there by the look on the pic. Maybe not in real tho?
I came to check the comments to see if anyone else thought that there are too many butterflies now.
Wow, I thought the cabinet was beautiful before, but you have taken it to a whole new level of gorgeous with all the trim work and the feet. You have such incredible vision Kristi. Fantastic job!
this project has been my favorite! I can’t tell u why, maybe your explaining so i can understand? Anyway, Thanks
Denise
You are amazing. That is all.
Kristi you always amaze me. You take what would seem a simple cabinet and make it into a beautiful piece of furniture. It will be a beauty when you are complete. I never can wait to see the finished product of y0ur workmanship….workwomanship??? You are a wonder.
I love it. Fabulous build. Can’t wait to see it painted and what color you chose.
Smart lady!
Excellent as always!
You never cease to amaze!