On Hold, With A Major Change Of Plan
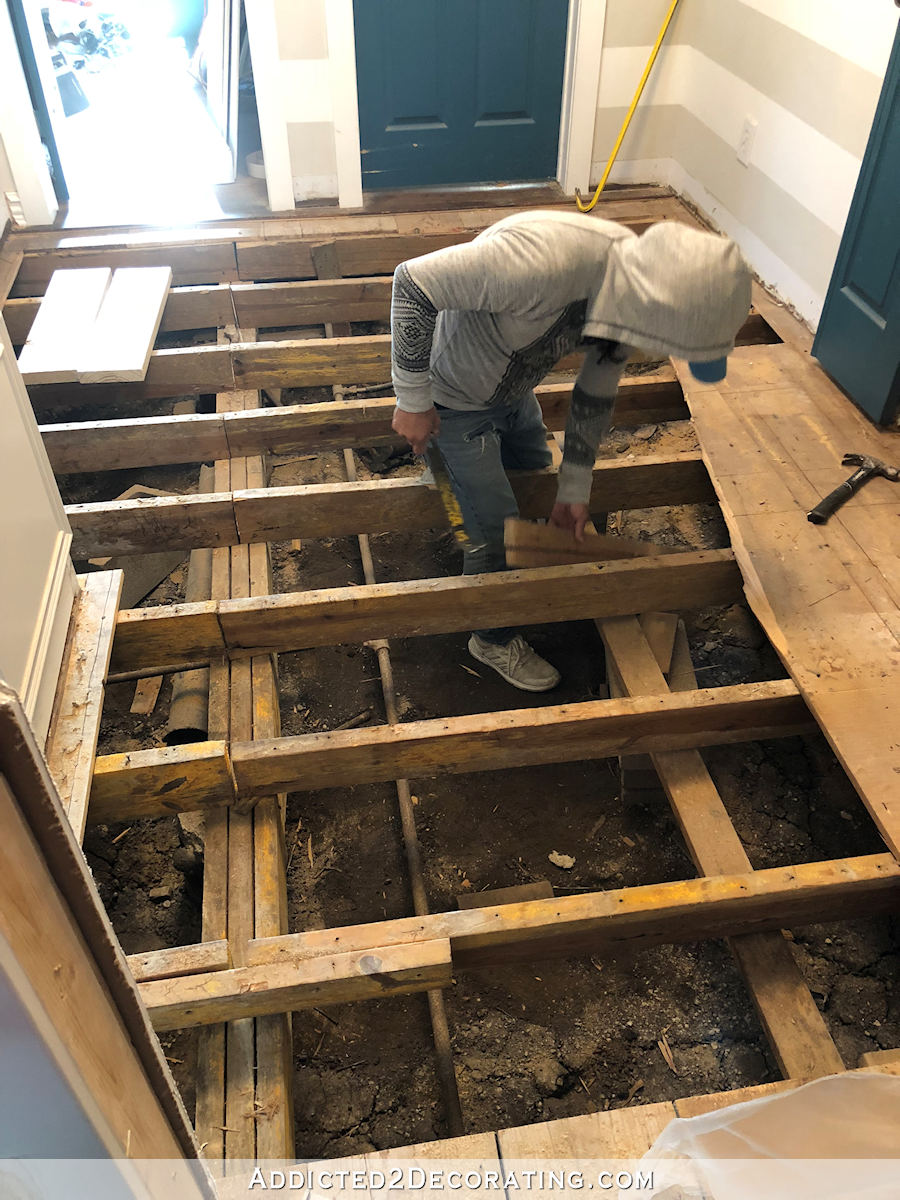
As I write this, the subfloor is being taken up in the hallway. And again, it’s both exciting and heartbreaking.

I’m just glad to see progress, and I’ll be very glad to have this Phase 1 remodel of this part of the house finished and behind us. A finished and comfortable guest bedroom (that we’ll use as our bedroom for a while) and a usable home gym are in our near future.
In other news, the bathroom is on hold. Ever since we learned that the cost would be around $30-35,000, Matt has had some serious doubts about us biting off that project right on the heels of the bedroom/hallway remodel that’s already costing almost $20,000. I begged and pleaded with him to go ahead with it, but in the end, Matt is in charge of our budget. So if he truly feels uncomfortable with it right now, then I need to listen to him.
But I’m so disappointed, y’all. So unbelievably disappointed.
It’s still going to happen, of course, but it just won’t be a part of this current remodel. And when it does happen, I’m going to take on far more of the project myself than I had originally planned. In fact, I may tackle everything myself except for the plumbing.
I don’t do plumbing. 🙂
And drywall. I don’t do that either.
But everything else seems pretty doable to me.
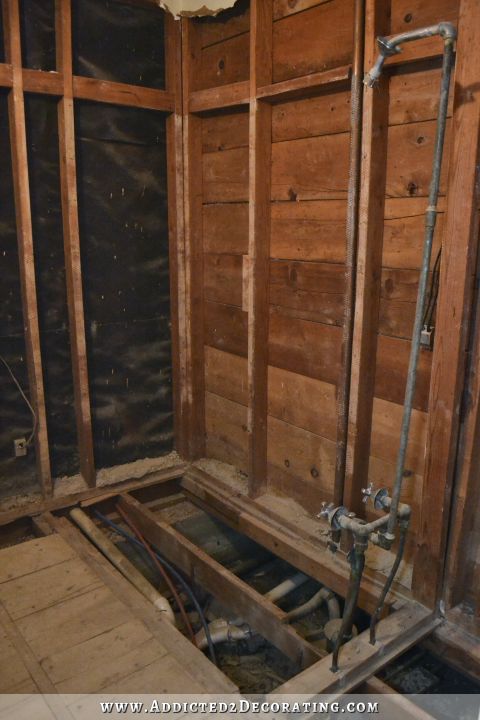
- Removing old flooring, including the subfloor? I’ve done that. Remember when my hallway bathroom looked like this?
- Removing old drywall and shiplap? I’ve done that. At one time, my living room looked like this…

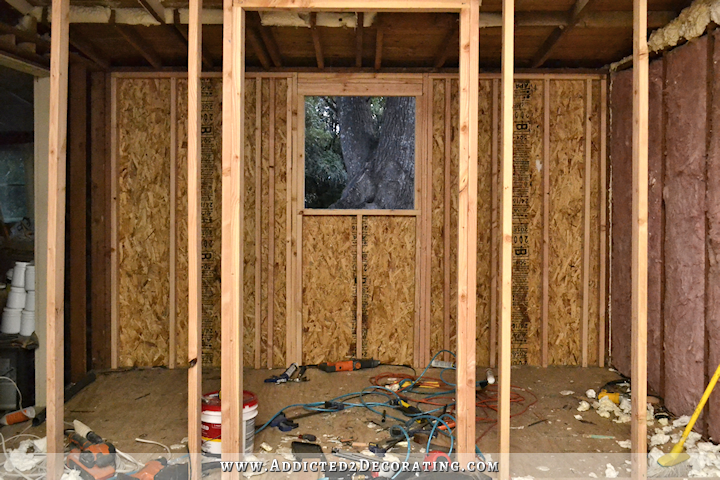
- Building new walls? I’ve done that, too. At one time, my breakfast room and pantry were one big room, and I added a wall to separate the two areas.
- Electrical? Yep, I can do that.
- Building a vanity? Well, I’ve never built one as big as I’ll need, but I’ve built a console table, a small vanity, and a pantry full of cabinets. I think I can manage.
- Installing concrete board and tile? I’ve done that several times.
You get the point. There’s really nothing in that bathroom that I haven’t done before, with one HUGE exception — building a shower pan. And this won’t be just any shower pan. In other words, it’s not like I can just buy a shower pan, drop it into the shower, and be done. Since Matt will need a curbless shower, and we’ll still need the slope to the drain, it will take some construction, materials, and processes that are unfamiliar to me.
But after searching all over for options, I’ve decided that the Schluter Kerdi system for curbless showers. I have watched this video about how to recess a subfloor and install the Schluter Kerdi shower pan about five times over this past weekend, and there doesn’t seem to be anything particularly difficult about it.
If any of you have ever done your own recessed subfloor shower pan using a Schluter system or something similar, I’d love to hear about it! A shower pan is one of those things that, if you get it wrong, can wreak havoc on the actual structural integrity of your house, so it’s something I don’t want to take on lightly. But at the same time, it just doesn’t look that difficult to me. And I think if I take my time, tackle each step thoroughly, I could get it done and save thousands of dollars just by doing that one thing myself.
The thought of turning this bathroom into a mostly-DIY project was dreadful and overwhelming to me initially. But the more I think about it, the more I’m actually getting excited about it. It’s been a while since I took on a big remodel myself. I’ve gotten so used to hiring out things lately that I’ve kind of gotten spoiled. 😀 But the more I think about it, the more I’m actually looking forward to challenging myself.
So 2020 is looking to be a very busy year for me. I still need to build cabinets in my studio and get that finished. I’ll need to build closets in the guest bedroom and get that room finished so that Matt and I can move in there. I’ll need to install the flooring in the hallway and get it finished. And now, it looks like I’ll be tackling a master bathroom remodel. And at some point along the way, I want to enclose the carport and turn it into a workshop. Exciting times ahead! 😀
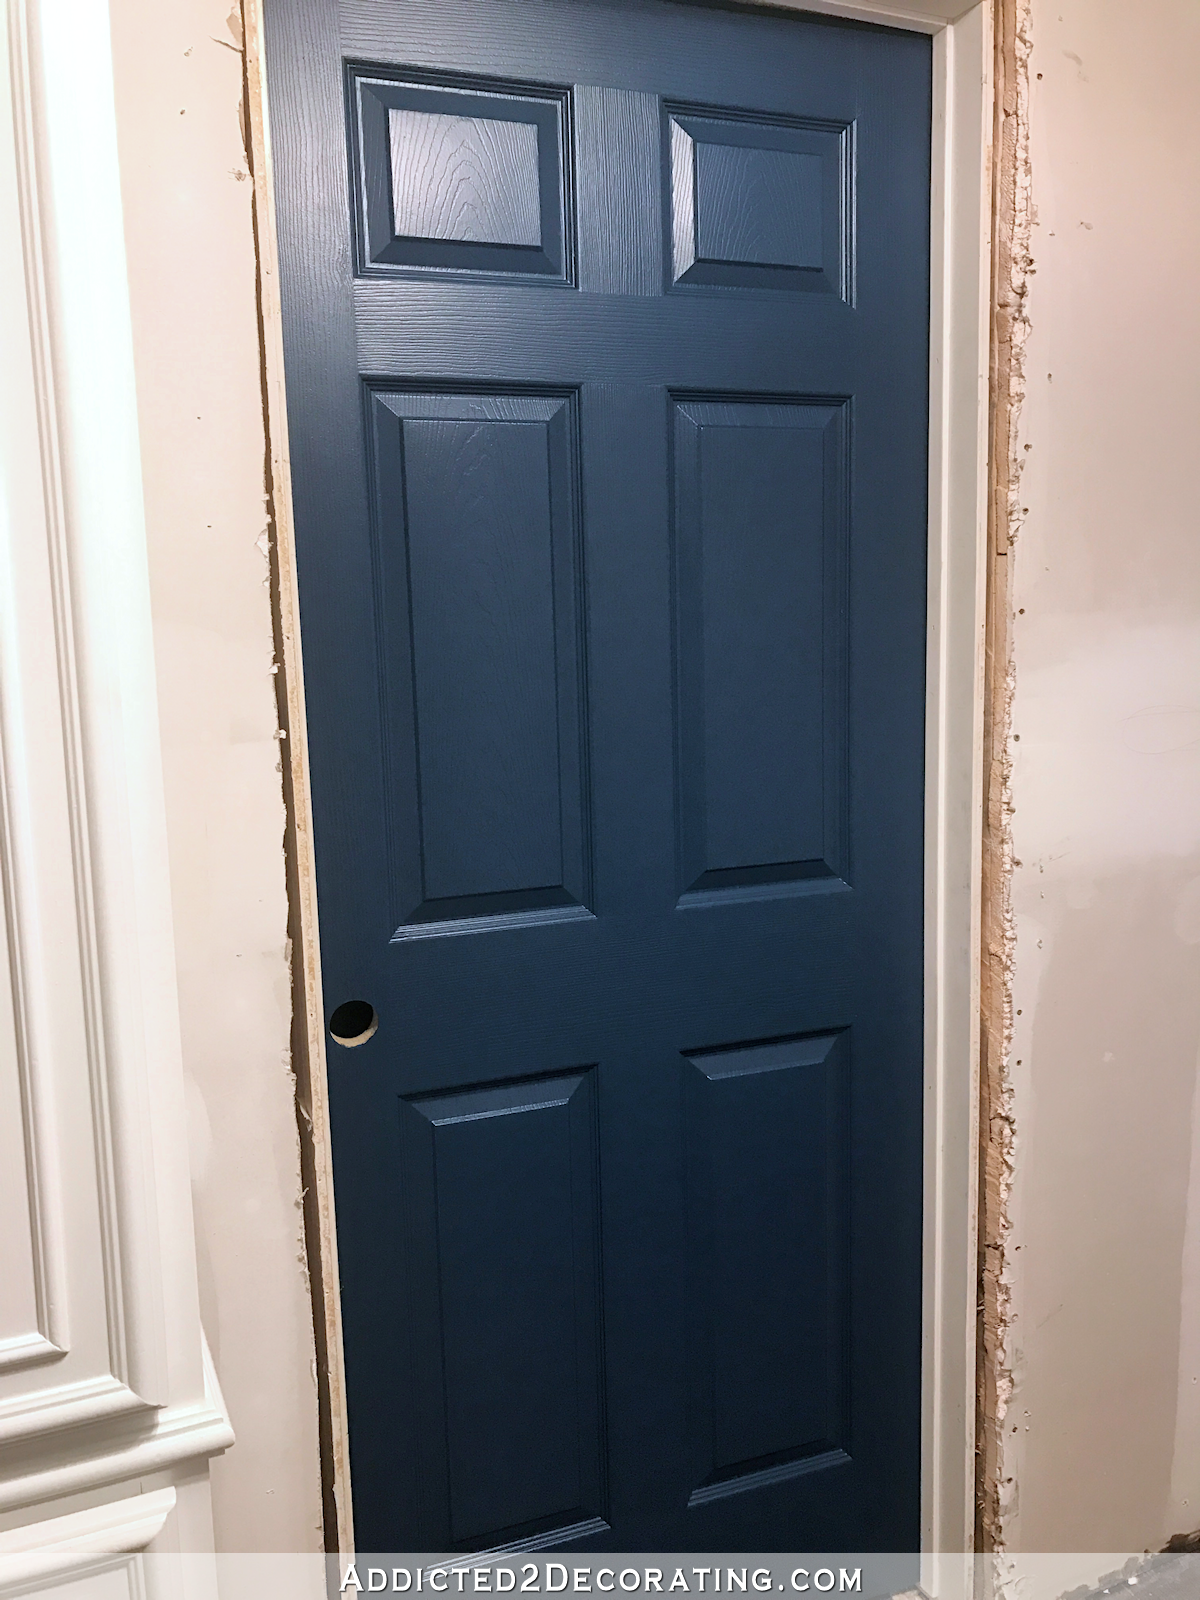
And in case you’re wondering, now my hallway looks like this…
And the coffee table I’m building for the living room looks like this…
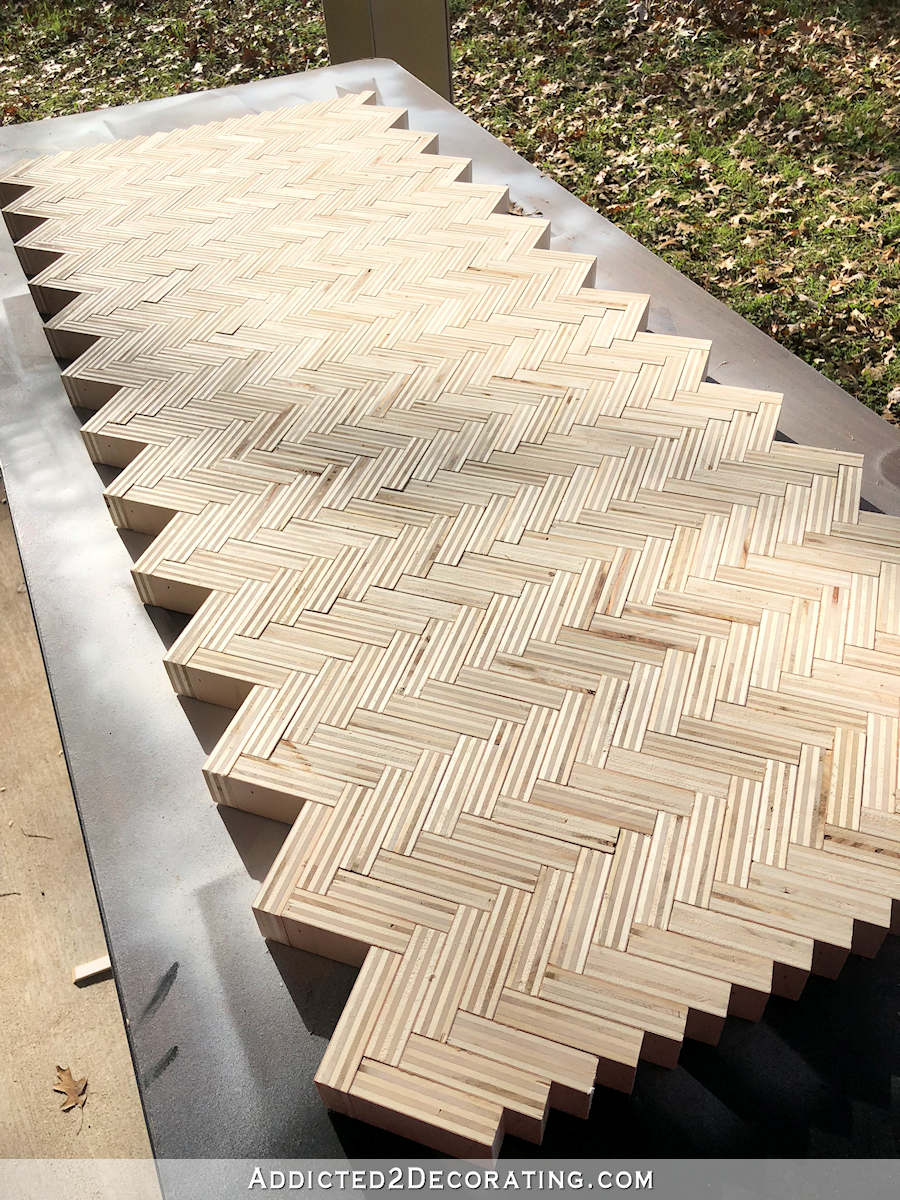
Assembling that top took way longer than I had anticipated, but the hard part is done now. Finishing the top and building the base shouldn’t take long, so I’m about 98.6% sure I can get this done this week.

Addicted 2 Decorating is where I share my DIY and decorating journey as I remodel and decorate the 1948 fixer upper that my husband, Matt, and I bought in 2013. Matt has M.S. and is unable to do physical work, so I do the majority of the work on the house by myself. You can learn more about me here.

I love following along on your construction journeys! I think more people would enjoy watching as it happens and may even drive more people to follow. I find my self going to instagram multiple times per day to find out what @chrislovesjulia is doing that day.
I am now thinking about building my own plywood table now!
We used the Schluter system when we redid our master bath.Turned a tub into a walk-in shower but did use a small curb. Used it on the walls as well so we are totally waterproof all over. Love it.
98.6% sure……Kristi, only you plan to the tenth of a percentage!! Love this blog😊
While I would not tackle all that you are going to be doing, I know you can definitely do it. Out of curiosity though, where are you and Matt currently sleeping?? Doesn’t look like bedrooms are accessible for either of you. 😲
We’re sleeping in the breakfast room for now. 😄
Breakfast in bed!!!!
I’v used Schluter Ditra on the floor over wood sub floor and leveler for water proofing and as a movement barrier, and Schluter Kerdi up the walls for two showers. Both went well. I followed all the directions carefully and it wasn’t hard. I used shower pans, but a curbless system should be fine with the extra time to make it perfect which you seem to do well. I only started the project when my (ex-)plumber set the shower pan off kilter (broken level?) and they tried to say that it wasn’t important since the shower door people could work wonders with spaces that were not level! I had them rip it out and started over. I loved the spacer system I used that snugged the tiles at the corners to one another. That was really important since I used those wood look long tiles that can easily get out of whack. My biggest challenge was the niches. Planning those ahead and marking the tile edges is key.
You can definitely do all of that work! Will be exciting to watch! Good luck!
If you haven’t already, I highly recommend checking out the tile forum at johnbridge.com. There are pros that are incredibly helpful in answering questions from DIYers through every step of their project. I learned so much from that site which has helped me know the right questions to ask of my contractor/tile installer to insure the project is done how it should be.
“And I think if I take my time, tackle each step thoroughly, I could get it done and save thousands of dollars just by doing that one thing myself.” !!!!!!! YES!!!!!
Just wondering why they had to tear up the floor in the hallway?
Over the last couple of years, the hallway hardwood floor has been warping and developing some serious hills and valleys. It got even worse the day that we had the volcano from the toilet in the hallway bathroom that covered the floor in the bathroom and hallway. So before they build the new wall in the hallway, I wanted the floor replaced. And while they’re at it, I also wanted the original 1″ x 10″ subfloor replaced with a plywood subfloor with a vapor barrier between the subfloor and hardwood flooring. The original floor didn’t have a barrier between the two layers.
Are you putting black plastic down on the ground under the entire house as a moisture barrier when you finish?
I’ve never heard of that being done. I hadn’t planned on it.
Crawl space vapor barriers are a good idea to keep moisture from rising from damp ground, and can reduce radon. I generally spec 6 mil as a minimum – doesn’t have to be black.
Don’t the local municipalities require you to pull a permit for remodeling of this kind? And if so, that’s when you learn about things like vapor barriers and adhering to building codes that effect your project.
Vapor barriers on the ground of a crawl space under a house aren’t required by code. Ventilation, yes. Vapor barrier, no. I asked my contractor about it, and he’s been in business for decades, and he said he’s never seen a vapor barrier used, and has never used a vapor barrier in a crawl space.
You want to do it *before* you finish, if you do it. My parents had a vapor barrier installed under their ranch-style home’s crawlspace. As Sarah stated it’s a good idea for reducing creeping moisture and radon but it can also deter wildlife from nesting under the house which was is an issue in my parent’s area with rattlesnakes, and various rodents and other wildlife nesting in crawlspaces, and when they purchased the home they had to deal with evicting some squatters from under the house. Recently a utility worker needed to access the crawlspace while we were visiting. My husband said when the utility worker emerged he shook his head in awe saying, “That is the most pristine crawlspace I have every seen.” We both laughed knowing that my parents are the most fastidious homeowners ever to walk the face of the earth, and are constantly doing insane things like checking the crawlspace is still wildlife-free, making sure the inside of the gutters are painted and sealed or whatever project my dad gets in his head or my mom decides she wants done (new doors, etc.) My dad has never been busier than when he retired 20 years ago. Whomever buys their property after them will be getting a PERFECTLY maintained home not to mention a constantly redecorated one. 😉
Girl you can do it! Your design is very simple, and there is nothing that you haven’t done, except the shower floor, well, and maybe, window placement/replacement. I can bet you will do it even better than a contractor! Easy for me to say, right! LOL!
Use portable wardrobe till you have time/energy to devote to building them.
Prioritize everything that is going to need to be done, and bite off small chunks every week till you get there. Saving big $ if you do most of it! [Leaves extra for high end finishes]
We are along for the ride, no matter what.
I absolutely love that “change of plans” is part of your vocabulary without it sounding like the sky is falling! It is one of the reasons I have continued to follow you because you are such a “can do” person. I admire your stamina and being so real about what it takes to start, execute, fix, and finish a task. Your home is wonderful now but will be so much more satisfying for you when you have done all that you want to do! I’m cheering you on from my computer here in California Kristi!
This excites me!
Are you concerned that they can’t get under the hallway cabinet? Are you concerned that the guest bedroom and home gym (and music room and living room) don’t have a vapor barrier underneath? Just curious. I know the toilet volcano definitely caused problems.
None of that concerns me. I haven’t seen any issues with any of the other flooring. It’s only the hallway that was giving me trouble.
Ooohh, I’m afraid the closest I can getcha is my mom almost built a shower pan years ago, but it was a standard one, not a curbless, and she ended up going with a prefab for cost reasons. So nothing I can say that isn’t straight out of a handbook. 🙂
I’m shocked you don’t do plumbing, honestly. The house I grew up in didn’t have plumbing when we moved in, so my mom and her twin sister (no men around!) did ALL the plumbing themselves. I find electrical way more intimidating than plumbing because of that! Is it because of needing to get permits?? (We were out in the country, so no permits required)
And maybe I’m just weird, but I love drywalling. 🙂 I look forward to the day when I built my bathroom from scratch… drywall and all. I put myself to sleep with volumes of The Complete Guide to Home x. 😛
Anyway, very excited to see you tackle this, Kristi!! You can definitely do it. You’re right–they really don’t look that hard to build, and you’re more than capable. The rest is all stuff you’ve done before. And I know I mostly tune in to DIY bloggers to see them DIY this big stuff, so looks like you’ve made my 2020 very exciting as well. 🙂
I love me a vapor barrier! Worth the hassle to know you don’t have to worry about something happening underneath. I never use the word, “mold.” shhh… we just finished kitchen renovation which somehow traveled to our basement with new flooring and bar cabinets. Worth it in the end.. #hashtagfirstworldprobs laura in CO
I am sorry for you that the bathroom won’t be built for you, but I am excited that we readers might get to follow along if you do the project yourself! You know all of us readers feel as if we are part of your family and are cheering you on!
Just a suggestion when you are working on projects would be to hire a helper perhaps. Speak to your contractor friend about someone who may be available to assist you for when it would be better to have two people working instead of just yourself.
Kristi, I too am surprised you aren’t doing the plumbing. PVC is the greatest thing since sliced bread! I learned to use it back in the 90s. What’s driving me crazy right now is that I don’t have a kitchen sink but I am still running the dishwasher! My SIL and g-son removed my sink & disposed because I have to replace the whole floor due to all the old plbg leaking. I went to Lowe’s and started building my drain line all the way out from the wall and up to the point it would attach to the sink. The guy in that dept at Lowe’s didn’t have a clue what I was talking about when I called pieces by their proper name! He had a real problem when I asked for 3/8 brass compression fittings for the water lines. Told me I knew more about it than he did! Plbg is pretty basic. I want to remove all the galvanized pipe from ’73 and go to PVC. Need to look at Pex too, Anyway, I have water to the ice maker and water to the DW. Going to wait until 2020 to remove the dead cabinet and start over. Then new countertops! Yipee! Once the kitchen is functional in 2020, I’ll start on the new lighting in the family room/sewing & embroidery studio now that I am a widow.
You can do anything you want to with this remodel. Consider getting someone to set the shower pan and drain, then do the rest yourself! BTW, I don’t do drywall either unless it’s a patch.
https://www.kbrs.com/products/the-wedge
I used this KRBS shower pan system in my last house. It was much easier to tile this base and trying to slope it myself. (Which was an epic fail.)
It is customizable from the go. Size, drain location, drain choice, and it was very easy for myself to handle and install alone.
I know you will make the best choice for your needs.
I’m kinda sad for you that you are doing the work yourself. But if anyone can do it, you can! I just worry it will take longer since it is just you alone doing all that work. It would be really nice if the Schluter Kerdi people could help you out by sending you a pro to install the pan for you, and show you some pointers. Couldn’t hurt to ask! Or even just walk you through it so you can do it yourself.
Out of curiosity – is it cost prohibitive to hire out the shower floor? I have no idea because I’ve never redone a shower so I don’t know the average price of that line item.
I don’t know the exact cost, but it would be one of the most expensive items in the bathroom.
We turned our half bath in our walk out basement into a 3/4 bath (moving the plumbing around and adding a shower). My husband did it himself using the Schluter Kerbi system. He liked it so much that when we started renovating his parents 1938 bungalow (that we plan to move into eventually because it is much better for mobility issues than our house of many stairs), and we turned a tiny hall bath into a master en-suite bath, he used it again. We also put in a curbless shower. If he can do it, you can do it.
By the way, you inspired me to convince him to make the bungalow as ADA compliant as we can. We plan to die in that house (hopefully not in the near future). While we are tearing out lath and plaster walls to redo the rusty galvanized plumbing and the knob and tube wiring, we are also widening doorways, putting in hardwood floors, replacing faucet handles and door knobs with levers, etc. and while we are at it, The house is being converted to WiFi-operable. We can open the front and garage doors, see who is on the porch and in the yard, turn on and off lights (including the one keeping our new Meyer lemon from freezing), run the sprinklers, etc from our mobile phones. In retrospect, I wish we’d put in some of these things while my father in law was still alive. He died in the house, where he’d been living by himself since my mother in law passed, at the age of 97. It would have been nice to have been able to keep an eye on him from our house an hour away. Thanks for all your great suggestions.
Kristi…..I don’t respond often but whether you know it or not you are my mentor! And damn right you can do it yourself! You have inspired me in many ways and my motto now is “I can do that”. I live out in Santa Rosa, CA where the wildfires destroyed 1000s of homes 2 years ago so now it is impossible to get any reasonable contractors and workers. I’ve built & painted cabinets with you as an inspiration, installed light fixtures, resurfaced a fireplace, tiled floors and I am in the process of ripping up all of the carpet in my house replacing it with Bamboo floors, repainting all of my trim, & installing new baseboards and stair skirts….including up a curved staircase! I’m planning on taking on our bathrooms next year when my daughter leaves for college so can’t wait to follow your journey. I will actually be coming to Waco to tour Baylor over Spring Break so hoping I can possibly meet you?? Keep up the amazing work!
I recently finished my bathroom and did everything myself. The shower pan was STRESS-FUL, but you can do it!! I used these when I poured the pan – https://www.homedepot.com/p/Goof-Proof-Shower-Quick-Pitch-Standard-Shower-Kit-QPK-101/202822185 It made pouring the pan WAY easier than when I poured the pre-slope.
The only Schluter product I used was the trim since my tile didn’t come in bullnose. It was easy to use and looks sharp.
Here’s some before/after pics – https://photos.app.goo.gl/eKQw68Fc6vFsYyDU7
I have restored a 1930’s Historic Bungalow in the Luna park Historic District in Charleston WV. My contractor used the Schuluter Kerdi Shower system for both of my walk-in showers and it is the an excellent way to go. I could send you pics but in my late seventies and I don’t know how to take the pics and put them on this site. I highly recommend this system and it is less costly than some other plans.
Wow, Kristi. Sorry to hear about THAT sort of plan change. You know, I don’t understand what has happened with the costs of building projects. They are absolutely through the roof, and yet everybody who works in the trades still seem to be broke. 20 years ago we built a brick and cedar 2,800 sq. ft. house for around $120K. 8 years ago we built a 1,740 sq. ft. house and it cost near $190K. We’re not talking top of the line finishes, either. I price shopped hard! And today you’re talking about a bathroom -one room- @ $35K. I know remodel is automatically more $$ than new construction, but I just don’t understand the outrageous inflation in home construction costs over the last few years.
BUT. You are so driven and talented, and this project will be brilliant, just as all your others have been. I’ll be cheering you all the way!