Master Bathroom Floor Progress & Trim Decisions
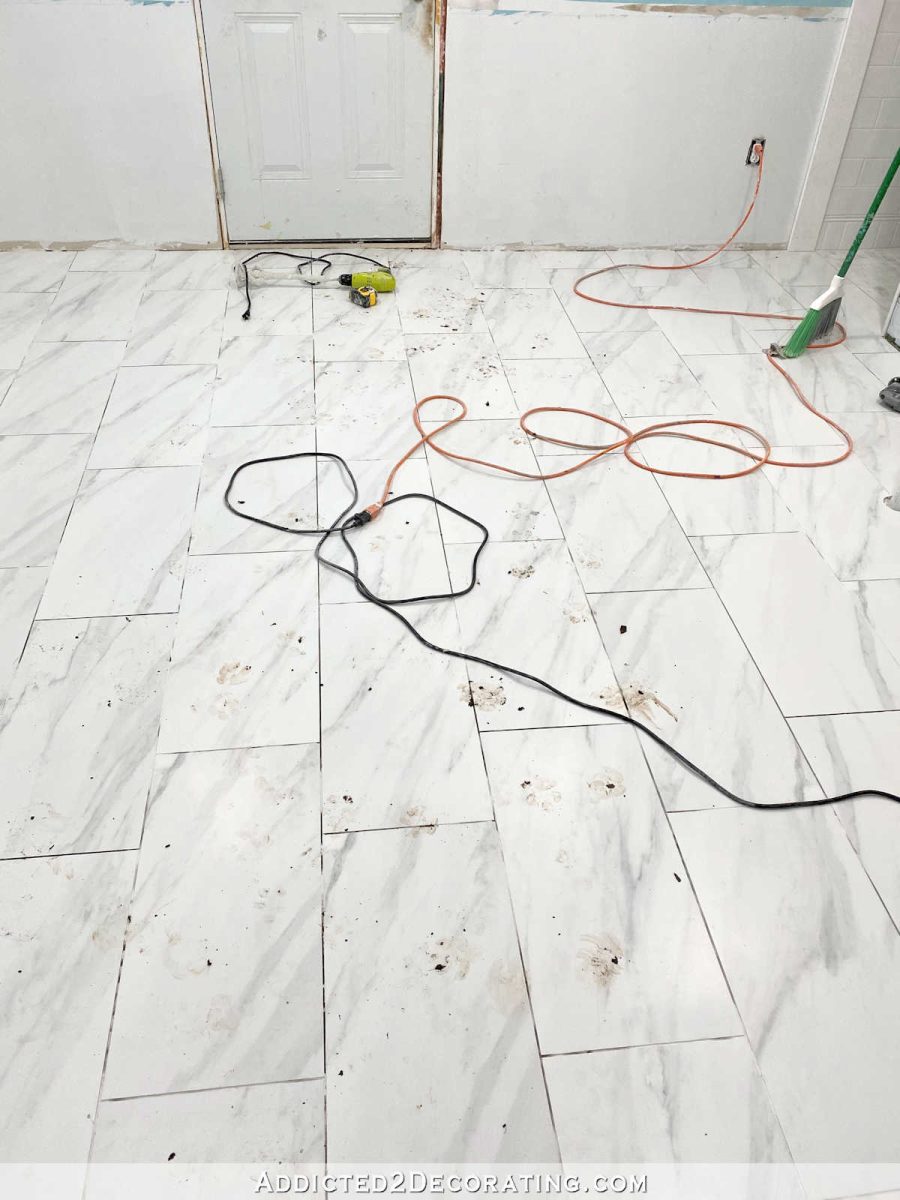
I had hoped to get the floor in the bathroom completely finished yesterday, but I quickly realized that the clean up process (including removing some dried mortar that had squished up into the grout lines) was going to take way longer than I initially thought. So my revised goal was to get the floor (and grout lines) completely prepped and ready so that I could grout as soon as I started working today.
And then this little monster made a mess of things. 😀
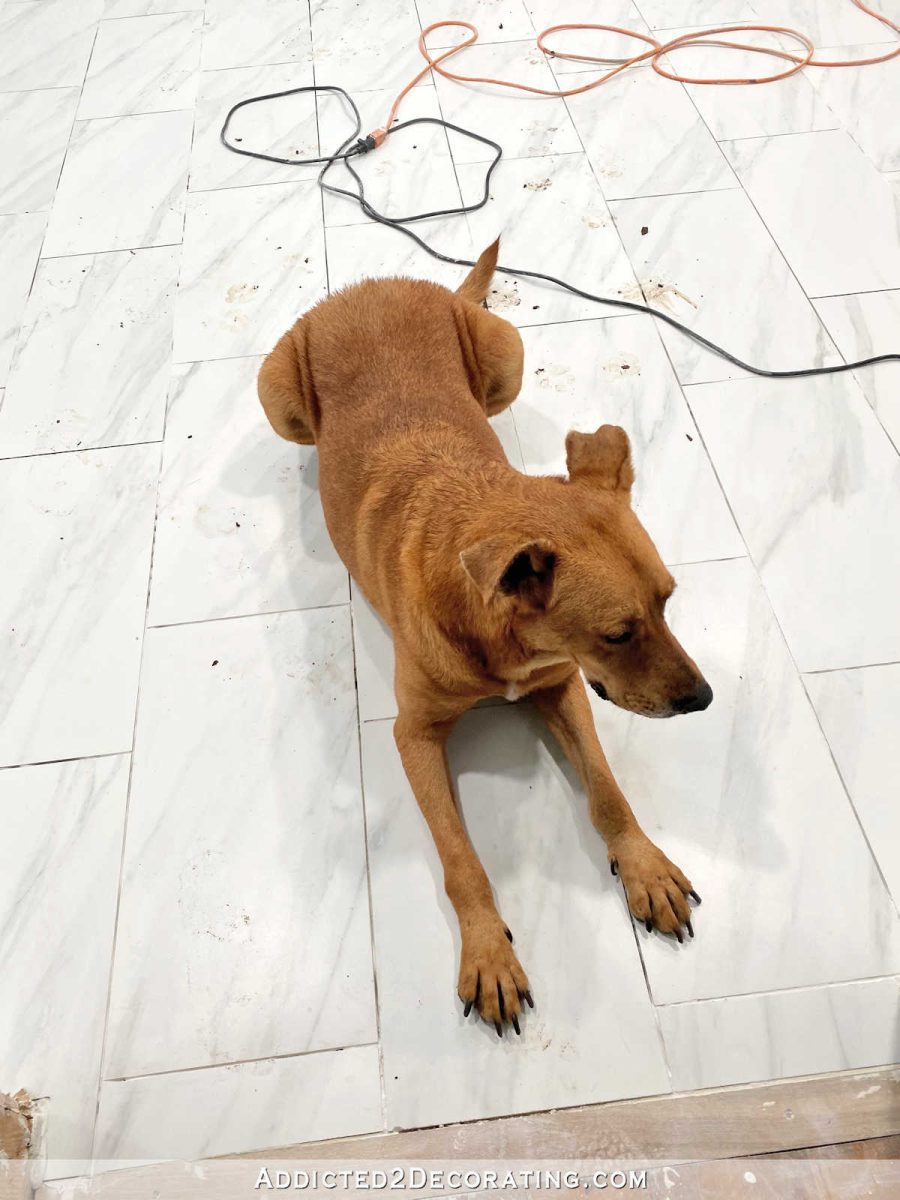
I let him out of the bathroom door into his yard first thing every morning, and I didn’t even realize that it had rained last night. He was out of the door and into the mud before I even realized it. So when I let him back in, he tracked mud all over. Two steps forward, one step back. 😀
I need to figure out how to solve this problem because the area right at the bottom of the steps leading outside lands right on dirt, and it always gets muddy when it rains. So as long as this door opens to the exterior (i.e., until we can actually build our addition and this door leads to our new master bedroom), this is going to be a problem unless I take steps to rectify the situation. I have no idea how to handle it, though. Fake grass around the steps? Small gravel? I’m not sure, but the dirt/mud is going to drive me crazy on my new tile floor, so something needs to be done.
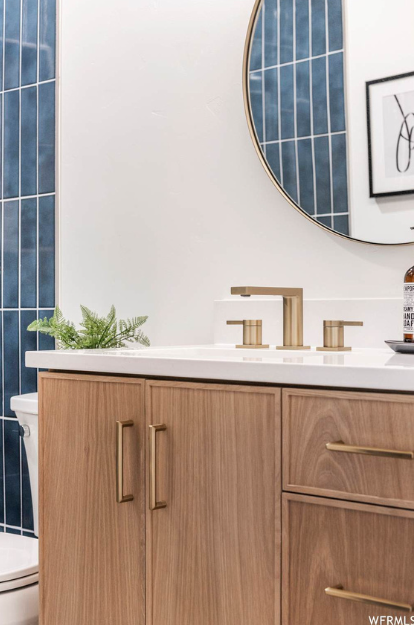
As soon as I get the floor grouted, I’m going to start on the trim. That means that this area around the top of the shower will finally be finished.

The trim decision was a tough one for me. I had no idea how to handle the shower. When I started tiling the shower, I thought maybe I would tile right up to the ceiling and leave it at that. And then the trim around the ceiling (crown molding and any other additions) would stop at this trim board delineating the main part of the bathroom from the shower.
But I couldn’t figure out a way to stop the crown there in a way that I liked. I don’t know if you’ve ever seen a situation where crown molding is stopped on a wall for some reason, and then cut so that it returns to the wall. According to The Joy Of Moldings, it’s called a hanging return.

I realize that there are times when that’s absolutely necessary, but I just don’t like the way it looks. So creating a situation where I have not just two of those (because if it’s on this wall, I’d have to mirror that on the wall going into the toilet area), but I’d actually have four of them because it would necessitate having these hanging returns on the mural wall, also. And I just COULD NOT bring myself to have hanging returns on the crown molding at either end of the main focal wall of the entire bathroom.
The other situation I considered was to create a drop down in the openings that lead to the toilet area and the shower so that the crown molding can be continuous around the main part of the bathroom.
But that just seemed like an afterthought (because it would be), and I really wanted the continuous ceiling throughout all of the areas of the bathroom. So that wouldn’t work, either.
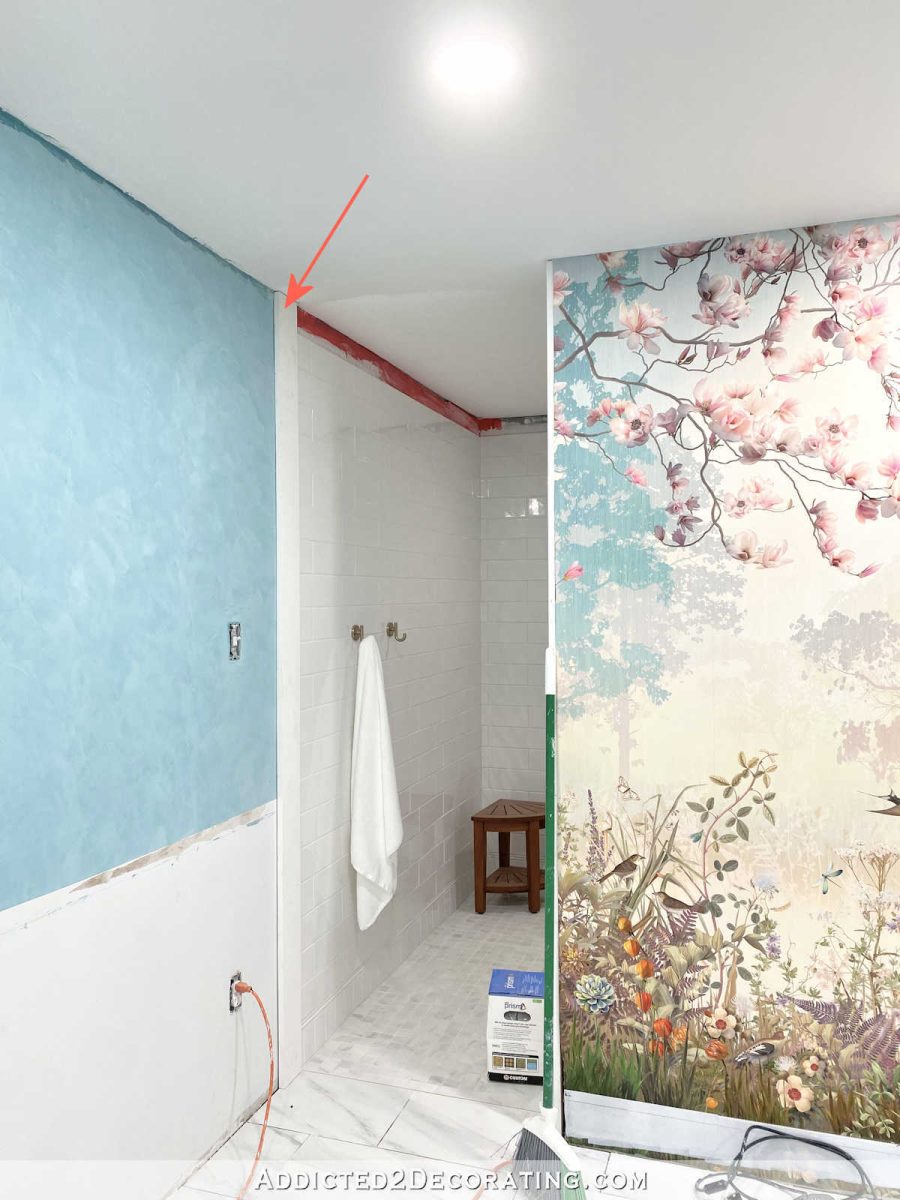
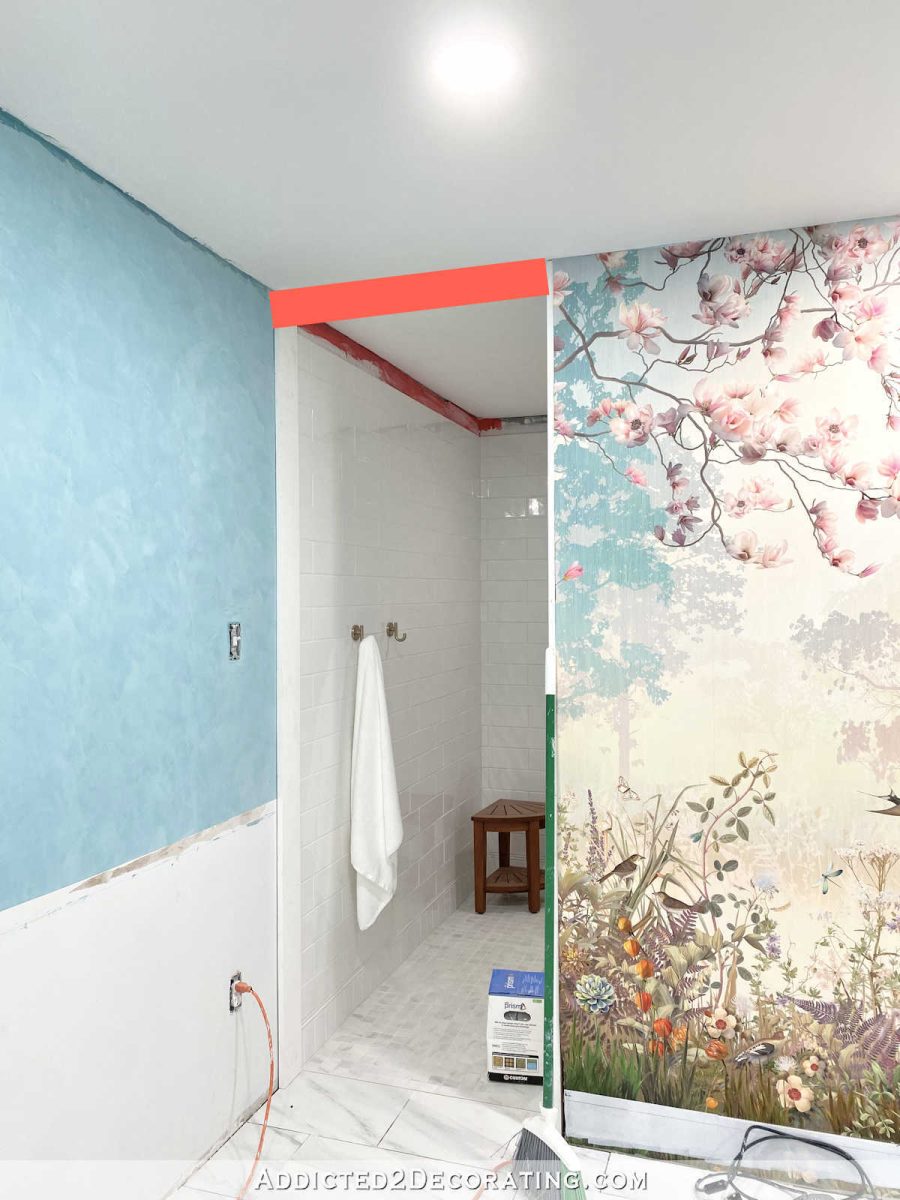
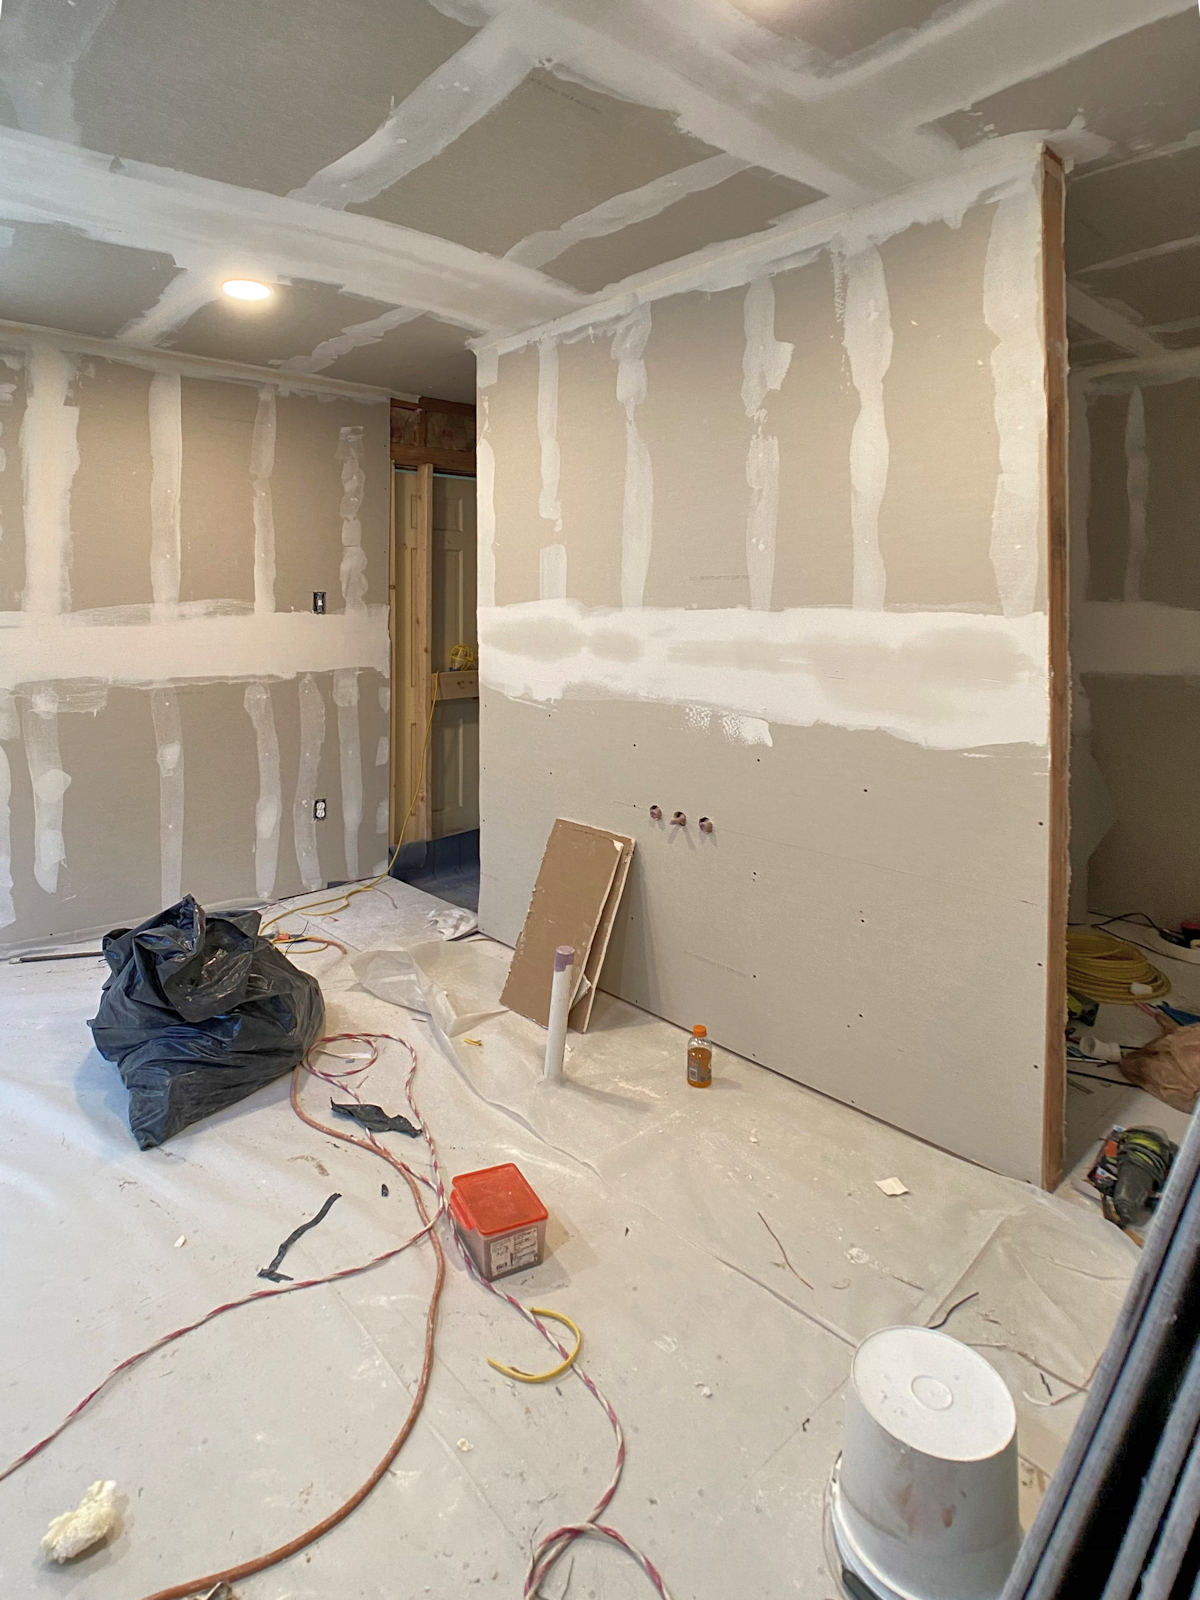
So I’m going to carry the ceiling trim all around the whole bathroom, including into the shower and the toilet area. The one problem that has been keeping me from jumping right in is that the ceiling in the shower has this very noticeable issue. See how it dips down right here?
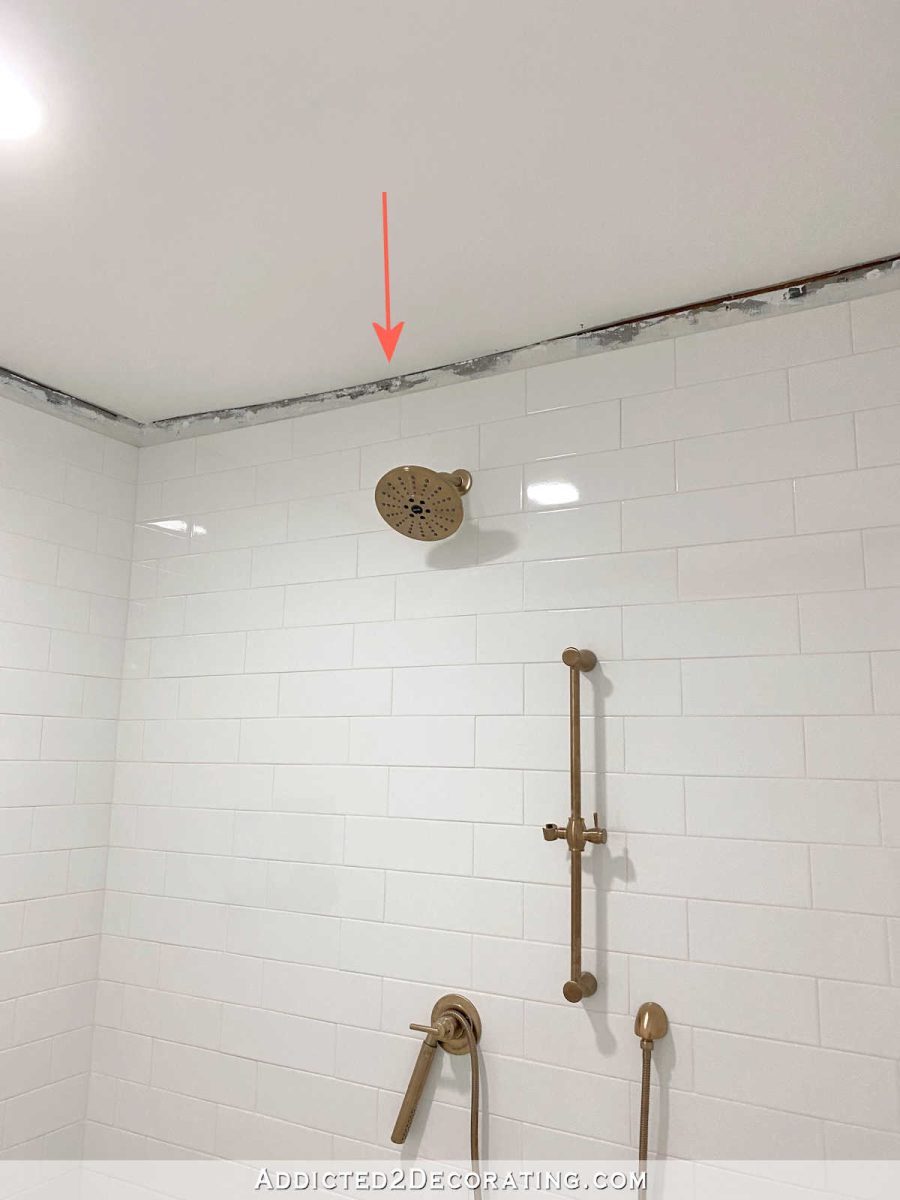
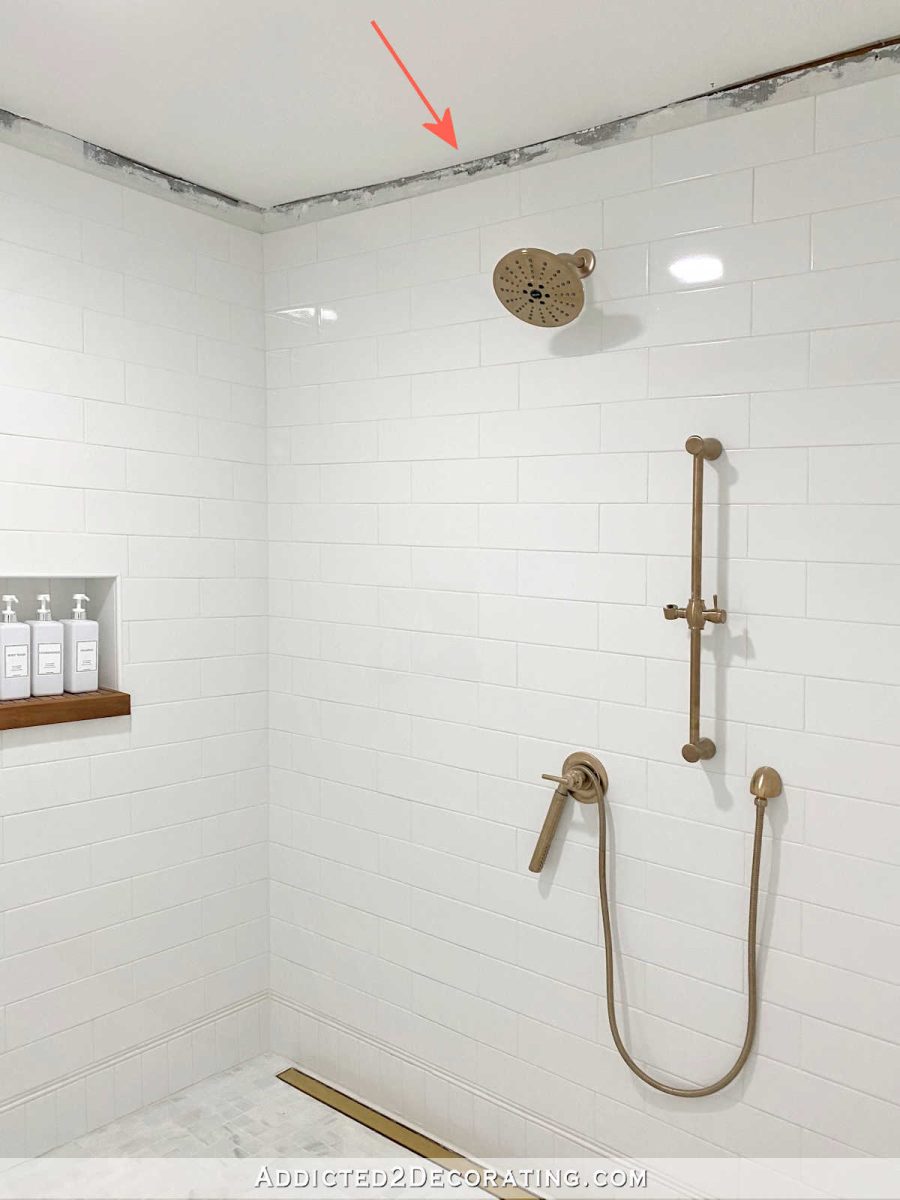
So it has taken me quite some time to figure out how to deal with that since crown molding won’t fit right up against that. Crown doesn’t bend that easily, and even if it did, it would have an obvious dip in the straight line of the crown that would drive me crazy.
But whatever I decide to do in the shower to accommodate that dip has to carry around the entire bathroom, so I had to keep that in mind as well.
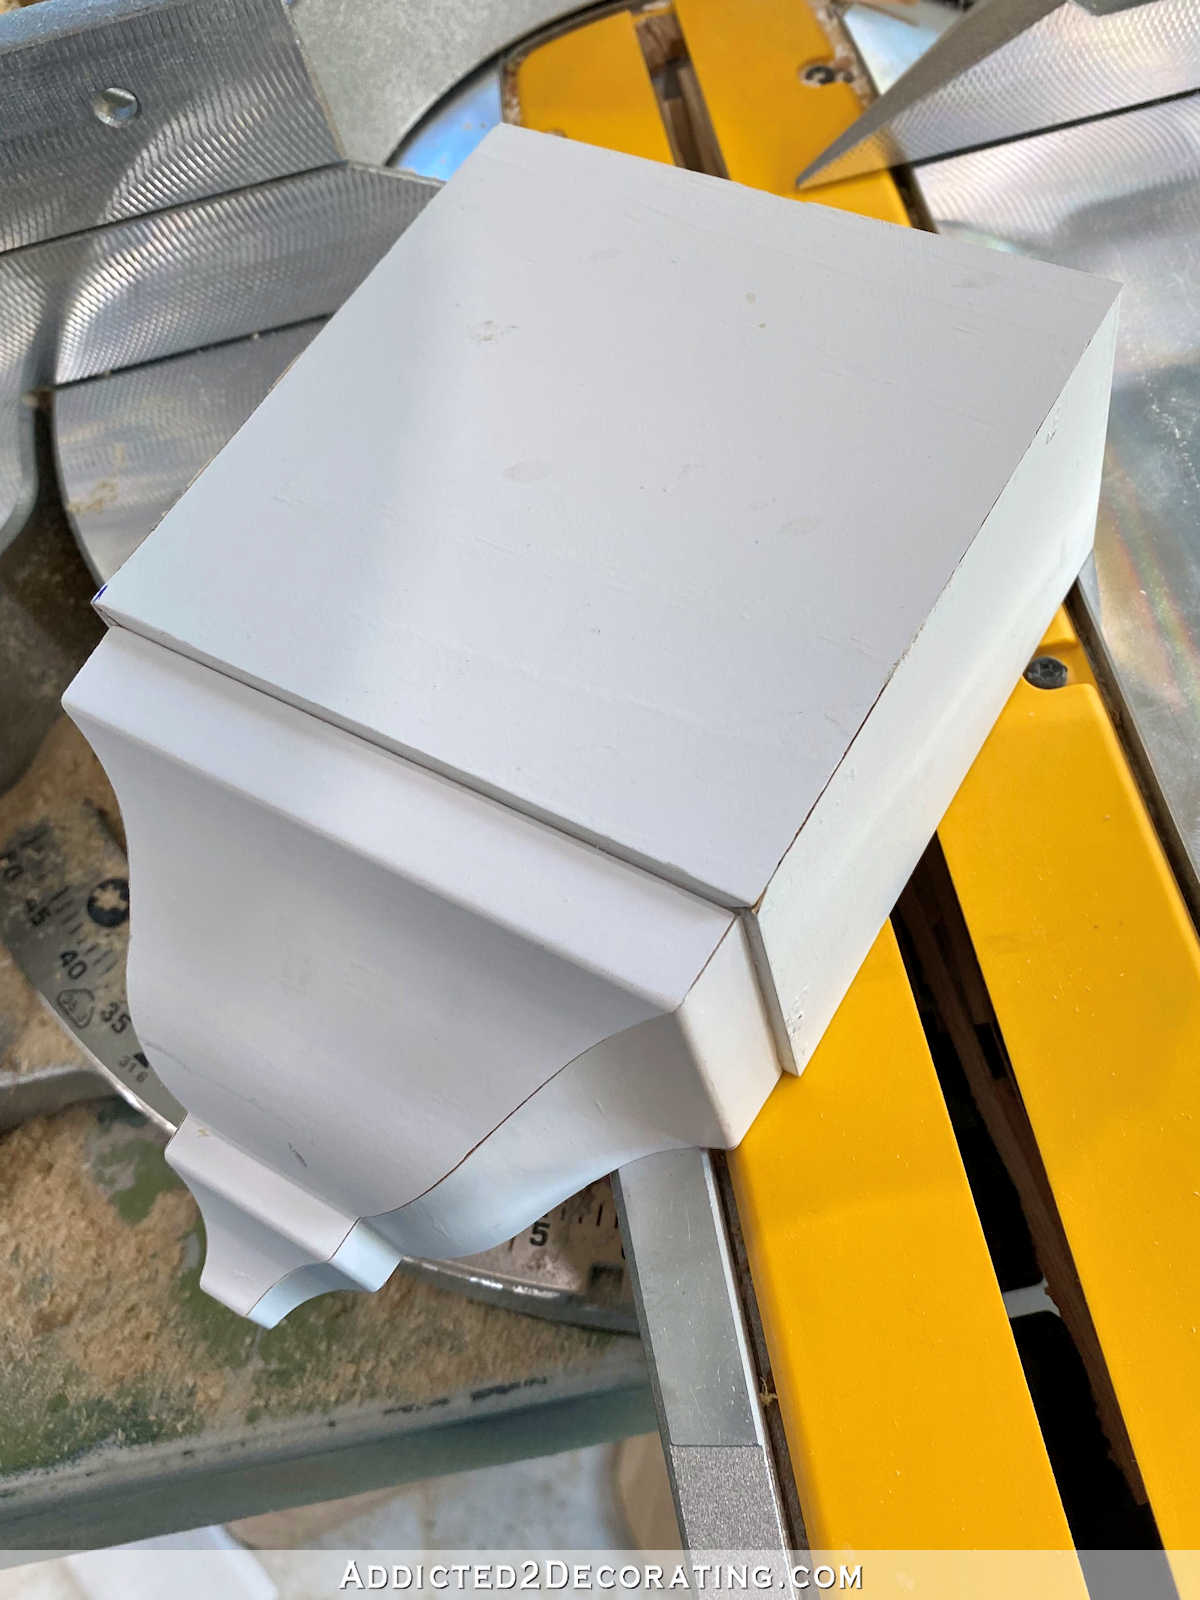
After racking my brain for every possible solution to the problem, I’ve finally made a decision. I’m going to tackle this bathroom ceiling (including the shower and toilet area) in a very similar way that I did in the music room. I won’t be doing the slats on the ceiling. I’m just talking about the perimeter of the ceiling. In the music room, I attached strips of MDF that are about 12-14 inches wide around the perimeter…
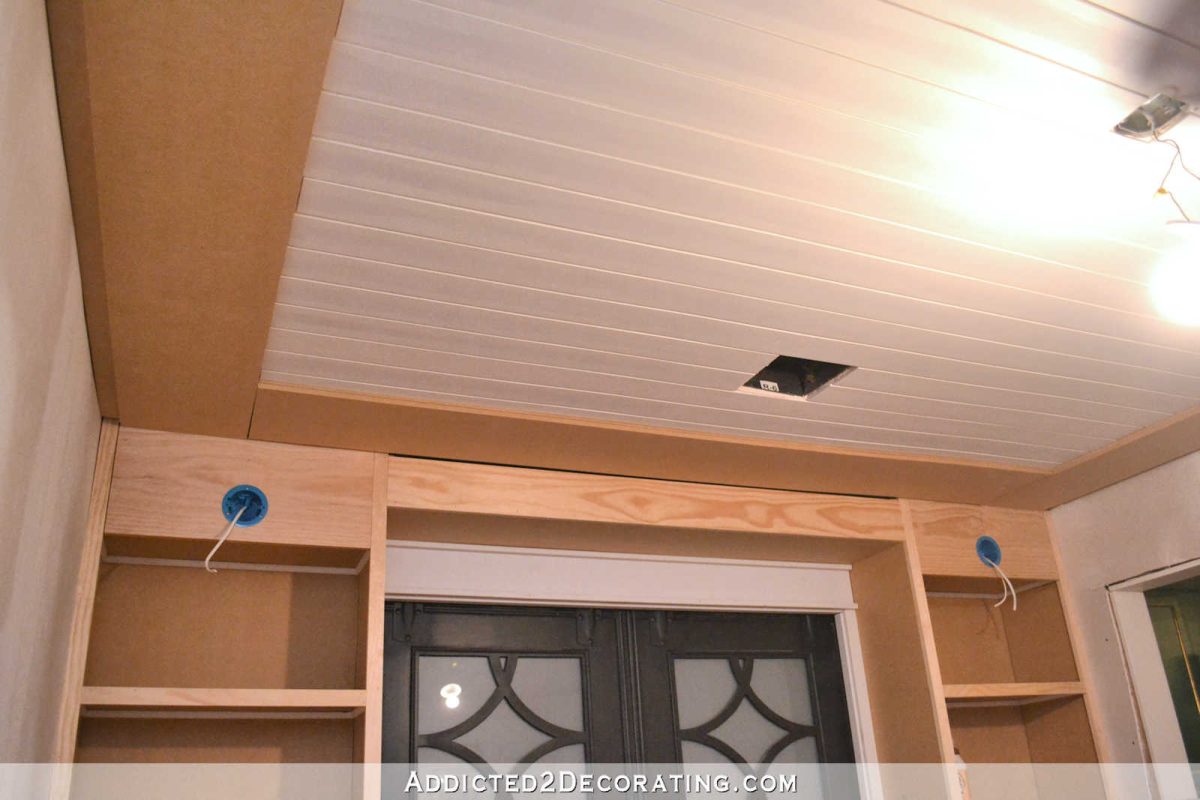
And then finished off with base cap molding on the inside edge of the MDF, and crown molding around the wall. You can see the details of the music room ceiling here.

Obviously, just attaching boards directly to the ceiling in the bathroom (shower) won’t help solve that problem with the dip in the ceiling, but I can add spacers (strips of 1″ wood) around the perimeter of the ceiling, and then attach the boards to the spacers instead of attaching them directly to the ceiling. That way I can space the spacers so that they’re not attached to that dip in the ceiling.
Since this ceiling trim will be in the shower as well as the main part of the room, I won’t be using MDF. I’ll be using primed solid wood boards (primed with an oil-based primer) so that they’re protected from any moisture during showers. And the light in the middle of the shower is also a vent that automatically comes on when the light is turned on, so there shouldn’t be a big moisture problem anyway.
I’m confident that this will work out because, as I’ve mentioned several times before, the shower in this bathroom is almost as big as the entire hallway bathroom. And that bathroom the only full bathroom in our house that has been in regular use for the last eight years. It’s full of wood and trim (and MDF, actually!), including a stained wood slat ceiling and MDF and a tub skirt made of wood and MDF attached directly to the side of the bathtub, and yet after seven years, it looks almost exactly like it did when I finished the remodel in 2015.
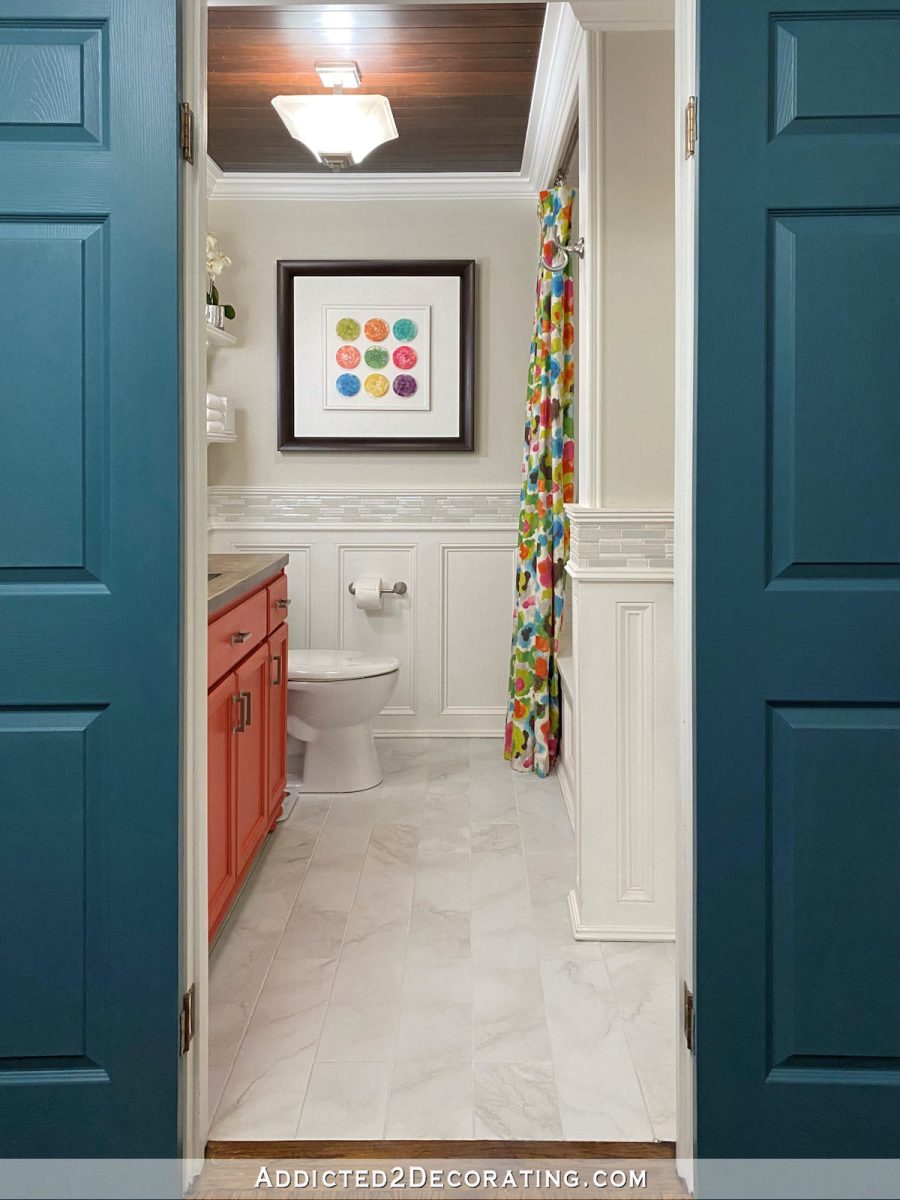
I remember people warning me about putting all of that wood (and MDF!) in that bathroom, but it hasn’t been a problem at all. I think the key really is oil-based primer.
So that’s the plan, and hopefully I can get started on the trim on Thursday. We’ll see how it goes. 🙂

Addicted 2 Decorating is where I share my DIY and decorating journey as I remodel and decorate the 1948 fixer upper that my husband, Matt, and I bought in 2013. Matt has M.S. and is unable to do physical work, so I do the majority of the work on the house by myself. You can learn more about me here.


I just saw a YouTuber use a paw scrubber she got on Amazon. She has a few big dogs and a very muddy yard. It’s just a simple rubber tube with scrubbers inside you stick their paw in and then dry off with a microfiber towel.
Do you have a link? I’d love to see it! Although Cooper won’t let me or anyone else touch his feet, so it might not work.
If he doesn’t like his feet touched this will be a no go for sure! You could certainly work with him just a few minutes a day to get him used to a wipe with a towel tho. 😀
If he’s not going to let you clean his paws I would suggest creating a “landing pad” of sorts outside of the door with artificial turf. That would certainly take more stuff off his feet than gravel would. You’ll probably need a mat inside the door as well. It may not comport entirely with your sense of aesthetics but it isn’t a permanent issue (even though it may be longer than you like.)
You will need to do something since you are going with white grout and it will get discoloured in short order if you are constantly mopping up muddy footprints.
Kristi I feel your pain. I use baby wipes to clean the paws and then a towel. He doesn’t like it but he doesn’t get in without out being wiped.
Great solution! I’ve posted before about how much I really like your music room ceiling. A modified version will also look nice.
I’ll suggest my solution for muddy dog hooves…I got a 6’ x 8’ grass looking outdoor rug and put that over my muddy area. Water goes through and it’s rough enough to work most of the mud off the dogs’ feet. I also have a rubber backed 3’ x 4’ rug on my deck for additional mud absorption. My doorway situation is different from yours, of course, but my two monsters are mud magnets and this helped a ton.
Otherwise, you might have to drop a temporary rug inside the door and teach Cooper to stop and let you wipe his feet before he moves off the rug. I can do that with one of my dogs, but the other has a brain injury and I swear, ADHD, and his feet move at 700mph if he’s awake. Impossible.
I have no suggestions on the molding. I’m watching here for your solution.
Can you do a small area of pavers (PT -pressure treated- frame, sand bed, pavers) around the back steps? It wouldn’t be permanent and having a sand bed it would drain. An outdoor mat like an LL Bean Waterhog is also helpful.
As I was reading the crown moulding issue and you showed MDF, I was thinking “No! It’s not for damp/wet areas” – so glad you went on to discuss using primed wood and oil-based primer in a wet area!
You can scribe the top of the moulding for the dip area! A lot less work, time and money. How much does it dip? Once painted and caulked you will never notice it. I promise! I am total OCD about things like that and have to make concessions, I’m mad about it then realize I never notice/think about it again. Honestly ask yourself do you “find” these other projects so you can avoid/put off the ones you don’t want to do?😕
I considered scribing, but that dip is too severe for scribing to work. It would literally require cutting off the entire squared top of a piece of crown molding, and cut right down into the curved part. That would be very obvious.
I have no idea what you mean with the last question. A decorative ceiling/crown molding combo has been in the plans for a while now. I’ve talked about it in at least one previous post, so I’m not adding random projects just to keep busy.
A quick and inexpensive fix for the muddy area by your door would be pea stone. We used it by our deck steps to keep dirt from being tracked onto the deck. I like pea stone because the rain water can drain away.
How about building a small deck landing. A rectangle frame of 2x4s with decking boards on top. This will allow drainage when it rains, but leave a non-muddy spot for the pup. You could then move it away when no longer needed. A pallet may also work.
We used outdoor or pvc trim for a bathroom area. It worked awesome with none of the priming work. Home Depot has started to carry more in stock but lowe’s carried a good selection at the time I purchased it. I think the brand at lowes was called Royal.
Search pvc mouldings and crown type stuff will come up. They come in a smooth and wood grain surface.
From experience… have your light/fan in the shower on a timer because you will want the vent to run for at least 30 min after your shower or the steam will remain…
Your thought on the trim work sounds terrific – ties in with what you have elsewhere. As for your sweet Cooper, unless/or until he learns to wipe his paws, how about a fake grass pad outside (not pea gravel unless you like that in your house too) to take some of it off and a runway like a flat commercial runner inside from the door to the other side of the room to use until dry weather appears. Nonslip, and you can easily roll it up to one side. It might help.
Have Matt’s vanity be the one on the left not right (farther from the door). If you do end up using an entry rug or towel in a pinch, it’s less likely to be in his area.
There are soil stabilizing grid you can level and compact the area. not sure how great it is under doggo feet with taking a landing. Install this with stakes and pour rock over. https://www.homedepot.com/p/GRAVALOCK-PERMEABLE-PAVER-22-in-x-22-in-x-1-in-Black-Slim-Grid-Plastic-Pavers-12-Pavers-40-5-sq-ft-S562HD/309800569.
Another idea, Costco sells rolls of the artificial turf you can lay it here and relocate it after the renno. https://www.costco.com/artificial-grass.html
The cheapest solution is growing a thick hardy grass in the area if possible.
You always come up with the answers that you can live with and not just a simple solution! Can’t wait to see the finished bathroom!
You could just scribe the top of your crown molding…
So if you really want the wide plank look go for it BUT if youre actually just causing more work for yourself – scibe it.
Muddy area at bottom of stairs- 1. Outdoor rug/runner, 2. Artificial turf, 3. Large format concrete pavers, 4. Wooden floor/patio squares (IKEA carries them!), 5. Pea gravel.
Dip in ceiling- I like your solution because you say it’s an extreme dip. If it weren’t such a bad dip, I would suggest foam crown molding (made and sold right there in TX- I ordered it to run crown LED lights in my dark bathroom) that is very easy to scribe or otherwise cut.
You need a moat. I have a large dog as well. This time of year is mud season in the back yard. Only a moat will do.
When we had that problem we put sheets of plywood down and the layered the dirt around it with straw. Our dogs did their business on the straw and came back in the house on the plywood
Kristi
I would use wood chip mulch for doggie. It will eventually break down and integrate in the dirt but will keep coopers feet from getting muddy in the interim
Secondly, have you seen that fake lumber made from pvc? It’s paintable and looks like wood. I have some of that trim and I like it.
I have seen it. I used it on my front porch. I don’t plan to use it in the bathroom, though. I highly recommend it for outdoor use! It’s fantastic stuff.
We did a deep french drain with lots of gravel on top and then used huge flagstones to finish off a 6 by 6 foot area next to our basement doorway. It was a disaster before with the kids and dogs bringing in all kinds of wet dirt and red Alabama clay. Now, 14 years later, it’s still dry as a bone. All the rain disappears into ground and there is no mud. Works like a charm!
Since the crown molding is in a wet area, have you considered using urethane moldings instead of wood? They won’t have expansion/contracting issues, rot issues and have some flexibility to deal with uneven surfaces. They can be painted just like wood.
I did consider it, but I decided to stick with the regular wood trim. I highly recommend the PVC boards and trim for outdoor use, though!
Can you take Cooper out the studio entrance to carport? You’d have a nice covered area to clean him up BEFORE coming inside when needed and just the expanse of the concrete will do quite a bit to keep some of the dirt/wet out. I can see my dog’s damp paw prints when they step onto the concrete of our patio then by the time they get to the back door they’ve stopped leaving prints and I don’t really need to wipe the paws. Good luck!
That’s a good idea! The walk from his yard to the studio would certainly help to clean dirt and mud off of his paws before he enters the house. Not so convenient for me on cold days. 😀
great solution. I love your hall and bathroom ceilings. I’m just wondering why there’s such a large dip. wasn’t it possible to fix when the workers were framing in the shower?
Late to the game. Old Town Home restores wonky old houses and have a post on this issue: https://www.oldtownhome.com/2014/2/7/How-To-Hang-Cranky-Crown-In-Spite-of-Wonky-Walls/
Can you please tell me where I can get a wall mural like that one in your bathroom it’s beautiful!
It’s from photowall.com. This one is called Sparkling Garden.
A YouTuber I follow was using a paw scrubber she bought on Amazon, and it looked really effective. Her yard is really muddy, and she has several large dogs. You can use a microfiber towel to dry off their paw after putting it in a rubber tube with scrubbers.