DIY Upholstered Bed Base
Our new bed is finished! I finished the upholstered bed base on Monday, and then my mom came over yesterday morning to help me get the headboard hung on the wall, get the bed base moved into place, and get our mattress moved into the bedroom. I’m so happy with how this turned out!

I don’t like the legs that I bought for the base, so I’ve ordered new legs. They’ll be here on Thursday, and I swap them out then. I thought the legs I ordered would be more of an antiqued gold because that’s what the picture on Amazon showed, but they’re actually very bright, shiny gold. I tried to use Rub ‘N Buff on one of them, but that didn’t work out. So the new ones will be turned wood legs.
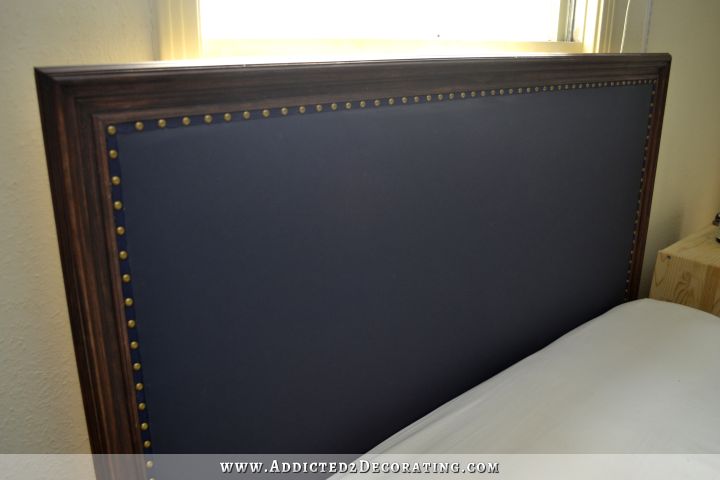
If you missed my step-by-step tutorial on how I built and upholstered the headboard, you can find that here: https://www.addicted2decorating.com/diy-upholstered-headboard-with-piping.html
So let me show you how I made this matching DIY upholstered bed base.
To build the frame, I used 3/4″ plywood and 1×3 lumber. I wanted my plywood sides to be 10 inches high, and I needed it to fit around a queen size mattress. So I ripped the plywood to 10 inches using my table saw, and then I cut two of the pieces to 62 inches long and the other two pieces to 83.5 inches long. I attached those pieces together using Spax cabinet screws. And then inside those plywood pieces, I attached the 1×3’s at the top and the bottom. I cut four of the 1×3’s to 60.5 inches long and four pieces to 82 inches long. I attached those to the plywood using 1.25-inch 16-gauge nails. These 1×3 pieces didn’t serve any structural purpose. They simply gave the bed base more thickness on the top and bottom edge, which I thought would look better once it was upholstered.

I couldn’t get the whole thing in one picture, so I made this diagram to show how the pieces fit together if you look at the whole structure from the top. The inside pieces are the 1×3’s and the outside pieces are the plywood pieces. Once it was all put together, the base had inside dimensions of 80.5″ x 60.5″.

In hindsight, I wish I would have allowed more space to have inside dimensions of 81.5″ x 60.5″ because our mattress ended up fitting pretty tightly inside the base, leaving no room to tuck the comforter inside the frame, which I would have preferred. But I’ll live with it.
Here’s another look at the frame once all of those pieces were screwed and nailed together.

Next, I wrapped high-loft batting around the whole frame, wrapping it around those inside 1×3 pieces and stapling it into place on the bottom edge of the 1×3 for the top, and on the top edge of the 1×3 for the bottom.

Here’s a look at the inside. You can see where I stapled it using my narrow crown stapler that works with my air compressor.

I started at the head of the bed (i.e., the part that won’t show once it’s tucked under the headboard) and worked my around the whole frame. Once it was all covered with batting, I went back and trimmed off the excess batting (and, of course, forgot to take a picture of that). But all of this excess batting was trimmed off before I moved on to the next step.

With the batting on, I was ready for the fabric. I cut several strips of fabric, about 20 inches high, and then sewed them together, making sure to match the patterns. I made this strip long enough to go around the entire base with about 12 inches to spare.

And then I pressed al of my seams open and flat using my steam iron. I was pretty relieved to see how great this fabric hid the seams.

I pressed the seams on the front and the back, making sure that the fabric was perfectly smooth and flat.

And then, starting at the head of the bed again, I wrapped the fabric around the whole base, making sure that the pattern was straight.

And then, starting at the head of the bed, I started stapling the fabric on just like I did the batting. I worked my way around the base clockwise and ending back at the head of the bed. As I worked my way around, I made sure that the pattern was straight, pulled the fabric taut to the right, and stapled it into place on the 1×3’s. Once I was all the way around, I trimmed off the excess fabric for a clean look.

The most difficult part was the corners, but I folded those over just like wrapping a present, making sure that I had a crisp, clean fold.

When I got back around to the head of the bed, I simply folded the fabric under about an inch, and then stapled right on top of the fabric. Again, this will be to the wall and under the headboard, so it won’t show at all.

Once all of the fabric was stapled on and the excess trimmed, this is what it looked like.

Before I placed the base on the floor for the next steps, I added the feet (the ones that I’ll be replacing on Friday). Then I placed the base on the floor to build the inside structure of the base.
For the inside, I started by attaching a 2×4 to each of the long sides. These went right under the 1×3 that were wrapped with batting and fabric. I attached these using 2-inch wood screws, and as you can see, I used a lot of them.

Here’s what it looked like with the 2×4’s attached to both of the long sides.

And then I attached to more 2×4’s to the inside, spacing them evenly. I originally considered using my Kreg pocket hole jig to attach these, but I ended up going a different direction.

I ended up using joist hangers to attach these to inside 2×4’s. Joist hangers are made for use with 2×6’s or 2×8’s, so they were too long to fit my 2×4’s. So I just used my grinder to cut off the excess metal, and then I had to drill two more screw holes into the hangers to make them work with my 2×4’s. They were actually very easy to cut and drill screw holes into. And then that allowed me to get these to inside 2×4’s right under the perimeter 1×3’s.

And then I added four additional legs to those inside 2×4’s. These didn’t need to be pretty since they won’t show, so I used 2×2 lumber and attached them with wood screws.

The final step was to add the slats. For these, I use twelve 1×4’s. I haven’t nailed these on yet because I want to be able to remove them when the new feet arrive. It’s easier to be able to remove this weight when I need to flip the base over to attach the feet. But after the new feet are on, I’ll come back and nail these slats in place.

And that’s it! That’s the finished bed base. Well, I guess it’s almost finished since I’ll be swapping out those feet. But the hard part is done.

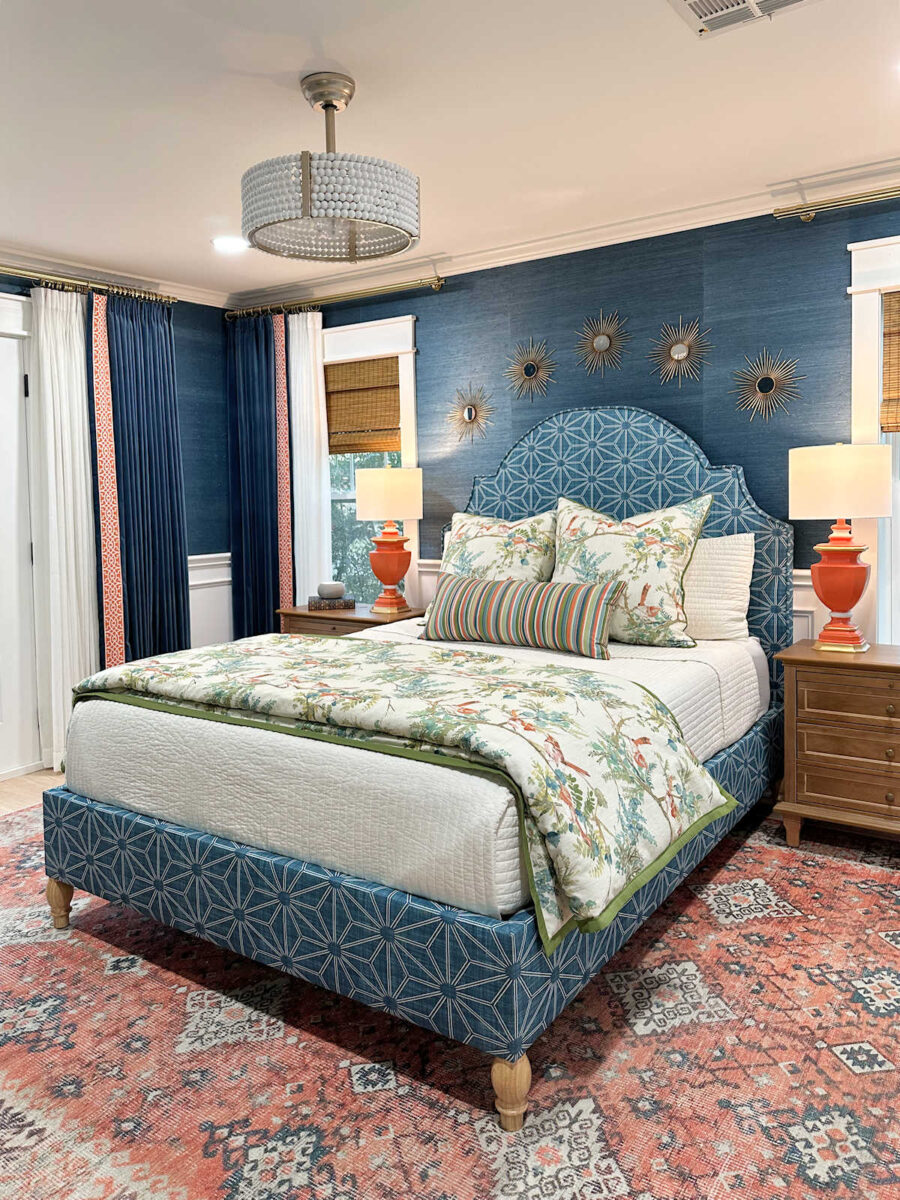
Here it is with the headboard hung on the wall and the base in place.

I am so excited about how this turned out. I can’t wait to get all of the bedding on!
I’ve made headboards before, and I’ve even built a bed base before, but this is my absolute favorite. I’m so proud of this project.

More About Our Master Bedroom
see all master
bedroom diy projects

read all master
bedroom blog posts

Addicted 2 Decorating is where I share my DIY and decorating journey as I remodel and decorate the 1948 fixer upper that my husband, Matt, and I bought in 2013. Matt has M.S. and is unable to do physical work, so I do the majority of the work on the house by myself. You can learn more about me here.
Doesn’t the lacquer on polished brass come off with acetone soak (per Martha Stewart)? I like the metal legs b/c they float and don’t compete with the wood legs on the beautiful nightstands.
If readers wanted the mattress to sit lower in the frame, would it just be a matter of attaching the side 2x4s lower?
Beautiful job!
The lower the mattress is in the frame, the harder it is to get a neat tuck-in of your bed linen. I had a base once that had about a 2″ well ….. it was murder on my fingers getting the bottom sheet in place – even a fitted one (I like it taut and neat – a bit like an army bed LOL).
I personally like a base where the slats are level with the frame – then the sheet just slides under the mattress. 😃
Yes, that’s correct. You can lower the 2×4’s so that the mattress sits further into the base. But just remember that the lower the mattress is in the base, the harder it will be to change the sheets.
That looks SO GOOD!! The room is coming together so beautifully.
So pretty! Looks awesome!
Very nice!!
I’m always amazed at your talent 😲(and your mom coming to help hang the headboard). You are quite a team! Beautiful work!
So very pretty! I was wondering about the headboard hanging on the cleat. Did you have to put a bock/spacer near the bottom so it would hang down straight on the wall or was that not necessary?
It wasn’t necessary. The French cleat towards the top and the chair rail at the same distance from the wall as the cleat help to keep it straight and secure on the wall.
You should be proud of yourself. It’s very, very nice. Great job.
WOW!!! I love it. What an amazing job you’ve done with this project. I think even Cooper approves. Thanks for always showing us all how to do these things. Can’t wait to see the end product.
Cheers to you, Matt and the fur babies!
It made me so happy seeing the bed hen I opened the email! It’s all coming together. It’s excellent, I would be proud, too.
This time I could not see you vision until it was complete! This is amazing!
Simply beautiful! Thats all!
The bed looks so nice, I can’t wait to see it dressed. Thanks for the excellent instructions for building the base, I’ve been planning to make one for my guest bedroom. I really liked the clever use of joist hangers though I can tell you that both my local Lowes and Home Depot sell face mount 2×4 joist hangers.
What happened to your adjustable bed? I was looking forward to seeing how you built a frame for it.
I am wondering this very same thing. What has been created is absolutely beautiful though!
I literally built the outside frame of the bed base to fit around our adjustable bed. I had it upholstered and finished, and my mom was ready to cover over and help me move the adjustable bed into the bedroom, get the upholstered base around the adjustable bed, and move the mattress into place. And then, at the very last minute, Matt and I decided to forgo the adjustable bed. We honestly never use it. When Matt wants to sit up in bed, we have other ways to make that happen. Perhaps if we had a king-size bed where each side can adjust independently, we would have kept it. But we realized that it’s kind of a hassle if he wants to sit up but I don’t, or vice versa. So at the very last minute, after we decided not to move the adjustable bed base in, I went ahead and added the support inside the upholstered base for our mattress.
Thanks for the detailed bed plans! I have been wanting to redo our bed and this seems like a great approach! I like that you used joist hangers for the mattress support, with the bed constructed more like a deck. Our current bed only has one support down the middle but this isn’t where our bodies lie. Your bed actually supports where you and Matt will be sleeping. BRAVO!
This makes bedskirts look dated. It’s beyond fabulous!
You should be proud, because its stunning!!!
Absolutely stunning. You’re making me want to build one, too! 🙂 The fabric looks sooo nice with your wallpaper.
It is beautiful! Another triumph!
Gorgeous 😍🥰
Absolutely stunning! I was wondering about considering a different option than nailing them to the frame. What if you used a sturdy cloth-type tape to make 3 or 4 lengths spaced evenly across the slats from head to foot. This would give you a roll-up slat board that can easily be removed for cleaning or moving the bed. I have used this type of slat base, and it works great. Just a thought since you haven’t attached them yet.
That’s a great idea! I might do that instead just in case I need to get under there in the future to tighten one of the legs under there or for any other reason. Brilliant!
That is awesome! Once again, I’m so impressed with your skill and design choice. You made building that bed look super easy!
Woohoo! Looks great!
Love it!
I am so impressed with your work. So glad I started following your blog back when you just got your landscape design. I have learned so much…that I will never use, but it is in my mind anyway!!
Have a good week. Happy New Year to you and Matt and all your fur babies.