Entryway Console Table Makeover — Before And After
My entryway console table makeover is finally finished! I already know that people’s opinions will be split on this, but I ended up painting the console table rather than trying to use gel stain to try to preserve a natural wood finish. After looking around the living room and music room (i.e., the two adjoining areas), I realized that I already have a lot of natural wood finishes in these areas, and I’m partial to painted finishes. So I decided to go for it.
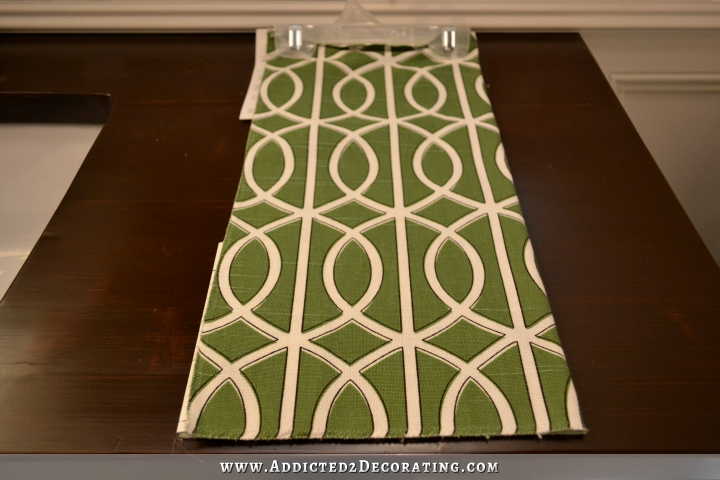
I chose a dark-ish green called Scallion from Behr. I went with green instead of pink for two reasons. First, I had already spent time doing a makeover on my lamps using art pastels (you can read more about that here) and it took a while to get the color exactly what I wanted. I wasn’t willing to repaint those. But the main reason is because when I stood back and looked at the whole area, I realized that a big pink piece of furniture in the entryway would probably compete for attention with the raspberry-colored settee in the music room, and both are very visible as soon as one enters the front door of our house. So, green was the color.
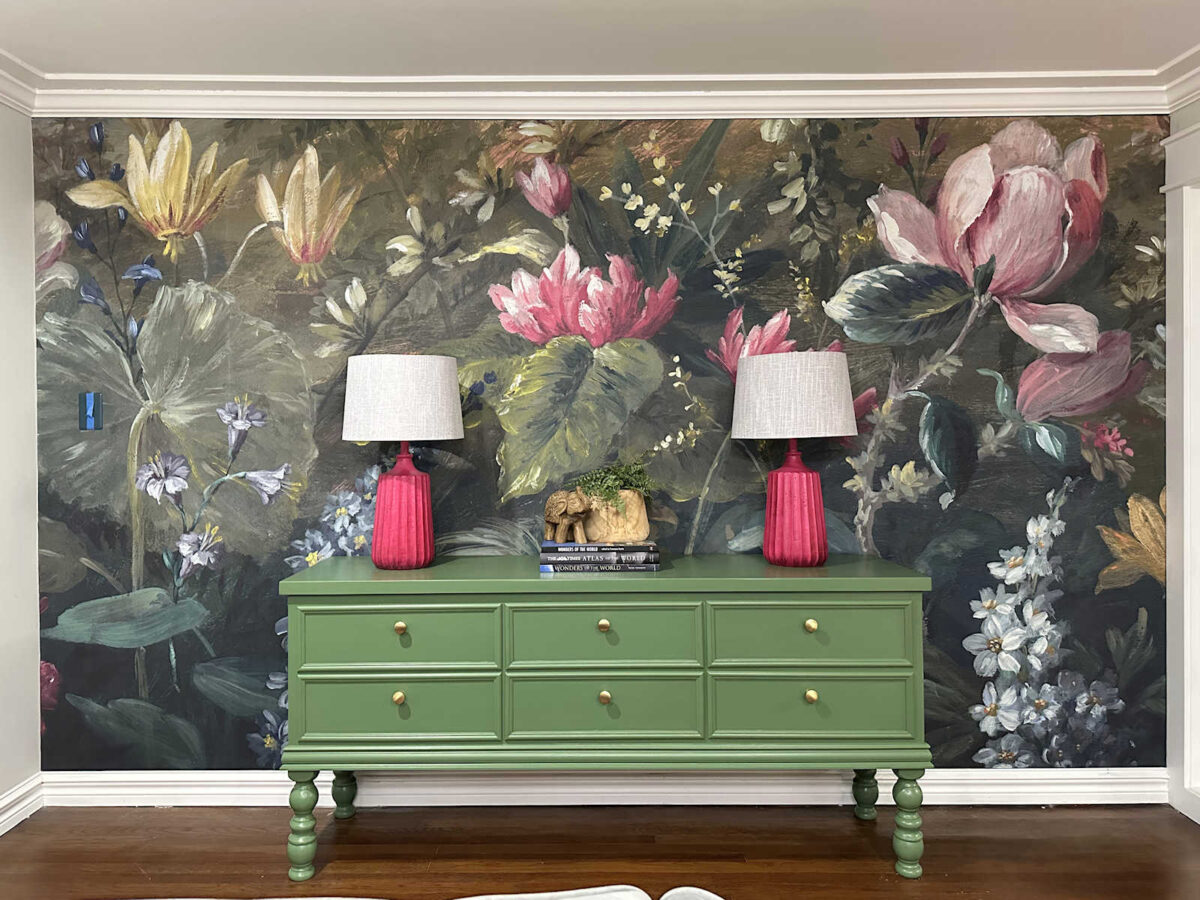
For some reason, the colors of both the console table and the lamps look brighter in pictures. They’re both a little darker in person. But anyway, here’s the final result.
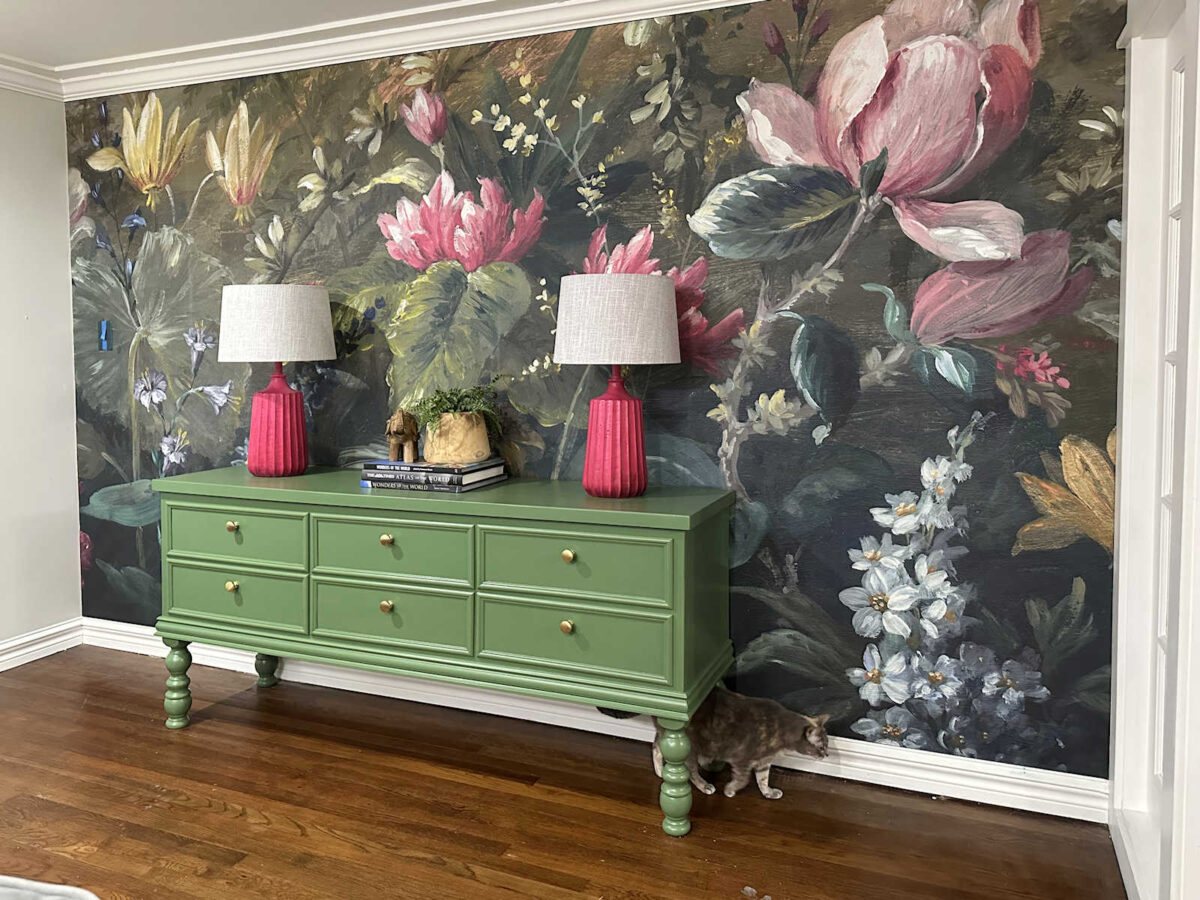
I’m still going to add some accessories and finishing touches to the area, but at least the main pieces are finally finished.
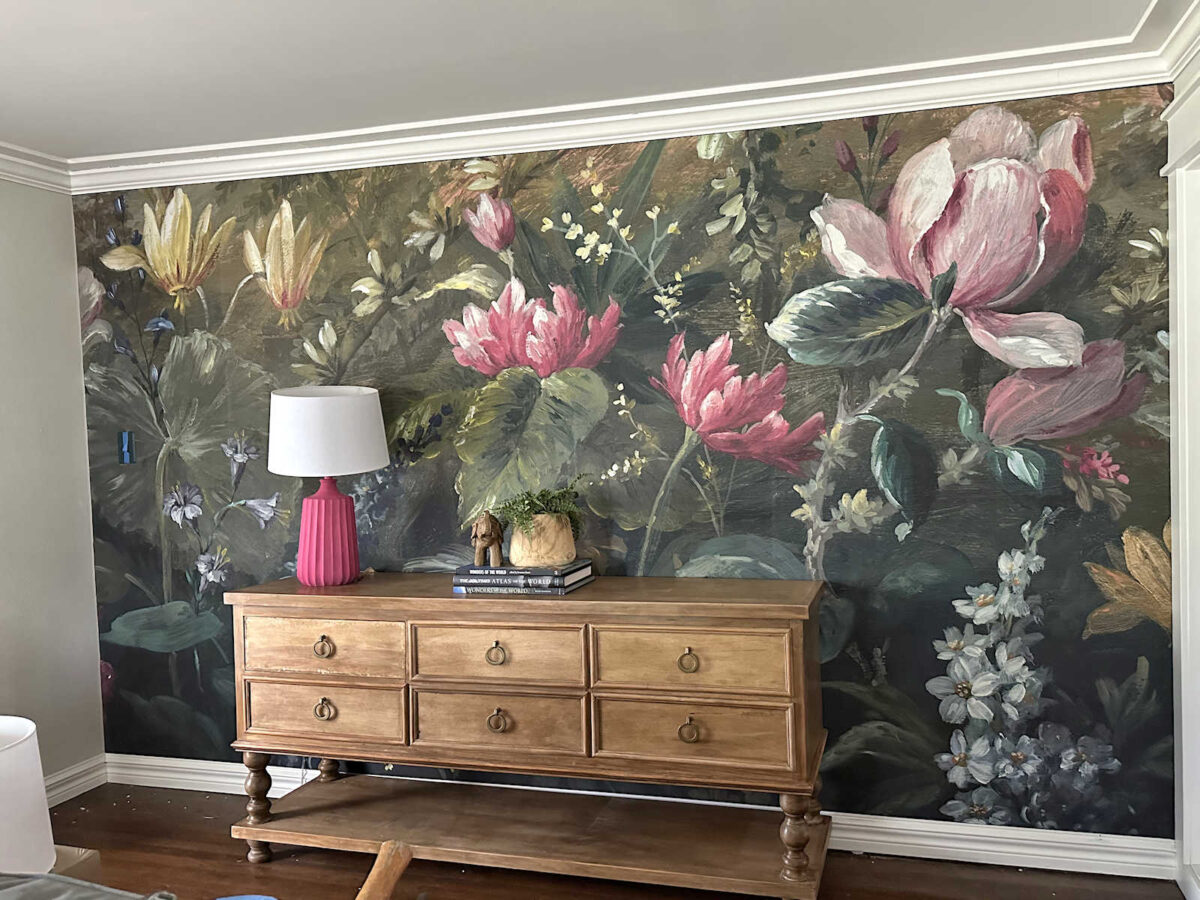
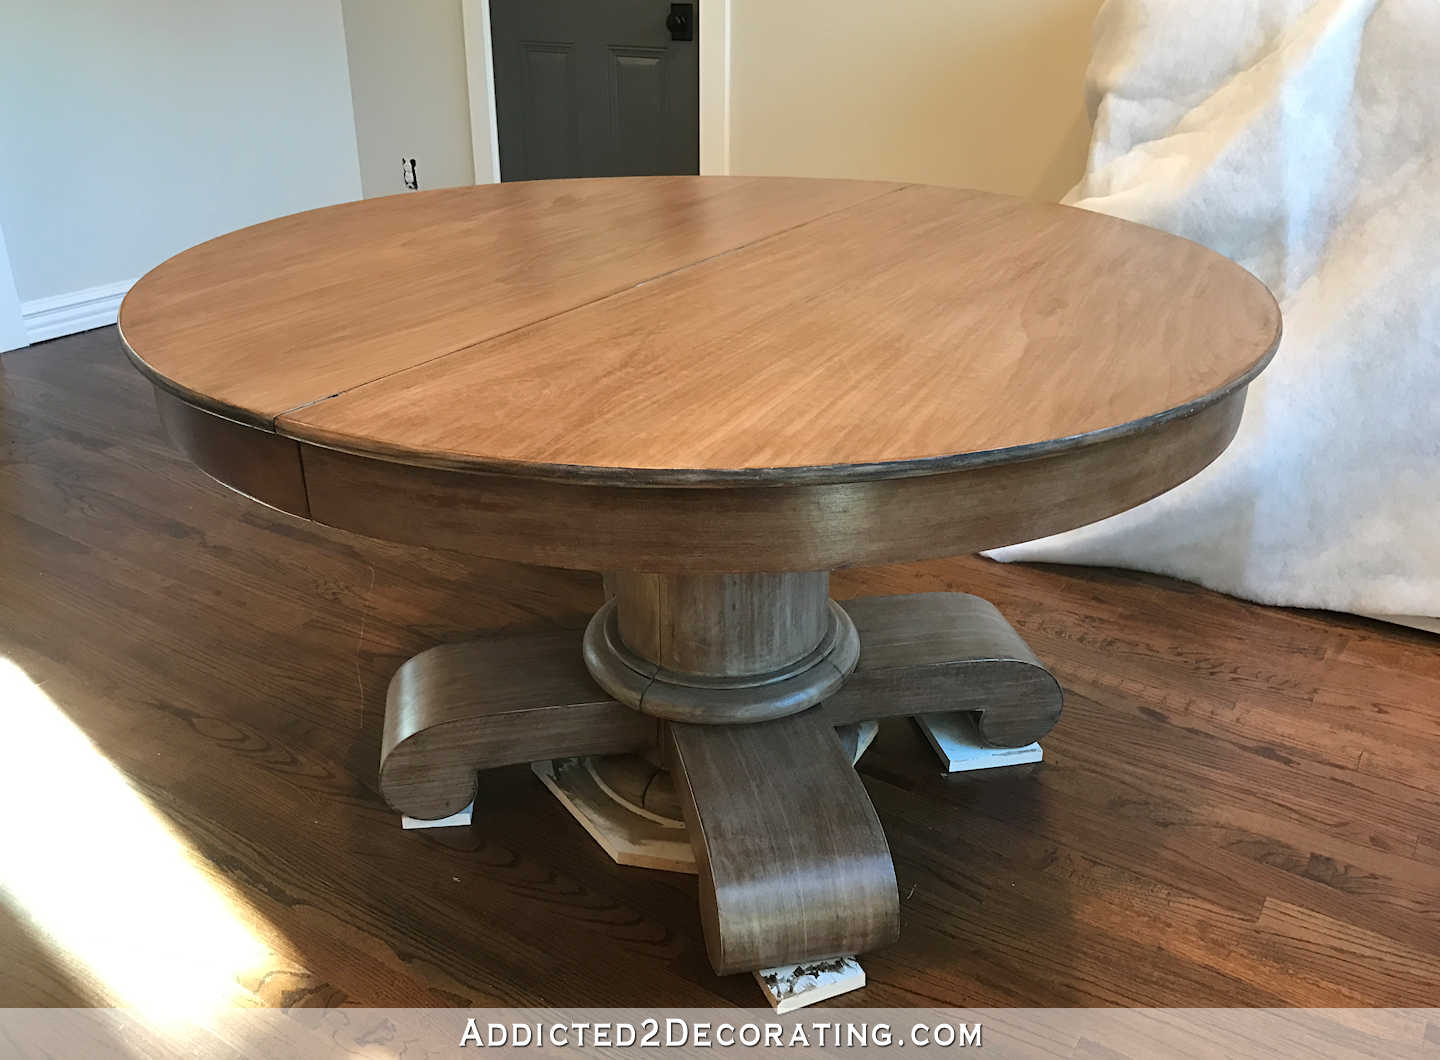
So let me back up and remind you where this started. Here’s how the console table looked before its makeover. I know a lot of you really loved the natural wood finish on it, but the finish really bothered me. It might look fine in pictures, but in person, it was way too orange and splotchy for my taste. I’ve lived with it for a long time like this, and I finally decided that I didn’t want to live with this streaky, splotchy finish anymore.
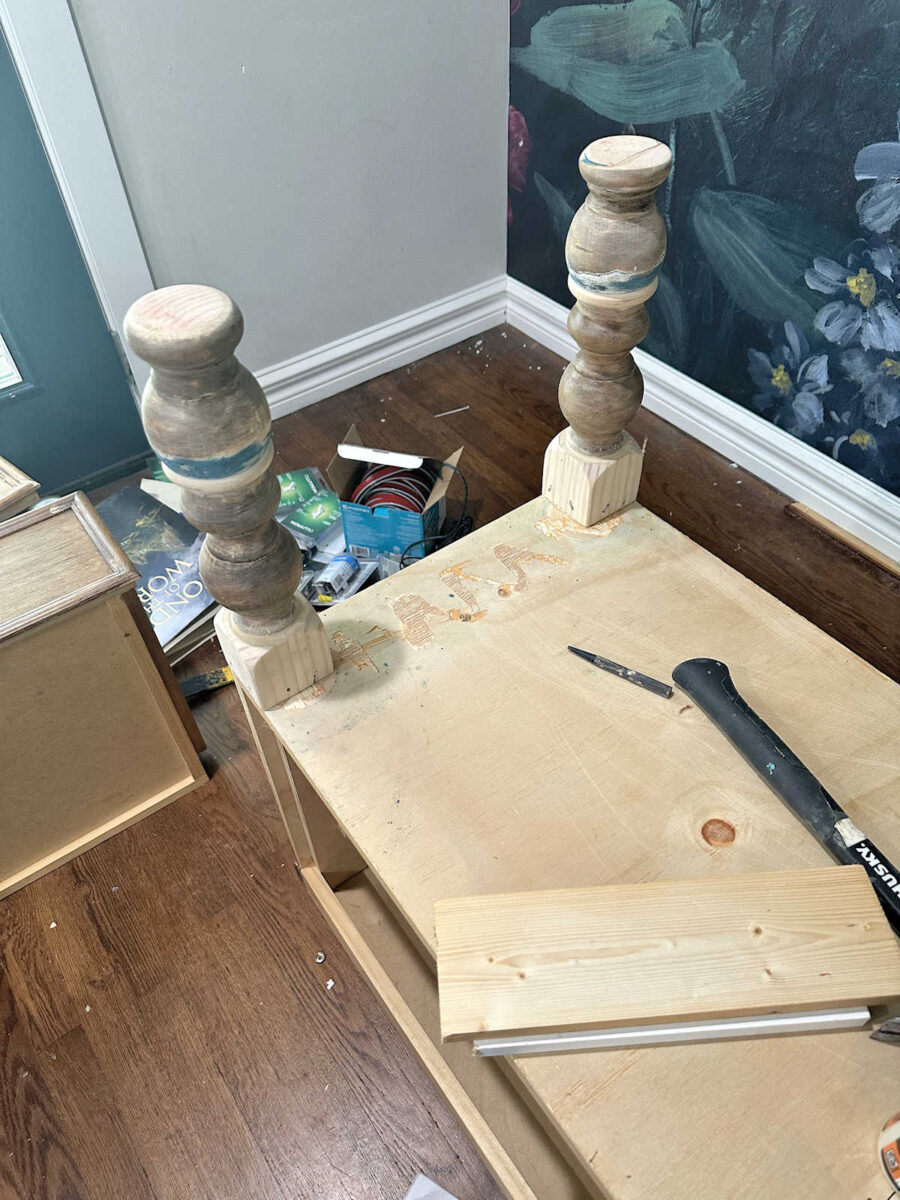
So since I was giving it a makeover anyway, I decided to take the advice that some of you had and get rid of the lower shelf. Once I removed the shelf, I had four turned legs that were each in two parts.
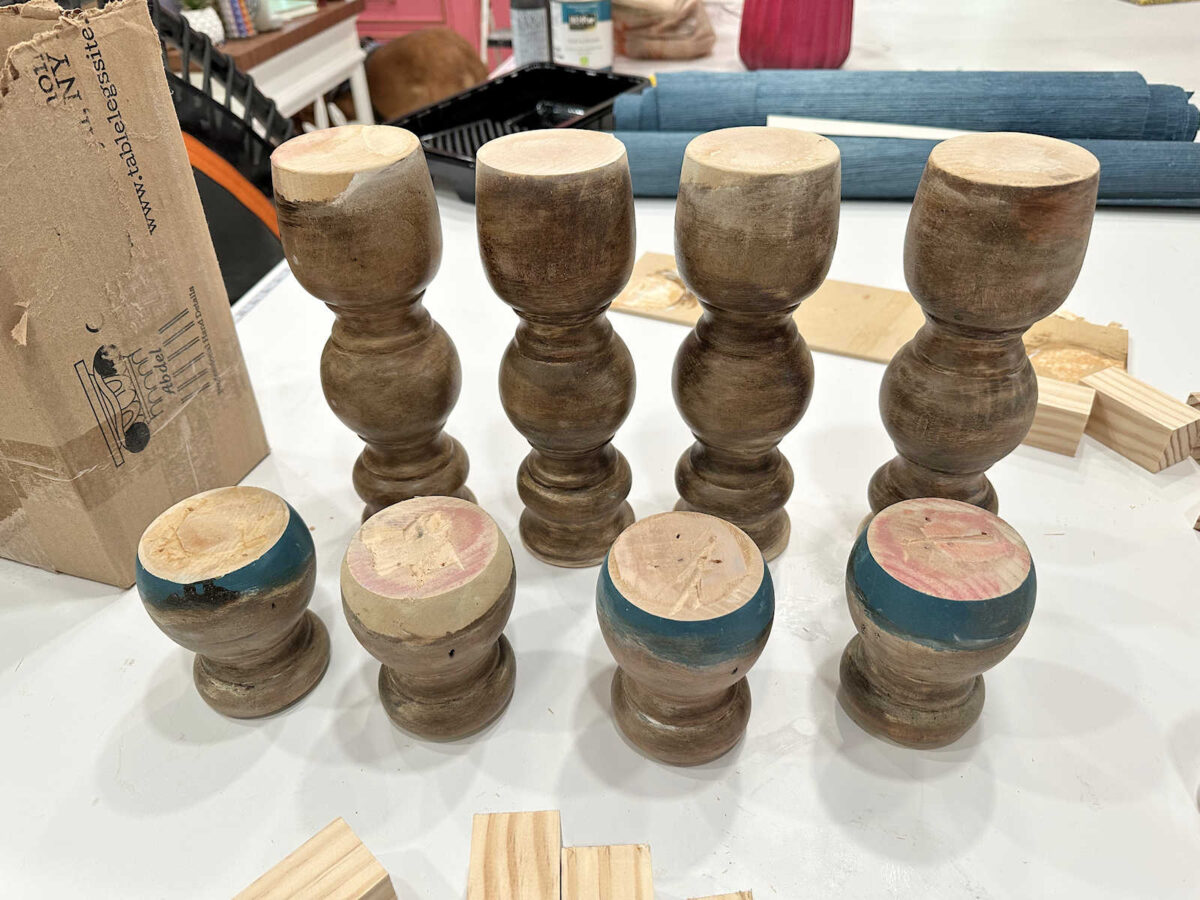
I glued and nailed those together and then used wood filler to fill the crack where the two pieces met.
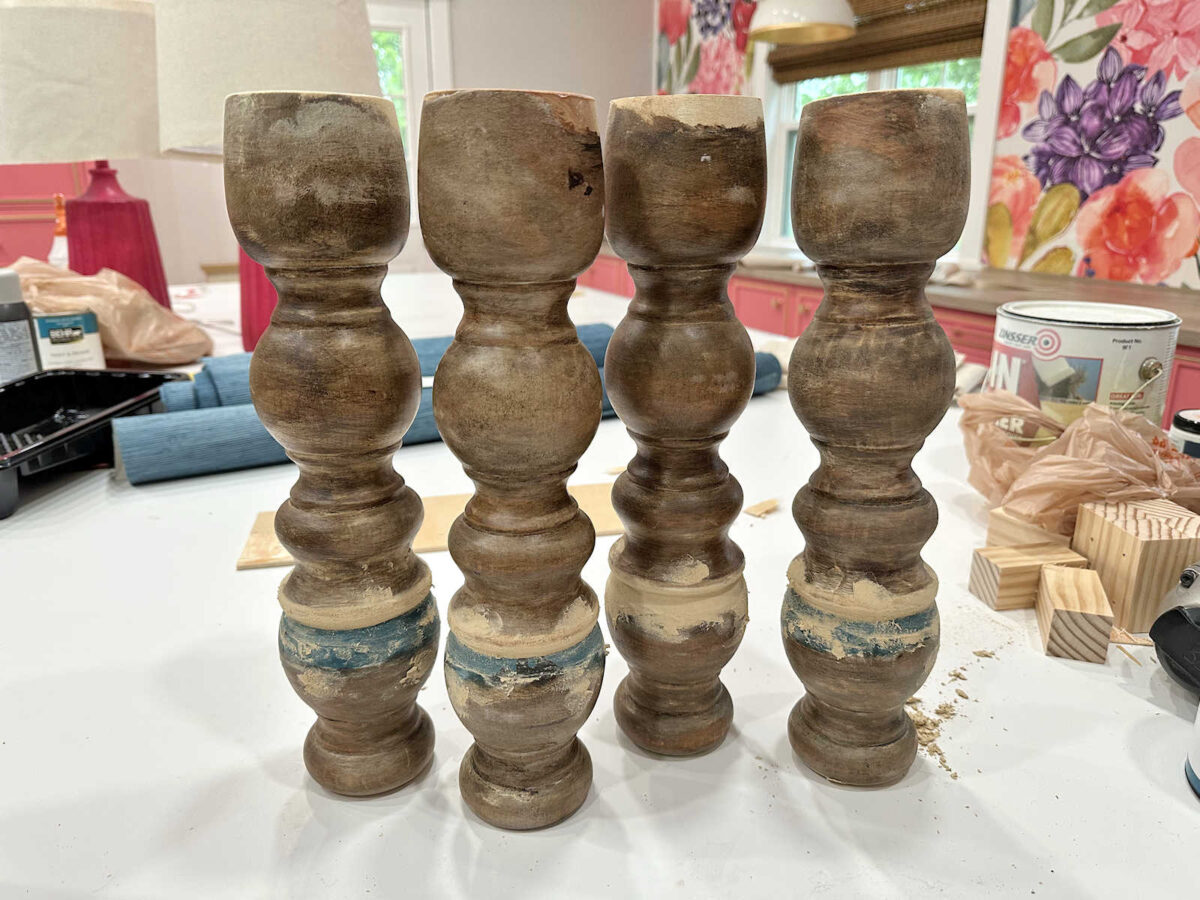
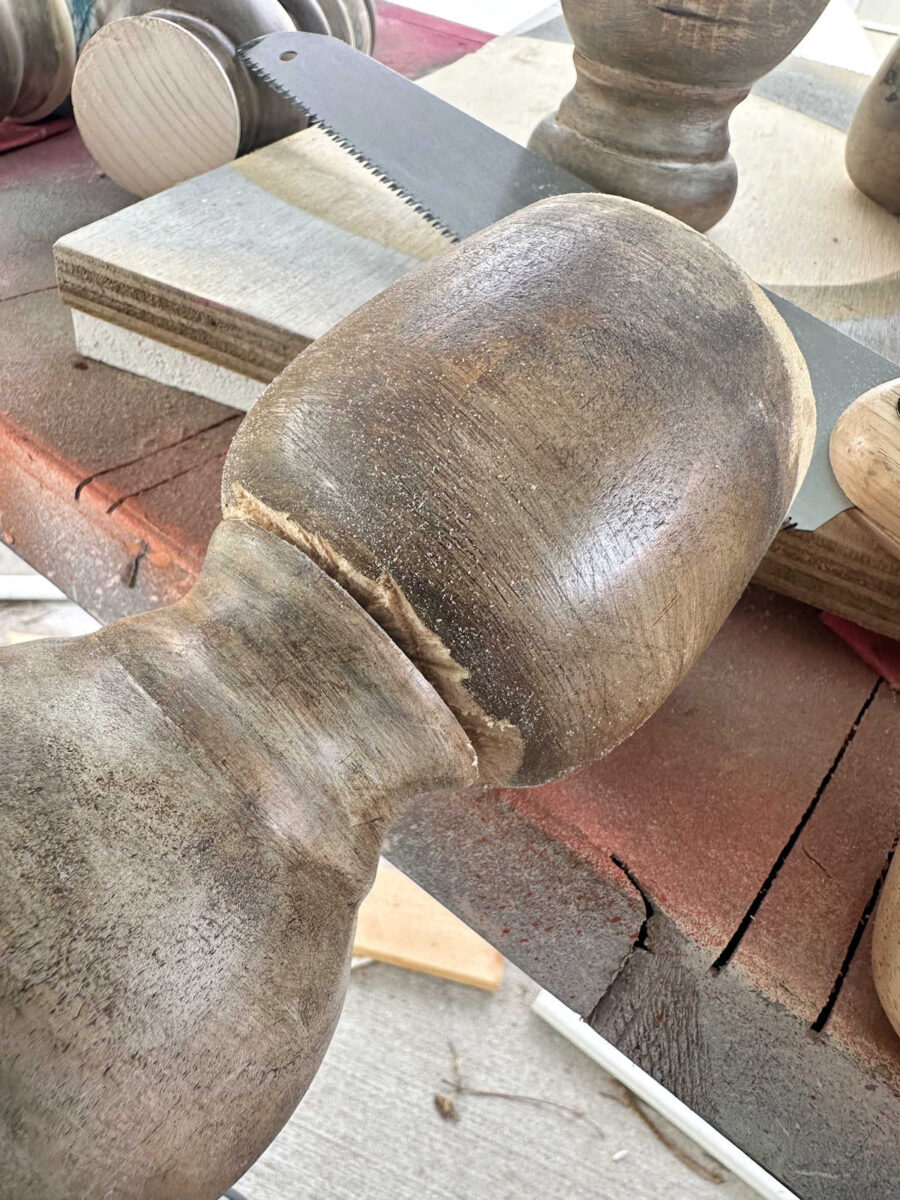
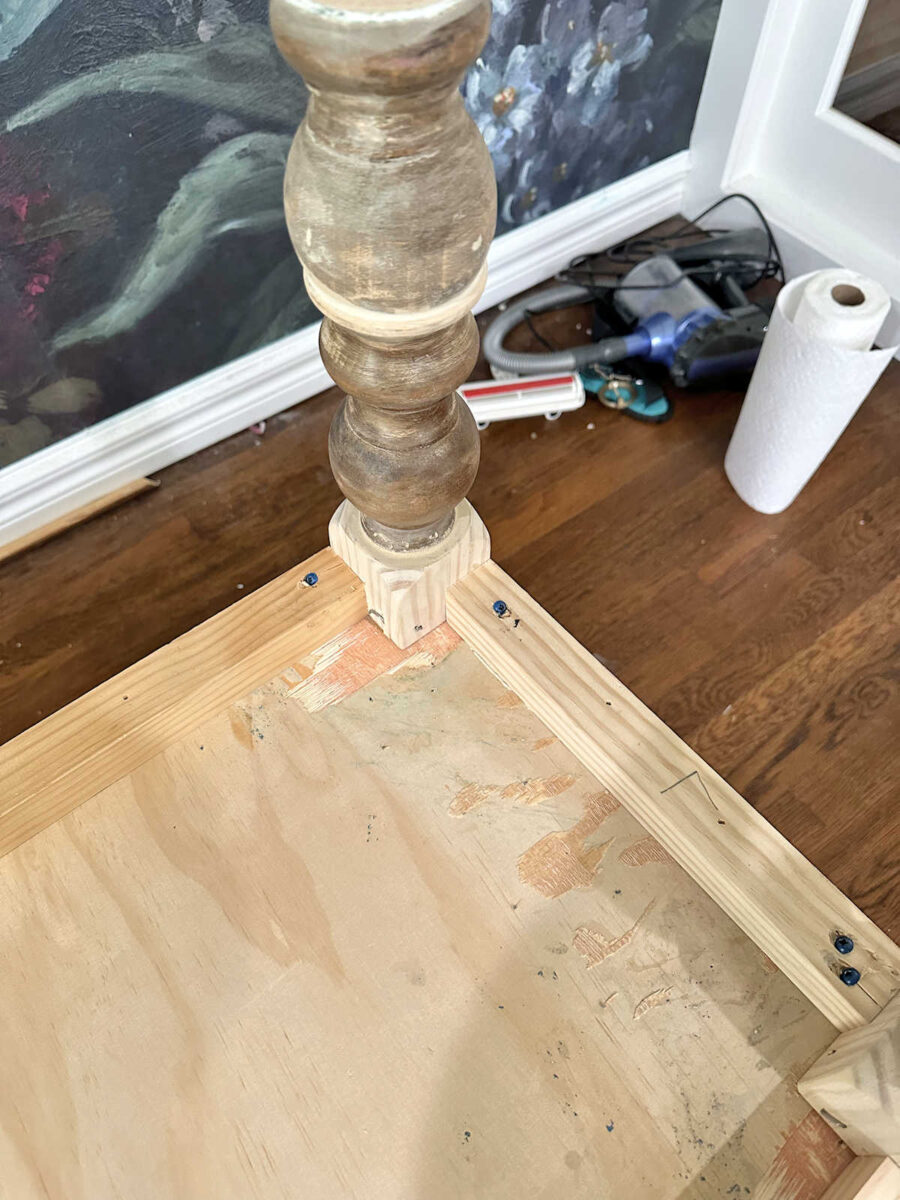
And then I needed to add a block at the top so that I could attach the legs securely to the upper part of the console table. Using a hand saw, I cut off the top turned section of each leg.
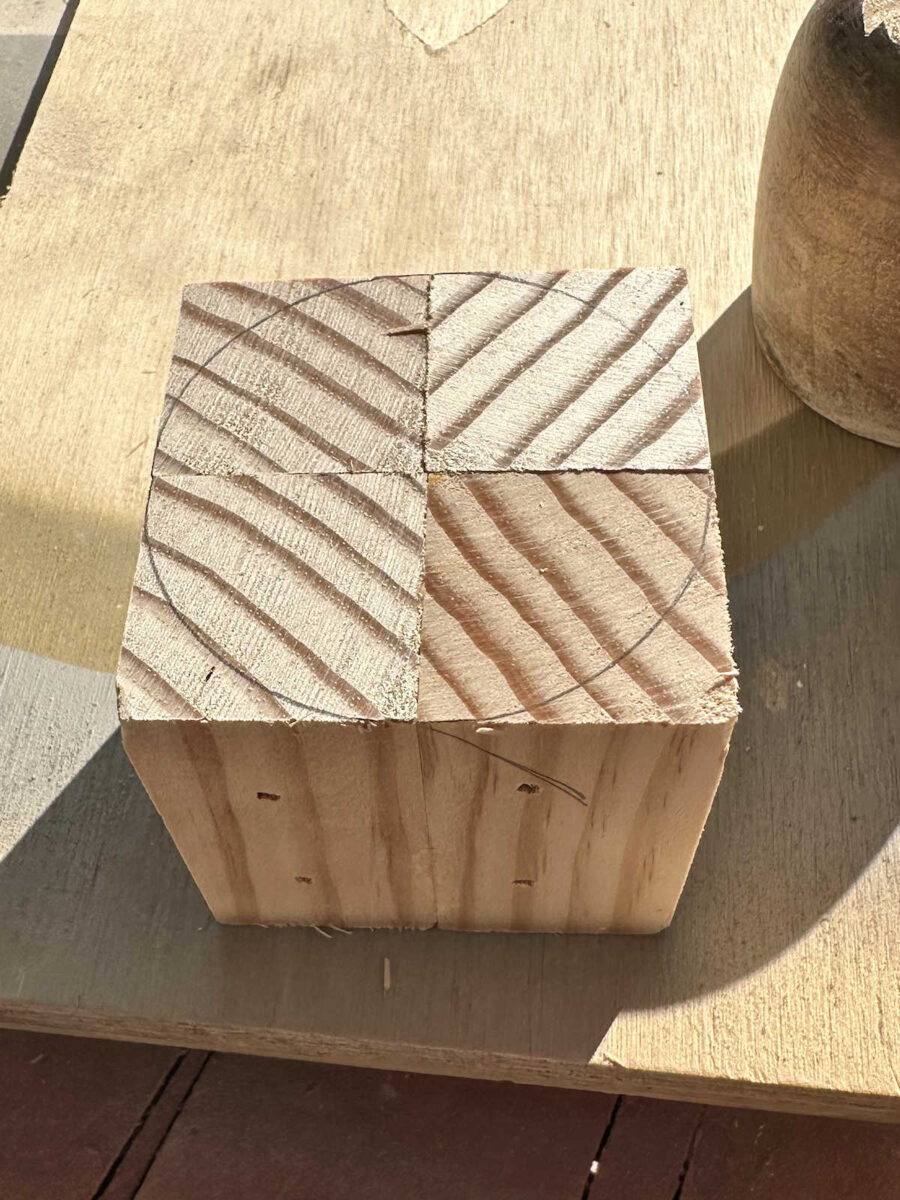
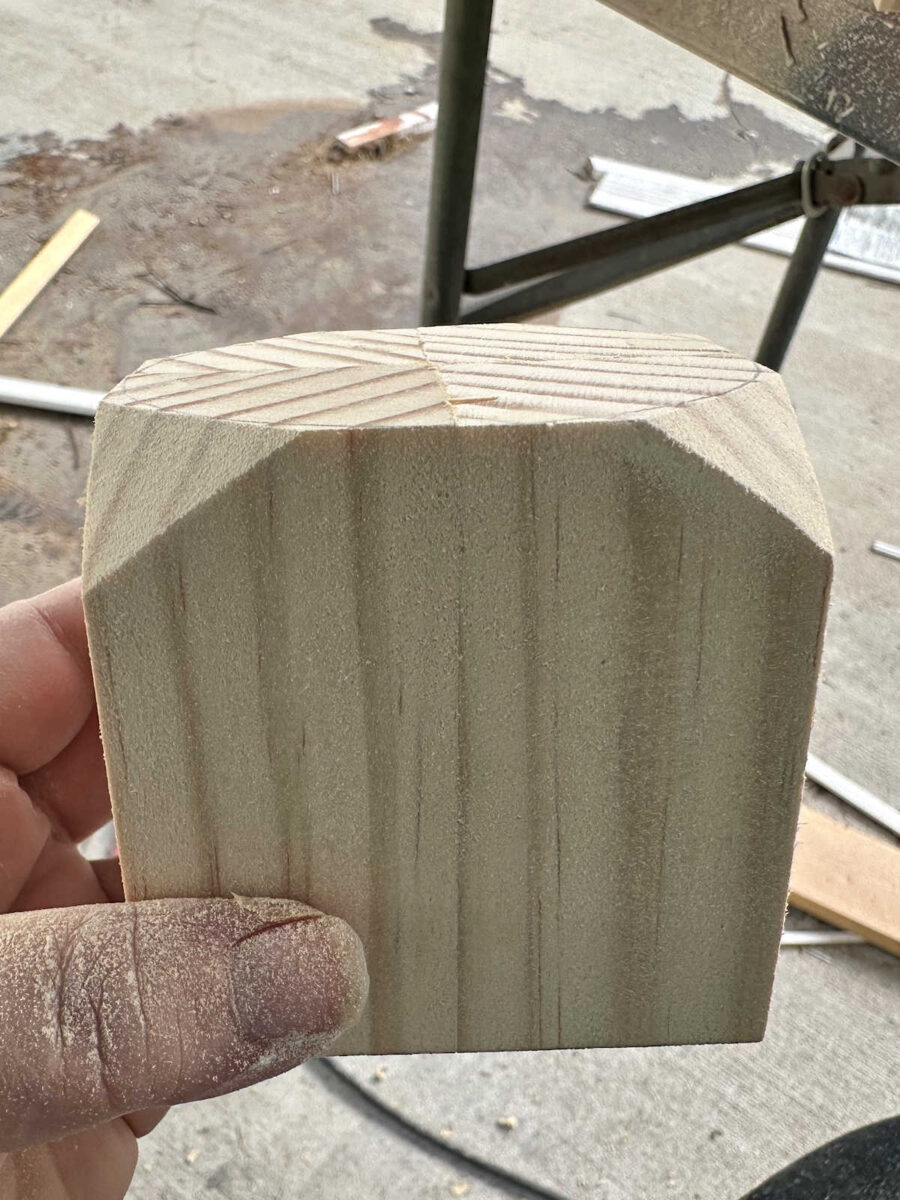
And then I used the top smooth end of that turned section to trace a circle on the blocks that I made by gluing and nailing four 2×2’s together.
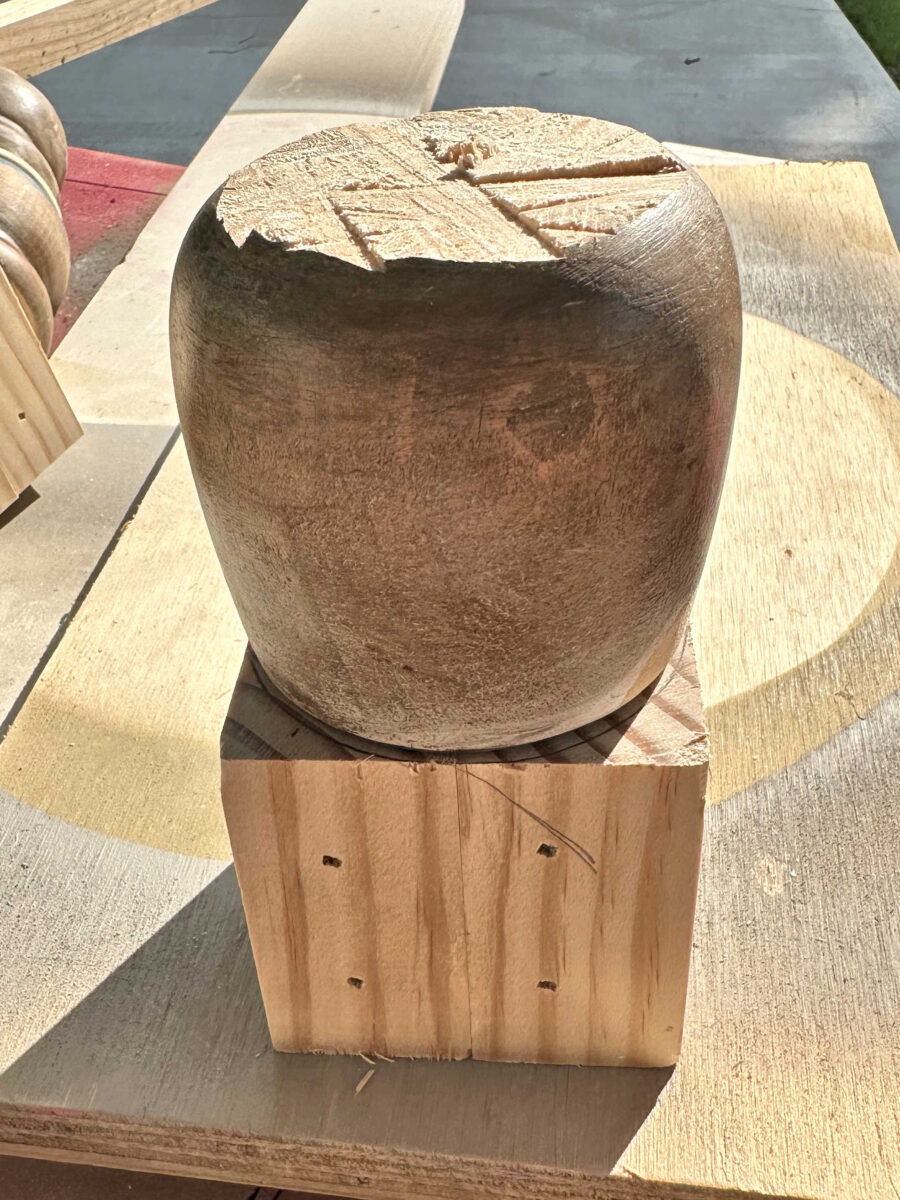
Here’s what that looked like with the circle traced on the top of the block.
Next, I used my orbital sander with an 80-grit sanding disc to sand down the corners at an angle until I reached the edge of the traced circle.
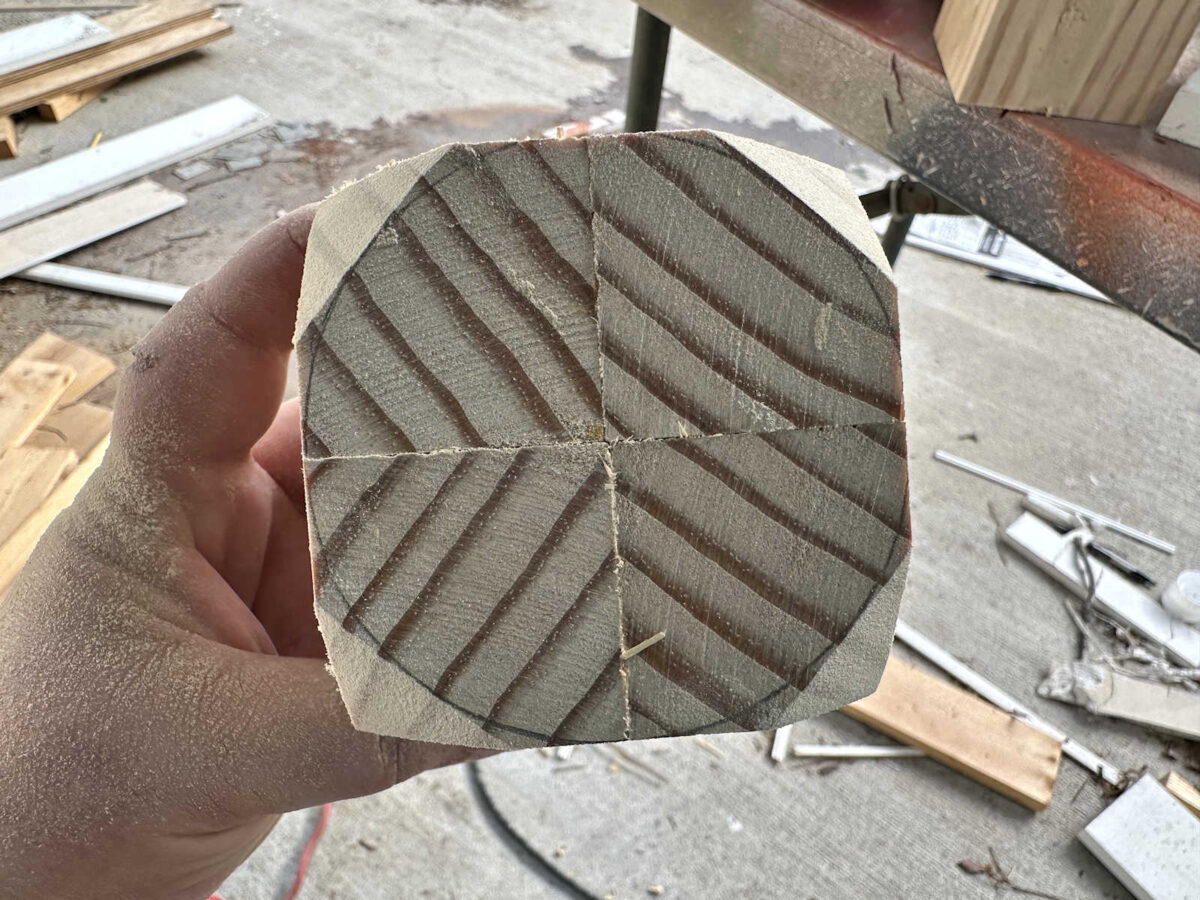
Here’s what that looked like from the side…
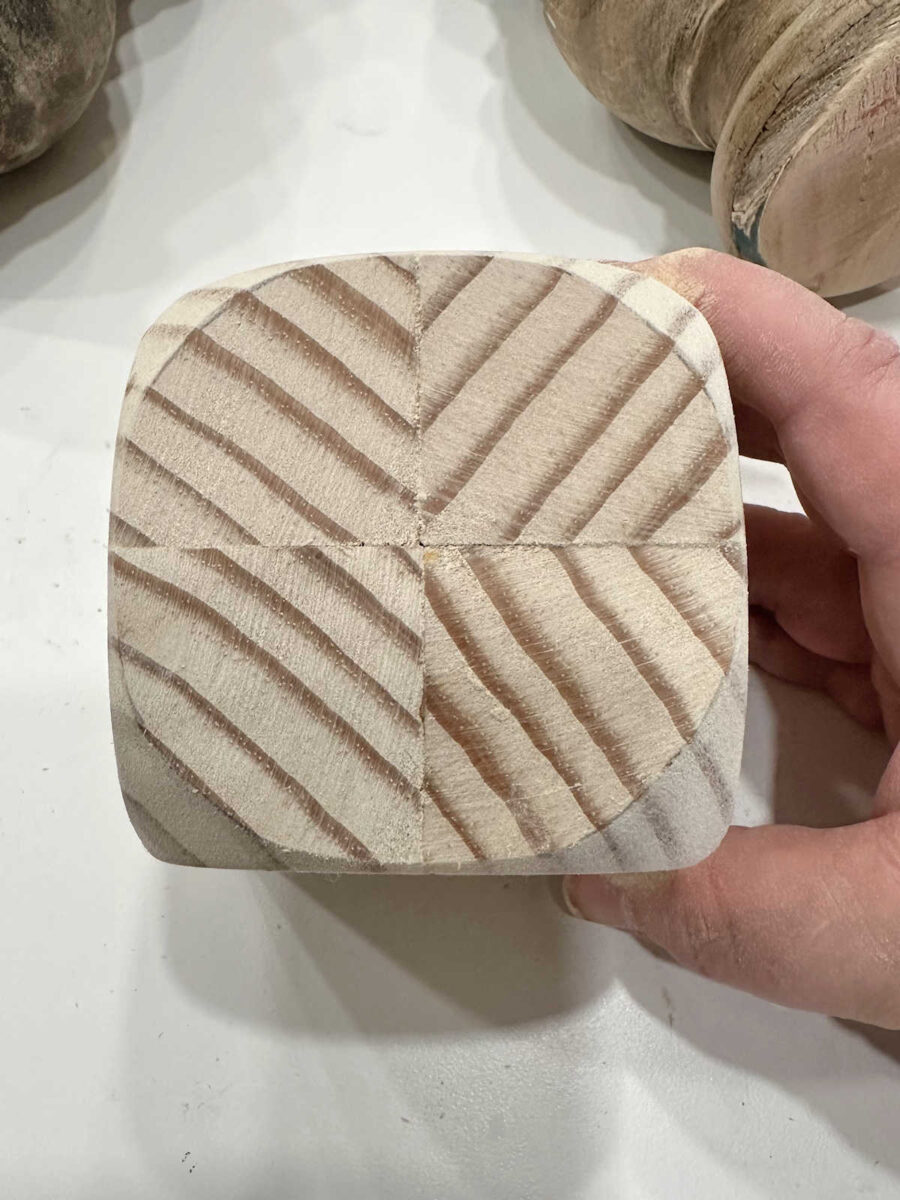
Once I had the corners sanded down, I started sanding all the way around, keeping that same angle with my sander, until the whole thing was sanded to meet the edges of the circle.
And then I did a little more detail sanding to round off those bottom corners and blend them in with the side edges on the block.
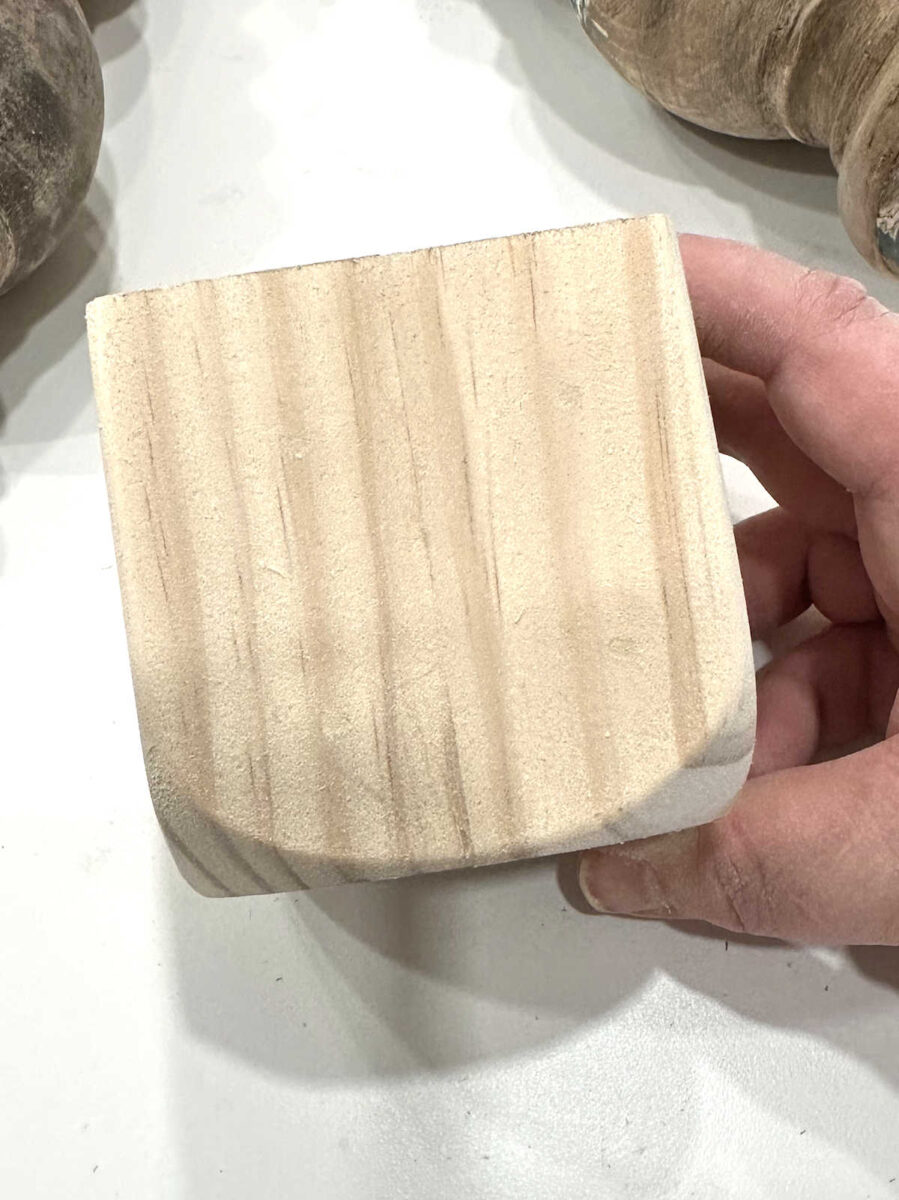
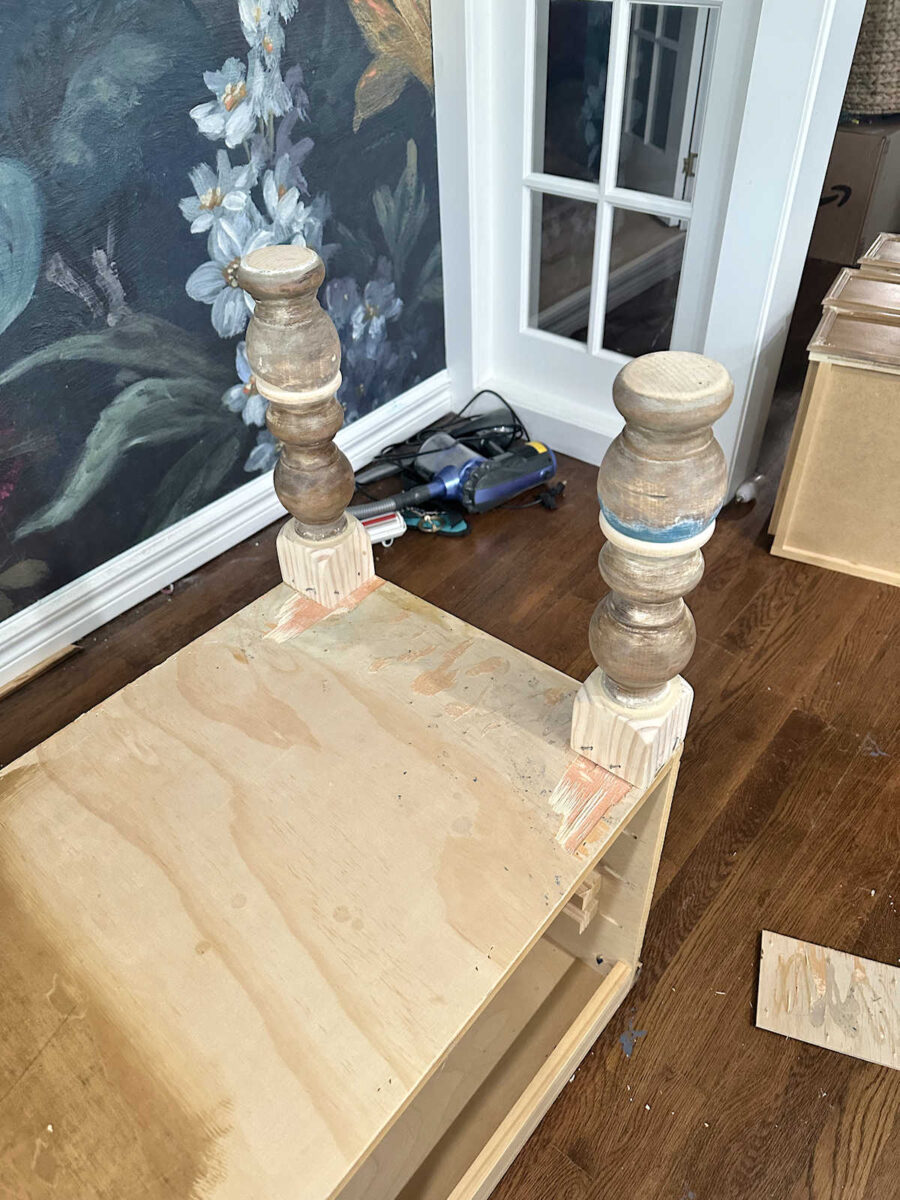
Once I had them sanded, I attached those blocks to the legs using wood glue and 18-gauge 1.5-inch nails. (The block shown here hadn’t been completely sanded yet, and it isn’t actually attached yet.)
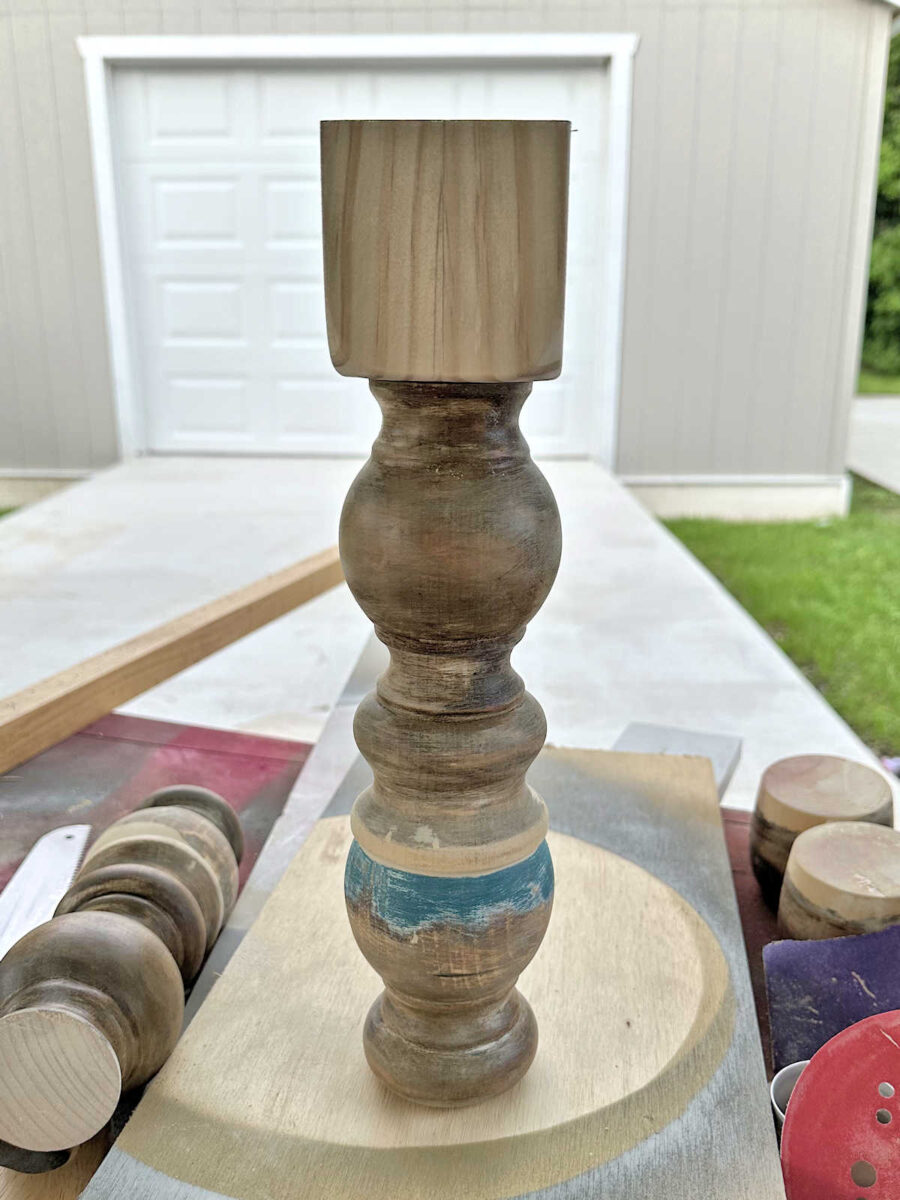
With my new Frankenstein legs completed, I attached them to the bottom of the console table using a whole lot of wood glue and a few 16-gauge 2-inch nails toenailed in from each side.
Once all four were attached, I left them alone for a while so that the wood glue could dry.
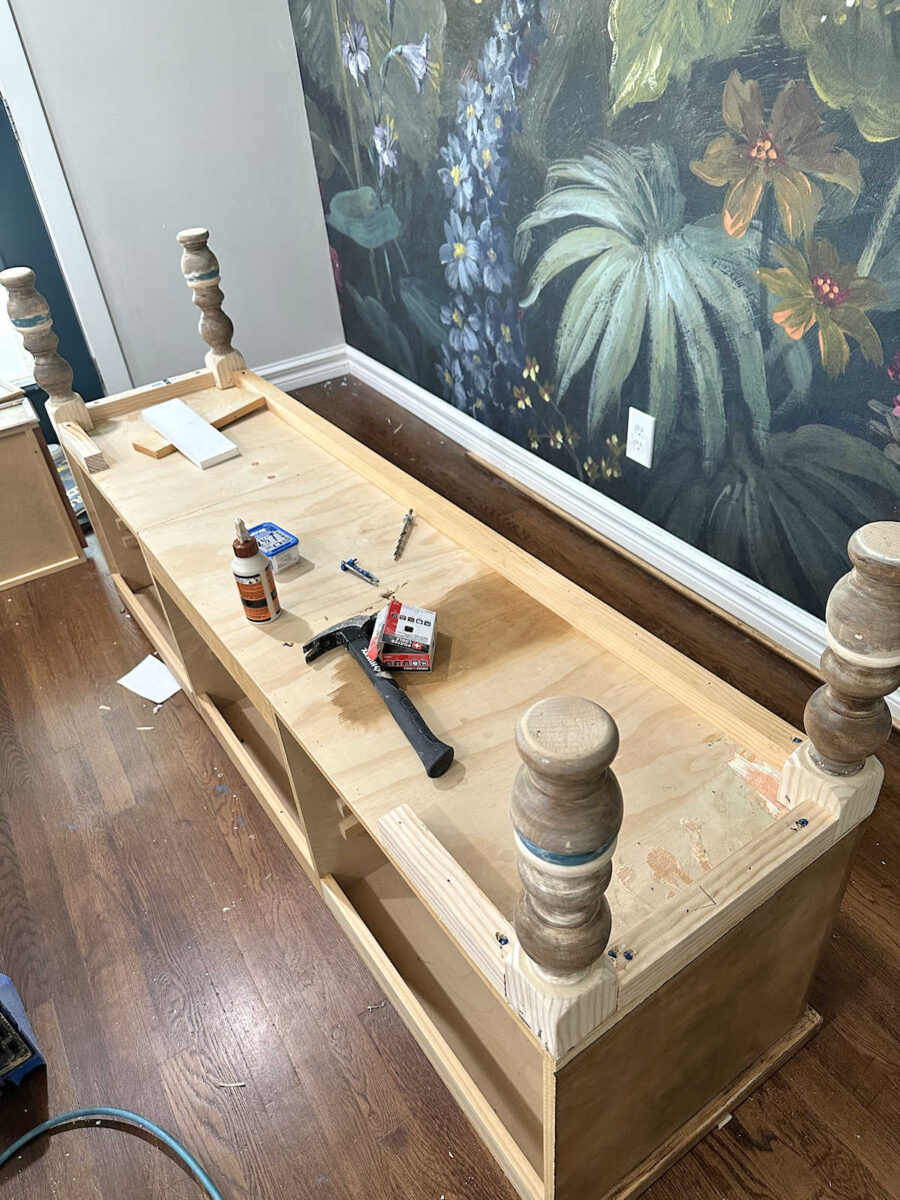
Next, I cut lengths of 2×2 lumber and attached them between the legs. I didn’t have enough 2×2 lumber on hand to reach the full span between the back legs, so I just used smaller pieces and made sure they were firmly against the block on the back legs. I attached those 2×2 pieces of lumber with lots of wood glue and then 2.5-inch 16-gauge nails to secure them to the bottom of the console table.
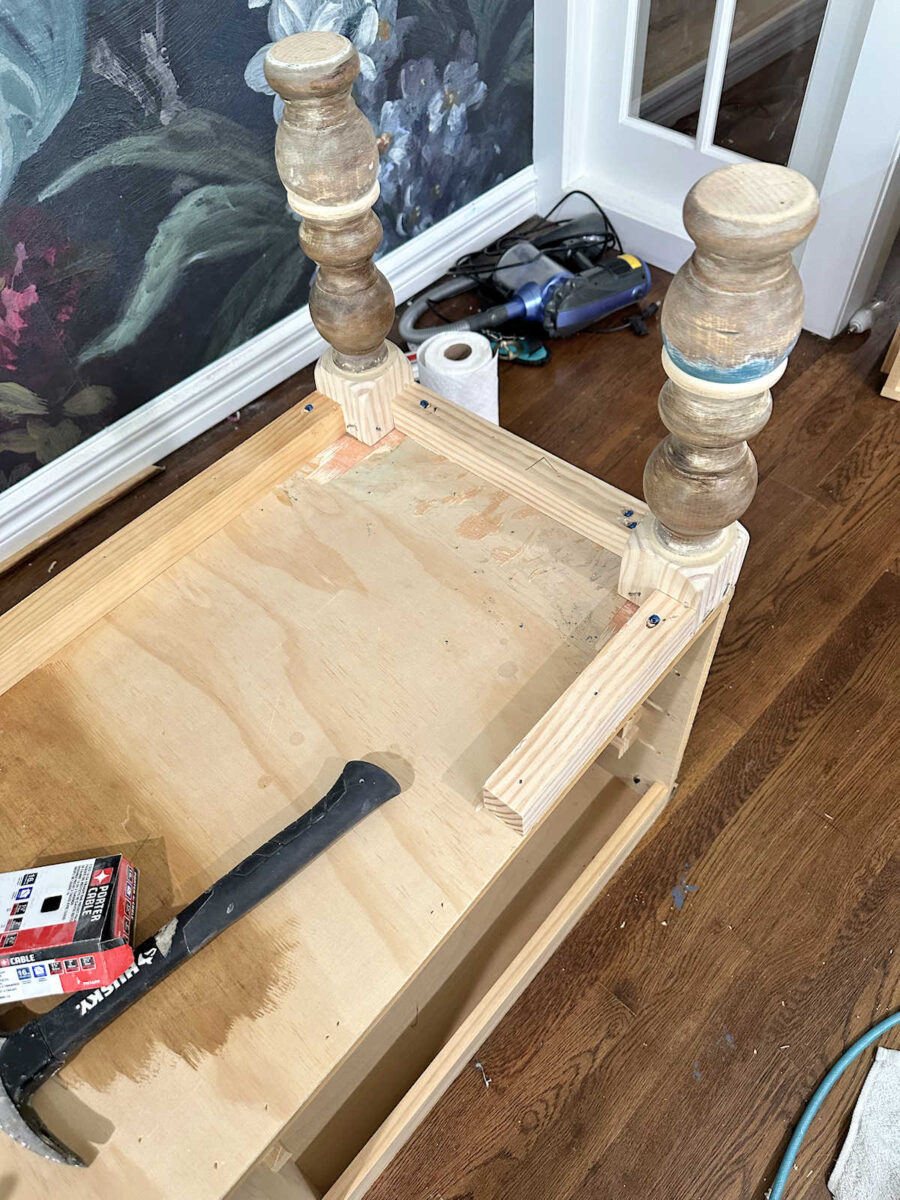
And finally, I used 2.5-inch wood screws and angled them in so that they would go through the 2×2 lumber and into the sides of the blocks on the legs.
I was going to use my Kreg pocket hole jig for this, but as I was trying to adjust the drill bit for the right depth, I accidentally unscrewed the little screw on the collar of the drill bit too much and it came out all the way. And then it fell on the floor and I couldn’t find it. So I had to make do without my handy Kreg pocket hole jig and just angle the screws in without those clean pocket holes. It worked out fine in the end, but it would have been a whole lot easier with pocket holes. Drilling pocket holes first minimizes the risk (there’s pretty much zero risk) of the screw splitting the wood as it’s going in.
Here’s what it looked like once it was flipped upright. I definitely like it better without the shelf, and as I’ve already learned, it’s a whole lot easier to clean underneath the console table without that low shelf in the way. But I still needed to cover the edges with trim.
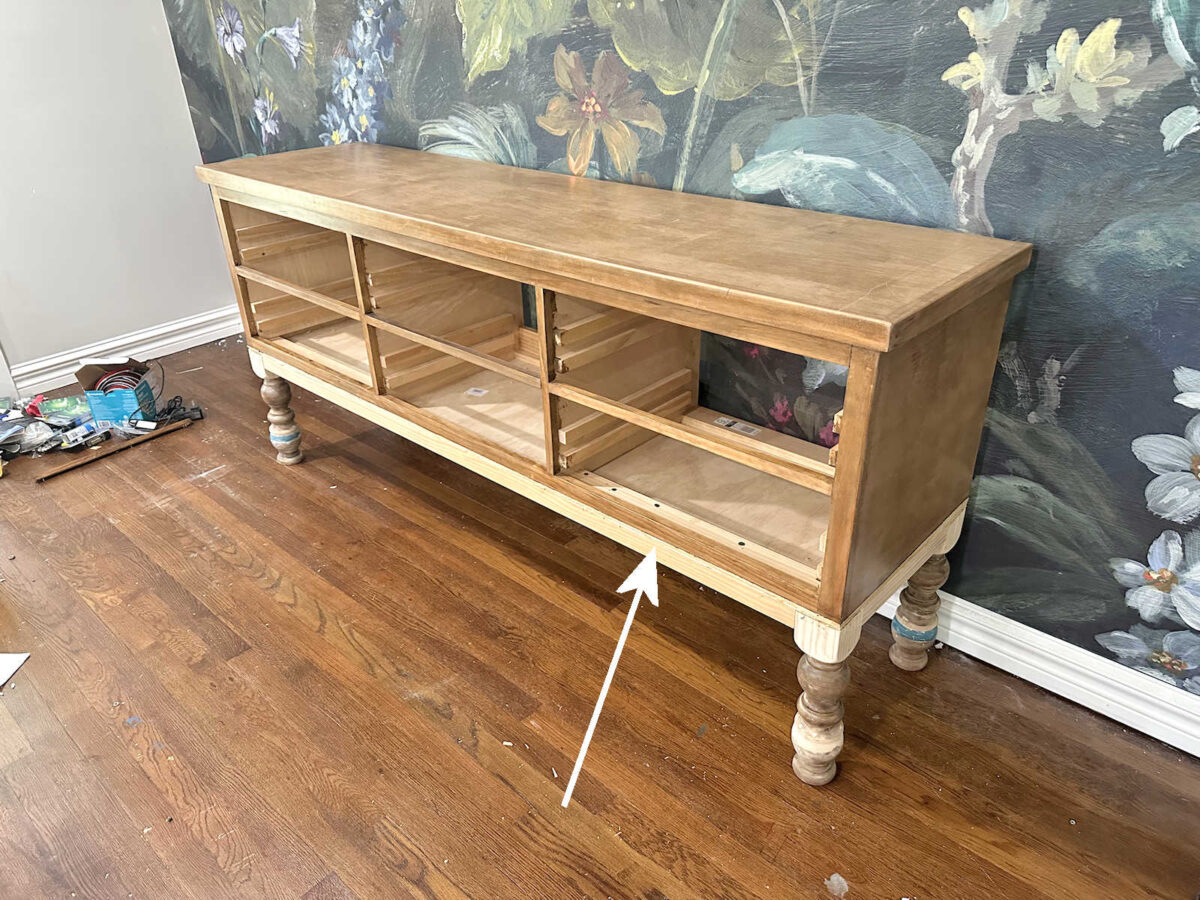
I forgot to take a picture of the trim before I painted the console table, but I found a 2 1/4-inch trim at Lowe’s that worked perfectly to attach to the bottom and cover over the 2×2 lumber and the area where that 2×2 met the bottom of the console table.

Now that it’s all said and done, I’m really glad I took the time to remove that bottom shelf. I really like the more open look. And as I said, it’s so much easier to clean under the console table now.
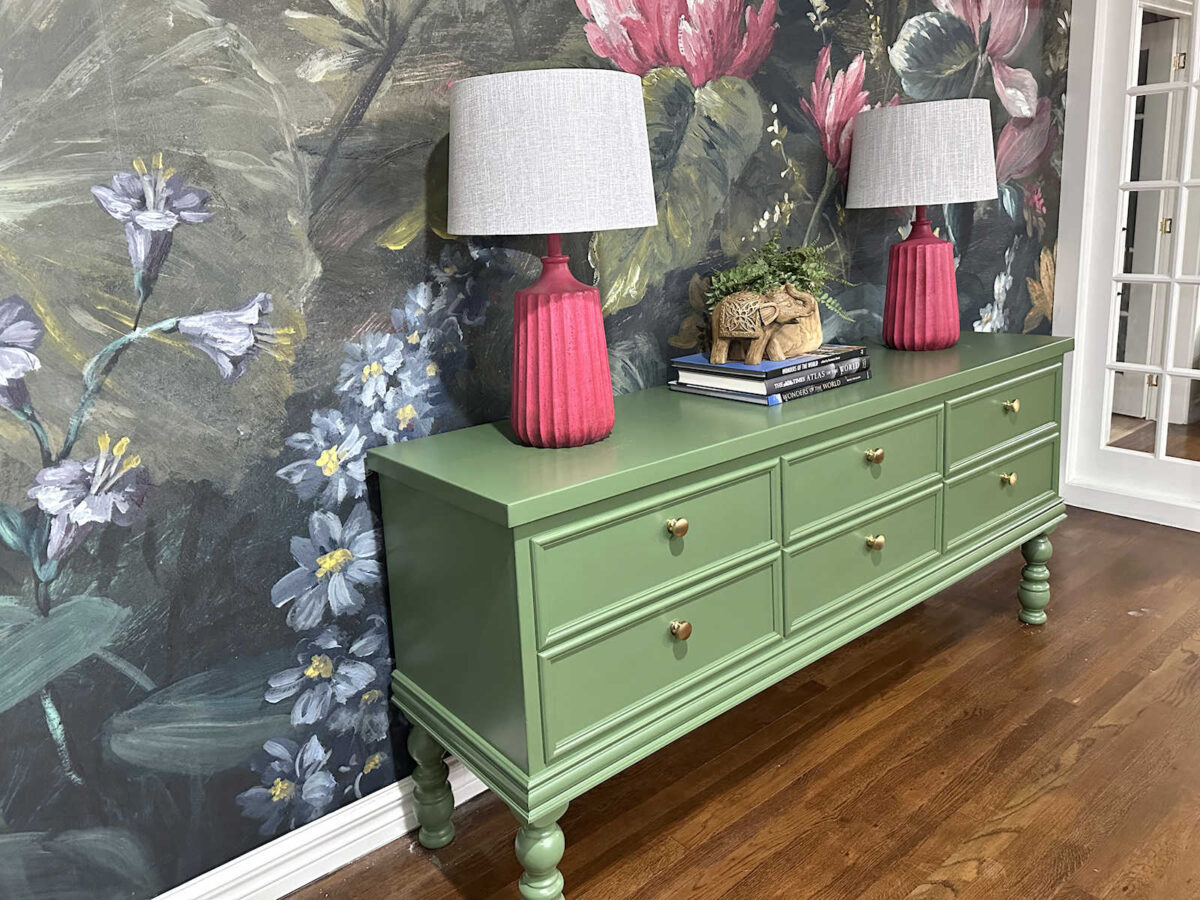
I swapped out the ring pulls for some very simple large gold knobs. I was ready for a change there, too. I like the simplicity of these.
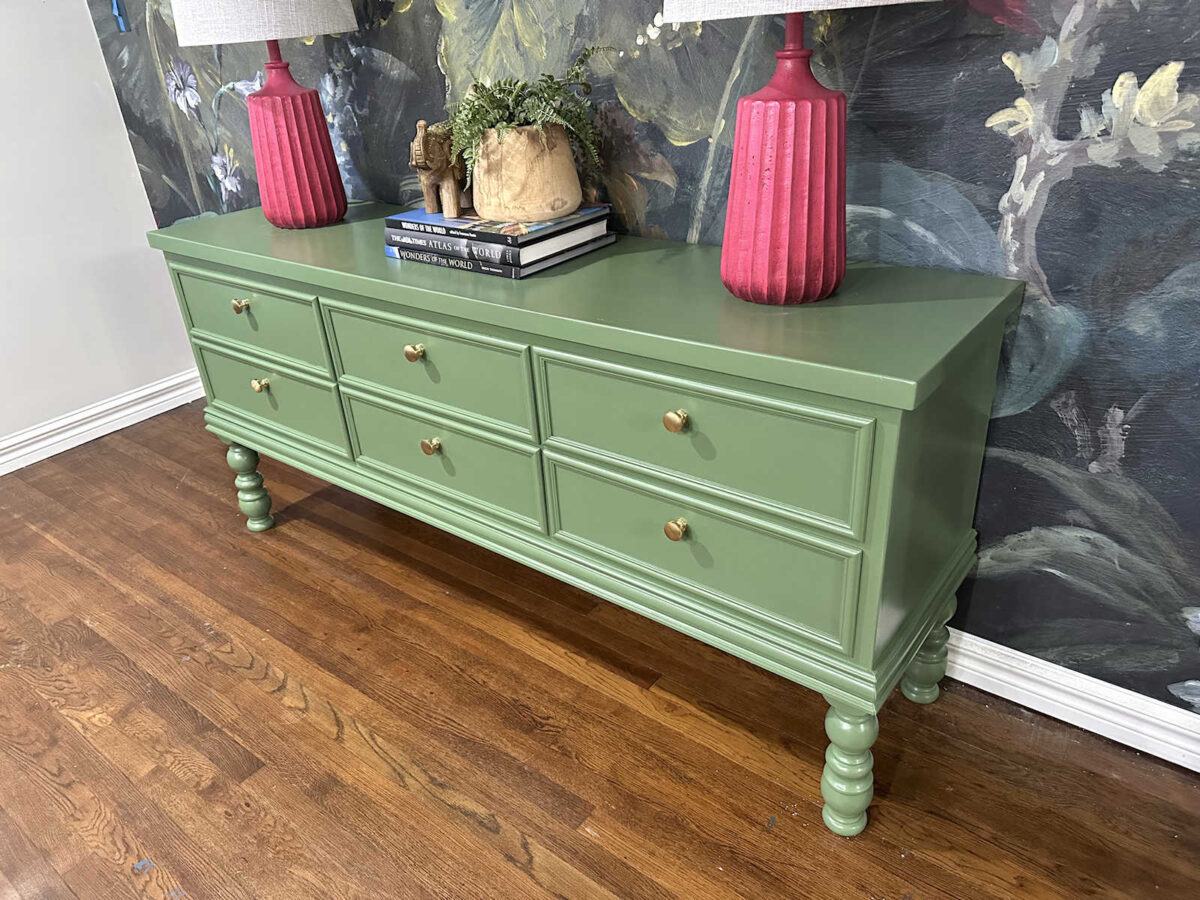
I’m not sold on the items that are currently in the middle of the console table, but I had these on hand, so I put them there for now. I’ll see what else I can come up with. Or maybe I won’t. I’m not sure yet. But I do have some ideas for the areas on each side of the console table. I think those areas need a little something.
I’m glad to finally have this done, and I’m really glad that I found a way to keep the turned legs. I don’t think I would have been satisfied with those simple, straight legs that I previously considered. And now that this is done, I need to finish up with some accessories, get all of my tools cleared away, and get the living room back in order. And then I’ll show you the whole area with the new look of the entryway wall.

Addicted 2 Decorating is where I share my DIY and decorating journey as I remodel and decorate the 1948 fixer upper that my husband, Matt, and I bought in 2013. Matt has M.S. and is unable to do physical work, so I do the majority of the work on the house by myself. You can learn more about me here.

I was (even though green is my fav color) against painting the console. As usual you knew what you wanted in the end and did it. It is gorgeous! I love this whole wall and like the top of the table. You have done an awesome job, again. When you are finished completely your home is going to be so vibrant with good energy and also relaxing. No one will ever doubt that you love your home.
Well I was firmly in the camp of ‘don’t paint the console table’; however, (as usual) it looks stunning and i love it!!
It looks so amazing and gorgeous. I love the dark moody mural, and then you step out of the jungle into this gorgeous living room. Perfect!
Cheers to you, Matt and the Fur Inspection Team!
Love it!!!
Nice, nice, nice! I enjoyed seeing this project! Kristi, you are my guilty pleasure and my creative release when I cant do anything creative myself, which is a lot right now in my life. We are dealing with a lot of infrastructure, so it will be a while until we can get to the pretty! Thanks for sharing. Frankenstein, that cracked me up.
That wall and those furnishings look gorgeous. Congratulations on a job well done!
That looks amazing. I love the colors. I need to thank you for the chatGpt tute. It was so easy and Helpful. I absolutely need visuals. We have been trying to furnish our condo in Belize and are limited to what we can pack to check on so I have no room for error. Just wanted to thank you and I’m happy to share the suggestions from the “chat.”
Wait, there’s a chat?
No, she’s talking about using ChatGPT (AI chatbot) to create mockups of rooms and stuff like that.
Oh, how fun! I’d love to see the suggestions! No way to upload here, but you can email me: [email protected]
Awesome! Thanks again Kristi. It would be great to get feedback even though It may all be contrary.
It looks great!
This was a wonderful choice. I bet myself you would paint it and I hoped for green. Perfect color. It is simple and is just right as it is. It needs nothing more, in my opinion. Let the wallpaper be the star. Simplicity always wins.
Yes, I agree…let the wallpaper be the star. Please don’t add anything to the sides of the console. It’s busy enough as is.
Love the green color! It’s a beautiful entryway. I do wish the right lamp didn’t cover up one of the darker pink flowers because I really like those flowers. Definitely just a preference of mine. 😊
It definitely looks more sophisticated than before, a lot less rustic.
But I wouldn’t overload the top with stuff, it just detracts the eye and can veer into chaotic. Don’t gild the lily. Let the eye go to the console, right to the mural then back to the console for a longer look.
Nice job!
A really nice freshen up for the entry. I like the scallion buffet against the wallpaper.
Boy, the whole thing is just beautiful!!! I love the big pink flower in between the lamps just as it is.
I spy blue tape. Were you able to get the wires disconnected from the switch that went to the sconces?
I think that’s tape over a switch plate cover. She probably just forgot to take it off,
I haven’t yet. I was so disappointed because I finished up the console table, got it in place, put the lamps in place, and stepped back to take a look, thinking I was finished. And then I saw that tape and was reminded that I still have to unhook the wires and disguise the switch cover. Ugh. It’s always those little finishing details that get me.
I think the green was a good choice. I like the new knobs and the trim below the drawers. I would have preferred the straight legs with stretchers between the front and back legs and the two back legs over the turned legs. When you said you were thinking about adding something to each side of the console table, did you mean on top of the table? I would just find a larger plant to place on top of the books and move the charming elephant to the top of the table to the left or right of the stack of books. Perhaps add another decorative item taller than the elephant behind it. You had mentioned a larger wood bowl in place of the books and that would be pretty with a plant in it.
No, not on the table. I have a big basket that I want to use on the right side, probably for some throws (since our house is always cool). I’m not sure what I want to put on the other side, but I think it needs a little something low on the floor next to the console table. Maybe a plant.
How about a few live or realistic plants—-couple tall palms, fiddle figs, something big and beautiful to sit on floor in textured pots!!!
That turned out fabulous., I love it.
I love what you have done. The paint color is perfect. When I look at the photo with the stained console and then the finished photo, I want to remove the lamp on the right. I just loved the compositional bounce from the left lamp to the two pink mural flowers. it is very interesting visually. The second lamp obscures that eye candy bounce unfortunately.
As always, excellent update.
The lamp on the right that’s partially obscuring the second pink flower in the center is a bit further in from the right side of the console edge than the lamp on the left. So it could be moved a couple inches to the right and uncover a bit more of that flower. The whole arrangement is just so lovely.
I agree. That flower needs to be fully visible. Good to move each lamp farther apart.
Glad to see the 4 footed inspector was on the job, approved the work and didn’t Red Tag you!
Looks very different now. I’m not a green person but each to his own. What does Matt think?
I just realized that he saw it (or looked that direction) this morning and didn’t say anything. 😀 He’s so used to me doing projects and changing things, so he may have looked that direction without really noticing it. He really likes the mural, though.
I love your console table!! The colour is gorgeous…and with the lamps & mural…perfection!!
I really like the console table without that bottom shelf. It looked bottom heavy before. I also love how ressourceful and thrifty you can be, like making the existing turned leg work despite it giving you a lot more work. That is totally something I would do. There is great satisfaction in not wasting. Another well done project!
Nice! And I love your cat model!
I’ve had an emerald green painted dresser/buffet piece in my entryway for 3 houses and 13 years! I’m a big fan of what you’ve ended up with 😉
Less is more on the entry table with that wallpaper! Please, no more tchotchkes to compete with the gorgeous large scale wallpaper. Green is my favorite color, so course I love the color you chose for the entry table.
I am glad you painted the console, and I love the color. I especially love the legs you did…they look sturdy for holding the console table, and perfect for it. The whole area looks new/refreshed, and colorful. The mural is wonderful. You must be so pleased.
Is the console table shorter now? It may be the same height, but it appears shorter, and this may be due to the color change as well. It looks great, and I love the mural.
Interesting! It’s 3/4″ shorter — the thickness of the plywood bottom shelf that I removed from between the two leg pieces at the bottom. I’d be surprised if you can actually see a 3/4″ difference, so it must be the color making it look shorter. Or the combination of the two.
I’m so glad you have it the way you like. I’m still thrown by the lamps–they seem too bright a hue for the softer pink of the wallpaper, but that’s me. Thanks for the step-by-step instructions.
Your console table looks great! You did a wonderful job removing the shelf, rebuilding the legs, and choosing a perfect color for this space.