Lamp Makeover Using Soft Art Pastels (The Art Medium)
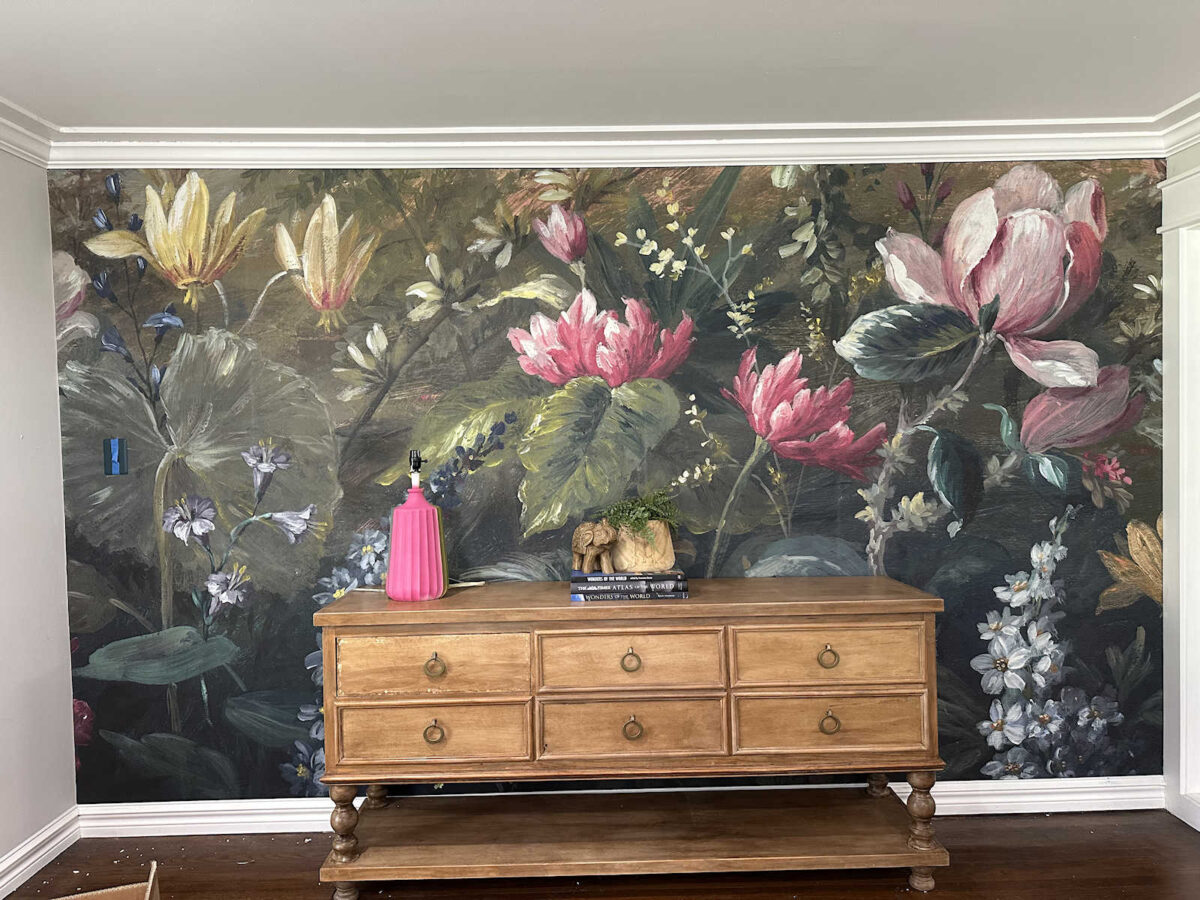
Okay, y’all. I’ve heard you loud and clear. After getting your input here on the blog about painting my console table in the entryway, I also put a poll up on my Fabebook page, and after looking through over 575 comments, the overwhelming majority of people thought that I should leave the console as is in its natural wood tone. My favorite comment was something like, “Put the paint brush down and back away.” 😀
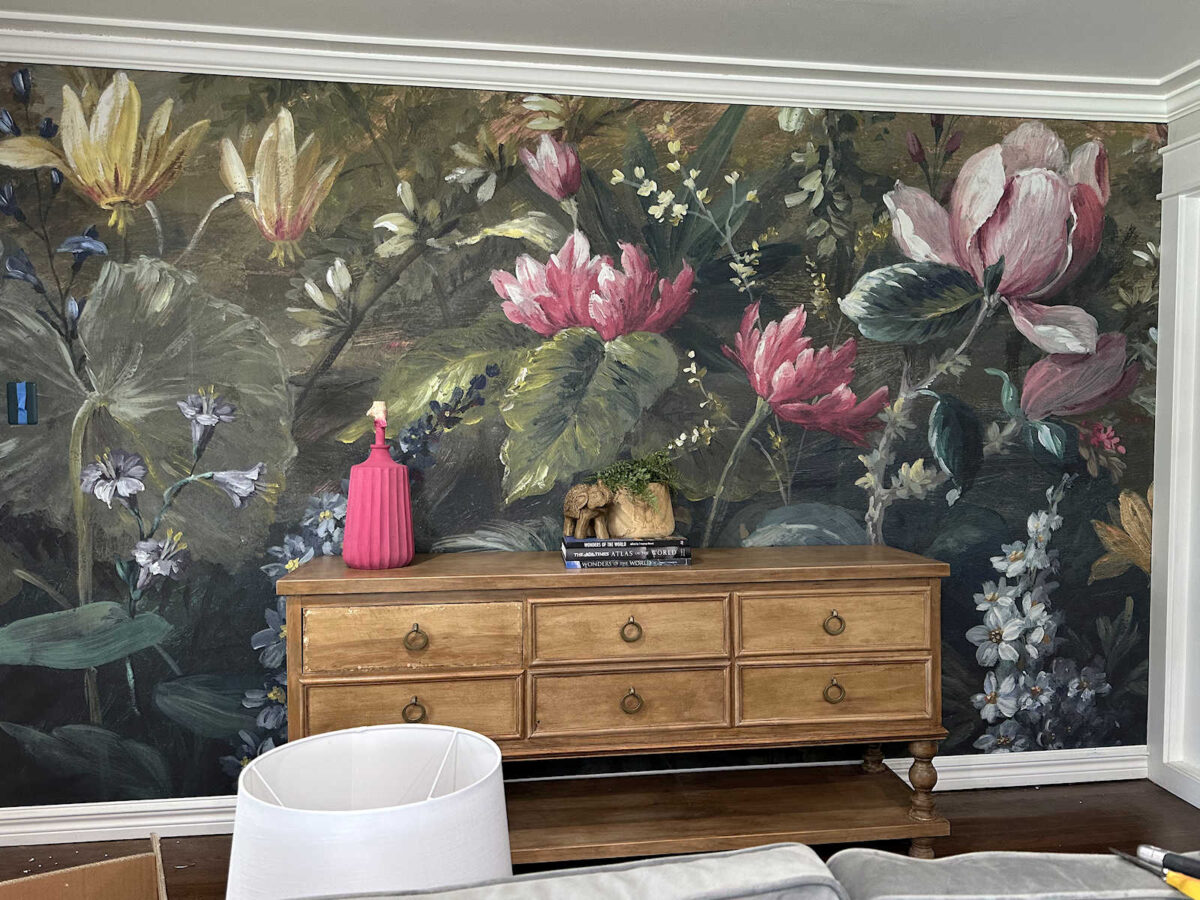
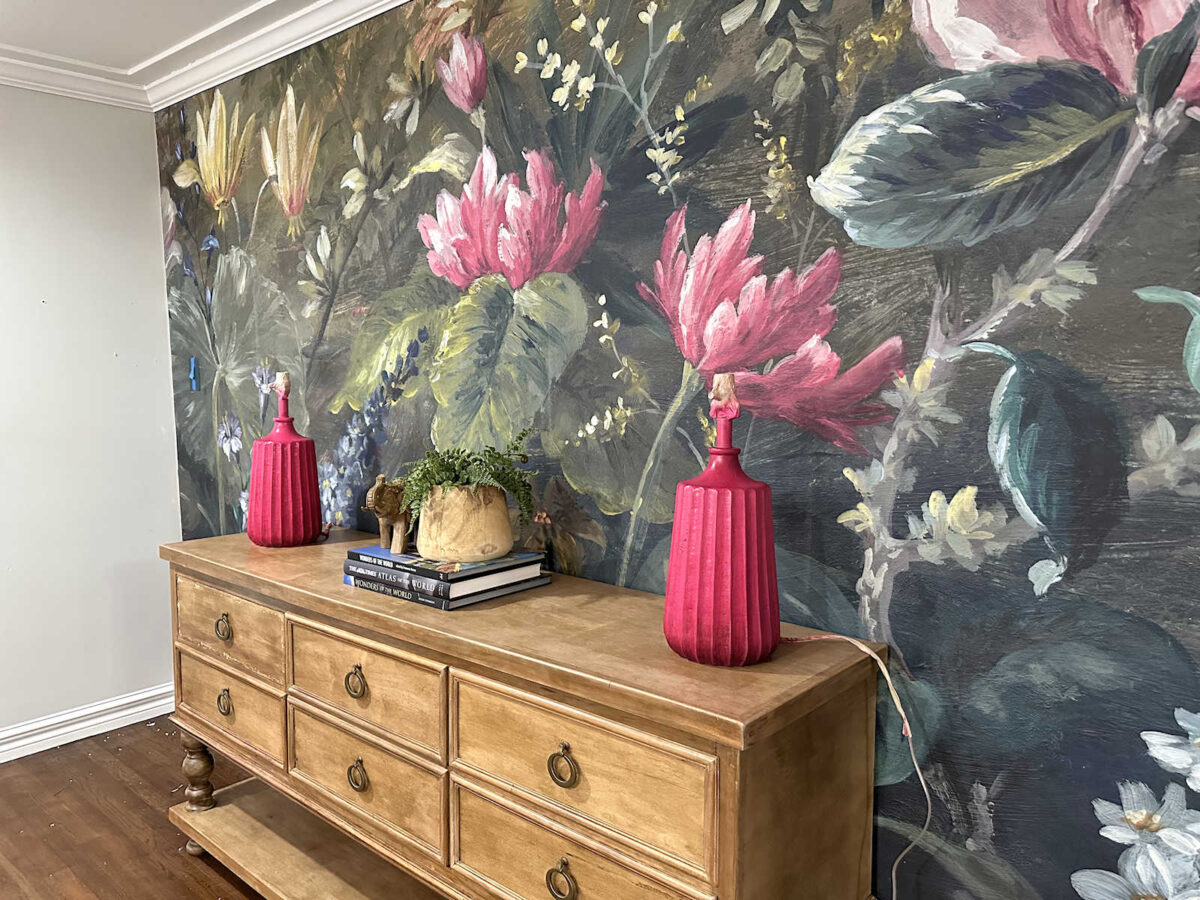
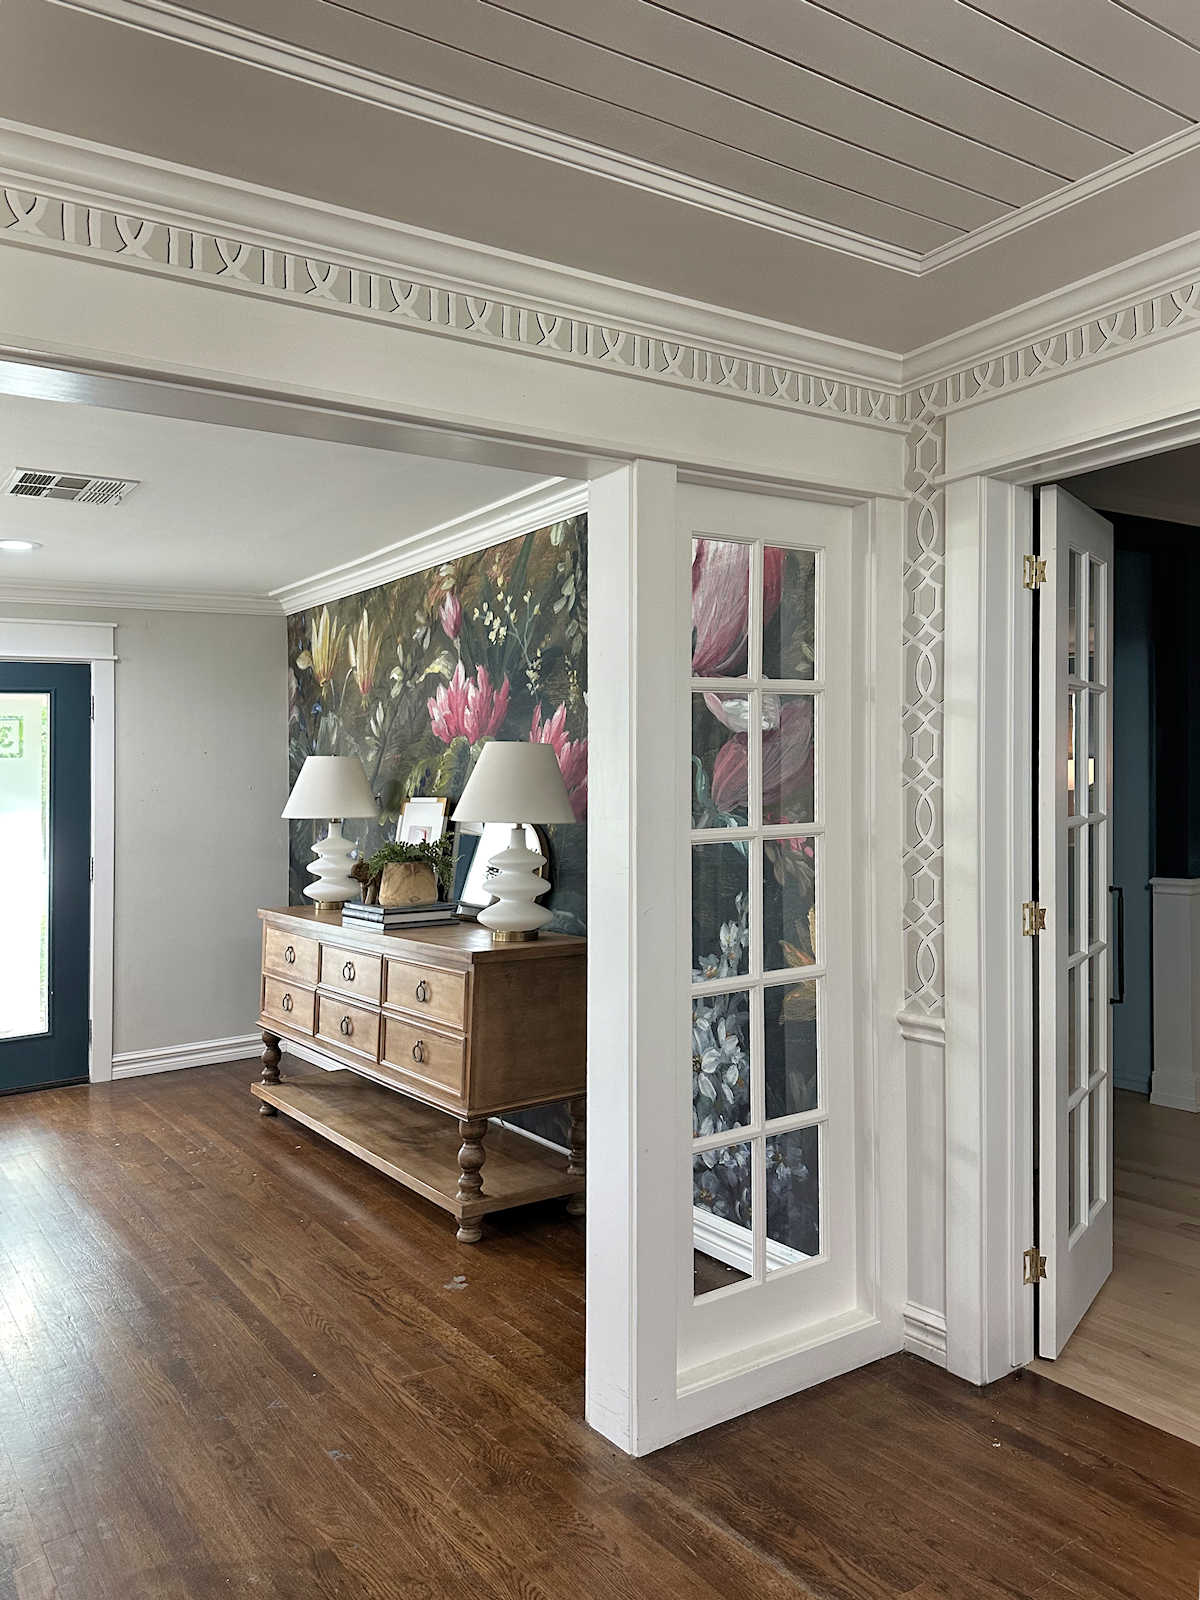
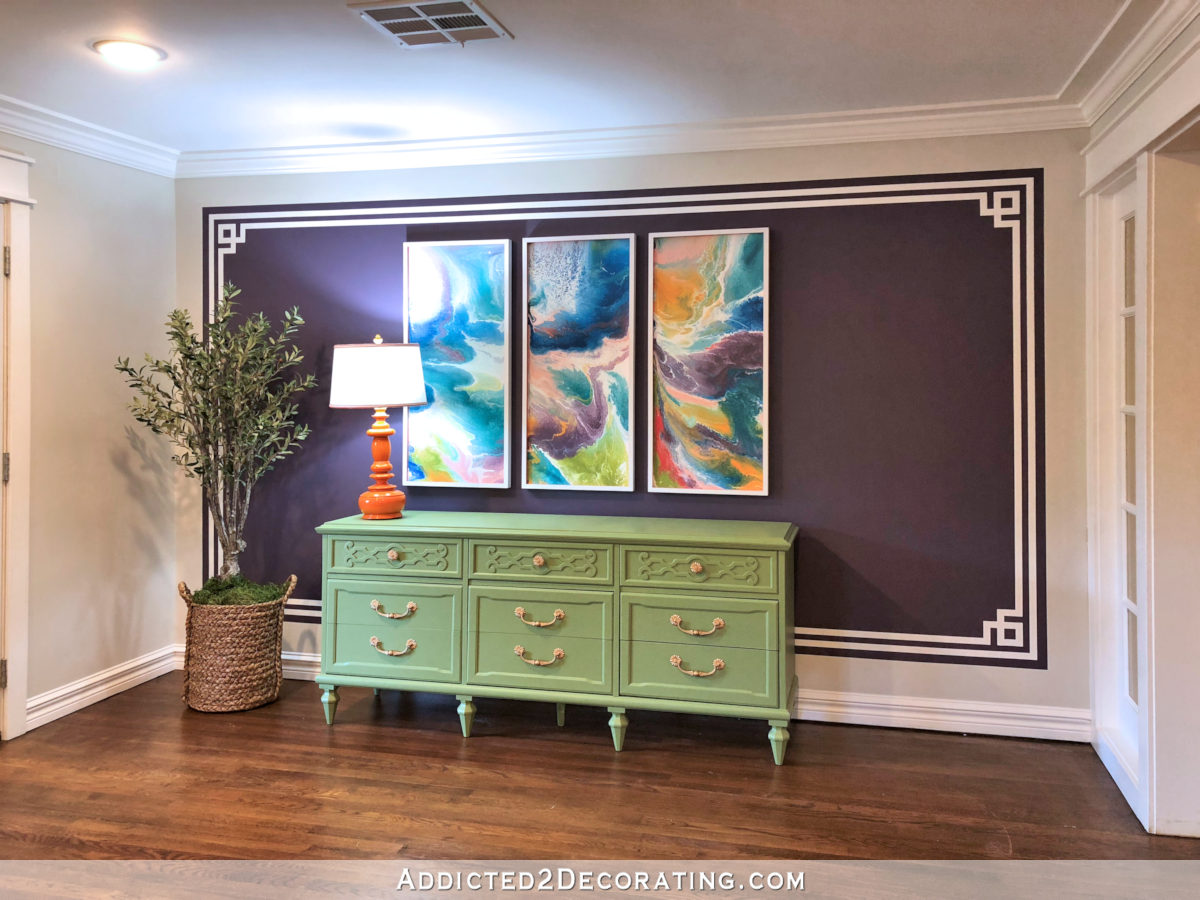
So I hear you. I’m still going to try to do something to even out the splotchiness and hopefully reduce the orange tone. Obviously, I still need to reattach that missing drawer trim, and I might also try to remove that bottom shelf. So with the console staying a wood tone, I decided to do something else with the lamps instead. I decided to keep these lamps and give them a makeover. (Just a random FYI, I do not like buffet lamps. They’re just not my style, so those were never an option for me.)
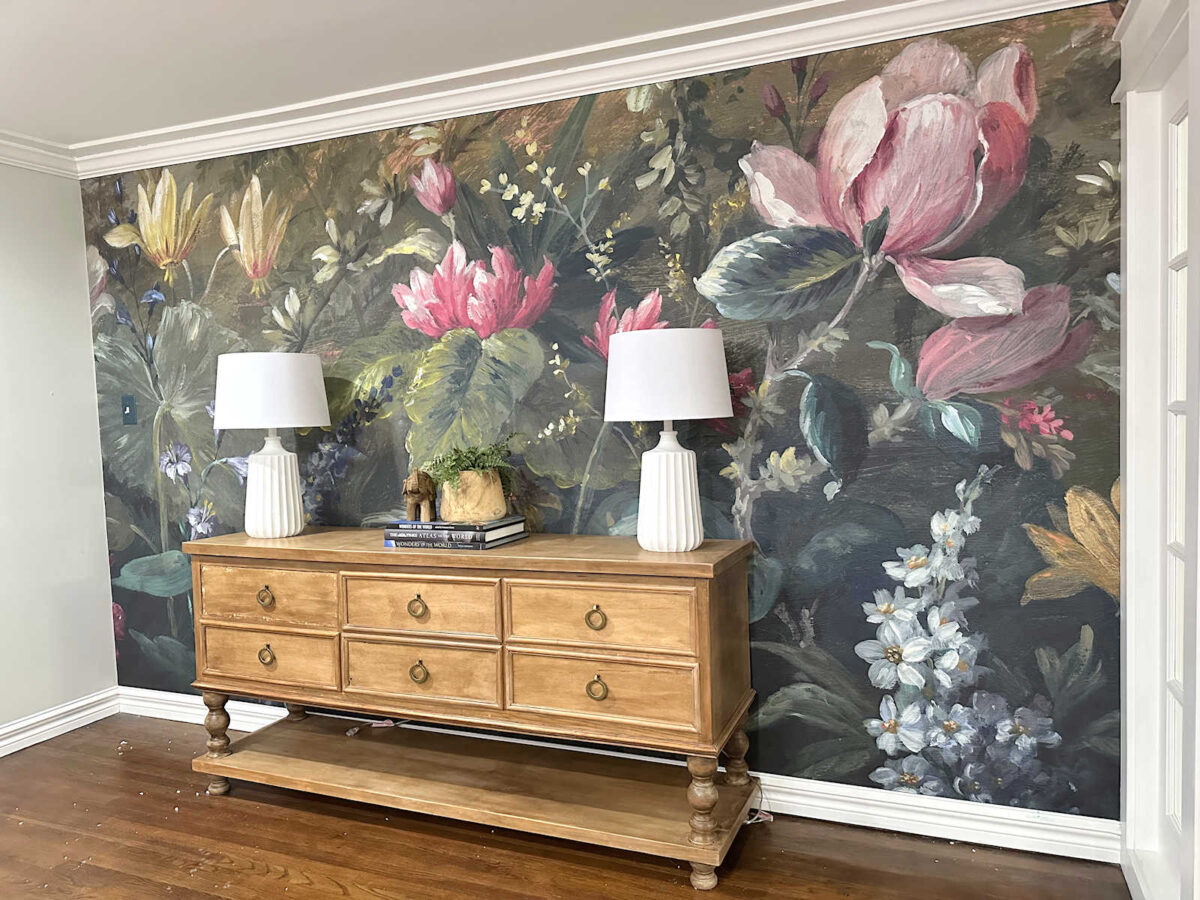
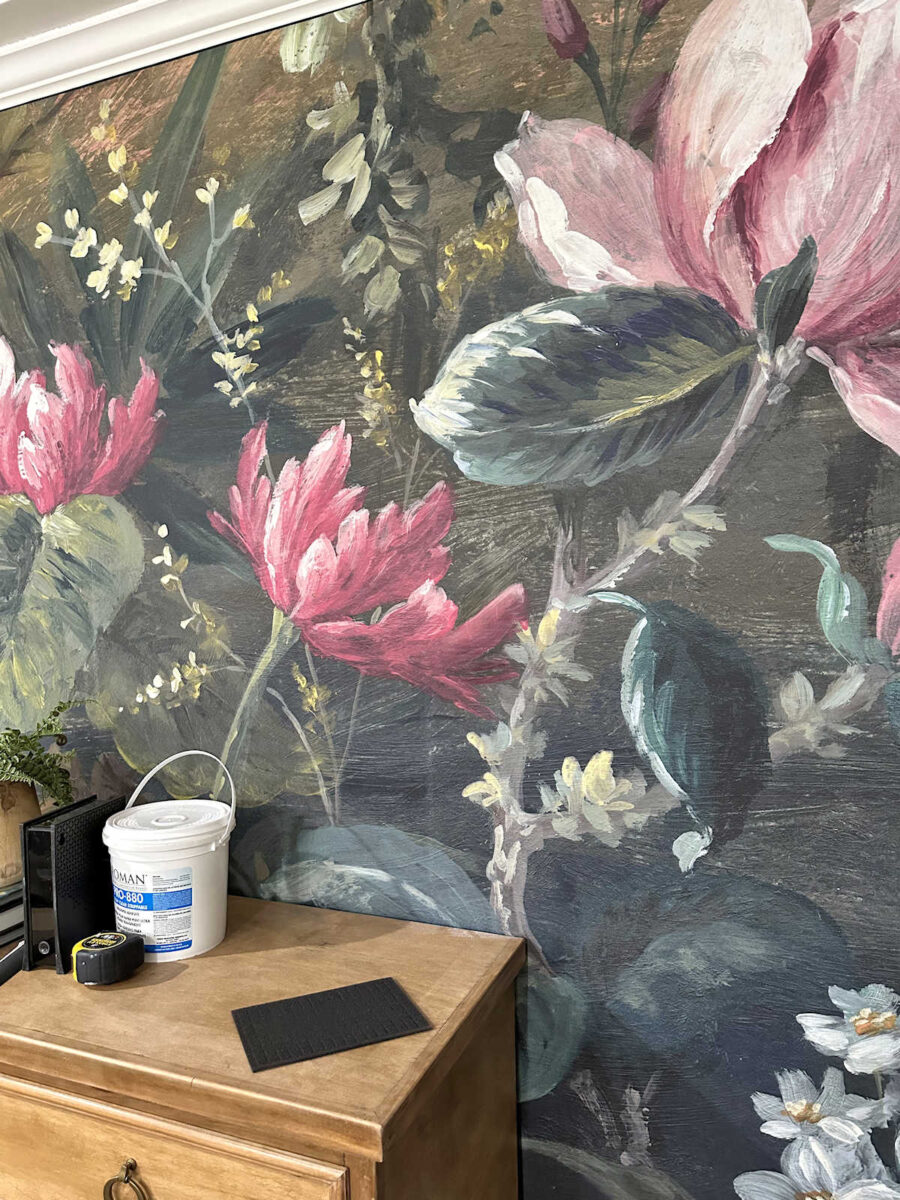
So as I was trying to decide what to do with the lamps, the first and obvious choice was to paint them. But I really wanted something more unique than spray painted lamps. And then I decided to try something with the art pastels I had used earlier this week to repair the patched holes in the wallpaper mural. (You can read more about that here.)

But first, I needed to decide on the general color that I wanted the lamps to be. I chose three different options from my huge selection of spray paint that I already had on hand, and I tested out all three colors on one lamp. First, I tried this darker green.
I also tried this brighter green. Again, this would just serve as the base color for the pastels that would go over it.
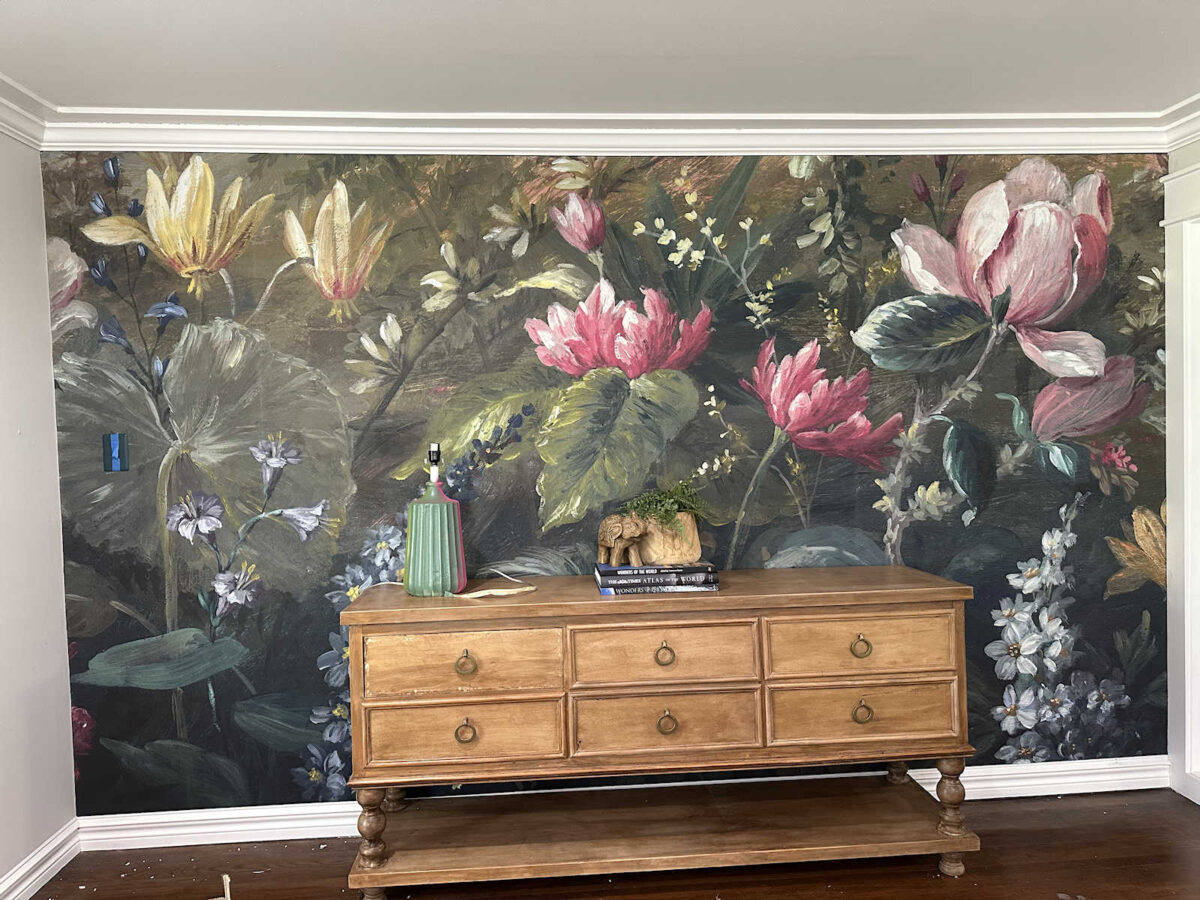
And finally, I tried out pink.
Pink was the obvious winner to me. The other two kind of got lost against the mural.

After giving the two lamp bases a couple of coats of spray paint and allowing them to dry completely, I started with my idea for the pastels. My original idea was to do a gradient design, with the color darker at the bottom and gradually becoming lighter towards the top. I used a total of five different colors starting with black on the very bottom, followed by red, two shades of pink, and ending with white at the top.
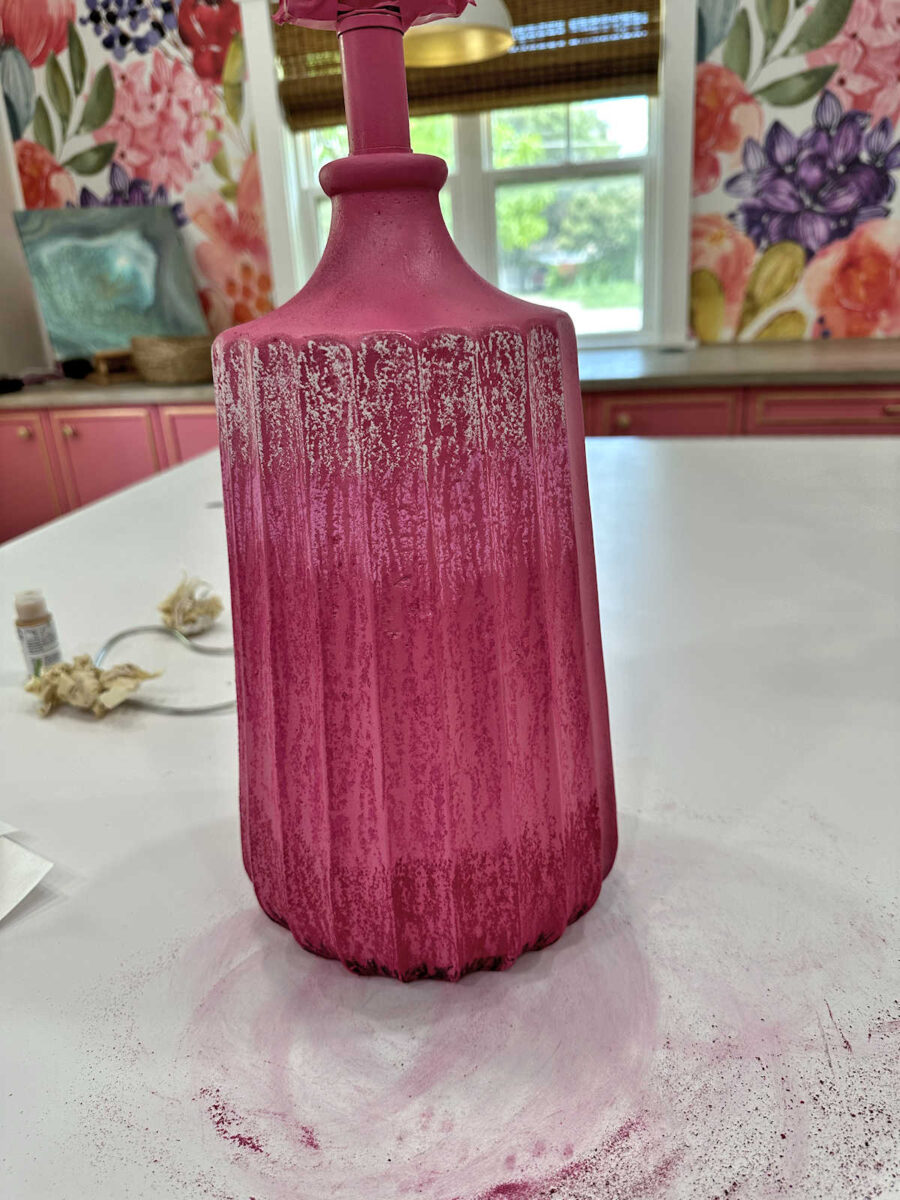
And then I used my finger to blend them all together and…I didn’t love it.
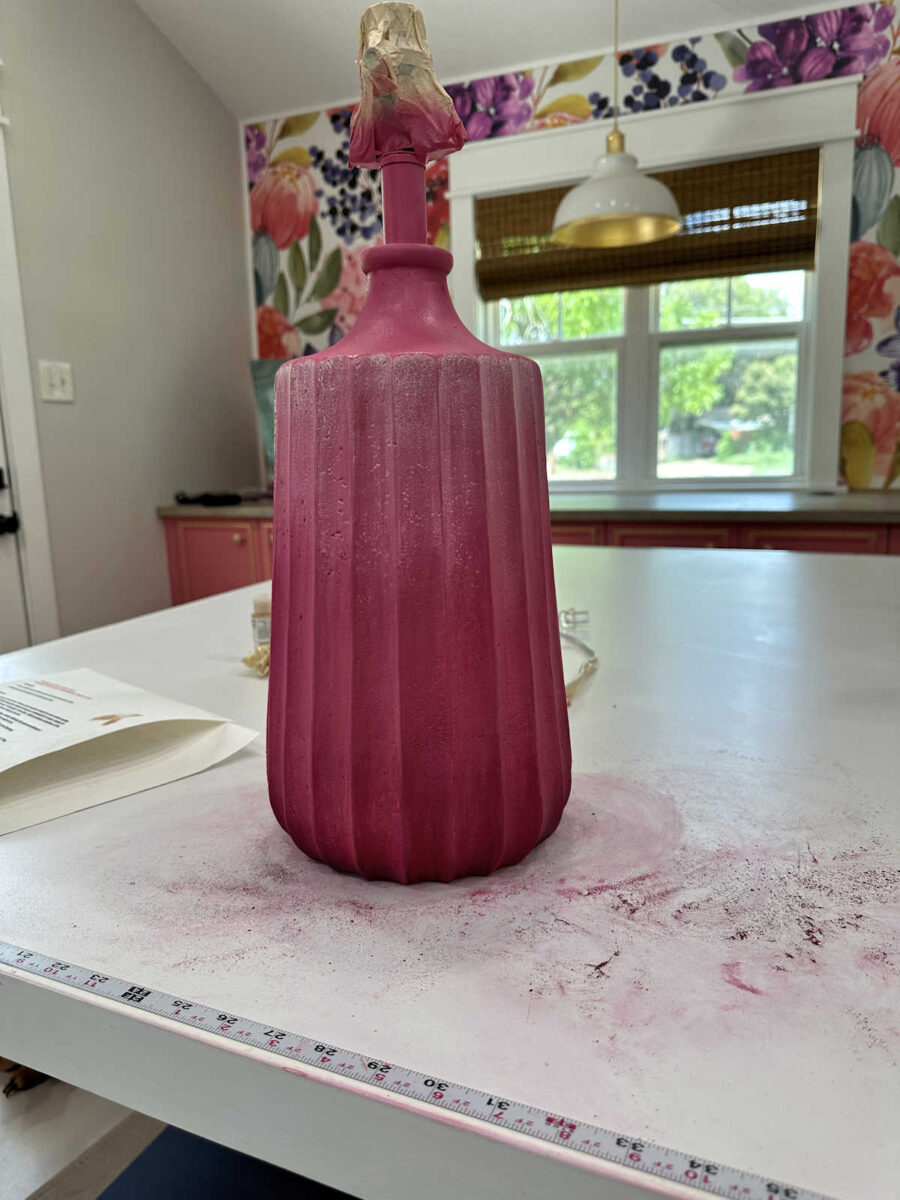
But I did love the darker reddish-pink color towards the bottom. So then I decided to blend all the colors together randomly and see what that would create. So I started again, this time putting the colors (minus the black this time) randomly over the lamp base.
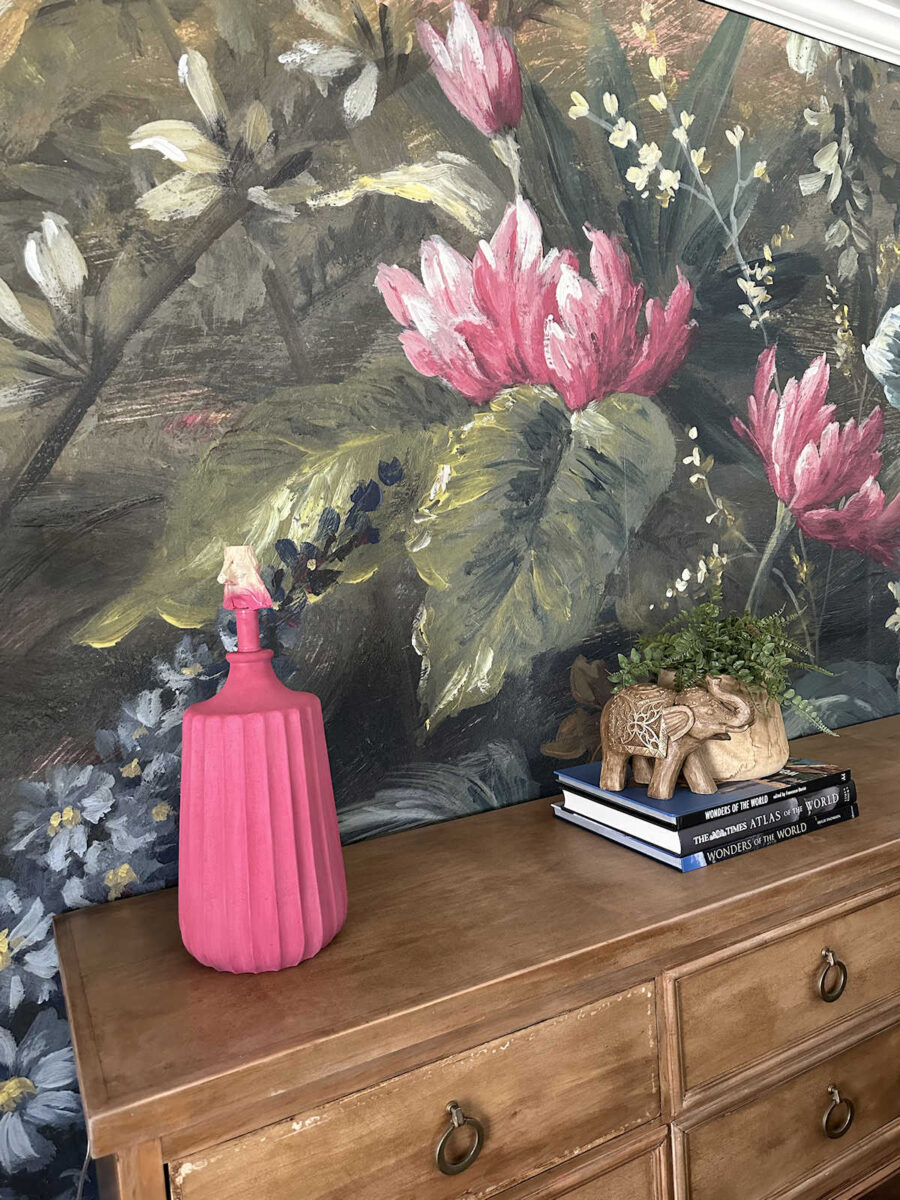
And this time, when I blended them all together, I absolutely loved it. It had such a beautiful, rich, organic look to it. Here’s a comparison of the spray painted lamp on the right and the lamp covered in the pastels on the left.

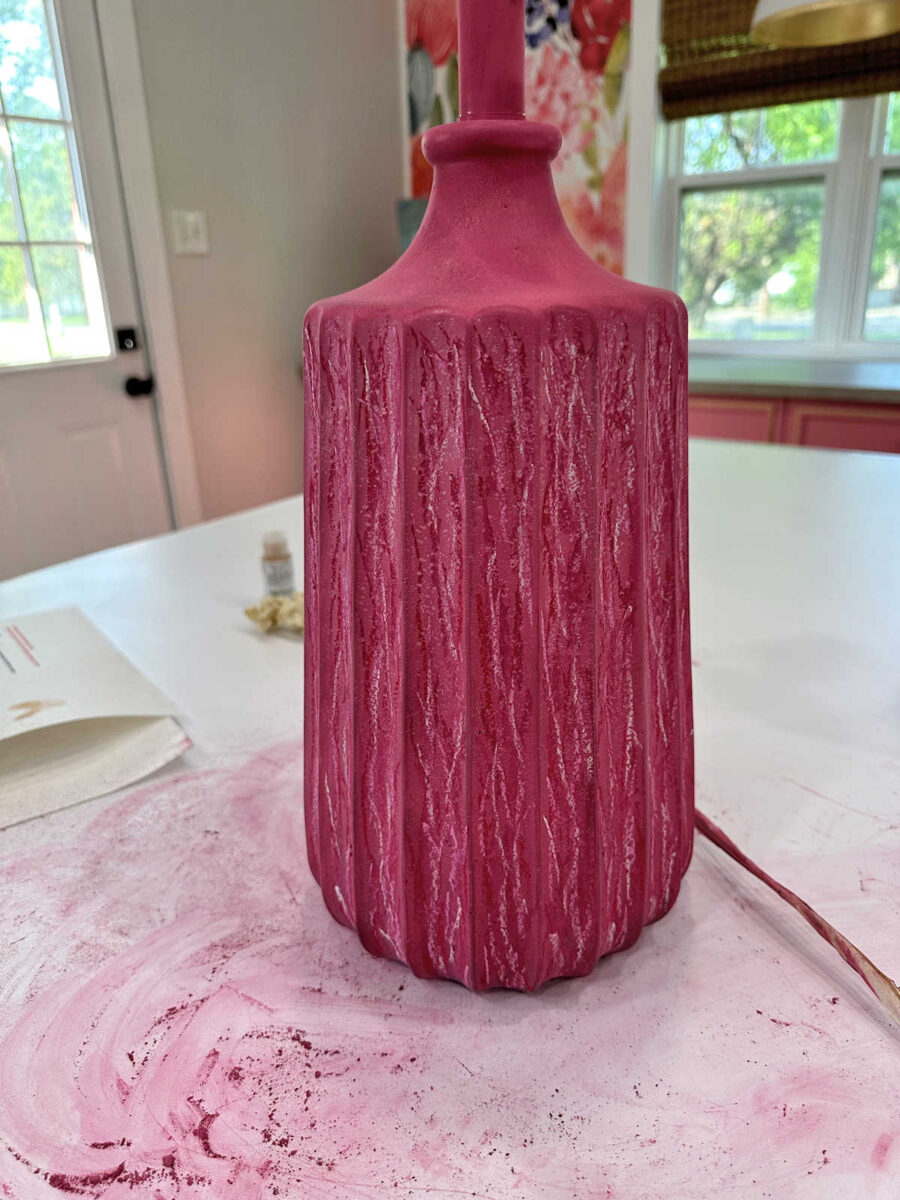
I very carefully brought it into the entryway to see what it looked like against the mural. It was perfect. But of course, at this stage, the base couldn’t be touched without the pastels coming off on my hands. So I knew they would have to be sealed.
But I absolutely loved the rich, organic look of the pastels.
The top was still taped off, so the lamp shade wouldn’t fit properly. But I balanced it as carefully as possible to get an idea of what the finished lamp would look like. It was perfect.
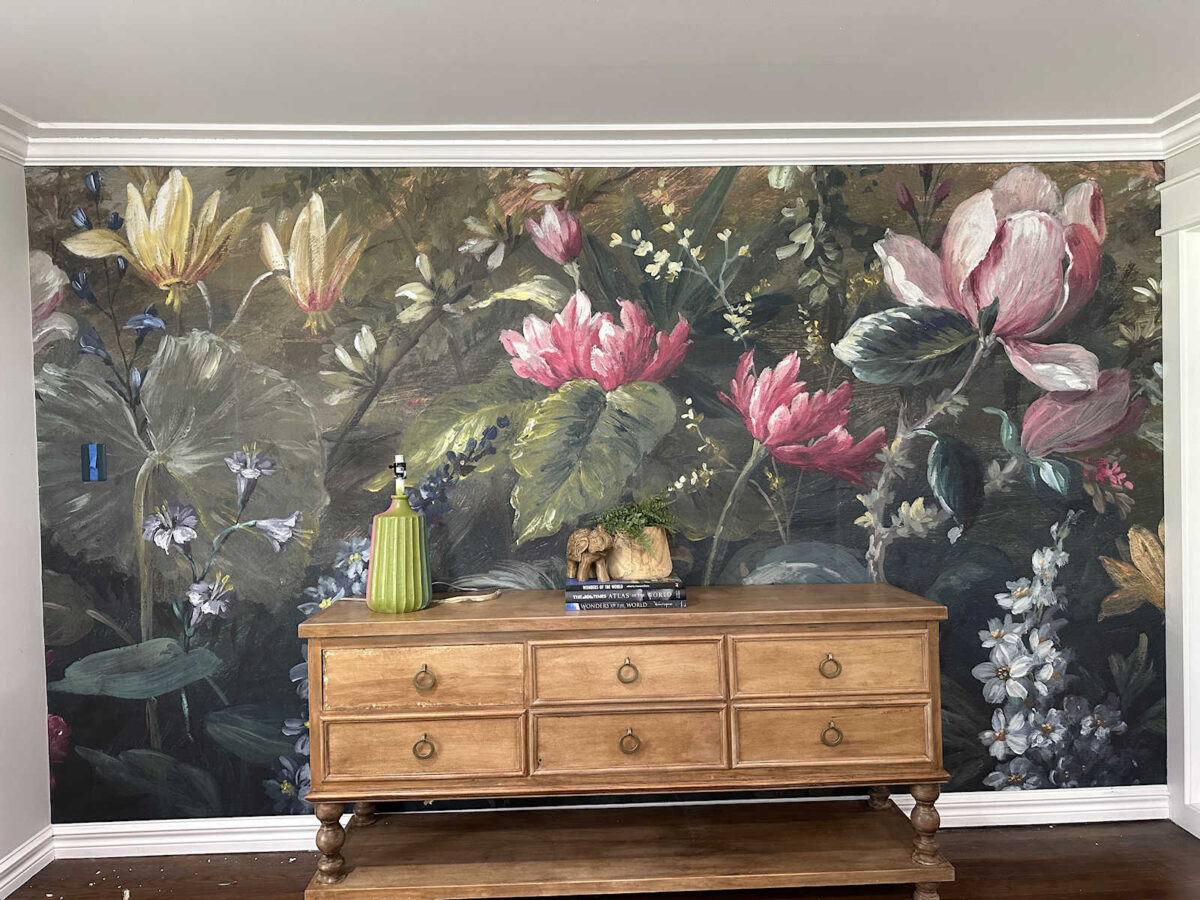
And then I made a huge mistake. Thankfully, I think it worked out, but I’ve learned a big lesson for next time I want to use pastels. Instead of doing a quick google search to find out the proper way to seal pastels (you have to use a special fixative spray for pastels), I grabbed my Rust-Oleum clear sealer in a matte finish and sprayed the lamp base. I knew immediately that I had made a mistake. As soon as that spray hit the pastels, it turned the pastels much darker. But I had already started, so I had to commit and do the whole thing. I hoped that it might lighten up as it dried, but it didn’t. Thankfully, I really love the darker color, too. So I decided to just go with it. It still has that organic, imperfect look to it that I liked about it before I sprayed the clear coat, but I did like it better before the clear coat.
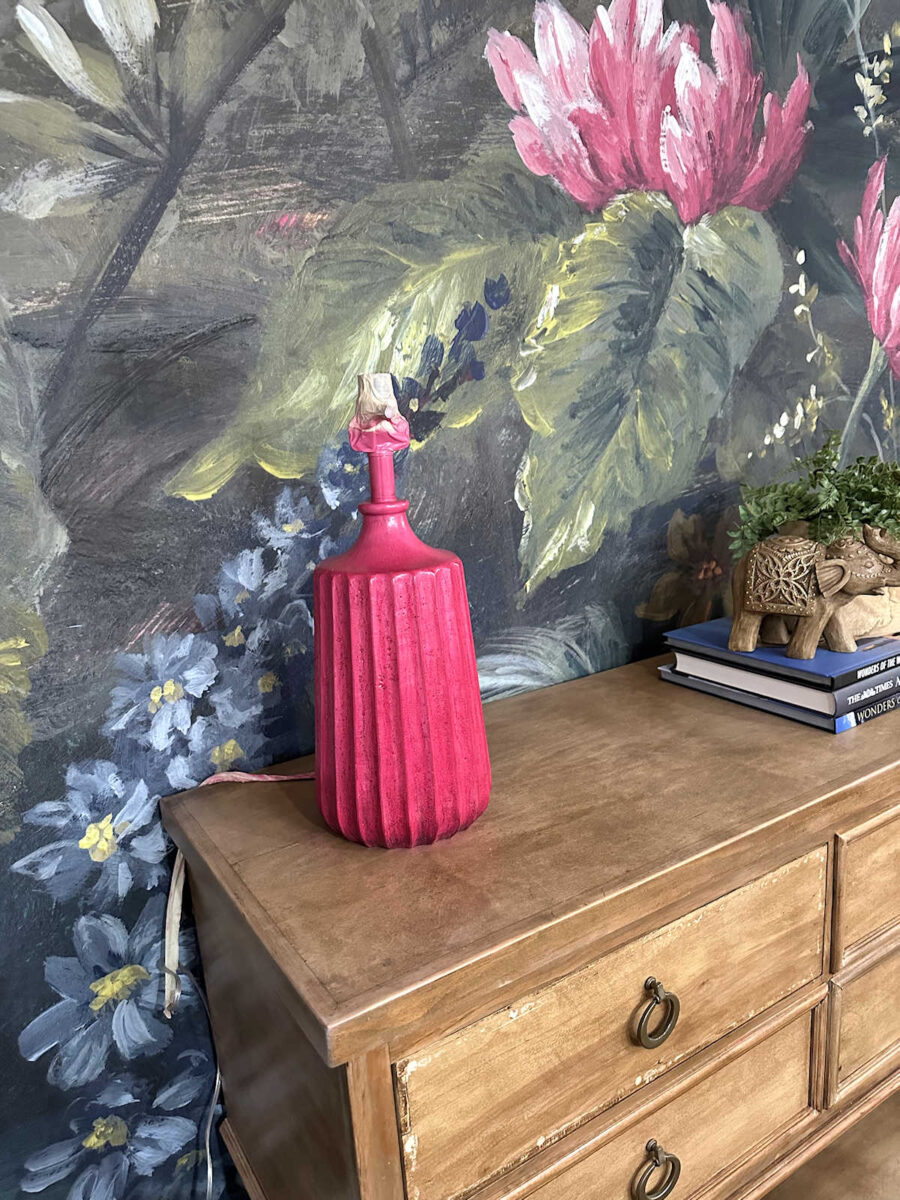
But overall, I really love how they turned out. And now I know for next time that I have to purchase a special spray to seal pastels.
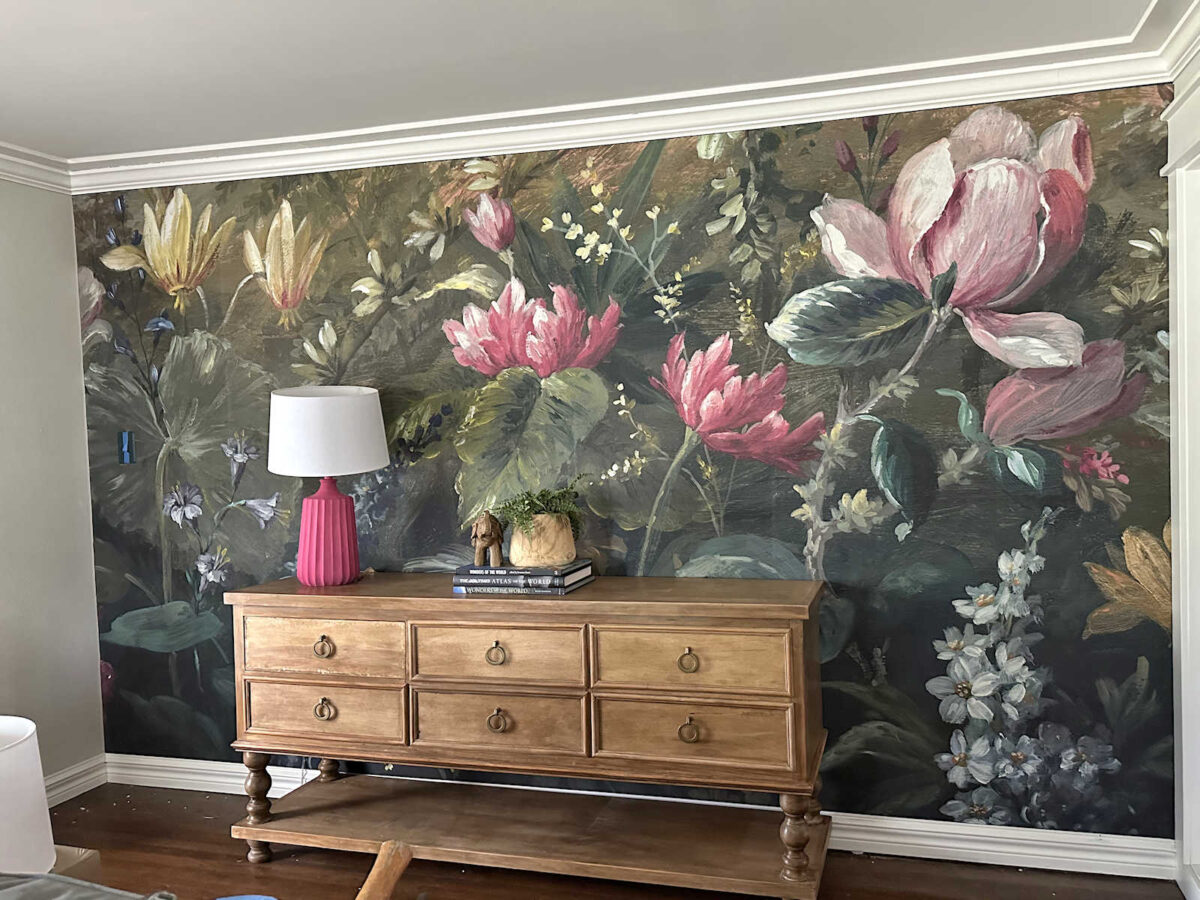
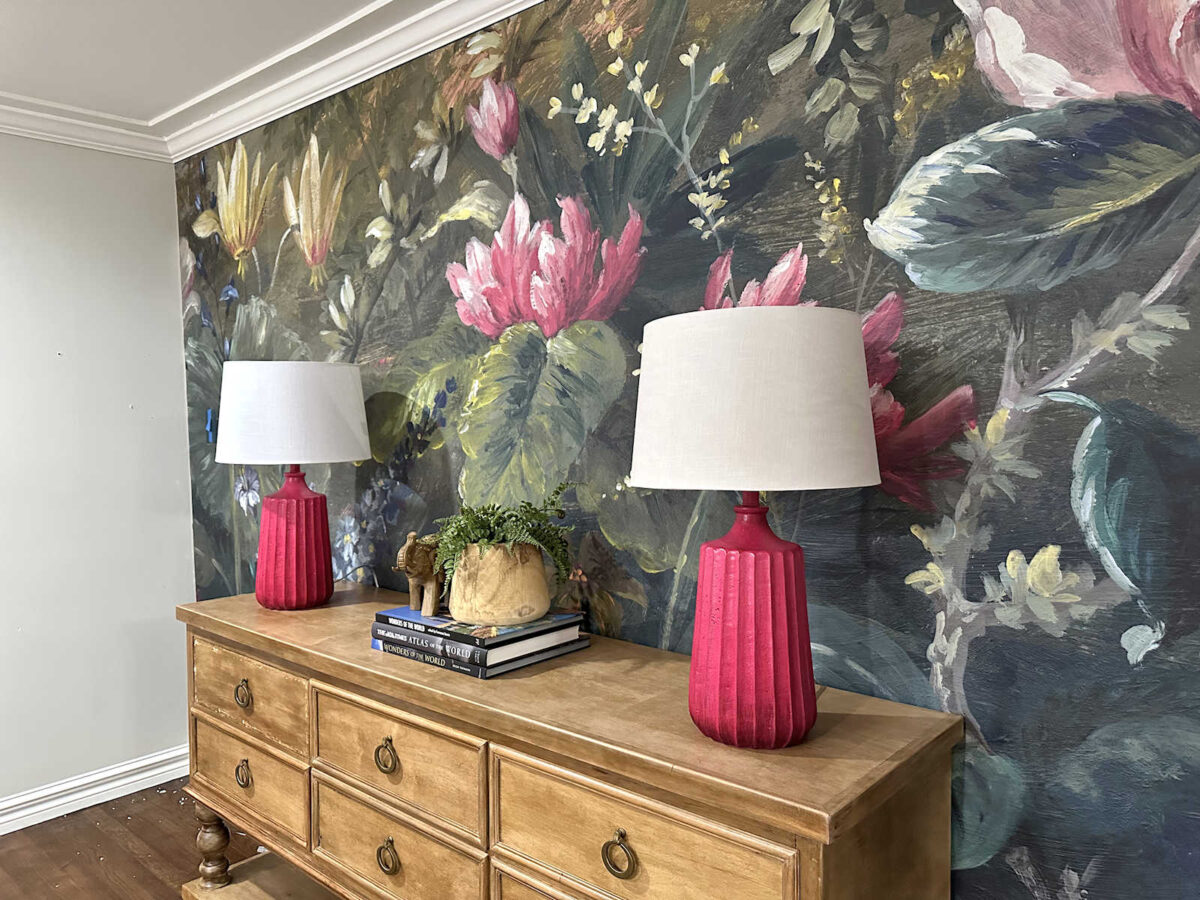
I’m still working on the lampshade issue. The lampshades in their original color were way too stark white for this area. I tried to tea stain this one, but it ended up streaky. I’m not sure what caused the streakiness unless it’s the adhesive used to attach the fabric to the backing that isn’t allowing the tea stain to soak through the fabric evenly. I do like how the tea stain toned down the white, but I can’t live with the streaks, so I’ll have to find another solution.
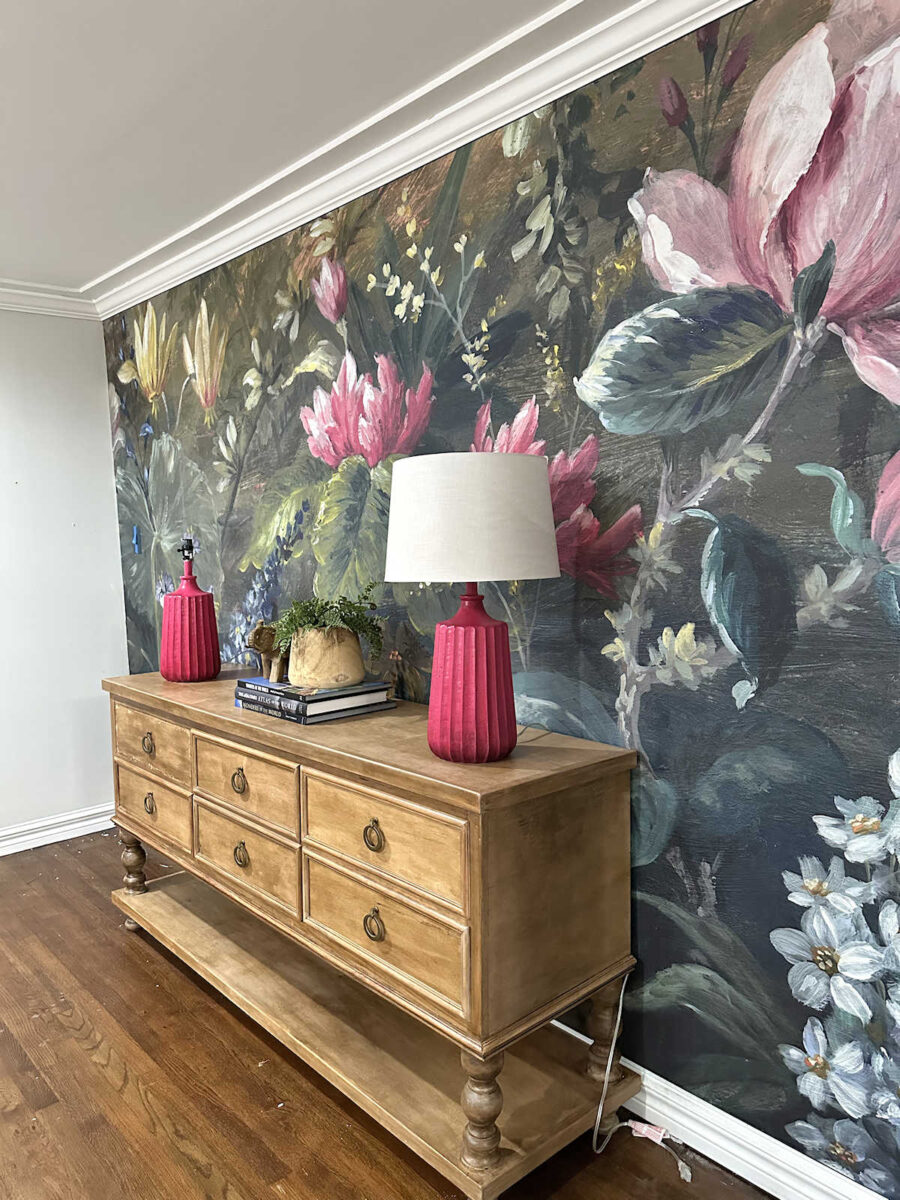
I think the tea-stained color is just right, though. Here’s a look at the tea-stained shade with the original white shade. There’s not much darker, but it’s just enough to make a difference.
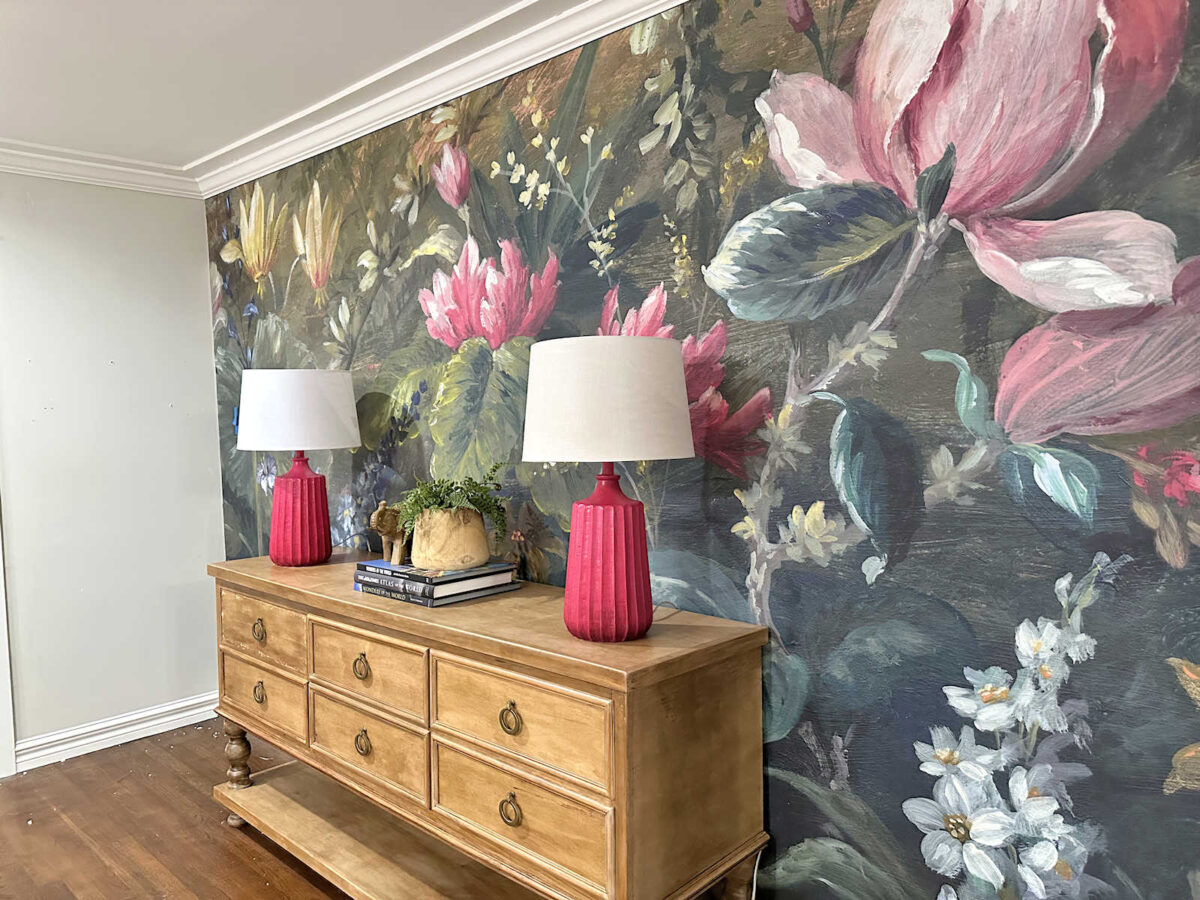
But I do love these lamp bases. I think the color is just right. I really love the more organic look over the spray-painted look. And I think the color turned out just right, even if they did end up darker than I had planned.
So now that I have the lamps and console table decisions made, I hope to get this area finished over the weekend so that I can move on to the next project.
More About Our Entryway

see all entryway
diy projects
read all entrwyay
blog posts

Addicted 2 Decorating is where I share my DIY and decorating journey as I remodel and decorate the 1948 fixer upper that my husband, Matt, and I bought in 2013. Matt has M.S. and is unable to do physical work, so I do the majority of the work on the house by myself. You can learn more about me here.


I think hairspray (fav: aquanet, that’s spray plastic, great for 3d printing) works as a light fixative. I’d be curious if hairspray+ rustoleum works OK.
I had a similar issue in finishing with the rustoleum sealer over gold sharpie..on black spray paint, it dissolved the alcohol marker and favored the base. Pivoted to buying the gold spray paint and doing your spray-in-bag-to-hand paint vs taping it off. It played nicely with that as long as the gold was applied in light layers.
Have you considered a paint wash for your console table? Where the wood grain would still show through, but it would just tone it?
The issue I run into is that this console table is waxed, so it would either need to be stripped and redone, or I would need to use an oil- or shellac-based primer to get paint to stick to it. If I did a paint wash over the wax, it would come right off.
I am an artist and have heard from pastel artists that the pastel spray still darkens it. Many do not spray and have to mount in a frame with space behind the mat for the pastel to shed. I love pastels and I love the way your lamps turned out. That is a beautiful color.
I think you have a happy accident! For me, the lighter brighter pink pulled attention away from the gorgeous wallpaper. The darker version tends to just play nicely with the wallpaper w/o making the lamps the star of the show. Well done!
I agree. It really came together.
The lamp bases are gorgeous. Pastels on a lamp base… so clever! I especially like the darker shadows at the bottom of the lamps. You are giving me the courage to try this on a lamp I no longer like. Good call on the wood table. I like the wood too, as it’s a nice compliment to the florals- another natural element. The tea-stained shade does is an improvement. I love how you show us how little details make all the difference. Bravo!
I like the color. Although I also liked seeing some lighter details with the pink. Highlight the edges?
Small detail – could you try pulling the lamps in from the ends more, so they’re not so spread out? I’m wondering if lining them up with the drawer pulls would help. And give you less area to “fill” in between them.
I would love to have an entry where I could do a mural. But alas, my entry is almost non-existent.
You always NAIL it in the end! I absolutely love the pink lamps and the console not painted. ❤️
Too bad the tea stain turned out streaky, it knocks down the bright white in the shades just the right amount. I hope you get the console just the way you like it without painting it.
I just used an acrylic paint/brush on two older shades I had. Turned out great, a lot easier and faster than using spray paint and having to tape off everything. I also understand your dilemma with the console, taking the wax off is no fun thing, and why you were thinking about painting it. I think a dark green that would blend in with the background of your mural would still read a natural, organic look and keep the bottom shelf (it grounds it).
Yea! Love it all….the wood of the console grounds the space…the lamp color and staining the shade….perfection!
Lamps turned out beautiful. And I love the fact you still have your pink there, just not so huge. Yes the table is perfect there in natural wood tones, but I agree, tone down the orangey look. But it’s all coming together beautifully!
The darker color you finished with was a happy mistake.
Ahhhh…. this feels right. I’m so glad you changed your mind about painting the console and toning down the lamps. The final result is going to be gorgeous.
How about black lampshades with a gold or warm lining. It would not contrast like the white shades allowing the mural to be the focus.
Glad you are not painting the console, but get it fixed. Love the lamp bases. They look like flowers opening that are darker on the outside and open up lighter on the inside.
Tea stain shades are perfect. That wall looks lovely.
Move on to the next project.
The lamp bases are fabulous. They say Kristi. They coordinate with the mural so well. I am looking forward to see what you change the front door to.