Gwen’s Master Bathroom
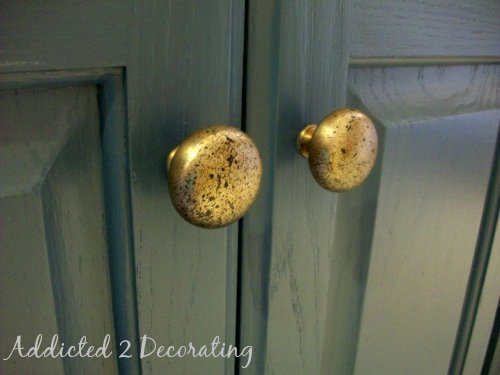
It is finished!! Well, it’s finished for the most part. There are still a few little details that need to be taken care of. For example, the pretty little handles that I bought for the six drawers…are…lost. I’m sure they’re somewhere in the depths of my very messy car. I seriously need a work vehicle. So please over look the sad little brass knobs, and imagine in their place beautiful antiqued pewter pulls.
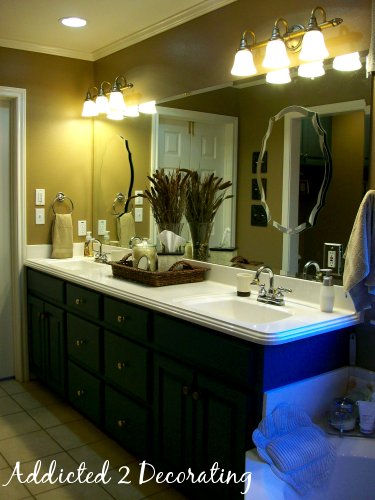
But before we get to the “afters”, I must first show you the “befores”! I’ll start with the vanity area: plain light oak cabinets, plate glass builders mirror, dated accessories, and a drab wall color.

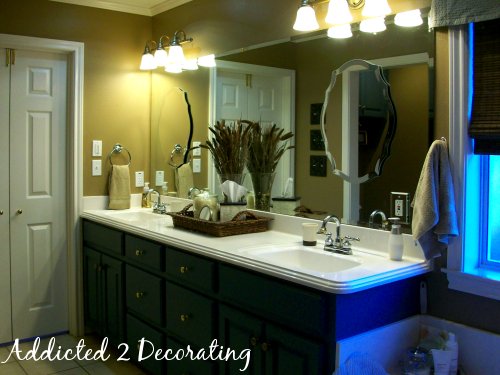
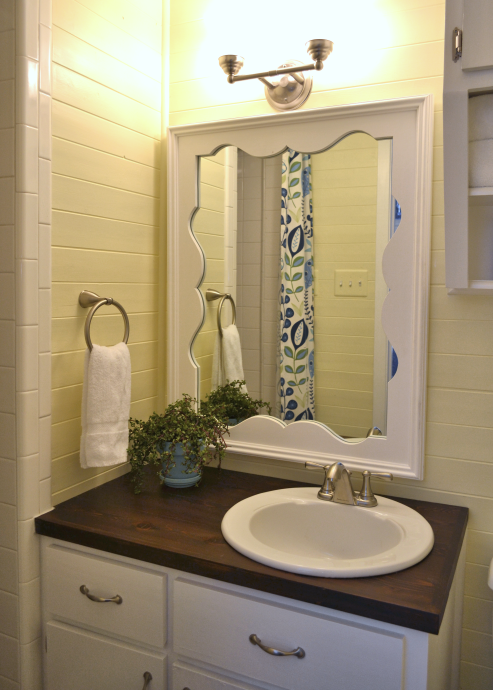
And take a look at it now! The cabinets are now a beautiful blue, new lights have been added above the sinks, decorative mirrors dress up the plate glass builders mirror, new accessories have been added, and the walls have been given a coat of warm brown paint:
Another before–the shower and tub area. The bright brass was really distracting, the recessed light above the tub left a lot to be desired, and the wall color needed some oomph.

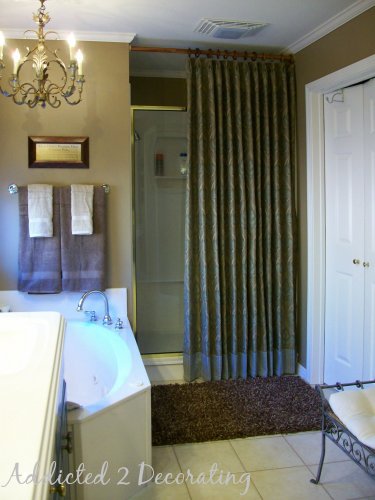
And here’s what it looks like now! A beautiful, tall shower curtain adds an elegant touch while covering the brass. A new chandelier has been added above the tub, and a new wall color warms the room.
The window before: the stained glass was a bit overpowering, and the window treatment was a little skimpy for such a big window.
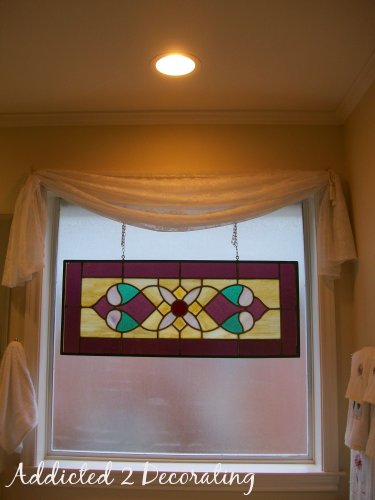
And the window after: the stained glass was replaced with a natural woven shade, and the little window scarf was replaced with a simple, yet substantial, valance.

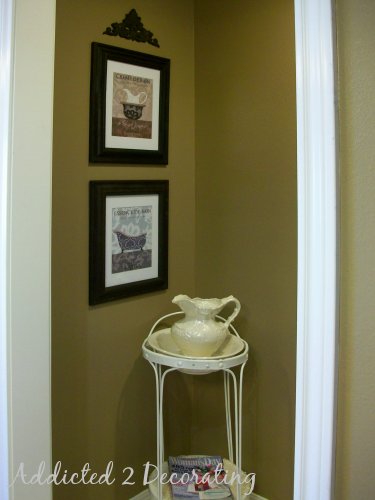
And on to the last before picture–the little water closet. This is the wall opposite the toilet.
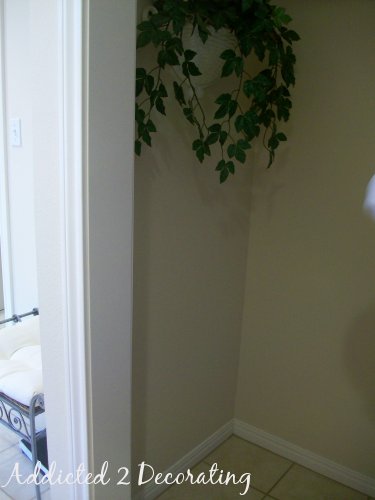
And now, the faux greenery has been replaced with two pretty framed pictures, which beautifully compliment a pretty little washstand that Gwen already had.
And just in case you haven’t had enough already, here are about a hundred more pictures. Enjoy!
This is the view from the bathroom door. W/C on the right, vanity on the left, shower straight ahead.

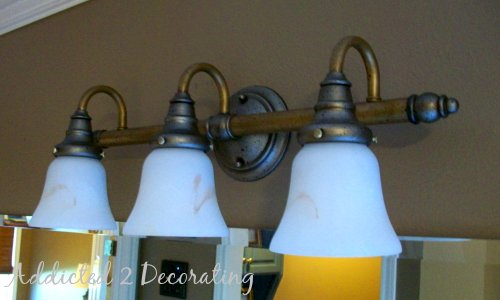
A close up of the light fixture that I painted and antiqued…all installed with glass globes added.
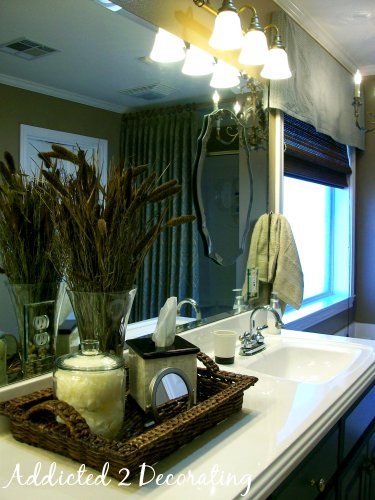
Detail of the new accessories: dried grasses and cattails in a tall glass vase, a glass jar with bath puffs, a mother of pearl tissue holder, and a little mirror, all on a pretty seagrass tray.


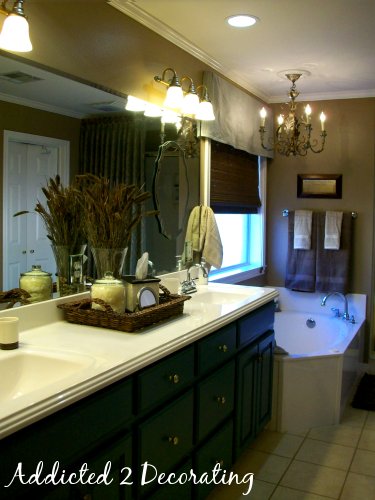

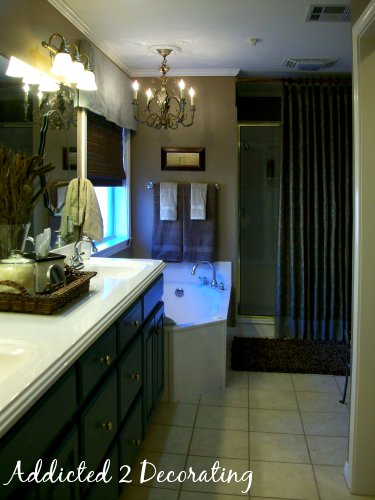
Remember this chandelier that I painted and antiqued? Doesn’t it look so pretty above the tub?

I used the paint technique that I used on the lights to antique the new cabinet hardware.
And that’s it! The bedroom still needs a couple of finishing touches (like a valance and bedskirt that I still need to finish), but I’ll be showing you the before and after of that room next week. Hope you enjoyed this little tour!
Additional Resources:
- Check out more shower curtains for your bathroom decoration.

Addicted 2 Decorating is where I share my DIY and decorating journey as I remodel and decorate the 1948 fixer upper that my husband, Matt, and I bought in 2013. Matt has M.S. and is unable to do physical work, so I do the majority of the work on the house by myself. You can learn more about me here.
Absolutely beautiful! You did a great job.
Wow! Great job!
Looks Fantastic!!
Kristi, BEEE UUUU TI FUL!!!!! All of your choices made this dated bathroom look BRAND NEW….. One question tho….. what type rod did you actually use to hang the shower curtain. That would be perfect option for a bathroom I am working on now. :o)
Oh,Kristi! I had to chime in :)Gwen must be sooo thrilled with what you have done here. Elegant. Sophisticated. There is so much to love–that chandelier,ack, and the rich wall color, and the seagrassy tray, and, and, and…so well done girl!
Sindy:)
Very Very Nice Job, Kristi! The mirror over mirror is an unexpected detail.
Kristi, that bathroom looks just fabulous, the vanity is light years from what it used to be. Fab fab fab !!!
So nice. I don't know what the budget was, but it looks like a high end model once you were done. Fantastic!
well done, as always.
Thanks so much for the kind compliments! 🙂 Kim, I just used a wood drapery rod and installed it using wood closet pole brackets from Home Depot. I seldom use standard shower curtain rods and rings. I much prefer the drapery rods and rings.
Gracie, the budget was quite low. I'll have to figure it out, but if I spent more than $1000, I'd be shocked.
What an inspirational transformation – lust lovely!
Nicola – Australia
Absolutely stunning! So elegant looking, yes comfy looking too! Great, great job!
Wow, fantastic job!!!
AWESOME transformation!! SOO stylish. Can you please share the brand / color of paint you used for the walls. It's so warm & rich looking!! THNX!!!
I thought that was what you used on rod but wasn't sure… you use your Home Depot and Lowe's to GREAT advantage. and the budget is low compared to the look you achieved.
It looks wonderful! How did you mount the mirrors on the slab mirror? I have the same situation, and would love to do the mirrors like that. 😉
Never mind, I see now, you have a post about the mirror. Doh! 🙂
What did you use to adhere the mirrors?
I would think Liquid nails' Mirror Adhesive with clear caulking around the edges?
Ang, I actually used 3M Picture Hanging Strips.
http://tinyurl.com/3xapvyf
They are really strong and work amazingly well. I think I used six strips per mirror. But be sure to follow the directions on the package!!
Wow, fantastic job!!!
I LOVE what you’ve done!! I’m picking out a wall color for my bathroom. What color paint did you use? And what kind of paint was it?
Thank you!
I Love it! Can you tell me where you got the Seagrass tray?
I copied your idea of the bathroom accessories (found your blog on Pinterest) by going to TJMaxx and $111 later, I got a very similar look. I had to go a larger with my items because my Master bath is pretty big. Thank you so much! I’ve been in my home for 8 years and never knew what to do with the vanity between the sinks. I just love your blog. You are extremely talented.
Amazing transformation and I LOVE how you’ve used the shower curtain!
I love the new look but I have one question. I always thought darker furniture was bad for small rooms because it makes it feel smaller. Do you think that holds true for bathrooms too? What made you choose to go with dark cabinets?
Despite the dark color I do love it! I’m a huge fan of chandeliers in the bathroom over tubs. Something about it is so magical and romantic.
Great remodeling of your bathroom, it goes to show that sometime the smallest touches can make the biggest differences… Have you done anything more to your bathroom since this article was posted..?
Great work done.