How To Build DIY Window Flower Boxes (Another Workshop Project Done!)
My DIY window boxes for the workshop are done! Y’all, this might be my favorite project yet. I mean, I realize that all of these projects are working together to create the look I wanted. Had I just plopped some window boxes onto this workshop in its original state and called it good, they wouldn’t have done much for the building on their own. But of all the changes I’ve made so far, this is the one I was the most excited about. Just look how cute these are.
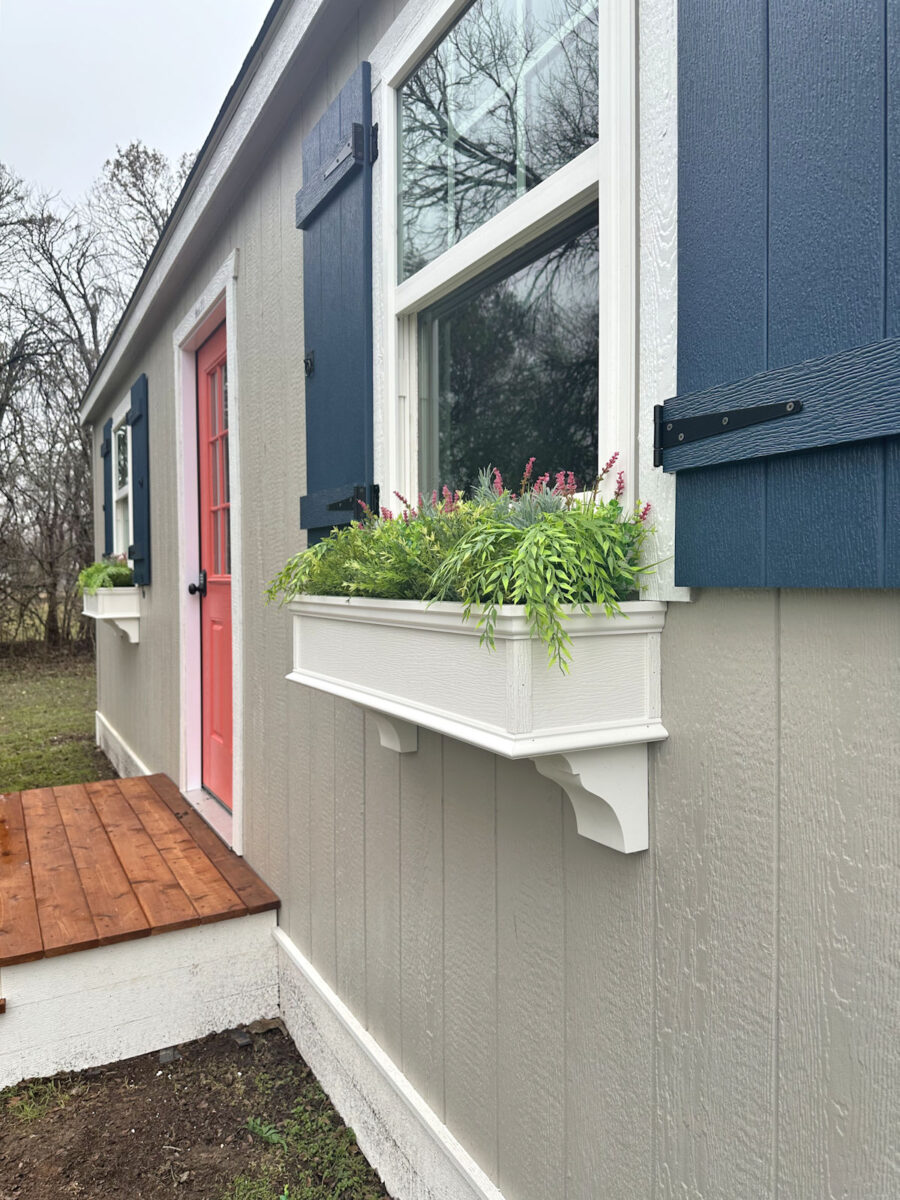
And I will admit that I filled them with fake plants…for now. I wanted to see what they look like filled, but it’s winter. And yes, even though I’m in central Texas, we do still kind of have a winter. It’s been getting below freezing at night, so I didn’t want to buy real plants only for them to freeze to death. So for now, the fake plants will do. Once spring hits, my plan is to turn these into self-watering planters and plant some real plants in them.
So let me show you how I built these DIY window flower boxes. This is such a simple project that pretty much anyone can do. You can see the entire process here:
To build the basic box, I used 1″ x 8″ PVC boards. After measuring my window, which was 32 inches wide, and measuring the space between shutters, which was almost 38 inches, I decided to build these boxes 34 inches wide to leave enough room for the trim that I would be adding later. So for each box, I cut one bottom piece to 32.5″, two end pieces to 7.25″, and two pieces for the front and back to 34″.

Since these are PVC boards, I used PVC glue to adhere the boards to each other and nailed the boards together with 16-gauge 1.5-inch nails. I started by attaching the ends to the bottom piece.

And once both ends were attached, it looked like this…

Then I placed the bottom/ends portion on its side, and put PVC glue on the edges of the bottom/ends, and then put more glue around the ends and bottom of the front piece. When working with PVC glue, you have to work quickly because you want the glue to be really wet when you put the pieces together. And PVC glue dries fairly quickly.

As soon as I applied a liberal amount of PVC glue to those areas, I put the front board in place and nailed it on all the way around the sides and bottom.

I repeated that process for the back piece, and then I had a very basic, no frills, plain box.

I took these pictures while working on the two boxes for the back of the workshop, and when building these boxes, I went ahead and trimmed them out before I hung the boxes on the workshop. But if you watch the video of the process, you’ll see that I hung the plain boxes on the building and then trimmed them out. Both ways worked just fine, but I think I preferred hanging the plain boxes first and then trimming them out. Of course, that only works if you’re hanging your window boxes on an easily accessible window. If you’re making them for a high window, you’ll obviously want them to be completely finished before hanging them.
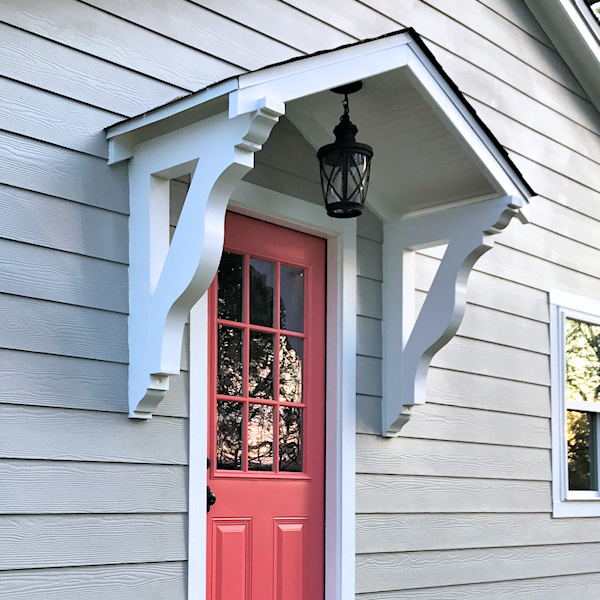
First, I trimmed out the top edge of the box using a PVC molding called shingle molding. The intended purpose of shingle molding is for use on the fascia boards of a house just under the shingles. But it’s such a pretty molding that I use it as a multi-purpose trim.

Here’s a closer look at the shingle molding…

To attach all of the trim, I used PVC glue and followed up with 18-gauge 1-inch nails. I only applied the trim to three of the four sides of the box since I needed the back to be completely flat to fit against the building. So using my miter saw, I cut the front piece mitered on both ends.

And then I cut the side pieces mitered on the front corners, and cut straight along the back edge where it would meet the building. If your mitered corners aren’t perfect, don’t worry about that. That’s what caulk and exterior wood filler are for. 😀

Here’s a look at the box with the top trim attached. You can already see how the trim really dresses up the plain box.

To trim out the bottom edge of the box, I used PVC base cap molding. The intended purpose of base cap molding is to dress up plain baseboards (i.e., to cap off plain baseboards), but again, I find myself using base cap molding for as a general purpose trim because it’s so versatile. Here’s a closer look at base cap molding…

Using my miter saw, I cut and applied that molding to the box in the same way I did the shingle molding around the top.

And with the base cap molding on, the box was really starting to look like a pretty planter.

At this point, I decided to hang these boxes on the building. And since I work alone, I had to make this as simple as possible. I went ahead and started three screws through the back of the box. I used three 3-inch exterior screws for this.

And then I held the box up in place and screwed into to the siding. This process was incredibly easy with the type of siding I have on this building. If you have stone, it’s going to take a bit more work that will require a masonry drill bit and masonry screws. And if you have lap siding, the box might need to be shimmed to get it to hang straight rather than at an angle. You’ll have to assess what you need for your particular situation.

Next, I attached the corbels. For my flower boxes, I used these solid 6″ x 6″ x 5″ PVC corbels.

I bought these before I bought my band saw, so I had no choice but to buy ready-made corbels. But if you have a band saw, you can design and cut your own corbels. If you have a band saw, you can make your own PVC corbels (or wood corbels) by laminating layers of 1″ boards together for the thickness you want (mine are made from four layers of 1″ PVC boards). Glue them together and clamp them securely until the glue is completely dry. And then cut your design with the band saw. But since I didn’t have a band saw at the time, I bought ready-made corbels.
First, I placed the corbel inside the box and marked the width of the corbel with a pencil to determine where the screws needed to be placed. And then I started four screws.

And then I used a liberal amount of PVC glue on the top of the corbel and the bottom of the box, and held the corbel in place while screwing it to the box with those four screws I started inside the box. And here’s a look at the box with both corbels attached.

And finally, I wanted to trim out the corners of the box so that the cut edges of the 1″ x 6″ boards of the box didn’t show. I used some scrap 1″ x 2″ PVC boards that I had on hand, and I cut those down using my miter saw so that I had thin strips that were 3/4″ wide and just under 1/4″ thick. If you don’t have a table saw, you can purchase thin PVC lattice or screen molding for this. And I attached these pieces vertically on the front corners and along the back where the box met the building.

And with that, the box build was done. I still need to caulk and paint (just like the skirting and the front steps) but the weather hasn’t been cooperative lately. So I’ll need to wait until we have a few sunny and dry days to do all of my caulking and painting. But I’ll be painting it all white anyway, so it won’t change the look much, if at all. But for now, I’m thoroughly enjoying the look of my uncaulked, unpainted flower boxes.

For now, I went ahead and drilled two small drainage holes on the bottom of each box. I’ll be able to fill those holes pretty easily with caulk once I get ready to convert these boxes to self-watering boxes in the spring. But for now, with all of the rain in our forecast over the next week (at least), I didn’t want these filling up with rainwater.

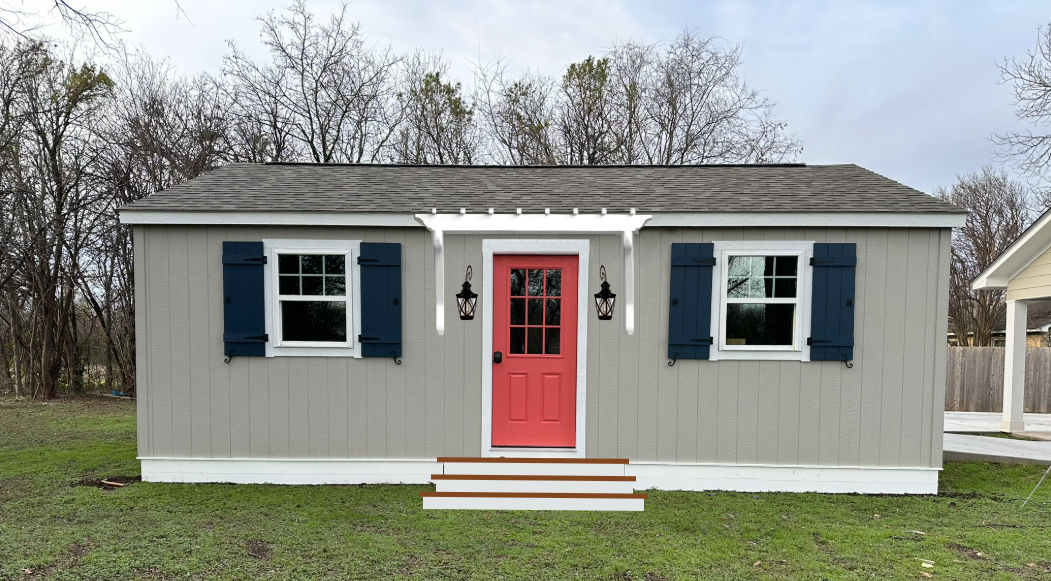
I just love how these turned out. I think they’re the perfect touch for my workshop, and they add some much needed dimension to the otherwise very flat building.

And while fake plants aren’t ideal, I’m happy to have them filled with something that gives some color and interest to the boxes.
I spent about $200 on fake plants for four boxes. I don’t think that’s too bad. I plan to keep them and use them each winter, if necessary. I don’t want empty window boxes. 😀 I use a combination of plants from Hobby Lobby, which I purchased during a 40% off sale, plus these from Amazon (all affiliate links): pink flower stems, boxwood stems, and weeping willow stems. Those are the ones I chose, but there are a ton of other options from that company on Amazon.

So, that’s it! Another project marked off of my list for the year. And I couldn’t be happier with how they turned out.

I did make four flower boxes so that the back windows (the windows that are visible from the street) could look cute, too. But what a mess this side looks like with that dirty skirting. But a bit part of the solution for that problem is in the works, and I’ll share that tomorrow.

For now, I just try to look past the dirt and admire my cute little window boxes. 😀

Free, downloadable PDF instructions:
You can find a free, downloadable PDF version of the step-by-step instructions for the window boxes here: https://www.addicted2decorating.com/wp-content/uploads/2025/01/How-to-build-window-flower-boxes-out-of-PVC-boards.pdf

If you want to keep up with my 2025 list of home goals (and my progress with links to finished projects!) you can see that here: 2025 Master List of Home Goals

Addicted 2 Decorating is where I share my DIY and decorating journey as I remodel and decorate the 1948 fixer upper that my husband, Matt, and I bought in 2013. Matt has M.S. and is unable to do physical work, so I do the majority of the work on the house by myself. You can learn more about me here.


I love the flower boxes! The trim along the top and bottom along with the corbels add so much interest to what would otherwise be plain boxes.
LOVE THE LOOK…..I lived in Texas for 25 years and I would like to suggest that you plant portulaca in your boxes this spring. You can get a variety of colors and they tolerate heat well and last from spring until your first freeze.
They don’t need to be babied and will
look lovely with the colors you used on the door and shutters. I moved away a few years ago but every spring I go to a local greenhouse and get 4 hanging baskets and they last until our first freeze and they are very reasonably priced.
Absolutely beautiful!! I am ok with fake plants….these look so cute. I had to resort to fake ferns hanging in my gazebo some years ago because two were in the shade and two were in direct sun. And I am not so good with plants to start with.. I had tried…Even my neighbor next door…..very close, and a plant person, couldn’t tell from his yard. That was a big plus for me. I so enjoy your posts….and love to see what you do next.
Pretty nice looking work shop. Where did you get your fake plants? I hope you get the bedroom dilemmas sorted out soon so you don’t have to sleep in the tv room and such a torn apart living situation.
Oops! I forgot! I just added those links to the post.
Thank you for the links.
These look so nice. Debating where I could add something similar for myself! Do you think you could share the links to the fake plants because they look really pretty. (I couldn’t see any links in the post, sorry if I missed it).
Sorry about that! I added the links to the post.
You don’t have a workshop. You have a cute little cottage! I absolutely love it!!
Well, you have smacked it out of the park, again. They say it is all in the details, and you really take that to heart. I love them, I am going to show them to my husband tonight, he’ll roll his eyes, but he will say that these are pretty darn clever and look fabulous. This workshop has definitely added a lot to the property value, and you haven’t even made it inside yet. It looks so amazing, and I really love the color combinations. We are already planning our shutters for our place and can’t wait for that project to get started.
Cheers!
So cute!
Are you going to attach them to a drip system?
No, I’m going to turn them into self-watering containers.
Completely unsolicited advice…I would paint the corner board of the building the same color as the trim.
I tried that on our house and hated it. It looked so busy with the front porch columns and trim, so I went back and painted them gray. And I want the workshop to match the house. I still need to paint the ones on the front of the studio gray. The white bothers me every time I notice them.
Where did you get the fake plants?
Hi! I love this project and I thank you in advance for the PDF for it. I wondered if there was a reason why you used nails for assembly instead of screws? The old wooden boxes I’d like to replace are very large and very heavy once they are full.
Thanks again!
The PVC glue does the heavy lifting on these. If interesting real wood, I’d use screws.
You are moving along on your list. Your shop look darling. What an update from the original flat box sitting in your backyard.
So what is next?
The pergola! 😊
They add a lot to the exterior! I’d suggest you to just keep with faux for such small boxes though. With the small soil reservoir, it’s going to be about impossible to keep whatever you plant in them moist enough. Unless you go with cacti I guess! 🙂
I may have to rethink a tiny house…it is adorable, and I hope gives you and Matt a grin every time you look at your new workshop!
Kristi your window boxes are SO cute and the plants look beautiful. Well done; great job!
Rather then caulk the drainage holes for summertime, why don’t you use removable plugs?
Great idea!
You are just incredibly talented!
Really nice!!!
May I ask – have you, or would you consider, a post about your tools? Or just tell me – all about your nail gun!! I’m really interested in purchasing one, but am interested in your experience.
Thank you also for the PDF!! I’m really going to try and build some boxes of my own!!
Kristi. Do you use a special saw blade for PVC? Those boxes are beautiful!/
I don’t. I just use whatever blade is on my saw. But I do think Dewalt has a blade specifically for PVC. It’s just such a pain to change a blade, so I probably would never bother to switch just to cut PVC.
These are SO CUTE!!! I honestly love the fake plants just as they are. No worry about having dead plants ever again – they look so real! (Personally I’d need fake ones 100% of the time – I can’t keep plants alive!)