Workshop Front Door Pergola, Part 1 — Making The Decorative Brackets
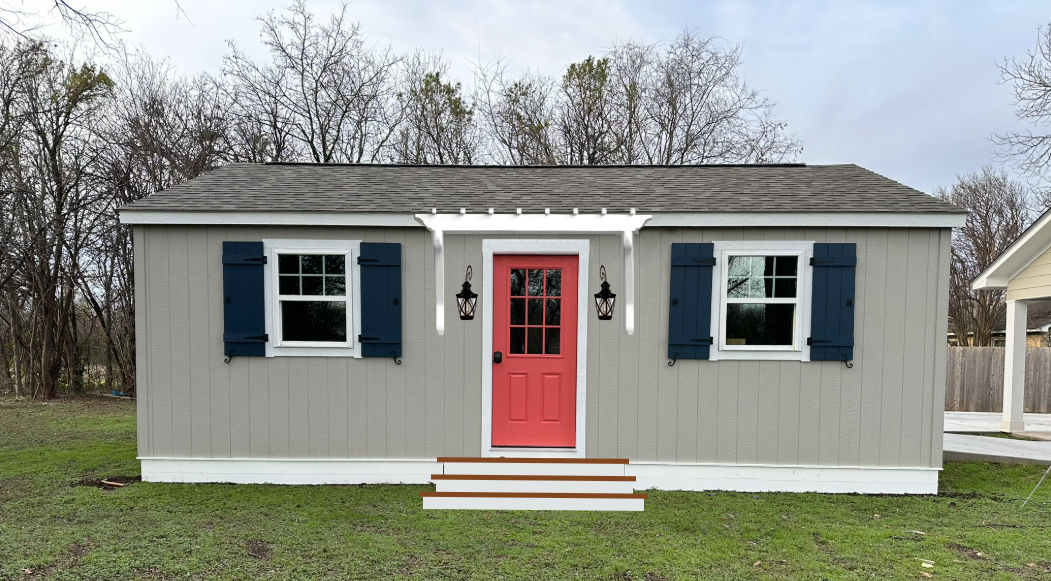
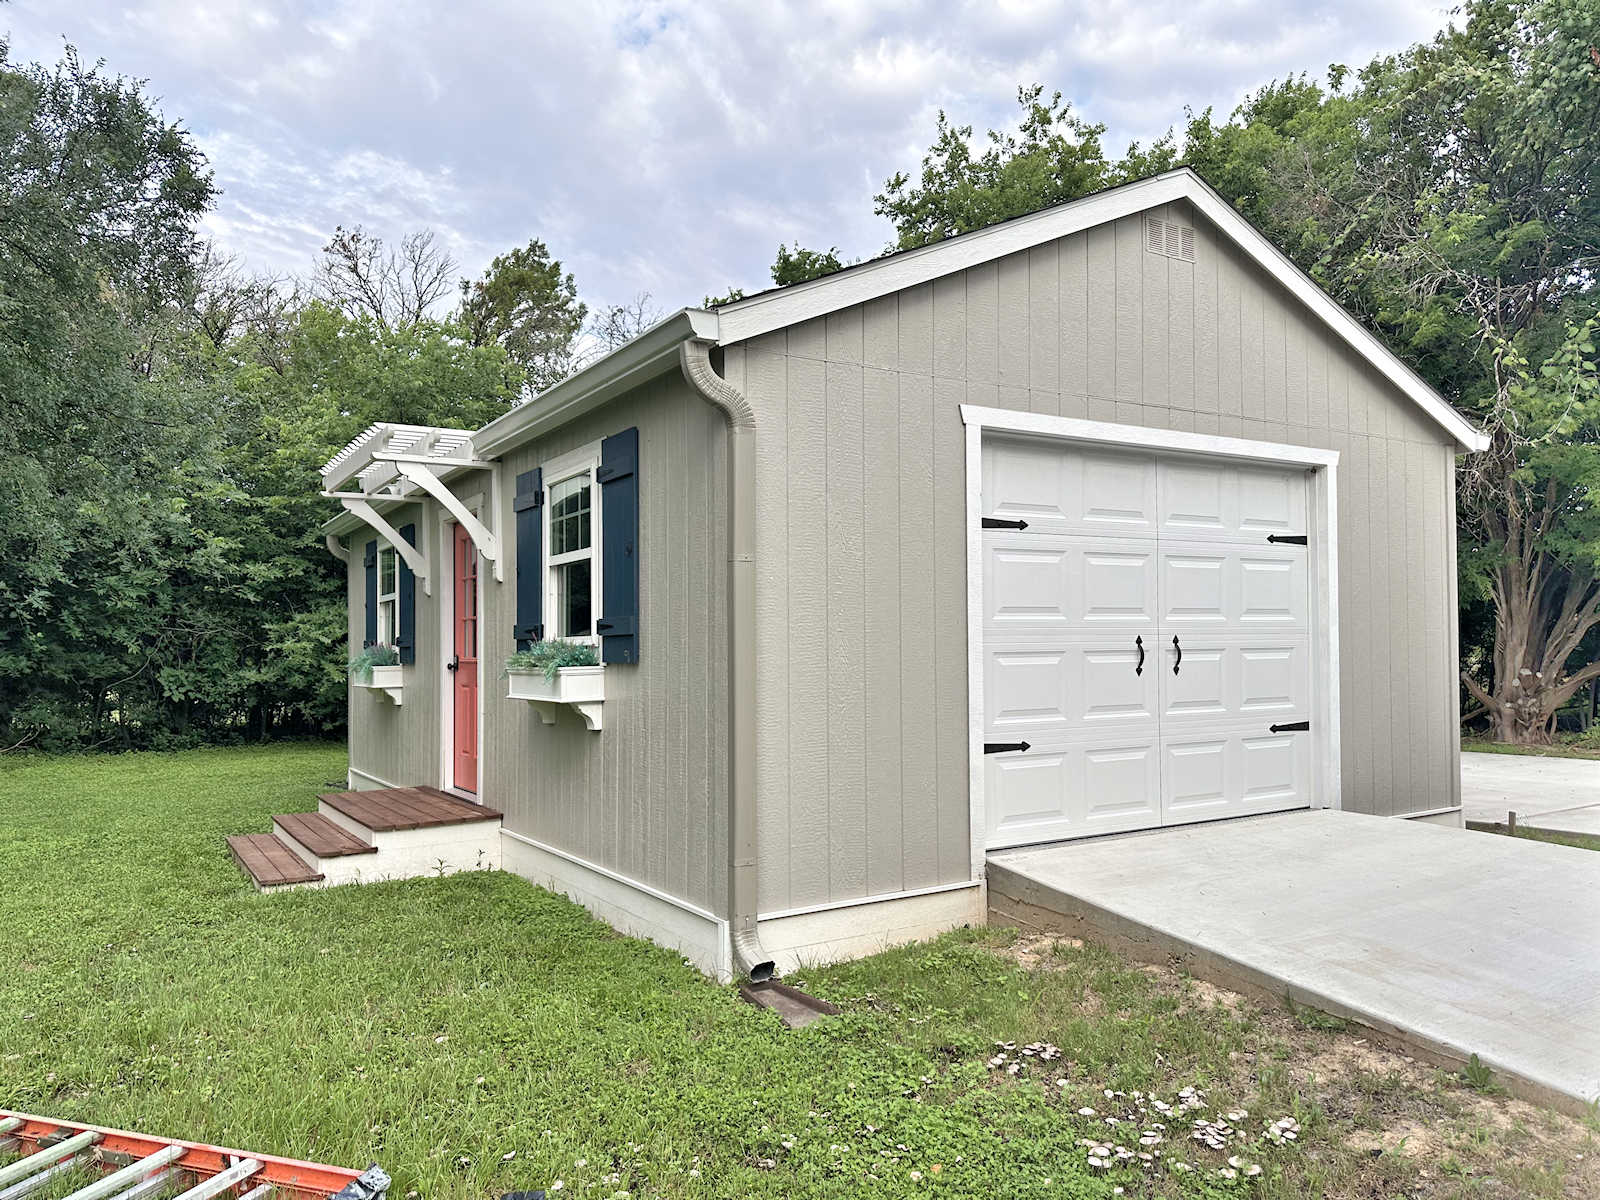
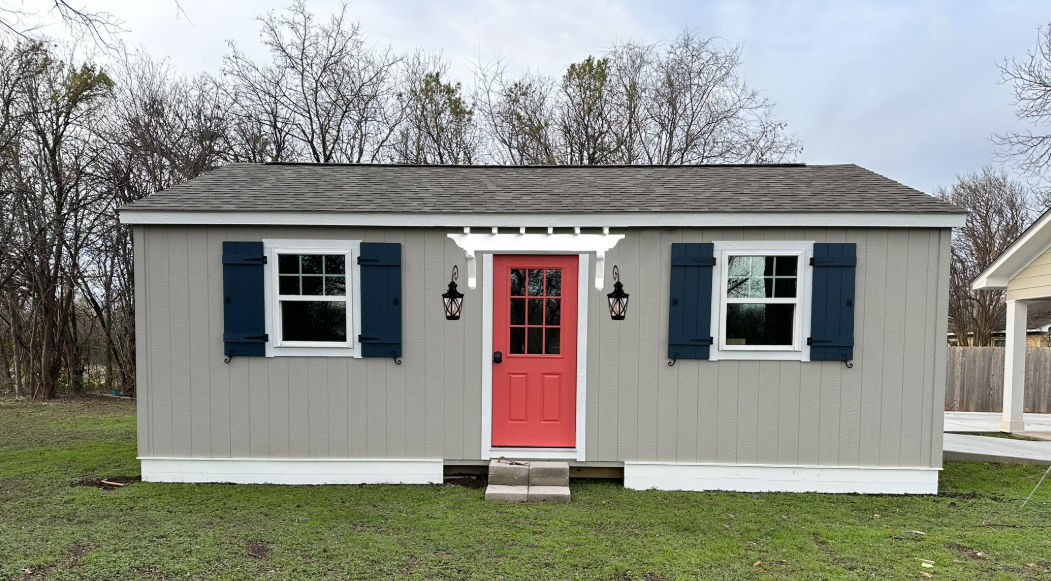
My workshop front door pergola is underway, and I think this is the project that’s going to make the biggest impact to the look of the building. If you’ll remember, something like this is the goal…
So today, I’m going to show you how I made the brackets for the pergola. I had originally planned to build the brackets to match those on the side door of the studio, but I changed my mind. I think those brackets are too big and bulky for the workshop. Plus, the two doors can’t be seen at the same time. If you’re standing where you can see the workshop front door, there’s no way to see the studio side door, and vice versa. So after deciding that wasn’t important, I just went with a different design that I really liked.
I wanted my brackets to be 31″ x 31″. So I started with a 2″x4″, and I cut one piece to 29.5″ and the other piece to 31″. I sanded those really well with 80-grit sandpaper with my orbital sander, and then sanded the corners by hand.

You can see above that the two pieces have a black mark on one end. That’s where I marked where I cut the 2″x4″ to cut the two pieces. I marked those so that I could put the bracket together with those ends together. Sometimes putting wood pieces back together where you cut them creates a better fit. It’s just a good practice to get into.
I wanted the ends of each arm of the bracket to have a gentle curve to it rather than having a squared off end. Standing the boards on edge, I used a can to draw a curve on one end of each board.

And then I used my band saw to cut that curve.

Here’s what it looked like after cutting it with the band saw.

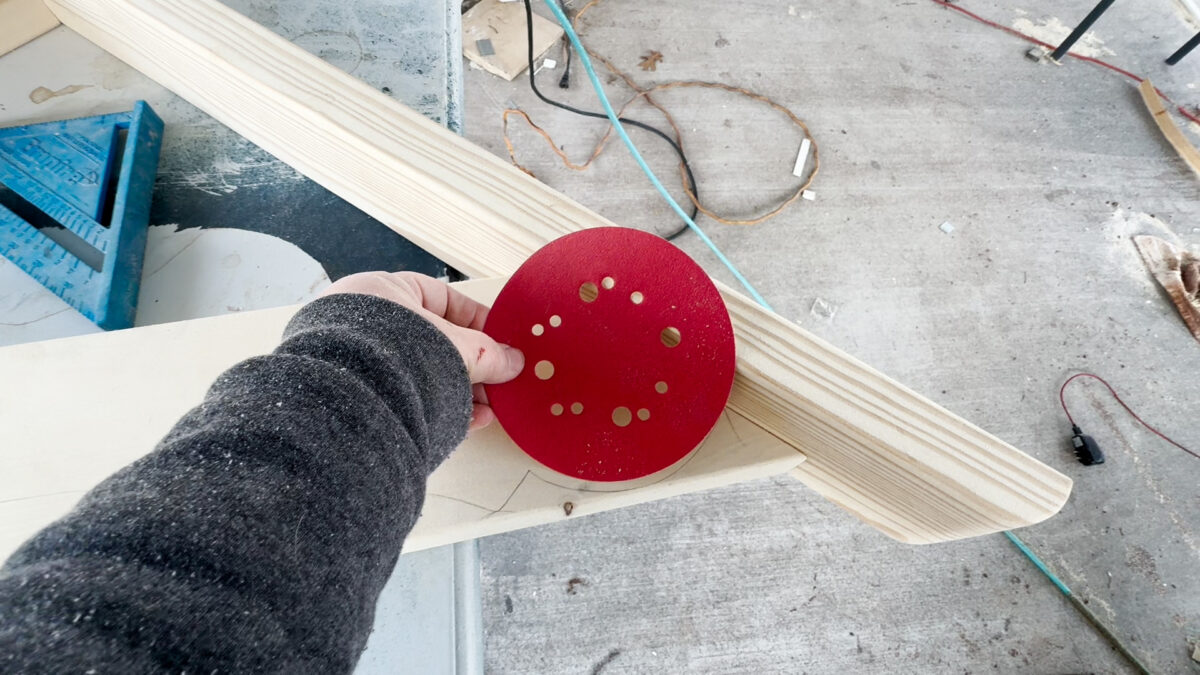
I followed up with sanding it with an 80-grit sanding disc to get it really smooth.

Here’s what it looked like after sanding.

With both pieces sanded, I put them together at a 90-degree angle to form the 31″ x 31″ bracket. I put the pieces together with a liberal amount of wood glue and then two 16-gauge 2.5-inch nails.

And then I followed up with two 3-inch exterior nails.

The reason I start with nails and then follow up with screws is because when joining wood together, the pieces have less of a tendency to move and shift when joining them with nails. those nails go in so fast, and they’re so much thinner, that the wood generally doesn’t have a chance to shift as they’re going in. But if you start with nails, which are slower and thicker, the piece of wood you’re screwing into can often shift and get out of line before the screw is all the way in. So I try to remember to secure the pieces together with nails first, and then follow up with the screws.
Here’s a closer look at the boards attached to each other.

It’s not perfect. It’ll never be perfect when working with this type of lumber unless you take the time (and have the tools) to run each piece through a jointer and planer first. I don’t have a jointer, and I wasn’t concerned about using my planer on these brackets. I’m okay with outdoor projects being less precise than my indoor projects.
To make the decorative part of the bracket, I used a 2″x6″ board. I placed the corner of the bracket onto a scrap piece of 2″x6″ wood, and then used my speed square to make sure it was perfectly square. And then I placed the 2″x6″ board under the arms of the bracket. I measured and made sure that the board was evenly placed on both arms of the bracket.

And then I used my pencil to mark the cut lines for this piece. Then I cut that piece along those cut lines using my miter saw.

To make the decorative design, I traced a sanding disc to get the curves on each end.
And then I measured and marked a particular point on the circle (so that I could repeat it accurately on the other end) and used the speed square to draw a straight line from that point.

Here’s that design repeated on the other side.

And then to get the long curve between those two points, I measured and marked the center point of the board 2.5″ from the edge of the board.

And then I freehanded the curve on either side, just eyeballing it to make sure they looked the same.

If you’re not comfortable with free handing a curve design, you can use craft paper or printer paper taped together to draw half of the design, cut that out with scissors, and then use that as a pattern. Trace on half of the board, flip the pattern, and trace on the other half.
With the design drawn, I then used my band saw to cut out the design.

You can also use a jigsaw to cut out the design, but I have to admit that I hate jigsaws. They’re my least favorite tool ever.
My band saw is a very inexpensive one, so it’s not the smoothest cut. But it does the job. There’s always some sanding that needs to be done, though.

So I used my sander and 80-grit sanding discs to clean up those edges, and then followed up with some hand sanding to make the corners and the tight areas that my sander won’t reach look really nice.

To put the pieces together, I put this piece on scrap 1″ lumber.

And then I assembled it in the same way — wood glue and then 2.5″ 16-gauge nails.

And then I followed up with 3″ exterior screws.

Here’s a closer look at those.

And with that, they were assembled and ready to caulk, prime, and paint. I caulked everywhere the boards met each other…

And then they were ready for primer and paint.

I primed them with two coats of BIN shellac-based primer, which I applied by hand because I can’t stand cleaning a sprayer that’s been used for oil-based or shellac-based products. And then I used my Wagner sprayer to give each bracket two coats of Sherwin Williams exterior paint.
Once they were dry, I measured and marked where I wanted to place the screws to attach the brackets to the building. I used a total of four 3-inch wood screws — two at the bottom and two at the top.

And then I drilled pilot holes with a countersink bit.

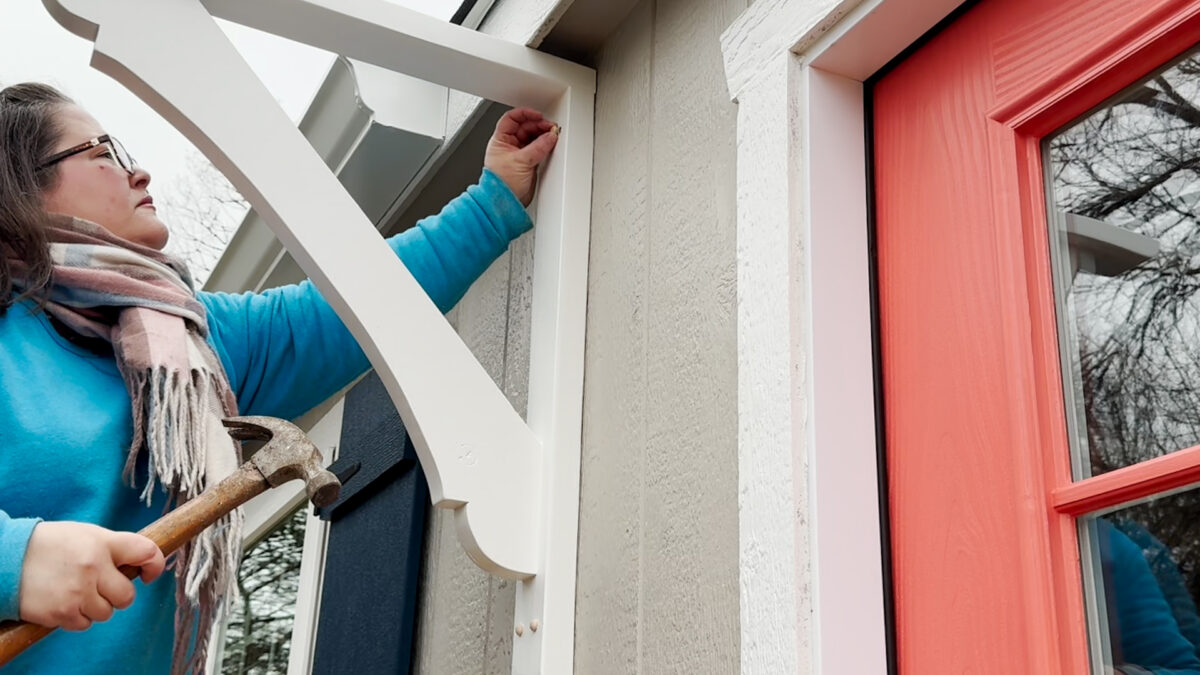
I went ahead and started the screws so that I wouldn’t have to be fumbling around with screws once I climbed up on the scaffolding.

I had already measured and marked a line where the brackets needed to be placed, so the installation was really quick and easy.

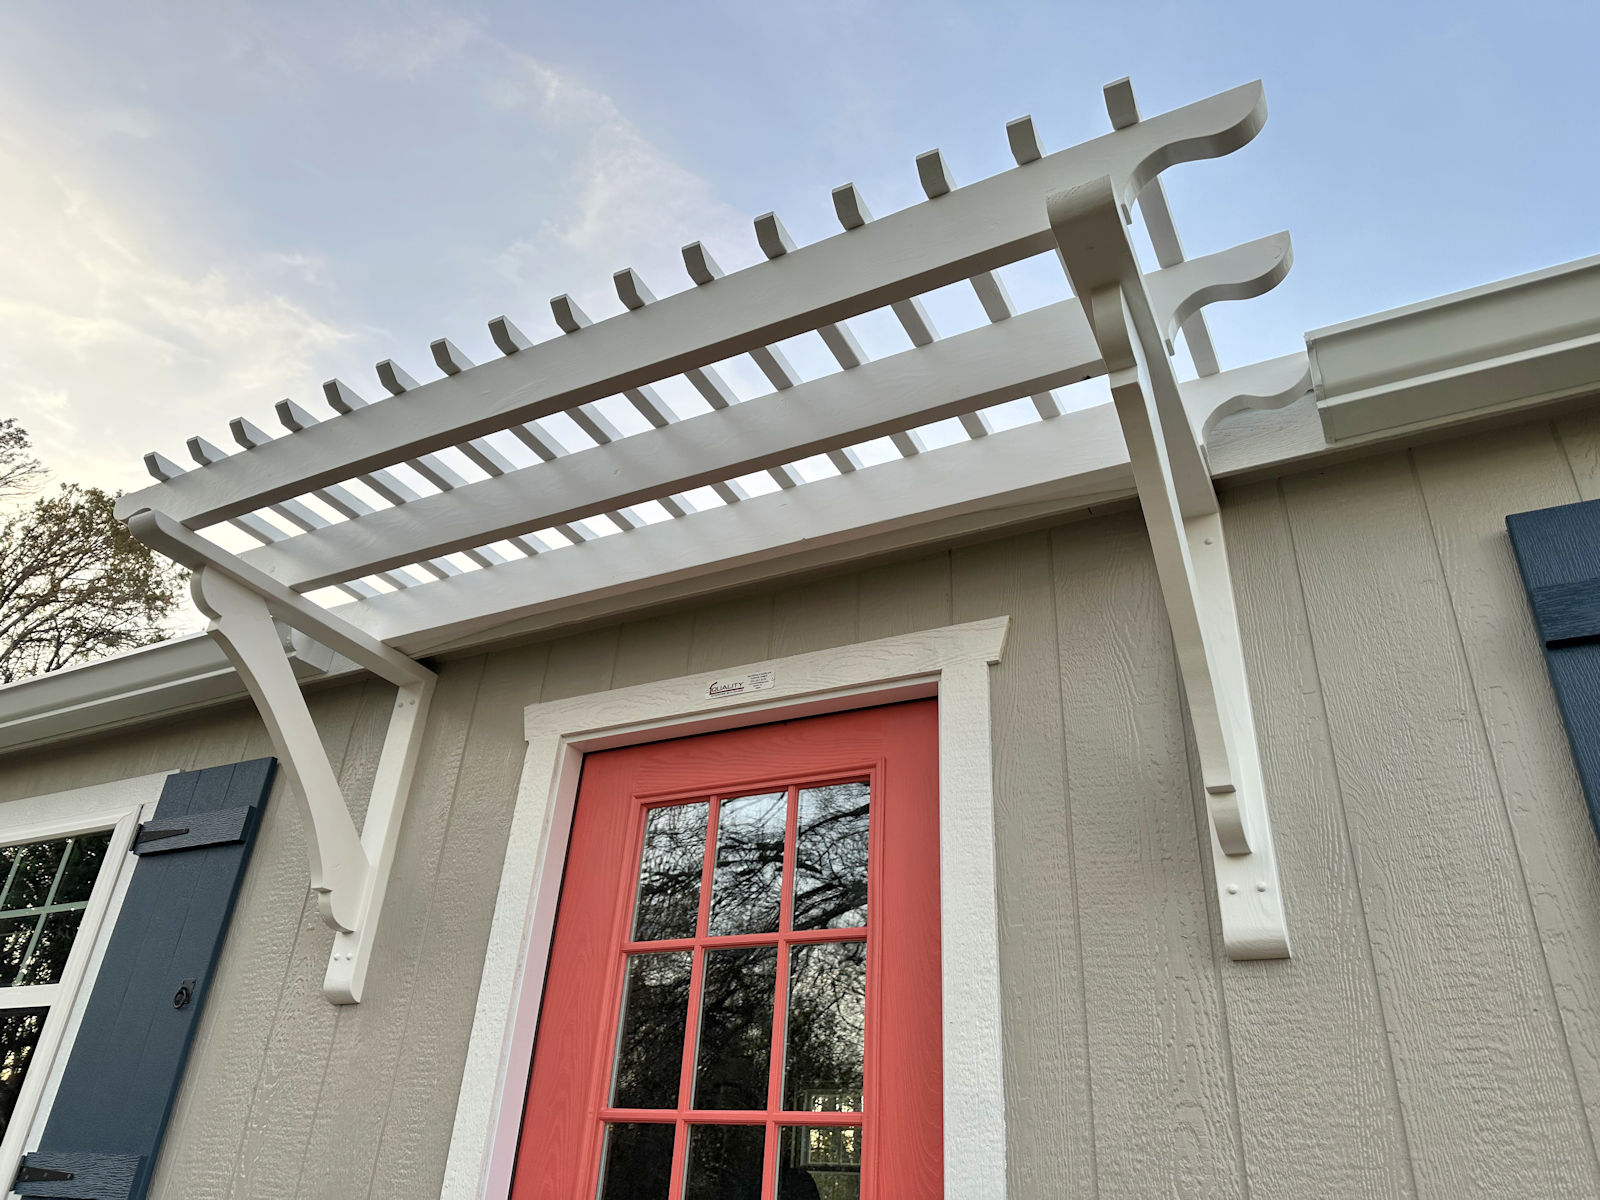
Once the brackets were attached with all four screws, I covered over the screw holes with some wood button covers.
I still need to caulk and paint those, but at least they helped to protect the screw holes from the downpour of rain we had yesterday.

I’m really hoping I can get this pergola finished this weekend, but it all depends on how the weather holds up, and how fast my primer and paint dry between each step. But my goal is to have a finished pergola to show y’all at the beginning of next week.
You can find Part 2 of this project here: Workshop Pergola, Part 2 – The FINISHED Pergola!

Addicted 2 Decorating is where I share my DIY and decorating journey as I remodel and decorate the 1948 fixer upper that my husband, Matt, and I bought in 2013. Matt has M.S. and is unable to do physical work, so I do the majority of the work on the house by myself. You can learn more about me here.


Dear Kirsti, as always you inspire us with your creative and ingenius ways to tackle all DIY issues. You know your way around power tools better than most, but coming from an industrial/production background, I always wear my “safety hat”. Seeing that beautiful scarf around your neck made me concerned of ways it could get snagged in the saw. Please tuck the loose ends into a sweater or drape the loose ends down the back. Accidents happen in a blink of an eye –
Keep up the awesome work with all your of projects – you have kicked off 2025 in a wonderful way.
Oh, I wouldn’t have thought of that! It is very good advice. The pergola brackets have a lovely shape. It’s going to be beautiful.
I agree. My neighbor caught her pony tail in an electric drill!
My thoughts exactly! Love you to pieces, but that scarf has to be worn a different way- Please’b
A friend in high school got his hair torn out in a lathe…Yikes!
It’s looks so great. Thank you for ALWAYS taking the time to explain how and why you do the things you do. It really helps when I am planning out my own projects and want to make them look nice. Yours are always so stunning. Can’t wait to see the finished product, as I am sure you are too. Here’s to a good weather weekend.
Cheers!
Thank you! This is one project I have been wanting to do- I appreciate your step by step photos and explanations!
Yours looks great so far and I love the mock-up!
Your brackets look absolutely beautiful!
I have two questions about your pergola project.
First, what went into your decision to use regular wood lumber instead of PVC boards?
Secondly, I am concerned about the lack of gutters above your workshop door. Do you have a further plan for diverting the water away to the sides, to the sections that are guttered?
Thank you for your exceptionally well done, step by step blog!
I would LOVE to have a pergola made out of PVC!! But the boards available for purchase locally are only 1″ boards (not the 2″ boards needed for a pergola). I guess I could have laminated boards together to make them the correct thickness, but I’m still very wary about using PVC boards for anything structural. I’m perfectly happy using them as cladding over structural things that are built with wood, but if the actual PVC boards have to do the heavy lifting, I just think they’re too flimsy and bendy for that. Now if pre-made 2″ boards were readily available, I might consider those, if I could see and feel them and make sure they’re structurally strong enough.
I do have a plan for diverting the water runoff from the roof over the front stoop. I’ve already attached that piece (just don’t have pictures yet) and then we had a big rain yesterday, and it’s working great! I’ll share those details when I finish and share the rest of the pergola project.
I really worry about you using those saws with your scarf fringe hanging so close to the action. Please be careful. Hair too.
After reading through the comments, I am now having waking nightmares about the scarf and the equipment. I have a vivid imagination!
Kristi – you do great work. I am terrified of electrified saws and I think you are incredible and brave!
Well done! You are the best at precise, clear, step by step, instructions for these finishing details!
I hope you get your project finished also. Our weather is crazy. We went to Austin Wednesday and the fog was thick all the way down and all the way back. Sure made for scary driving.
Your shop is going to look like a million dollars be the time you are finished with the outside of it. I know you are pleased with the look of it.
Have a great week.
Please God, Kristi, STOP wearing scarves around machinery! I’ve known several people who were maimed when their clothing/hair caught in industrial machinery. One woman had her scalp torn off when a decorative flap on the front of her blouse was caught, followed by her hair. All maiming accidents are preventable. Don’t be one of those people who says, “Don’t worry, I’ve been doing this a long time, I know what I’m doing.” Well, most people who are injured in industrial accidents involving dangerous equipment are experienced, even expert! Tie your dang hair back, poke it under a hat, quit wearing scarves or other dangling clothes, and zip up the bottom of your jacket so it can’t get caught. You have a husband who would be completely at the others’ mercy if anything happened to you! You owe it to him to behave responsibly and safely around your own tools and equipment!
Yes, it’s looking great, and your instructions are very clear and helpful. However, I too cringed when I saw the photo of you using your bandsaw with your scarf so close to the blade. We love you too much to learn of an accident, so please do not do that again! Hope the weather holds up to allow you to finish the pergola soon. The workshop is looking beautiful!
YAY! Just what it needed, sort of like “icing on the cake”. It will look wonderful when completed!
did you post part 2 yet?
I’m working on it right now to post tomorrow.