Home Gym – Finished Colorful Gradient Vertical Stripe Walls
At long last, my colorful gradient vertical striped walls in the home gym are finished! I painted the final stripe and peeled the last piece of tape off the walls at 11:35 last night, and was so exhausted that I made absolutely no attempt to clean up the mess in the center of the room. Please be so kind as to over look that for now. 🙂
Y’all, I was beginning to think this project was a lost cause. A few nights ago, I got so frustrated and came very close to painting over everything in a solid color. But now that it’s finished, I’m glad that I persevered.
I had so much trouble with this project. I don’t know if it’s the insufferable humidity we’ve had lately, the primer that I used on the walls, or the painters tape that I used. Or maybe it was all three working together to create a perfect storm that tried to doom my striped wall project. But whatever it was, it created so many problems that required tedious and time-consuming repairs.
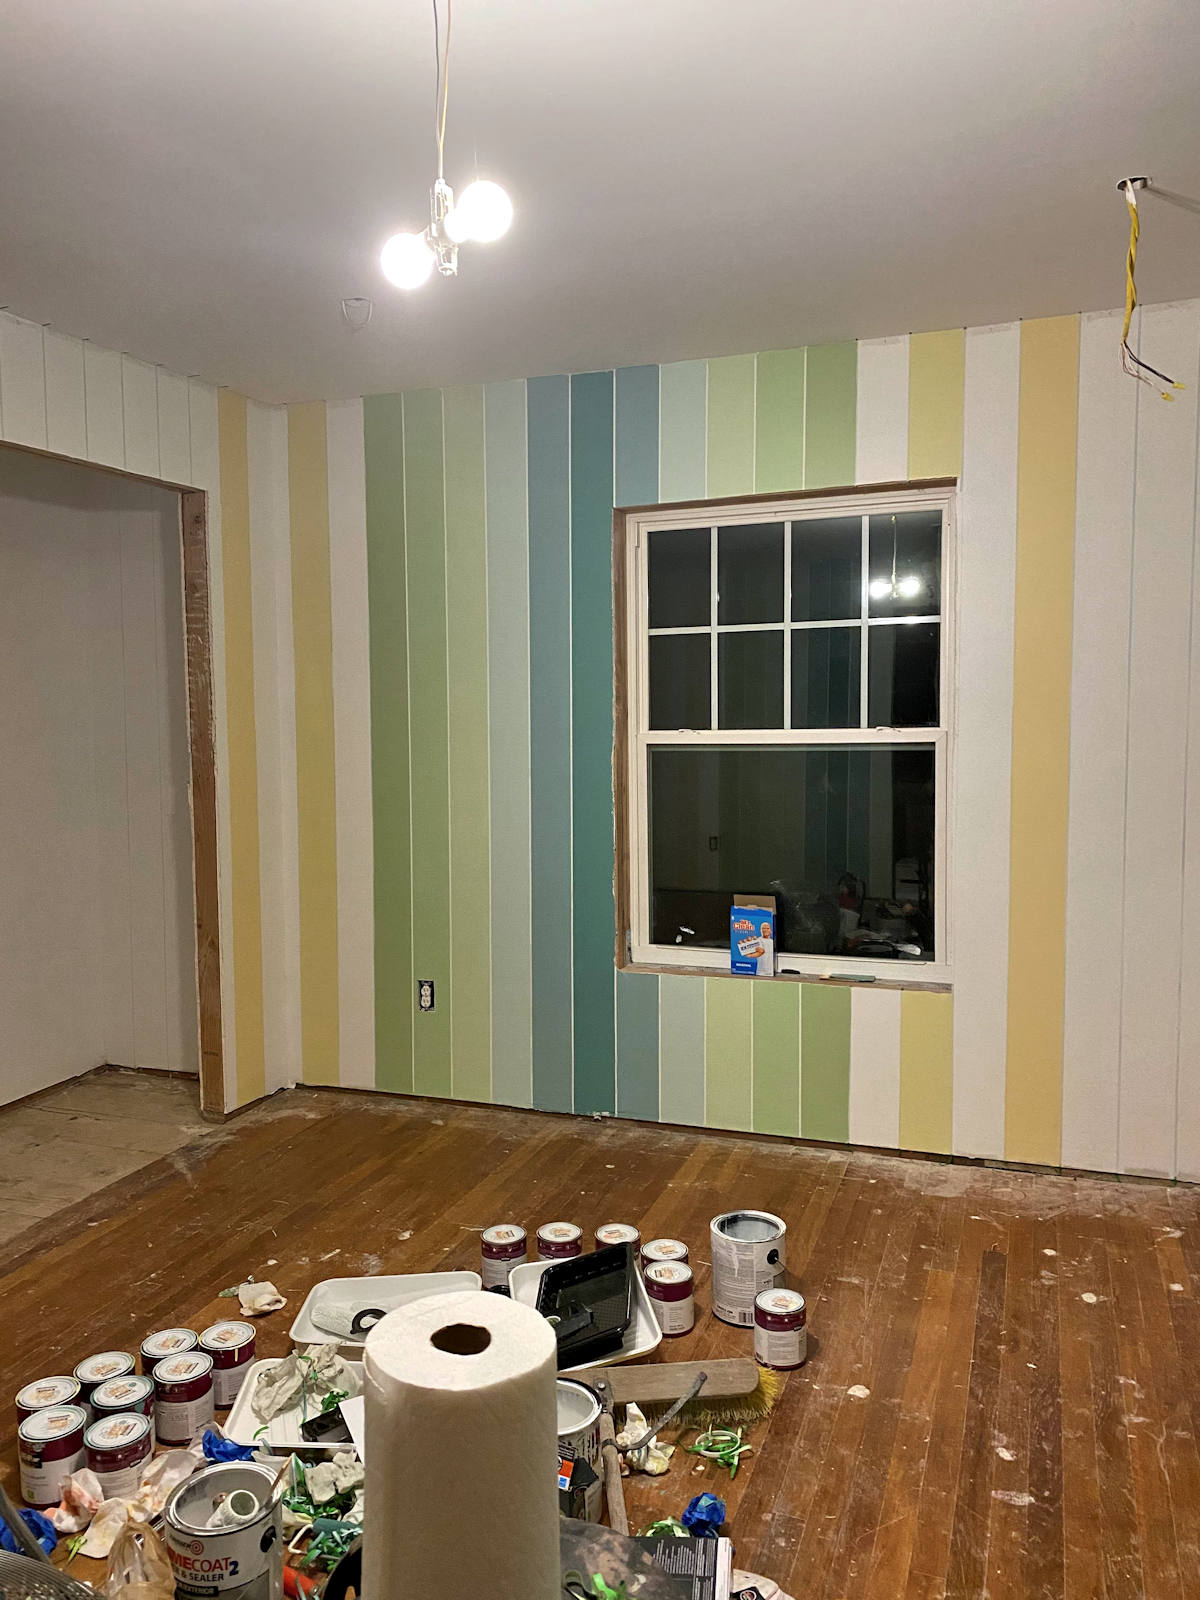
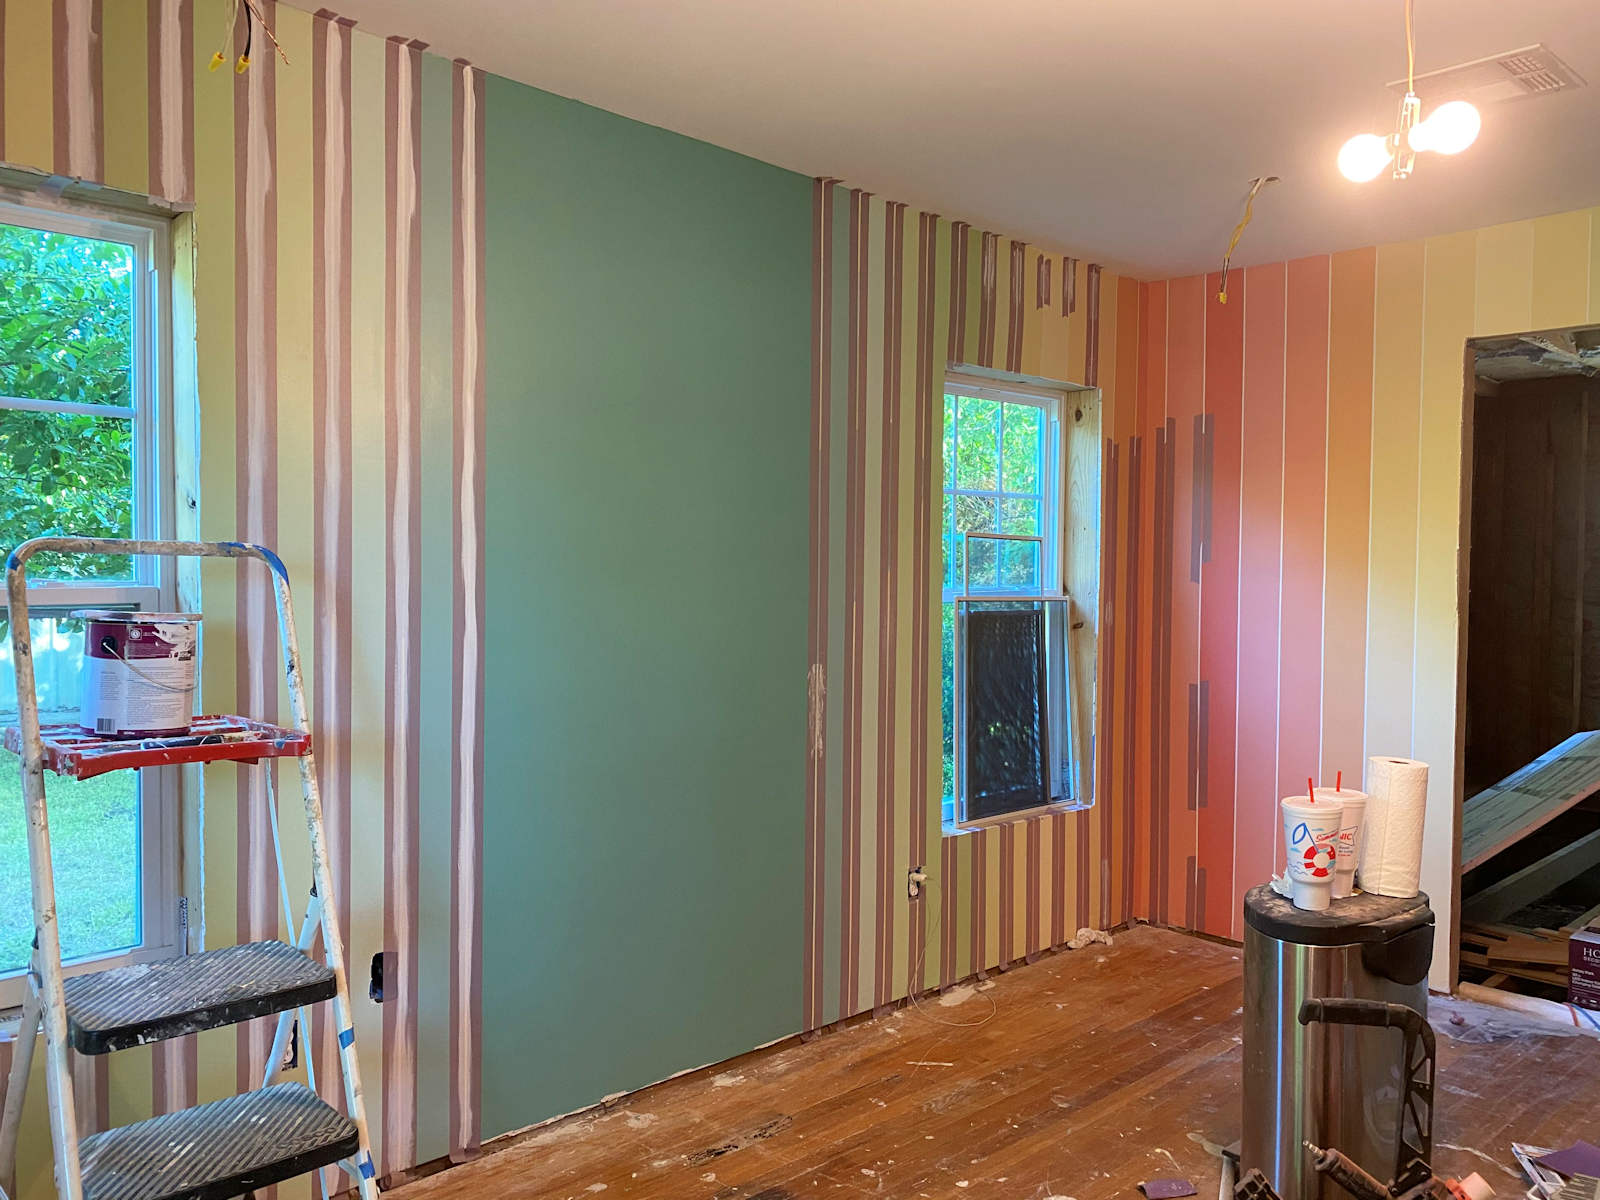
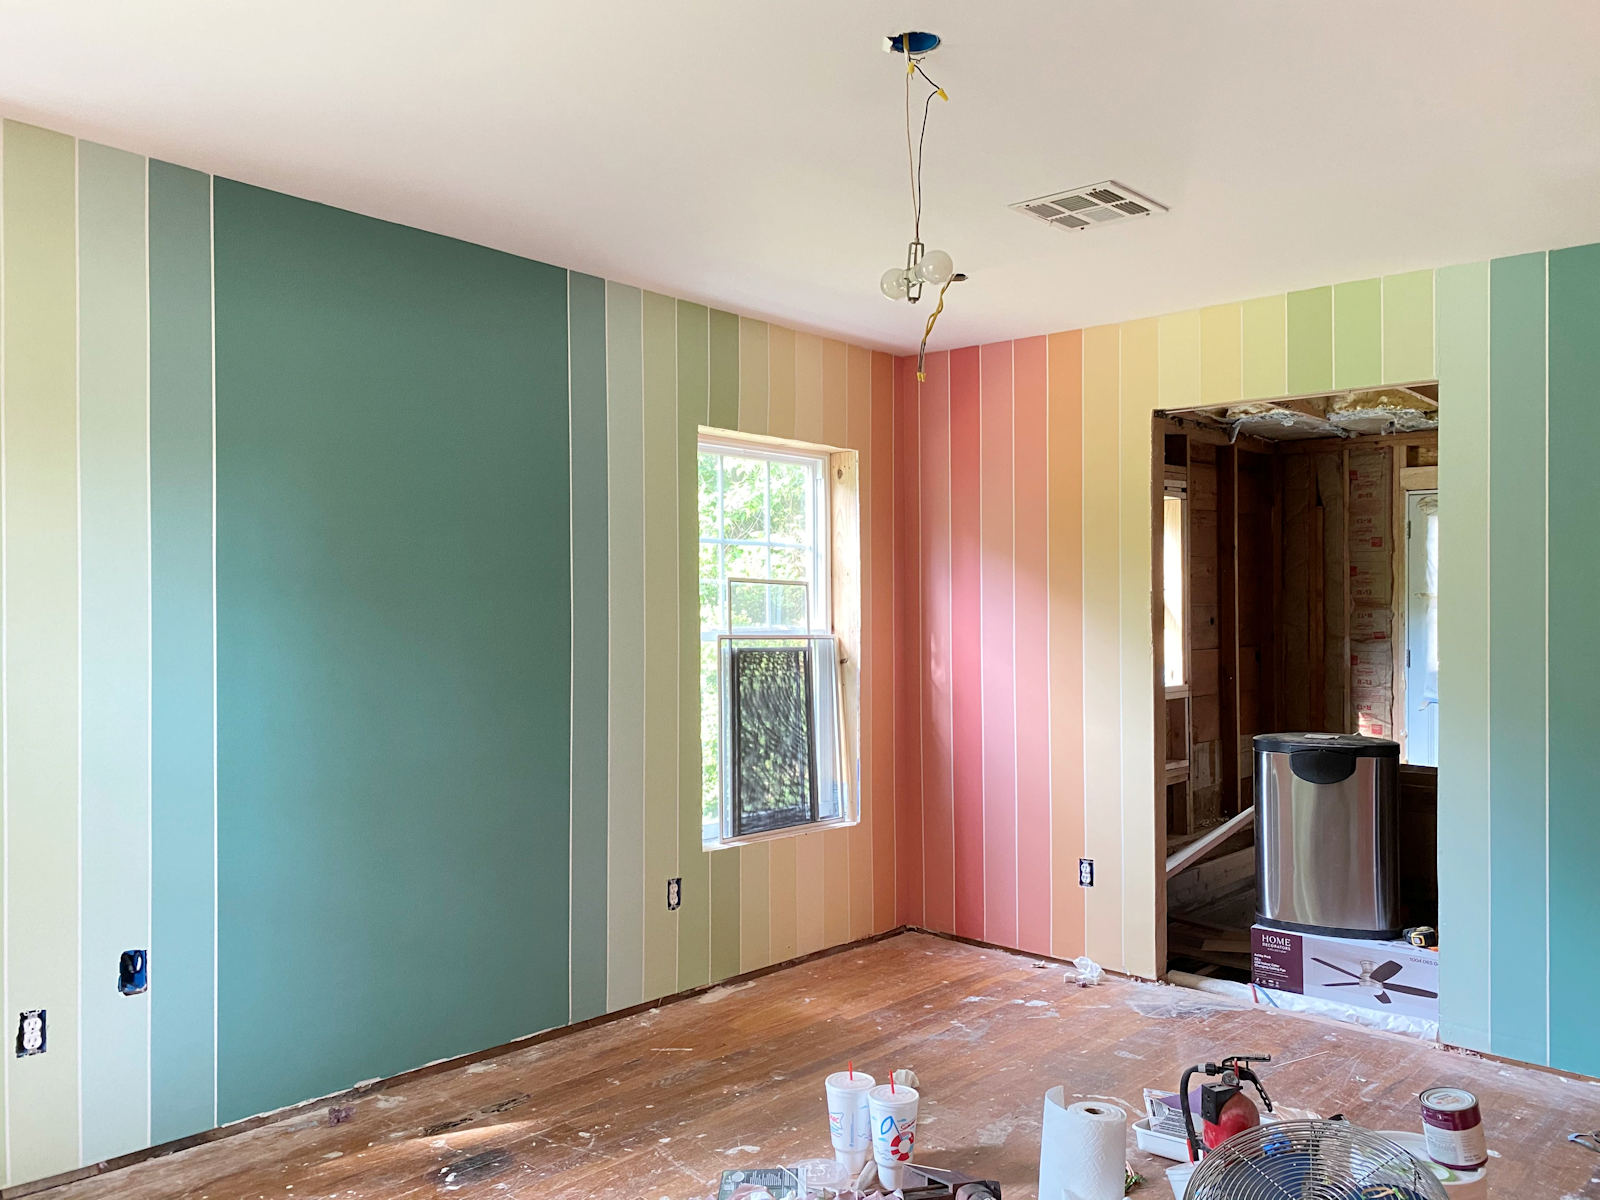
But in the end, things turned out well. And talk about colorful!! I love how lively and energetic this room feels. These walls are the perfect backdrop for a home gym for this color-loving girl.
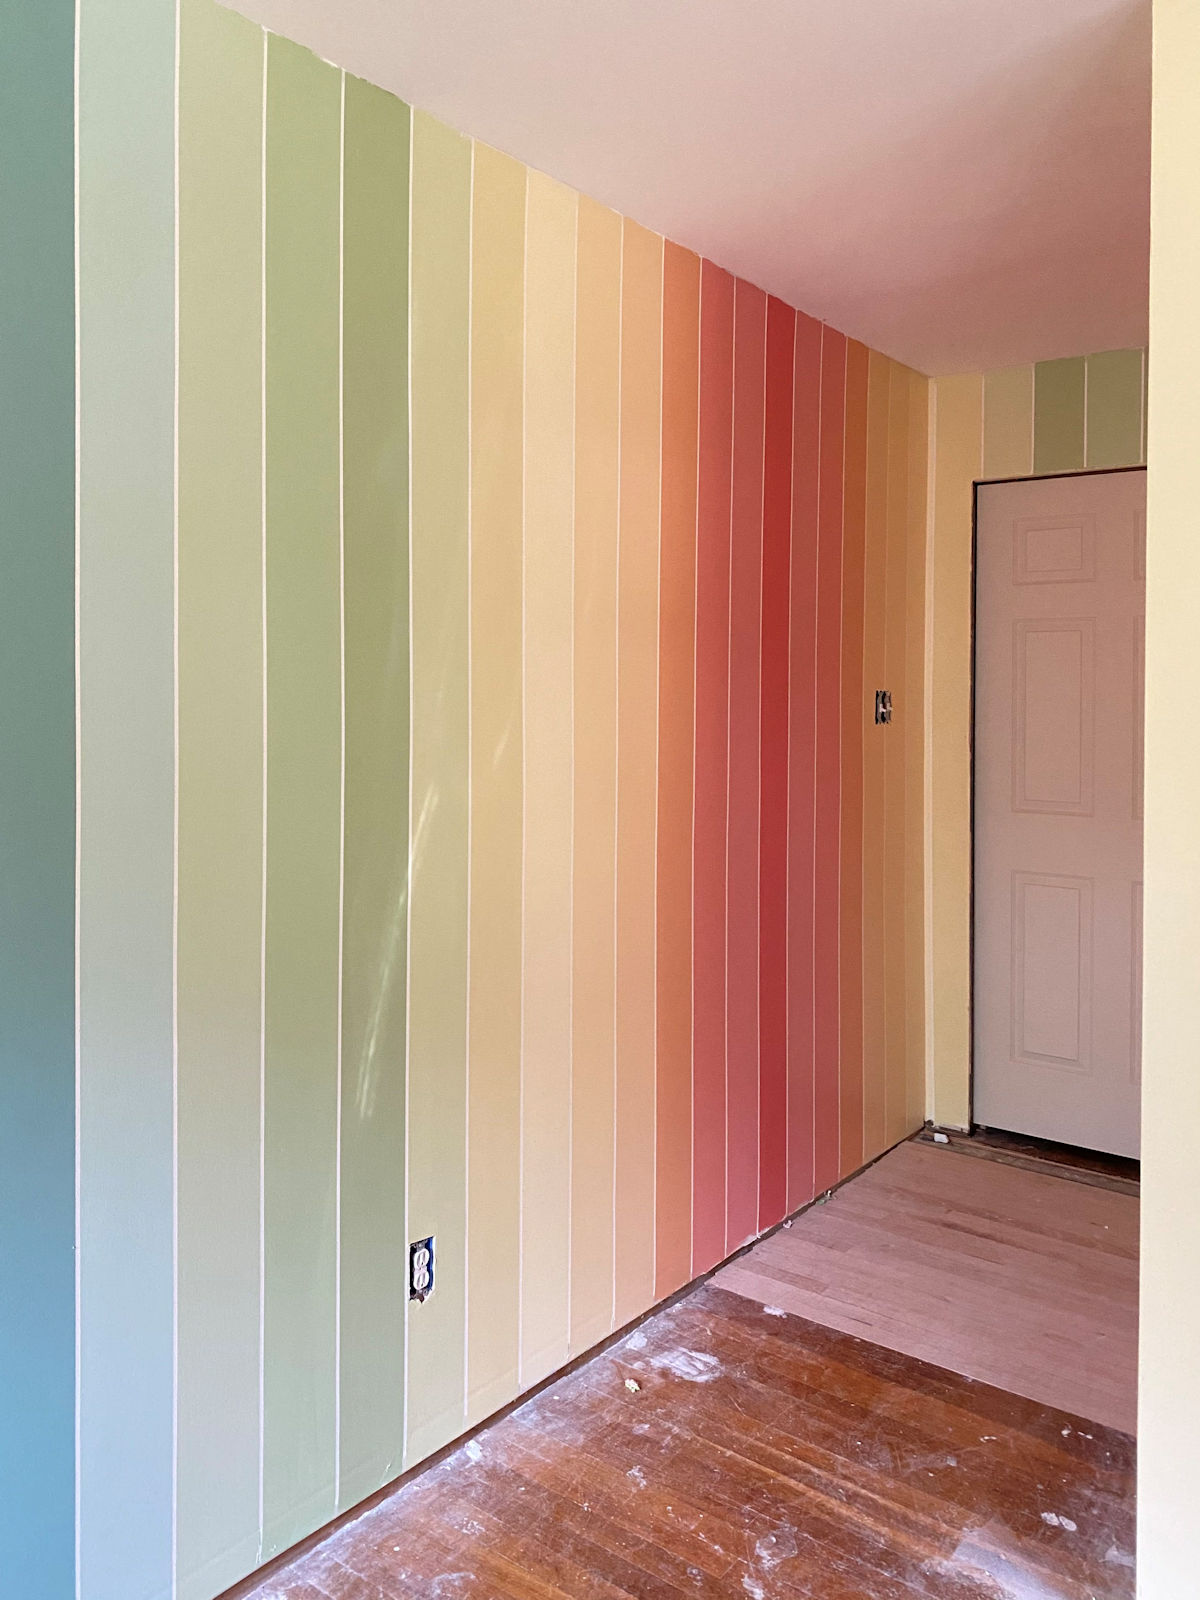
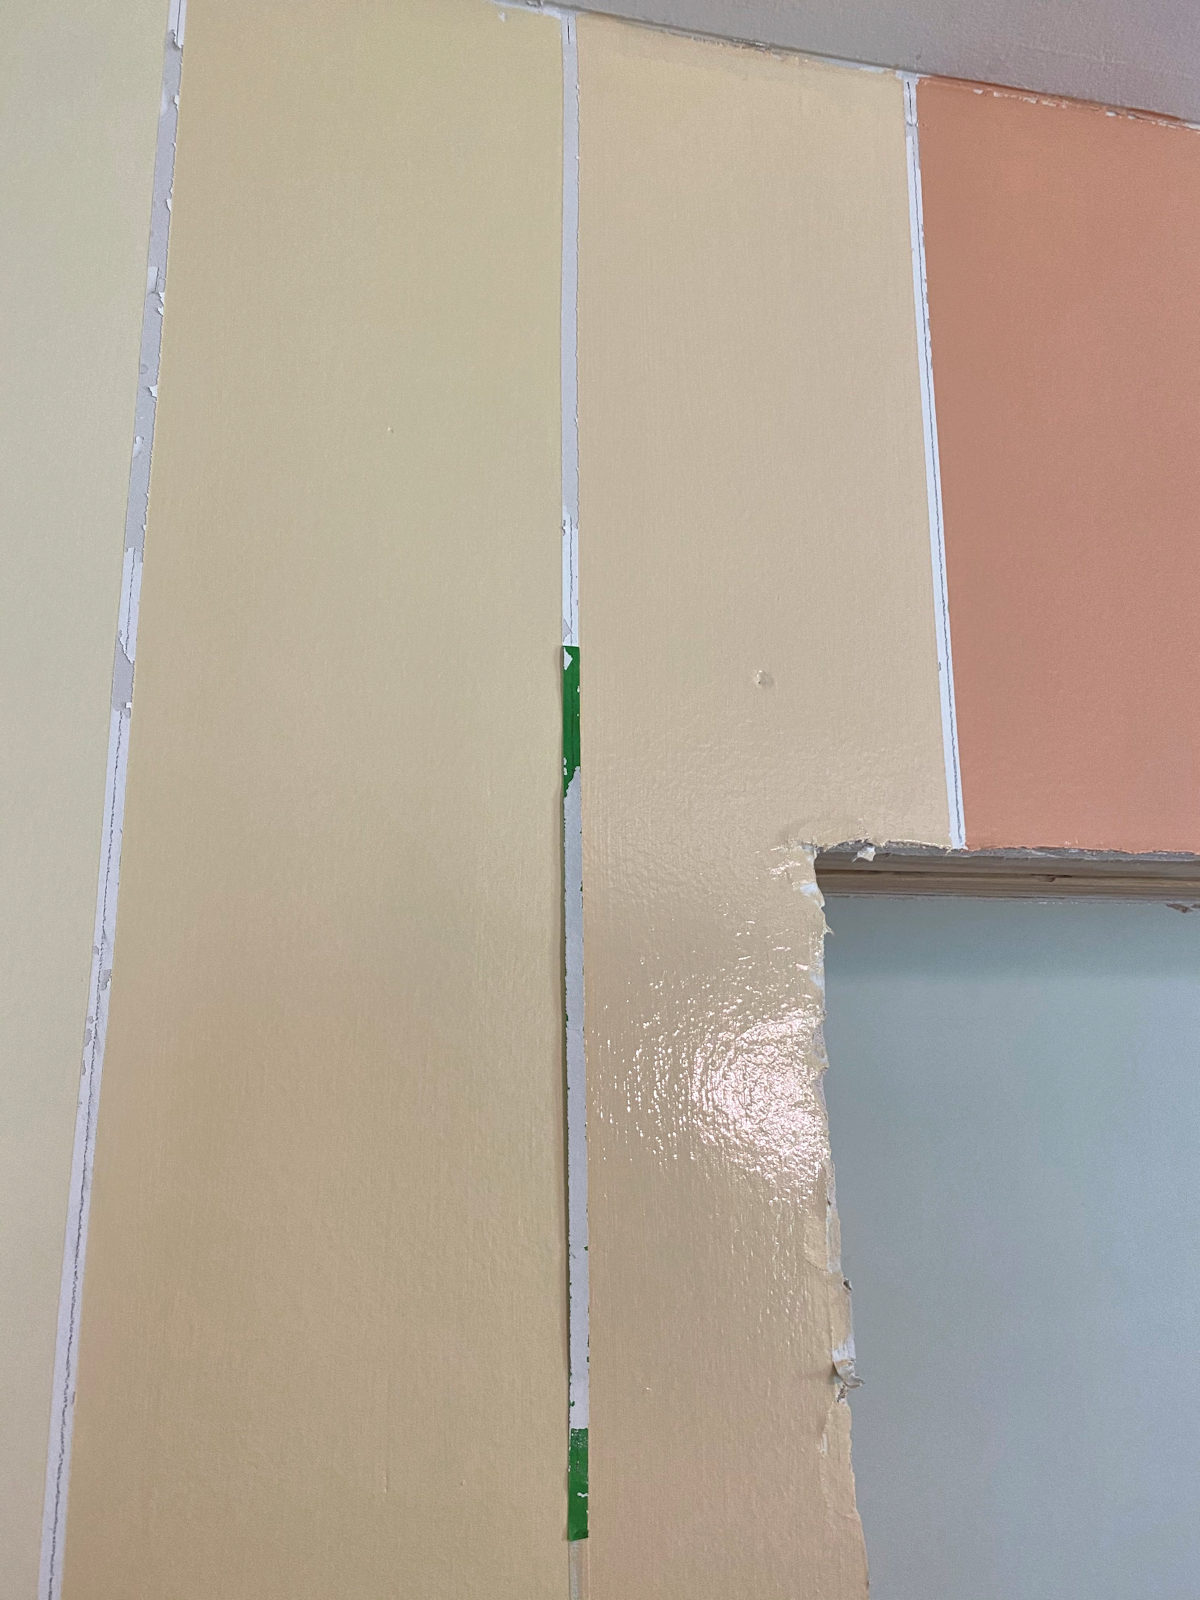
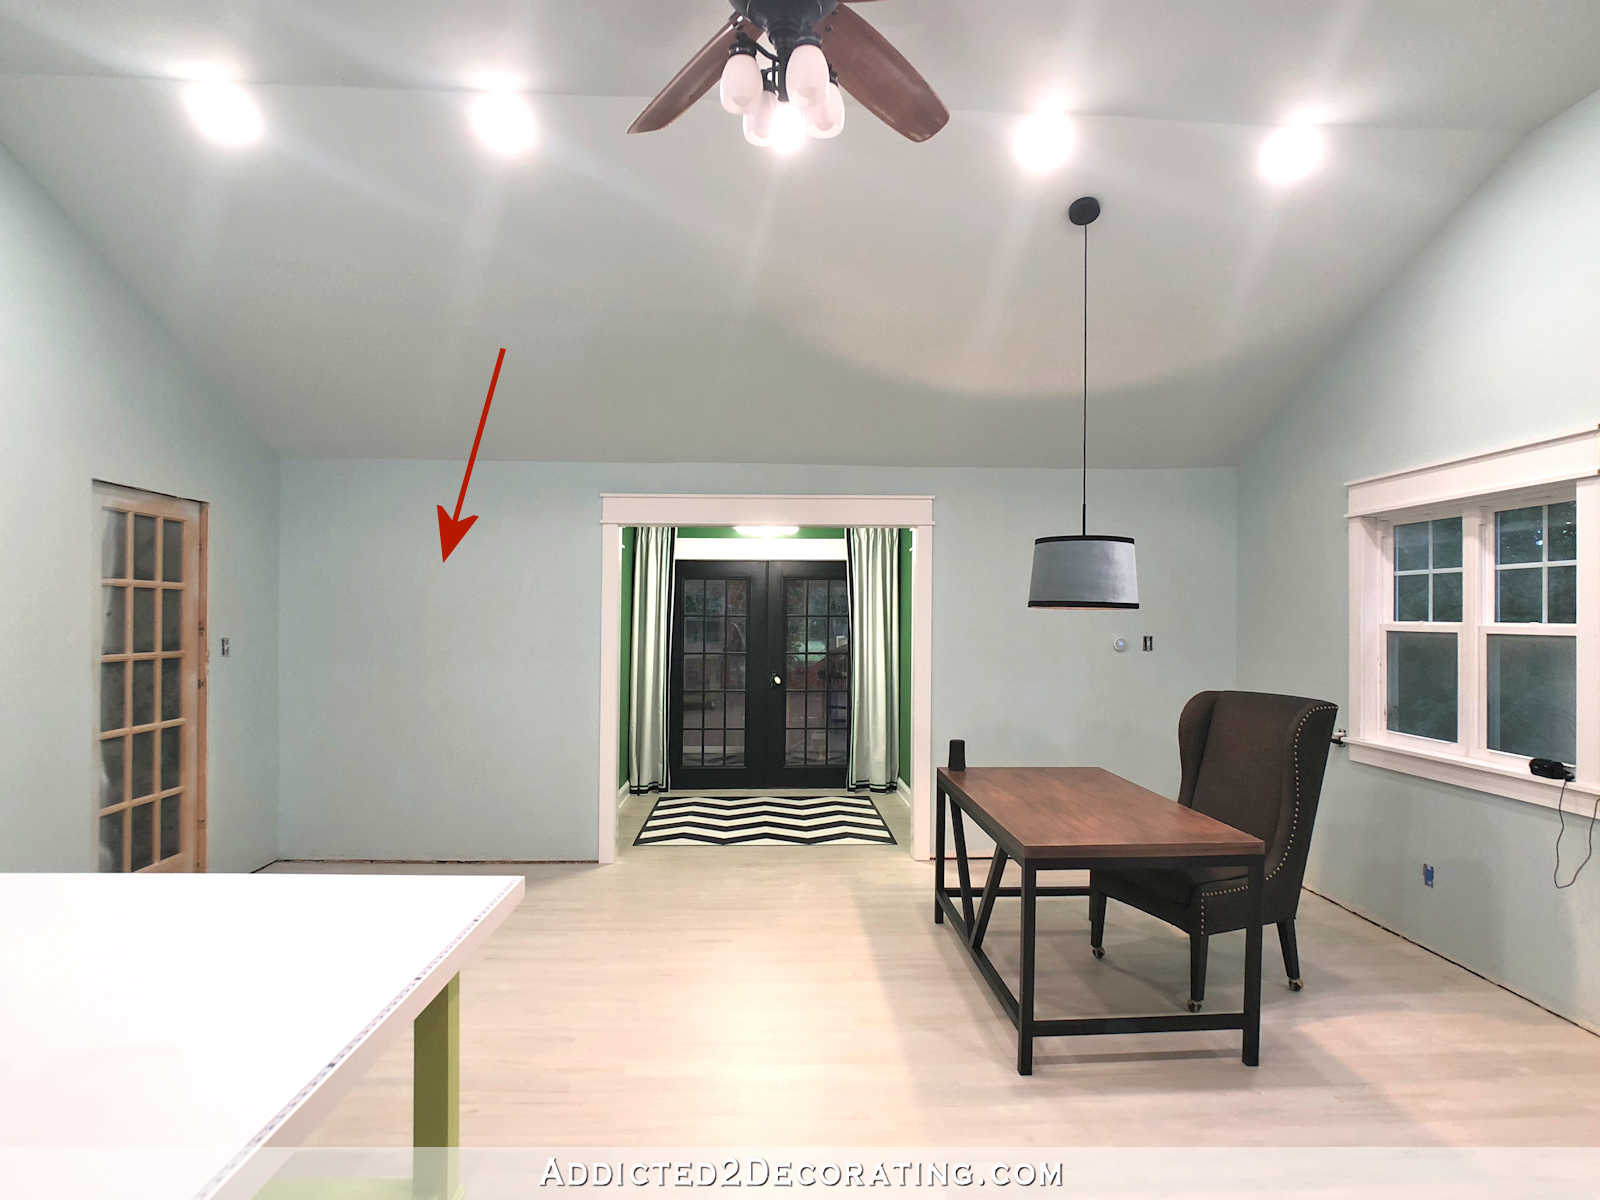
FYI, that streak that you see on the wall in the photo above is sunlight coming through the branches of the big oak tree in the front yard, through the window, and onto this wall. Those stripes, as far as the paint goes, are flawless. 🙂
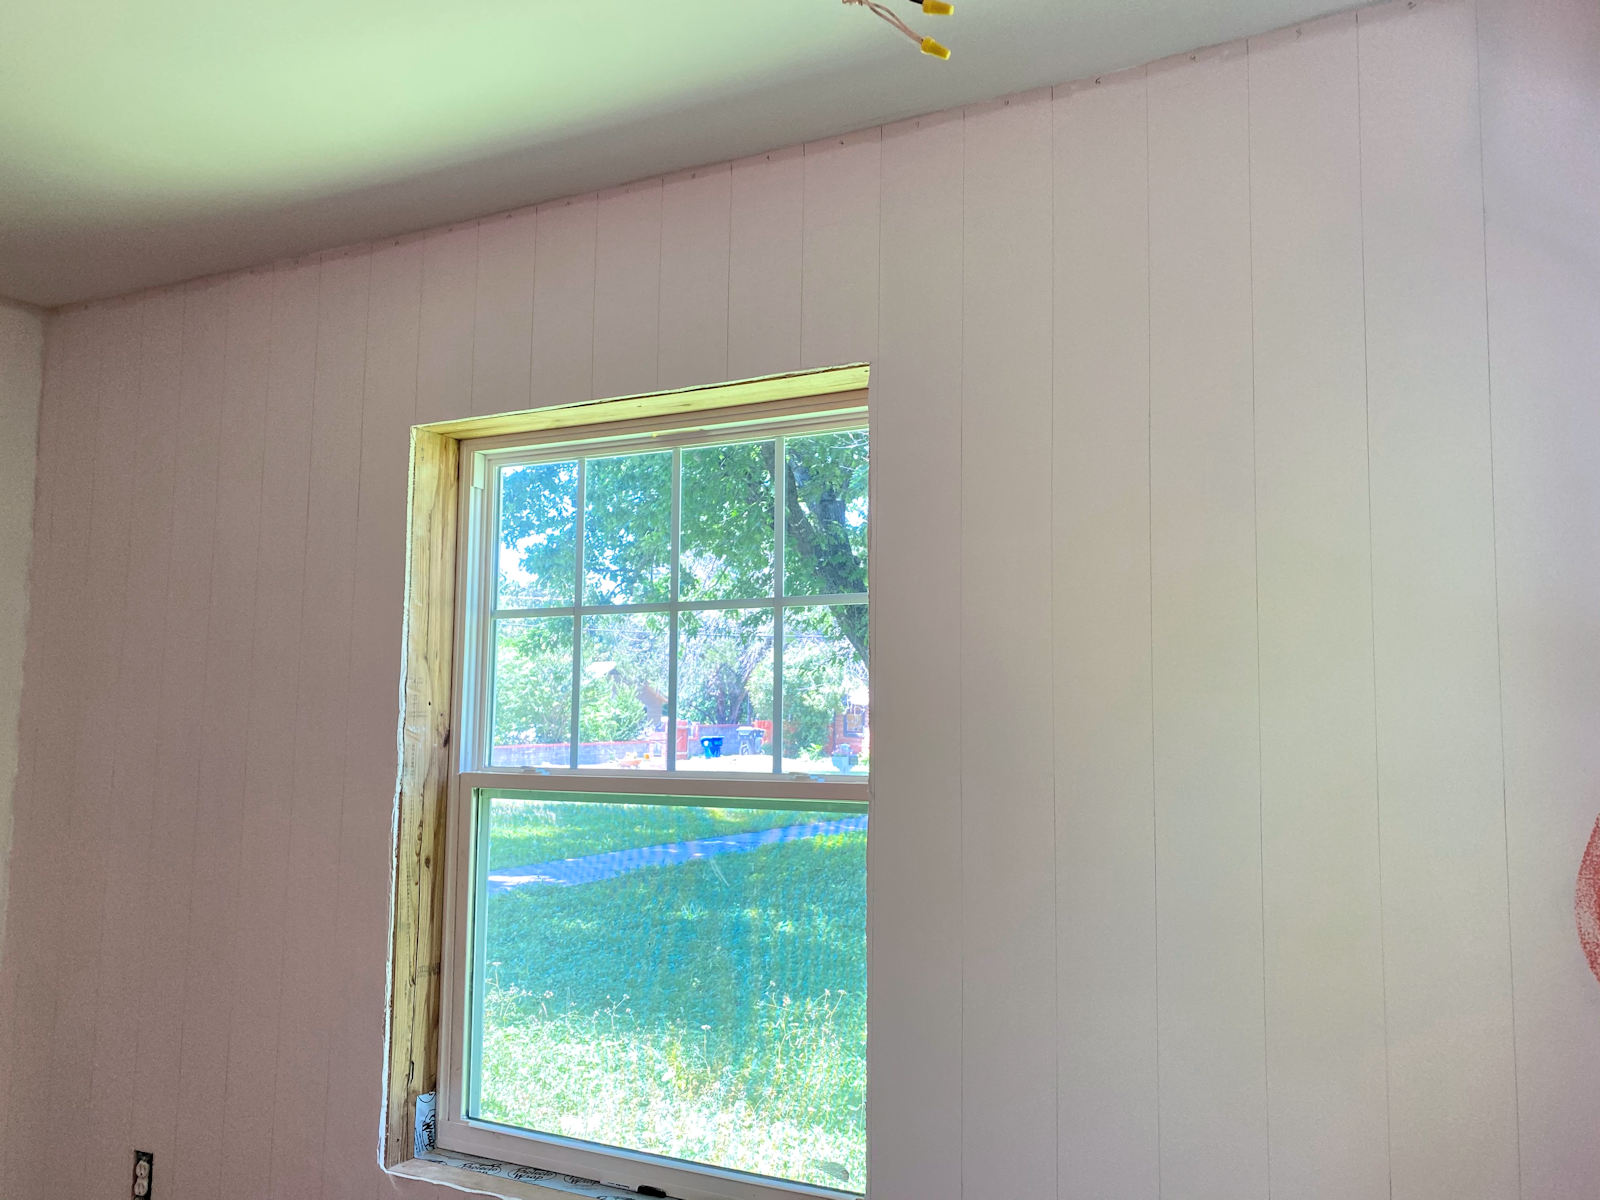
So let me give a quick rundown of the process from the beginning. I started by priming and painting the walls, and letting that dry for about three days. Then I was ready to do the stripes.
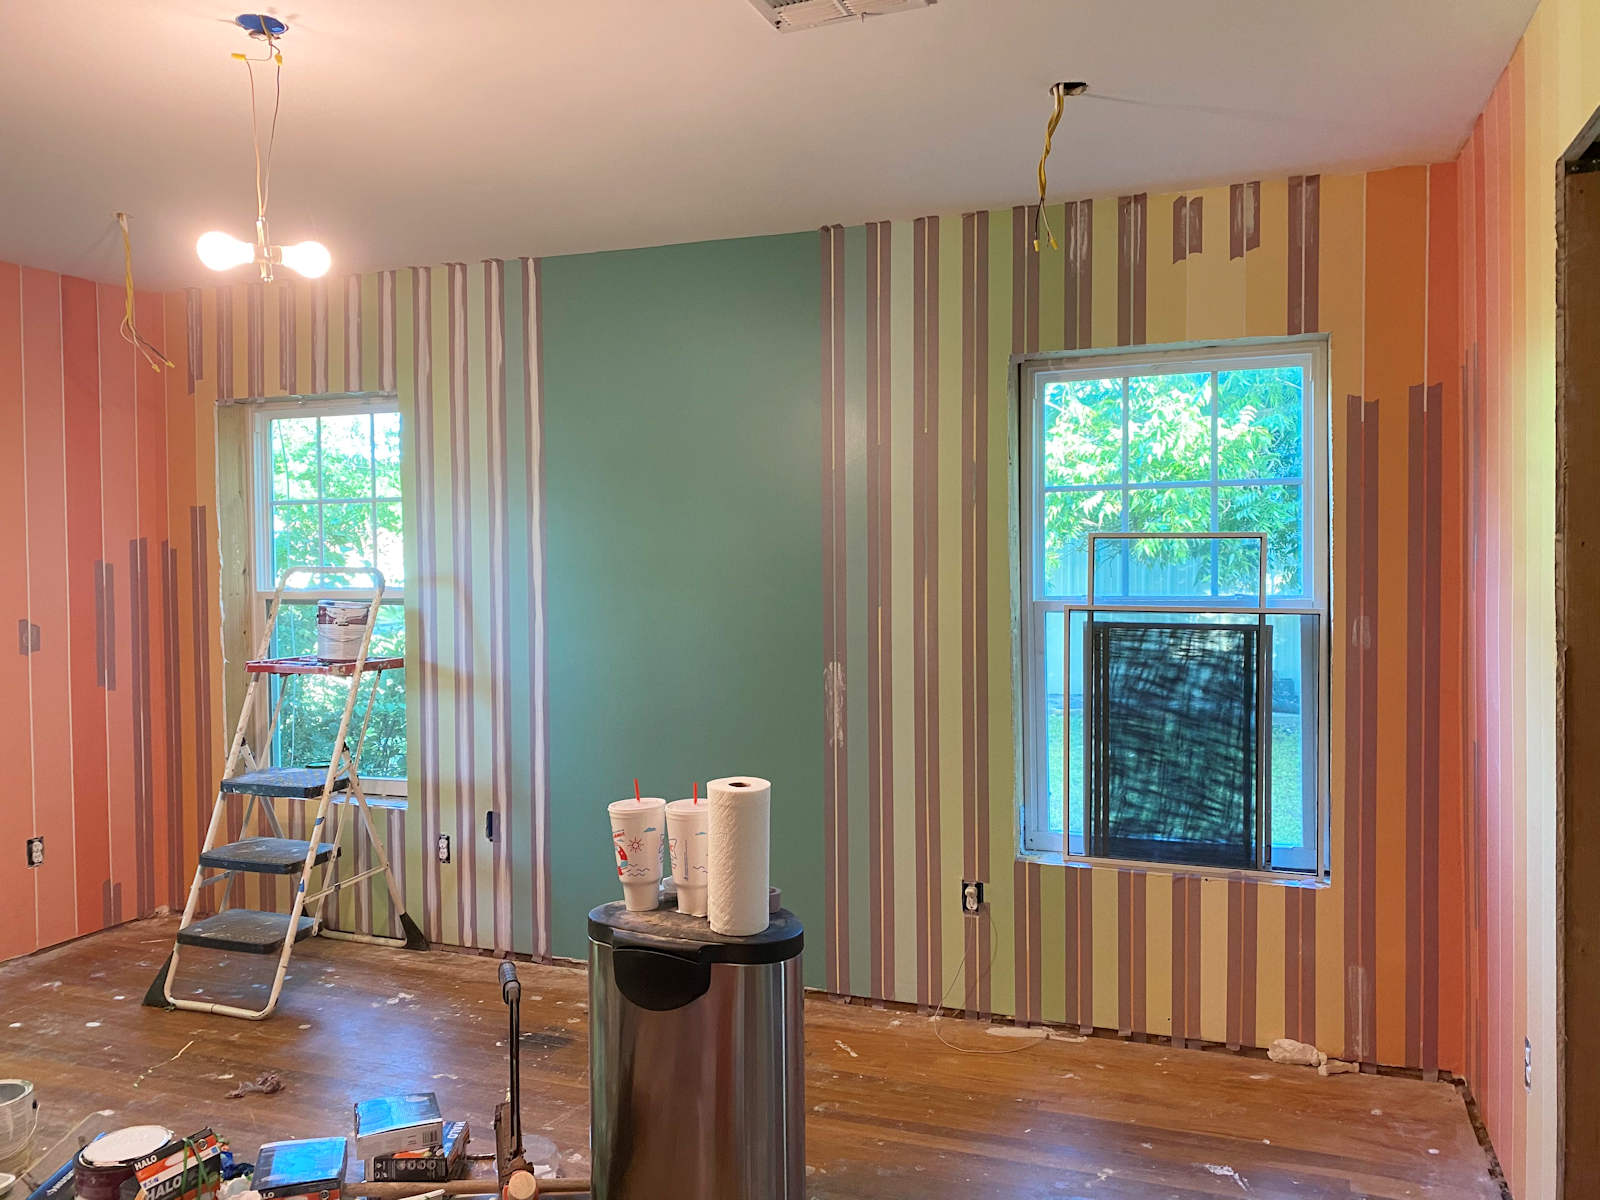
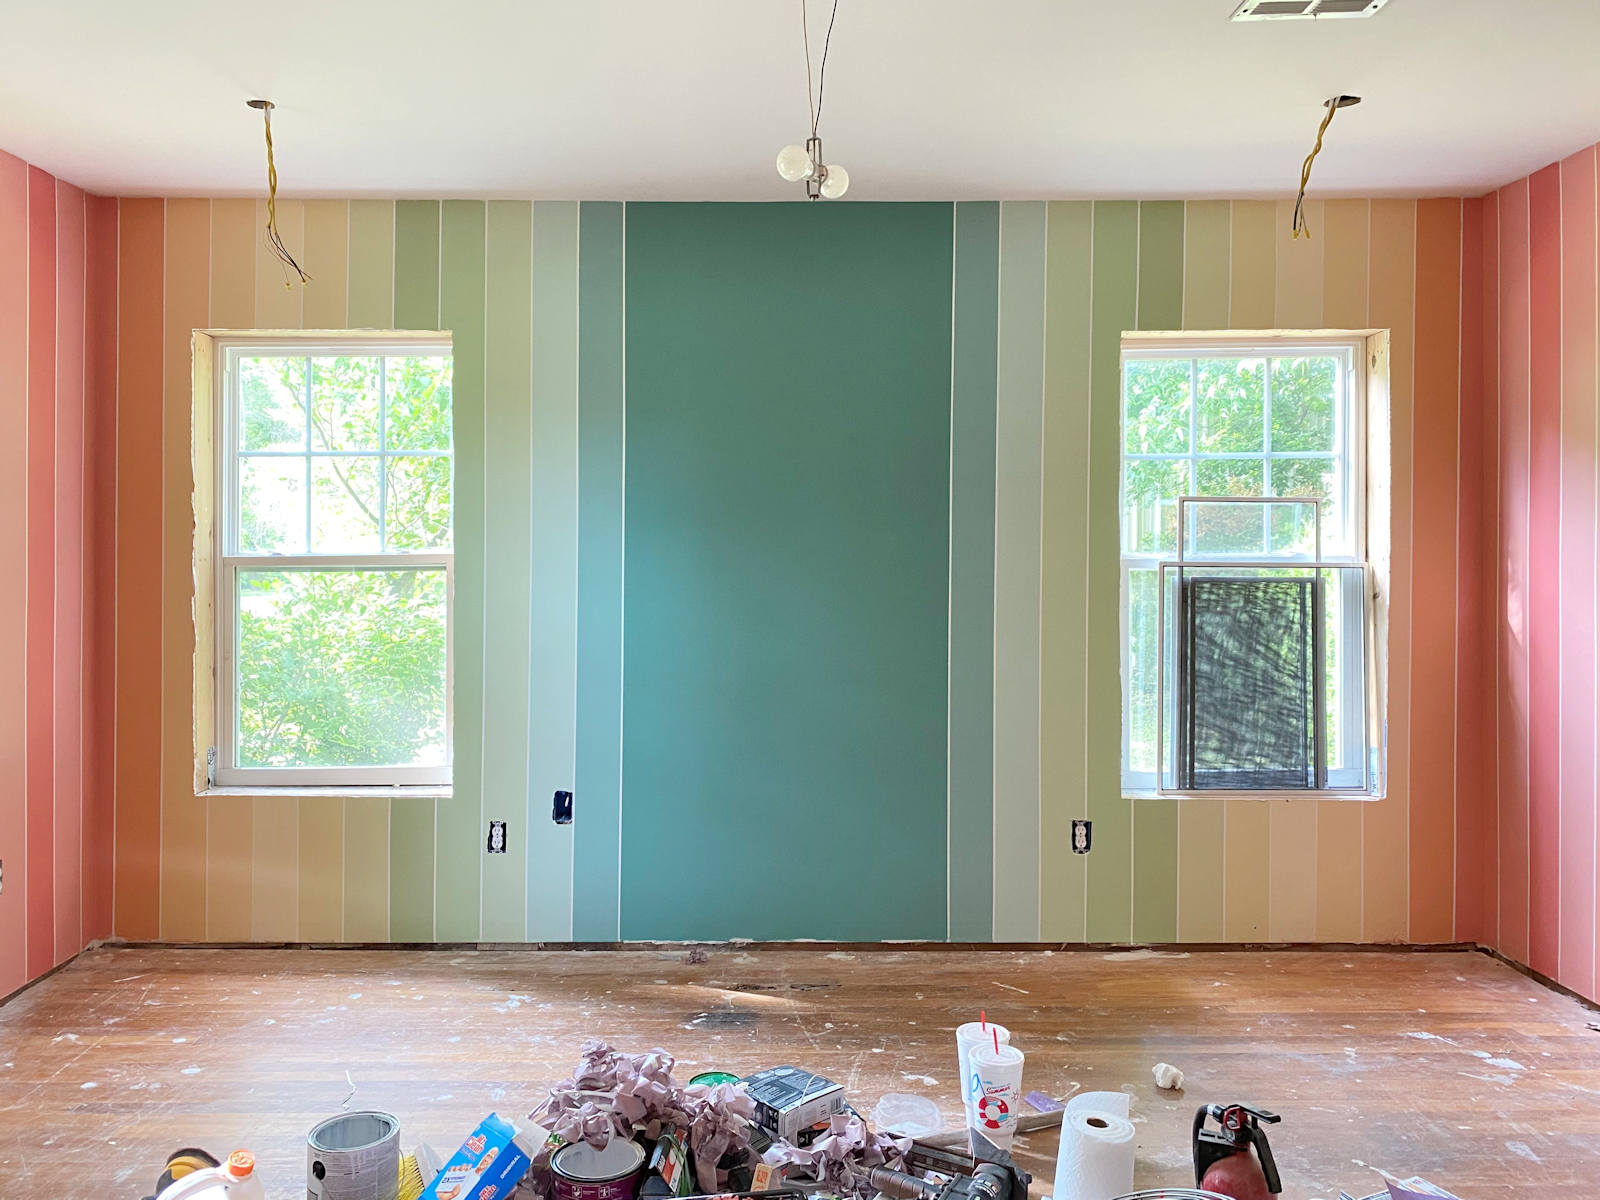
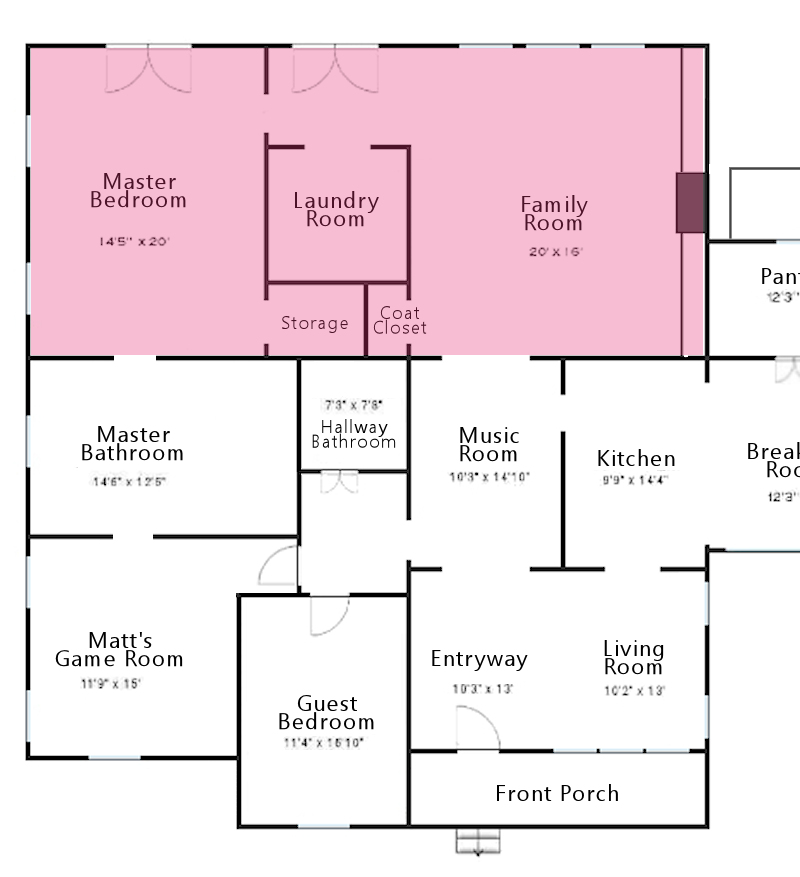
I knew exactly where I wanted the two main colors on each end of the spectrum of colors I had chosen. I wanted the darkest teal to be in the center of the main wall where the I’ll build the Swedish ladder. And I wanted the darkest reddish pink color to be on the main wall of the closet. So I measured the wall space between those areas, and determined how wide my stripes needed to be to get those colors to land exactly where I wanted them while keeping my colors in the exact gradient I selected.
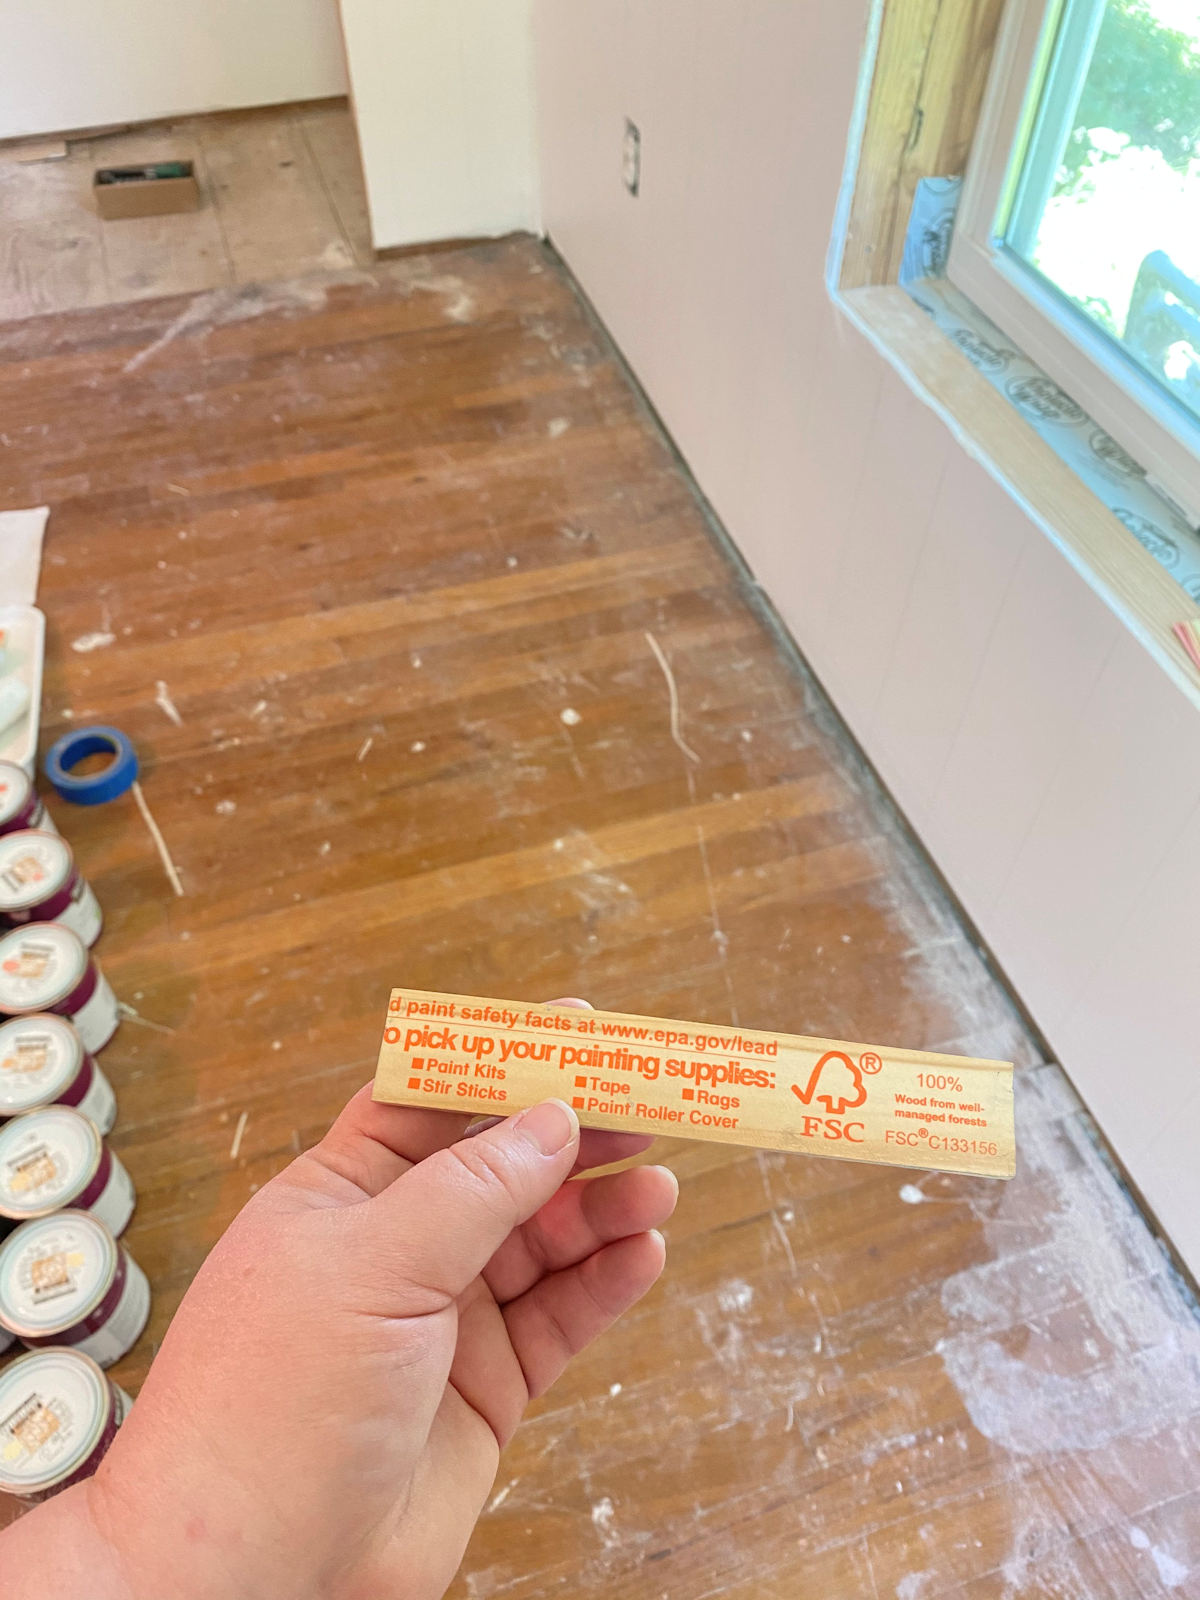
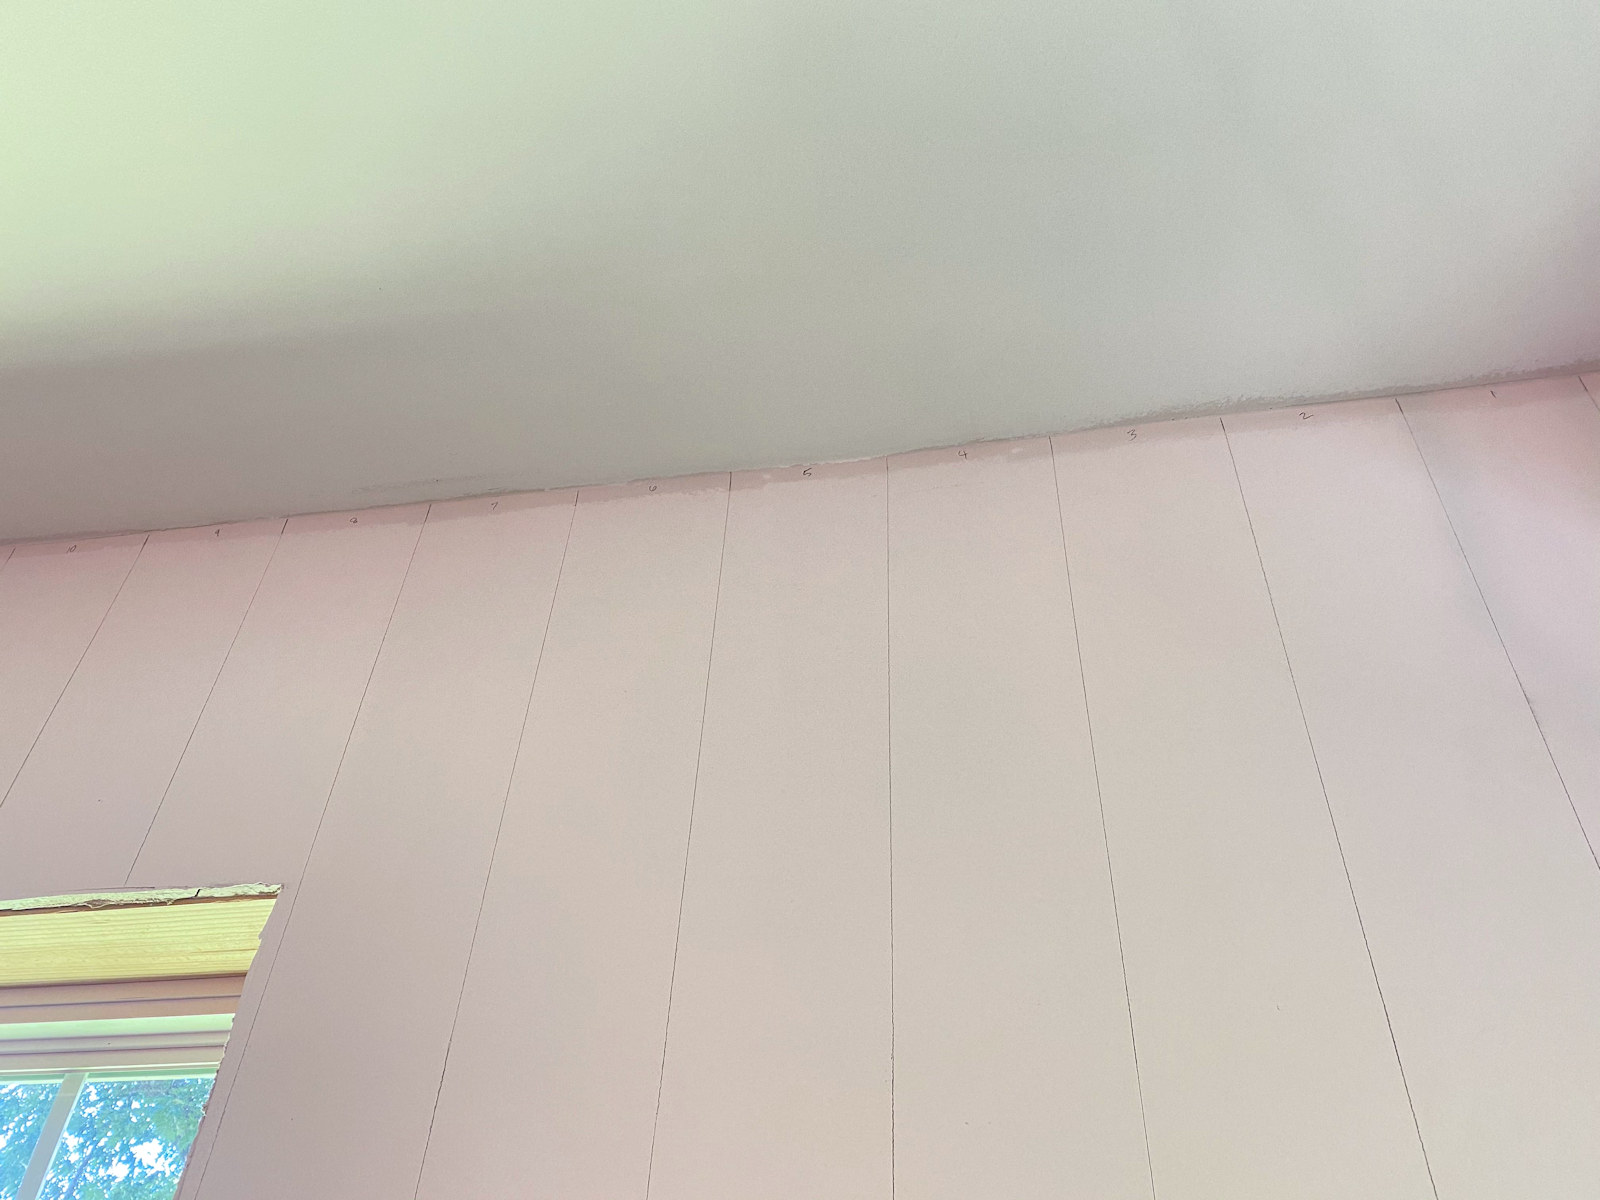
That made my stripes 5 7/8 inches wide. I cut a paint stir stick to that width and used it to make marks along the top of the wall all around the room.
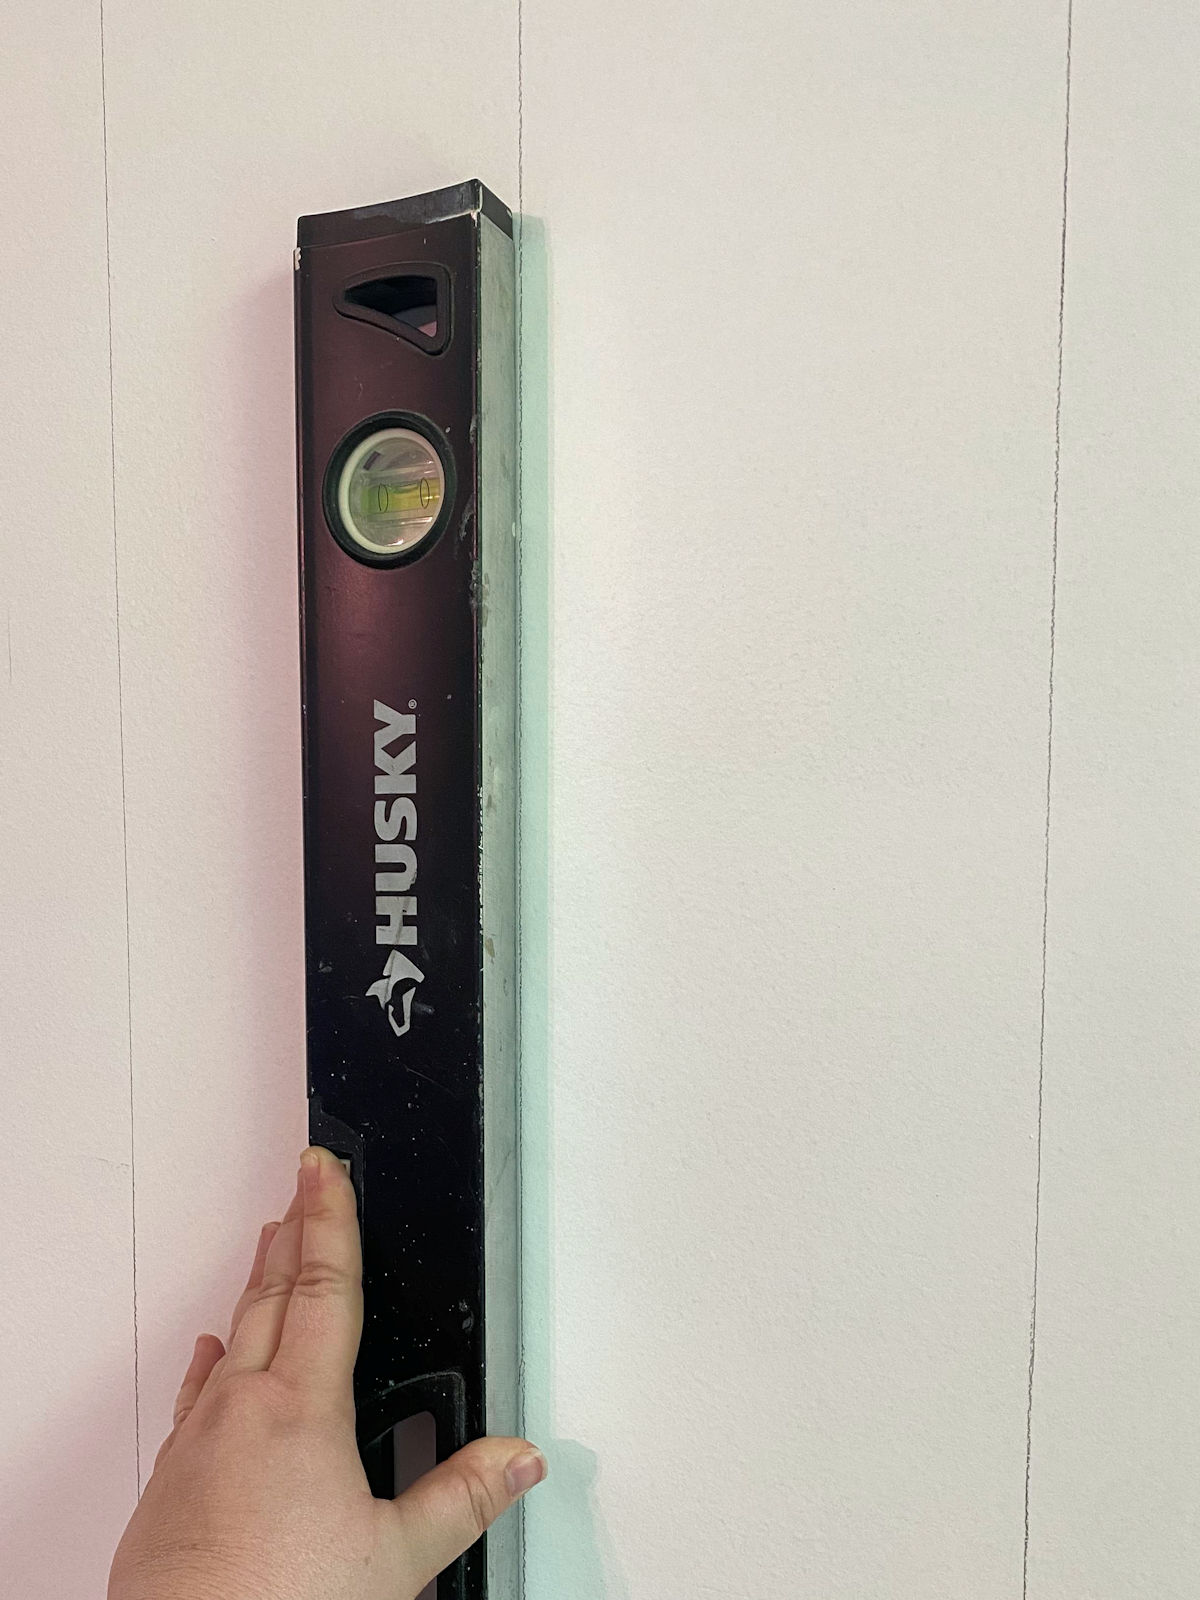
With those marked off, I then used a pencil and bubble level to mark all of the vertical lines. I initially tried a laser level, but that didn’t work for me at all. The old school way, using a bubble level and a pencil, was much faster and easier for me.
Once I had the lines marked off, I numbered my paint cans in the exact gradient I wanted them to appear on the walls, and then I numbered the wall stripes along the top of the wall to match the paint color I was going to use for each stripe.
(Note: If you’re reading this post on any website other than Addicted 2 Decorating, that means you’re reading on a site that is stealing my blog content. I hope you’ll consider joining me on my actual blog by clicking here.)
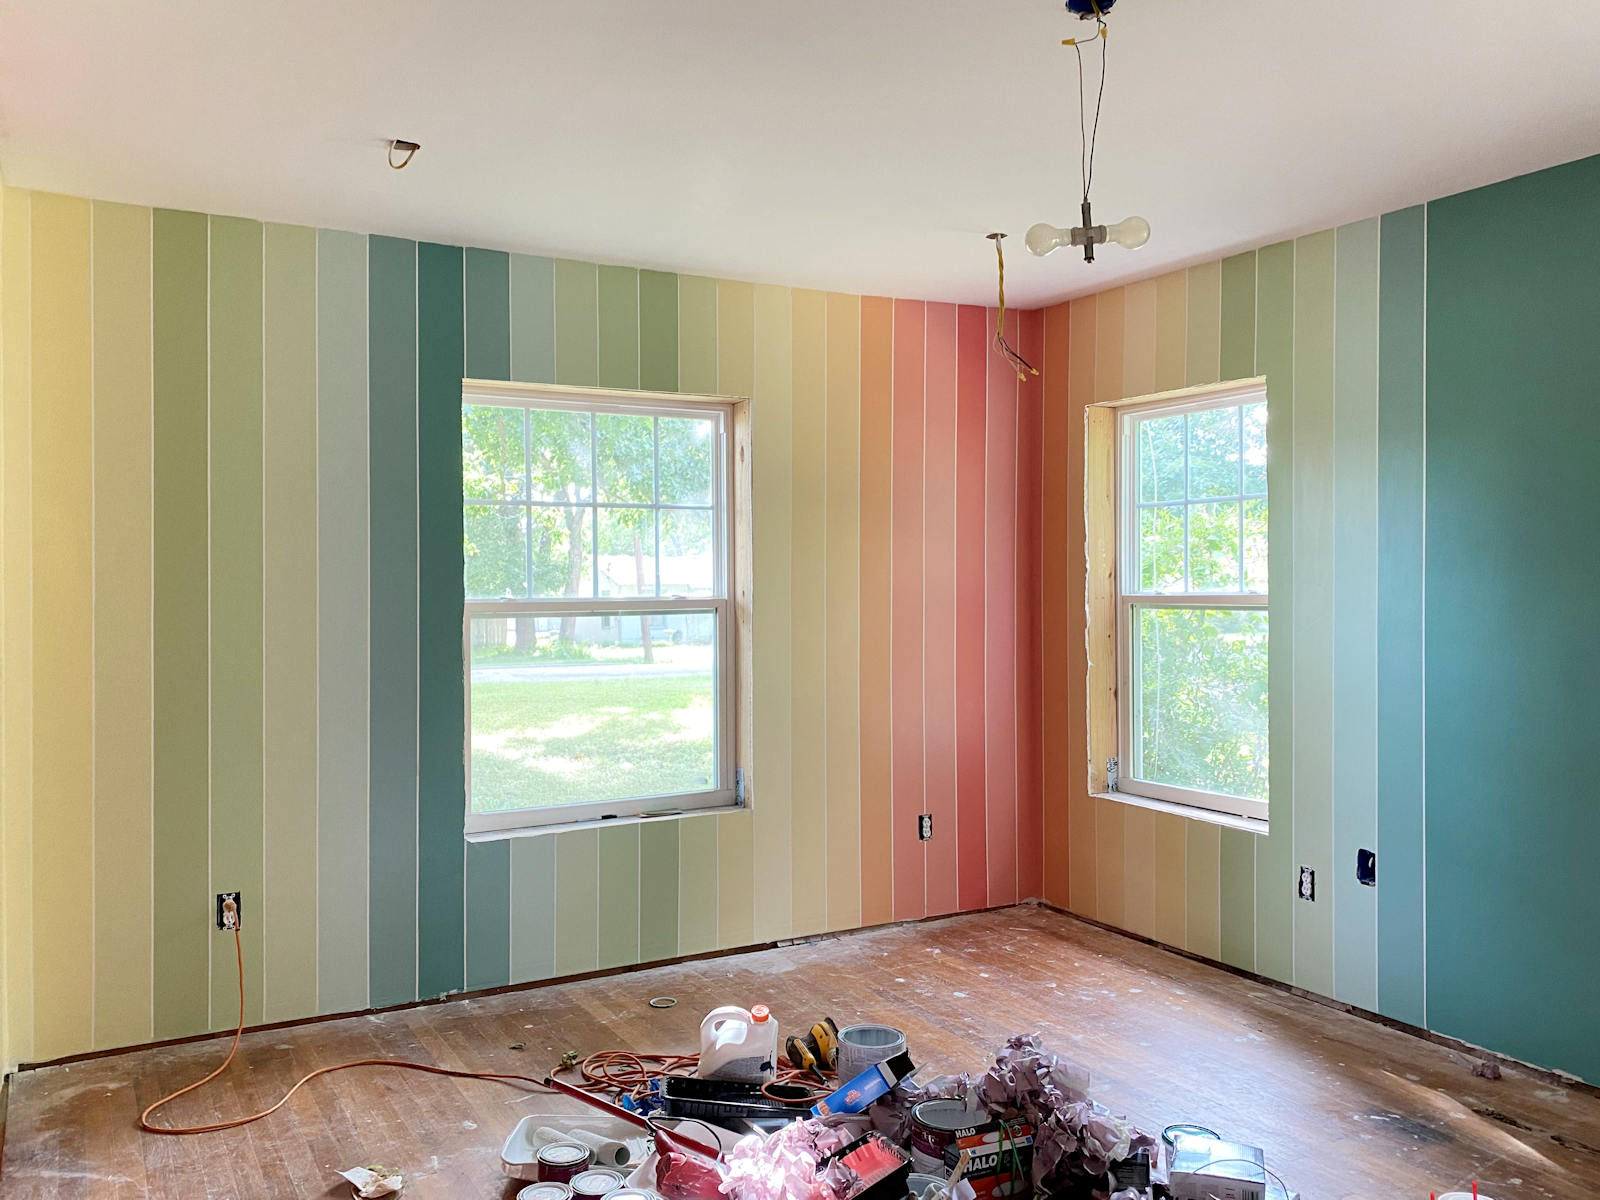
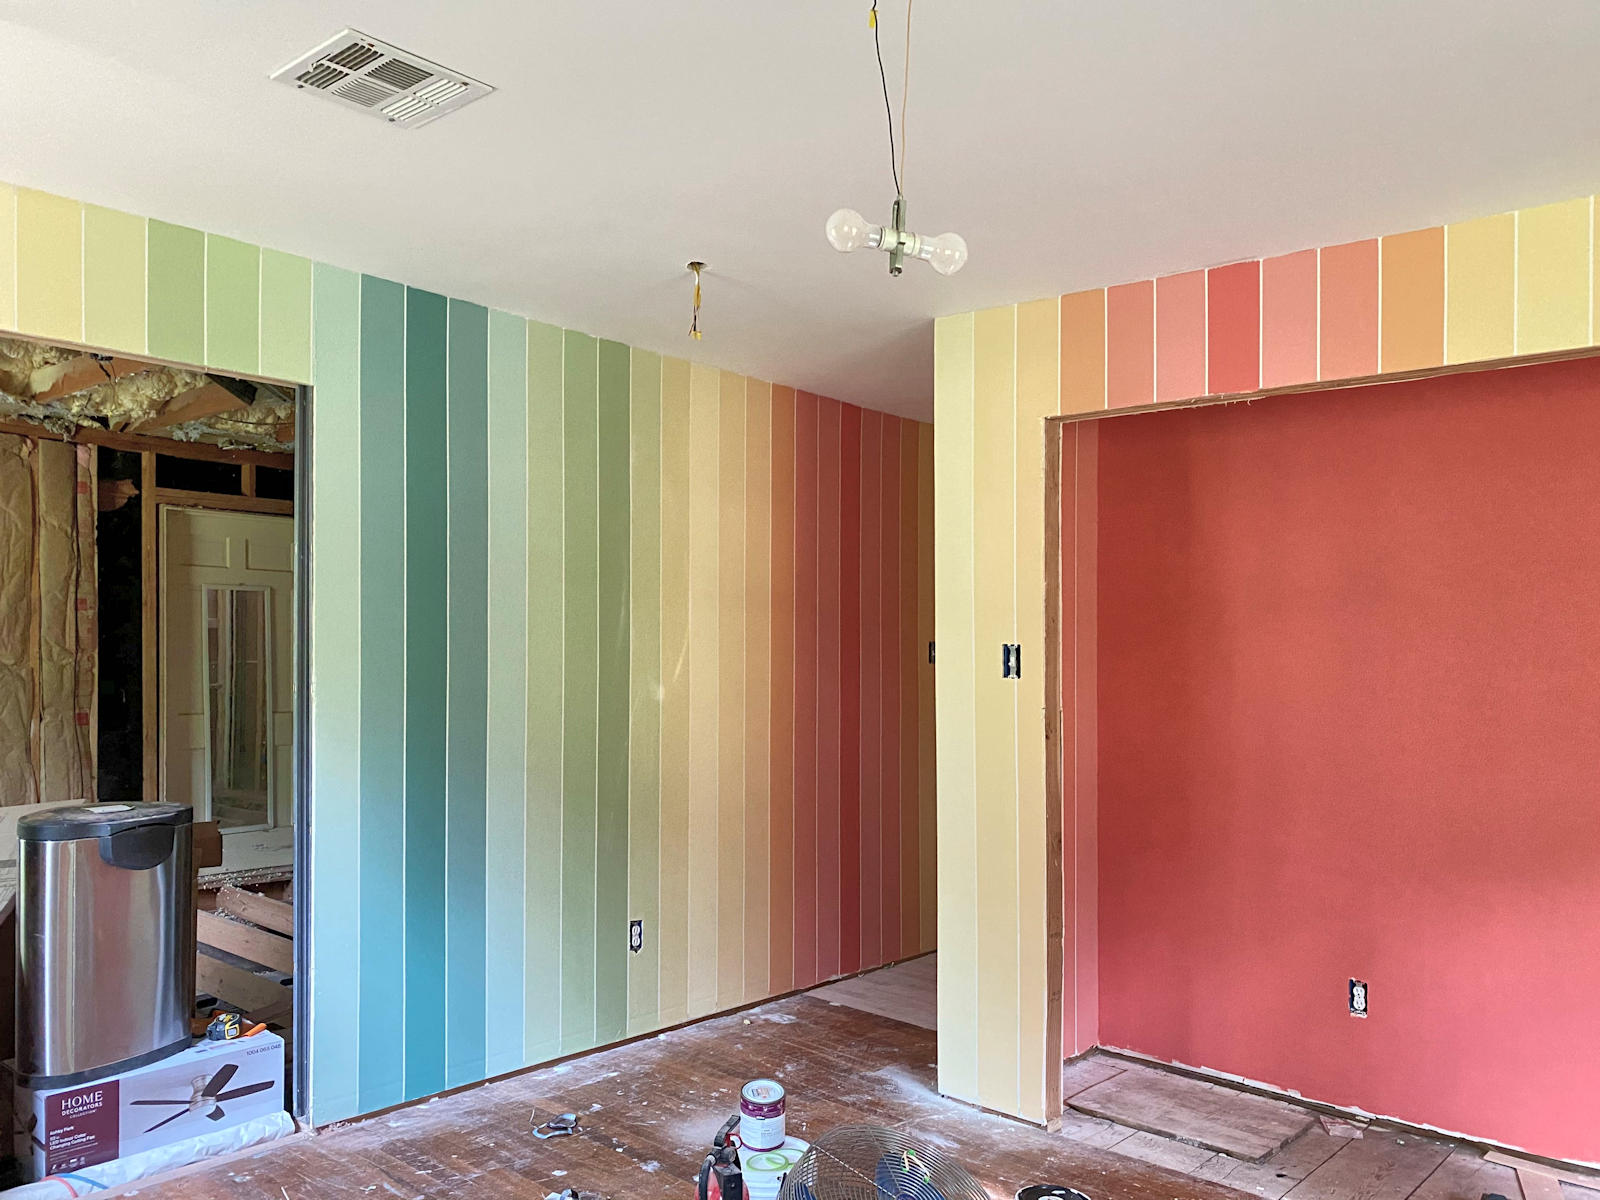
I used 15 paint colors, and I did my gradient so that the stripes went from 1 to 15, and then back down from 14 to 1. In other words, I didn’t do 1 to 15 and then start over at 1 with the next stripe. If that’s confusing, it’ll make more sense when you see the colors on the walls.
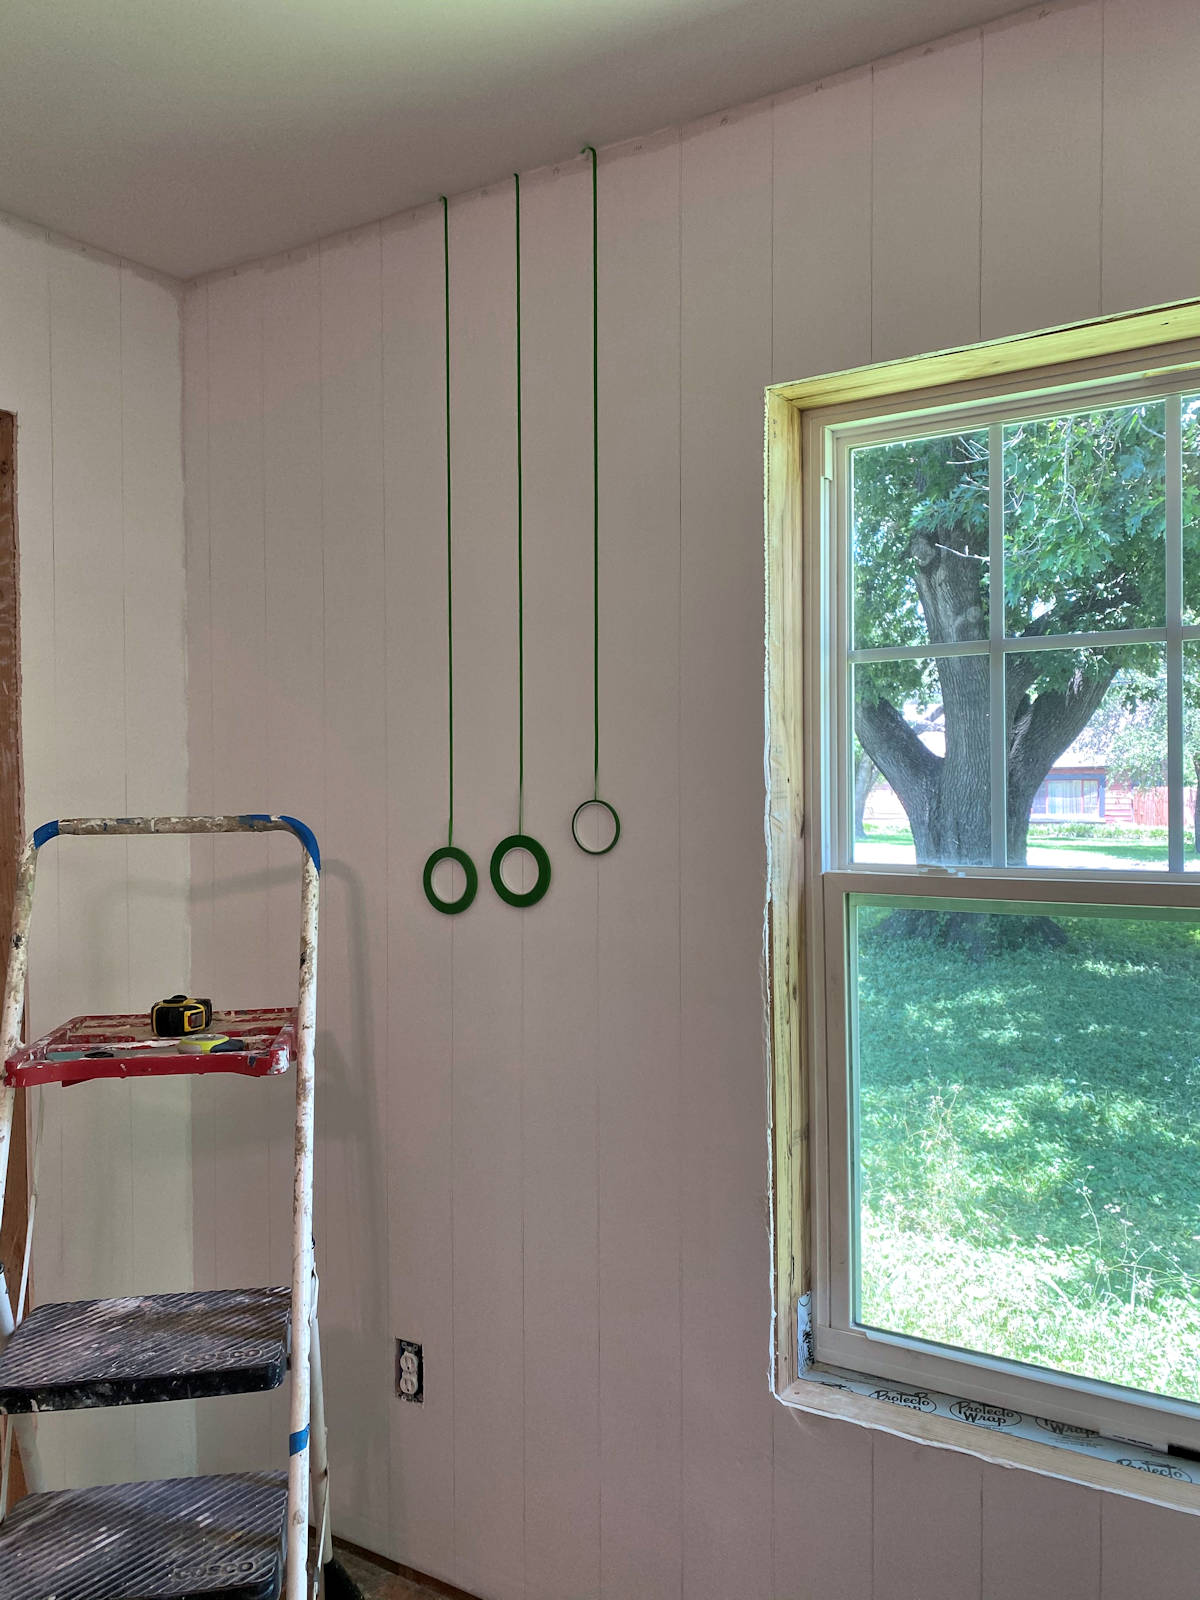
Next, I marked off the stripes using 1/4-inch painters tape. I used two different brands. The tape that was used on 99% of the stripes that were damaged is called STIKK, and I found it on Amazon. I would NOT recommend it. When I ran out of it, I used 3M. I had very little damage on the walls where I used the 3M tape (which is bright green, and I happened to find locally at an auto supply store with the car paints and pinstriping supplies). This process was tedious, but I found that it went much faster if I taped off three stripes at a time. That greatly reduced the number of times I had to climb the ladder and then get on my knees to do the bottom part.
After everything was taped off, I sealed the tape with a thin coat of the white wall paint.
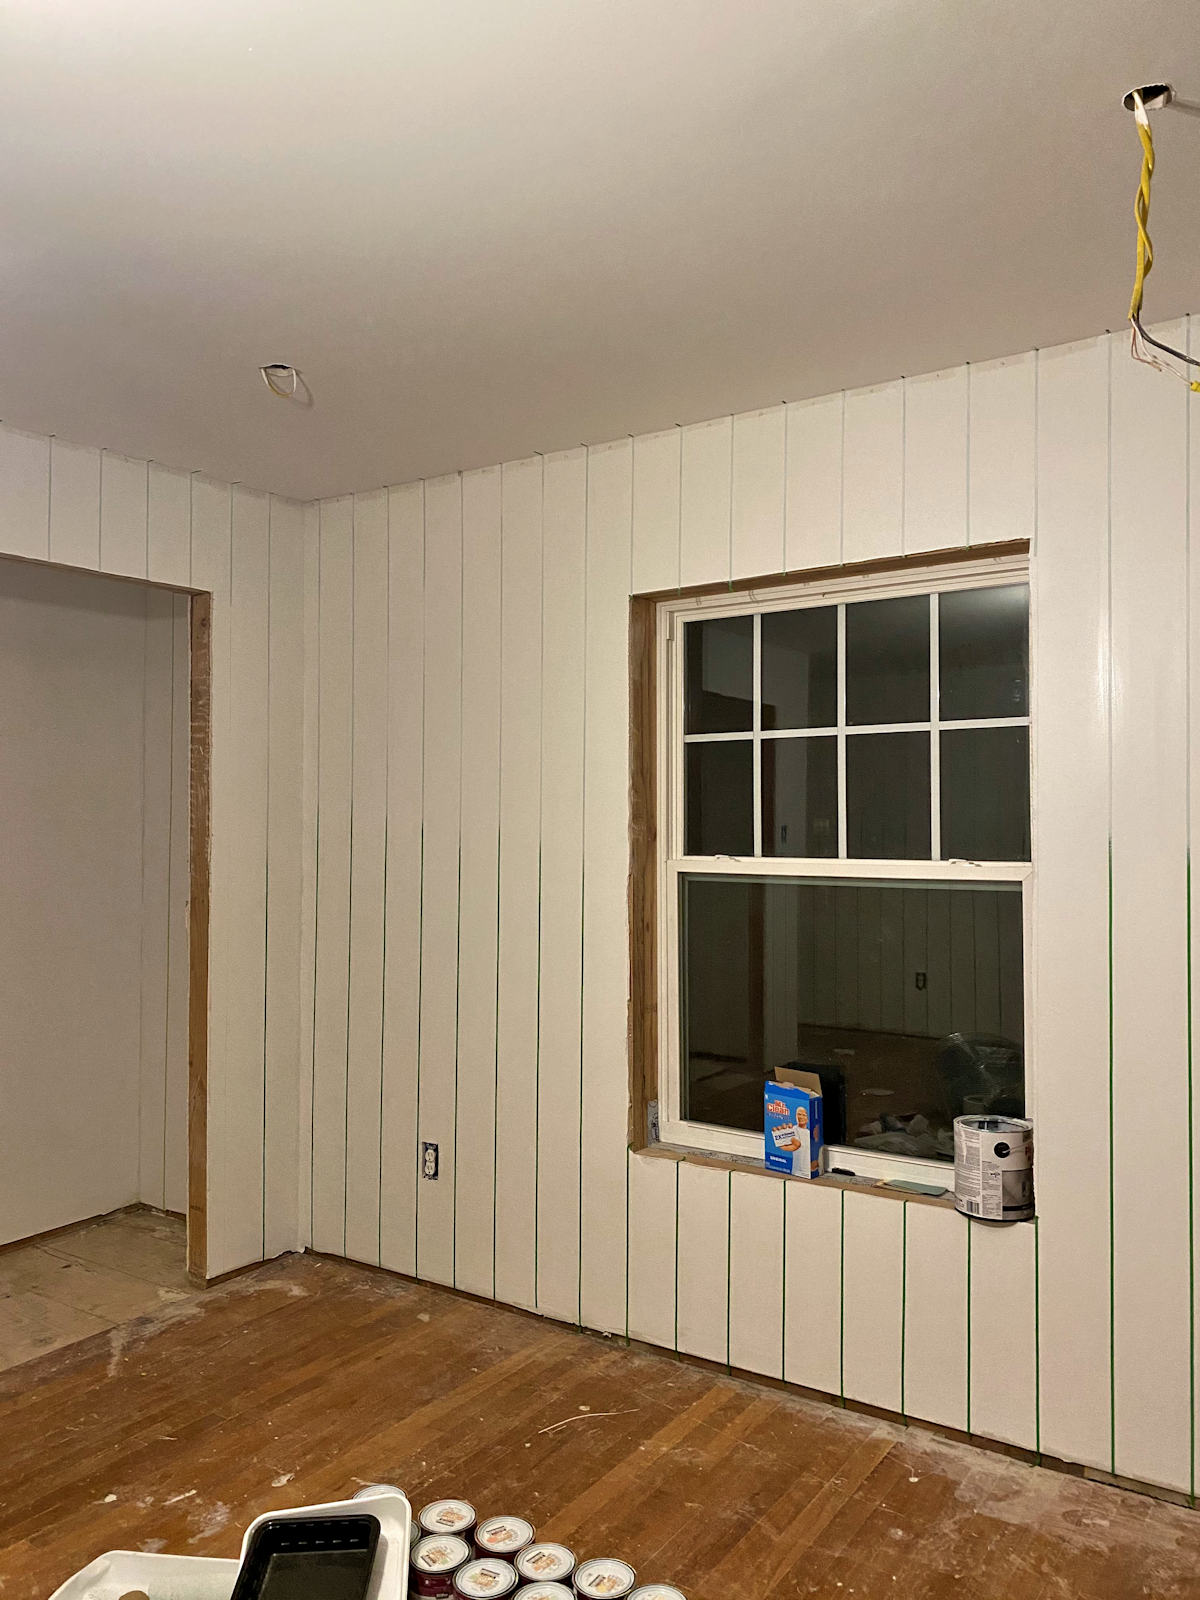
Taping off all of the stripes in the whole room and numbering each one to coordinate with my paints before painting any stripes saved a ton of time. This way I could paint all of one number at once, and then move on to the next number and do all of those.
After I got all of the stripes painted, I should have been able to remove the tape and have finished walls. But this is where that perfect storm had other ideas. As I began to remove the tape, it peeled off the paint and primer right down to the bare drywall. It didn’t do this on all of them, but it certainly did enough to cause me a huge headache and a ton of areas to repair.
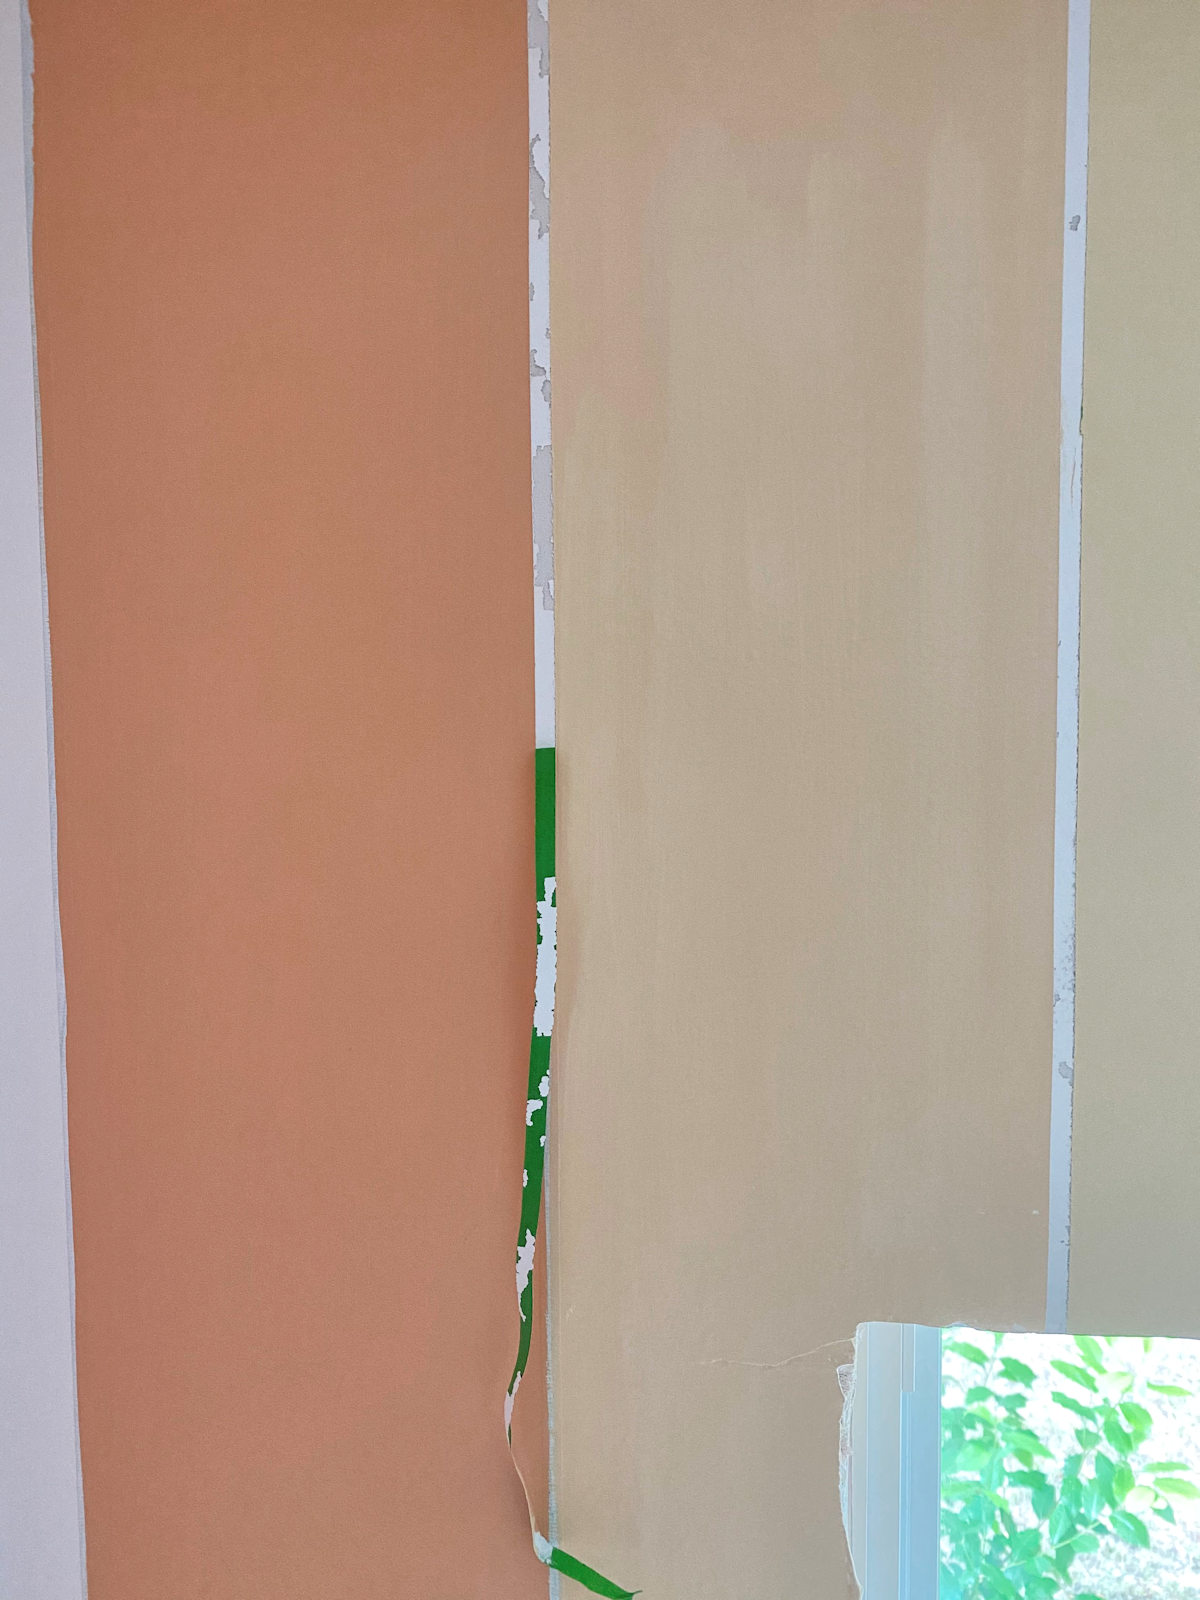
The ones where it peeled off almost all the way down the stripe were so disheartening. But interestingly, it didn’t peel off any of the colors. It only peeled off right inside the white stripe area.

After I removed all of the tape, it didn’t look terrible from far away, but up close, the damage was very obvious. And it wasn’t just a difference in color that could be covered with paint. The problem was that the areas that peeled down to the drywall also created an unsightly texture. Those areas would have been very visible if I had just painted over them.

So I had to tape all of those areas off, this time making sure to use the tape for delicate surfaces, and then I used a 1.5-inch putty knife to fill in those areas with drywall mud.

After it dried, I sanded very carefully with 220-grit sandpaper to smooth out any rough areas, and then I painted the areas with two coats of the white paint.
The entire main wall had to be taped off, but this isn’t because the paint peeled. This is the wall where I tried the freeform design before I painted the stripes, so the stripes needed to be repainted. There were a few areas on this wall that had peeled, though.
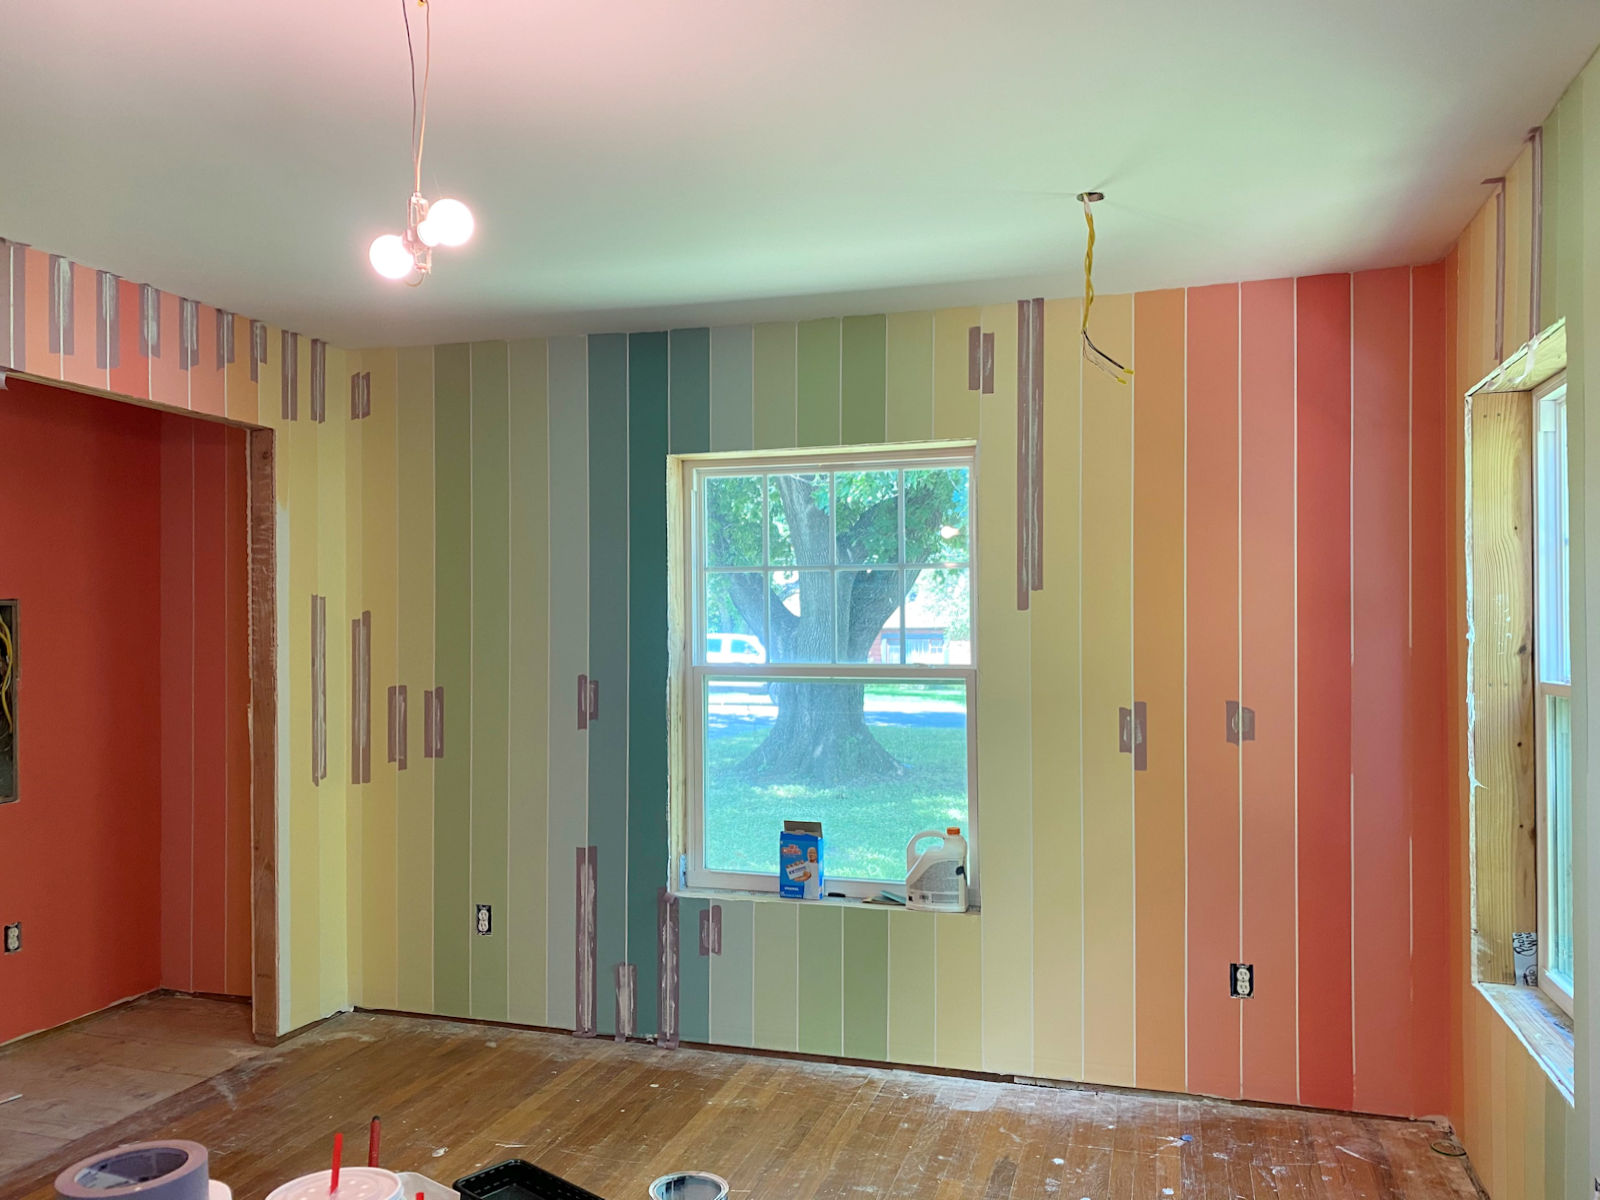
It was a mess for a while, but this method of repairing the little white stripes worked out great.

But my gosh, there were a ton of repairs that I had to do!!
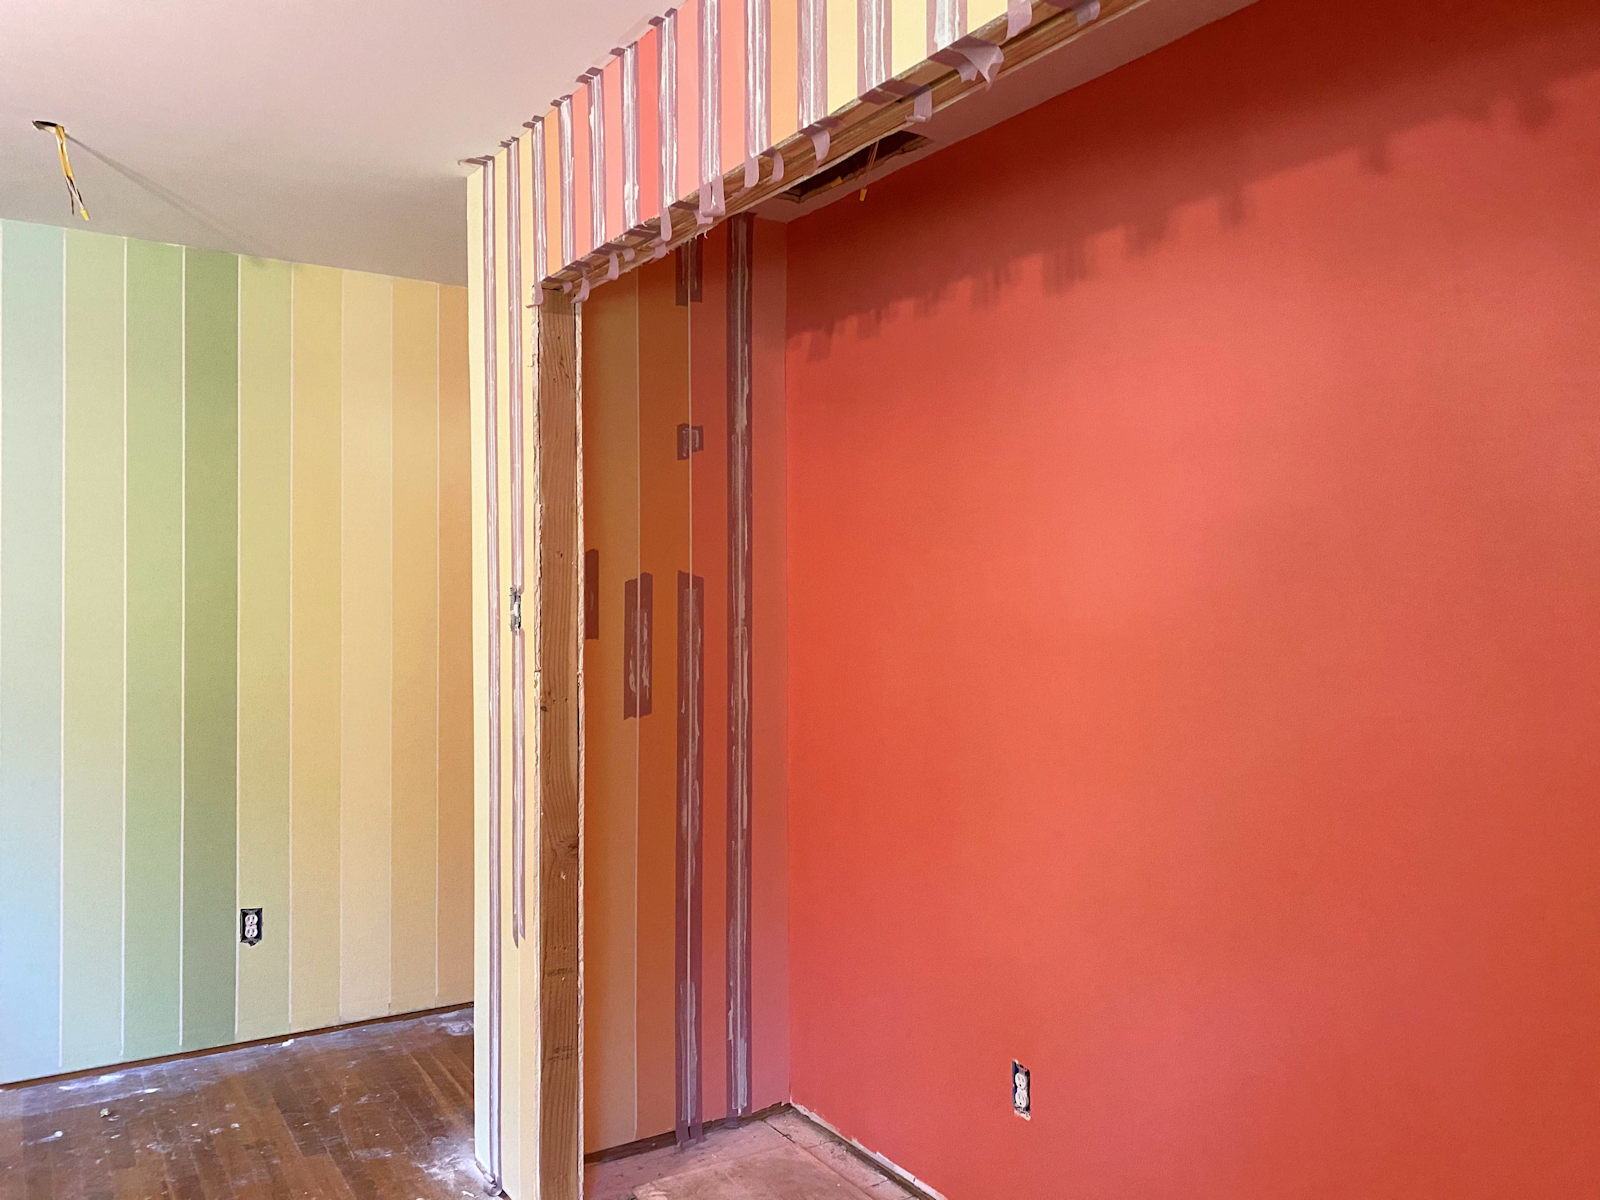
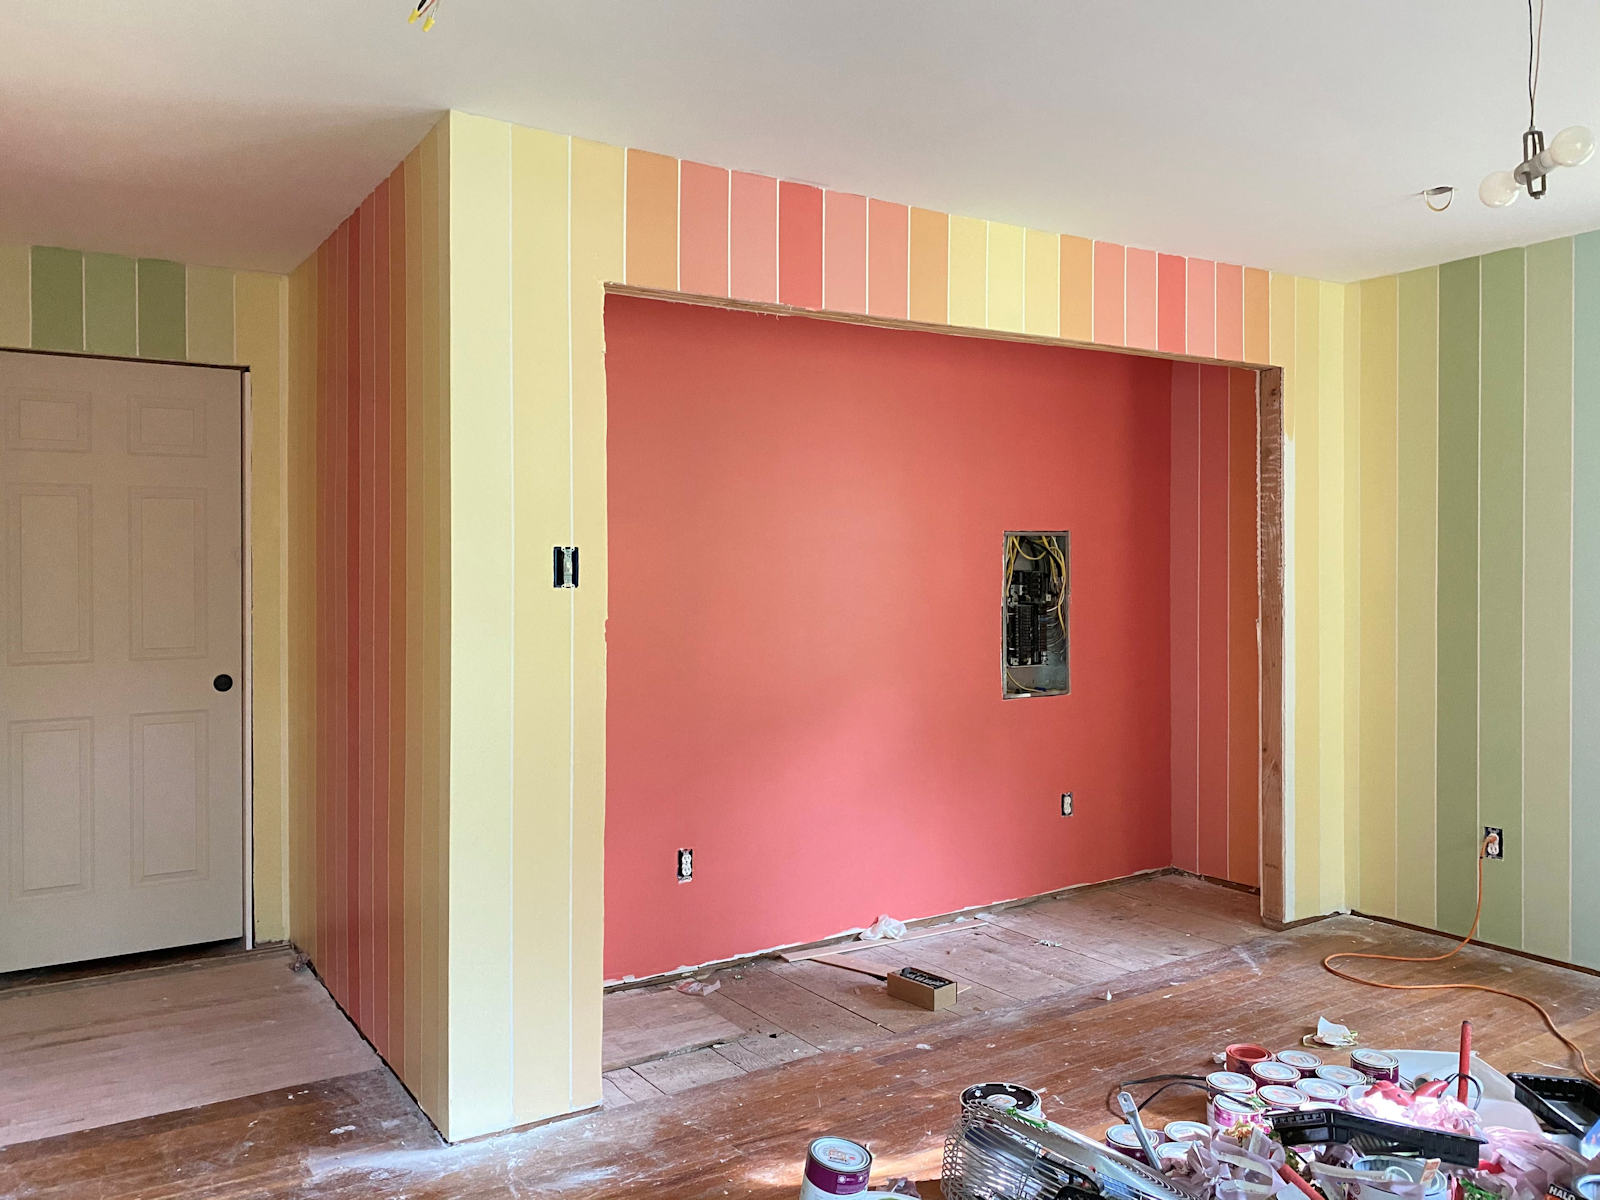
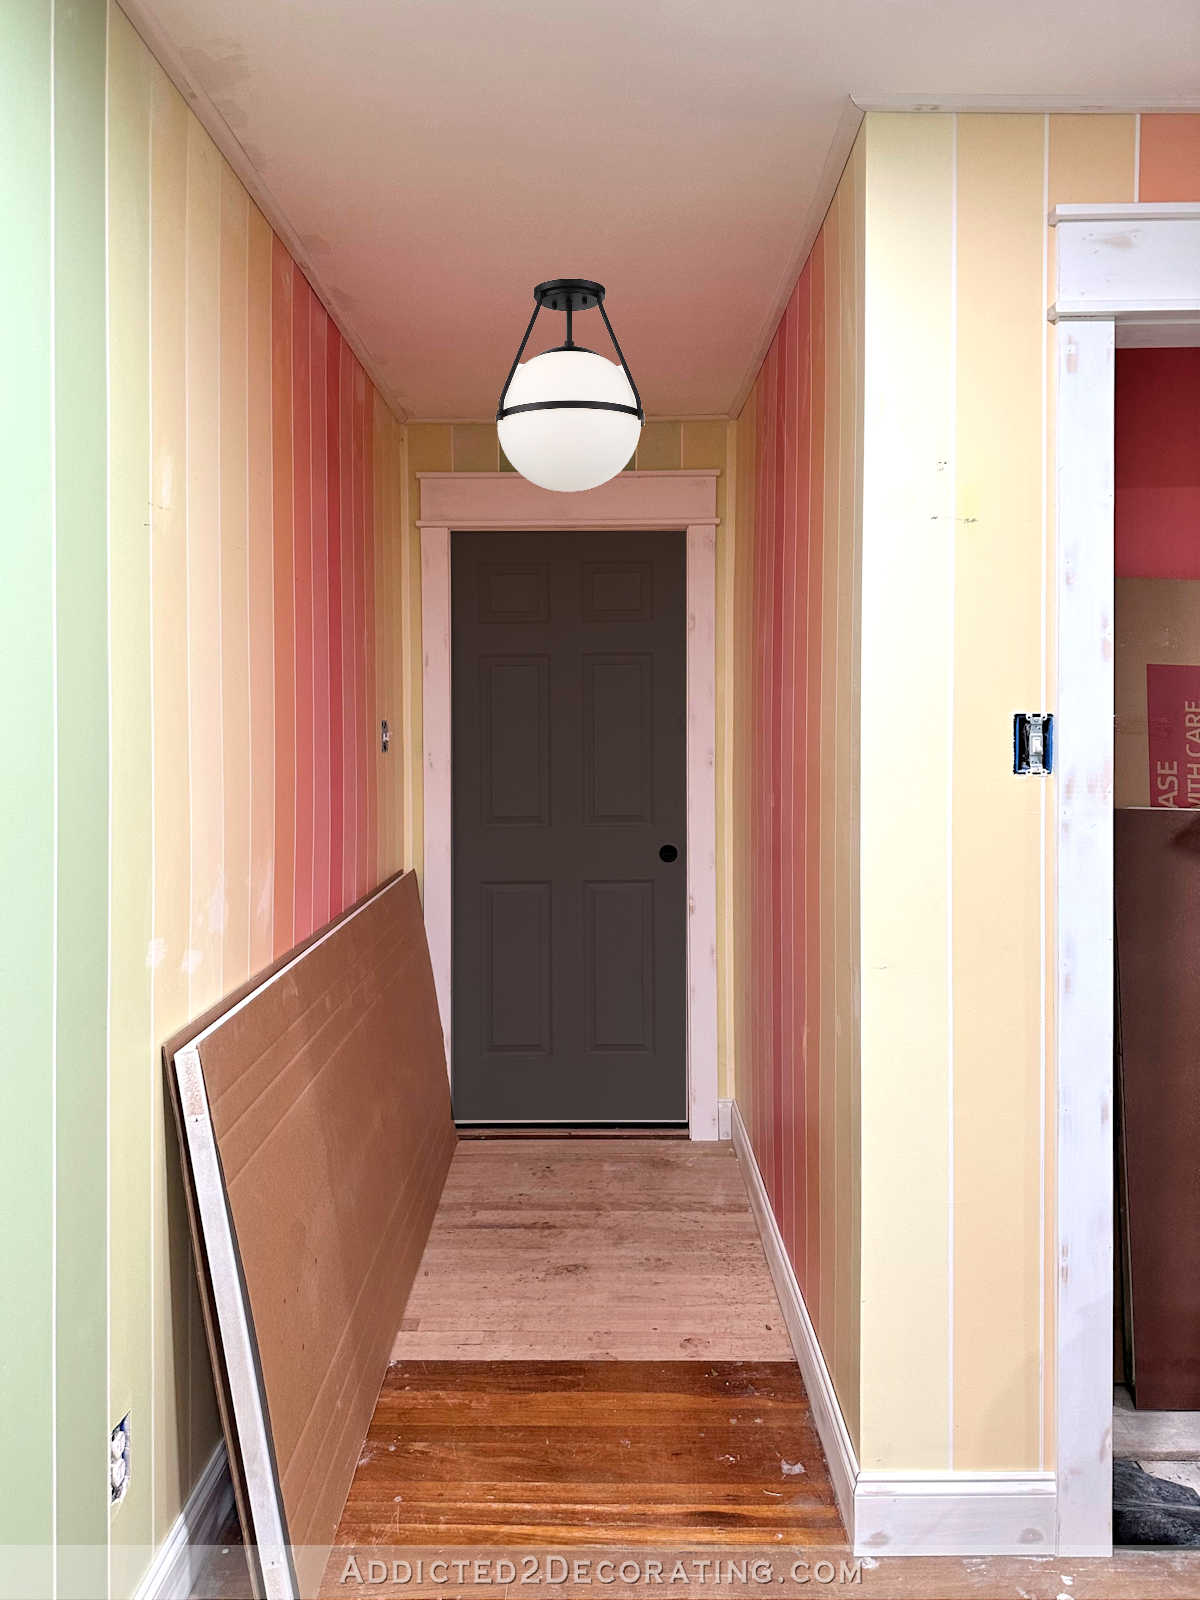
But here are the finished walls. I’m very pleased with how they turned out. And I’m very glad that I decided to paint the ceiling white rather than continue the stripes on the ceiling. I love my colors, but I love them tempered with lots of white.
The colorful stripes will be tempered even more when I install all of the trim (crown molding, casings, and baseboards) and paint all of those white.
But even now, I love the walls, and I’m glad I persevered to the end.
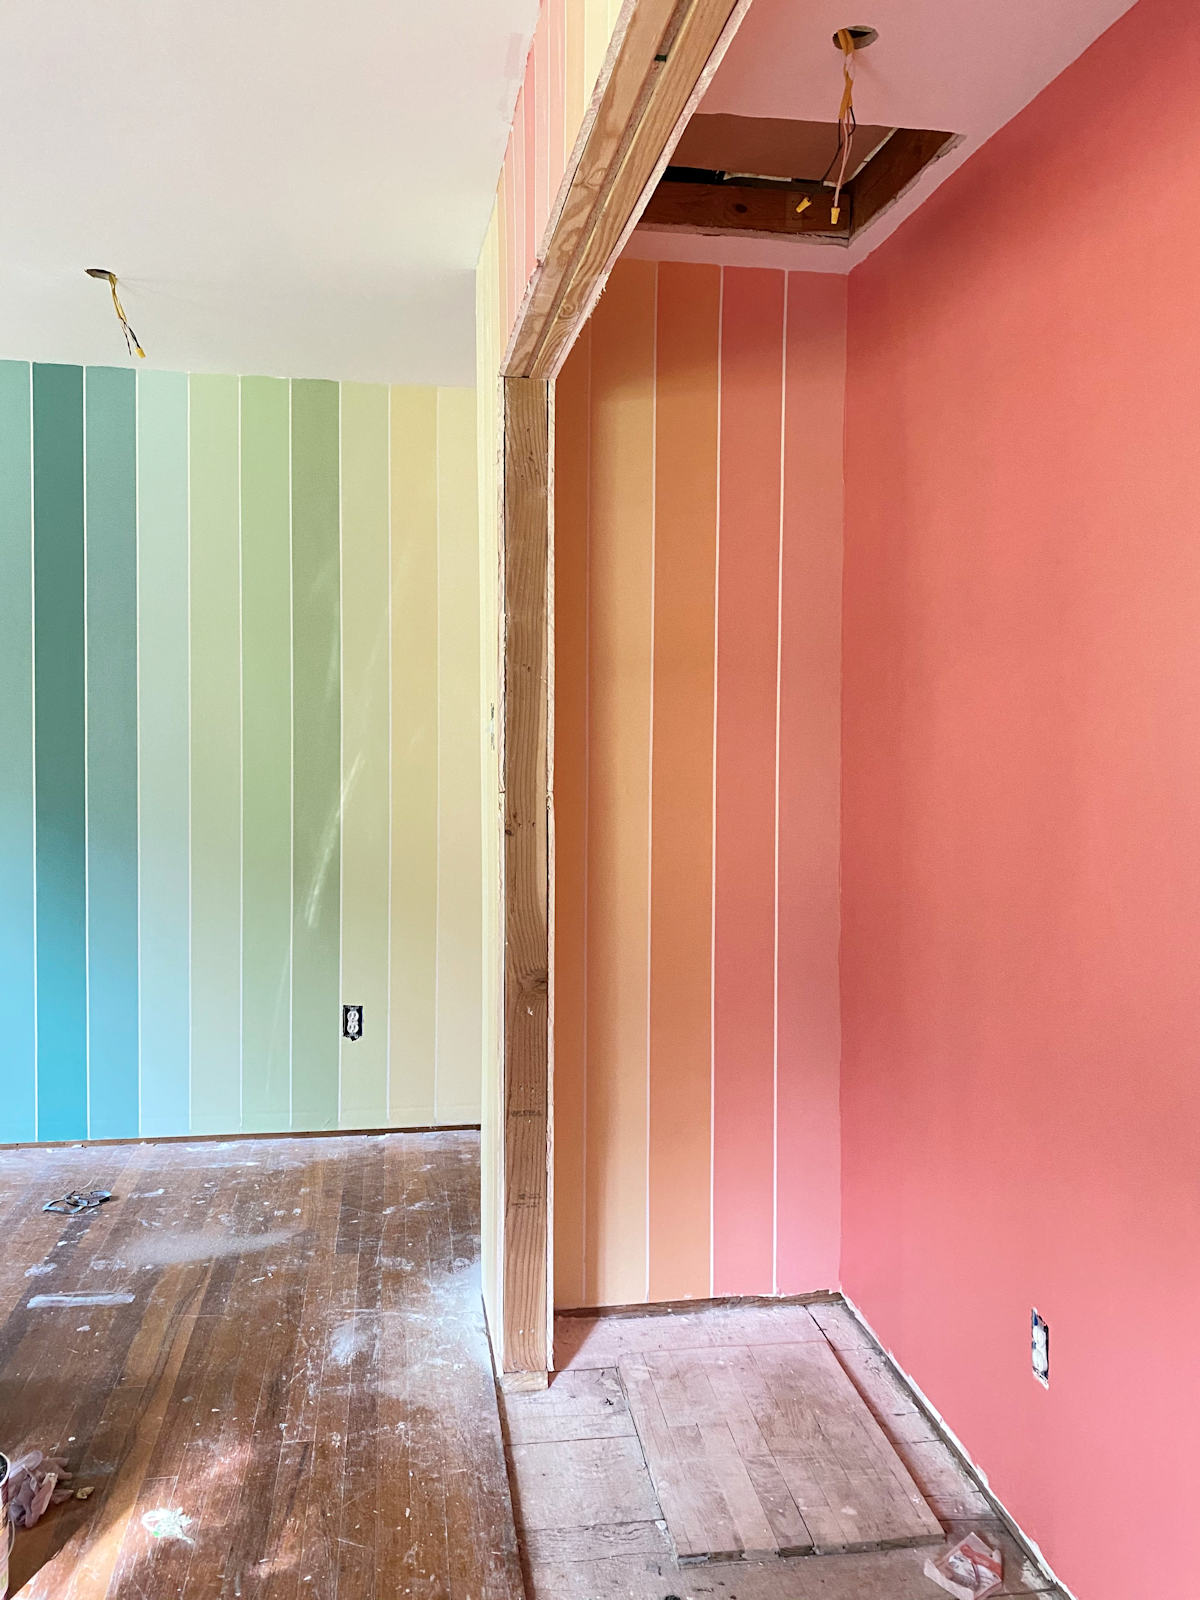
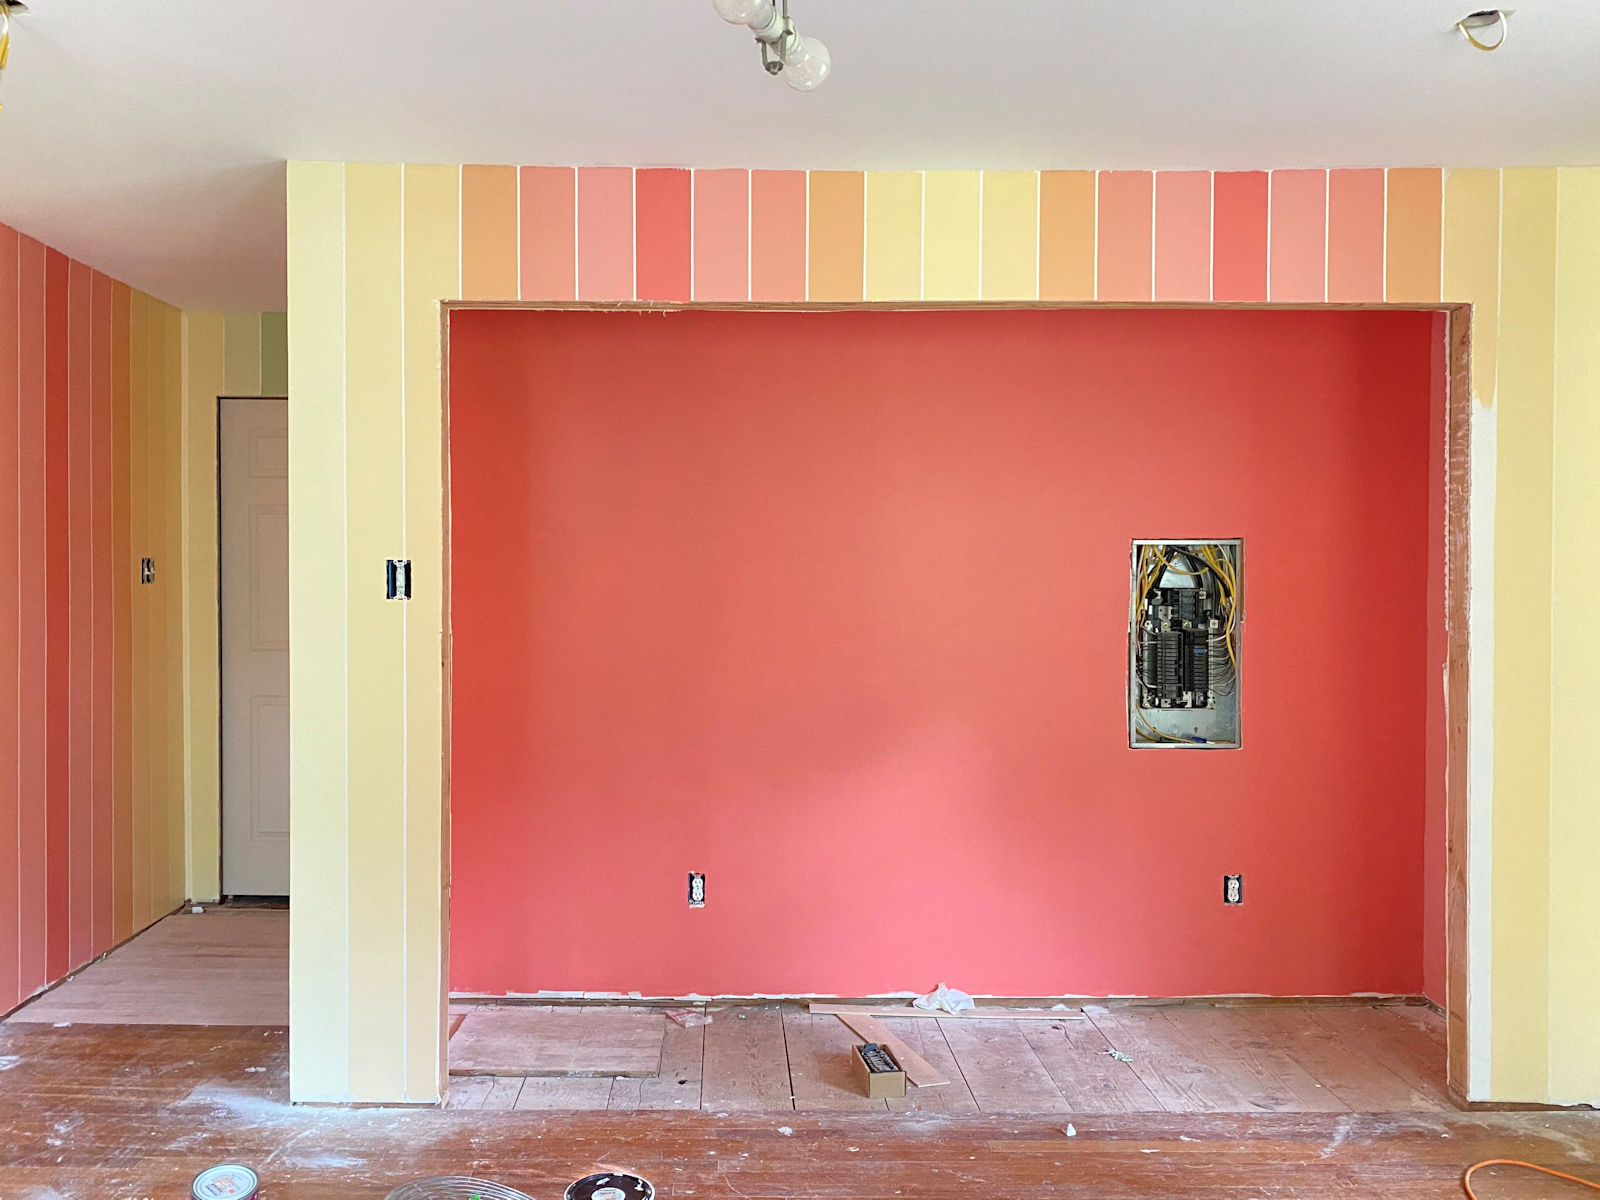
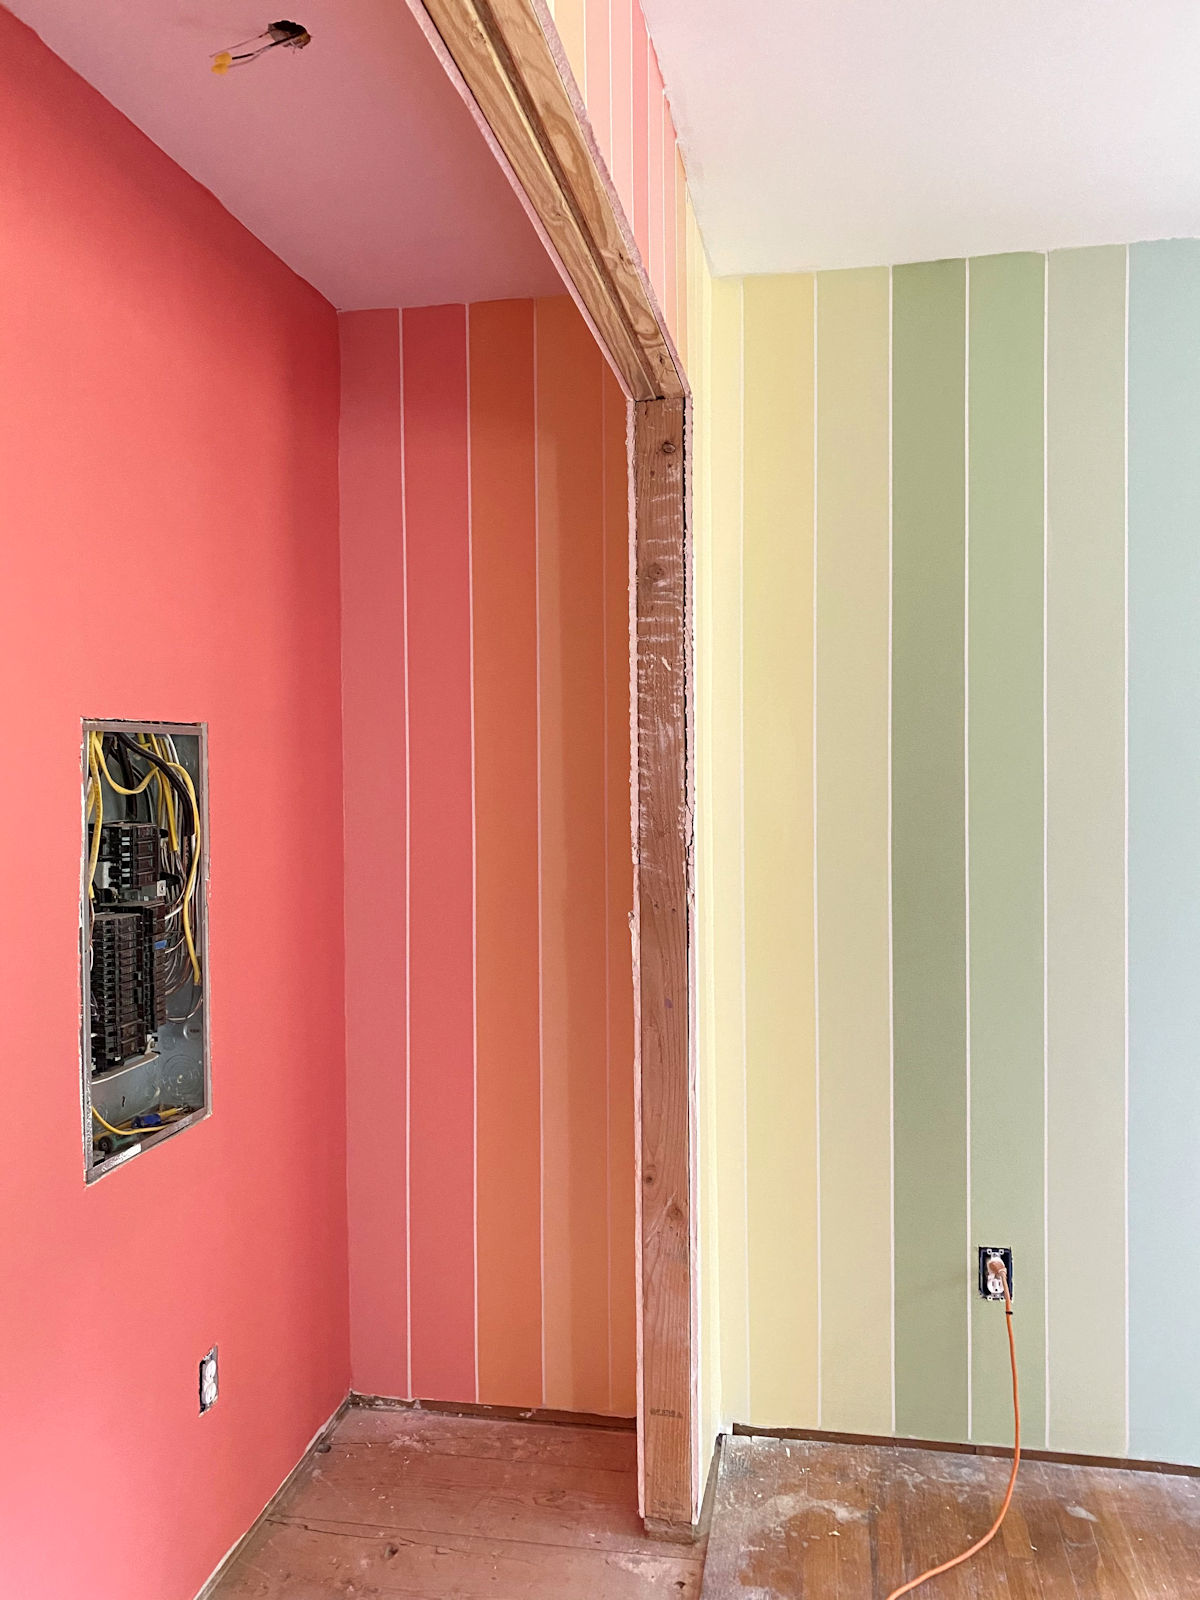
Here’s where you can see just how precisely I planned the stripes so that the darkest reddish pink color would land on that closet wall. That took some very careful planning. 😀

So next up, I need to do the floor repairs and get it ready for the foam floor installation. But I’m going to hold off on installing the foam floor tiles until I get all of the trim and lighting installed. I want all of the construction projects and painting finished before I bring the flooring in.
But the most time-consuming part of this room is done. I’m so glad to have that behind me now! I’m hoping that the rest will go much smoother from here on out.

Addicted 2 Decorating is where I share my DIY and decorating journey as I remodel and decorate the 1948 fixer upper that my husband, Matt, and I bought in 2013. Matt has M.S. and is unable to do physical work, so I do the majority of the work on the house by myself. You can learn more about me here.

Wow! It is beautiful! So much work, especially with the tape problems, but man, it looks great! Can’t wait to see the trim up and the flooring in. You are just so, so talented!
Have a wonderful weekend and enjoy the holiday!
Amazing! Love it!
That is just amazing!
You have the gift of patience girl!! Wow, absolutely fantastic colors, design and so you.
Bless your knees, it looks great!!
I wish I had your patience! I LOVE how it turned out and I can’t wait to see how it looks finished.
I love love it!! So good. And boy do you have perseverance!!
I’ll say!!! Luscious color! I would’ve been crying from frustration with all you had to repair! You have a much higher pain tolerance than I do!
Might you consider mirrored doors for the closet? Or will you do white? Dying to know!!!
I won’t be putting doors on the closet. As long as this room is our home gym, the closet will be wide open and doorless. I have plans for shelves, a cabinet for Matt’s gaming systems, a big TV, etc.
Oh my! This looks great! I can’t wait to see it all completed! The closet color really pops as well. Will you be leaving it without doors? Tremendous amount of work but it paid off!!!
Yes, I’ll be leaving the closet without doors as long as we are using this room as a home gym.
Gorgeous. Love it.
Love it! So fun!
I truly love, love, love it. You are truly creative and amazing
Wow! Just Wow!!!
I’m seeing stripes in my multi-room (sewing/quilting/reading/BBC binging room)
Your attention to detail and planning are simple incredible! I can’t wait to see the final results.
(I’m glad you left the ceiling white. The walls will have so much more impact, being framed by white.)
I have the utmost patience when it comes to tedious jobs, but girl! I practically hyperventilated reading this post. 😂😂. It’s beautiful! 😍
You are an inspiration. I admire your tenacity and attention to detail.
Wow-what a lot of work and emotion. I would have quit but you go girl. Is there a reason you painted over the tape with white? I don’t get that step and I think maybe that’s what caused most of your problems-I could be wrong.
I wondered about the paint over the tape too.
That’s the process I’ve used for years and years for painting stripes. After applying the tape, paint with a thin coat of the base color to seal the edges of the tape, and then paint with the stripe colors. That keeps the stripe colors from seeping under the tape and creating jagged edges on the stripes. When the tape is sealed, it creates flawless edges on the stripes…usually. I’ve used that method for at least a decade now, and I’ve never had trouble with it before.
As I was reading through today’s blog – I thought to myself – this woman needs to write a “coffee table” book about paint treatments and moulding designs. Maybe, for the sake of keeping it real, you can add a few examples of when things go wrong and how to fix them 🙂 – ha! But seriously – I would absolutely buy a book with all your creativity in one place!
great idea!
What a shame you had to make SO MANY repairs! But it looks just great.
It turned out GREAT!! And kudos to you for your perseverance ~ it really paid off!
Rainbows and sunshine. It’s a happy, beautiful room.
What an achievement! The detail of continuing the stripe gradient onto the short walls of the closet is extraordinary.
When you started this project, I thought of the work of the great American contemporary painter, Frank Stella. I saw an exhibit of his years ago and never forgot this: Between every color, he has placed a thin line of white to set it off.
https://upload.wikimedia.org/wikipedia/en/6/6f/Frank_Stella%27s_%27Harran_II%27%2C_1967.jpg
Just like you!
I’ve never heard of him before. I love some of his work! The geometric artwork is fantastic.
Bravo! Such a lot of work to get this done, but how rewarding every time you will be in the space. I think I would (maybe) even like to work out in this room! I admire your diligence and perseverance. Well done.
It looks fabulous! It sounds like an eight Xanax job!
This looks absolutely incredible. Kudos for your perseverance! You must be so happy to have the job well done.
LOOKS AMAZING!! I love all the colors you chose and the way you planned it out. So fun and cheerful!! Why can’t all our projects go SMOOTH!! haha All your hard work was definitely worth it and your patience paid off. This is one of my favorites! Great job!
This is one of your prettiest projects! Well done!
This room that just makes me feel happy! Great concept, well executed. ‘Swonderful!
Exercise? exercise? Naw. If it were my room I would just get a swivel chair and spin around and around to admire the fun of all the colors.
When all is said and done, no one is likely to ask, “How long did all that take?” They are going to exclaim, “Ah, how beautiful!” which echoes my thought.
Congrats on a job well done! Definitely a delightful space for Matt and you to enjoy while you huff and puff.
Love, love, love your walls!
Stunningly gorgeous!
What a happy vibe you created! ⭐️⭐️⭐️⭐️⭐️
I am… stunned. Stunned at the finished product, and stunned that you persevered in the face of THAT MANY repairs. Well done. You more than deserve this beautiful room after all that hard work!
This is freakin amazing.
The walls are really really nice, lovely! But as much work as they were, it seems to me that the careful careful planning was much harder! The precision is masterful.
Kristi, the room looks great! It sucks that you had so many problems with the tape/paint, but as usual, you figured it out and it looks wonderful!. What a cheery room to be exercise in! xo
I wouldn’t mind working out in this room. I go to my gym 2 to 3 days a week. They need something like this.
WOW – quite the story…but I am so glad you stuck to it…it looks wonderful, fun, and perfect. Can’t wait to see the trim up. I think you guys will really enjoy that room!
Out of pain and heartache, comes beauty.
It looks ravishing!
With the amount of tape you use, you deserve free shares in the companies LOL.
And you have more patience than Job ….. respect to you!!
Your gym will deservedly be a wonderful room (like all your others). We’ll done – amazing job.
Absolutely gorgeous!!!!
Girl!!! I can not believe you did all that. I would have given up way before. It does look amazing and you can be so proud every time you look at them. But the work you put in just to have striped walls???? holy cow! I am impressed.
LOVE LOVE LOVE LOVE LOVE!!!!!
OMG… WOW do you have patience…!!! First of I LOVE the room and all of the colors BUT I would never be able to do all of that even from the beginning….!! Kudos to you for working through it all.. Job well done…!!!!
Oh my goodness! I absolutely love this! I don’t know how you didn’t just sit down in the middle of the room and cry when the paint pealed up with the tape, I know I would have. Thank heavens you didn’t and continued to follow your vision, this room is fun and so uplifting, what a great place to workout in!
Did you wash down the drywall before priming it?
Primer peeling off fresh drywall is often due to dust from sanding setting on the surface causing issues with adhesion.
I once had a room where I could peel the entire room down to bare drywall after painting because it hadn’t dusted prior to priming.
I don’t generally wash the walls or wipe them down, but I use my upholstery brush attachment (the round bristle kind) on my shop vac to remove the dust.
Oh My Gosh……Just WOW!!!!!!! These stripes in your home gym are absolutely stunning. Sorry to hear though you had so much heartache with the tape etc, but your perseverance and dedication to perfection has definitely paid off. What a bright and inspiring home gym this is going to be. Kristi, you have done it again. Simply stunning!!!!!
That is really an energy rich endeavor! I love it and if that doesn’t inspire you and Matt to use that gym, nothing will. GREAT!
Nothing short of amazing!
UN…..REAL 😳 and gorgeous.
ok. I’m not going to lie, when I saw your concept, I was not on board, lol. I’m not a stripes person or a ton of bright colors, but since it’s not my house, I figured if you enjoyed it that’s all that matters. But oh my goodness, I LOVE this!! It’s sophisticated and fun all at the same time. As always, what an amazing job!!
Stunning! I wish I had your patience. It looks fantastic!
Now the white ceiling looks out of place. I would love to paint it the lightest shade of blue that you have on the wall (you have a stripe of it above the window that looks out to the street). I’m a cool color person and that would look so pretty to me, but maybe the lightest warm color shade would be more appealing to others. Either way, a color on the ceiling would be pretty awesome. 🙂
This is amazing! So beautiful. I appreciate your blog. Thank you for continuing.
I think Talbots saw your decorating plan for the workout room, loved it, and decided to adapt it into a scarf design ;o)
https://www.talbots.com/ombre-oblong-scarf/P212067509.html?cgid=sale-accessories&dwvar_P212067509_color=SCALLOP%20PINK%20MULTI&dwvar_P212067509_sizeType=AC
WOW! You are persistent! That would have done me in. I went back to look at your original post for the plans for this room, and you mention a Swedish ladder. I DID google it, but they listed a couple of types (your amazon link no longer works) What does one do with a Swedish ladder? Very curious.
There are probably an infinite number of workouts one can do using a Swedish ladder. To get an idea of the possibilities, a great place to look is YouTube. Just search “Swedish ladder exercises” or “Swedish ladder workout”. It’s an incredibly handy and versatile piece of equipment. It’s also called Stall Bars, so you could search that as well.
LOVE it!! I admire your creativity and your patience!! I would have given up and painted over it! But the results are stunning!! Thanks for sharing!