How To Reupholster A Chair – Part 1 (Removing The Fabric & Making Patterns)
My mom and I have been working on reupholstering my desk chair for the studio. She gave me a very good head start on the project by starting on it while I was still working on organization, so that was a huge help. The chair we’re reupholstering is one that I’ve had for several years, and I love it. When I started redoing my studio, I thought about purchasing a new desk chair in the right color to save myself the hassle of reupholstering this one, but I couldn’t find one that I liked as much as this one. It’s very comfortable and has a high back, which I love. So my best option was to reupholster the one I have.
Here’s what the chair looked like when it was new…
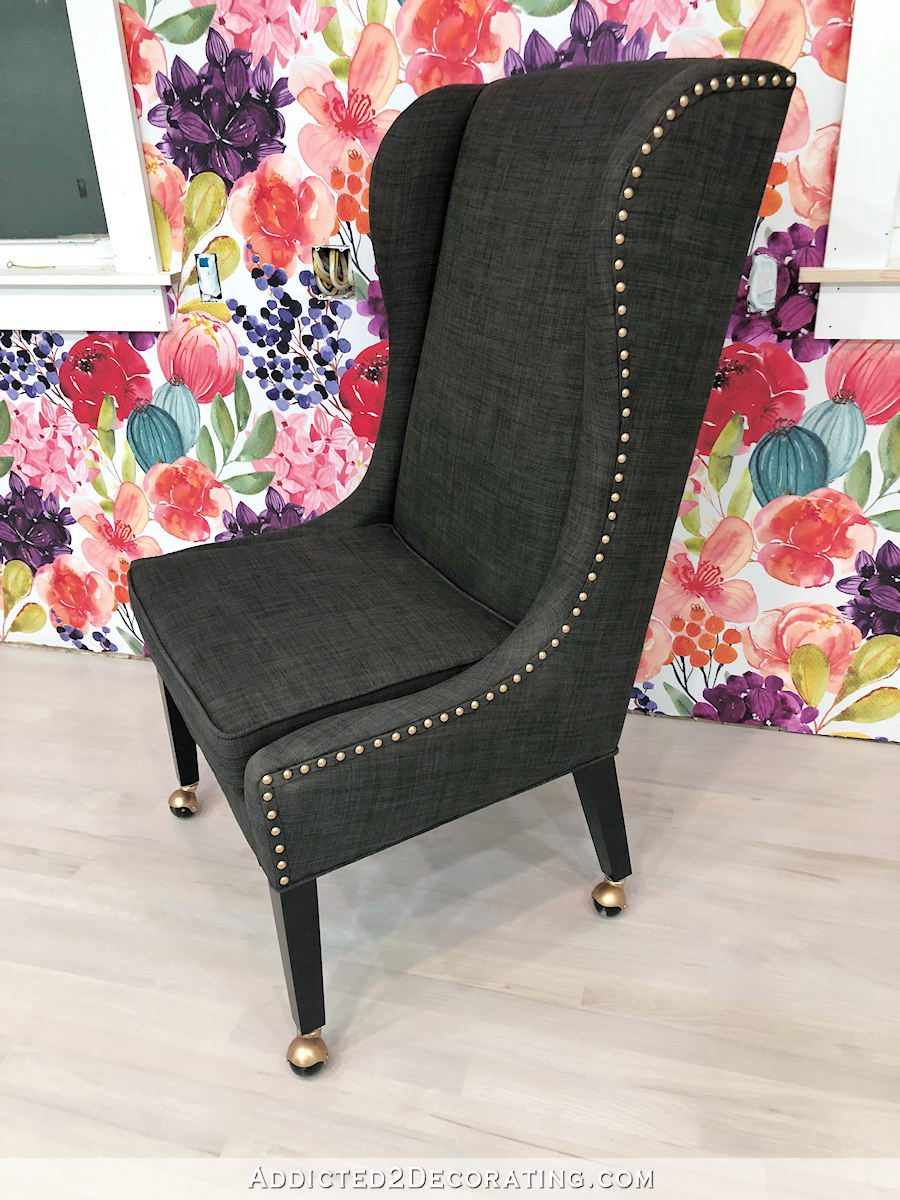
But after having the chair for a few years, my cat completely tore it up. The woven fabric was perfect for her to get her little claws into. So even if the current color went perfectly with my vision for my studio (it doesn’t), I’d still need to reupholster it because she has completely shredded it. And of course, I’ll be reupholstering it with velvet, which is my favorite cat-proof fabric.
My #1 tip for reupholstering chairs and sofas is to take the old fabric off in an orderly fashion. I’ll never forget the show Trading Spaces for many reasons (most of them not good 😀 ). But one thing I remember very vividly is the shoddy reupholstery jobs those amateurs would do. And under the guidance of those designers (I’m looking at you, Hildi), they’d start by ripping into the original fabric, tearing it off as quickly as possible. That may make for exciting TV, but if you’re a novice at reupholstering, or even if you’re like me and you’re not a novice, but you just don’t do it often enough to be really proficient at it, then you’re going to want to take your time in removing the original fabric.
In removing the original fabric in an orderly way, it will take more time at the beginning, but it will also save you time and frustration in the long run. First, taking it apart in an orderly way will help you see just how the chair was upholstered in the first place. You can see exactly where each piece is stapled into place. It will give you the opportunity to take lots of pictures of how the pieces fit together. But most importantly, the original pieces will serve as patterns that you can use to cut the new pieces of fabric.
Here’s my mom carefully removing the fabric one piece at a time, starting with the very back, and then the outside of the arms and wings.

The most important tool in taking old fabric off of an upholstered chair or sofa is a flat head screwdriver. This will help you to remove all of the old staples holding the fabric on.

But sometimes the staples are so deep into the wood that you can’t get a flathead screwdriver under them. In that case, my mom use a new and very sharp razor blade to cut the fabric around the staple, leaving the fabric as intact as possible.
I always take photos of areas like this just so that I can remember how it looked. Without a picture to remind me, I might start reupholstering this part, see this bulk of fabric that won’t lie flat, and think that I’ve done something wrong. Having a photo is helpful to remind me that it looked like this originally.

The fabric generally comes off of chairs and sofas in this order: the back side of the chair back, the outsides of the arms (and wings on a wingback chair), the inside of the arms (and wings), the front side of the chair back, and then the seat. And once all of the fabric was off of my chair, here’s how it looked.

This is when you need to assess if you’re going to need new foam or batting. I’ve seen chairs and sofas that had pristine foam and batting under old fabric. And I’ve seen others that had old and brittle foam and destroyed batting. Heck, I’ve even reupholstered a very old daybed that was originally filled with something that I can only guess was straw. But in this case, the foam on my chair looked pretty good, but the batting was looking pretty thin.

So a couple of layers of new batting will be needed on this chair before I add the new fabric.
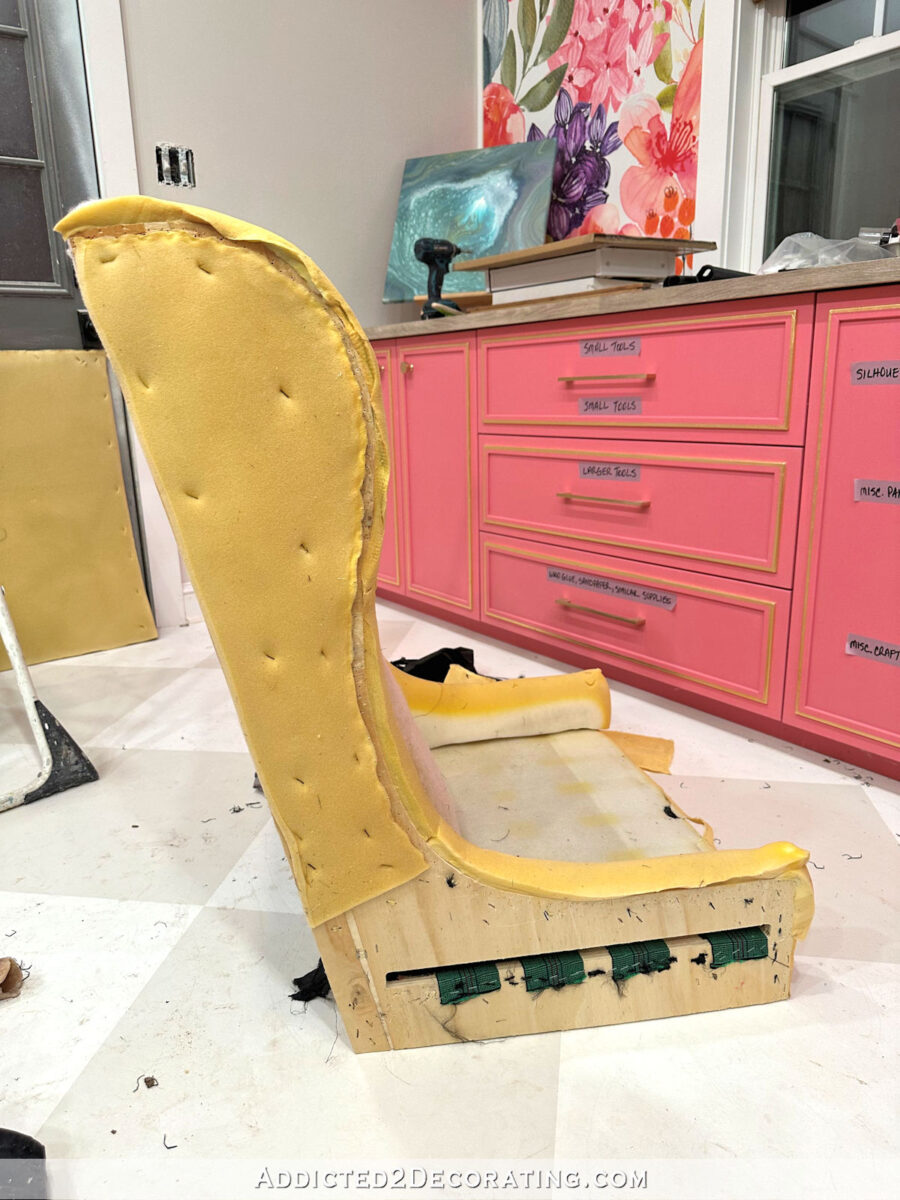
The fabric on the back had a thick piece of cardboard under it, so I’ll be reusing that to give some structure to the back.

Once we had all of the fabric off, I was ready to take the pieces apart and prepare them as my patterns for the new pieces. Here’s a look at the piece that wrapped around the back of the chair and onto the outside of the arms and wings. You can see the damage my cat did.

This was three pieces sewn together, so I used my stitch ripper to take them apart.

I also measured the seam allowance and made note of that measurement. This way I can decide if I want to use that same seam measurement or add extra allowance when I cut the new fabric. These seams were only 3/8-inch, so I’ll probably add at least 1/8 inch to the seam allowances when I cut the new fabric.

After the pieces were taken apart, I ironed them so that the seams allowances would lie flat.

And then I flipped the pieces over and used a big Sharpie marker to make notes. I noted which edges were seams, which edges were wrap-and-staple. On the center piece, I noted which side was the top, since that might be hard to tell on a rectangle piece once the pieces were separated. Basically, I just made notes of everything I thought might be helpful for me to remember. And I don’t ever assume that something is so obvious or basic that I’ll just remember. I’ve had too many times when I assumed I’d remember something, only to get in the middle of the reupholstering project and get confused about something because I didn’t make notes or take pictures to remind me of the details.

I did the same thing for the pieces that went on the front of the seat back and the inside of the arms and wings. None of these pieces were sewn to each other. Instead, they had eight-inch strips of thin black fabric sewn to most of the edges, and that thin black fabric is what is shoved into the crevices, pulled, and stapled into place.

Those pieces of thin black fabric aren’t visible on the finished chair. So after removing that black fabric, I made notes of which edges those pieces (which I call “pull fabric”) were sewn to.

And then I made note of which edges required a wrap-and-staple.

And finally, I did the same thing for the seat. This chair has a seat cushion which covers most of this piece, so there’s a large piece of the thin black fabric. So before taking these apart, I labeled which edge needed to be sewn, and which one was a wrap-and-staple.

**VERY IMPORTANT!! Keep in mind that all of the wrap-and-staple edges on the original fabric have been trimmed. So when you cut your new fabric from the patterns of the old pieces, you’ll need to add about three inches of fabric to those edges to give you a comfortable amount of fabric to work with. Once the fabric is attached, you can trim the excess fabric from those wrap-and-staple edges. **
So now that I have all of my pattern pieces, and they’re all labeled, I’m ready to use those to cut the new fabric. And all of my notes should come in handy when I start putting it all back together.

It’ll go back together in the exact opposite order that we took it apart. First, the seat, then the front of the chair back. Then the inside of the arms and wings. And finally, the three-piece back and outside arms and wings piece that gets sewn together. And because I took pictures of the tricky parts with confusing details, I can breeze through those tricky parts as well. Stay tuned for the new and improved desk chair!
You can find Part 2 of this project here: How To Reupholster A Chair – Part 2 (Attaching The New Fabric To The Chair)
And you can find Part 3 of this project here: How To Reupholster A Chair – Part 3 (Adding The Finishing Trim & Nailheads) – It’s Finished!
You can see how I swapped the legs for an antique swivel base here: Desk Chair Upgrade – Swapping Legs For An Antique Wood Swivel Caster Base



Great tutorial, Kristi. Thanks for taking the time to explain the details. The chair will be fabulous.
Hi to Mom. Such a willing spirit in helping you!
Hi, I have done reupholstering for myself for 50 years. I agree with all the steps you did. Especially marking on the old pattern pieces. It takes away the guessing in the new assembly. Lots of photos and notes, worth their weight in gold. It isn’t that hard if you do all of those steps, AND take your time and enjoy the process. Remember the nap, matching plaids, stripes, and patterns. I’ve always been amazed with how beautiful the “old” piece became with the new fabric applied. A very satisfying result when done. More than worth the work. Thank you for being so detailed so more folks will be brave and try it. I have 2 loveseats I’m going to reupholster this winter. Can’t wait to start.
Don’t forget the nap since you are using velvet.
Thank you for easy to understand instructions. Thank you
Your advice about carefully removing the fabric and making note of the order that new fabric will be replaced and attached is spot on. I agree that some new and thicker batting is in order. I would be inclined to add it all over. Some spray adhesive would help with that on the sides and back.
I’ve recovered a couple of couches (two of my own and one for a friend) and none of my jobs have looked amateurish because – as you point out – careful attention to detail is what makes the difference. Upholstery isn’t rocket science but it does require care and some patience.
Napped fabrics and patterns require a little extra attention to direction and how a pattern will lie on a finished piece. Stripes can be difficult since you have to ensure pulling the fabric to attach it doesn’t pull the stripes out of alignment.
I can’t wait to see the final product.
Fabulous tutorial. Bookmarked and definitely saved in two places (because I’m good at losing instructions) for when I redo my wingback. Thanks so much. I can’t wait to see the newly upholstered chair!
You make it look so easy and having never upholstered anything, I am sure it isn’t easy. I know it will br beautiful.
This is going to be a fun reveal! Can’t wait to see! And Trading Spaces was nightmare fuel. I really wonder if any of those poor people kept the hideous looks once the filming wrapped.
🤣🤣🤣 I often wondered that too! I pretty sure some of “Hildi’s helped” designs got thrown out. Do I remember right, a feathered wall? And a paint can ceiling? If I came home to that, I think it would be hard to stay calm…! There was a older man on some of those shows…now HE I think, was better for me! I think I remember a couple coming home and they were very noticeably shocked and upset. WOW…I kind of miss that show! It’s more fun the watch/follow the Kristi show.
Nice explanation! Thank you
I have an upholstered rocking chair my grandfather made back in the 30’s. He built ans sold furniture at one point in his life. My mother inherited it and it has been reupholstered many times by my uncle. But he has closed shop so I have been thinking about trying it myself. I have the fabric. This tutorial is timed perfectly, I’m going to give it a try.
Thanks, Kristi!! This is super helpful!!
Trading Spaces was awful, but I hate when people walk into a perfectly reusable kitchen and start swinging sledge hammers. Those cabinets at a minimum would work in a garage, but no–lets smash them. That chair will be fabulous–can’t wait.
Being facebook and instagram addicted, I keep looking for the “like” button. Fabulous post!
Thank you so much for all of that information, it is like gold. I love how it all came apart, easy is a relative term, but I can see how that makes it work for making a pattern. Can’t wait to see that glamorous fabric go on.
Cheers to you and your mum!
It’s getting closer and closer. Can’t wait to see it finished. Fantastic!
http://www.sailrite.com has the most amazing dense upholstery foam
That Hildi! I snorted Dr Pepper when I read that. Her ideas were so outlandish. Remember when she glued hay to the wall of a home with a child who was allergic?
Great step-by-step instructions. Will for sure bookmark. Can’t wait to see your new chair!
Thank you Mom!
Kristi…I enjoyed reading today’s blog so much. Thank you for taking the time to show us every step of removing the old covering of your chair, and how you meticulously showed us every step of the way. Photographing, ironing, measuring, and especially labeling the way it was on the chair. I can’t wait to see your chair recovered with the new fabric.
Your Mom is a wonderful person to help you get started on this project. God bless your Mom.
This is gold! I’ve been too scared to jump in and try to recover my own pieces. This definitely gives me great instructions and confidence, and I love your followers tips as well 😊. It’s good to see those beautiful work tables in your studios coming in so handy! I love this project.
I ready to see the final chair.
As someone who has re-upholstered a sofa and wing back chair myself, your tips and tutorial are spot on. It isn’t difficult if you meticulously follow your instructions. How blessed you are to have your sweet mother as a helper. That chair will be a wonderful reminder of her love for you. I’m eager to see the finished project!
I took an upholstery class and they make a tool for removing the staples (not the kind you use at your desk for paper). It works really well for getting under those really stubborn ones, would save a lot of time not having to cut the fabric to help get under it.
Great tutorial! I have upholstered a few pieces and it is not as easy as it looks. I love your detailed notes (my notes were minimal). I’m sure you will have this chair done in nothing flat. Thank you for sharing with us!
That is an amazingly thorough tutorial! I look forward to referring back to it next time I go wild and take on an upholstery project. Thank you!
This is the best tutorial I have ever seen for upholstering a wing back chair!!! I have two I would like to recover, and with you beside me (via video, of course) I feel confident I can do it.
The way you preserve the old fabric for patterns is excellent!!!
Thanks so much for sharing your expertise