How to Reupholster An Occasional Chair With Tufted Back
<< Return to Part 3 Proceed to Part 5 >>
This particular occasional chair has both an attached seat and a separate seat cushion. If your chair has an attached seat only, then you will need to modify the instructions below.
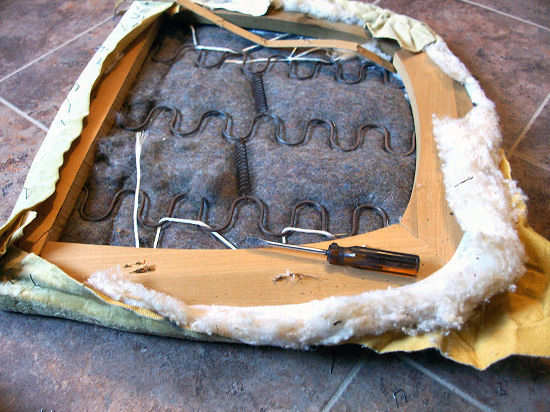
First, use a screwdriver and pliers to remove the existing staples, fabric, batting, and foam (if applicable).
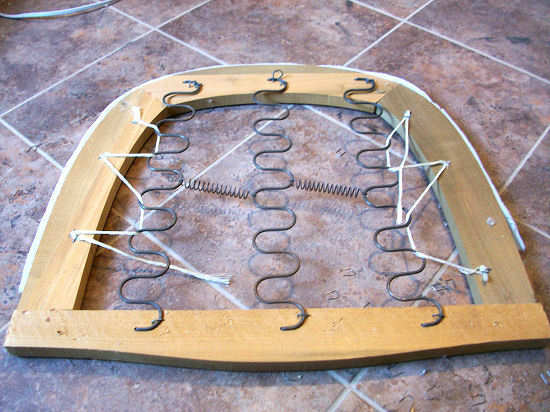
With everything removed, you should have a frame that looks something like this…
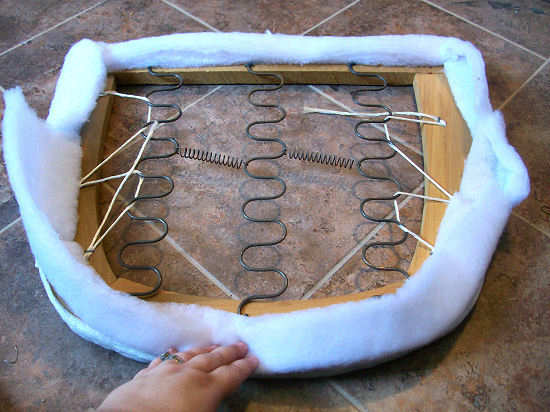
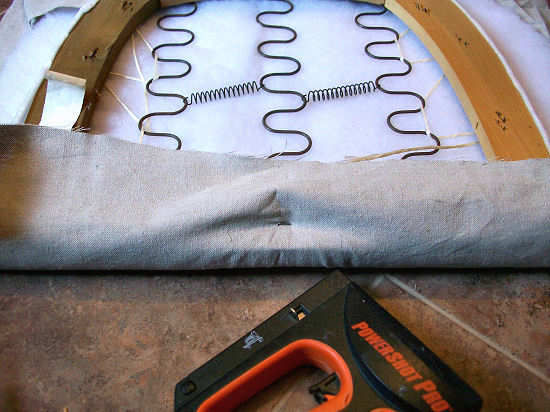
Cut strips of batting approximately 4 inches wide (just eyeball this, there’s no need to measure), fold them in half lengthwise, and place on the edges of the top of the seat. Note that if your seat has springs like the one shown below, the springs are on the TOP.
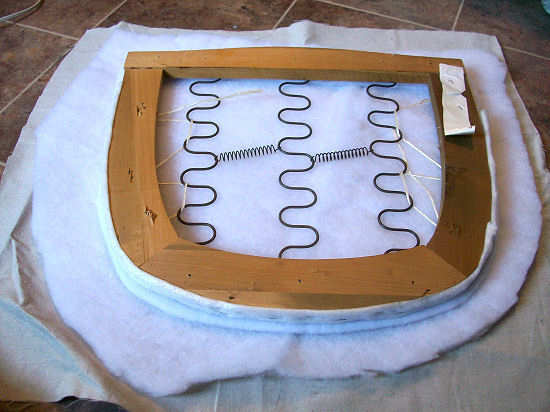
Now on your work surface, place the fabric with the right side down, then a layer of batting, and then flip the seat frame over so that the top is facing down. You might have to do a bit of arranging with the batting strips. They need to extend past the edge of the seat frame about 1/4 inch.
**Note: If your chair does not have a separate seat cushion, then you will also add a piece of 2-inch or 3-inch foam between the batting and the seat frame.
Now begin pulling the fabric around the frame and staple in place.
Start by placing one staple on each side, and then go back and staple the rest.
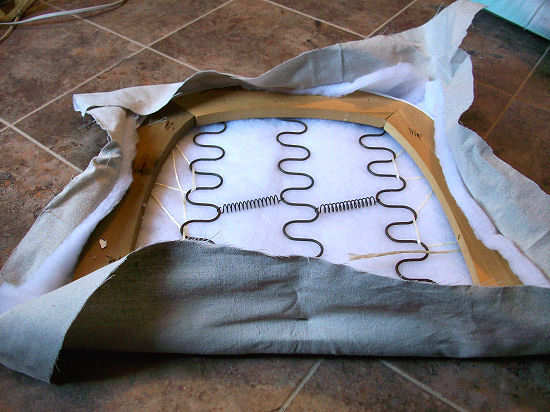
On the corners, you will need to trim off the excess batting with scissors. If you leave it, it will add too much bulk to the corners.

And once you’ve stapled all the way around, trim off the excess fabric and batting, and it should look something like this. If you’re using an electric or manual staple gun, it’s always a good idea to go back over the staples with a hammer to be sure they’re in the wood completely.
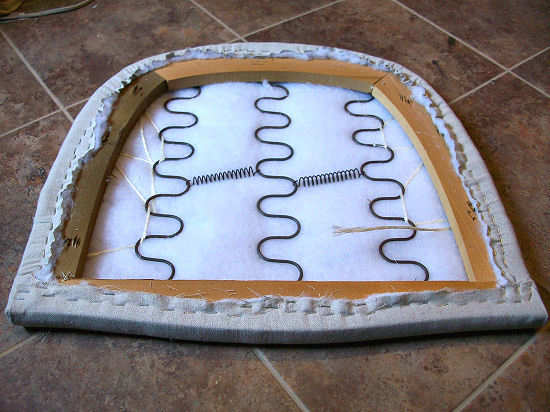
When you flip it over, it should look something like this.

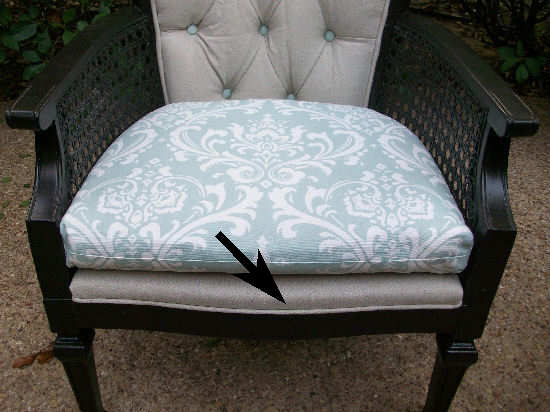
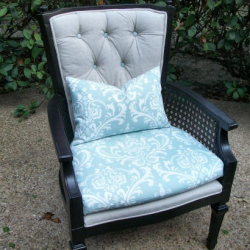
Now you’re ready to re-attach the seat to the chair frame. (Pretend like you see a tufted back on this picture.) Secure the seat from underneath with the screws you removed in Step 1.

This is optional, but you’ll notice below that on this chair, I actually added a strip of fabric-covered cording before I attached the seat. This strip is only attached to the front, and wraps around each side about 1 inch. I attached it to the seat with hot glue before attaching the seat to the chair frame.
If your chair does not have a separate seat cushion, then your chair should be finished at this point! Yeah! Congrats to you!
If your chair DOES have a separate seat cushion, then let’s continue to that. Don’t give up on me now. You’re so close!
<< Return to Part 3 Proceed to Part 5 >>

Addicted 2 Decorating is where I share my DIY and decorating journey as I remodel and decorate the 1948 fixer upper that my husband, Matt, and I bought in 2013. Matt has M.S. and is unable to do physical work, so I do the majority of the work on the house by myself. You can learn more about me here.
I recently did a cane chair that just had a bottom. But today I found this excpacr chair at a flea market! I cannot wait to redo it! Love your instructions, I was really nervous about the favor backing but this looks super easy.
I am so grateful for your tutorial as I have 6 chairs to reupholster! These chairs need a lot of TLC. I need help with the springs. I don’t know how to restring them. I doubt the original string would support even a child. Do you have any advice?
Thanks so much!!
Staci
I haven’t had to deal with springs on any of my upholstery projects yet, but I would imagine you could find tons of help on YouTube. That’s one of my top resources when I’m trying to learn something new. Good luck! 🙂
Hi There,
The pictures in the 3rd and 4th part aren’t showing up on my end. Any suggestions? Thx!
Hi the pictures aren’t showing for me either. How can I see them?