Master Bathroom Progress – Tile, Mirrors, and Vanity Decision
Do you ever procrastinate on a project because you know it’s going to be challenging, and the more you procrastinate, the more you dread it? Of course. We’ve all done that. But what generally happens for me is that I finally get around to doing the project that I’ve built up in my mind as being completely awful and difficult, and it turns out to be nothing. Well, tiling the bathroom floor (so far) has not turned out that way.
I procrastinated on getting started on the tiling for days because I just couldn’t figure out exactly how I wanted to do things. The more I procrastinated, the more I convinced myself that this would be a super challenging project. And I wasn’t wrong. Oh my gosh, y’all!! I worked from 3:30pm to 10:30pm yesterday, and this is the tiling that I got done.
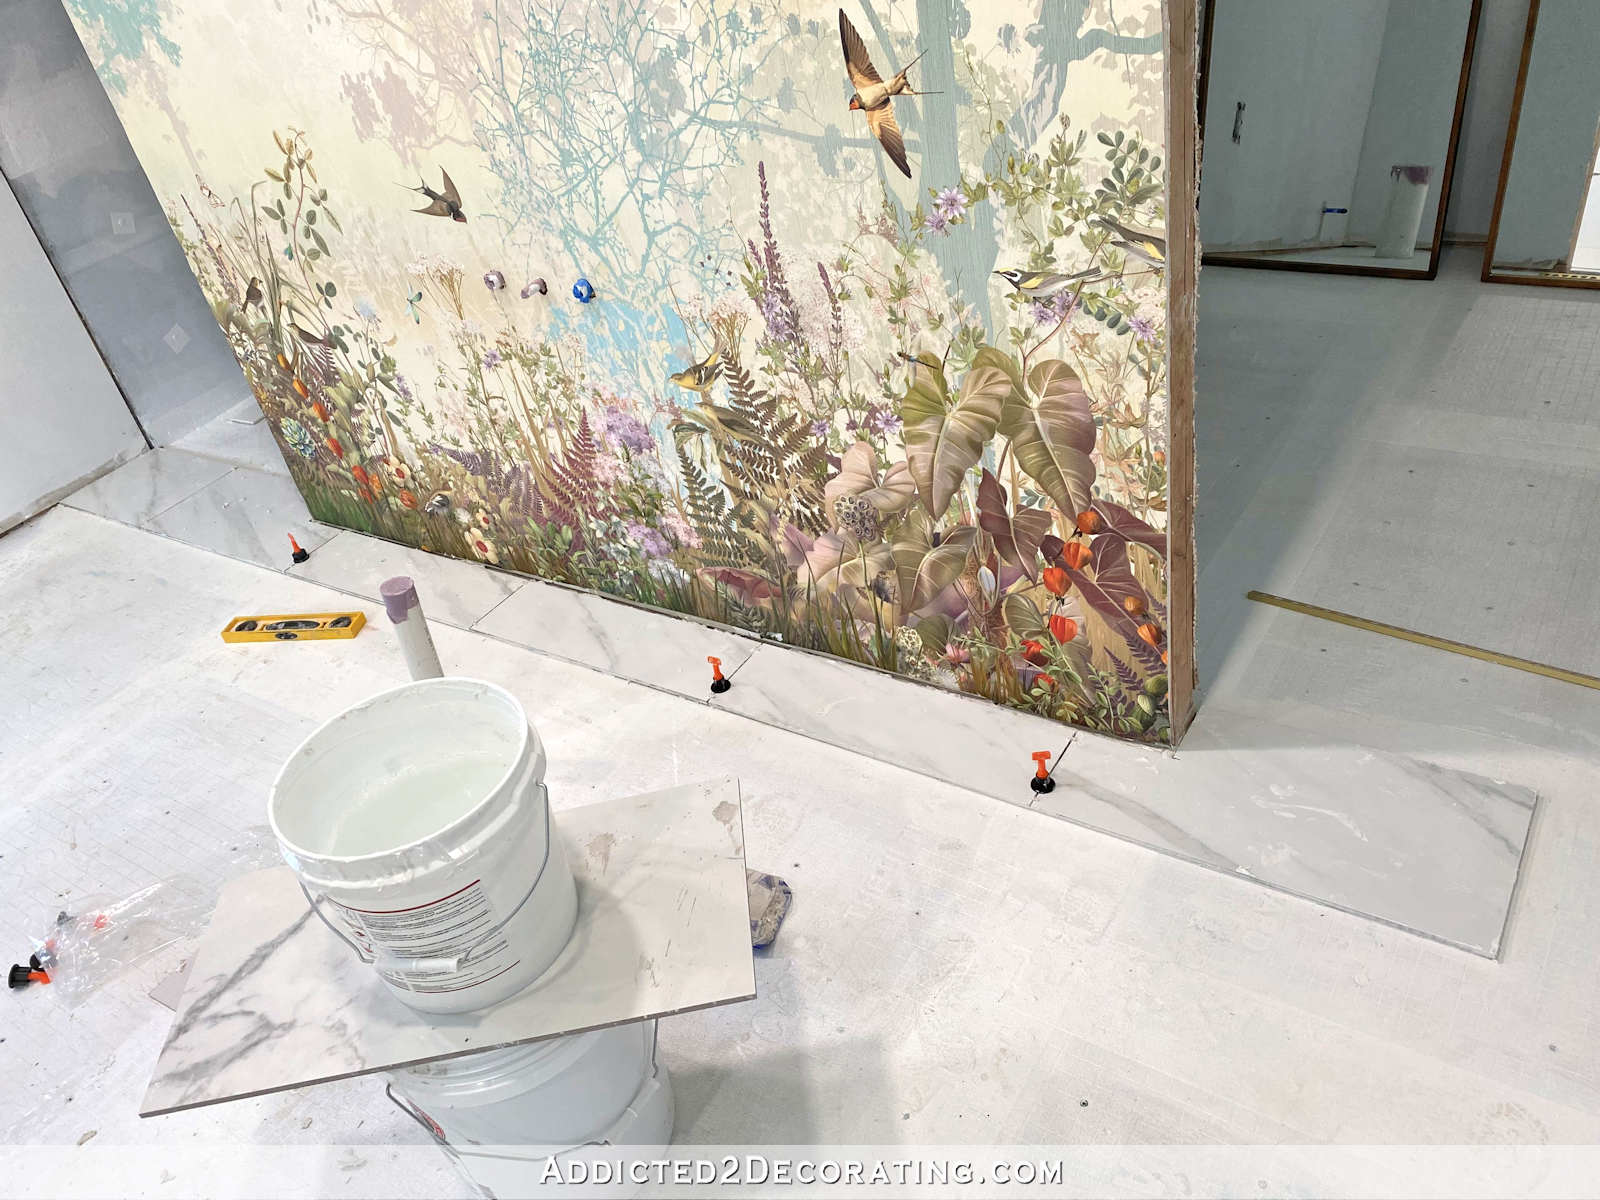
In case you can’t tell exactly what you’re looking at, that’s six pieces of tile. Six. That’s it.
It was such a frustrating day from beginning to end. I did spend about an hour putting my new tile saw together. More on that in a bit. And then I spent about 45 minutes trying out different tile layouts and transitions from the main bathroom floor to the shower.
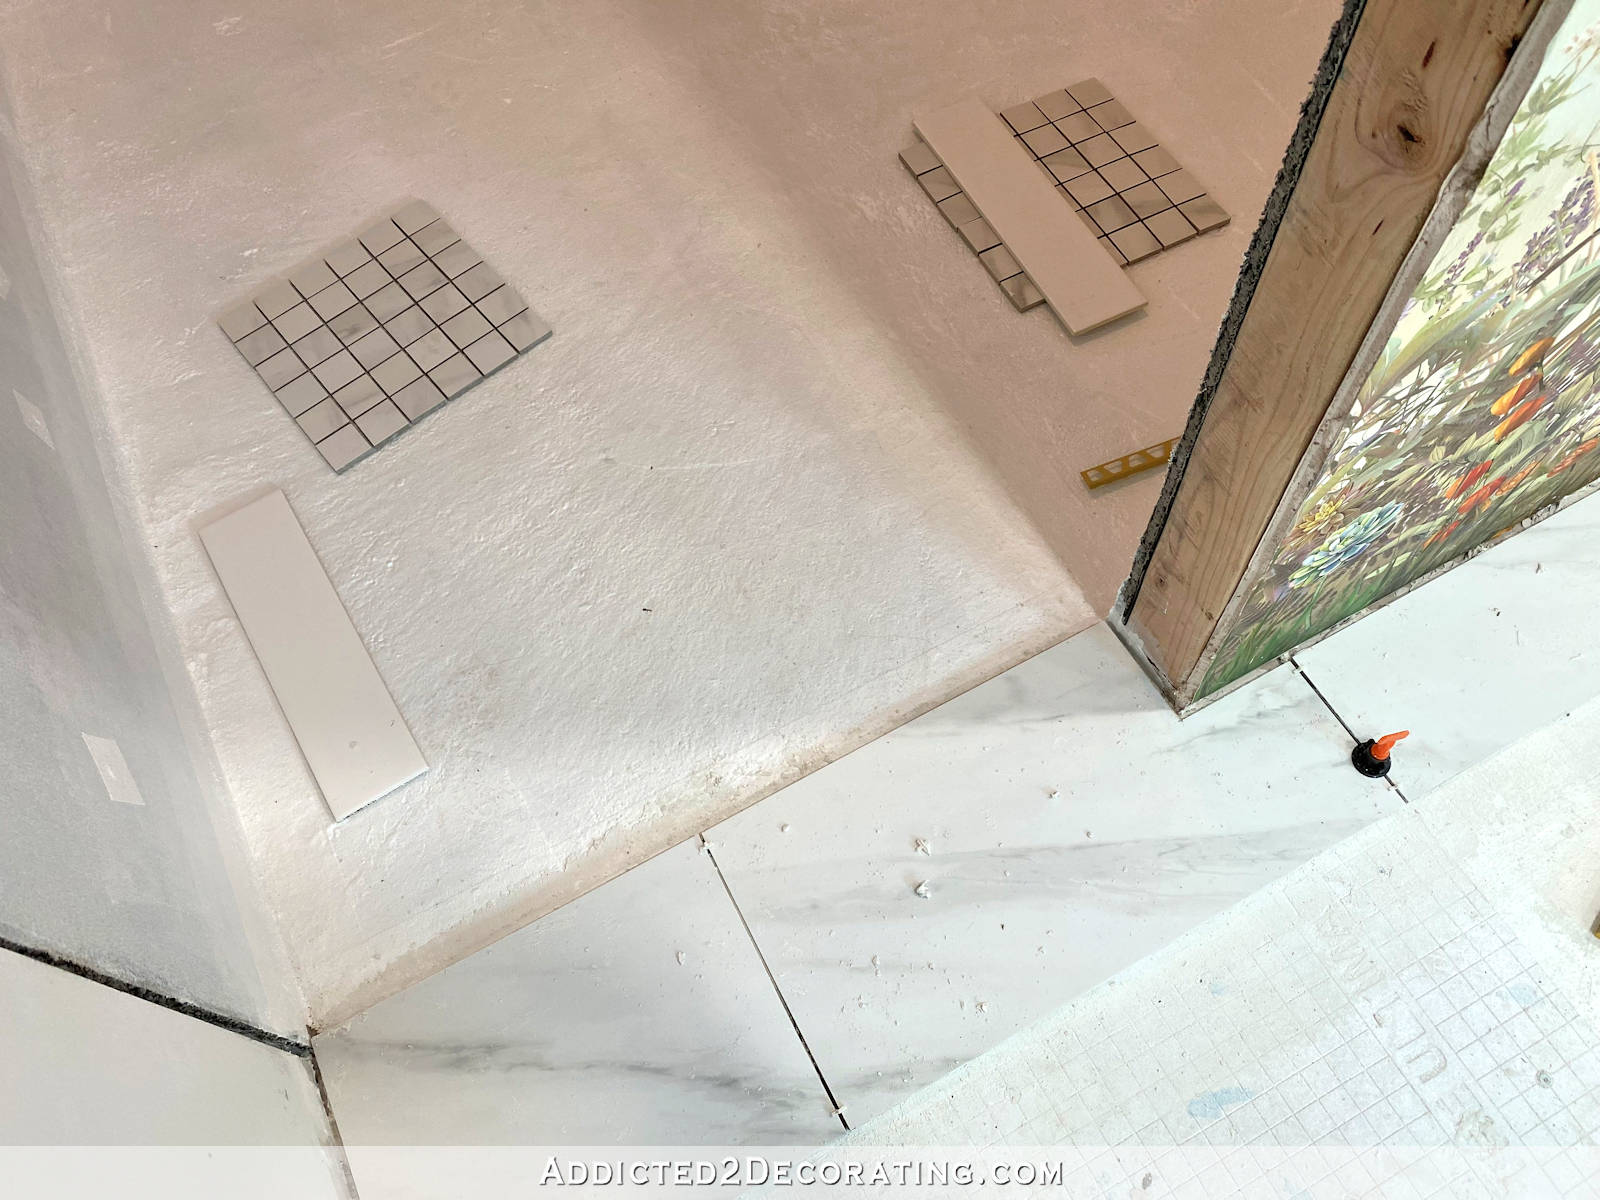
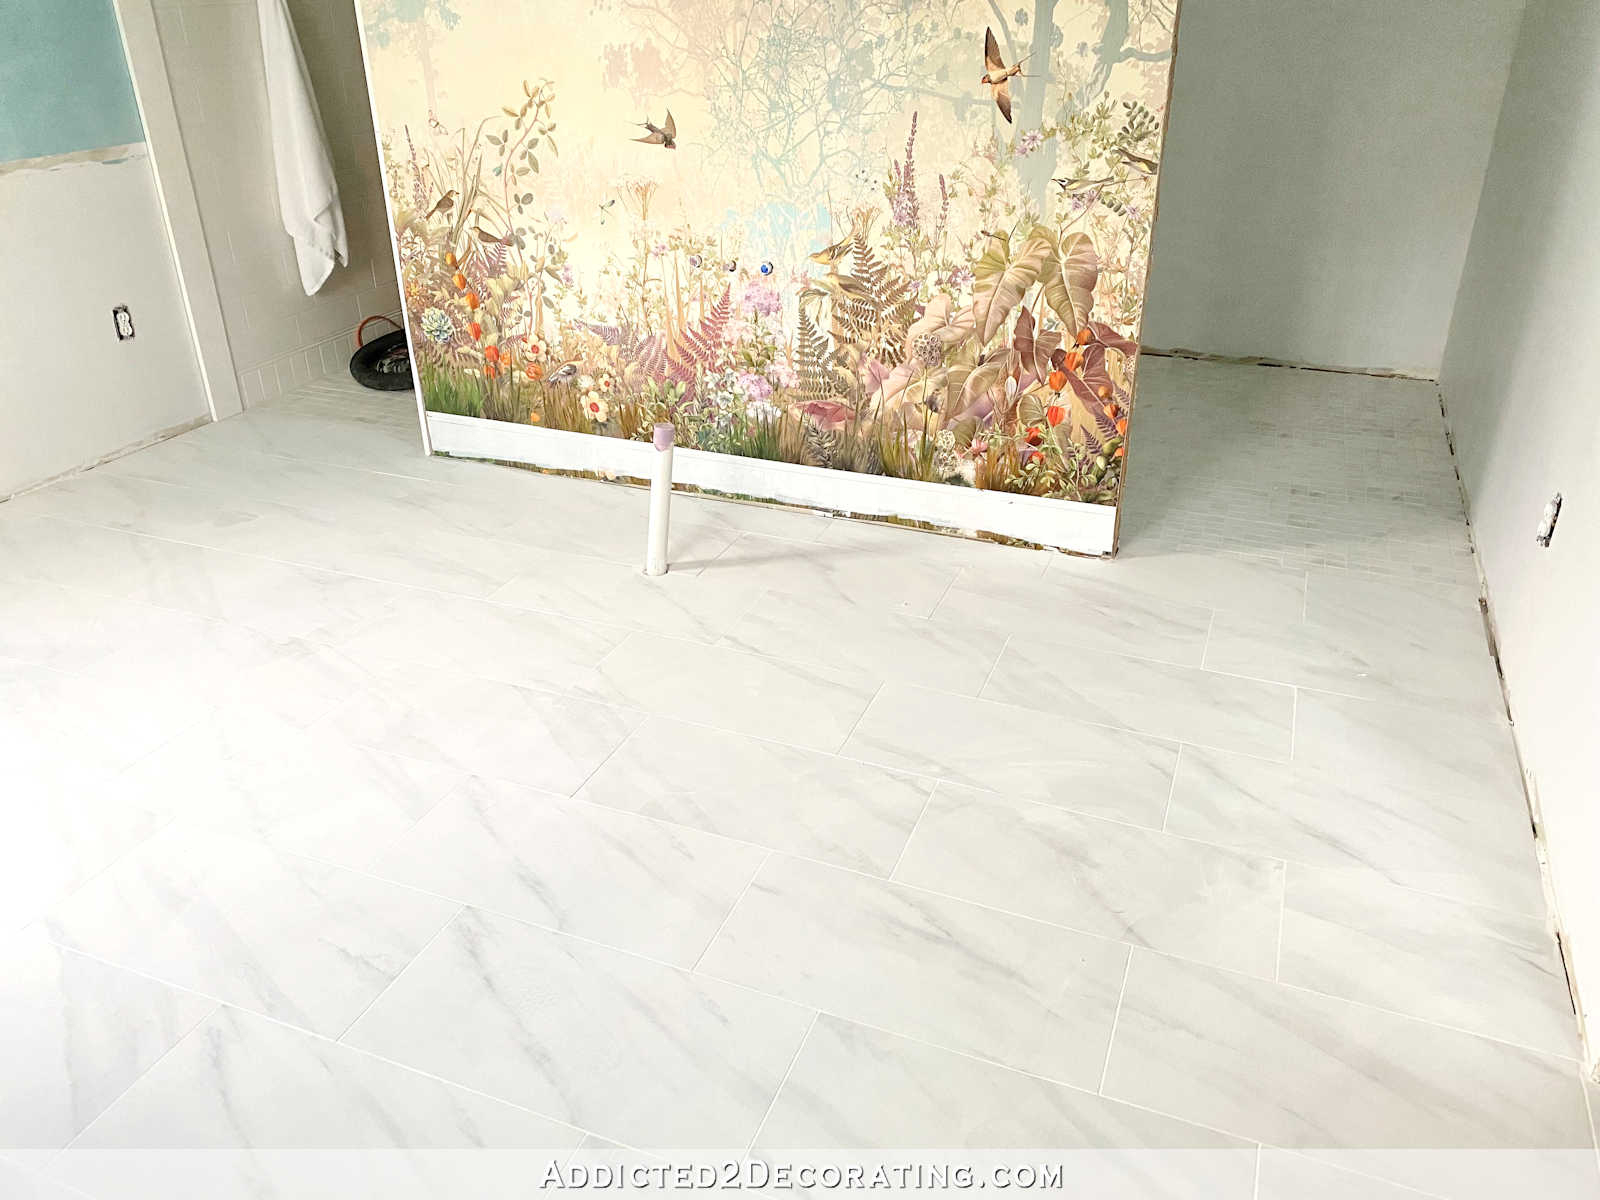
I’m still not 100% sure exactly what that transition will look like, but I did decide for sure that I wanted the big main floor tiles to go just to the inside wall of the shower, and that’s where the floor would transition to the small tiles for the shower floor. And since I didn’t want any cut edges on the floor tiles meeting with the shower floor tiles, that meant that I had to start my tiling on this row right along the mural wall so that I could make sure that the factory edges of the tiles landed exactly where I wanted them to be in this opening.
So after cutting those tiles and getting that row in place, you can see where the floor tile ends and the shower floor tile will begin.
So why did this take so long? Well, as I mentioned, I had to put my new saw together, get it all set up in place in Cooper’s yard (which is just outside that exterior door that’s in the bathroom), fill the water reservoir, gather my tools, mix the mortar, etc. But then when I started laying the tiles, I learned very quickly that this job was going to be a huge headache.
I have done plenty of tiling in the past — the condo kitchen backsplash, a client’s bathroom, the hallway bathroom tub surround and floor, the hallway bathroom wainscoting accent tile, the kitchen walls, the pantry backsplash, and the studio bathroom accent tiles. So I’m not new to tiling at all.
But what do all of those tiles have in common? They’re small. I mean, the hallway bathroom floor tiles were the largest I’ve worked with, but they were very manageable.
These tiles, on the other hand, are 12 x 24, and heavy. In addition to that, because they’re large format tiles, they require a 1/2″ x 1/2″ notched trowel. I have NEVER done a tile job that required a trowel with such massive notches. And not only are the notches big, but the actual trowel is big. (I bought the only 1/2″ x 1/2″ notched trowel that HD had.) And let’s just say that that trowel is not meant for the small hands of a woman who is only 5 feet tall. I mean, just the whole experience was frustrating.
In addition to that, no matter how much I pressed the tiles down to seat the tile into the mortar, if I just barely bumped the tile after it was in place, it would move. So just getting six tiles in place, spaced properly, and lined up so that they were all equidistant from the vanity wall was probably one of THE most frustrating DIY projects I’ve ever done in my life.
I had also purchased some tile leveling things that screw down onto the top of the tiles to keep them level with each other. You can see a few here…

But just the process of screwing those down so that they were tight enough to keep the tiles level would move the tiles over the mortar just a bit so that they were no longer even on the edges.
So I finally realized that all I could do yesterday was get that row of tiles into place, and then I’d have to let it dry before trying to push other tiles up against those. From here on out, I know it’ll be much easier. But my gosh, I was ready to pull my hair out yesterday.
At least I have a nice straight line of tile against which I can place the shower floor tile. The one thing I still haven’t decided is if I want to use a Schluter strip in brushed brass as a transition between the tiles. I’ll be using these strips elsewhere in the bathroom, and I do love the little hint of brass/gold that it adds here. I also think it makes the transition look a lot more intentional and planned. Here’s the view from the shower to the main bathroom floor…
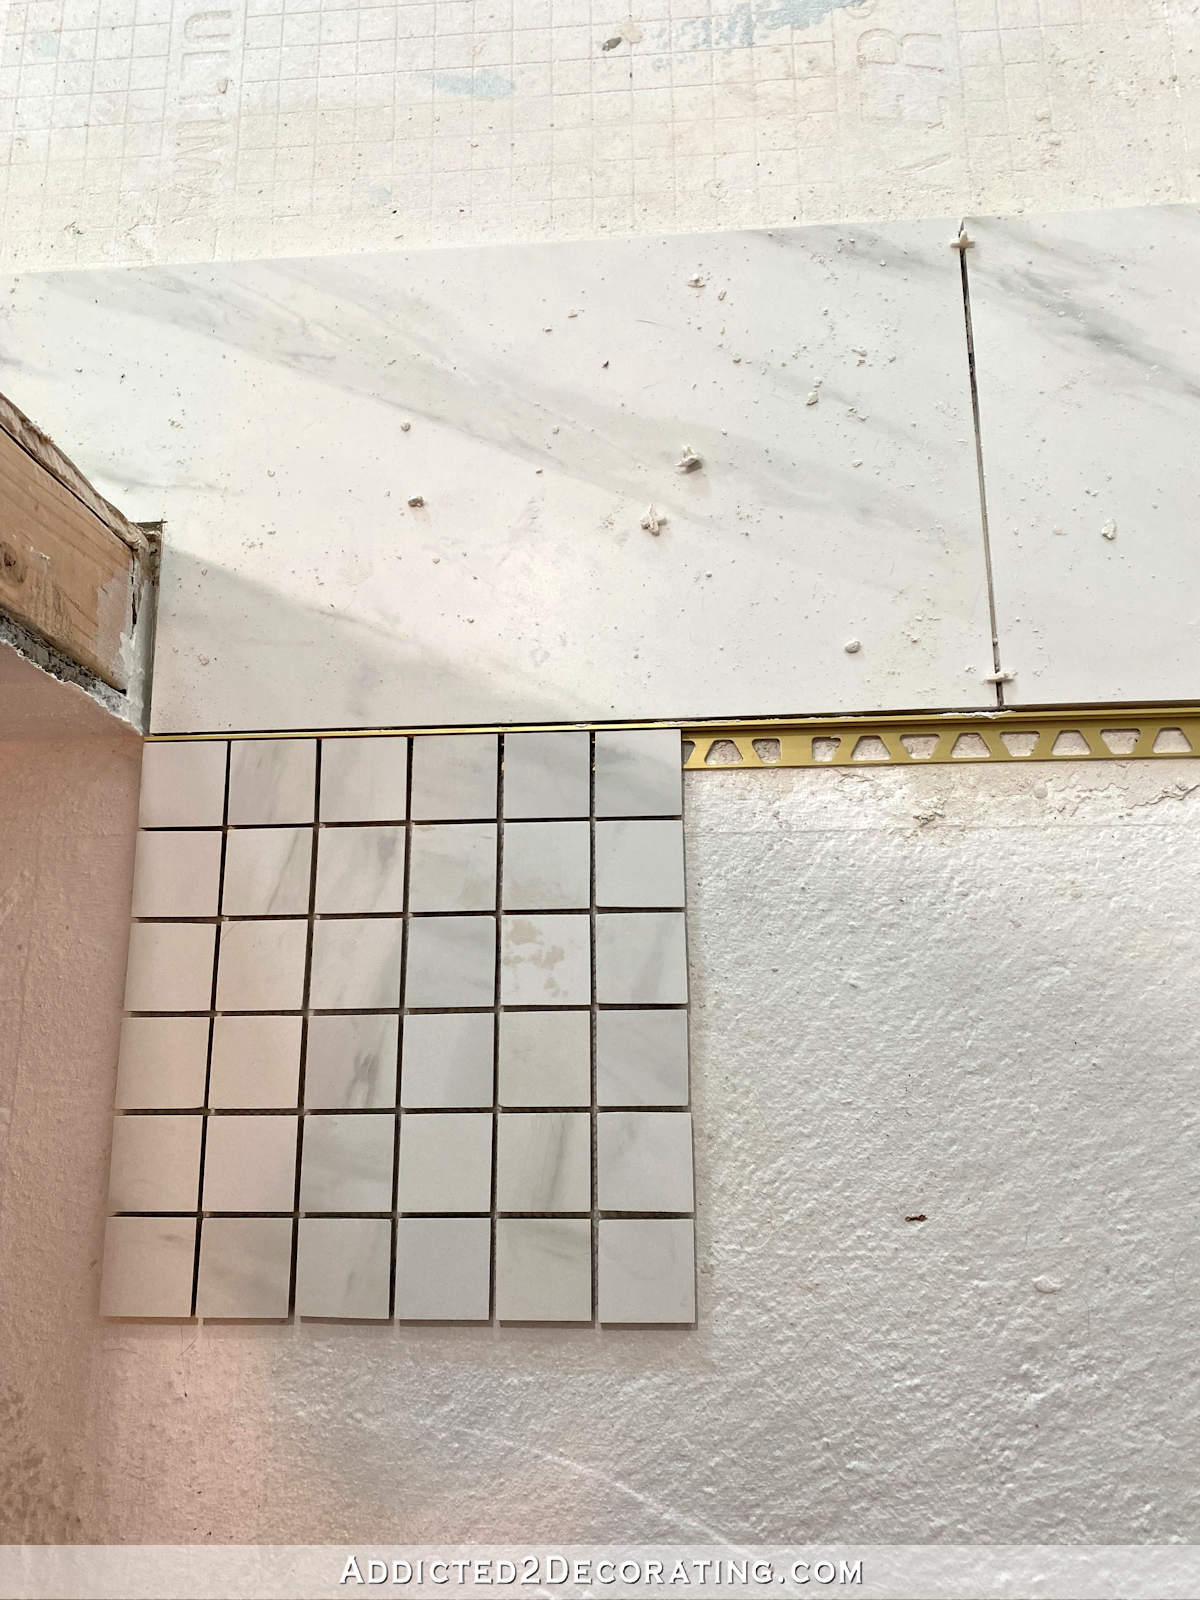
And here’s the view from the main bathroom floor to the shower…

If I don’t use the Schluter strip, it’ll look like this. Of course, the grout will completely change the look and make the grout lines disappear. This is more how it would look with black grout, but I’ll be using a very light gray grout to match the tile.
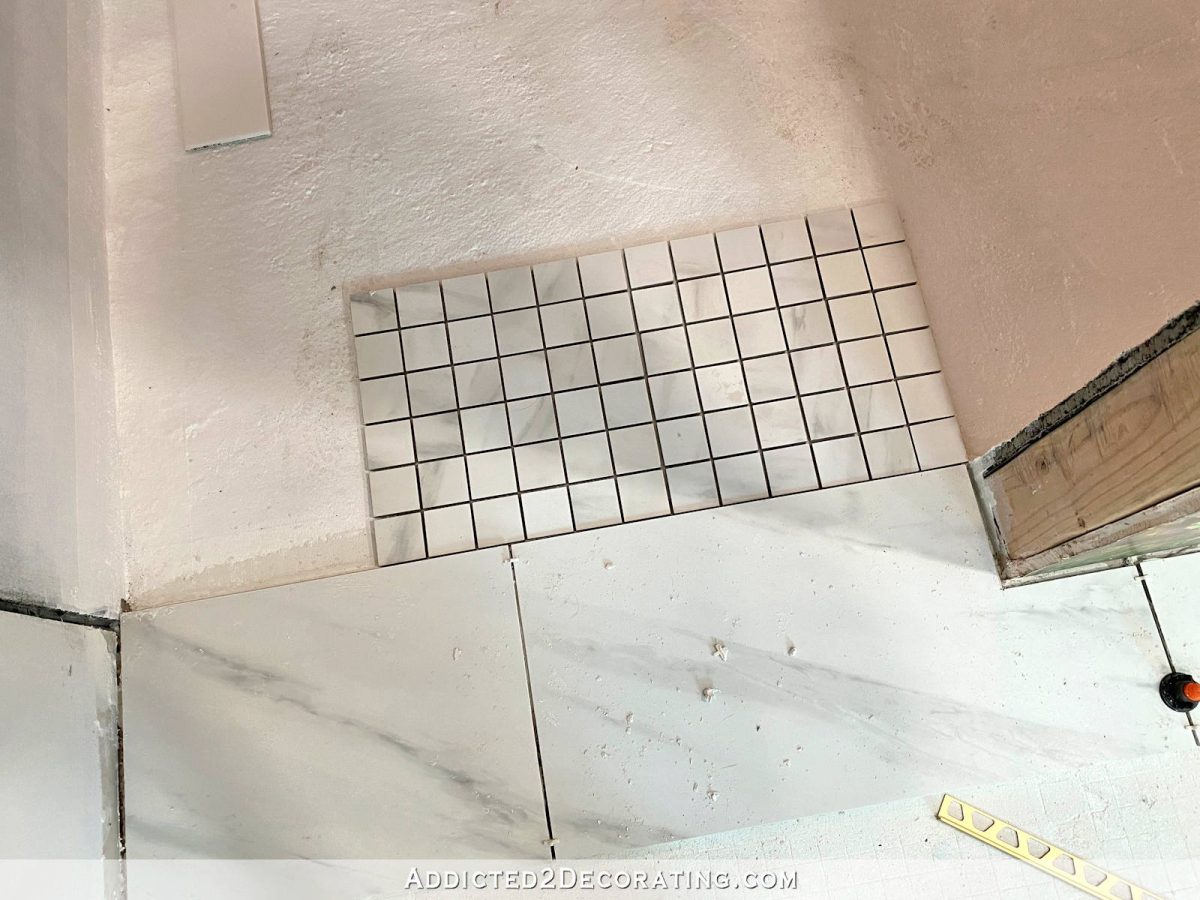
So, to Schluter strip or not to Schluter strip? That is the question. Have any of you ever used these strips before? Do they hold up pretty well? I’m specifically wondering about the aluminum strips with the brushed brass color like I have here. Does that color hold up over time?
Now to my new tile saw! My previous tile saw is the one that I bought when I tiled the kitchen backsplash in the condo, so I definitely got my money out of it, especially considering that it was one of the little $99 tile saws from Home Depot. (Probably very similar to this $149 Ryobi.) It’s a great little tile saw, but I was ready for an upgrade before tackling the tiling in the bathroom.
So I upgraded to this Rigid tile saw, which was $334. And this thing is awesome!

On this one, I have to deal with an arm that holds the motor and saw blade, which the little table-style tile saw didn’t have. But so far, it hasn’t been a problem at all. I’ve been able to cut my large 12 x 24 tiles any way I need to cut them. Of course, I’ve only cut six so far. 😀 But I doubt the rest will be any problems at all.
I love this saw so much because the part that the tile is placed on rolls on top of the frame. It makes the cutting process so much smoother. By contrast, the cheaper saw has a table that stays in place (just like a table saw), and you push the tile across the table. This style is so much smoother.
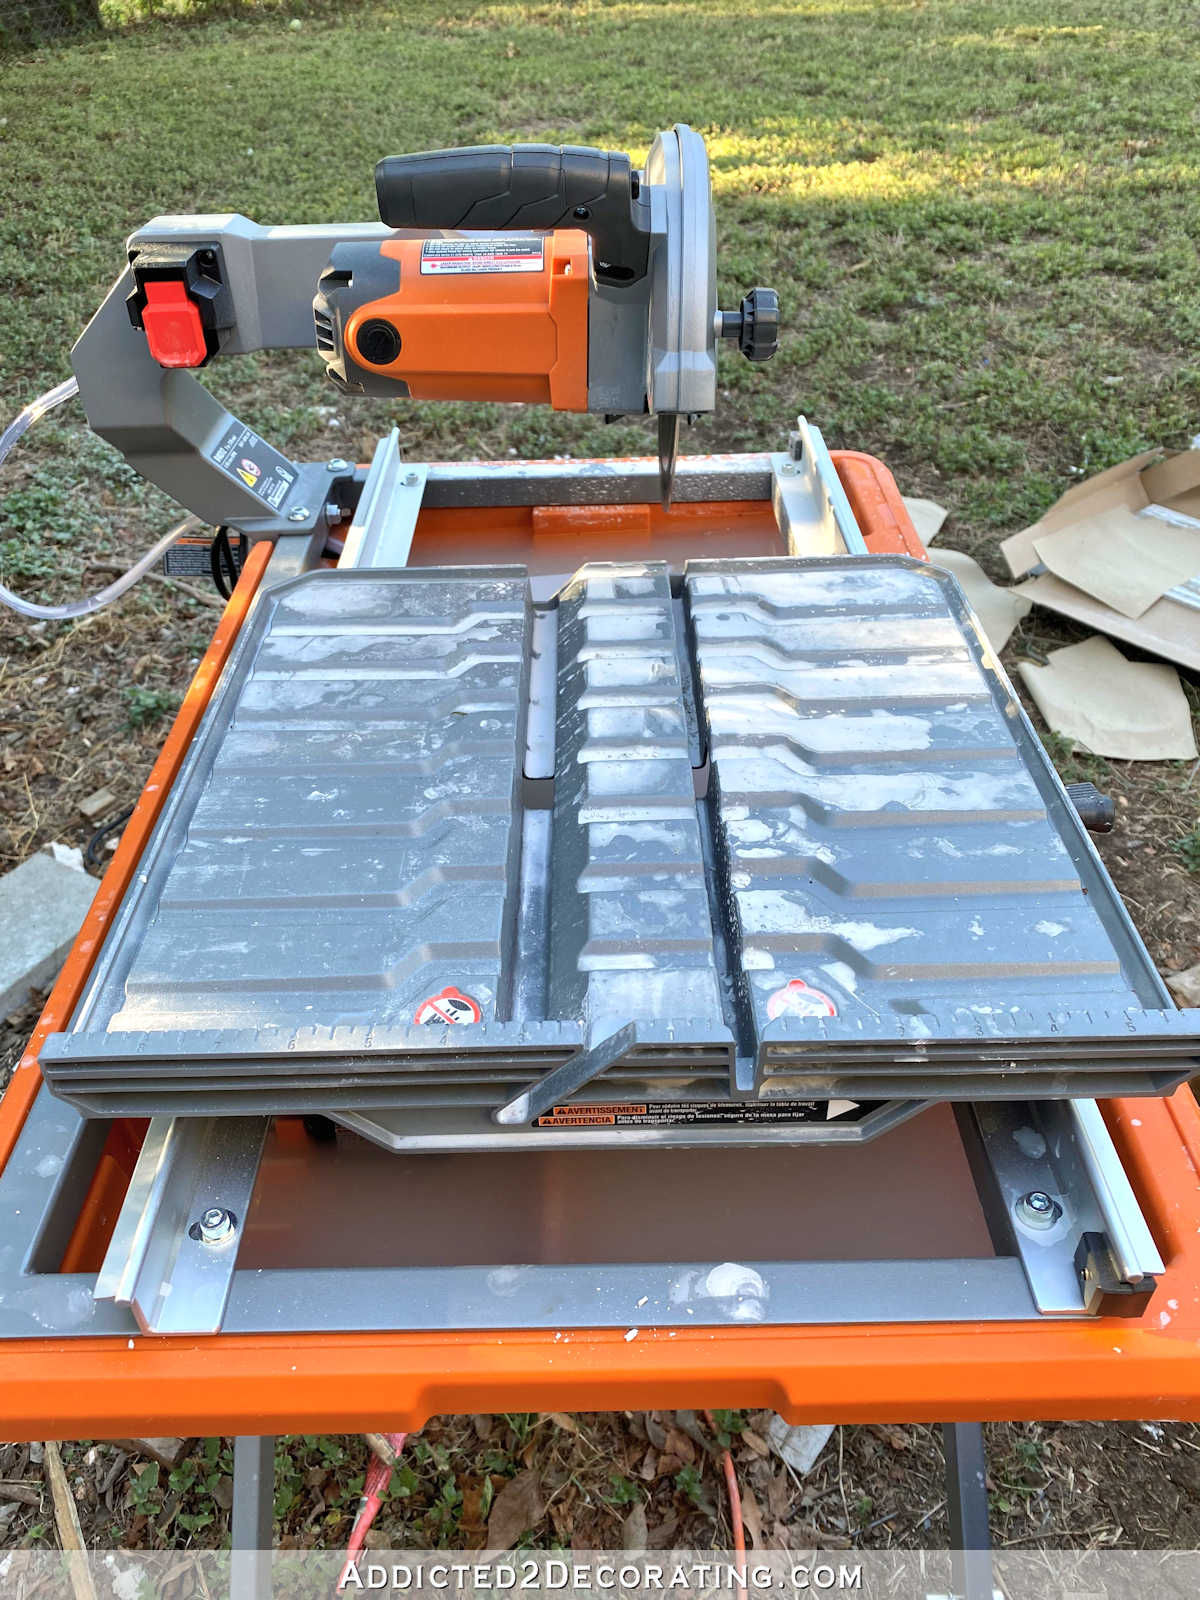
It also comes with this adjustable miter gauge that clamps onto the rolling table to hold the tile in place for angled or straight cuts.

I also love having this huge water reservoir with the water pump that sprays water directly onto the blade and down onto the tile. The way that the cheaper table saw-style tile saw works is that the saw blade turns through the water reservoir below, and if you don’t have the splash guard in place, the blade will fling water directly onto you. I love being able to see clearly where the tile blade is cutting while also being able to remain dry. 😀
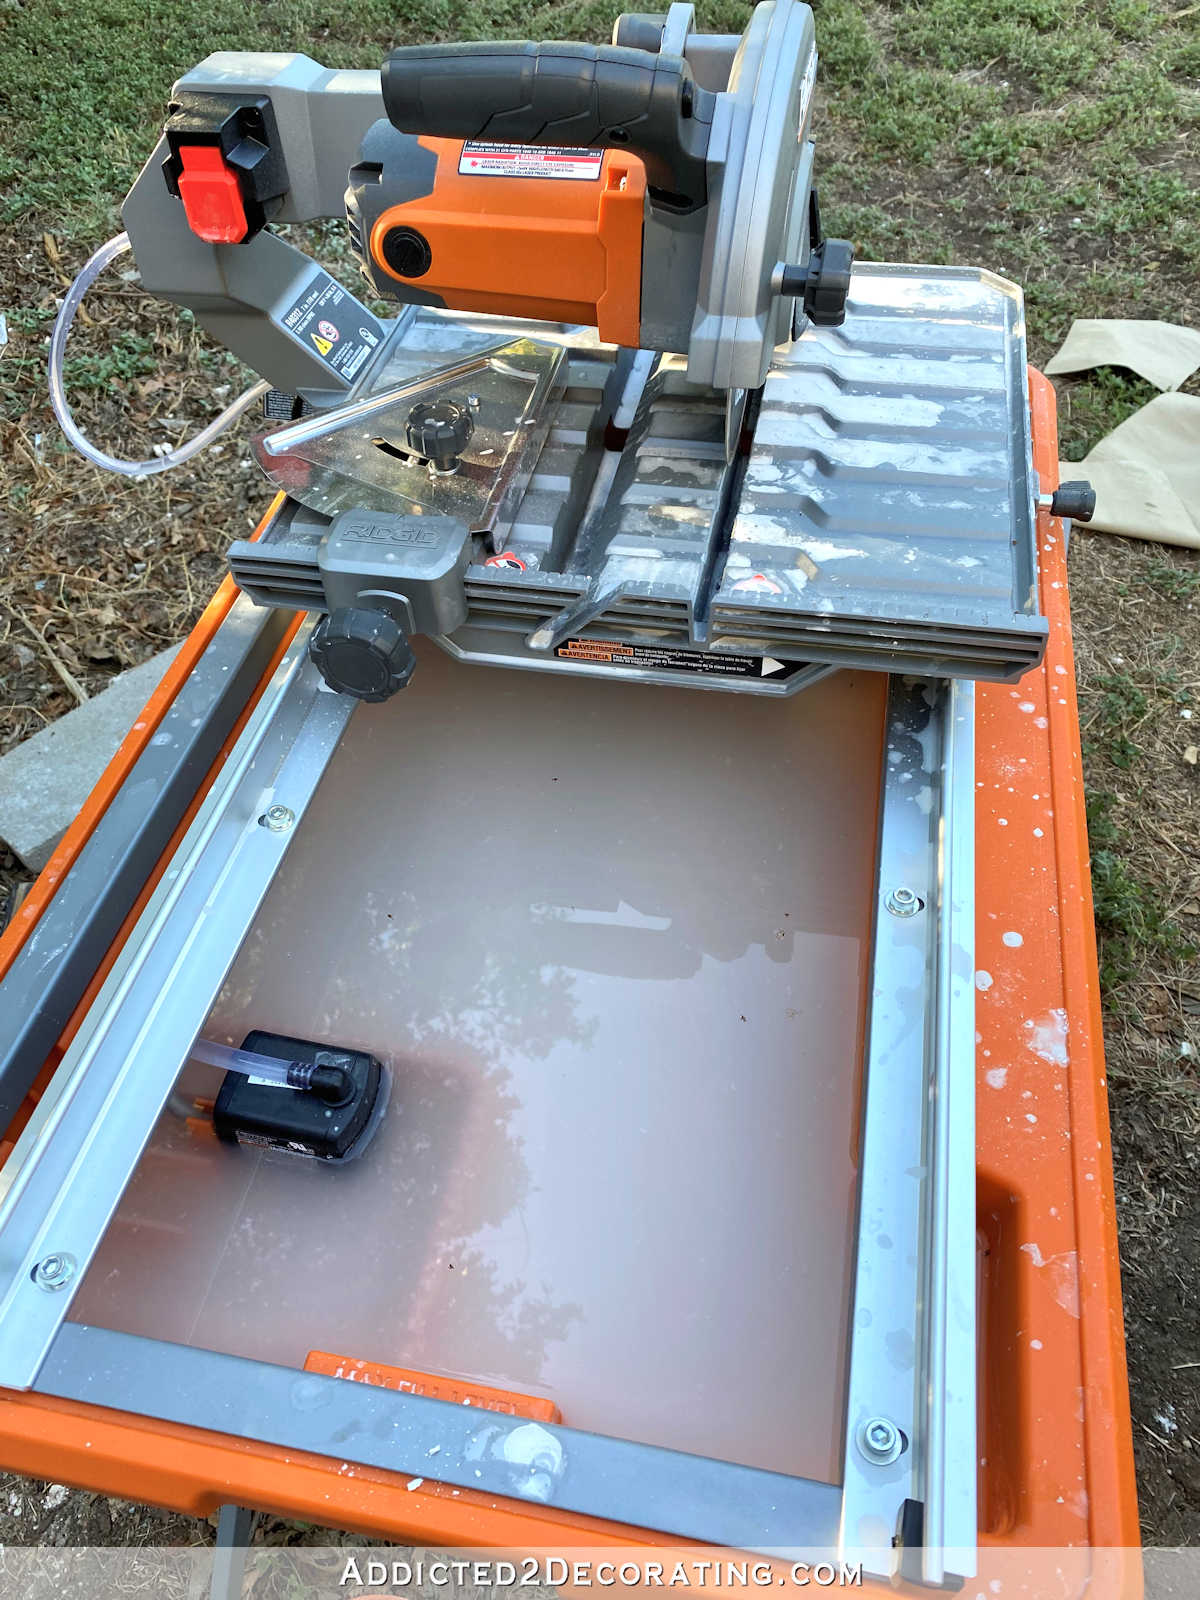
This was definitely a long overdue tool upgrade for me. It’s a much easier tool to use than my cheap tile saw, although that thing served me well for many, many years.
In other news, the mirrors finally came in! I ordered these at the beginning of July, and they just arrived. I love them. The shape is beautiful, and they’re very well made. But the color is darker than what I had expected. This doesn’t look gold to me. I don’t know what color I’d call it. Bronze, maybe? But they’re not gold.
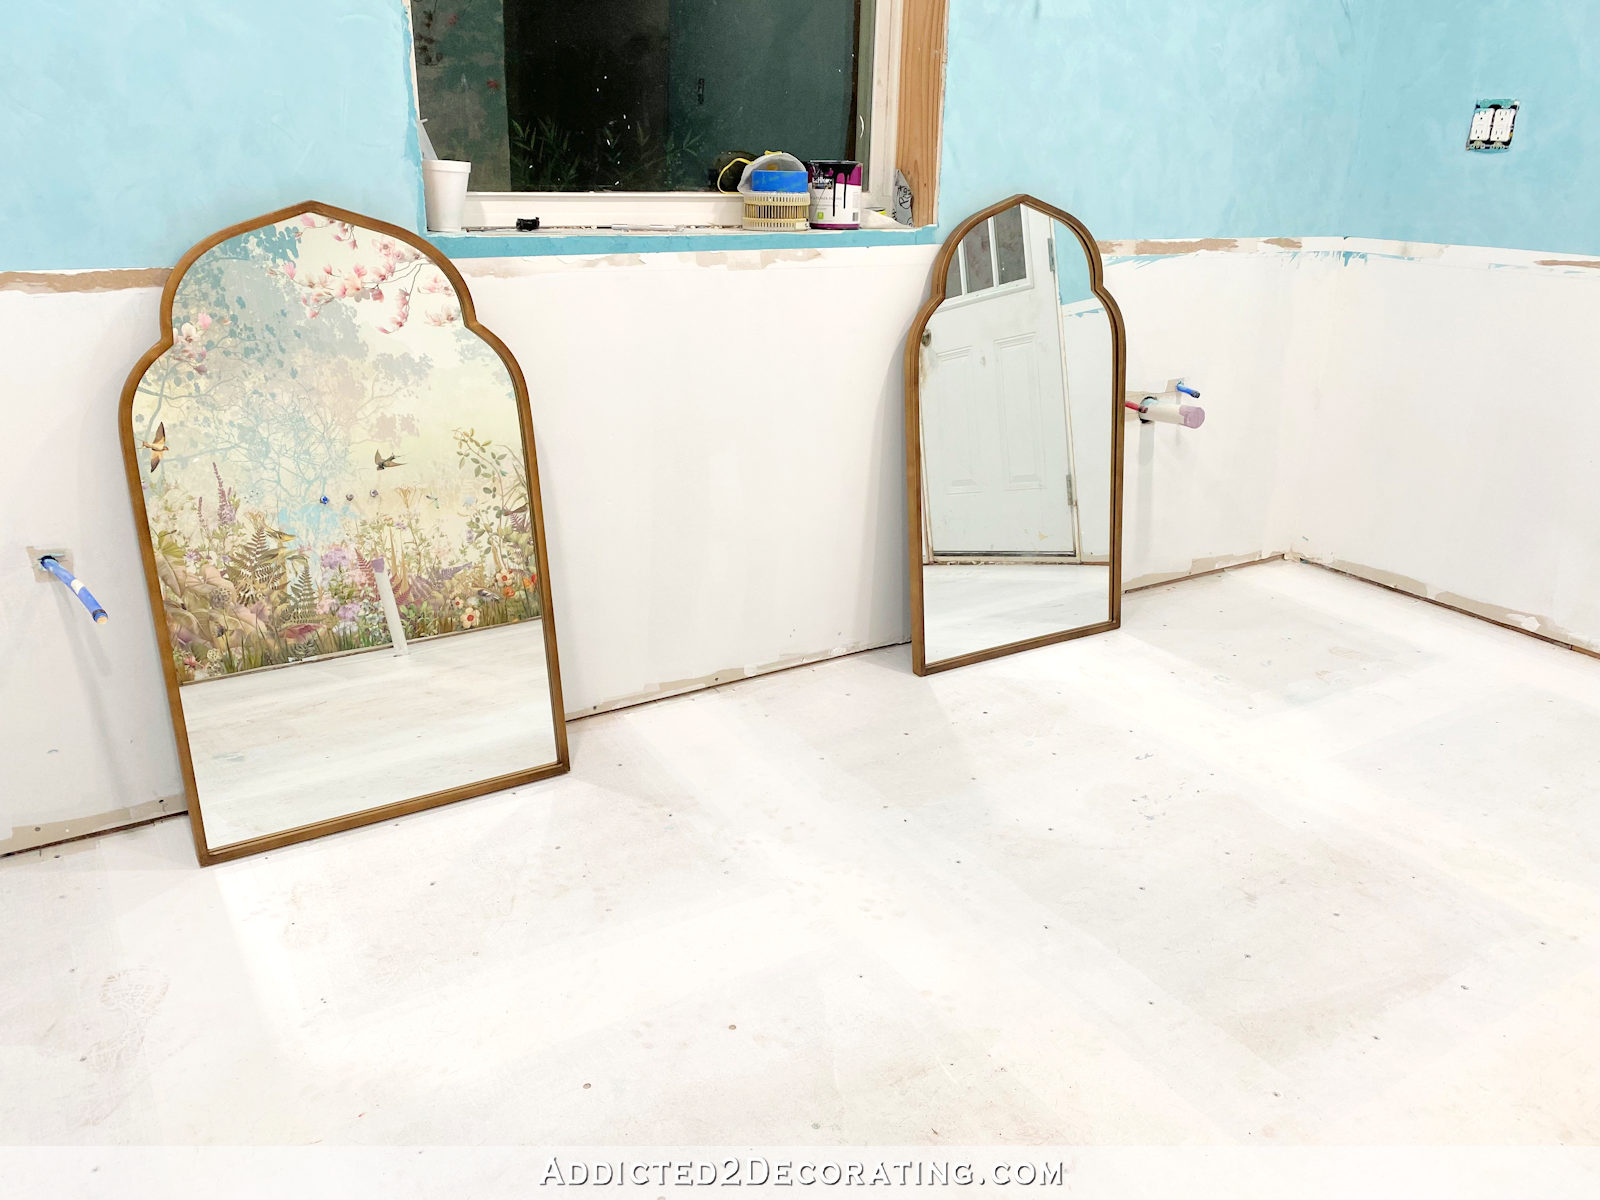
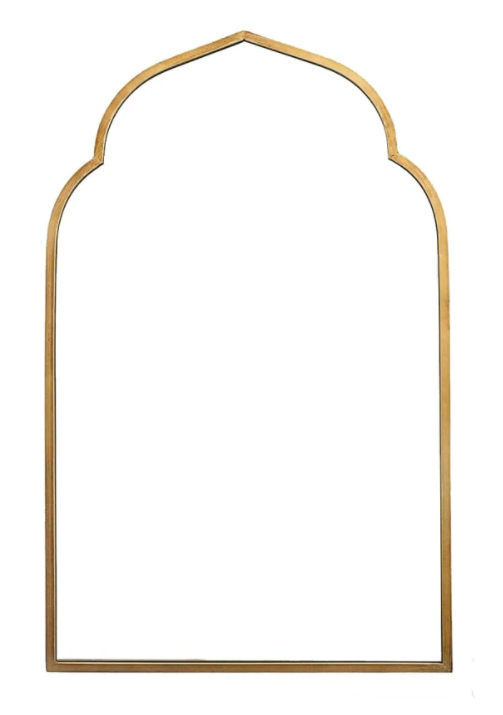
This is the picture from the website. This looks gold. This is what I was expecting. But this is not what I got.
So I’m slightly disappointed, but not too terribly so. I mean, I can always figure out a fix for the color. That’s not a big deal.
Also, when I was rooting around in my stash of supplies in the sunroom, I came across this scrap piece of walnut veneer. Remember when I used this on the music room end tables? (See: Metal & Glass Side Table Makeover (Music Room Progress).) So I took it into the bathroom to see what walnut looks like with the mural.
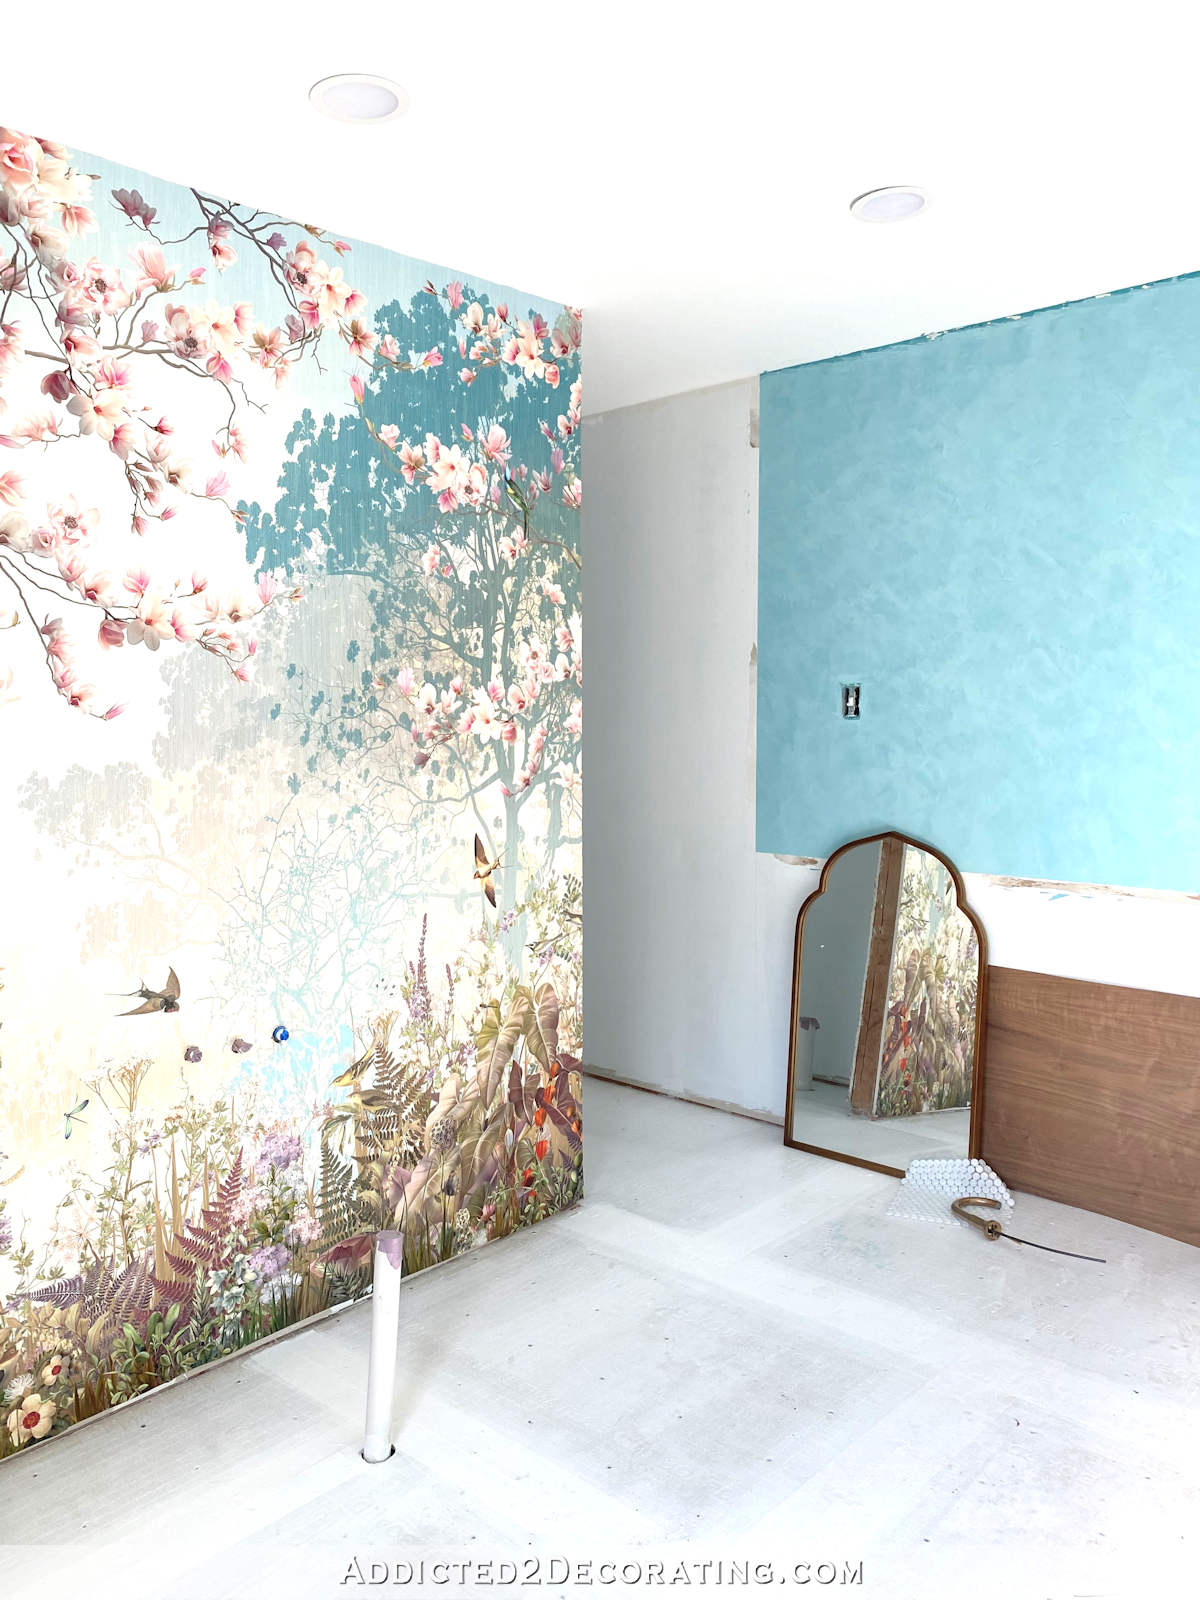
And…oh my gosh, I love it. I mean, I really love it. So I’m definitely leaning this direction at the moment. It’s my favorite wood, and it looks beautiful with the mural. At least I think it does. 🙂

Addicted 2 Decorating is where I share my DIY and decorating journey as I remodel and decorate the 1948 fixer upper that my husband, Matt, and I bought in 2013. Matt has M.S. and is unable to do physical work, so I do the majority of the work on the house by myself. You can learn more about me here.
Use the Schluter strip. It gives a finished look.
Agree.
I also agree about the Schluter strip. And the walnut is beautiful with the mural.
I am CERTAIN that whatever you do will be lovely…and you have likely addressed your tile choices in a prior post that i’ve missed while procrastinating/overthinking the current million projects of my own.
Aesthetically, the small tile will be gorgeous, no problemo.
Day to day?
I just finished scrubbing our sizeable shower and all. the. grout. that goes along with those itty bitties. Unfun.
Not sure if there’s an easier option. (NOT showering isn’t one, cleaning more often is “meh”).
Just tossing it out there, completely vulnerable and open ended. Perhaps sealing the grout is something we missed that you won’t.
Either way, good on you for tackling the overwhelming!
Love thy blog…you’re always inspiring!
Sorry, meant that to stand alone, not as a reply…mustn’t🍷while commenting 🤣
Also agreed.
I wish you lived next door to me. I’d love to see this live, and get your help on our bathroom updates!
You ROCK! Choice of transition solution, I think they both work. Love your review of the tool The right tool for the job is a true game changer. Congrats on that. Everything you are doing is beautiful!!
Now that you started the process and got a great tile saw upgrade, I’m sure the rest of the thing will be easier. I was on team lighter oak, but that walnut is hubba hubba good! I think my mind is changed
I watched an episode of This Old House on floor tiling. When Mauro was done he used dry grout spread all over the floor. It worked it in then swept it up. Then he threw down sawdust, I think, and that soaked up any left over grout. You would need go look up that episode because I’m not sure if it was sawdust or litter. The purpose was to not have to sponge off the grout for hours on end. The tile just looked great when he was done. It was quick and easy. Much, much cleaner and easier. Your bathroom is going to look divine! I love the mural.
Yes, I saw that episode of This Old House. The tiler was an old world master. He spread dry grout (From the same grout that had been used for the grouting) after grouting. then he used a straw broom to “sweep up” the excess grout. He swept against the grouted spaces in the same pattern as when installing The dry grout picked up the excess grout, he added more as needed. I too was amazed when I saw it.
WOW – not taking on a tile job ever! BUT I am so glad you invested in a new tool…it will probably make things easier and safer, and give you better results. You deserve it! Once you get past all the planning and experimenting, you will move much faster in the shower, for sure! Looking forward to the next post. PS) I looked at that exact same mirror – I really like the shape as well. But, my husband, unlike yours might veto it…we have different tastes. UGH.
I’m so glad you’re leaning towards the Walnut. It is going to be beautiful and uniquely you instead of influenced by current trends. Looking forward to see the progress as you keep going.
When I had my bathroom redone they used brushed nickels Schluter around the shower edges and it has held up very well. Go for it. I like the look with brass. You’re ding a great job.
First off – yes to the Schluter strip. My last apartment had them throughout the building. They are a bit tarnished but that’s from exposure. The building was built late 60s early 79s They are still intact. I like the clean separation between the different size tiles. As for the walnut, I love it as well. Very rich look. The venetian walls accent the top of the mural while the walnut accents the bottom. The mural doesn’t get lost. I have converted from the light oak to the walnut for sure.Looks great so far. Looking forward to seeing seeing more of your progress.
I learned from my brother, who has a flooring company, to use a grinder with a diamond wheel for curved or the corners.
What a game changer. Made some cuts or corners a breeze.
Kristi, Just a thought here…When I use my tile saw, similar to yours, I use a 5 gallon bucket of clean water for the pump to sit in. The tray collects the dirty water from the tile cutting. My tray has a hole in it with a plug that I lift off to drain and then clean the tray. I don’t think it is good for the pump to be in the same tray that the tile goop is in, unless the newer saws are different. I just have to keep an eye out that the bucket stays full of clean water.
I have used the Schluter tile trim and like it. Just make sure that after you put it down into the mortar, put a thin amount of mortar on the top before before your put down the tile. That is so the tile will have something to stick to on the edge. I feel for you….large format tile is hard to do! But it is going to be beautiful!
That walnut will be fabulous. I am glad you are thinking of using it. I hope the tile work becomes easier for you.
I love the Schluter strip. I think it will really finish off the transition nicely. I also think the walnut choice is brilliant. It looks amazing with the mural and is my favorite wood too.
The only issue I have is the line up of the small tiles with the larger ones. Remembering how picky you were in the kitchen (which is so beautiful), not having those grout lines lined up might end up driving you crazy. I know it would bug me every time I looked at it. Just food for thought. You are doing a great!
I agree. I would go insane looking at how the grout lines don’t line up. I like the Schluter strip.
Based on what I think is your style, I would recommend the Schluter strip. I’ve never used one on the floor, but on shower bench edges and around showers (probably used brushed nickel), etc. yes and they’ve held up well.
I love the transition with the schluter strip. And I absolutely love the walnut! Can’t wait to see more progress!
Looking great! I love the new tile saw.
I agree, the strip looks lovely and finished. I liked the washed oak but now that I see this walnut, I also like it too!
Your’e doing a fantastic job! And yes the metallic strips work well and hold up over time! We installed one over 25 yrs ago in a shower window to dress up where the tile ended and window started. It was our 1st starter home, then became a rental. So it took quite a bit of harsh scrubbings over the years between renters moving in and out! It still looks great! Plus I think it adds that bit of polish to your floor, like jewelry!
I vote for the Schluter strip and the walnut looks incredible. I hope things go smoother today.
Well done for persevering, that sounds like a horrible day! The walnut looks great against the bottom of the wallpaper, will much of that be seen once the bath is in place? If I look at the top half of the wallpaper there’s less of those browns and neutrals that the walnut is picking up on.
The transition looks great! My opinions on the strip and transitions. If it’s not designed for a floor transition no, it’ll probably deform or just not feel okay. We used a similar profile on a vertical edge and love it. I was good with ours because it was a finish and color that wouldn’t show damage too easily. Since its a bath floor I’d be picky and more cautious. Some of these are surface anodized, so put a nick in the end of a piece and see if the color goes thru or shows silver. I’d do a walk test If your chosen size sticks up too much or feels like a sharp edge. Something extra, because it would not feel good under foot, get caught on mops, then continue to be damaged, especially being rolled over. Once it’s in it is difficult to remove, and a place you want to not mess with much to preserve the waterproofing.
Making progress everyday! Looks GOOD!
I love the strips. Really classy looking.
Use the strip, it’s lovely. And the walnut, OMG! Looks amazing. Didn’t expect this, but it ties in the whole look. Mirrors don’t look bad either, I get a feeling they’ll be a better match for your revised plan.
For the tiles, when my dad put tiles on my floors he hit them really hard with his hand, but when I brought a professional tiler for some later project, he had some rubber hammer I think, and you can’t imagine how hard he hit them!!! He actually managed to break a tile, and those things didn’t even break when we dropped some metal tool on them while workind on the ceiling! They stayed in place after that (and also, the mortal spread evenly under them, so that it covered the entire area).
I like the look of the brushed brass Schluter strip, maybe try to match that color when you do the mirrors? I would also try to match the grout line of the big format tile across the strip going onto the small tiles. We have a similar situation and those grout lines weren’t matched when they were installed. They are just enough off that it drives me nuts every time I see it. Love the walnut! It is going to be beautiful!!
First off – yes to the Schluter strip. My last apartment had them throughout the building. They are a bit tarnished but that’s from exposure. They are still intact. I like the clean separation between the different size tiles. As for the walnut, I love it as well. Very rich look. The venetian walls accent the top of the mural while the walnut accents the bottom. The mural doesn’t get lost. Looks great so far. Looking forward to seeing seeing more of your progress.
the tile is looking great! Bummer on the mirror trim color, but I have every confidence that you’ll make it work! I also like the Schluter strip.
The darker color of the mirrors looks great with the walnut…
Maybe with rub ‘n’ buff, you could ombre the color of the mirrors from dark (like they are) at the bottom to brighter gold/brass at the top….
I put those same large tiles on my bathroom floor and within a week, they had all cracked. I don’t know what I did wrong when I installed them but I’m going to have to re-tile my bathroom floor. Very disappointing!
It’s impossible for ALL tiles to crack in a week, even if the grout wasn’t spread evenly underneath all of them. lol
Love the brass strip between the two styles of tiles—I have never used them so I don’t know how they hold up. BUT I have laid 12×24 tiles. I feel your pain. Hang it there—it’s going to be stunning when you are finished. We will all be jealous. 😃
That WALNUT with the mural…. be still my heart!!! 😍😍😍 It’s GORGEOUS. I had a feeling it would work perfectly when you previously mentioned it! <3
Hi Kristi! I LOVE the gold Schluter strip going into the shower. We used Schluter strips in our bathroom, but of course, we have only been in here for about 5 months, so I can’t really tell you how they hold up. But if they are metal, which I assume the gold ones would be, I think they would hold up well. But I truly think it looks gorgeous! They would tie in so nicely with your gold hardware!
As far as the trim on the mirror, it is an easy fix and I say go with what you really love and think looks best. You are the one that has to live with it, so it doesn’t really matter what anyone else thinks. You do you! Either way, it will look fabulous! xo
The walnut looks great and I love the gold Schluter strip for the transition!
I would leave off the strip. But the tiles are smaller and you’re using grey grout though so if the visual appearance of the tiles looking darker (because the grout to tile ratio is diff), requires a transition for you then yes. But to the eye will it play off as a shadowy area in the distance? I see why this is so easy to overthink
Be careful of the “brass” schluter (sp) strips. I had them in a previous home and the lady who helped me clean used something on mine that took the brass right off of it. I was very displeased but there is no turning back once they are discolored. I have white strips in my recently remodeled bath, but they are not on the floor. In my opinon beware of the “brass” strips particularly on the floor.
I really dislike metal strips being among stone and grout, but that is just a personal preference.
If you go with the walnut, then the darker shade of your mirror frames will go really well with that also.
Whatever you decide will turn out beautiful!
Woo-hoo! So exciting! And you’re so right about the walnut, girl! Mahvelous!
*hugs*
I’ve used silver Schluter in several bathrooms we did at our church plus the choir loft where wood met tile. Definitely recommend it for safety and a finished look. And I did walnut vanities which I loved. 🙂
Team Schlueter.
And I thought the walnut would be too dark, but that truly is beautiful! I may be changing my mind 🙂 I think there is enough natural light to carry it, but that isn’t always easy to judge via picture.
I love the brass look of the Schluter (sp?) strips! and the walnut!!