More Studio Bathroom Progress
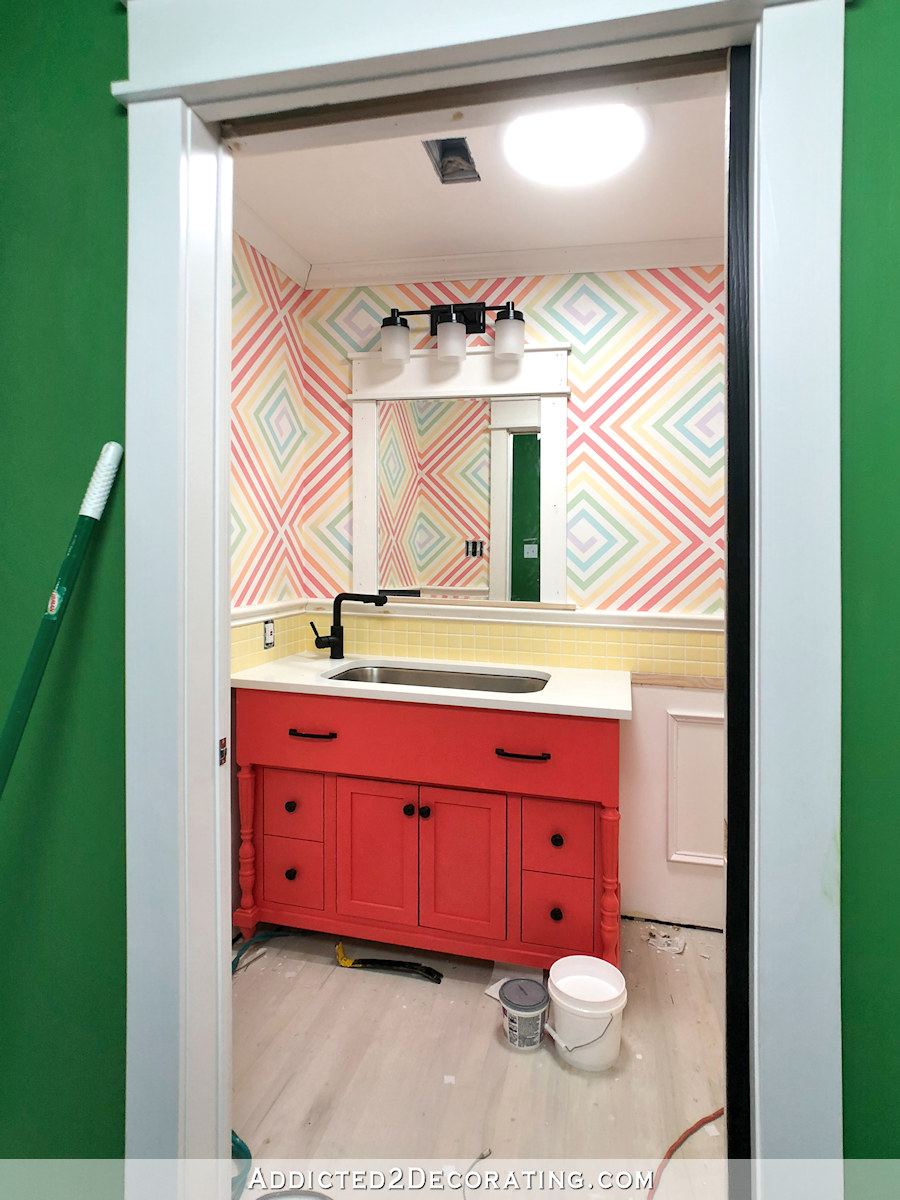
I’m making progress on the studio bathroom, but I still haven’t gotten to anything exciting. In fact, here’s a little “behind the scenes” look into my blogging process. I start by editing all of the photos for a post (I edit every picture on my blog for lighting and brightness), and then I upload them as a batch and add them to the post as a batch. So before I get everything organized into an actual blog post with my commentary on each photo, the photos are in a gallery form and appear as rows of small photos.
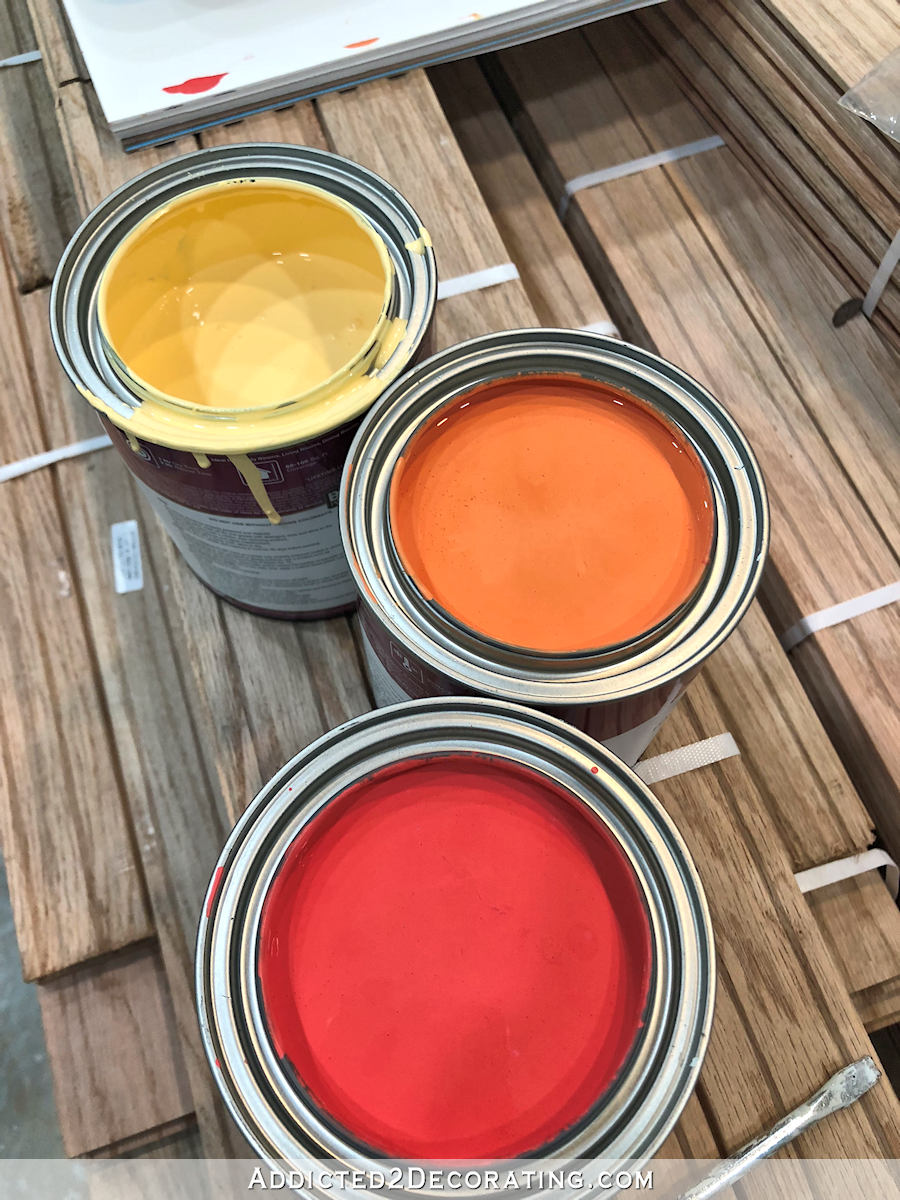
So I uploaded all of the photos to this post this morning and then looked at them as a batch and thought to myself, “Oh my gosh, this is awful! There’s no COLOR!” 😀 Looking at all of those drab photos together kind of sucked a little bit of life out of me. It gave me a little glimpse into what it would feel like to live in a neutral-colored home, and there’s just no way I could do it. 😀
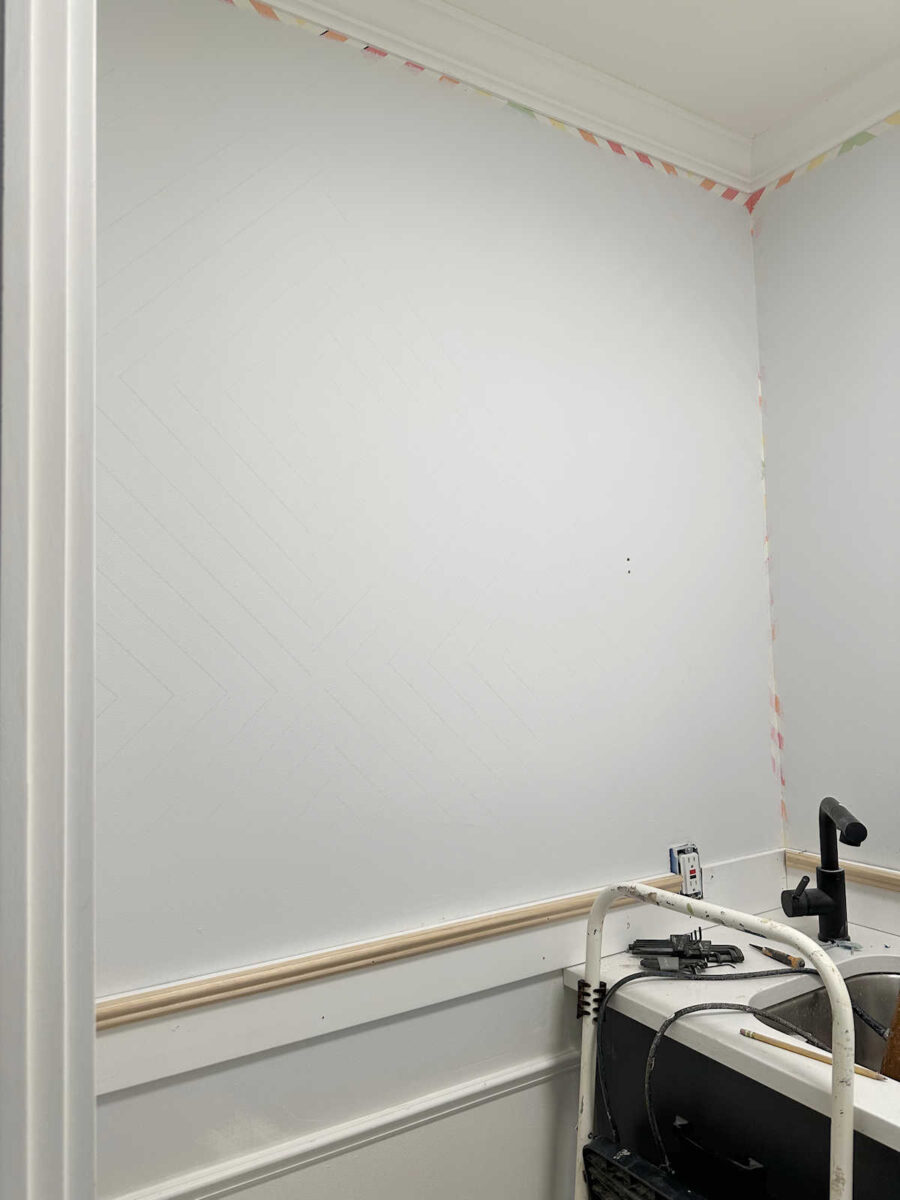
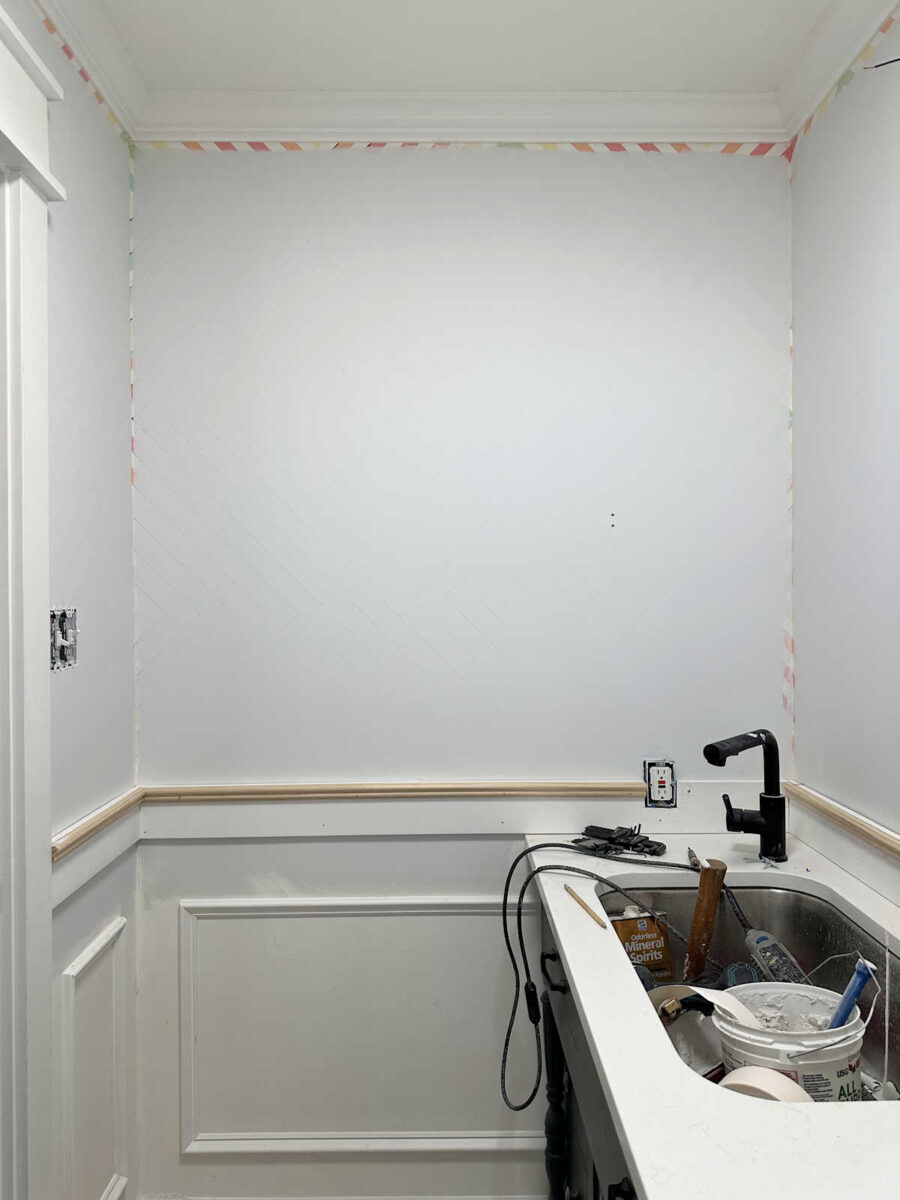
Anyway, I’m right on the cusp of being able to add the wallpaper, but these walls have given me more trouble than I thought they would. One issue is that the black Sharpie marker that I tested out to outline that original square spiral design keeps bleeding through the primer.
I had hoped that the water-based primer would cover it up (this Sharpie marker area already has three coats of primer), but I had already expected that the Sharpie marker would be a problem. It’s not a big deal. I just need to go over those specific areas with some shellac-based primer, and it’ll be fine. And oil-based primer would probably work, but I know for sure that shellac-based primer will take care of it.
While that primer was drying, I started adding the trim to the top portion of the wainscoting. I think this overall look will work. There are still two other trim pieces that I need to add to finish the look. But once I added this first trim piece to the top board, I ran into another problem.
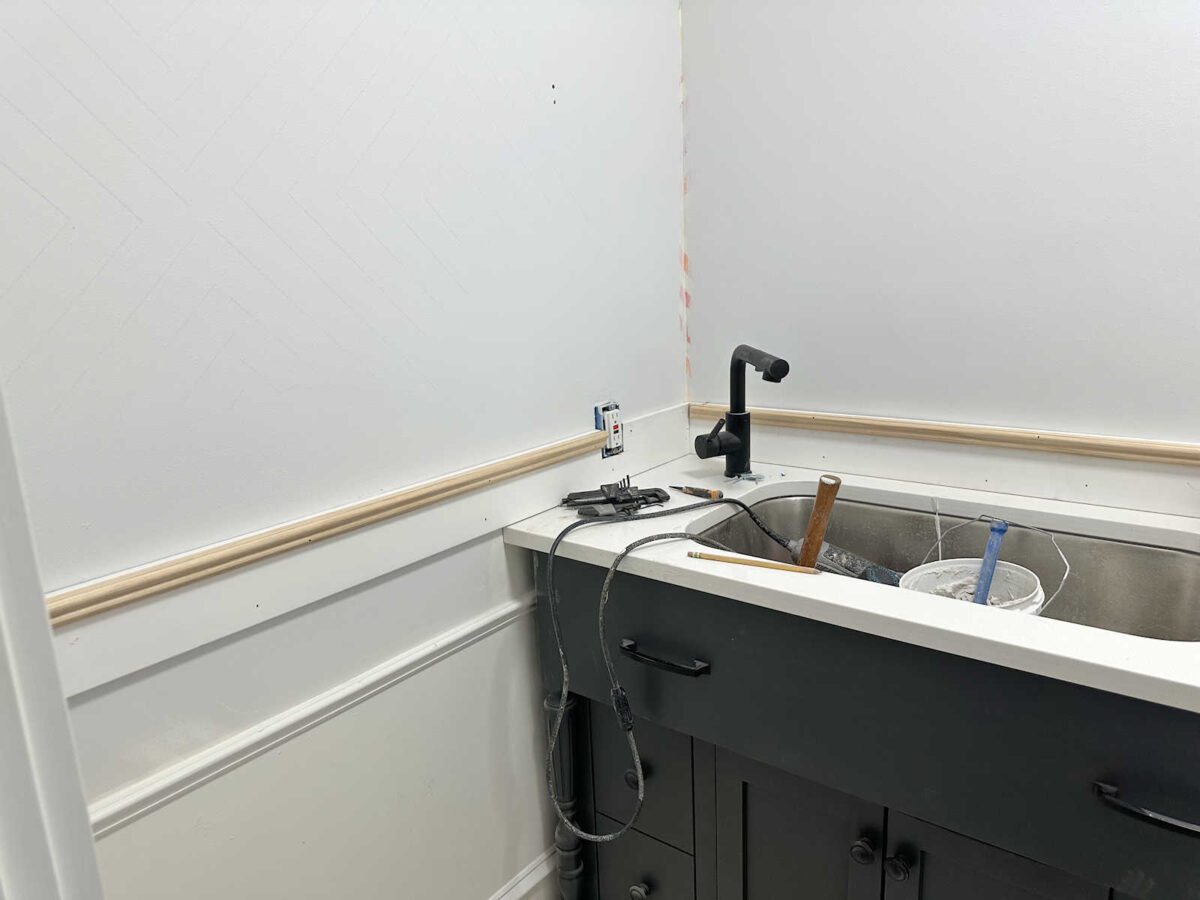
I have no idea how I’m going to trim around this outlet. It’s an adjustable outlet, so it can come out from the wall to be flush with the trim, but then the top half stands out from the wall. I can make it flush with the wall at the top, but then it’s recessed into the trim.

So I need to figure that out. I know the obvious solution is to move the outlet up, but I’m not willing to do that. I don’t want to do any electrical work in this room, so the outlet is staying right where it is, and I’ll figure out a solution. When I had the tile border, it was taller, so I just had to notch out a tiny bit of the chair rail to make it fit.
But this time, I wanted the top portion of the wainscoting to be shorter, but I didn’t quite think through this area when I made that decision. So now I’ve created a challenge for myself. I’m not worried about it. I’ll come up with something. I just need a bit more time to think it through.
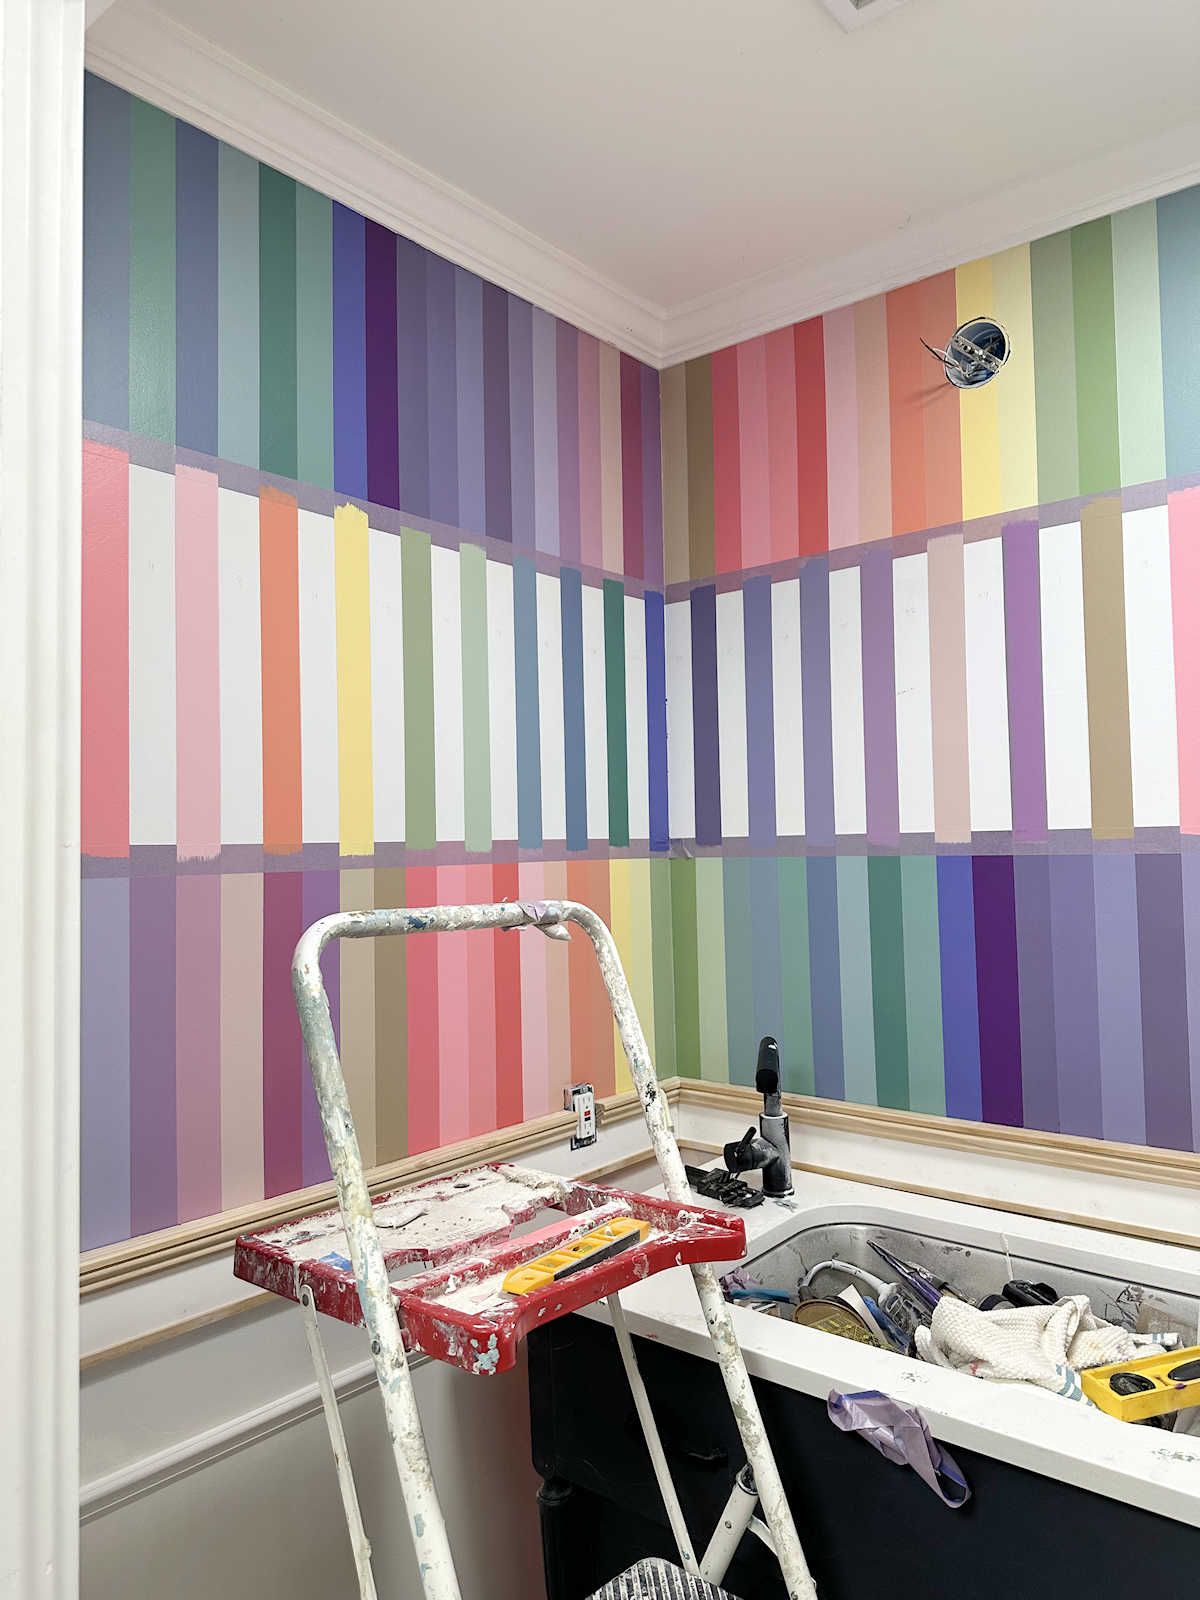
Another concern that I have is that in some areas, the texture of the previous design, where I taped off the design to paint it onto the wall, is showing through. I know it’s kind of hard to see it in a photo, but it’s noticeable (to me) when standing in the room.
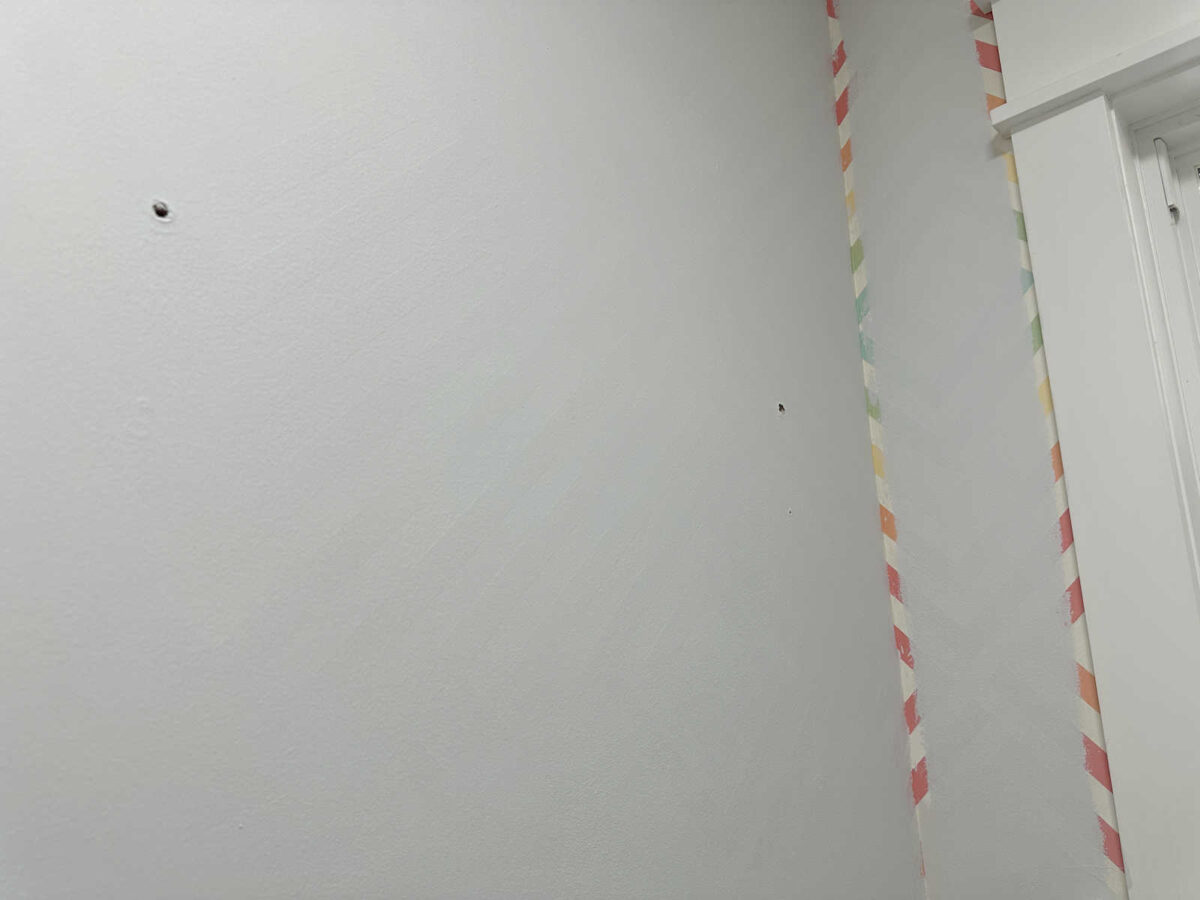
If I were putting up a thick wallpaper, like the grasscloth I used in the bedroom, that amount of texture wouldn’t concern me at all. But the wallpaper going in this room is much thinner, and the last thing I want is for that texture to show through. So it looks like some of these areas are going to need more sanding and then more primer.
I still need to do all of the cutting in with the primer. But in the meantime, I have to say that I kind of love this look. 😀 I wish I had a room where I could do a design like this. I think it would be fun to paint a room a solid color, and then find a fun, colorful washi tape to outline the walls and windows. I’ll have to file that idea away in my inspiration folder.

In hindsight, I wish I would have just used the shellac-based primer from the start. These walls already have two coats of water-based primer, and the design is still showing through. And the part with the Sharpie marker has three coats, and that’s still bleeding through. This would have been done by now had I just used shellac-based primer from the start.
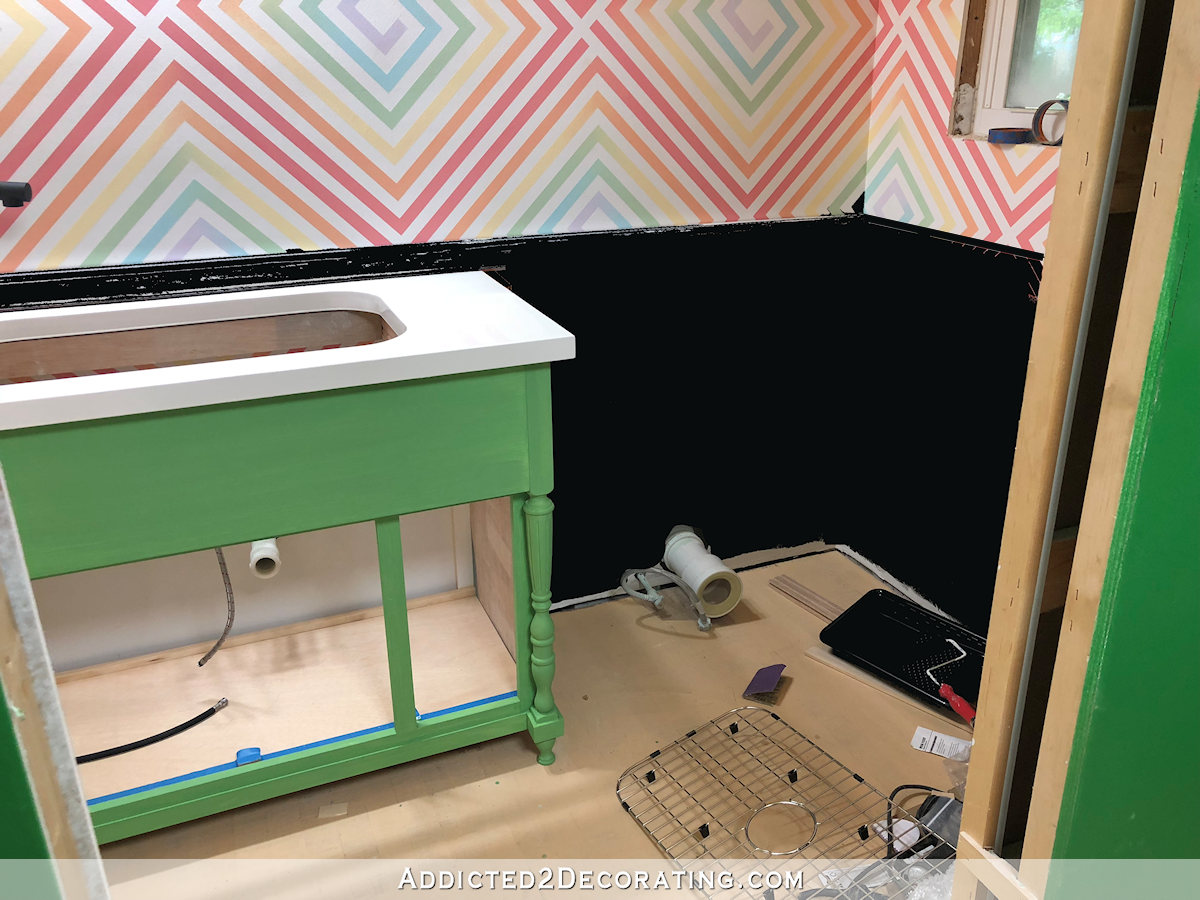
In other news, I’ve had questions about the faucet and other black metal elements in the room. I do plan to swap the faucet, towel ring, and toilet paper holder for gold or brass. I’ve never loved this faucet anyway, and I don’t want the black fixtures anymore.
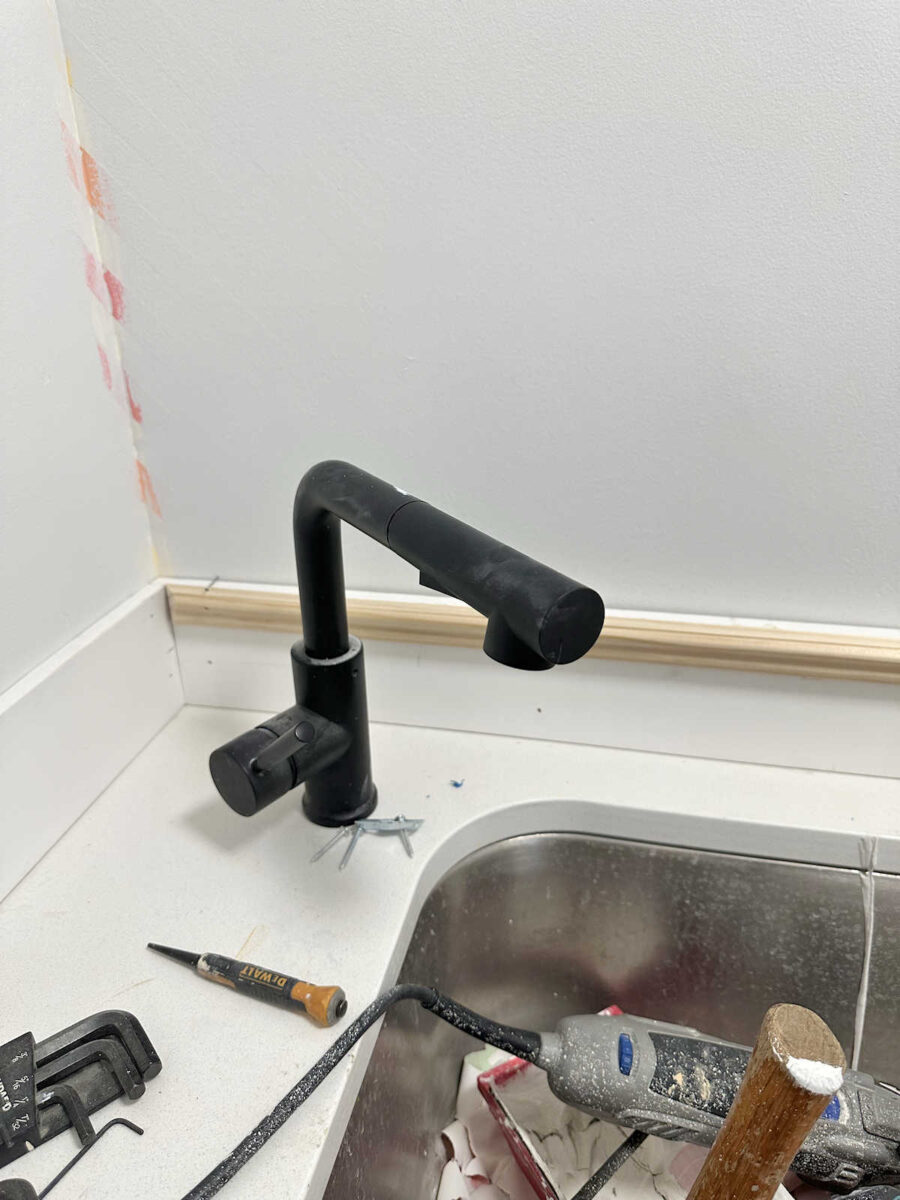
I chose the black back when the back entry of the studio had the black and white floor design and the bold green walls. But now, my studio has all gold/brass, and I think the black is way too harsh for this room.
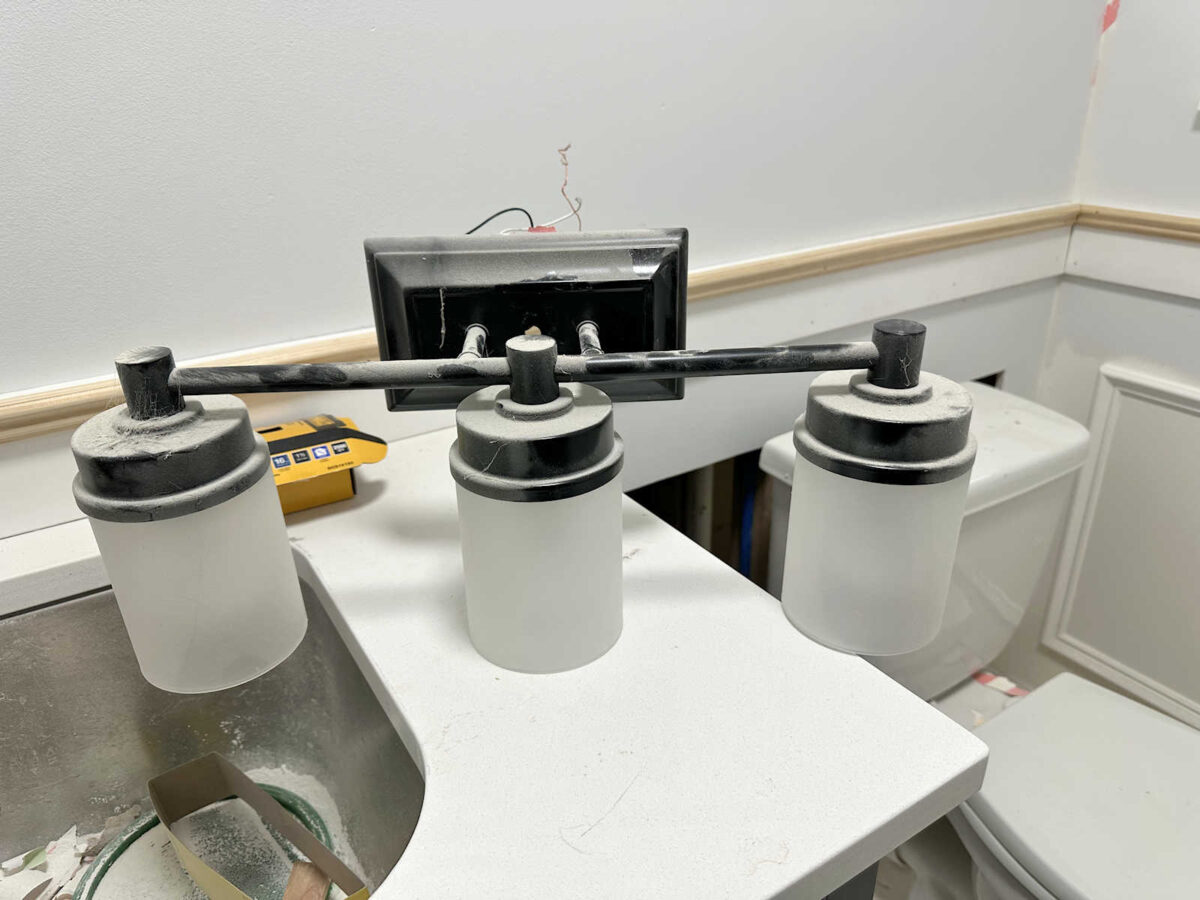
But because I don’t want to spend more money than necessary, and I do like this light fixture, I think I’ll just paint it (after giving it a good cleaning) and reuse it.
So there’s progress, but it’s been slower than I had hoped. There’s definitely a challenge when painting crazy designs on a wall. When you change your mind and want to paint over it, you have to deal with textures left behind from the painters tape and hard-to-cover colors. Shellac-based primer would have made this so much easier, but then you do have to deal with the really strong smell. I was hoping to avoid that, but it looks like I’ll need to mask up, open the doors and windows for good air flow, and just get it done.
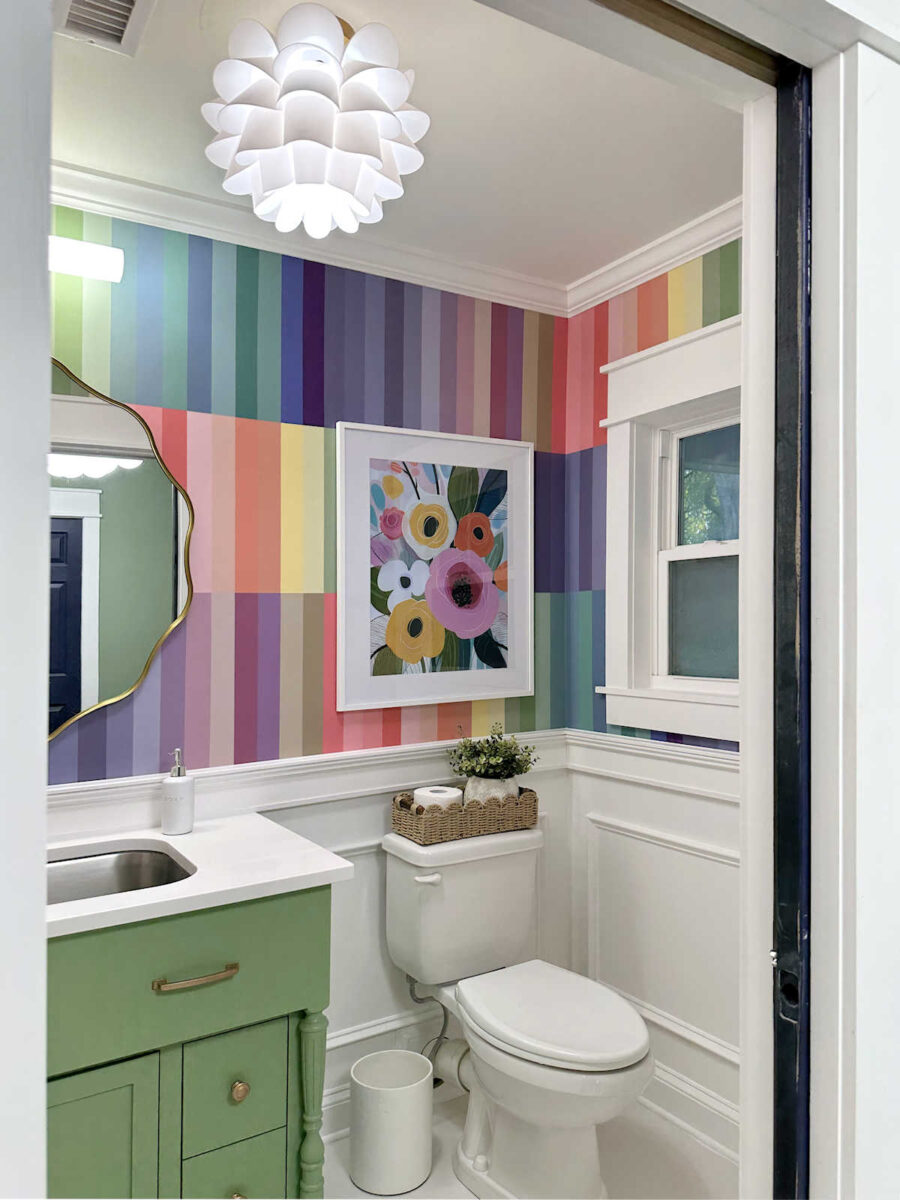
I’m so close to being able to put the wallpaper up. That’s the thing that’s motivating me right now. I need color in this room ASAP! 😀
More About My Studio Bathroom
see all studio
bathroom diy projects
read all studio
bathroom blog posts

Addicted 2 Decorating is where I share my DIY and decorating journey as I remodel and decorate the 1948 fixer upper that my husband, Matt, and I bought in 2013. Matt has M.S. and is unable to do physical work, so I do the majority of the work on the house by myself. You can learn more about me here.
For the outlet, we had one that hit similarly in our wall treatment. We added trim so it matched the thicker portion of the trim. So there was a little bump up where the trim just went completely around the outlet. For yours I would do similar, keep the outlet flush with the lower portion and run the trim (the unpainted wood piece in the photo) up around the outlet.
I was coming here to say the same thing.
Could you rotate your outlet to be horizontal instead of vertical?
The outlines look like Fruit Stripe gum! Best gum but flavor only lasts 30 seconds! LOL
Curious if the plumber been scheduled to repair the toilet?
I’ve wondered that also.
Can you just bevel the edges of the trim to where it meets the outlet at the same level as the beveled edge of the trim? Looking forward to seeing this room underway (and finished). The wallpaper pattern is growing on me!
how about turning the outlet sideways and just below the top trim. I wouldn’t think that would require much touch up as it would be in the wood not above in the sheet-rock.
You’ve got this. As for your injection of color, go stand in the master bedroom foyer and take it all in…and breathe. I’m with you on boring and bland, there are over 24 million colors here on planet Earth and some folks think beige is where it’s at, and that’s cool if you really like beige. But life is too short for no color. Have fun, I thought you could frame out the outlet with some of the molding that has been ripped down and make a smaller version of the chair rail, just a thought.
Cheers to you, Matt, and the Fur Babies!
The current stripe “trim” around the corners reminds me of the old Fruit Stripe gum with the Zebra mascot. That would be a cute look to try one day!
To trim around that outlet, put the outlet cover on, then miter the trim pieces to fit right up to the edge of it (so it diminishes instead of an abrupt end). When you’ve got it installed, take the outlet cover off to paint.
Instead of more sanding and priming, can you use a heavy duty liner under the wallpaper?
Can you turn the outlet sideways? You would probably have enough wire to do that without ant electrical work.
I love the idea of a solid colored room with washi tape – that would be really fun. I’m really loving your pictures now, even though I see the work ahead of you. I can’t wait to learn more about how you work with the issue of the trim and outlet.
Kristi ~
Why is the outlet so close to water? It should be moved purposely, then you won’t have to decide how to trim the outlet out. Also, it seems the plumbers should have fixed the toilet before all your hard work, therefore, it won’t get all messy and dirty. I’m hoping it won’t take much to fix or replace it.
The wasi tape trim is funky! In a good way. I’ve seen ribbon used as trim on walls, kind of the same concept/idea.
Check out the below website as Sarah Fogle stated “After tiling the new kitchen backsplash, I needed the outlets to be flush with the wall again. Here’s how to extend them and keep them snug.”
https://www.uglyducklinghouse.com/dueling-diy-extend-fix-wobbly-outlet/
Just start the trim on the other side of the outlet and go to the corner. You couldn’t go right up to it because you have to put the cover on the outlet. Wallpaper the cover and stick it on there and continue with you trim as desired.
You could always use crime scene tape in your workshop!
Is there a reason why the flat MDF moling can’t be larger and finish higher so that the entire outlet is surrounded by the trim? Like have a 6 inch MDF mouling instead of a 3 inch one? (I’m throwing random sizes here but hopefully you get the idea…)