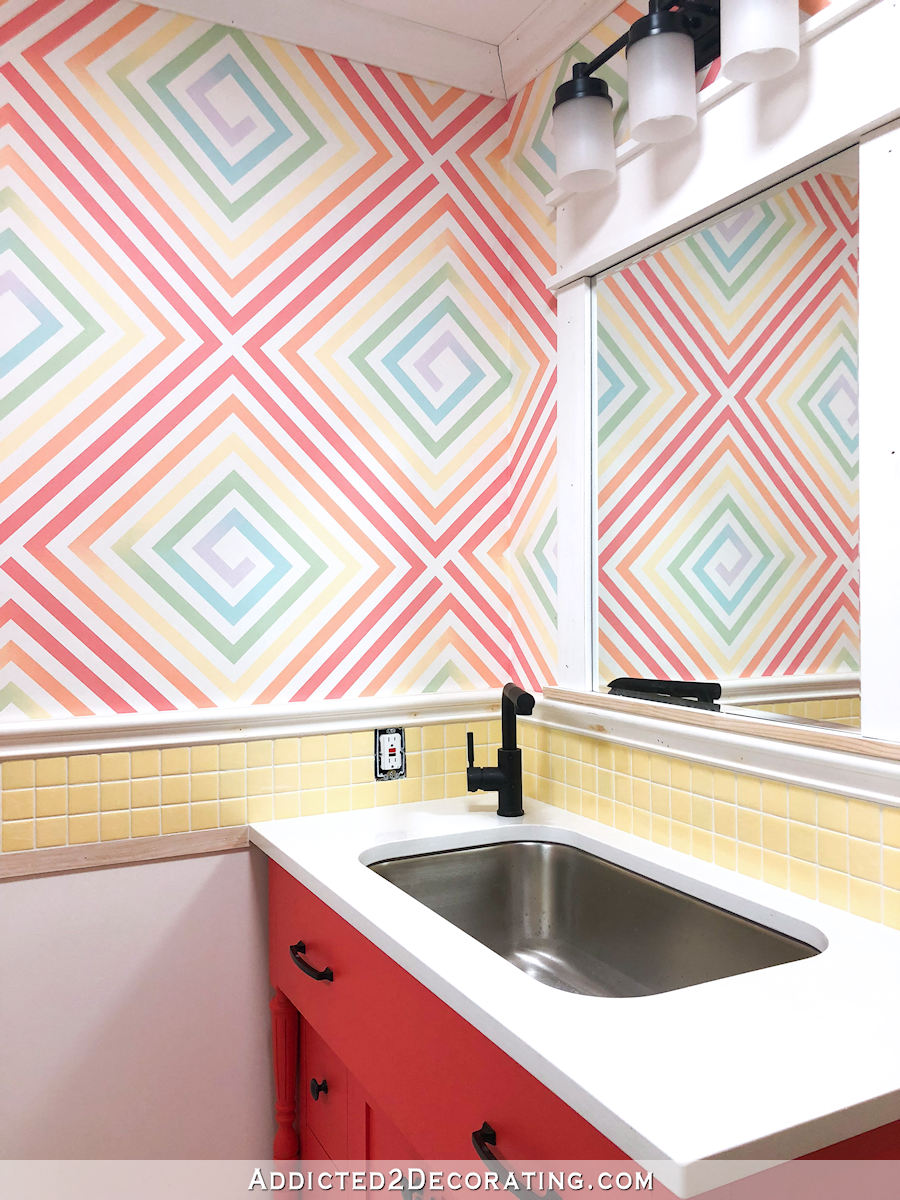
Bathroom Wall Progress (And A Multi-Color Ombre Spiral Square Demonstration — VIDEO)
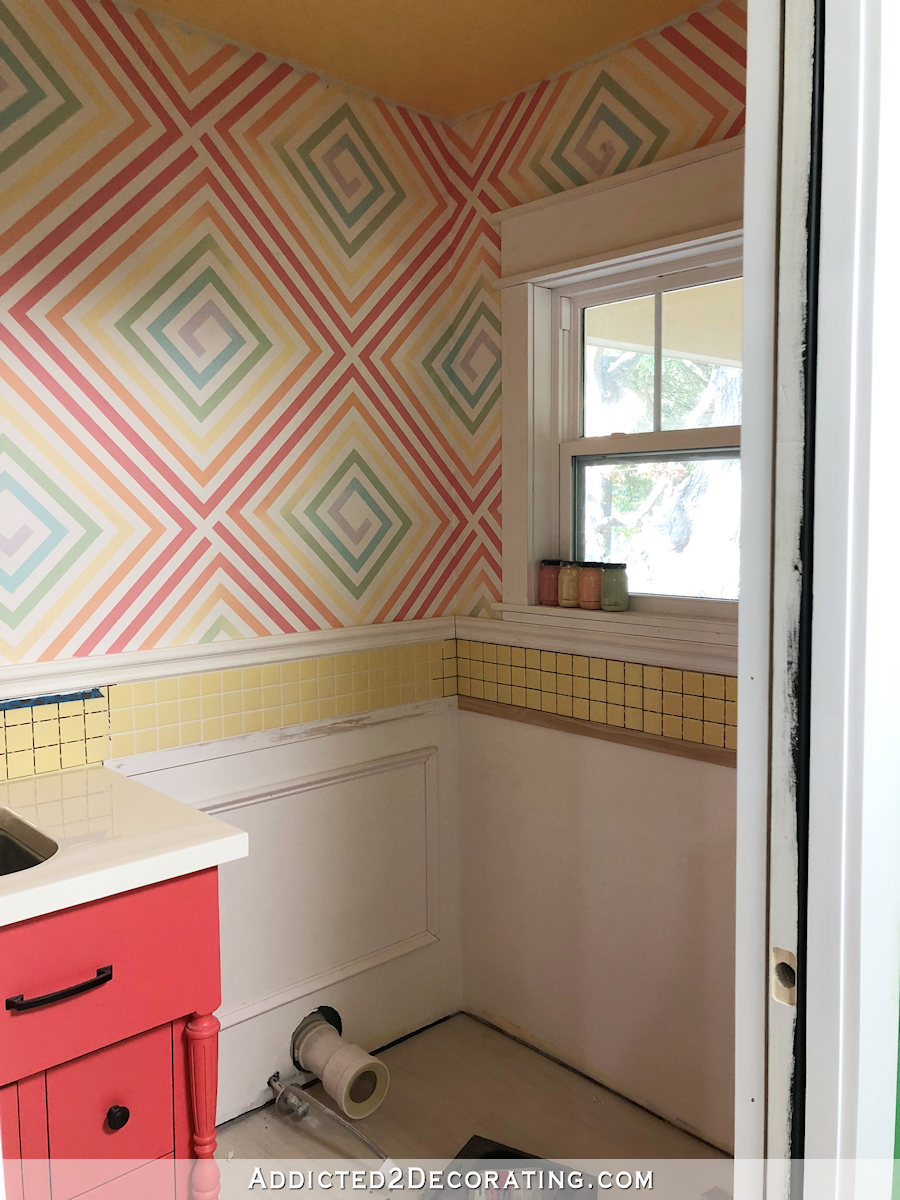
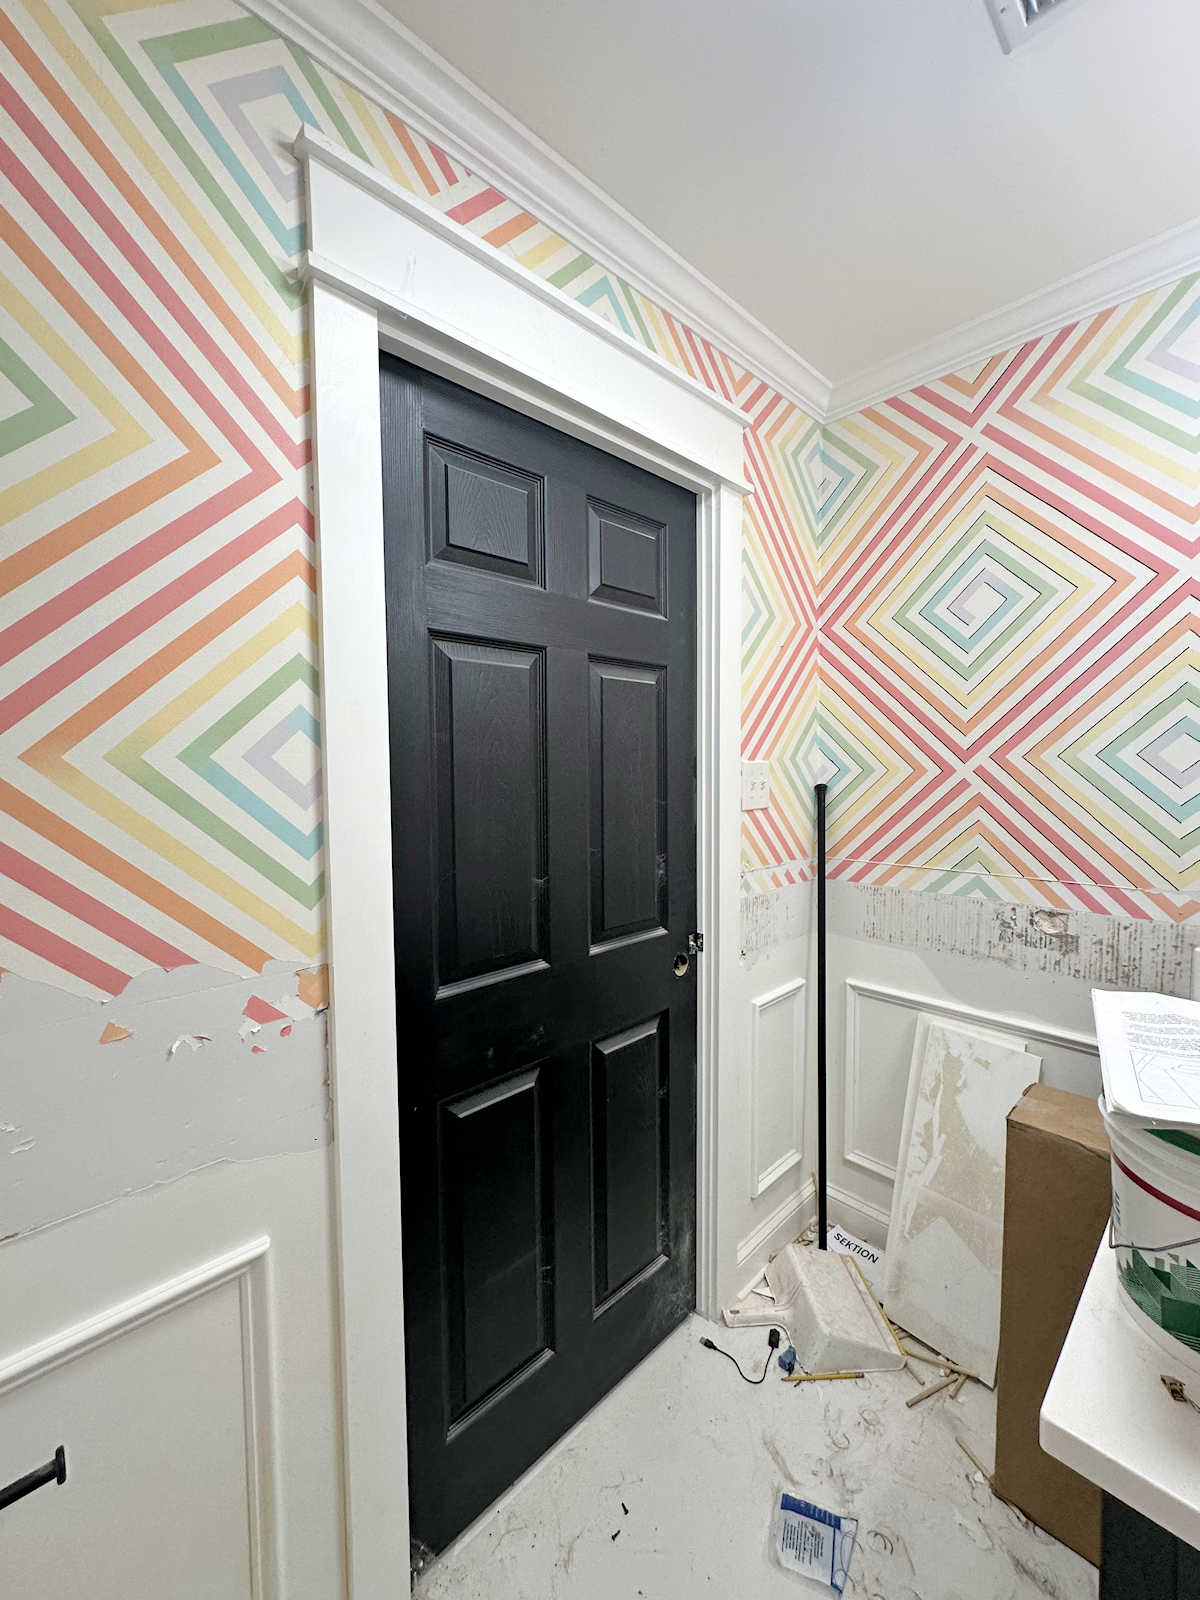
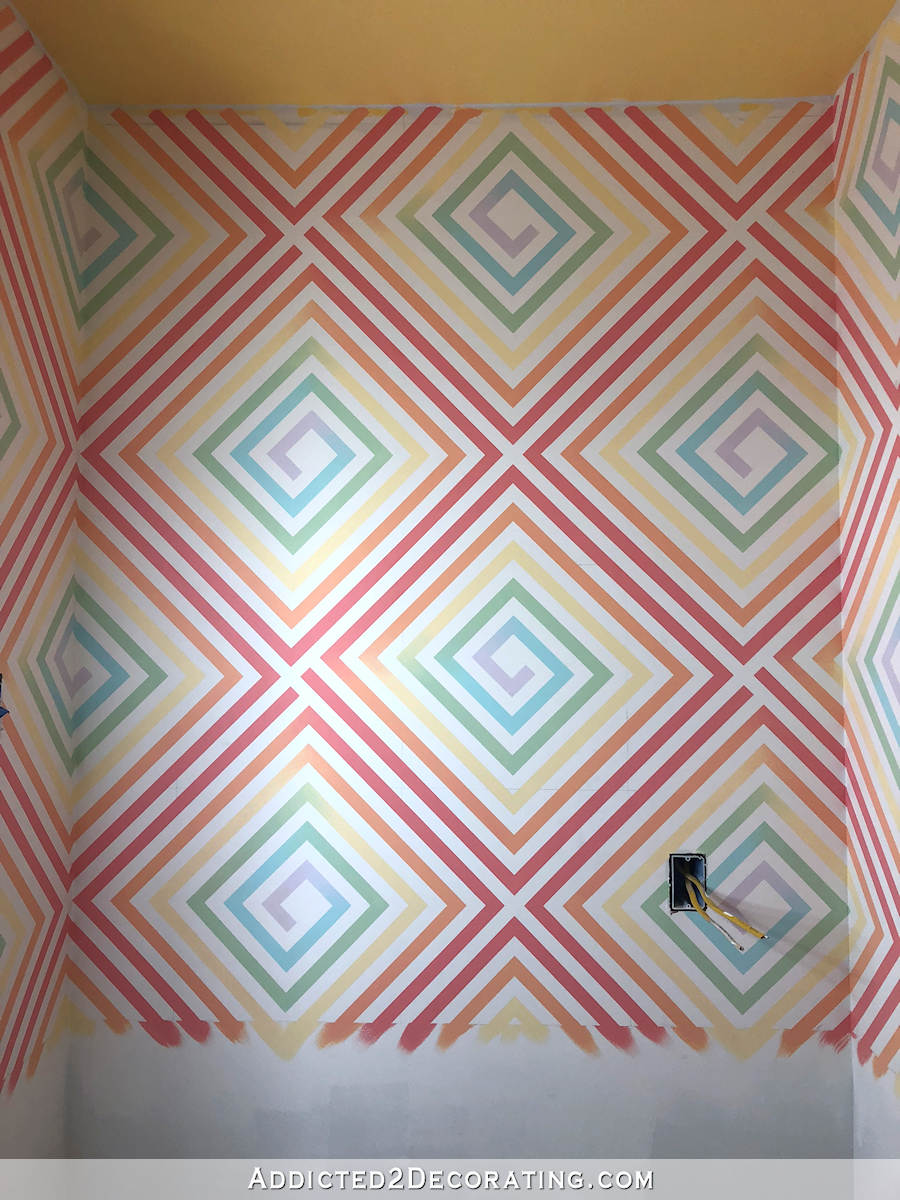
I finally made myself mix new paint colors for the section of my bathroom wall that I had left unpainted for some unknown reason. I’m guessing that I ran out of one of the colors, thought to myself, “I’ll finish up tomorrow,” and then forgot and convinced myself that the walls were finished since that section of wall isn’t visible from the back entry. And now, it’s five months later, and I’m just now getting around to finishing up that small section of wall.
I’ve already written a post with with the step-by-step instructions for creating this walls design, which you can find here…
But since I had to mix all new paints to finish the wall, I wanted to test out the colors on a scrap piece of drywall before putting them directly on the bathroom wall. Since I was doing this test design anyway, I thought I’d do a video and show y’all how I created the design from beginning to end.
You can check it out here…
Having trouble? You can click here to watch on YouTube.
As it turns out, all of my colors were spot on (or close enough 😀 ), so hopefully I can get the walls finished today. The bathroom is so close to being finished! I know I keep saying that, because it keeps being true. But you know how it is. All of these finishing projects just take so long!
It really is close, though. And after this bathroom is finished, I think I’ll tackle the following projects in this order:
- Finish the second studio work table.
- Make the pink draperies for the living room.
- Build the studio cabinets.
Sound like a plan? It’ll be a diversion from the studio for a bit, but I’m very anxious to get those pink draperies done! And I’ll need my second studio work table in order to make that project easy. For now, my excitement about pink draperies, which I’m using as an incentive and reward for myself upon completion of the bathroom and table, is keeping me focused and motivated. We all need those breaks from the drudgery to do fun and exciting projects, right? 🙂

Addicted 2 Decorating is where I share my DIY and decorating journey as I remodel and decorate the 1948 fixer upper that my husband, Matt, and I bought in 2013. Matt has M.S. and is unable to do physical work, so I do the majority of the work on the house by myself. You can learn more about me here.

Perfect plan. Diversity along with the dangling of the carrot (pink drapes) leading you on to the finish line.
Good luck with the bathroom finishing projects. Your reward will be showing it off. It looks great so far!
The wall is amazing. I read the post about how you did it, but this video makes it seem less daunting.
Hey Kristi!
Have you given any thought to just buying basic cabinets and then making them your own? My husband is a carpenter and when we redid a cabin we owned, after much thought and looking at the costs in time and money of hand built cabinets vs store box he decided to by stock cabinets. We then tweaked them to make them gorgeous! Now, I’m not sure he will ever go back to stick built again! Just a thought…you work so hard and everything is so beautiful that you do! I always look forward to your blogs and my husband who has been building for 40 years is also impressed when I show him your projects!
I would love to see pics of what your husband did to the stock cabinets, please!
WOW – now that I see the video, I am even more impressed with your wall project! I love it, but I know I could NEVER do this – SO much work. But yes, quite the reward – the results are beautiful. I’m so enjoying seeing this room finished! Another Kristi masterpiece.
Fantastic video. I would find it hard to stay on track with the taping and painting but I guess you did enough squares that you might be able to do it in your sleep. Very impressive.
There is NO WAY i would have the patience to do this, even in a small room. More power to you.
An outstanding video! The results are beautiful.
I also think that you should consider selling this design as a wallpaper.
I had the same idea—there has to be people that would love to have this but would not ever create it for themselves!! Isn’t it crazy that something that takes so much time and attention to detail is finished in just a little while when you’re actually painting it?
Can I get an ‘Amen’ for pink drapes!?
Fabulous video. Confusion would definitely rein if I tried that.
I would go nuts doing that design! Good for you! I think you need to do the drapes to satisfy the creatives!!! But I would hope you will get outside and finish the front yard projects before winter. The window boxes could wait if you wanted, but I would love to see the stone done around the porch, the porch for the studio finished and maybe the shutters all installed. Oh and get the monster bush pulled out too! That way you can see if any of it pops back up in spring! Do your cabinetry in the winter!
I just realized you’ve done the shutters. Duh. I totally thought they were finished but not hung for some reason!
SO satisfying to watch the tape removal. Nice progress!
Loved the video!
Your commonsense approach to doing things makes me wonder why I don’t think of these things when I do projects. I’ve decided I could save A LOT of time if I just never did anything before I saw how you would approach it or something similar. Kudos. Great job!
Would also like to have seen how you replicated your paint colors. Having done some of that, I know it can be tricky. Wondering if I am approaching that less than efficiently as well.
Great job! You have done so much with a small room. Looking forward to seeing your cheerful finished bathroom.
Kristi – What brand of painter’s tape did you use?