Music Room Progress (and What’s Left To Do)
I feel like my music room is really starting to come together, and I’m getting so close to having the room finished! Of course, when I say “finished,” I’m just talking about the actual room itself — walls, floor, ceiling, bookcases, door casings, and doors. I’m going to hold off on the decorating, because I want to finish all of the basics in the dining room and entryway before I start decorating. Otherwise, my decorated music room would just get dirty with all of the sanding I still have to do in the dining room and music room.
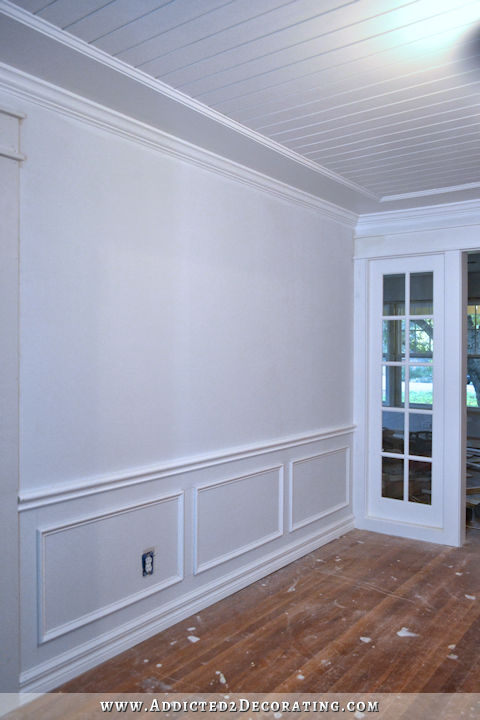
Anyway, as I mentioned yesterday, I got the chair rail, picture frame moulding, and baseboards installed on the wall on the right.

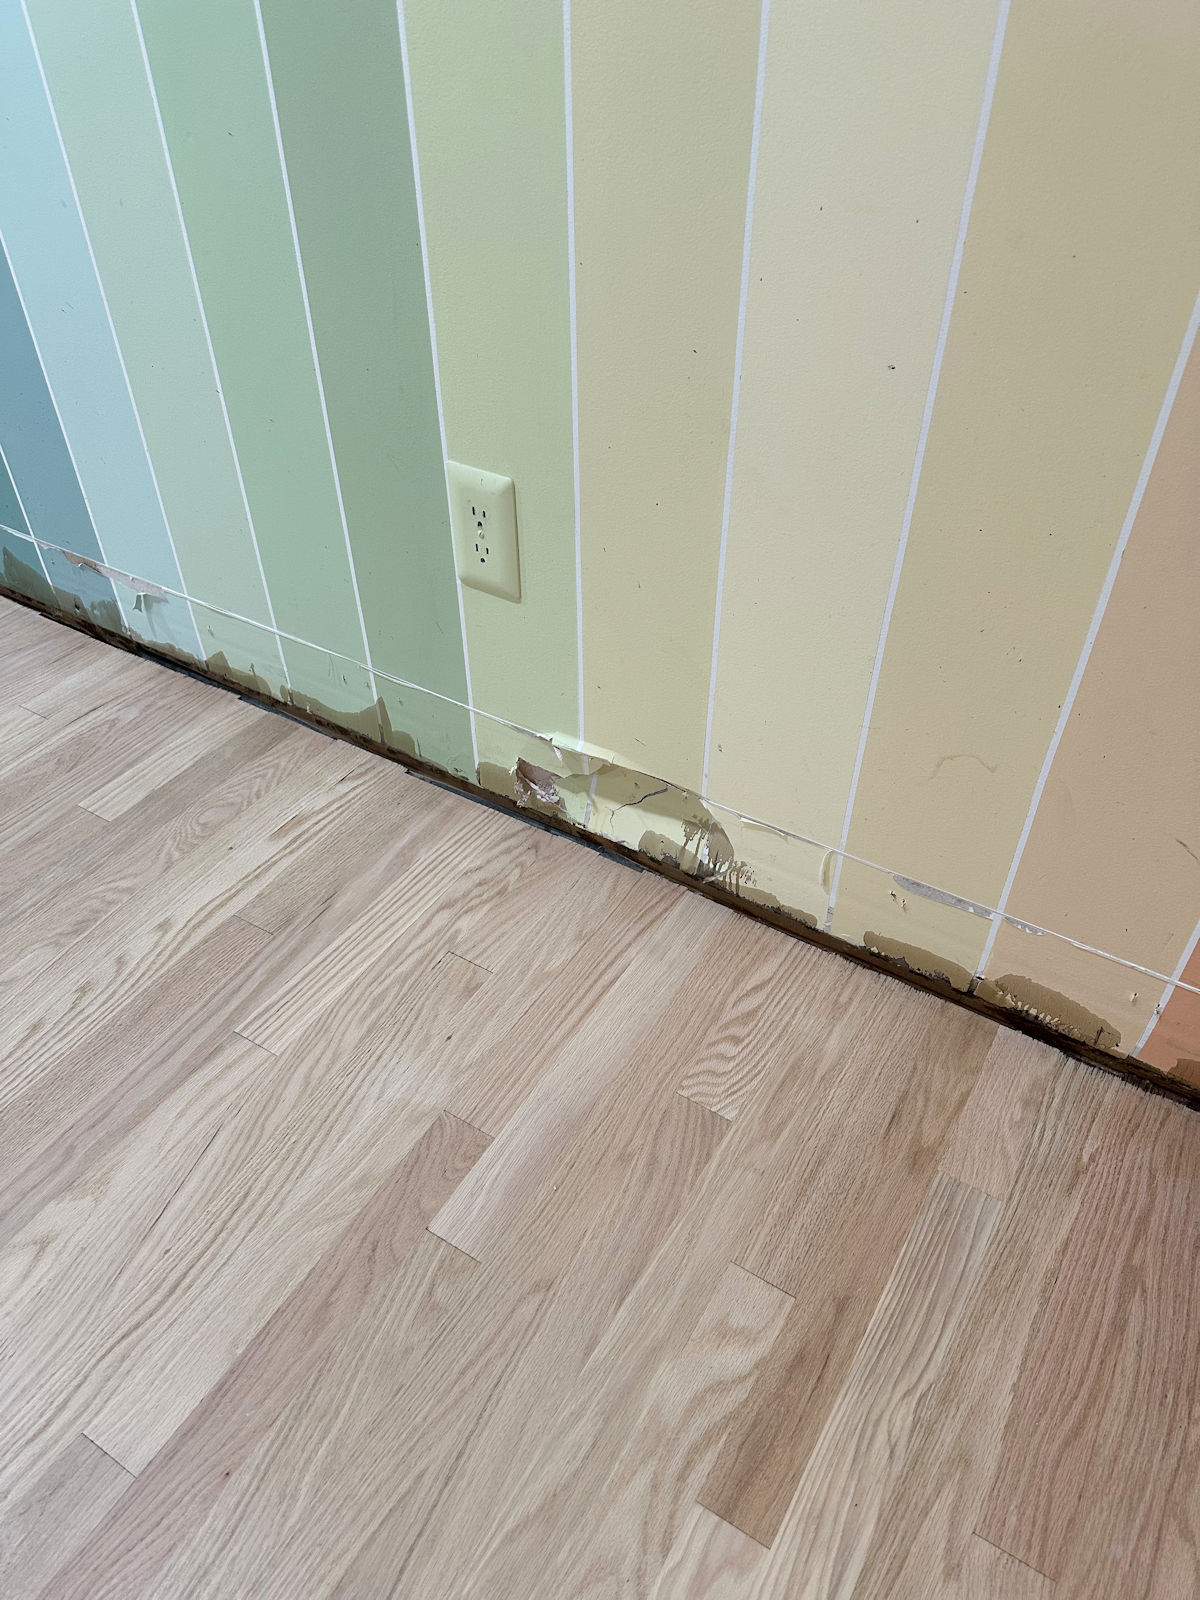
The wall on the left was a lot more work because I had to install the casing on the opening into the hallway. But first, I had to patch more of my hardwood floor. If you’ll remember, I widened this doorway about 12 inches, so that left this messed up floor that I had to deal with.
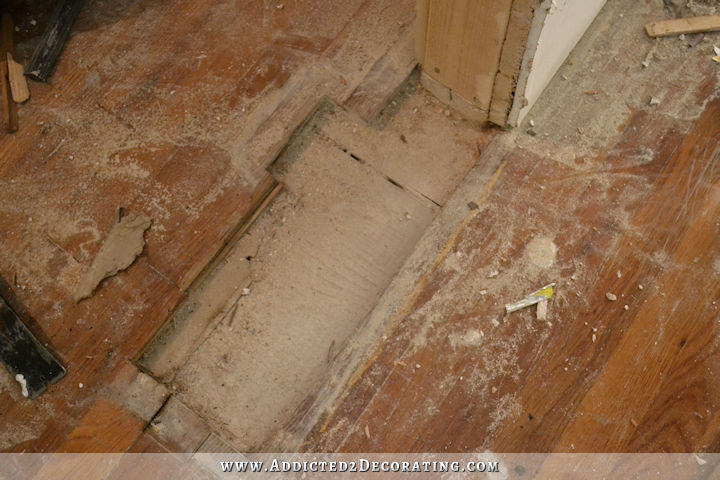
I only had two pieces of the original hardwood floor left from what I removed from the hallway bathroom closet, so I used those and then had to use to new pieces. Those two pieces will have to be stained before I add the Waterlox, or they’ll stand out like a sore thumb.
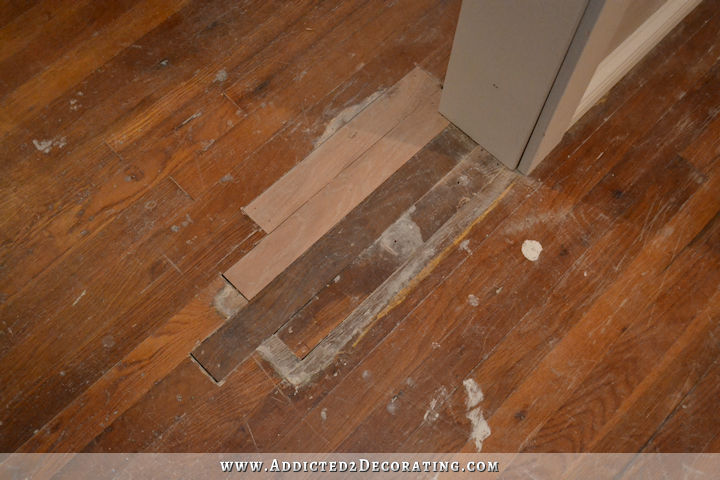
It’s not pretty at all right now, but it’ll look just fine once I use my awesome red oak wood filler, sand it all down, stain those two new pieces, and Waterlox everything.
With the floor patched, I could finally add the door jambs and casings to the opening, and then get started on the trim and moulding on that wall.

(FYI, for those who were confused yesterday about exactly where I was going to be building the hall tree, it’s going to go right there in the hallway where the credenza (that the ladder is leaning on) is currently sitting in the photo above. It’s not going in my entryway. My entryway is on the other side of that French door panel.)
I got all of the trim installed on that wall except the picture frame moulding. And you’ll notice that I also forgot to prime the wall before installing the trim.
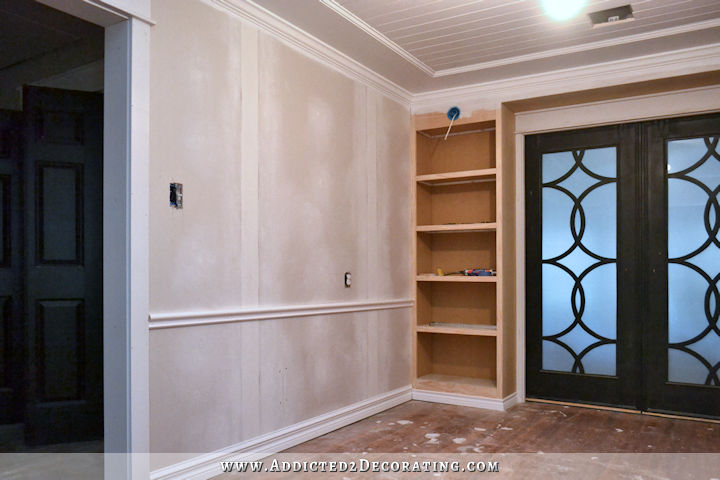
And the bookcases are still missing two pieces of trim each around the bottom. But installing the rest of this trim should go very quickly.
When I look at the room, it seems like I’m almost finished. But when I look at my “to do” list, I realize just how much more work is needed, and it’s all of those finishing projects that take so long.

So before I can call this room finished for now, I still need to:
- paint a second coat on the ceiling and crown moulding,
- wood fill and sand the left bookcase,
- caulk the bookcases,
- prime and paint the bookcases,
- repair the doors where the bottom trim was removed, and touch up paint,
- install the rest of the wall trim,
- wood fill and caulk the wood trim,
- paint the walls,
- paint and install the lights on the bookcases,
- paint the door casings,
- wood fill and sand the patched floor (and stain the two new boards),
- clean, spot sand, and add a coat of Waterlox to the floor,
- make or find a ceiling light,
- install outlet and switch covers.
And I think that’s it! 🙂 Then I can turn my attention back to the dining room and entryway, and hopefully get all of the major projects done by the end of this year. That’s the goal, at least!

Addicted 2 Decorating is where I share my DIY and decorating journey as I remodel and decorate the 1948 fixer upper that my husband, Matt, and I bought in 2013. Matt has M.S. and is unable to do physical work, so I do the majority of the work on the house by myself. You can learn more about me here.


Kristi, It’s just beautiful! I am so excited for you and Matt. I can see it all just like you’ve described, and its amazing!
Kristi — it is all beautiful and you must just go in some of the rooms and grin at how great it all looks and that you did it all yourself girlfriend.
Love it!!!!! Now that the wall(s) are all but done, I was wondering if you could work your Photoshop magic and show us how the black and stenciled wall would look?
Definitely! Although I keep thinking that the stencil will be too much in that room. But I’d still like to try it and see.
Just a crazy thought, dont laugh…what about various size random gloss on matte polkadots? I think they could compliment the lighthearted feeling of the piano and not compete with the ceiling like a trellis stencil :).
What an jaw-dropping experience it would be for the past owners of your home 😀 Looks really nice!
Barb, I was thinking the exact same thing!!! The previous owners would be amazed at the transformation of this house! I’m always excited to read Kristi’s blog and see the gorgeous works she performs in this house. She is certainly an inspiration. Great, as always, Kristi!!
Ha! Same thought here – and I also wondered if they were reading her blog before selling to her, and whether they were thrilled to sell it to her… (I think they were clients or something? but not sure)
You are just so darn talented! Could you tell me if your baseboard is one or two pieces? How about the chair rail? What size molding did you choose for the picture framing on the lower part of the wal? Lots of questions as we have begun some redoing on our house! Thanks so much for your great posts and wonderful explanations of how you are doing what you do!
The baseboard is two pieces — a standard baseboard with a base cap moulding on top. The chair rail is one piece, and I chose the chunkiest chair rail moulding that the Home Depot here carries in stock. For the picture frame moulding, I used base cap moulding.
You continue to amaze!! Love your vision!
I absolutely love it. It will really allow your piano to take center stage. Bravo, Kristi!!
It looks amazing! I can really begin to see your vision.
Beautiful!
Looks amazing! Did you already decide on a light fixture? I can’t wait to see !
I had planned to make one inspired by a light I found on the Coleen & Company website, but now I’m thinking it might be too much for this room since the room already has so much going on. I think the room might need a very simple light.
You are amazing….beautiful job. Can’t wait for you to decorate your the space.
I cannot believe how much you have accomplished. You have done an awesome job. It looks amazing and will be a truly beautiful room. You are so talented. Congrats!
Kristi-If this were my house, I’d want a cozy chair in front of the left bookcase. Why, you ask? Because I’m a cook. I would want my cookbooks in the bookcase to the right. And good reads to the left. So after I get something cooking/baking/roasting, I’d have a cozy place to curl up with a GOOD book!
I love this design. LOVE IT!
As usual for your projects, this looks great before it’s even finished! I’m loving the walls with the picture moldings and the doors/bookcase combination is elegant and striking. Can’t wait to see the lighting you install here and of course how you style these bookcases. This will be a lovely, inviting room.
It looks amazing! The “finish” list looks long but many of those projects won’t take you very long.
gorgeous –
Your remaining “to do” list is so very realistic on the true nature of taking on projects like this. Those are the things that can cause these projects to seem to endlessly “drag on”. But your steady plodding carefully breaks down the steps necessary to achieve the final result. Slow and Steady wins the race! Bravo on your diligent expertise!!!
You go girl!. What kind of ceiling light do you plan to put in the music room? Just curious and trying to picture the completed room.
I’m really not sure now. I wanted to recreate a light that I saw on the Coleen & Company site (that costs over $2500), but now I’m thinking it might be too much for this room. There’s a lot going on my little music room already, so I think I might need something not quite so attention-grabbing.
I’m not crazy about the planked ceiling fitting in with what all is going on but overall it’s very attractive. The rolling door solution is infinitely better!
Totally disagree. That planked ceiling is awesome and will fit in with other design elements Kristi is creating…like the planking on her fireplace etc.
Thinking of doing this ceiling treatment for a friend/client that has a swirly plaster ceiling right now.
Love Kristi’s vision and it will eventually come together.
I have to agree. Everything is beautiful, but nothing stands out. I think the rest of the room needs to be kept simple or it will be like a circus, lots to see but difficult to focus on one thing.
I can’t get over how wonderful that music room looks! Every single project you work on amazes me even more than the last one. You are an unlimited source of knowledge and inspiration to me. I really mean that!
I am so in love with picture moldings after seeing how gorgeous they look in your house. I’m even thinking I could install some myself with your step-by-steps. Thank you!
I know you want the black on top, but I can really really see the black on bottom. Can’t wait to see more!
Wow, what a difference the trim, chair rail and picture framing makes. This room is really coming together and it looks totally A-MAZ-ING!!!!! The excitement is really brewing up for the finish, and I can’t wait each day to see what you’ve achieved. Awesome work Kristi, as always!!
Loving it. That room is so pretty I would be happy to pull up a chair and sit there with a good book😊 Great job.
It’s looking great! And compared to some of your previous almost-finished to-do lists this one looks pretty short. That has to be a good feeling. Congrats!
JEEEEEEEZ LOUISE….I’m over here doing a SNOOPY DANCE! I’m so excited to see this room come together. It’s going to be FABULOUS!
Absolutely beautiful design and execution! I’m used to 9 ft ceilings in so many of the homes where I live, and often the normal 8 ft ceilings seem low to me. I was wondering if adding the planking and trim would cause it to seem even lower in this room, but curiously, it does the opposite. It’s as though it draws the eye up and makes the ceiling seem higher now! Does it do that in person, as well?
I don’t know if it makes it seem higher, but it doesn’t seem lower to me at all. Interestingly, the dark stained plank ceiling in my bathroom seems higher to me, and I would have thought that the planking plus the dark color would make it seem low. I was pleasantly surprised at how high that ceiling feels to me.
Brilliant. Absolutely brilliant!
Just have to say … I actually love that all white look going on! Wonderful work, Kristi; the final project will be amazing.
Kristi you work faster than anything which is amazing! Beautiful and I am so ex cited to see how is progresses! Love all the changes as thy are so much better tahn your first ideas!
Just wow. I really thing the overall effect is that the ceiling appears higher than 8 ft.
I LOVE this room. It’s turning out great.
Really beautiful!!!
Music room is looking very classy! I think that it would be just charming if you rethought your hand painted wall idea and put in your bird and branch stenciled design. That would be so great over the chair rail with the yellow piano and the white plank ceiling.
I am curious as to what the square hole is right between the bookcases. It isn’t for a light fixture is it?
I also have to add that the room looks much bigger now!
It’s the HVAC vent. I just removed the vent cover to work in the ceiling.
You are amazing, Kristi! That room is going to be beautiful when done.
I don’t think you’ve talked about it unless I’ve missed it, but what are you doing for the lights on your bookcases? I see the blue area on the outside, will you do a sconce style on the outside of the shelf or will it be something inside the shelf that lights up? Can’t picture how that one will work. I love the music room…especially the planked ceiling!
I’m doing little sconce on the outside. I got them at Lowe’s, and I should have them installed later this week.
Looks amazing so far!
So beautiful!! Thank you for letting us watch the progress- I’ve learned so much!
Good Luck Kristi!
You can do it! But if you don’t make it, that’s Okay too! Make sure to leave time to enjoy the holiday season also!
The bones of the room are beautiful – you are going to have so much fun doing the decorating!
Now that you have your pocket doors I can’t imagine this room any other way. What an incredibly creative idea I’m just in awe of what you are capable of! We have a small formal dining room off of the front door and instead of the usual arrangement we installed a wall of bookshelves and comfortable chairs for reading. Now we call it “the library”. I love the idea of making every room in the house functional, not just for show. Can’t wait to see what you do next!
Very nice change, I love this room!!
Good Luck!
Really spectacular, I loved it !!