Oh, What A Difference Some Trim Makes!
My rolling French doors are taking longer than I had expected. I spent several hours on Tuesday stripping the many layers of paint from the doors (I think there were about 8 to 10 layers of paint on them), and then I spent yesterday getting them all sanded, wood filled, and sanded some more. And then I was finally able to start adding trim to one of the doors.
Trim is always the fun part. It’s what turns a project from an amateurish homemade looking thing into a beautifully hand crafted piece. Trim makes all the difference in a finished product.
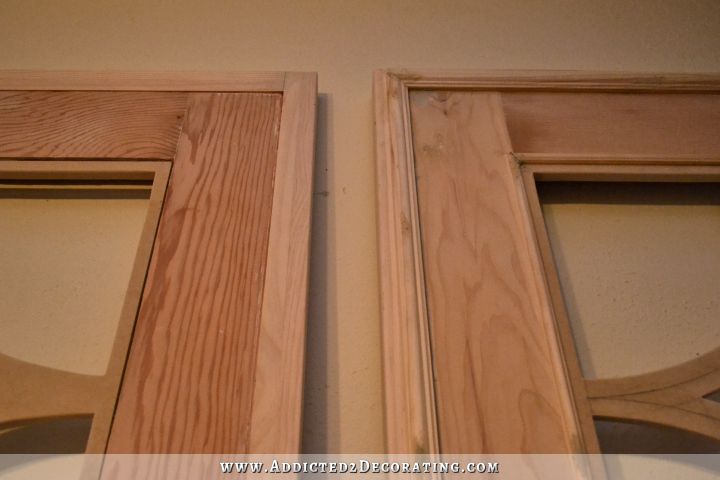
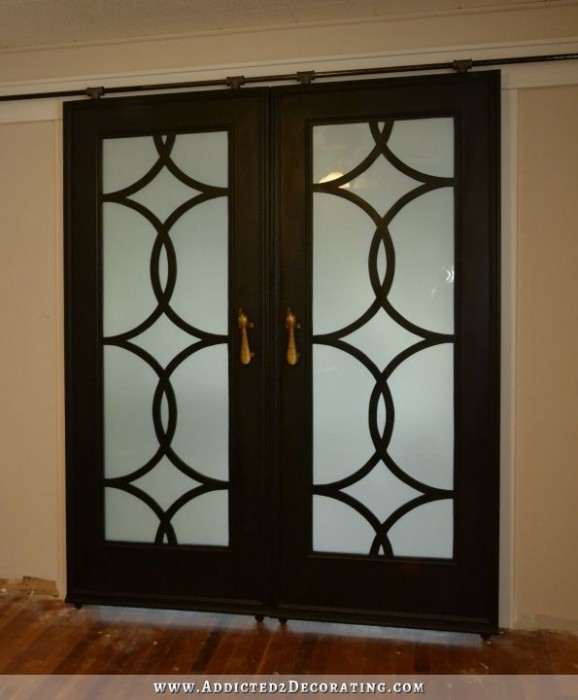
In the picture below, the door on the left hasn’t been trimmed out yet, but the door on the right has had three types of trim added.
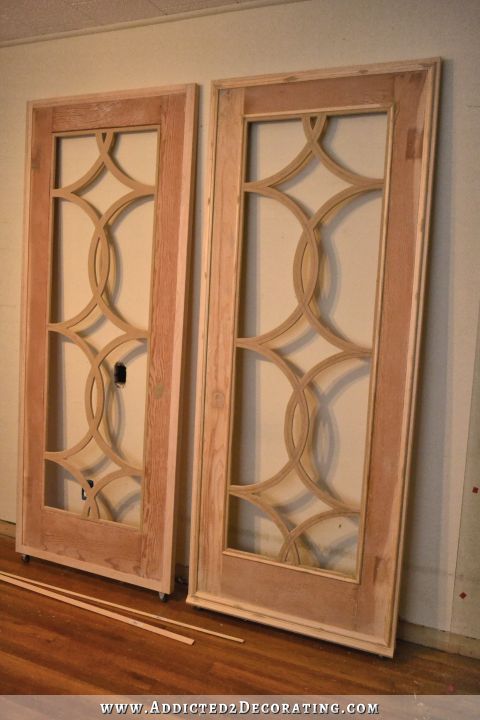
The untrimmed door has such a flat, thin appearance. The one with the trim has a much more substantial look (and feel) to it.
I added a thin 1/2-inch trim (called cabinet trim, and sold by the 8-foot piece at Home Depot) around the center fretwork panel, and then added a larger 3/4-inch trim (also called cabinet trim and sold by the 8-foot piece at Home Depot) around the inside edge of 1″ x 2″ lumber that I attached around the outside edges of the doors. (I still need to sand the nail holes and corners that have been filled with wood filler.)
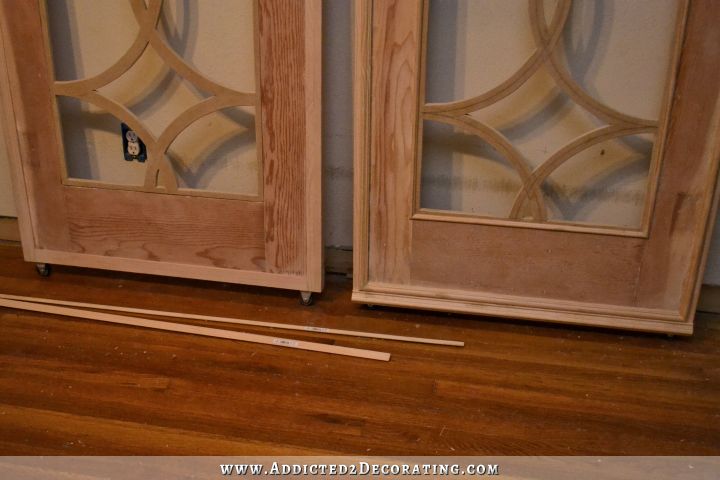
At the last minute, I also decided to add a strip of trim along the bottom of the door to cover up the casters a bit.
I love trim! And when I’m at Home Depot (which is at least four times a week) and I have a few extra minutes to spare, I love to browse the trim aisle and dream up uses for all of the different trim they have. It can be used in so many different ways, and can really add a touch of elegance to a room.
Of course, we’ve all seen trim used on walls, right? Picture frame molding is very often used in traditional
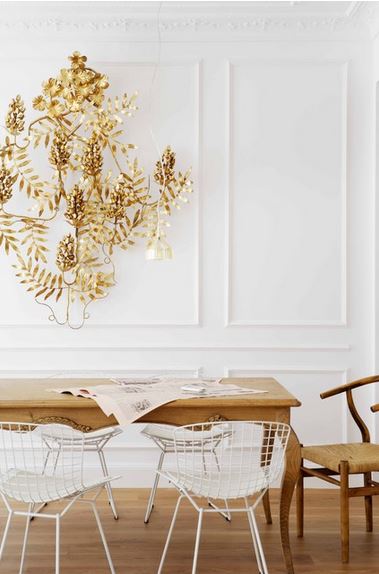
Contemporary Dining Room by Other Metro Interior Designers & Decorators Mikel Irastorza
That type of molding is very easy to add to a wall, and it’s also relatively inexpensive. All you need is a miter saw, a hammer and finishing nails. If you have a nail gun, then it’s even that much easier. You can easily add elegance to the walls of your room in a weekend by just adding traditional picture frame molding.
But if you think beyond the typical picture frame molding, board and batten walls, and other traditional wall trim, the possibilities are endless.
Just about any pattern you can think of that is made of straight lines can be recreated on a wall using trim from the hardware store. (Designs with curves are much more difficult, and beyond my skill level. I have yet to try bending wood.)
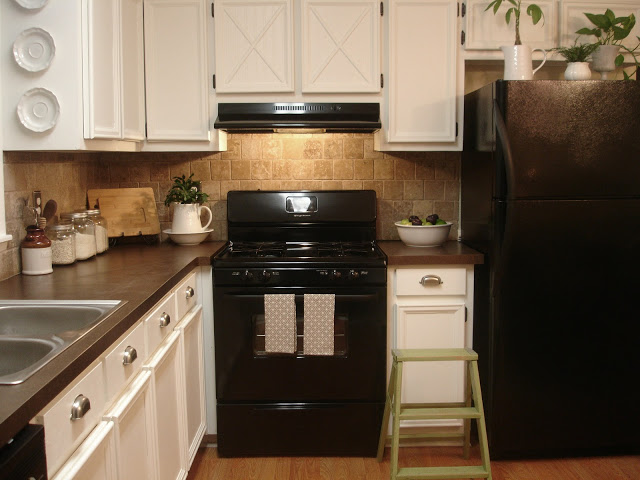
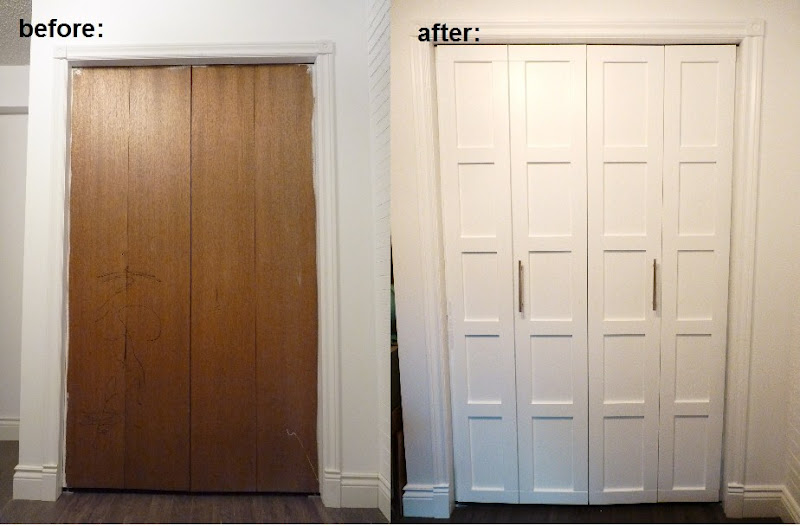
If you have some cabinet doors that are looking a little plain, they may just need some trim and a coat of paint to look brand new and completely updated. Brandi from Don’t Disturb This Groove completely changed the look of her kitchen using this method. Here’s what her cabinets looked like before…

And here’s what it looked like after she added trim and a coat of paint to the doors.
And even if your cabinet doors are looking just fine, sometimes it makes a huge difference to add trim to the actual cabinets. Remember, in my own kitchen, the main difference between these cabinets…
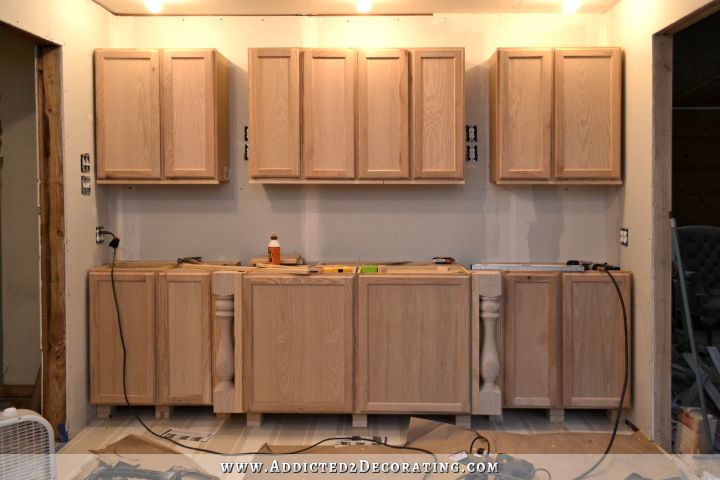
..and these cabinets…
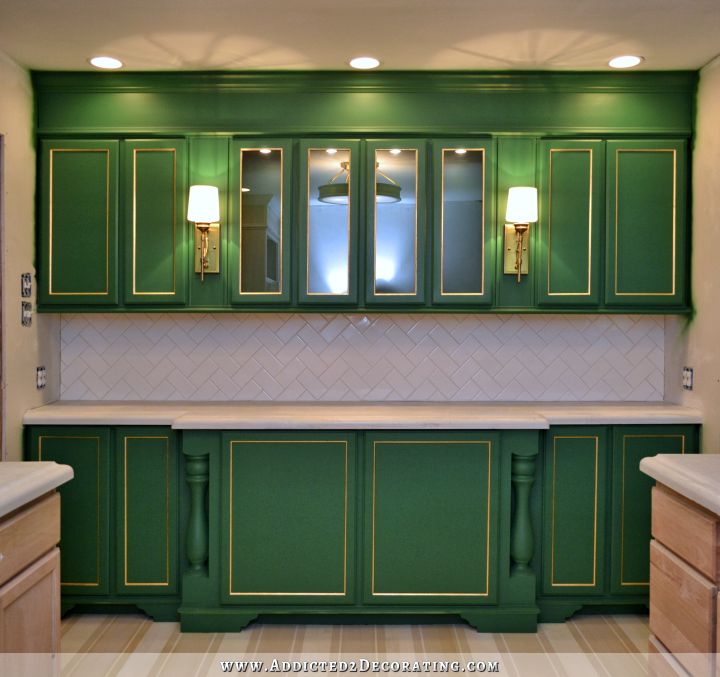
…is lots of trim and paint.
Have boring interior doors? Just add trim! Abby at DIY Design completely transformed her interior closet doors using trim, recreating the look of the shaker doors that she wanted but were out of her price range.
Or even just some very simple molding can create a very elegant look. This door from White Nest got a very simple treatment with thin molding. Here’s how the door looked as the trim was being added…
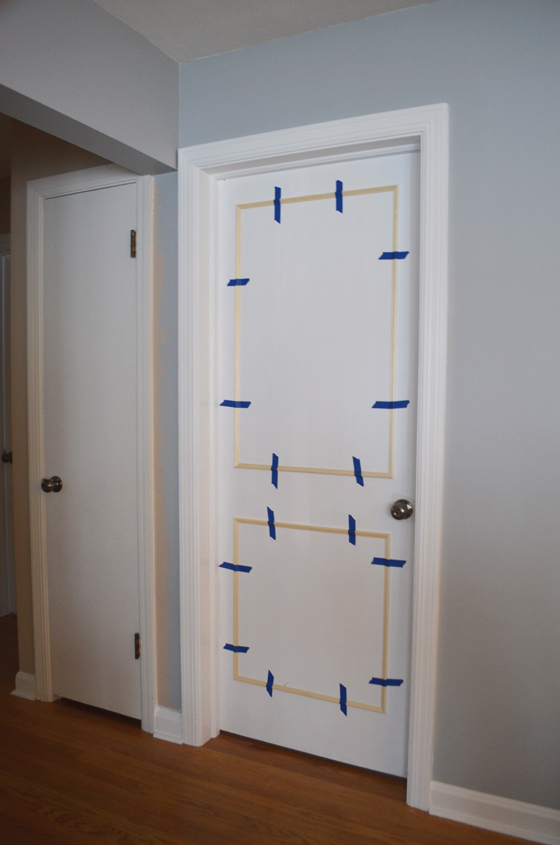
And here’s how it looked with a coat of paint.

It’s a very simple idea that really elevates the look of flat panel doors.
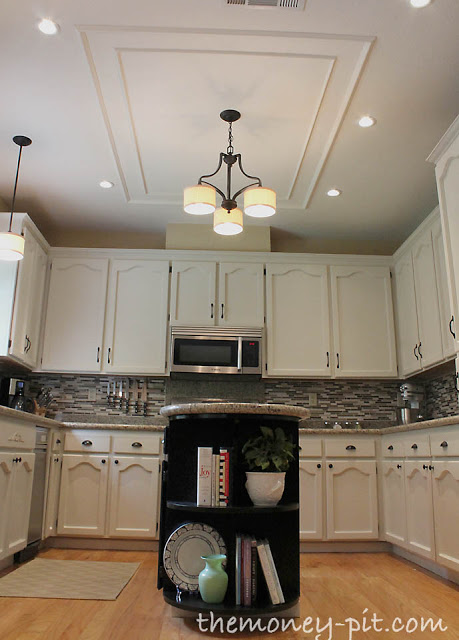
One area that I think most of us forget about is our ceiling, but adding just a very simple trim pattern to your ceiling can create a very big impact in a room. Here’s an example from a kitchen remodel by Kim at The Kim Six Fix.
Or you can add trim around the edge of the ceiling, which really makes the crown molding look much more substantial and dramatic.
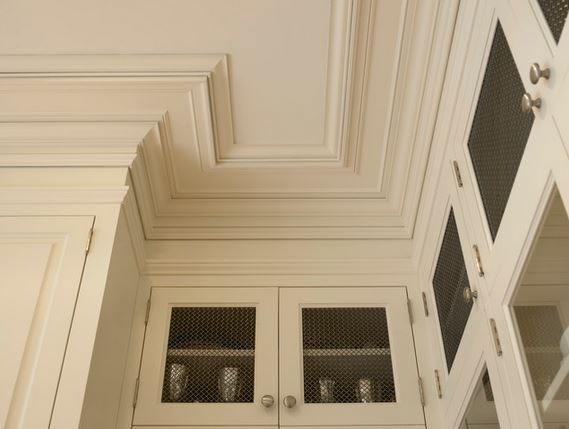
Traditional Kitchen by San Francisco Architects & Building Designers Gast Architects
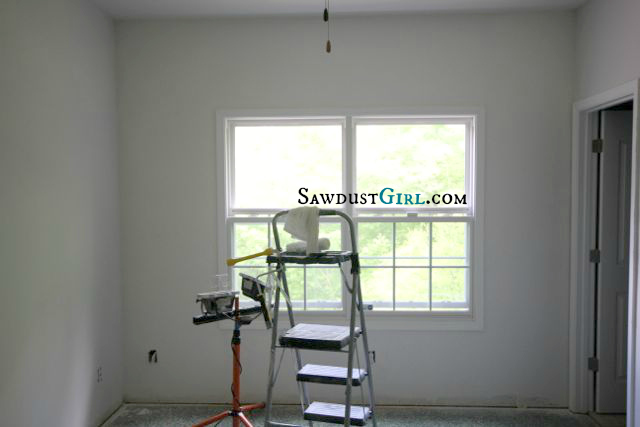
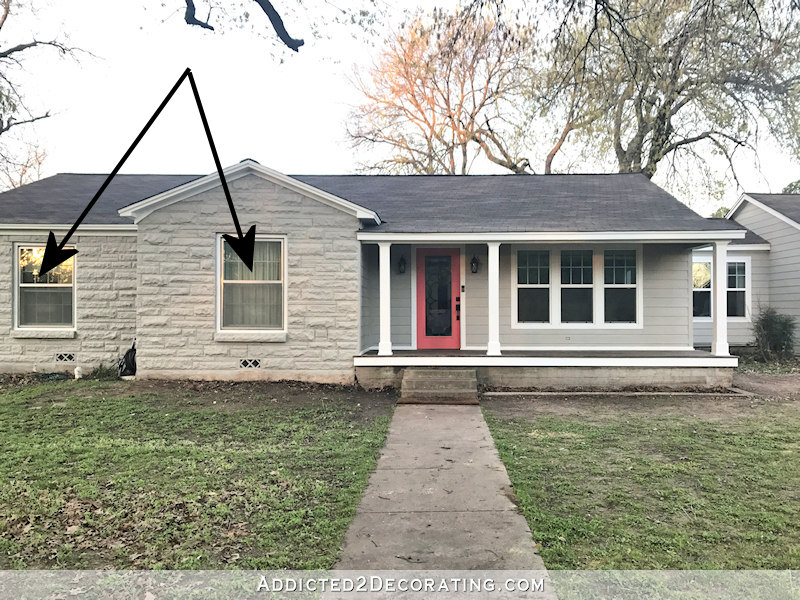
If your doors and windows have wimpy builder-grade trim around them, you can add more trim to create a custom look. Sandra at Sawdust Girl did this with her windows, and the difference is quite dramatic. Here’s what she started out with…
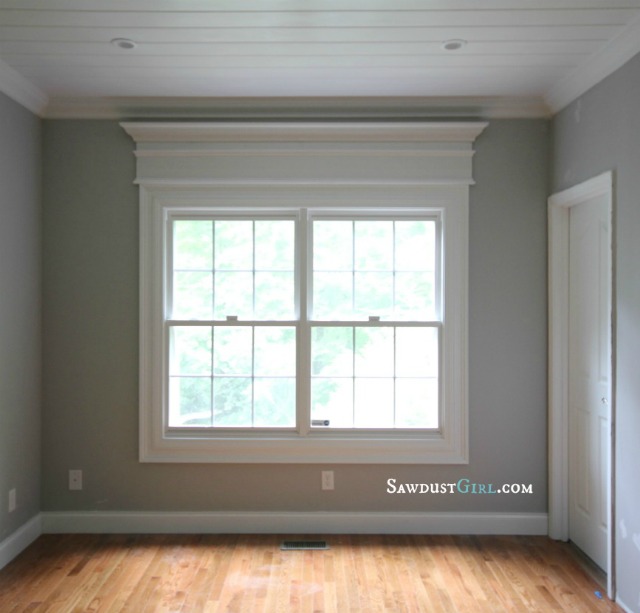
And here’s how it looked after she add quite a bit more trim…
I’m tellin’ ya. You can transform the look of just about anything with decorative trim. The next time you’re at Home Depot or Lowe’s, just take a stroll down the trim aisle and let your imagination wander. And remember, don’t pay attention to the labels on the trim. Just because something is labeled “casing”, that doesn’t mean that you can only use that on windows and doors. If you can think of another creative use for it, go for it!
Update:
To see the next step in this rolling barn door-style French door project, you can see that here…
Update #2:
My rolling barn door-style French doors are finished! Here’s a peek at how they turned out…
You can see more pictures of the finished doors here…

Addicted 2 Decorating is where I share my DIY and decorating journey as I remodel and decorate the 1948 fixer upper that my husband, Matt, and I bought in 2013. Matt has M.S. and is unable to do physical work, so I do the majority of the work on the house by myself. You can learn more about me here.
I was just wondering if you had painted the fretwork first and then installed all of the trim if it would make painting the door easier? I am amazed at what you have accomplished!
From “builder grade” to “elite designer grade” – they are beautiful!
You’re the best Kristi! Thank you so much for including my cabinets and a link to my blog in your post. Everything that you do is simply amazing. I have truly enjoyed following along as you transform your house via your blog and Instagram. You inspire me so much. Thank you for sharing your remarkable gift with us all.
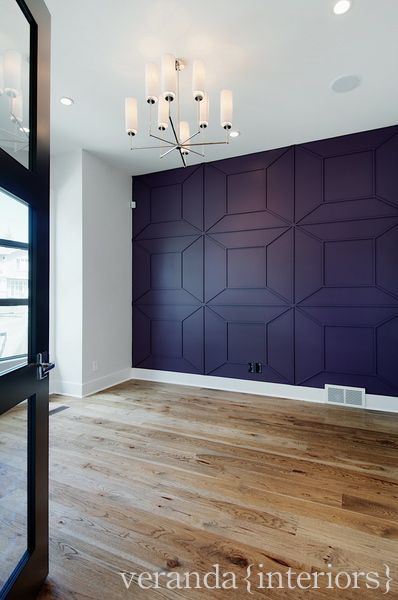
The doors are looking fabulous! I agree, trim does so much! In our hall bath, I used door casing to trim out the builder grade mirror. I used the style that had a flat piece in the middle and I added mosaic tile to that area. I love how it turned out. I really love the profile of that particular casing, so I had my hubby use it as a high rail (about 70″ at top) around the office to separate two paint colors and it looks great there. I had plained on adding a batten treatment to that same hall bath and use that same door casing at the top, however, that one picture above from Veranda Interiors had me swooning! That is so different and I’ve always loved that color (is it eggplant?). That color wouldn’t work in that room unless I replaced all accessories, which I don’t plan on doing but I love that wall treatment. It’s certainly unexpected and now has my wheels a spinnin’! thanx so much for sharing!
That wall treatment has me swooning, too!
THANK YOU! for this post. I cannot believe the timing. I have very UGLY cabinet doors (inside of a linen closet) at the end of the hallway. I was stressing over how ugly they are and how I would like to replace them. Now I can just fix them up with some trim, following the trim style of my kitchen cabinets, before painting them. I cannot believe this never occurred to me. The fret work you did is lovely and I think I can do something even more simple (not requiring a jigsaw) in the top part when I did take out the centers and put in glass. OMG, this was so helpful. Now for a question. These cabinet doors (think similar style to upper kitchen cabinets) have been painted over many times, including the hinges. I’ve held off on doing this because I need to get the hinges off (I think) and replace them. How do I get the old hinges off with all that paint on them and is it a good idea to do this. I know you normally don’t have time for questions, but if you are able to respond, I value your opinion.
Absolutely fabulous! I usually don’t comment on blogs.. I just ogle and wish I could do xyz diy work, but I had to say something. I’ve been building up the courage to add moldings all around the house. We built our house, but was disappointed that I don’t even have wimpy molding around the windows! Imagine that! It’s been 6 years…but I think by watching you and these doors, I’ll build enough courage to get this done. I come from a long line of carpenters and I’m not afraid of tools, but the one thing that I that absolutely scares me is not being able to cut a straight line without heavy heavy guidance. Anyway…great work! (and word “great” is an understatement).
Kristi…how did you attach the fretwork to the door? Thanks so much for all the time you take to show us details of everything you do. It makes it seem possible to achieve any look you want at a fraction of the cost. I look forward to your post daily. 🙂
Love what you shared today! I’m full of inspiration!
Thank you Kristi!
I concur!
I would love a picture filled tutorial/mock up using various big box store trims put together to form a combined profile. Does that make sense?? I too love to look at the trim aisle but I just can’t see the various pieces put together to form something beautiful. You seem to have an “unfair” ability to “see” the final product! In the future – do you think you could do a mock up showing various combinations of trim? Adding approximate pricing would be wonderful too – though I know prices vary from store to store and state to state! Thanks for all the wonderful tutorials you do!
I would love to see some kind of post like this too!
Great post, Kristi! Also, another creative way to hide a bit of the casters on your doors. Do you EVER cease to amaze???
Ooh,,in that photo of the contemporary dining room the gold/brass leaf wall feature would look great (in smaller scale) in your kitchen on the wall you weren’t sure what to do with!
I love your doors so much. And, why hasn’t someone contacted you for your own DIY tv show?????
I am really happy to see the casters covered a bit. Much more ‘professional’ looking. Great job.
These are so lovely, Kristi!
In *my* mind’s eye, I see the fret work done in the same gold leaf you did the kitchen cabinet trim in, on a satin black painted door. I think that would be stunning! 🙂
OH my gosh Kristi! Thanks so much for including my ceiling in your ‘inspiration’ photos. I’m super honored! You have such beautiful style!
GREAT JOB on those doors! I think they look WAY better than the old rather plain doors that you had started with! I think that it would be a great reminder to let folks know that some trims and moldings can get REALLY pricey. BUT, if you look for the trims that are sold by the piece length, instead of the foot, it can save you at least a bit of money. But when buying for a certain area, I have measured out the space and, drawn it out, and written down the cuts needed on a pad of paper. I took this with me to the store, then the fellas at Home Depot, were kind enough to have mitered the cuts for me. As they did the cuts, all I had to do was number each piece that coordinated with the number on my drawing of measurements that I brought to the store. This also helped a great deal, when I got to the register, because I added up all of the cuts for total inches and then divided the total by 12 (a foot). When I got to check out I simply gave them the total ‘cut feet’, and was only charged for that specific number of feet cut. This helped to make sure that I ended up with no wasted inches, or money spent! (and no HUGE random lengths to fit into my Jeep!)
Can’t wait to see those doors finished! I’d love to see a video tutorial on how you did the jigsaw cuts in such a detailed manor on the inserts!
HOLY MOLY!!!! Wish I could re-do my place. I would love a purple trimmed wall. I think I would make each room a different color and trim pattern. This would be so amazing if I could.
Loving the doors and thanks for sharing all those different trim ideas. The bi-fold shaker doors have me taking a second look at the plain (added later) closet doors in my own home. Hmmm….
Trim is a wonderful friend…next to spray paint. lol Glad to know I am not the only one who likes to meander around Home Depot. 🙂
I can’t wait to see what you do with these doors! I like the idea of the extra piece of trim to hide the wheels.
Love this post. I also love trim and what it does for a room, especially ceilings. I love your doors.
So beautiful! So amazing!
Amazing. Wonderful. I can’t wait to do this. I love your posts each day. I have needed to redo my kitchen cabinet doors for some time. I couldn’t figure out how to make the flat bi-fold pantry doors match the cabinets. Plus I have the flat doors in the entire house. Now I finally know how to trim out the cabinets, bi-fold, and regular doors and have a designer look through out the house. Thank you! NOW I just need to “DO IT”.
Oh, did I miss one of the posts? What type of glass did you install in the doors and how do you keep the glass in place?
If I am painting existing doors in my home black, do I need to sand, prime and then paint? Also, should I use a semi-gloss?
Kristi, I just picture the people at Home Depot yelling out your name when you come in, kind of like the “Cheers” gang used to do when Norm entered the bar!
The trim on your doors elevates them to a more refined, finished level. Just a few pieces of strategically placed wood made all the difference in the world. You have an artist’s eye, that’s for sure!
The last photo here of the trimmed out window is fantastic – what a difference
OMG! You are my DIY Hero!! You do such beautiful work!! I can just see how I can fix up my “vanilla” home with these tricks! My thing has been using different color paint to make statements, I can now also use your suggestions for trim. Please continue to share your information. Thank you soooo much!!!
Pat