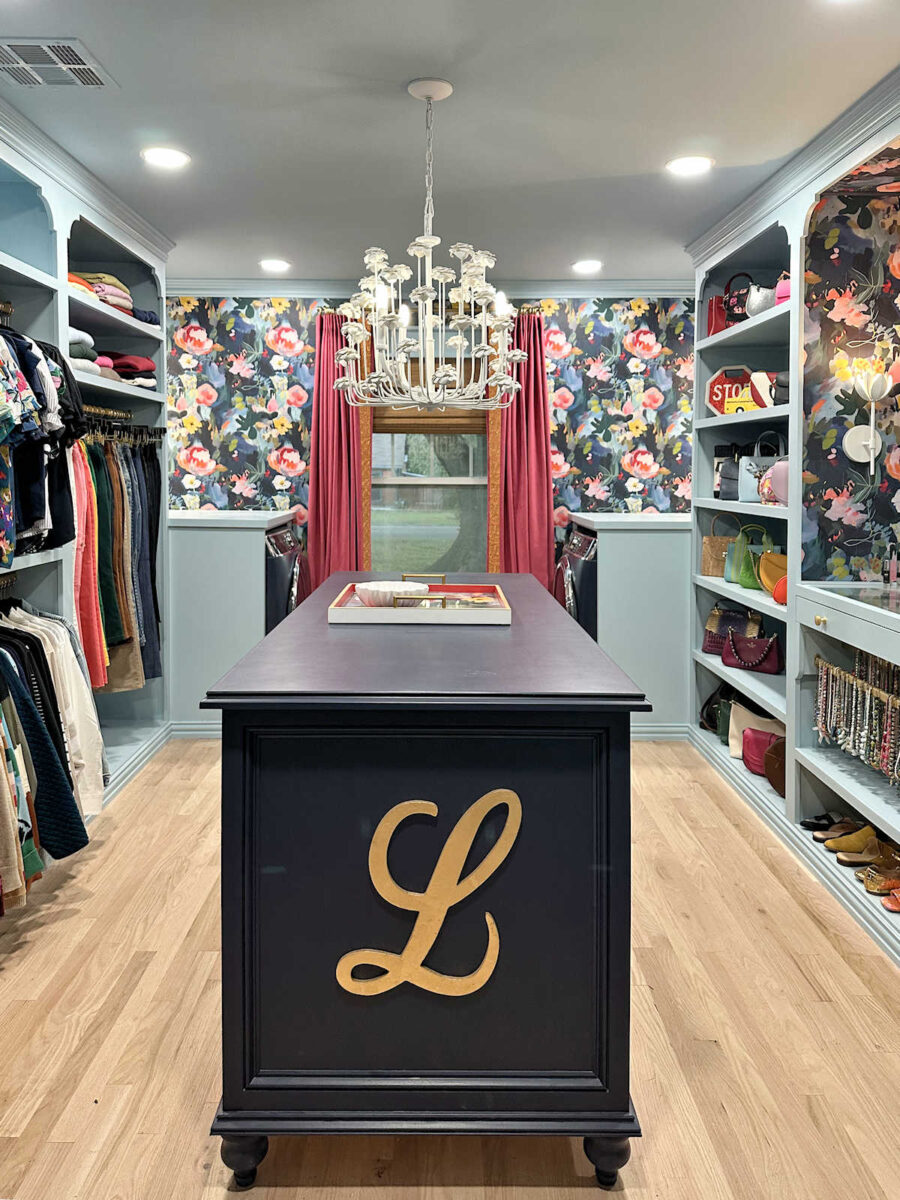
Part 1 – DIY Flower Chandelier (I’m About 60% Confident This Will Work Out)
I’m down to two remaining big projects for my walk-in closet — the flower chandelier and framing out the doorway. After having so much trouble with the finish on the island and basically having to sand down the drawers and doors and start over last week, I decided to give myself a break and focus on the fun project this weekend. So I got started on the flower chandelier. Framing out the doorway will have to wait a bit longer.
As a reminder, this is the chandelier that I’m using as my inspiration for making my own. I didn’t buy this one because it costs over $2500, and that’s just out of the question for me. There’s no light fixture that I’d ever love so much that I’d pay that amount of money for it.

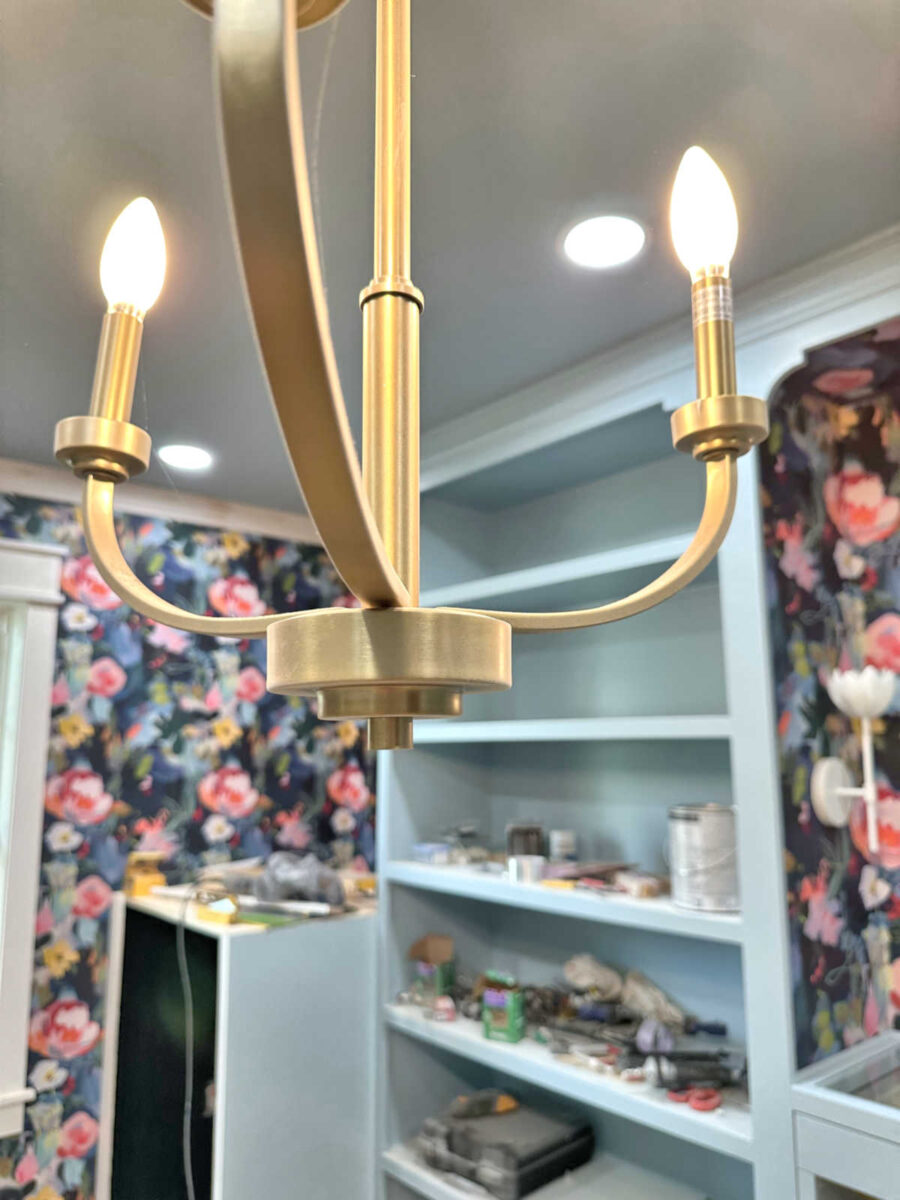
So I decided to try to make my own inspired by that one. I needed to start with a very simple chandelier with a specific shape, so I decided to start with this one. (Please excuse the old picture!)

I chose this one because of the specific shape of the arms, but also because of this section at the bottom that I thought I could attach the flower stems to.
So I unscrewed that bottom nut holding the bottom cap on, and decided to attach all of the stems to this bottom cap.
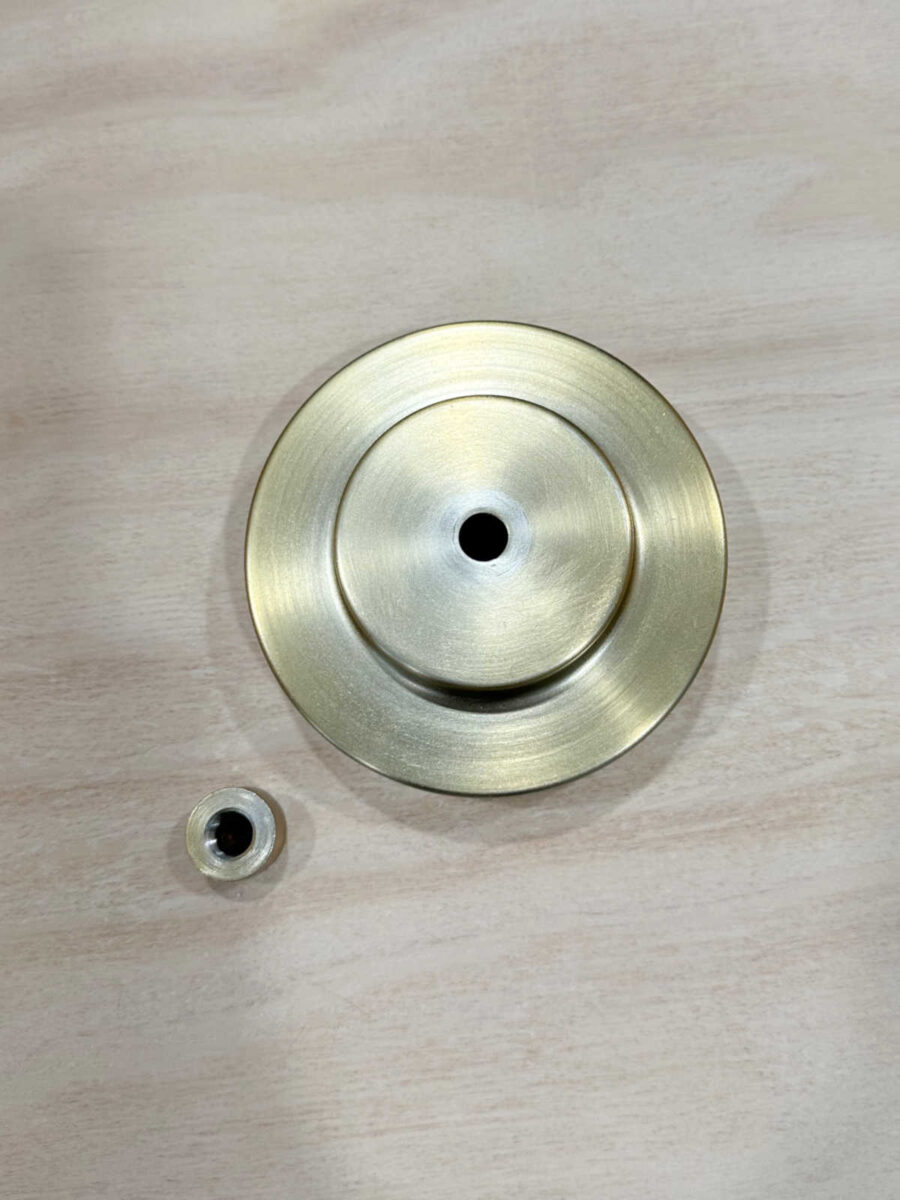
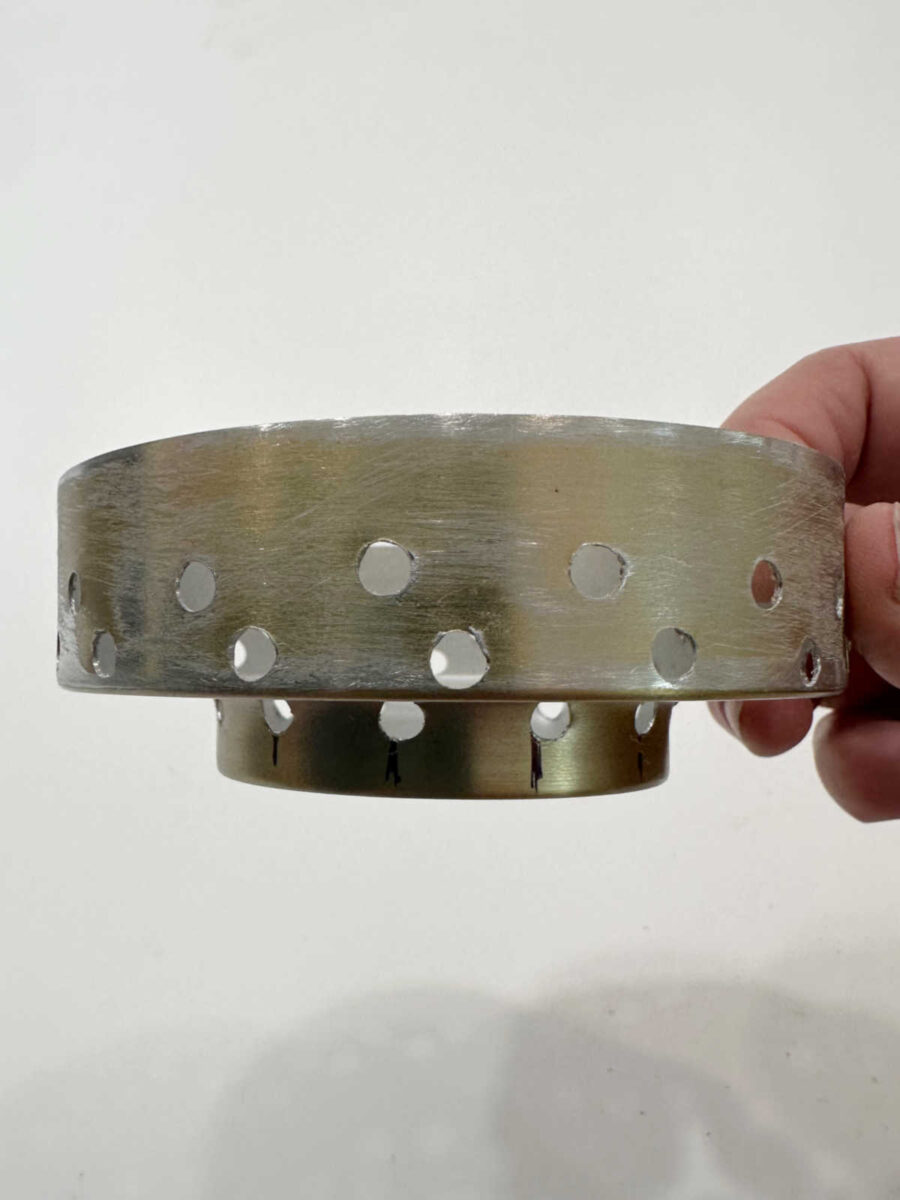
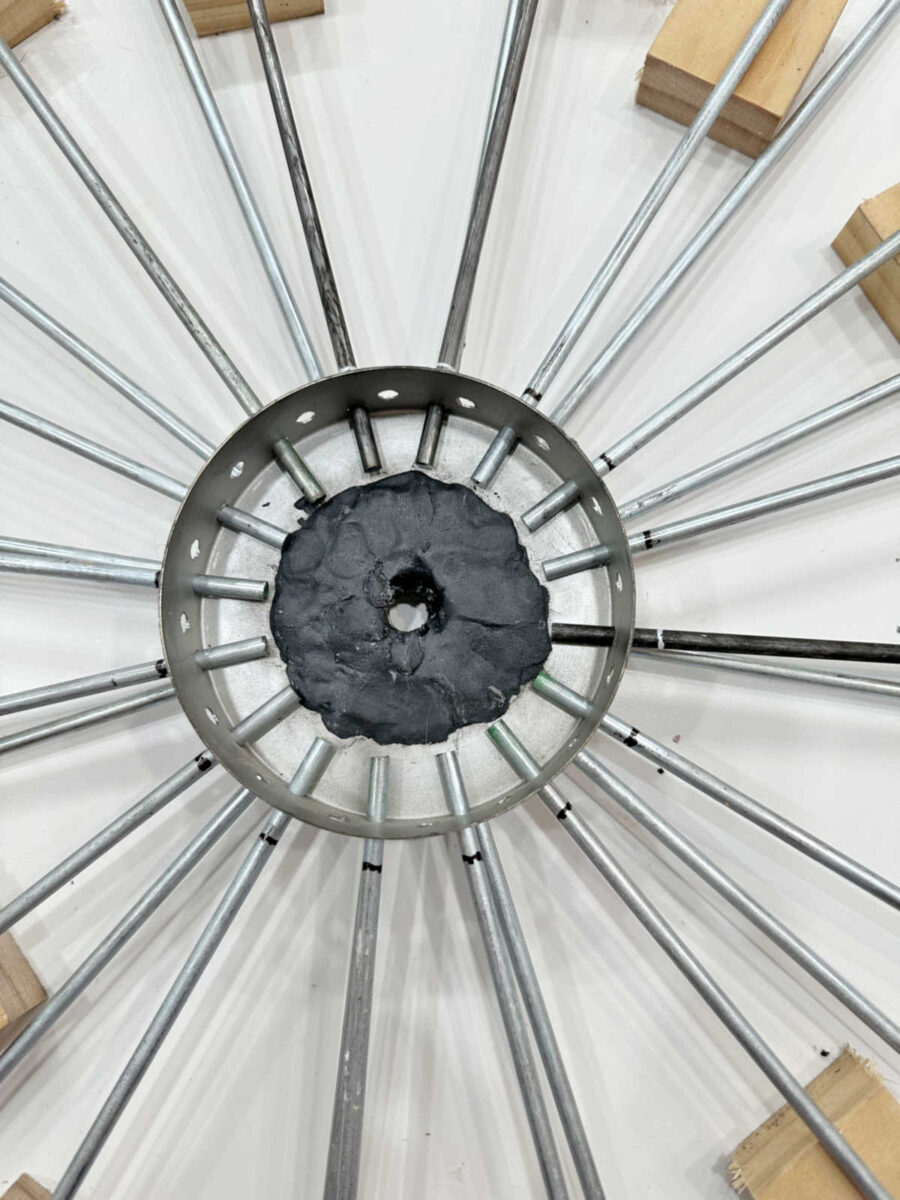
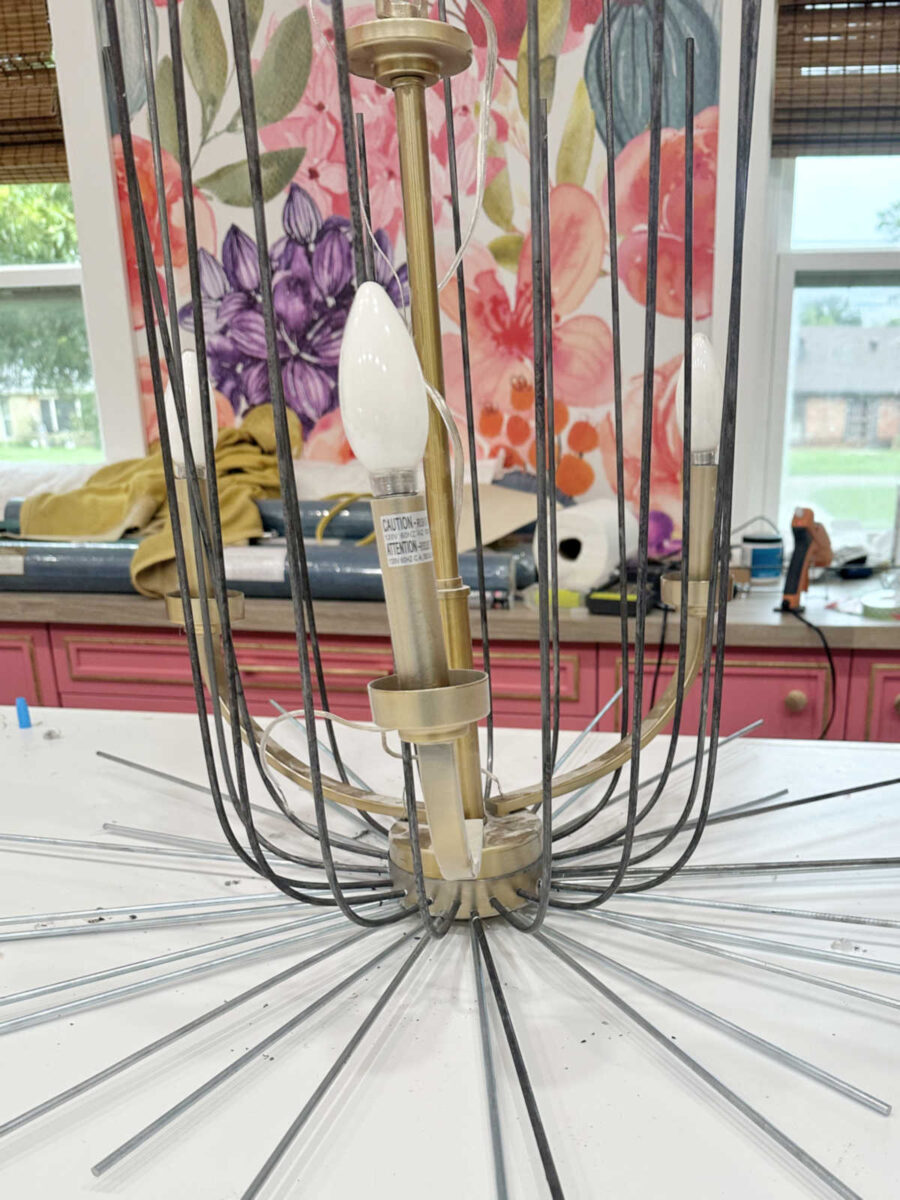
With that bottom cap and nut removed, this is what I was left with. So I had to keep in mind that the center of the bottom cap had to be left open in the center to make room for the wires that connect the lights.
I had about 3/4″ perimeter around the inside of the bottom cap that I could use to secure the stems without interfering with the wires. and the bolts and nuts holding the light arms onto the light.

First, I had to mark where I wanted the stems to enter the bottom cap. I wanted three rows of stems, and it worked out to space them about 5/8″ apart.
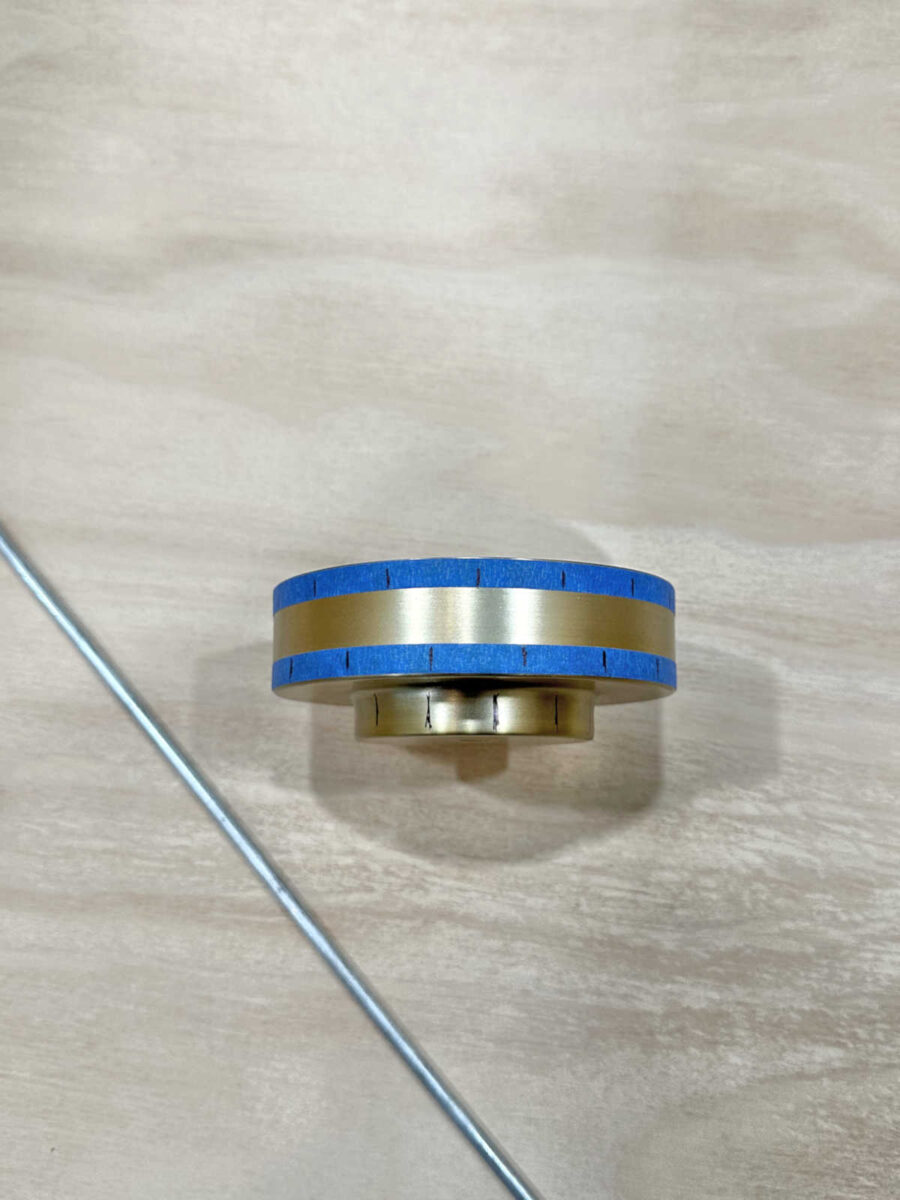
And then I used my drill to drill 3/16″ holes on each mark. It’s a bit challenging to get holes drilled perfectly through metal without a drill press, but I did the best I could using my hand-held drill.
And then I continued on the next row up.
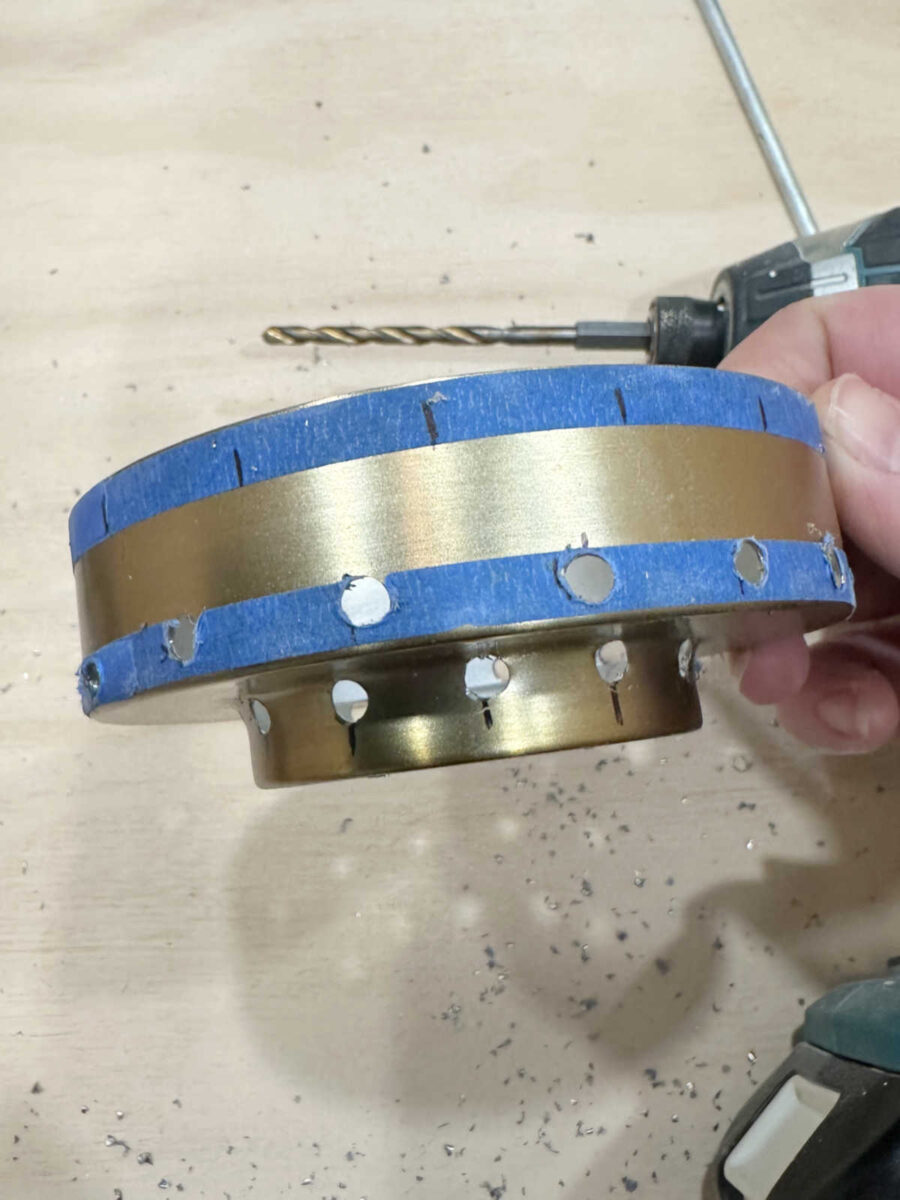
I decided to move the top row down quite a bit. It would have been very challenging (if not impossible) to reassemble the bottom cap to the light with the top row of holes drilled to close to the top of the bottom cap.
And with all of those holes drilled, I was ready to attach the stems. I turned the bottom cap over and started with the bottom row. I used my miter saw to cut the 3/16″ metal rods to about 14 inches long, and then inserted them into the bottom row of holes. I inserted about 3/4″ of the rod into the holes, and then I used hot glue to temporarily hold them in place
I used my utility knife to cut away any hot glue that squeezed out on the sides of the metal rods and looked messy.
And then I very gently turned the whole assembly over so that it was upright, and so that I could secure the rods from the inside of the cap. To do this, I used JB Weld SteelStik epoxy putty.
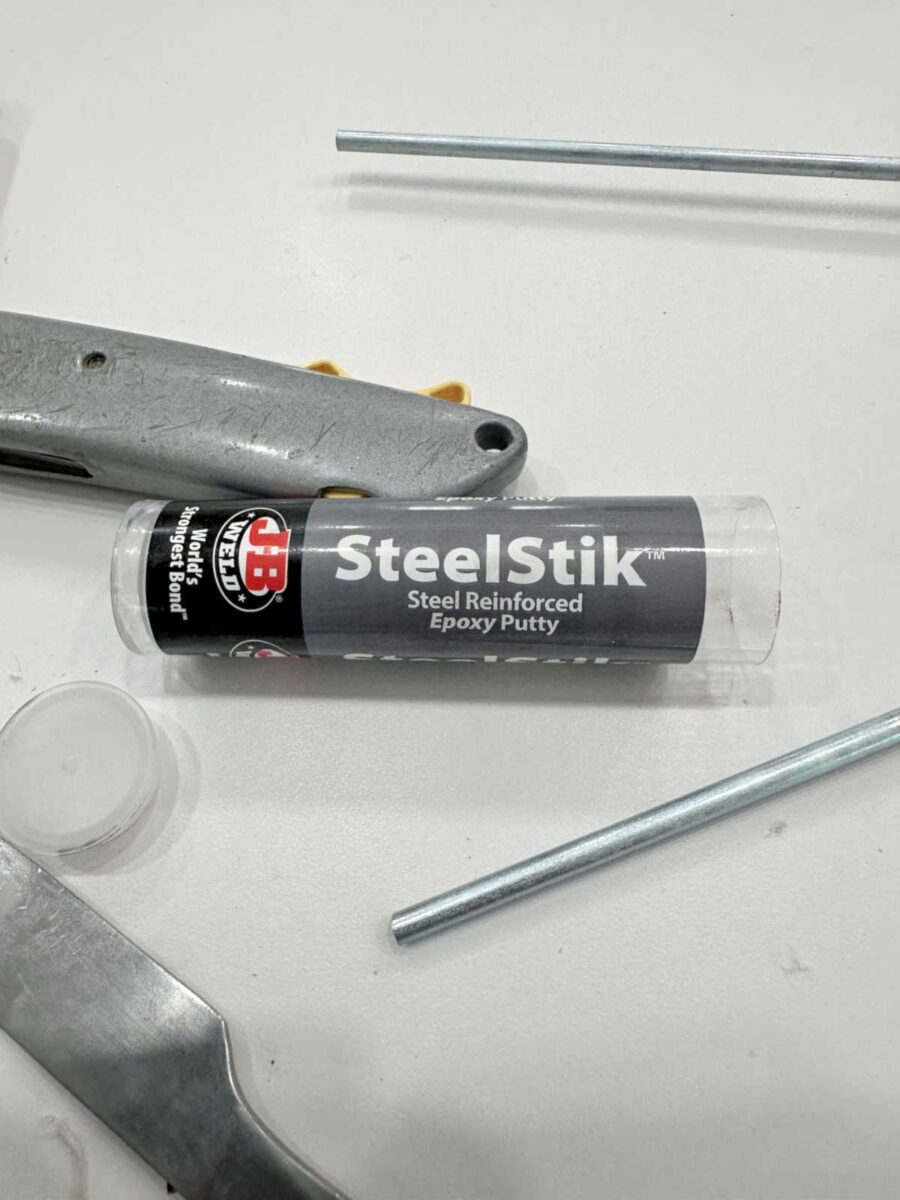
This is a two-part putty that comes with the two parts in one roll. You can see the gray part on the outside of the roll and the black part on the inside of the roll below. As long as the two parts remain separate, the putty remains soft. But when you cut off as much as you need and mix the two parts together, it activates the putty and then you have a limited amount of time before it starts to harden.
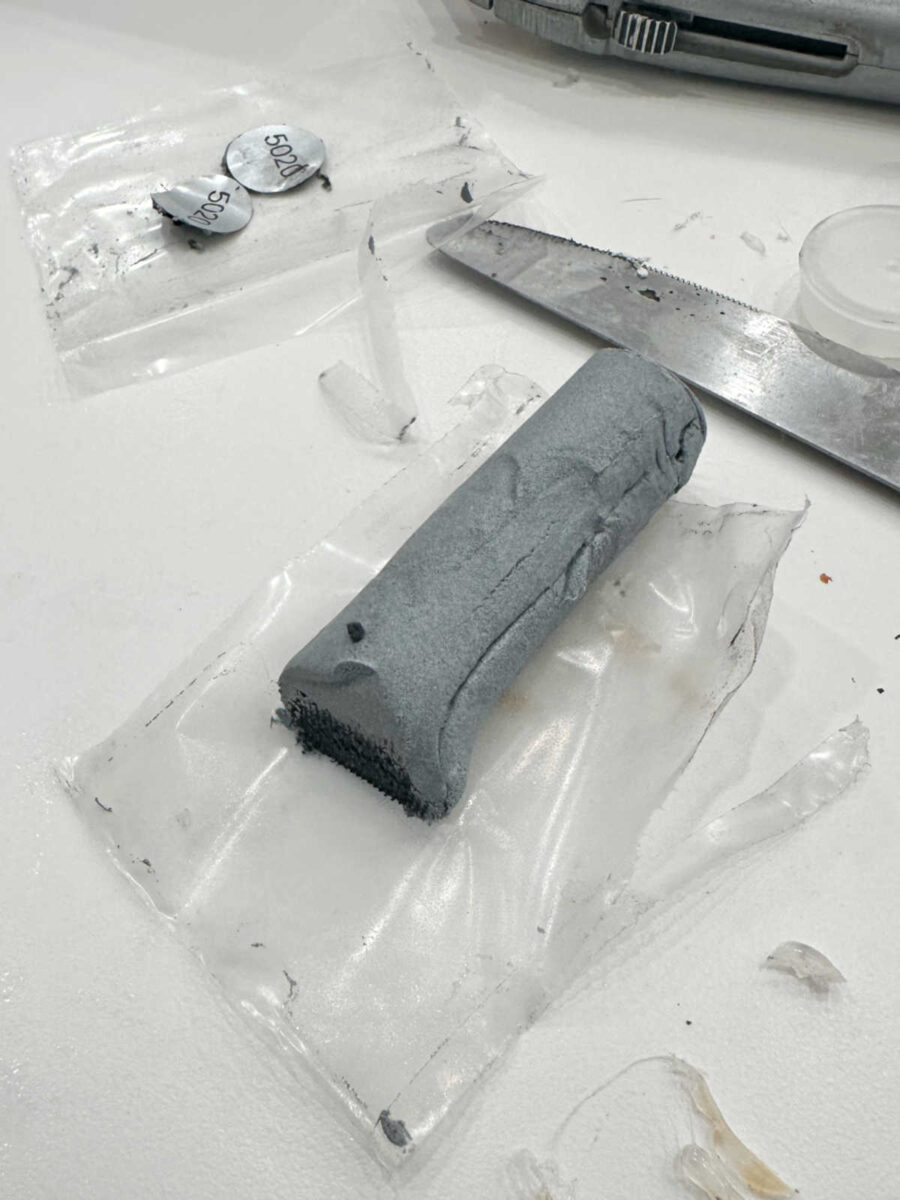
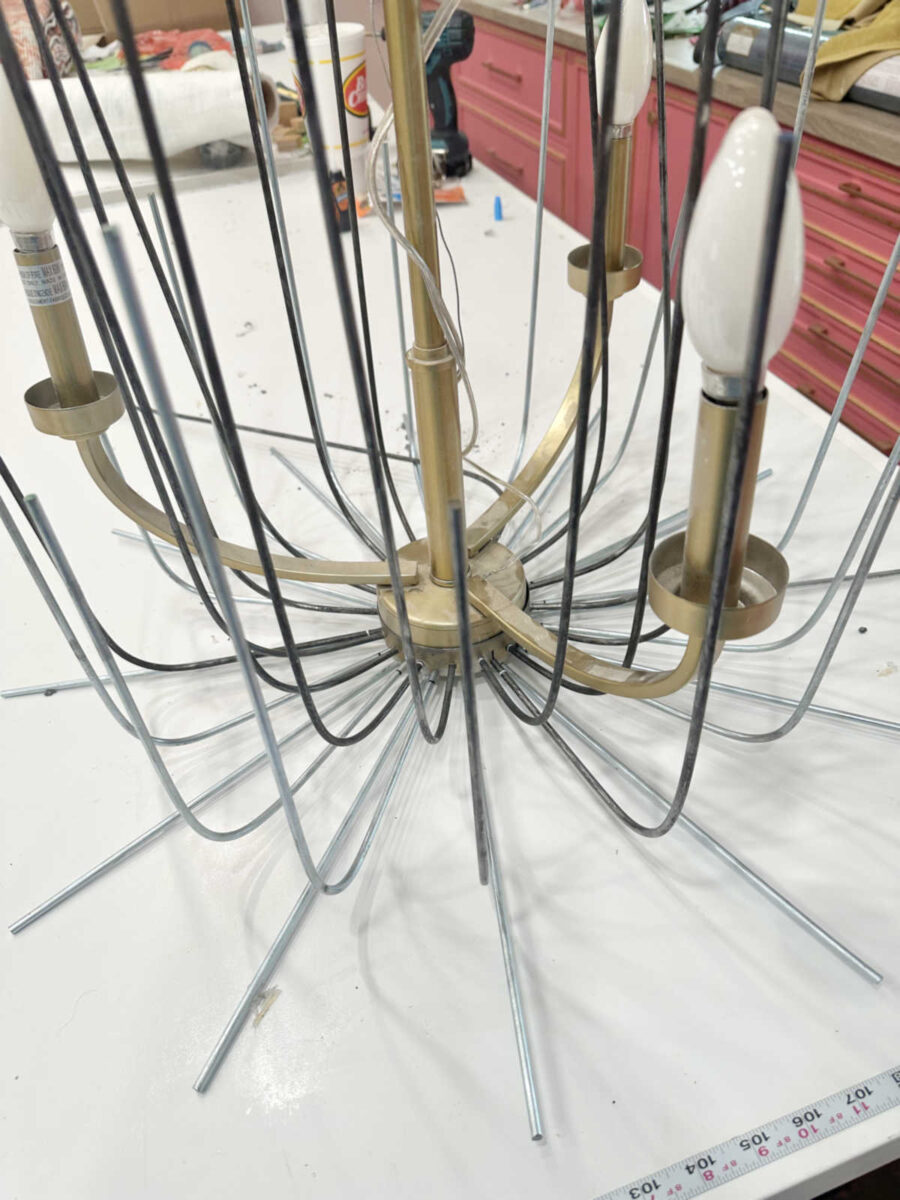
So I used about half of one roll, mixed the two parts together with my hands (like playing with Playdoh), and then smooshed it into the bottom well of the cap, securing those rods. I just made sure that I left that center hole open so that this base cap could be reattached to the light with the threaded rod and the bottom nut.
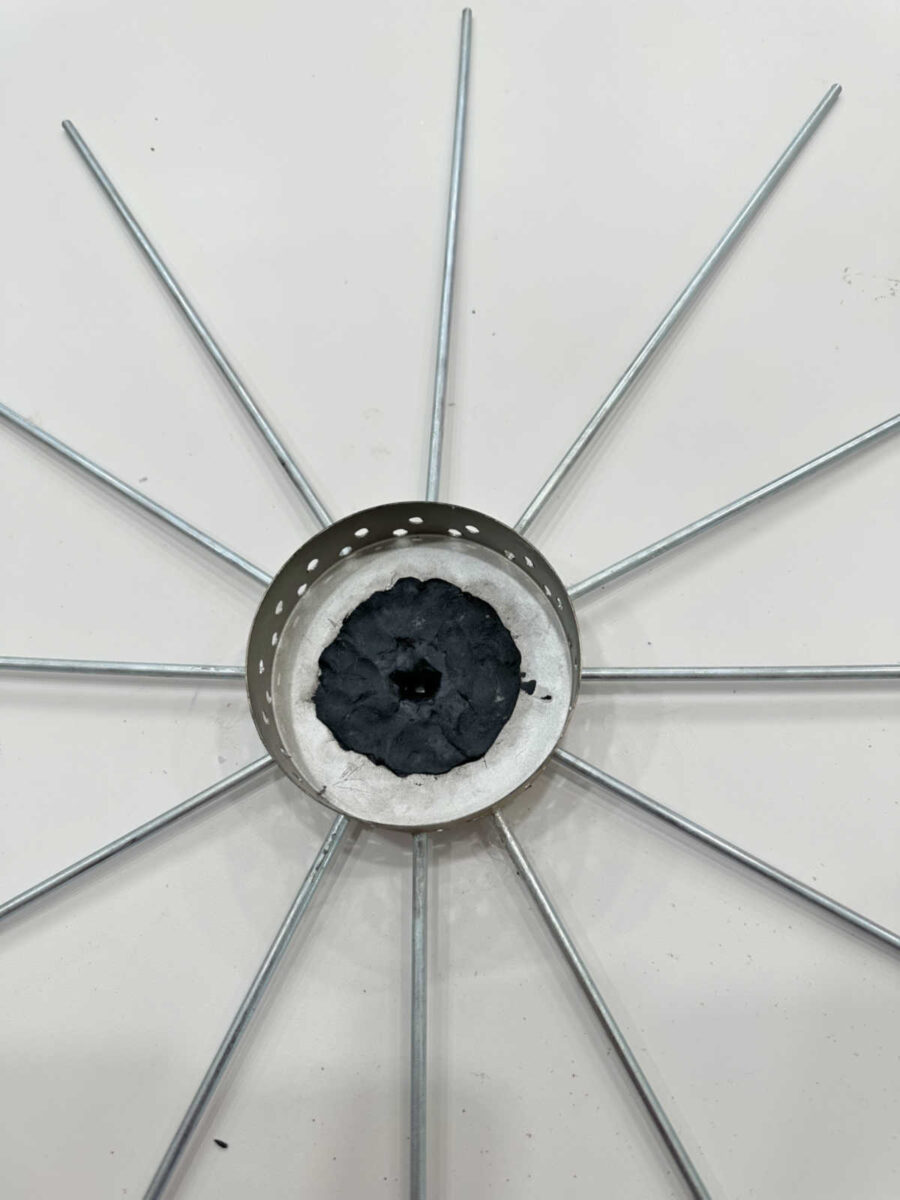
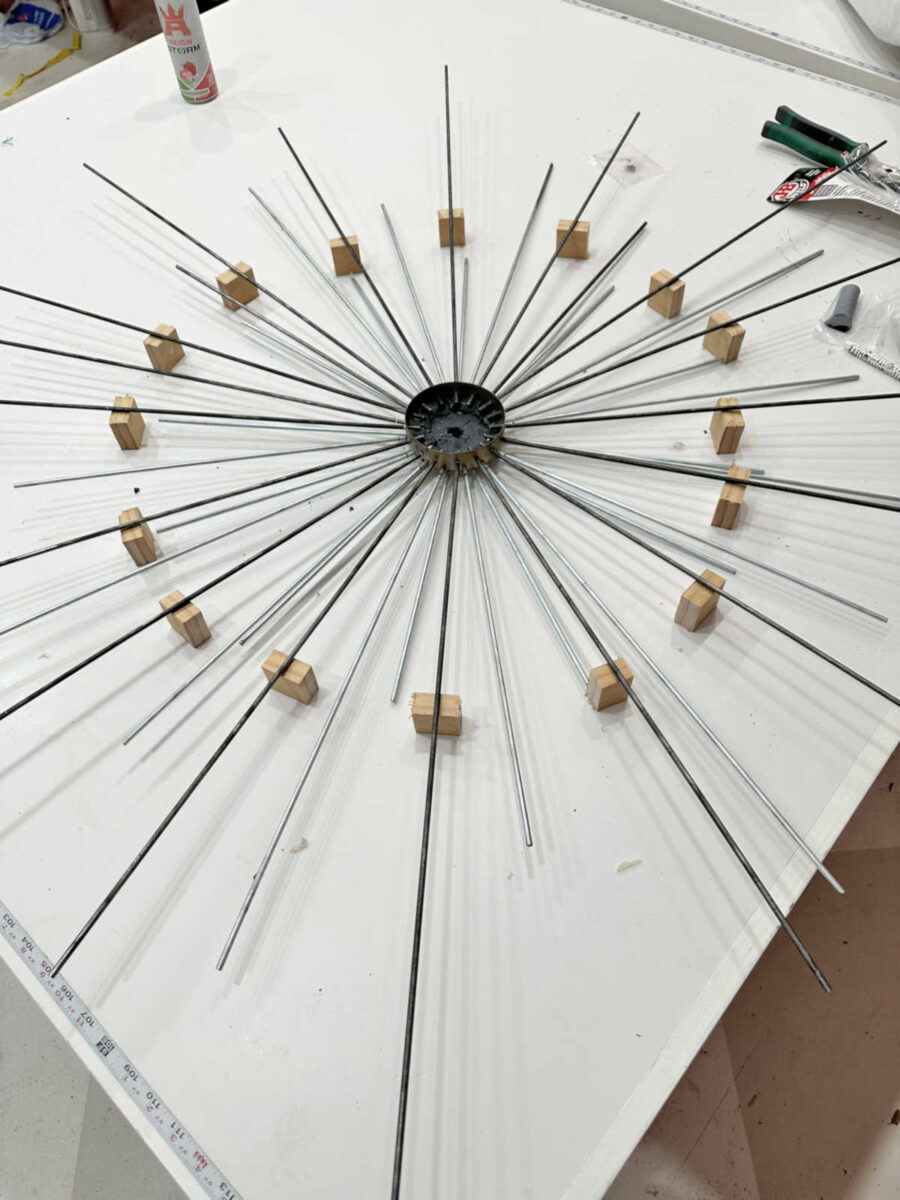
I left that to dry for about 30 minutes and then came back and did the second row. I cut these rods longer and inserted them about 1/2-inch into the bottom cap, and then secured those with another layer of epoxy putty, making sure that I left the center part of the bottom cap open to leave room for the wires on the light. I cut some scrap wood to hold these off the table in the right position.
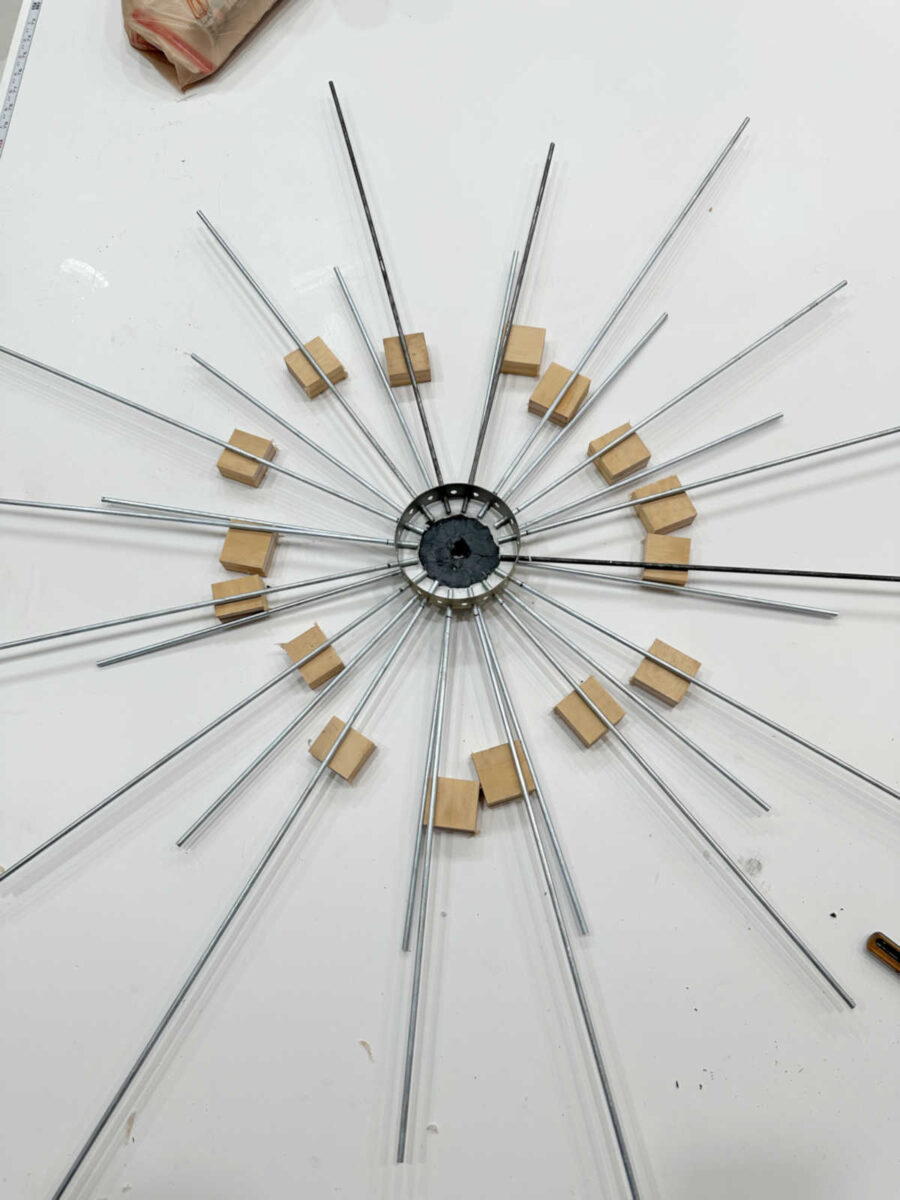
Here’s a closer look at what those looked like before I added the epoxy putty.
Once I added the epoxy putty to that row and let it dry for about 30 minutes, I came back and did the same thing for the third and final row of metal rods. Once I had the epoxy putty on this last row, I left the whole thing to dry and cure overnight.
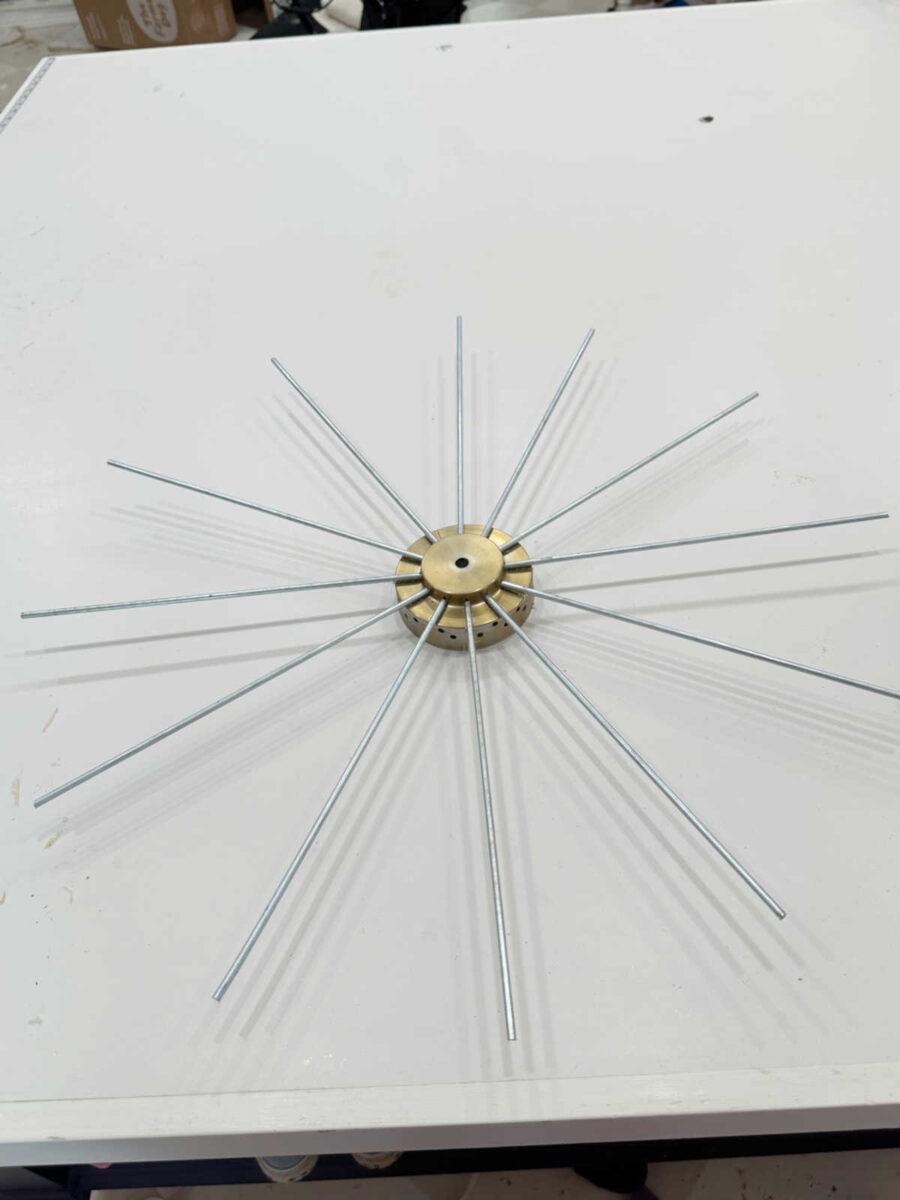
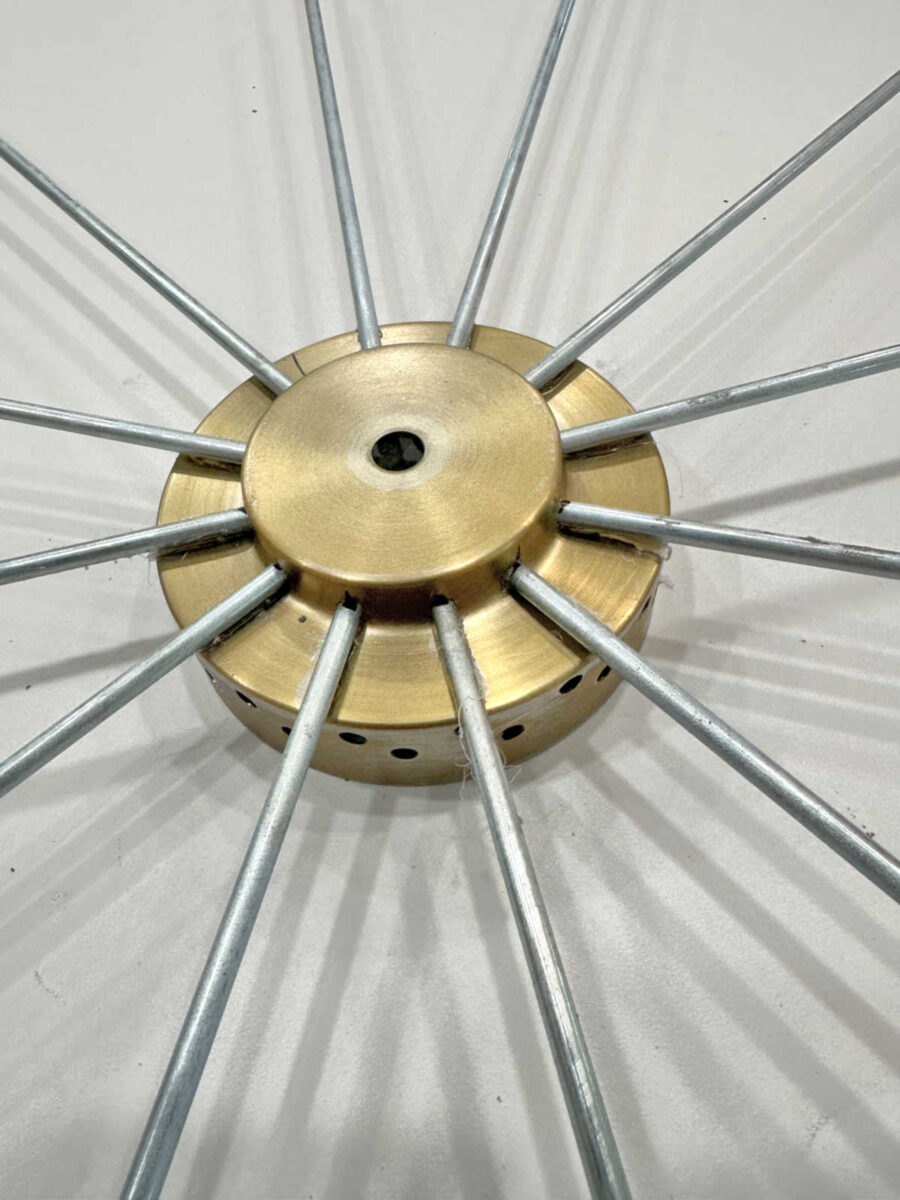
The next day, the whole assembly was very secure, so I started bending the rods up to make the flower stems. For the first row, I used an empty quart paint can, and bent the rods around the can.
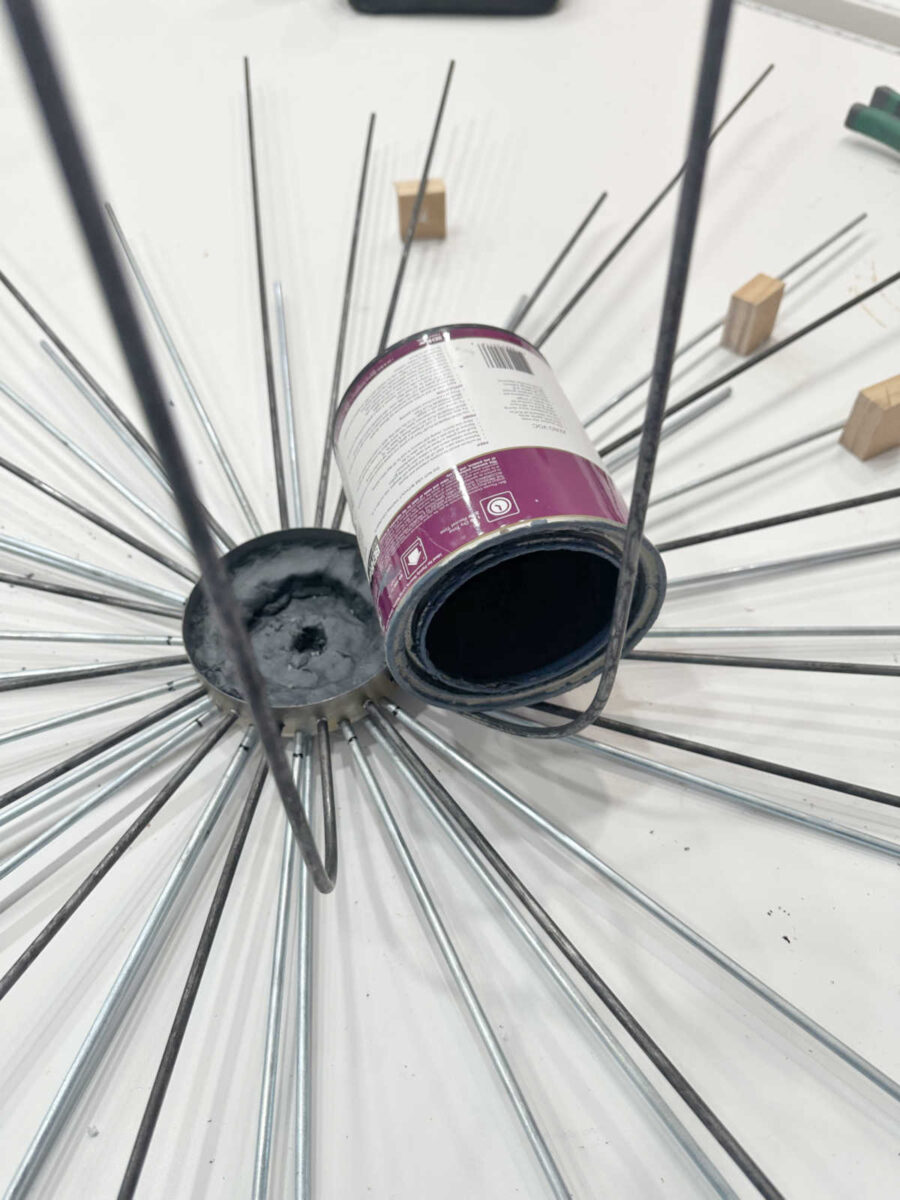
That actually worked way better than I had expected it to work.
Here’s what it looked like with all of that first row done…
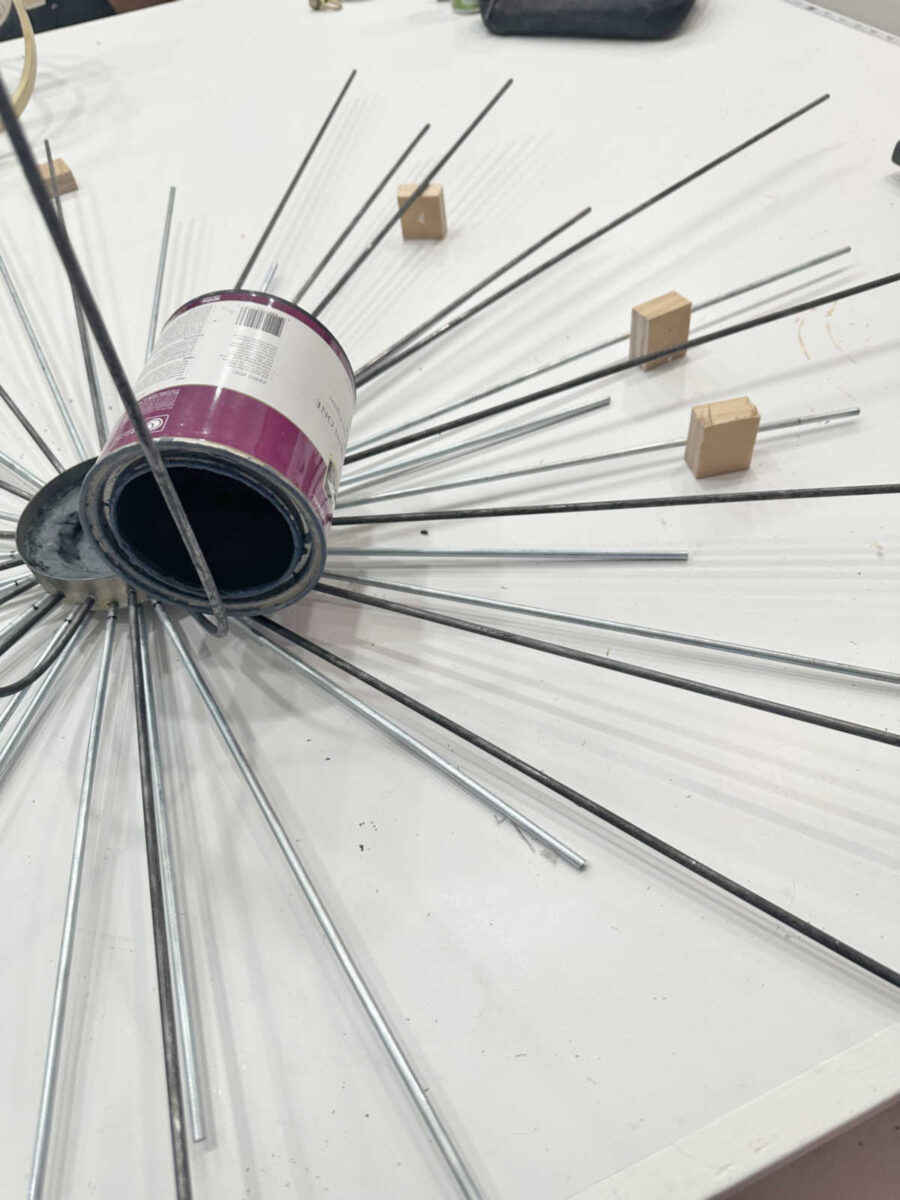
And then to do the second row, I needed a smaller diameter curve, so I used a spray paint can up against the first row to bend the second row of metal rods.
And here’s what those looked like once they were all done.
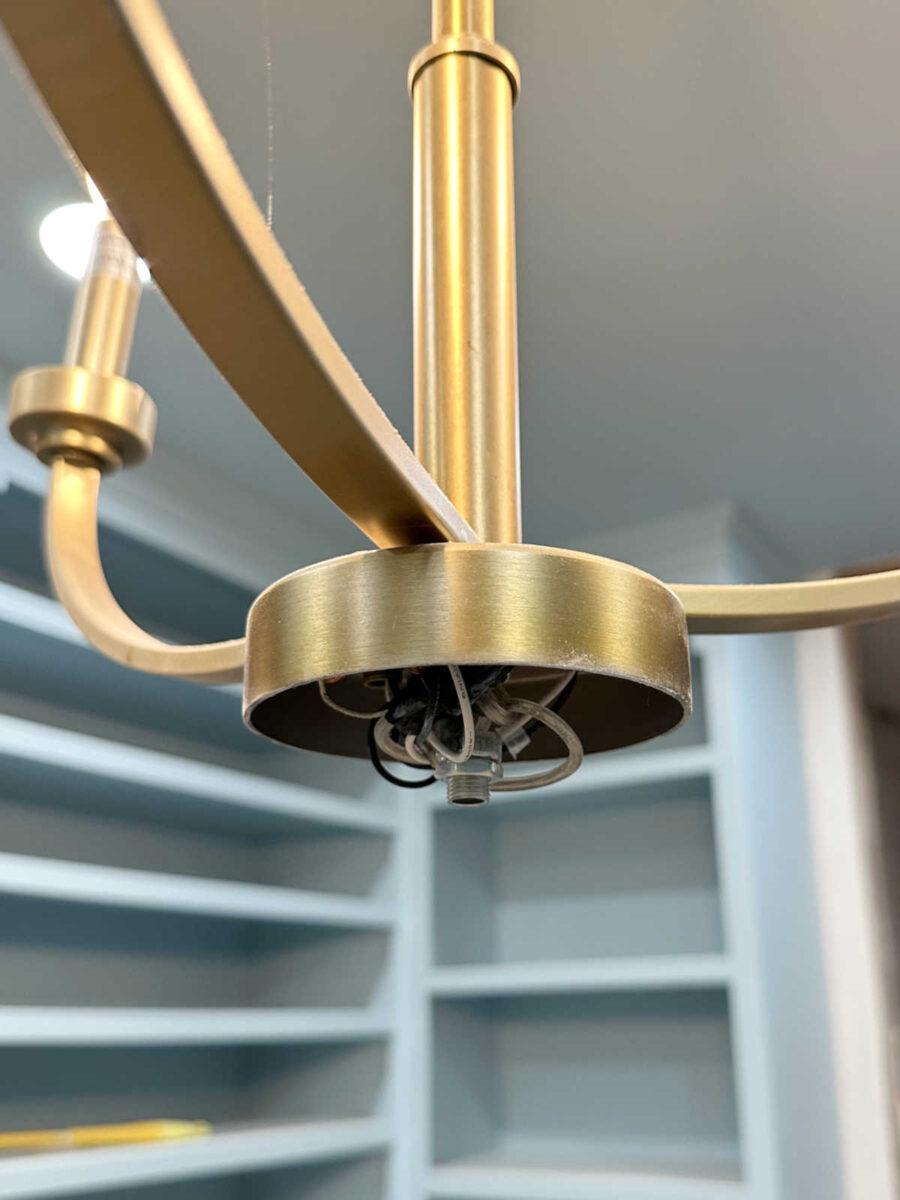
That’s where I stopped because I have a sneaking suspicion that I cut the wires for that bottom row too short, and that stressed me out. 😀 So I decided to sleep on it and look at it with fresh eyes today. Also, you can tell that I’m going to have to do some surgical removal of metal from that piece that the bottom cap fits over to make the whole assembly go back together. My metal cutter/grinder tool hasn’t gotten a whole lot of use, so this will be the perfect opportunity to use it. I’m also going to have to use it to cut all of these rods to the perfect height, as I was just guessing at the lengths that I’d need, and clearly some of them are way too long.
So at this point, I’m still not fully confident that I can pull this off. I’d say that my confidence level is at about 60% this morning. Hopefully it will increase as the day goes on. Check back tomorrow, and we’ll see if I can actually do this!
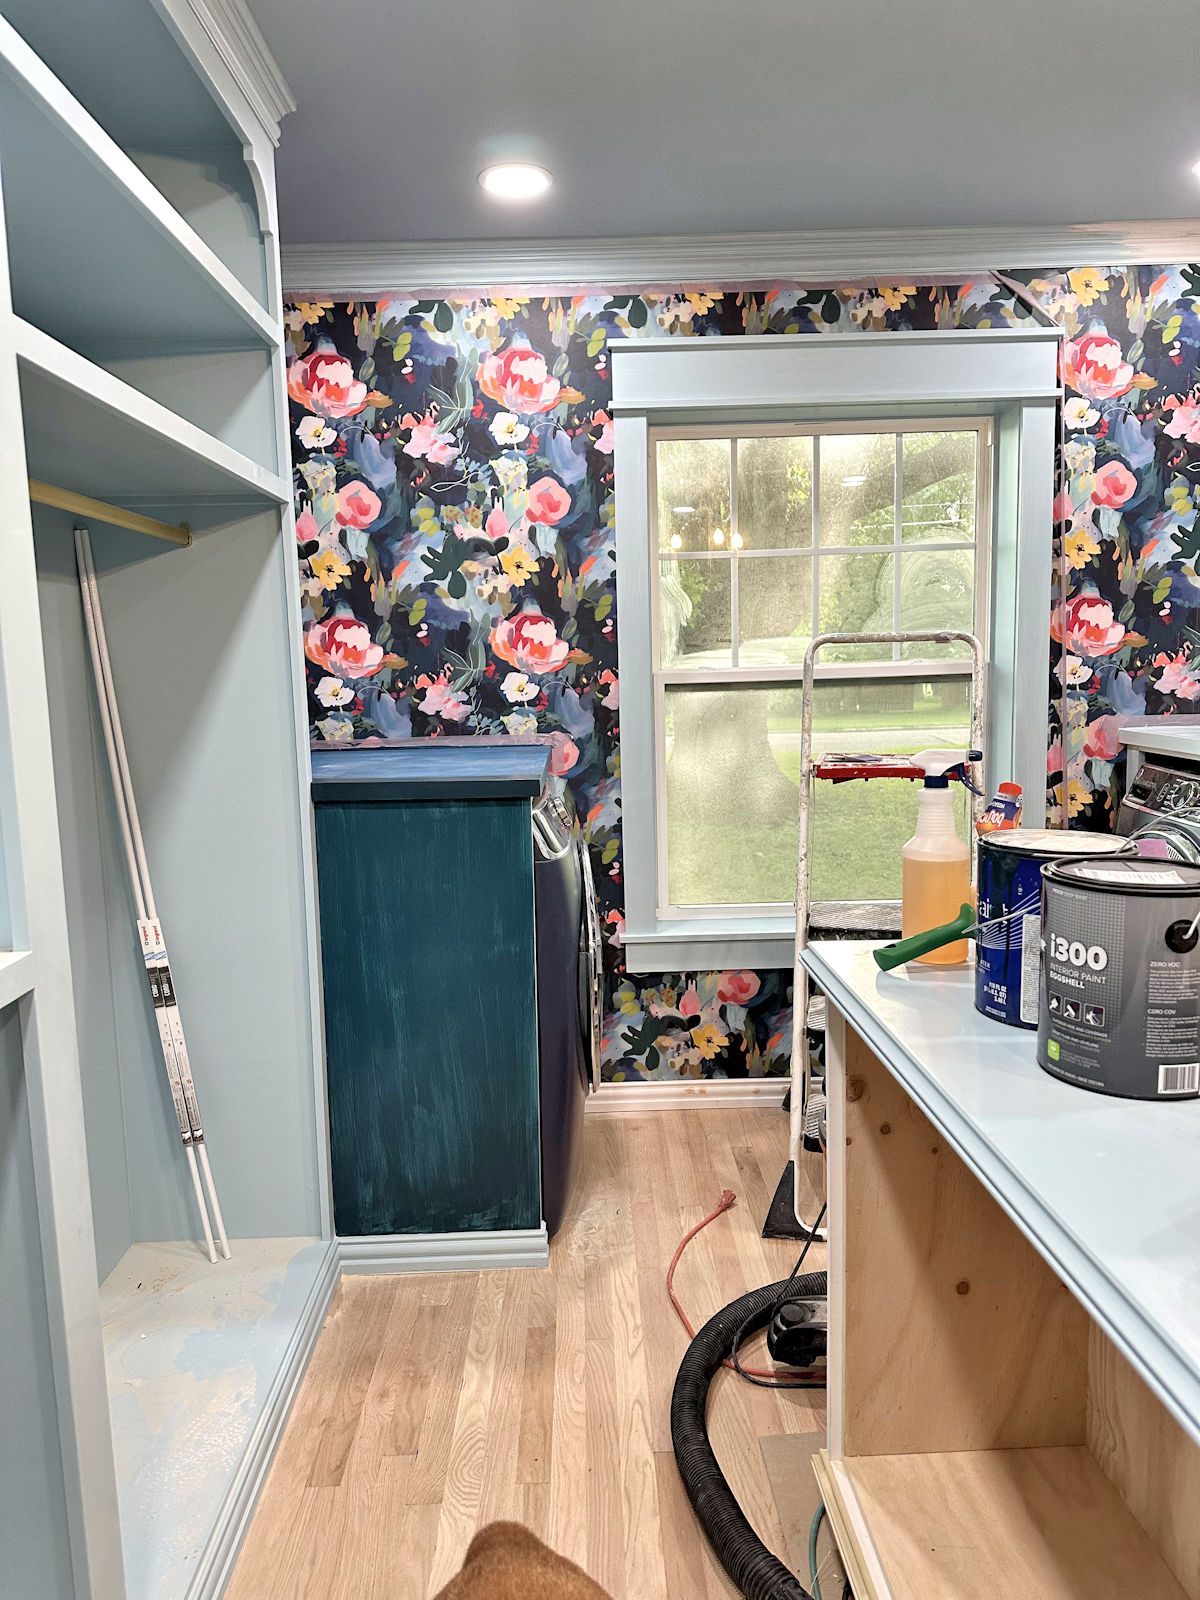
More About My Walk-In Closet/Laundry Room

see all walk-in closet/laundry
room diy projects
read all walk-in closet/laundry
room blog posts

Addicted 2 Decorating is where I share my DIY and decorating journey as I remodel and decorate the 1948 fixer upper that my husband, Matt, and I bought in 2013. Matt has M.S. and is unable to do physical work, so I do the majority of the work on the house by myself. You can learn more about me here.

I had been thinking the inspiration chandelier had lights in each flower. I sure didn’t look closely enough the first time you posted it. The metal rods curved very nicely. I’m anxious to see how you make the flowers.
Off to a great start! I’m betting you can do this & make it exactly what you want.
You are so clever, and resourceful, by the by, you drilled those holes better than most WITH a drill press. You’ve got this. Ever Forward!
Cheers to you, Matt and The Gang!
I would continue with bending-the bottom looks perfect. Shorten the inner ones that are bent to random heights not the outer ones to work with the outer scale and heights involved. There’s a cutting tool, they had in back in the day they used to cut wire shelfs in box stores. Maybe that’s still available. I have a childhood memory of traveling to the store with parent and watching while they worked on a rental house). I’d use that to trim down those but mark with tape, take pictures. Sleep on it. Do it after time plus try a few flowers and see if you need additional adjustments before cutting. So if you need to take this somewhere you know all the cutting you need. Maybe verify any special techniques to cleanly put it together.
So cool. Only you would even attempt this! I know you’ll be pleased.
Count me supremely impressed!
What a fun project! I cant wait to see how it turns out!
So far, it’s looking great! Keep going, I think you’ve got this!
You are truly a genius! Fantastic play-by-play! I can’t wait to see the results of this magic!
WOW! I am glad to know about the epoxy putty. I have used J B Weld on other things but it can be kind of runny. Another “tool” in my mental toolbox!
Can’t wait to see it finished. Is it going to be white? If so, please consider using daylight bulbs. The warm bulbs are just too yellow.
Yes, it’ll be all white. The bulbs in it are actually daylight bulbs. I’m not sure why they look yellow.
Love reading how your mind works!
You are so talented!
I was reading the details of how you are doing this and looking at the pictures and when you doubted yourself, I said out loud.. Why wouldn’t it work?? I can’t wait to see the finished product, it will be beautiful!
You always amaze and inspire me. I can’t wait to see this light fixture done.
I’m impressed so far! I know if anyone can do this, you can! I love that you don’t give up, you just make alterations to get to the finish line. I’m that way too; I will set a project aside and visualize how to complete it or adjust it. Then when I am sure of the steps I need to do, I eat a bowl of ice cream and go over it one more time in my head. I’m almost always able to get it finished by then!!! I know you’ll get there too!
Beautiful! Of course you’ll make it work! How’s Cooper?
Cooper has had a really tough last few days, but unrelated to the issue I told y’all about. Somehow, he got a serious puncture wound in his hind leg, and it swelled up really huge, so we had to go back to the vet. I have no idea how he even got this wound. I’ve looked all over his yard, and I don’t see anything that could have caused it. She said it doesn’t look like a snake bit, either. But finally today, he’s pretty much back to his normal self.
Just followed the link to the inspo chandelier and looked at all the different views, and I think you’ve got it.
What are you using for petals? Spoons? What color will it be when complete, white like the inspo piece? Sorry if you’ve addressed these questions already and I’ve forgotten.
The rest of this closet project is still so fun to watch! Thanks for letting us peek over your shoulder. Still saying prayers for Cooper, BTW.
I’ll actually be using air dry clay for the flowers. It’ll all be painted white.