Part 2 – DIY Flower Chandelier — Victory & (Temporary) Defeat
As with many of my projects, this DIY flower chandelier project is a process of making it up as I go along. I had a general idea of what I wanted the finished product to look like, but the individual steps to get from the starting point to that finished product weren’t quite so clear in my head when I started out. So yesterday, I found myself having to redo a part of the frame.
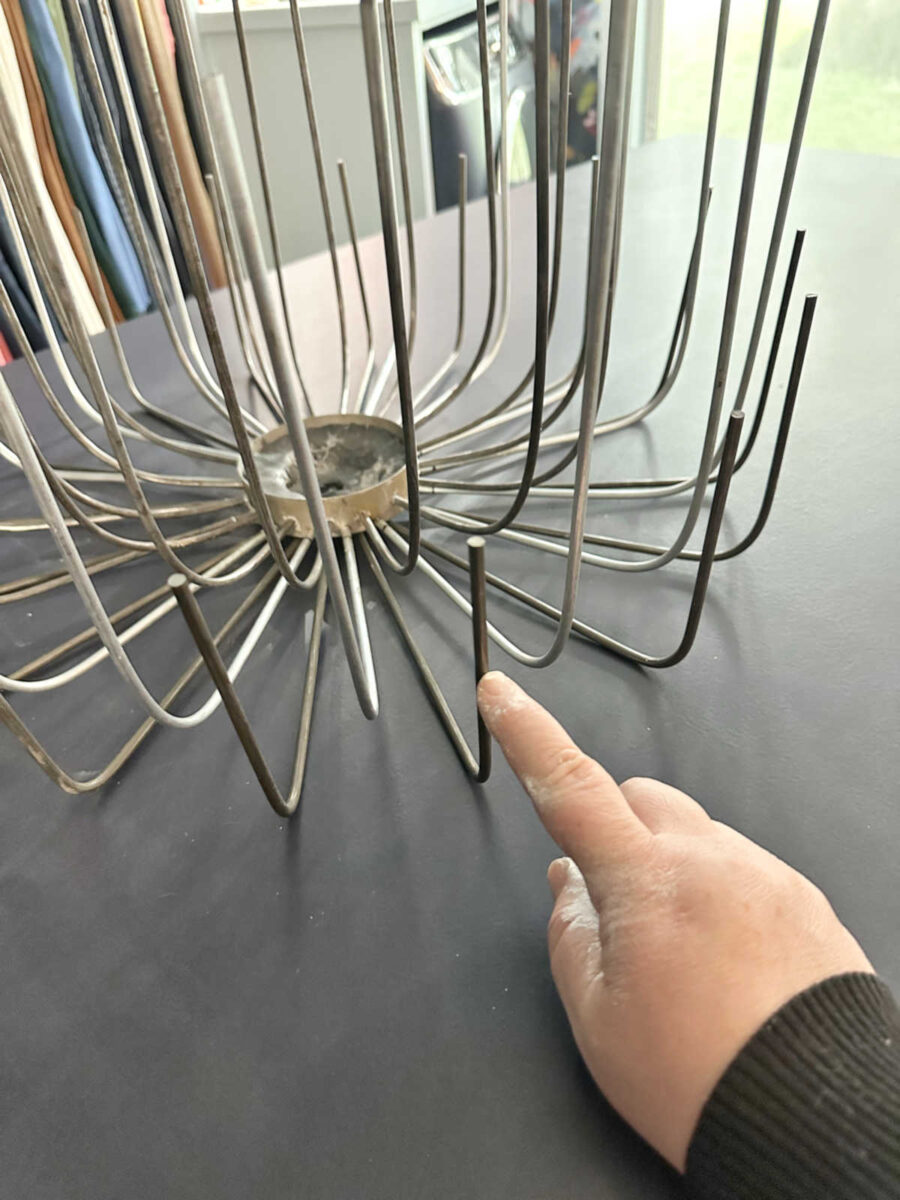
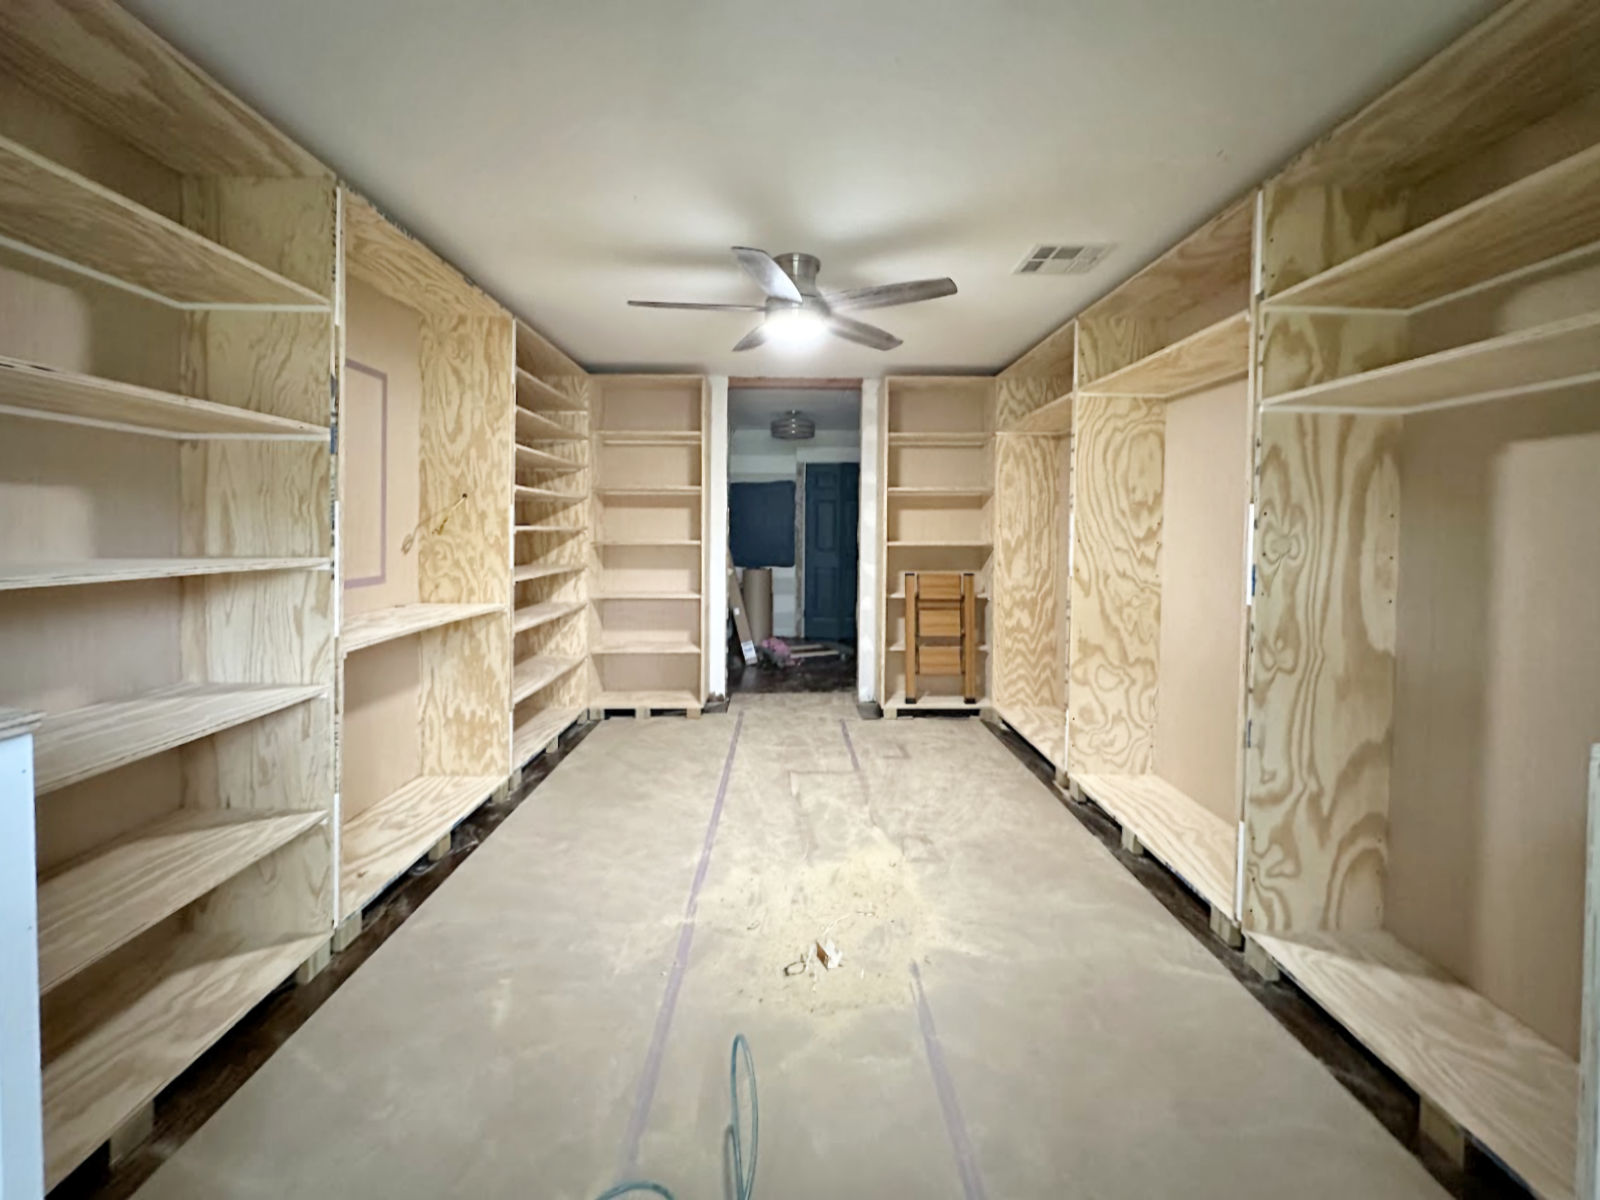
As you can see from this photo that I showed you yesterday, on that bottom row of metal I had kept the same spacing (i.e., the same 5/8″ measurement) between the metal rods that I used on the top upper rows. But that resulted in the bottom row of rods not being evenly spaced between the two upper rows of rods. And this became a problem when I started bending that bottom row of rods up. It looked messy, uneven, and unplanned.
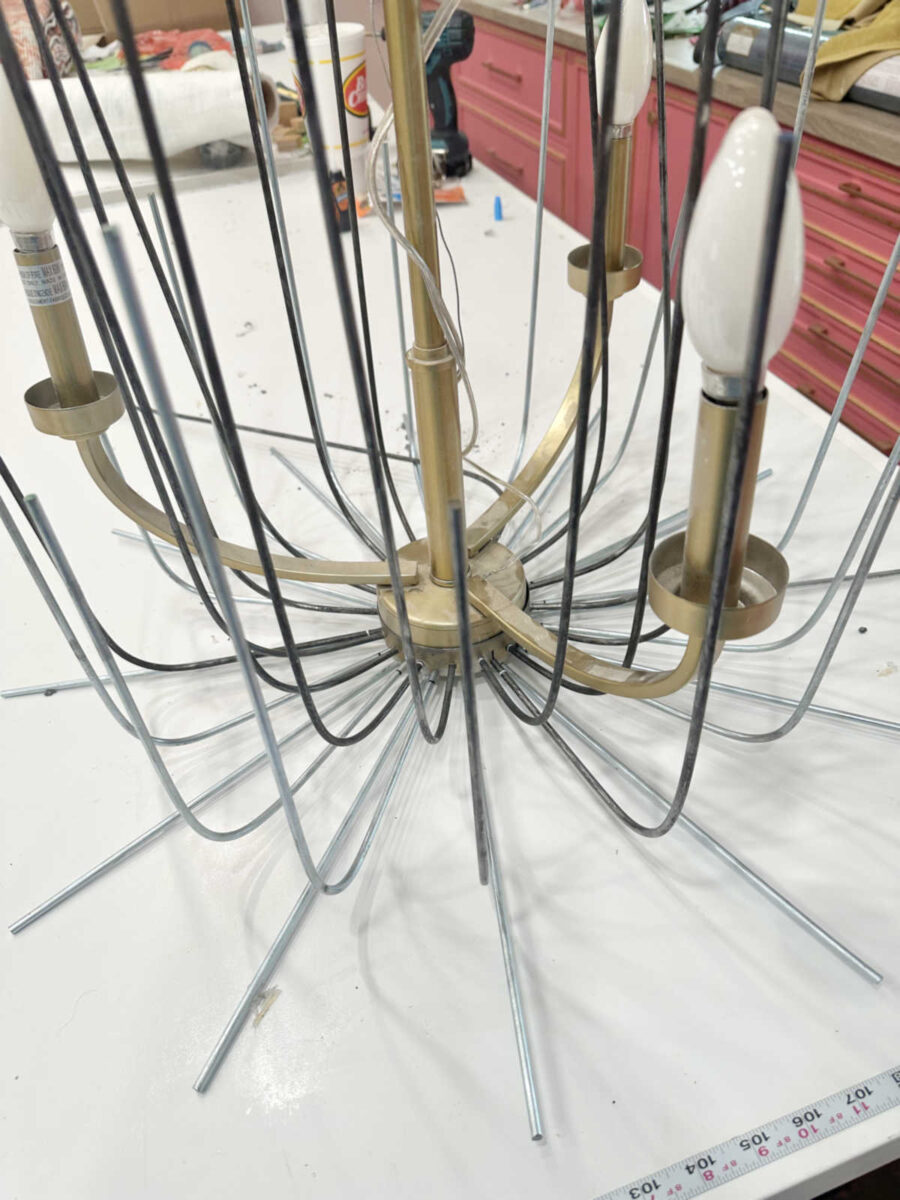
So yesterday, I knew I needed to redo that whole row. But I already drilled holes through the metal, so I needed to figure out how to do that. After removing those metal rods (which took quite a bit of brute force and sheer determination since they were held in place with JB Weld), I then used more JB Weld epoxy clay to cover over the holes that I had already drilled, making sure to push the clay into those holes as I molded it around the bottom metal piece. I tried to get it as perfect as possible before the epoxy clay dried, and then when it was completely dry, I used 100-grit sandpaper to smooth it out.
This gave me a new base into which I could drill the new holes, and then I re-inserted the metal rods and held them into place using super glue. It actually worked quite well!
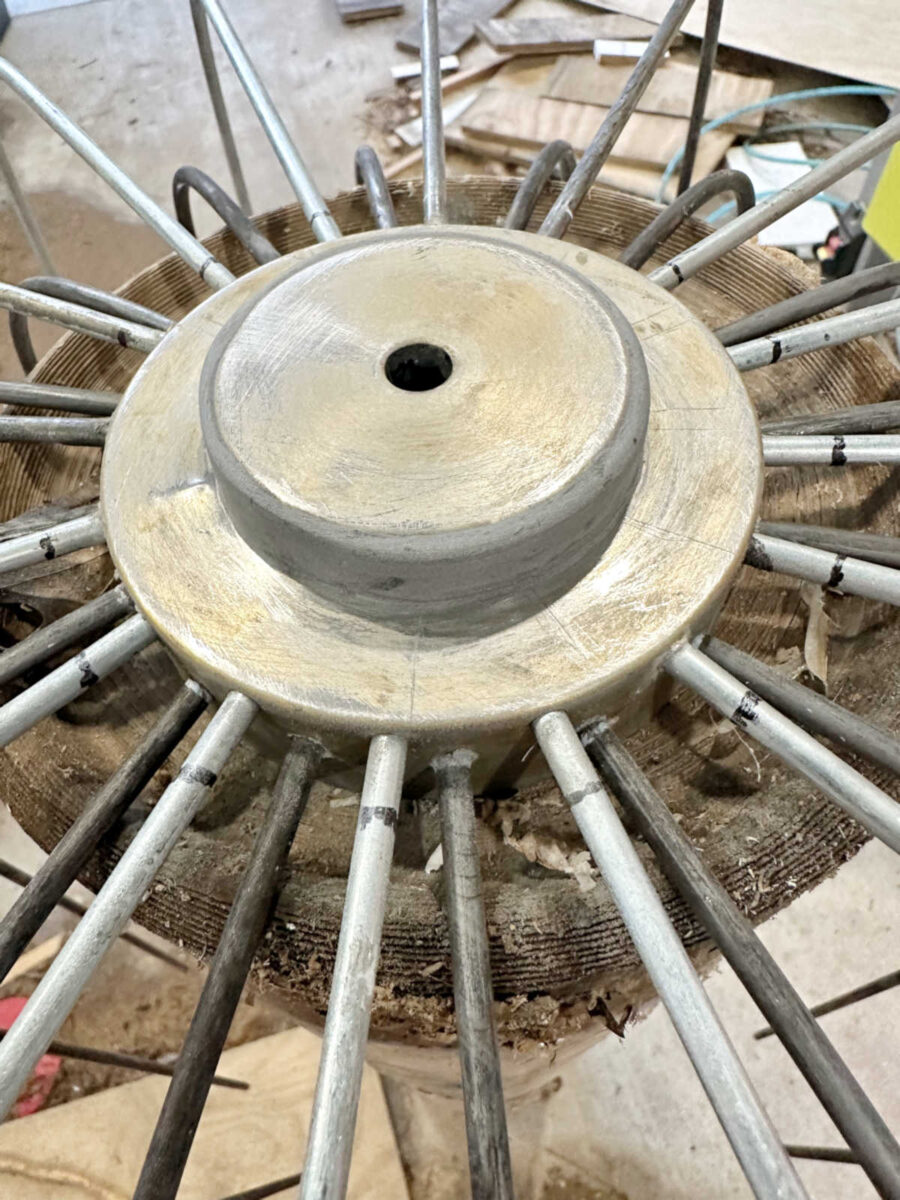
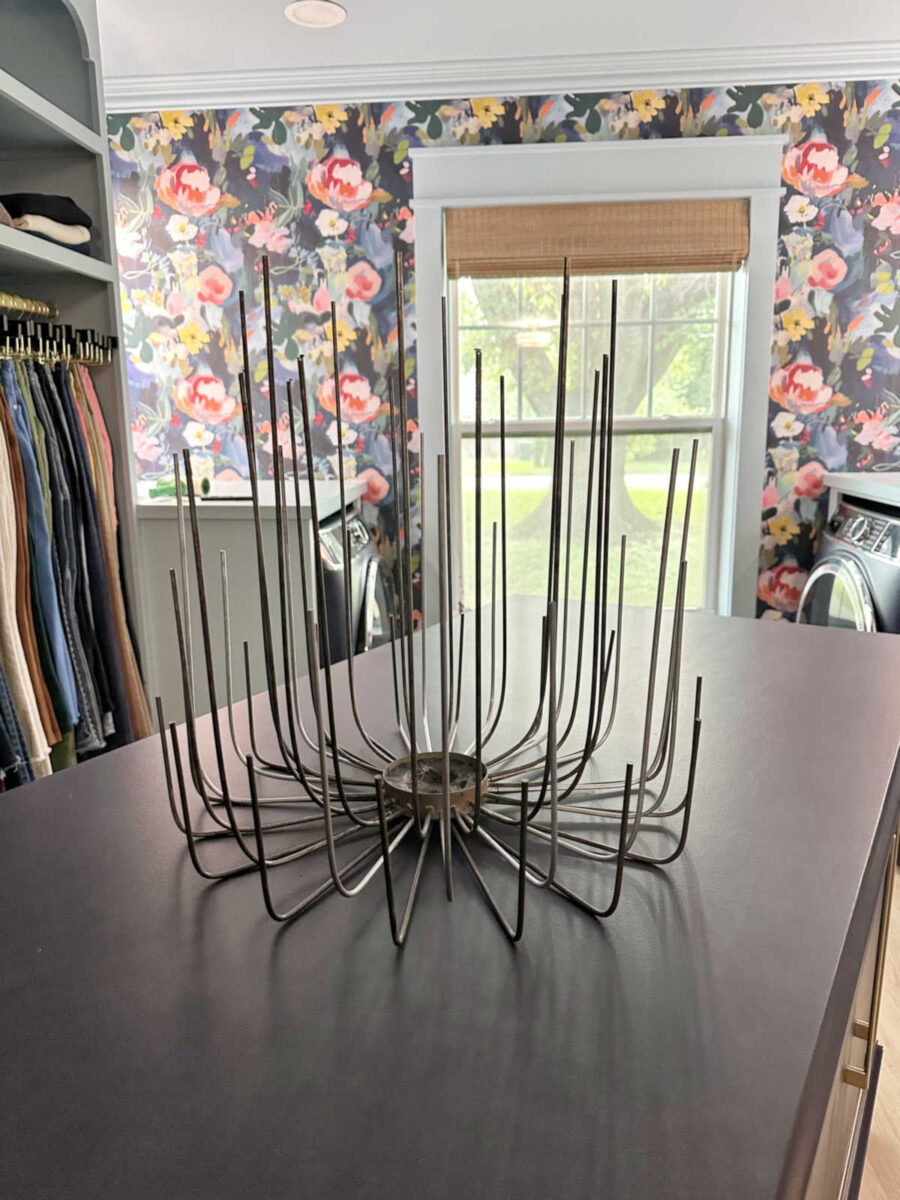
Once I had that row of metal rods in place and secured, I used a 1-inch wood dowel rod to bend that row up, just like I had used an empty quart paint container, and a spray paint can for the first two rows. I have to admit that I was pretty proud of how this whole frame turned out. I know it looks like a mess right now, since there are no flowers, and the whole thing is an ugly color. But just imagine the flowers attached and the whole thing painted white.
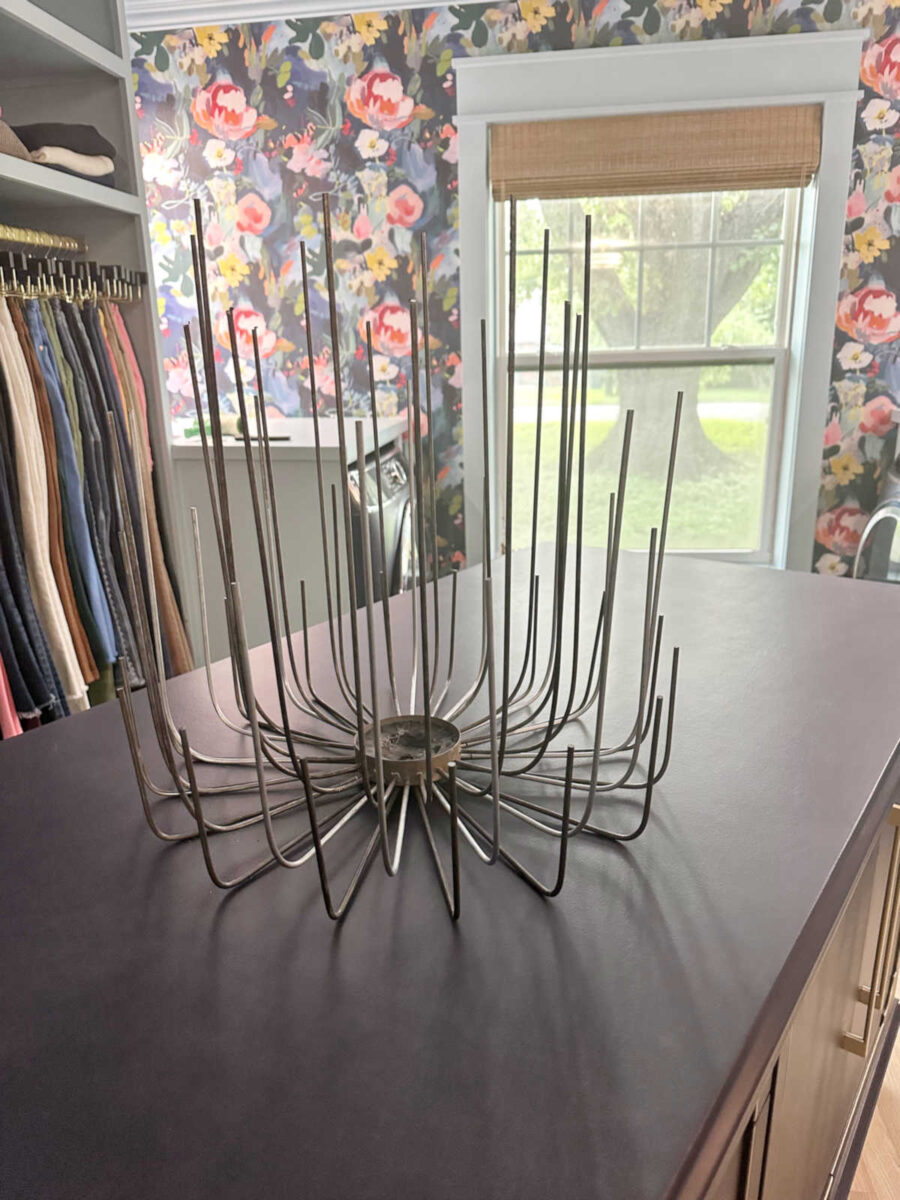
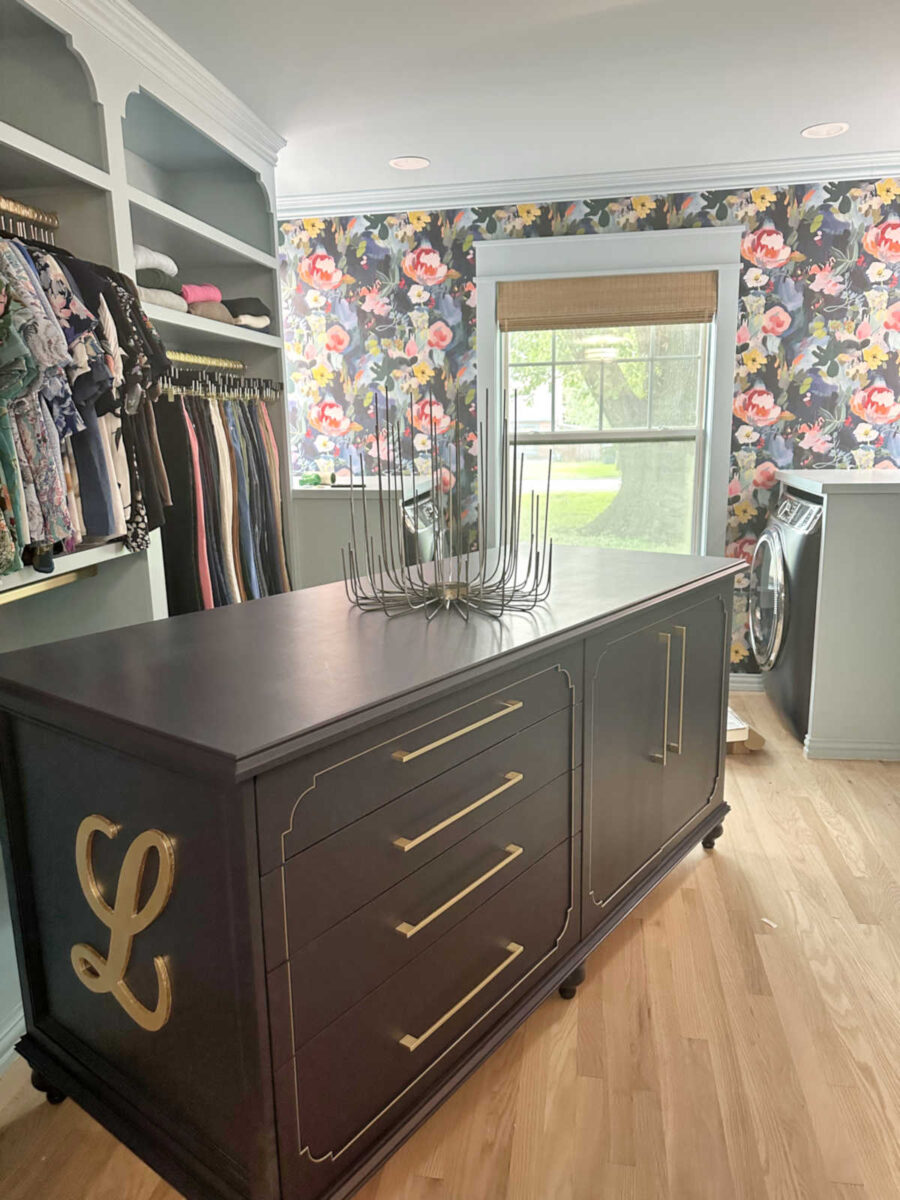
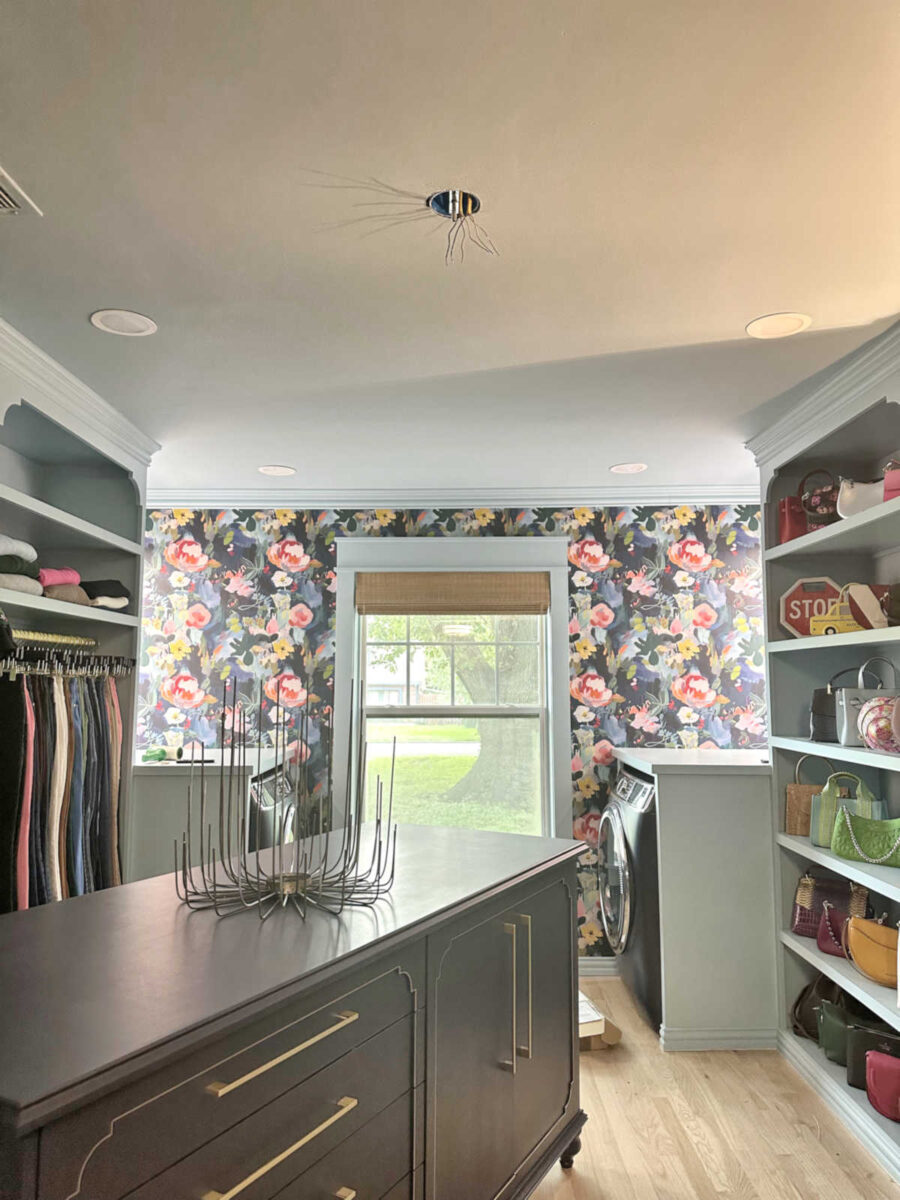
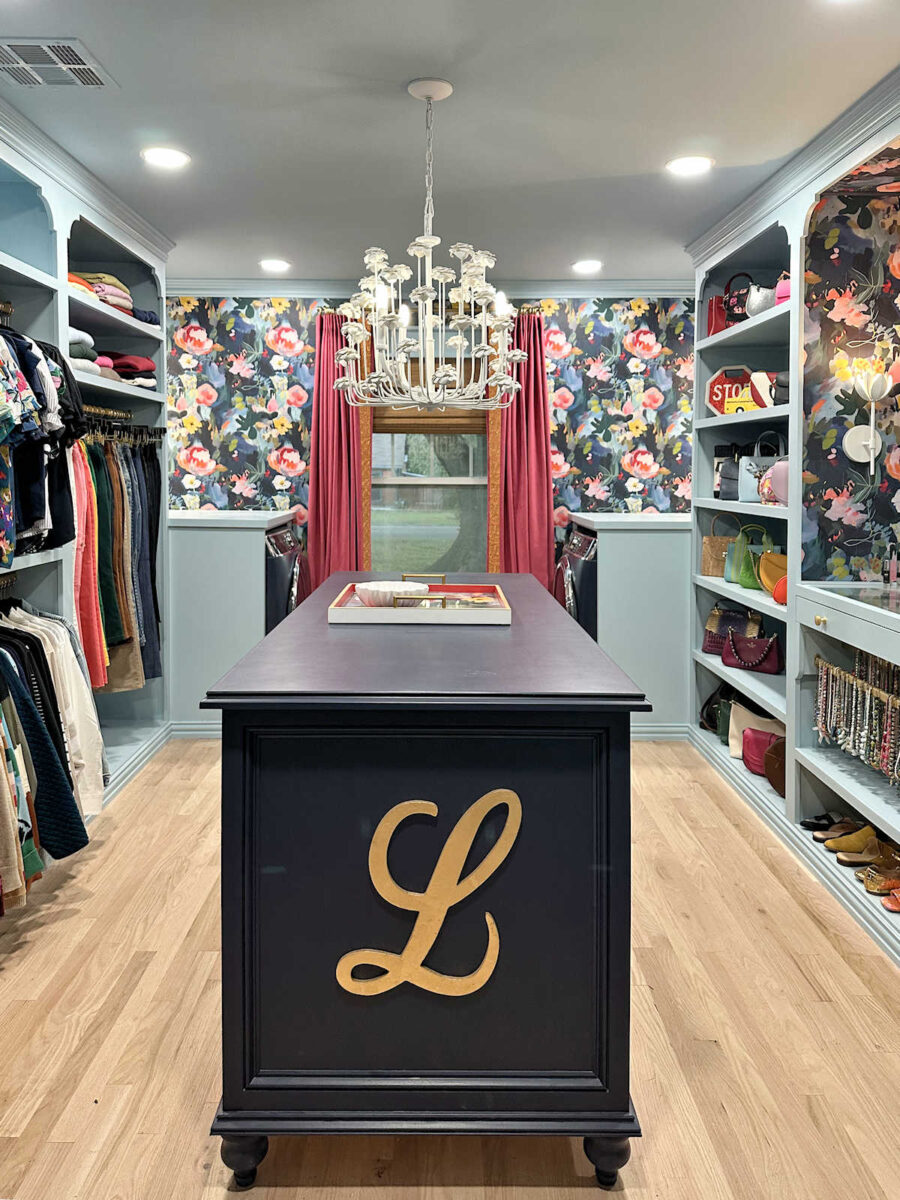
I was also concerned about the overall size, but once I brought it into the closet and set it on the island, my concern went away. I think it’s going to be the perfect size!
I do plan to trim the rods down. I wasn’t sure how tall I wanted the tallest rods (stems) to be, but I think these are too tall for a closet.
Also, I apologize for the poor lighting in these pictures, but this chandelier is the first light in the whole chain of lighting in the closet, so without it there, none of the others on this switch will work. 😀
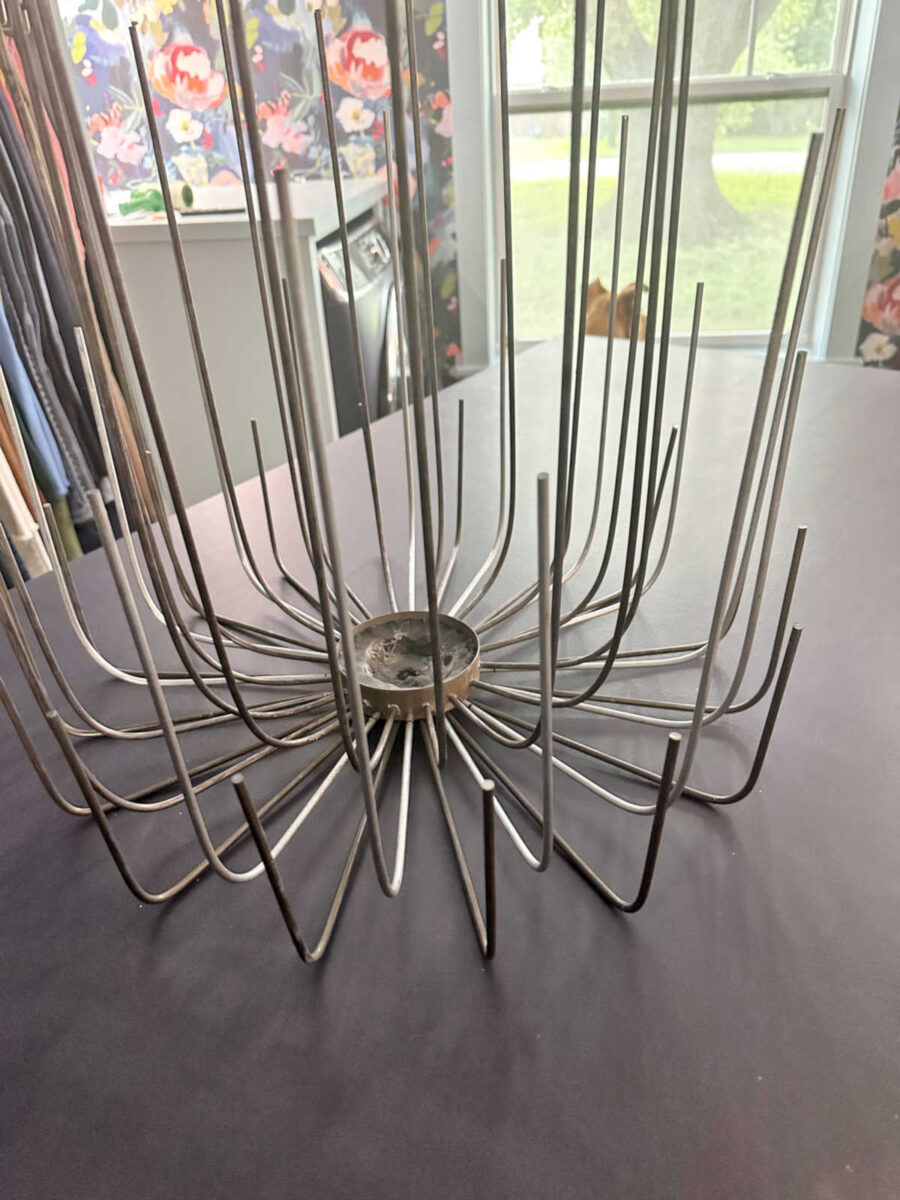
I also don’t plan to keep all of the rods on that bottom row all the same length. I want them a bit more staggered instead of having 16 flowers around the bottom that are the exact same height.
So I’ll keep eight of them the height they are now, and then I’ll cut the other eight down about 2-3 inches, so those eight will be about here…
And then I’ll adjust the heights of all of the rest of the rods from there.
With the frame finished, I was ready to make some flowers. And this is where things went off the rails. 😀 But interestingly, even though my first two flower experiments failed miserably, my confident level on this project has increased from 60% to about 80% after yesterday.
After watching lots of videos on how to make flowers with various types of media, I had pretty much determined that air dry clay would be the best option for this chandelier. But since I have hundreds of wood tasting spoons on hand, I thought I’d try those out first. These were a fail. The spoons aren’t curved enough. Since they’re so flat, it’s hard to get them into a flower shape. I tried gluing them to each other like this, but you can see how flat that made the flower shape.
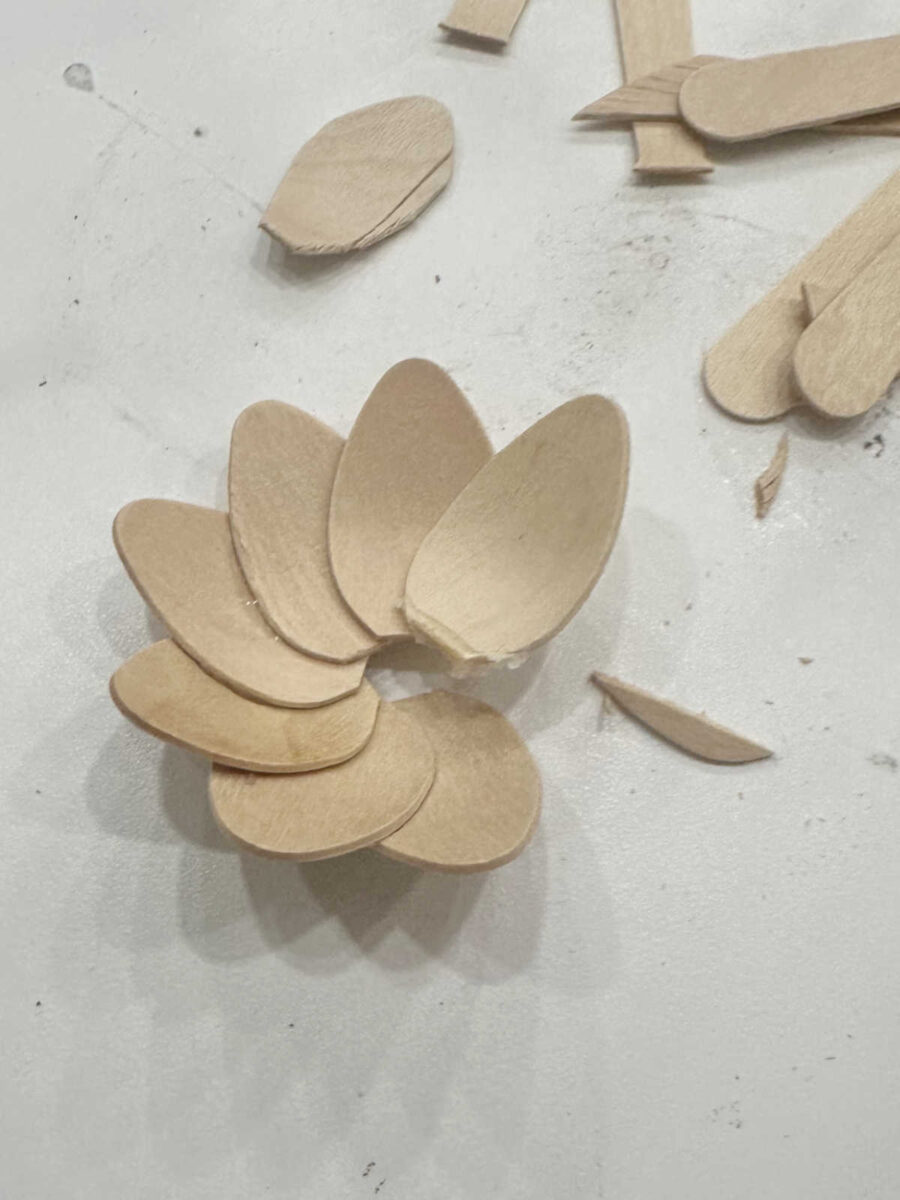
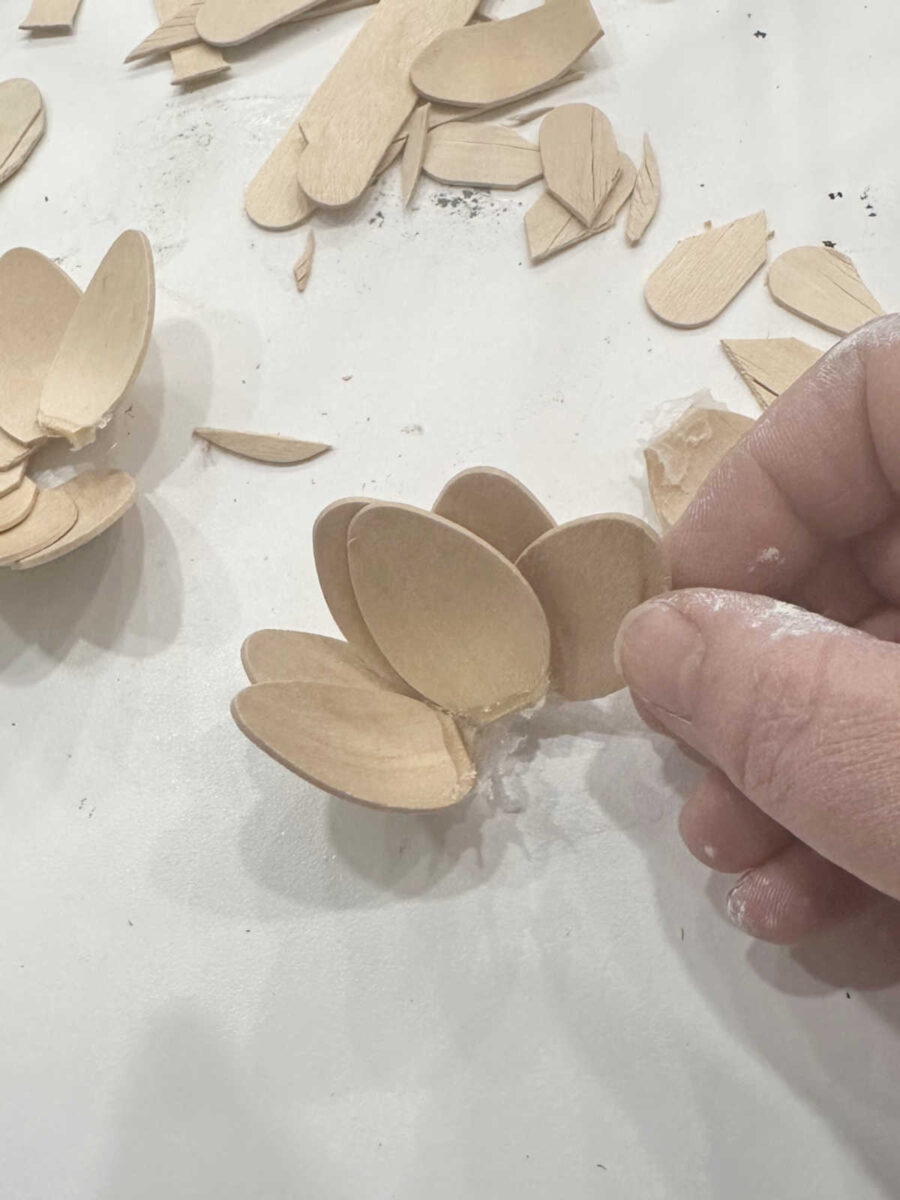
That’s not at all what I’m looking for. So I tried gluing them more upright, but again, since the spoons are so flat, and they’re wood, so I can’t bend them at all, that didn’t work out either.
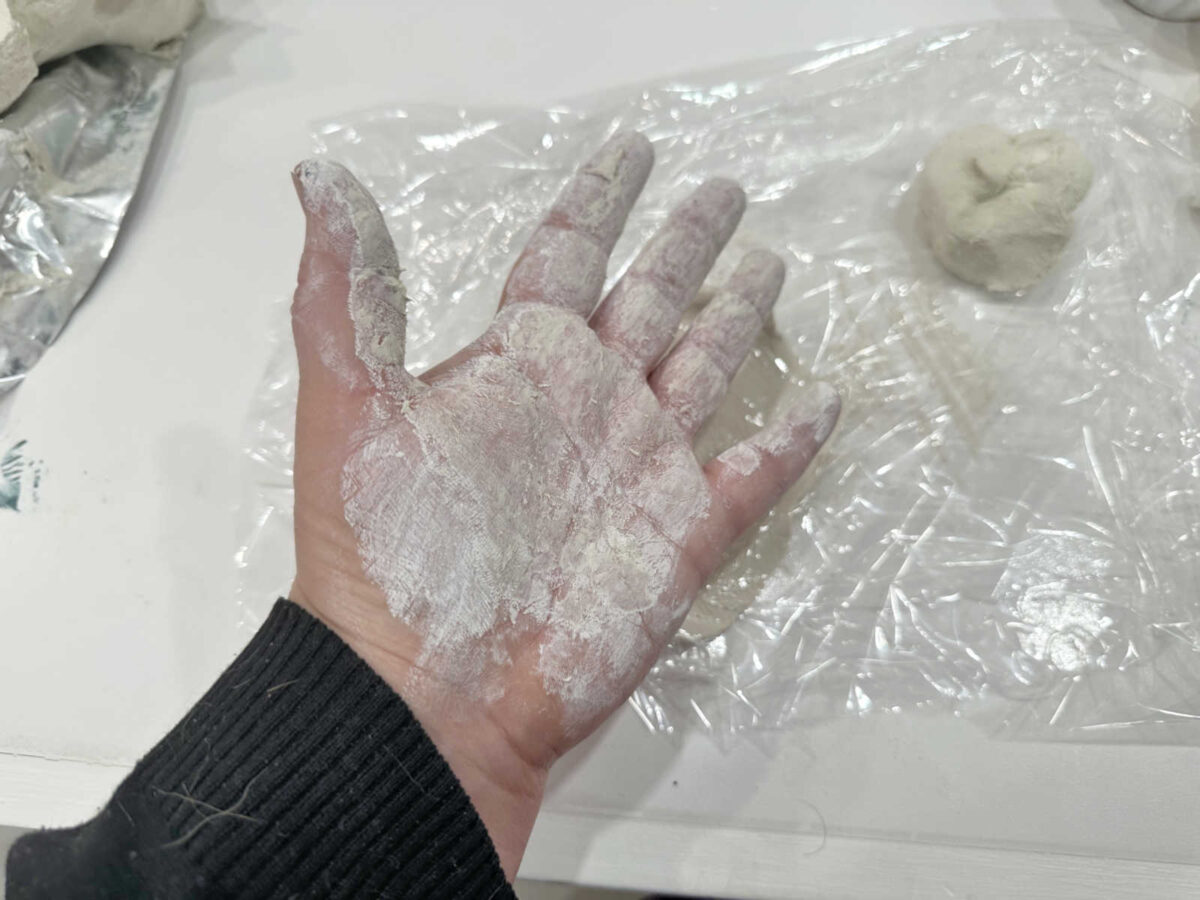
So I went to Michael’s and purchased some Craftsmart air dry clay. I had already watched several videos on making flowers with air dry clay, and they all looked so easy, so I was fairly confident that I could do this.

Well, this was a complete mess. In my humble opinion (even though I’ve never used air dry clay before), this product is way too wet. It stuck to everything! I couldn’t get it off of my hands.
And after attempting to roll it flat between two pieces of plastic wrap, just as I saw person after person doing in the videos I watched, it was so sticky that it wouldn’t come off of the plastic wrap.
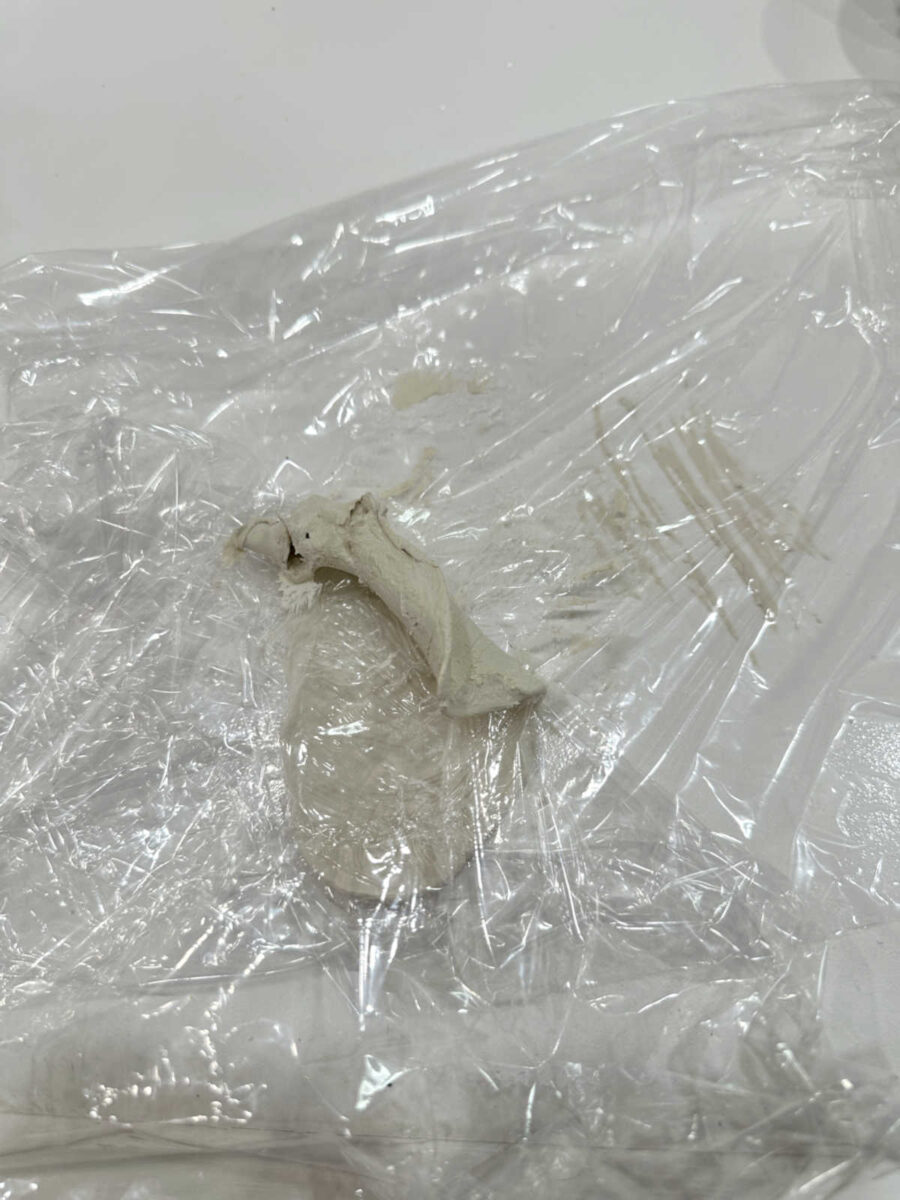
So both of those experiments failed. I’m thinking I just need to try a different brand of air dry clay. Or maybe I need to go with an oven-baked clay. I don’t really know. I’m feeling a bit out of my element here. I only have a tiny bit of experience with clay, and it’s been years since I’ve attempted any kind of project with an oven-baked clay. But I do remember it being a lot easier to work with than this, and it didn’t stick to everything it touched.
If you have any experience with clays, I’d love to know what you think! Is there a better brand of air dry clay that I should be using? Should I go with an oven-baked clay? Is there another product that I haven’t thought about (or don’t know about) that would be easier for sculpting flowers? Tell me what you think.
More About My Walk-In Closet/Laundry Room

see all walk-in closet/laundry
room diy projects
read all walk-in closet/laundry
room blog posts

Addicted 2 Decorating is where I share my DIY and decorating journey as I remodel and decorate the 1948 fixer upper that my husband, Matt, and I bought in 2013. Matt has M.S. and is unable to do physical work, so I do the majority of the work on the house by myself. You can learn more about me here.


Perhaps a large round bead or round of plywood from a hole saw depending on diameter needed for size that accommodates however many tasting spoons can be glued upright on the sides? Will need a center hole to slip over the metal rods. Just an idea. This is going to be such a great closet when all is said and done!
I, too, thought the wooden spoons would work. They’re more upright (vertical) than you (Kristi) were laying them out. Then leave a bit of a “neck” (shaved/whittled/cut down down a bit) and fit that part into a small cone shape of some sort.
Wow Kristi…its coming along wonderfully!! kudos! I’m thinking that maybe, just maybe an even easier way might be to use fishing spinners, they are the exact shape of those flower petals, curve and all! or some type of thin gauge metal ? perhaps a 20 ga? but then you will have to hand cut & file the edges of each and every one before you can even play with the shaping of them? But you can definitely get that customization you crave! I cannot wait to see the what you come up with!
https://www.amazon.com/dp/B08164BC3Y/ref=sspa_dk_detail_2?pd_rd_i=B08164WP2Y&pd_rd_w=iKO2L&content-id=amzn1.sym.386c274b-4bfe-4421-9052-a1a56db557ab&pf_rd_p=386c274b-4bfe-4421-9052-a1a56db557ab&pf_rd_r=861DENMKN6FVAWS4R4P9&pd_rd_wg=sSP4C&pd_rd_r=7fc14984-b4c4-4262-9371-a5c10c4147b4&sp_csd=d2lkZ2V0TmFtZT1zcF9kZXRhaWxfdGhlbWF0aWM&th=1
Hi, could you get an oval disk cutter and cut your own thin metal disks for petals? I don’t have any experience with that but it would seem if you get thin metal, you could just punch them.
My kids love Crayola model magic. It has a great smooth texture and is very light weight. Not sure if it will be ok next to a light source though or if its considered flamable.
Sculpy is also a very high quality oven bake clay that i’ve used in the past, but this option can get very pricy in large quantities. it can be “painted” with a finish to give it a sheen. because it gets baked can probably handle heat from light bulbs.
Would Shrinky Dink plastic work?
https://m.youtube.com/watch?v=cdGZovzHooA
How about cutting thin sheet metal into four petal flowers with a hole punched in the center of each flower. Bend the petals into shape and then slide the flowers onto the rods.
I just took an art class where we made piped flowers and leaves like would be added to a cake, but we used lightweight spackle in the piping bag. The spackle can be colored any shade you like with acrylic paint, or painted after the fact. We piped onto parchment paper and let the pieces dry overnight, then used some artist’s glue to adhere to a mixed media canvas, but the instructor said hot glue or something like E6000 (it another in that line of glues) would work too. You could also shape it with a putty knife or whatever other tools you want to try.
Sculpy clay for sure. Love the stuff
Do you use the air dry Sculpy clay, or the oven baked kind?
Yeah, my first thought was to use FIMO/Sculpy clay, the stuff you bake to harden. You can make a foil form to put the petals around, so they hold their shape while baking. It can be painted, too. I think you can get a large block, to save. Also, you can use a cheap manual pasta maker to make getting an even thickness.
Can’t wait to see the results of whichever way you go.
how about these spinners?
https://www.amazon.com/dp/B08164BC3Y/ref=sspa_dk_detail_2?pd_rd_i=B08164WP2Y&pd_rd_w=iKO2L&content-id=amzn1.sym.386c274b-4bfe-4421-9052-a1a56db557ab&pf_rd_p=386c274b-4bfe-4421-9052-a1a56db557ab&pf_rd_r=861DENMKN6FVAWS4R4P9&pd_rd_wg=sSP4C&pd_rd_r=7fc14984-b4c4-4262-9371-a5c10c4147b4&sp_csd=d2lkZ2V0TmFtZT1zcF9kZXRhaWxfdGhlbWF0aWM&th=1
Could you use thin sheet metal or thin foil for crafting. They sell it on Amazon. Can’t wait to see the finished product. You are so clever, and I look forward to all your blog posts.
Crayola air dry clay is super easy to work with!
Have you tried regular plastic spoons…..they seem to have more of a curve?
This was my thought too, Claudia. The petals of her inspiration chandelier definitely remind me of disposable plastic spoons. I’m stumped on how she would attach them but spoons would all be a consistent shape whereas hand-crafting something will, no doubt, yield some variations/irregularities. I also think using 3 (spoon) petals would look less busy than the 4 on her inspiration chandelier but I suppose it would depend on the size of the spoons.
https://www.amazon.com/ZEML-Medium-Weight-Disposable-Plastic-Spoons/dp/B088MM75T8/ref=sr_1_18?crid=UBSQL0AJG7B1&dib=eyJ2IjoiMSJ9.u-oQt2pkksUYEoVKPNnvyhstZ6jrIkOBnMjZlaIZsxPirB-7RU8kkxGDR7KXgmBVI8m-rm3JyYlqqVwg7TMNpqjS-9hfjvKcHLDiqHpM0ymlx4wtdBTmMCxV_dP6GZpwrzl8ihc81Y0KUSWfDYdS-VhUJGpAunoDZZIwLZ3Wt1A2H2My8p6w0oGn4TlQfEL6uNvWKY6oHxWjuKP7kXGSL8-5Fv53ra_u18TOyumdW4HIpPb9ANzynVsrWiqRWiEs6CdWjNJxzABMgA0FHkJyBl97GeceIa5Q6_q0-T0MVp4.hii202O8EWNWrI97lS0Rq2vDJoLOrrwUCAAJ8zUPMZQ&dib_tag=se&keywords=white%2Bplastic%2Bspoons&qid=1752590659&sprefix=white%2Bplastic%2Bspoons%2Caps%2C139&sr=8-18&th=1
That’s what I’m thinking the original inspiration light looked like. The plastic may not hold up to light, but the new bulbs we have now don’t give off a lot of heat.
https://www.amazon.com/Apoxie-Sculpt-White-modeling-compound/dp/B0013UDWXI
I would be concerned about the combined weight of all the clay flowers and if that would be problematic.
The suggestions of using light weight metal spinners may work better.
Maybe 3d printing would work for the flowers?
Would faux flower petals painted with plaster work ? Then painted. Or painting the paper mache on the petals might work.
If you want to try air dry clay again, definitely go with DAS. Brand matters here! The Sculpey baked clay might be better. Especially when wanting curved surfaces, those can be hard with air dry clay without making an external support to keep the shape as it dries. For air dry clay I have to drap curved pieces over a mold or in a mold to keep the curves I want while drying.
I was also going to suggest using plastic spoons. They have a deeper bowl than the wood ones. Or, is there no way to use artificial (silk or plastic) petals?
I played with DAS air dry clay and it wasn’t wet at all, I think it would do what you want it to do.
I don’t think clay is the way to go. I would use a metal. I vaguely recall in high school (over 50 years ago!) that we worked with copper sheeting and made designs on it, shaped it and used sculpting tools on it. Perhaps finding some thin type of metal sheeting that you could buy in a roll, like this: https://a.co/d/gOIpuLW . They also have shaping tools!
Perhaps you discussed this or it’s been been mentioned by readers already, but why not use aluminum, tin, copper sheet metal to shape the flowers? There’s lots of inspirational videos online.
When I started thinking about what materials you might use, I thought a malleable metal might be what you’d chose. Any thought of considering a metal of some type?
What about using plastic sheets like Sintra that you could heat gun against a buck (I dunno if that’s the right word) to repeatedly make the same curve? Pre-cut the petal shapes, heat them up to soften the plastic, then shape them against a wood (or something) curve. Maybe even a matching pair of convex and concave curves that you could sandwich them between…
There’s also Wonderflex and Worbla, which cosplayers use to make fake armour for costumes, but I think it might have more texture to it. It’s also a thermoplastic that comes in sheets.
Could you steam the wooden spoons somehow so they could be bended?
Perhaps you could find some metal flowers that are the right size and shape.
My grandson is an expert with clay. His name is Brandon Wells and he lives in Lawton, Ok. I will email this blog to him and he will answer back to you. I also need to send him what you are generally going for!
Hope this works.
P.S. He is 30 years old and is a fireman! Ladies, he is good looking and single!
Hope that doesn’t make him angry.
Your comment about your grandson is so sweet and pure! I love it and it really made me smile. What younger lady wouldn’t love a firefighter who is creative and good with his hands?! Come on Ladies, make his Grandma happy! XOXO
I mentioned this on facebook, but Worbla or similar products seem ideal. I’m assuming you’d use LED bulbs so they shouldn’t get hot enough to re-soften it. This would allow you to customize each petal of each flower to get exactly what you want, so if you want variation (like every other flower in the outside row to be more open, or just an occasional petal that is curved out slightly, or whatever), that would be easy to do. I’ve never worked with it, but my understanding is that Worbla is incredibly easy to work with and very fast.
What about aluminum from coke cans. It is thin enough to be cut easily and can be shaped and painted. Worth a try.
My neighbor crafted flowers for outdoor use out of soda cans. She asked neighbors to drop off empty colored soda cans as she didn’t paint them. The flowers were beautiful and very unique but the edges were sharp.
I’ve been told you can use baby powder to soak up some moisture from air dry clay by just kneading it in, or just kneading the clay in general until the distributed moisture dries out a bit can help.
Interestingly, I’ve seen someone dip faux flowers in plaster of paris to make plaster flowers. Those could look cool for your project!
Try using cheap metal spoons–like thrift store junk. You could also use plastic spoons, but the cheap metal ones would be more flexible to shape them.
https://www.pinterest.com/pin/99360735510654260/
https://www.pinterest.com/pin/99360735504987349/
I’ve included some pinterest links, but I don’t know if they will work. Otherwise, search Pinterest for silverware flowers. They are surprisingly easy to work with.
When I first saw your picture I pictured white plastic fast food spoons. Would the bowls from those work?
as an afterthought do you have a Cricut machine? With the right blades, you might be able to sheets of petals and leaves.
I think the chandelier looks amazing, and I know the problems with JB Weld if you need to redo it…Oy Vey! I went to Amazon and looked up “large plastic spoons”, and found a ton of them, and since they are serving spoons, they are larger in scale and might work for you. You can try using metal, or wooden washers to attach the spoons to and then have a platform for them to rest on the arms of the chandelier. Sorry I don’t have pictures. I would just think about the clay a little more, remember you will want to clean this light fixture in the future, and it should be sturdy enough to handle that. I know that you will find the best solution and it will look amazing. Don’t drive yourself crazy with this project, you are so good with spoons.
Cheers to you, Matt and the fur babies!
New idea here- try using small styrofoam balls on the end of each rod and glue the wooden spoon “petals” onto the balls at the level you want. Then when you paint it all out, it will look great! I would first paint all the balls, and spoons just to get perfect paint coverage, and do a final coat when everything is finished.
I would agree with those suggesting using a malleable sheet metal. You could cut a flat 4 petal flower in the desired shape, then ‘fold’ it up into tulip flowers similar to your inspiration light. If you have a hole punched in the center, it could be slipped over your metal rods or without the hole it could be glued to the end of the rods. Similar to the original, a cone shaped bead with the right diameter of hole through the middle, could be slipped onto the rod before installing the flower to bridge the gap between the two. You’re certainly on the right track – I look forward to seeing your end result!
The first thing that comes to mind is an airdry clay that is white; I don’t remember the brand but I do remember it being no fuss no muss; you mold it and done! Then there’s Fimo and Sculpey for the oven type. It can smell up a room so be aware of that. Best of luck, it’s really coming along. Bending the rods seemed daunting to me but it looks like you’ve pulled that off brilliantly.😉
Check this out: https://www.instructables.com/Flame-Coloring-and-Making-a-Steel-Flower/
You could use a similar process with a thinner metal and no worries about flame coloring the metal since you want to paint yours.
Great find! I think these are fantastic!
I was thinking of Mexican Tin art, called hojalata (we have them everywhere in San Diego!) You can use the link Yvonne posted above for a pattern and then these steam table lids to cut your petals from: https://tinyurl.com/SteamLids
Have you thought about soaking the wooden spoons long enough to curve them? I would think that would work?
I would DEFINITELY go with an oven-baked clay. Even if you do manage to form flowers from air-dry clay, they’re going to remain brittle and will probably crack as they dry, and be extremely frustrating to try and attach to the metal rods. With oven-baked clay like Fimo, you’ll end up with a much more durable (and lightweight) product.
I liked the look of the 2nd try with the wood spoons but I’m sure you’ll get it figured out. I mainly wanted to say how great the island looks and if you posted about it, I missed it. I absolutely love it all blue with the gold accents and the “L”.
This link to metal stamping products might give some ideas: https://metalcraftusa.com/collections/steel-stampings-flowers-plants?srsltid=AfmBOoqNsJX6H7fqGgQPZiQNVQpTcC3TjfKscKjlpWlJcLKlnKFWyWOI
What about thin metal ? When I was in Girl Scouts, we used it to cut leaves to put on a tray, that we were making as a gift. You could turn them up and even curl them. My mom had the tray and used it for years.
If you soaked the wooden spoons in water, can you then bend them?
DAS air dry clay is great. It’s all I use. I made Christmas ornaments several years ago and they have held up great. It’s so easy to work with. Good luck, it’s going to be beautiful.
IF you decide you want to try plastic spoons, like others have suggested, you should check out the ones at Dollar Tree, if you have one near by. I was recently there to get some spoons for an event, and I was surprised by their small size — which might be perfect for your project. Obviously, they are very affordable as well.
I don’t have experience with clay, but I do make wedding cakes and work with fondant, which has similar properties. I would form the flowers around small styrofoam balls while they dry/harden. If you’re trying to replicate the exact look of the flowers on the inspiration chandelier, I think a dahlia petal cutter set like this could be used to cut the individual petals. You can get not only the shape of the petals, but the realistic veining and texture (if you want that):
https://www.amazon.com/KALAIEN-Veining-Fondant-Cutters-Gumpaste/dp/B07Z1NW2WH/ref=sr_1_1_sspa?crid=R4VQCRIZVF93&dib=eyJ2IjoiMSJ9.j1eEyu_5zMdpbPDPe6m5Q6TB1zUQtDUgOKcBhpTyQeSqNBE2jO3XuoLmELRqMD0EL2oHx76Ec5Dqz9a6fDtN5hBDklTIuMqwH0jiAtF951d5VP6QyxCFWM2-fhWtE3E1B4MNl64tuW5bv6eOKjPM7y2VMGqQmet0KykeDnE4wGiMG0v6tSPiEUfVg5vIHQgvm_LiZ22AnjysJVQhWC1ZOhjdlNWGb6cuKBdjZosvRNdXcXp8pMiLadA1Fc18B67zHlC-47H1WuquHfNsQHVEHxk3xOx74rpQTiVRNfK-3HQ.O07FnCc2W1a19Z6agrJdEoxExIbzSVV3YqRV5FV3njg&dib_tag=se&keywords=leaf+cutter+for+fondant&qid=1752618028&sprefix=leaf+cutter%2Caps%2C839&sr=8-1-spons&sp_csd=d2lkZ2V0TmFtZT1zcF9hdGY&psc=1
I like yours better than the inspiration piece already! It’s amazing!
How about using metal spoons? I don’t know how the size would look but then you would have a piece at the bottom to attach to the rod (after cutting of course). These seem cheap enough to be “bendy”. $19 for 100!
https://www.amazon.com/Silverware-Stainless-Tablespoons-Restaurant-Dishwasher/dp/B0BFRBY97G/ref=asc_df_B0BFRBY97G?mcid=b46cacf5c25c3da88e93571a9aaaccbe&hvocijid=5906368743244374764-B0BFRBY97G-&hvexpln=73&tag=hyprod-20&linkCode=df0&hvadid=721245378154&hvpos=&hvnetw=g&hvrand=5906368743244374764&hvpone=&hvptwo=&hvqmt=&hvdev=c&hvdvcmdl=&hvlocint=&hvlocphy=1022533&hvtargid=pla-2281435179258&psc=1
IOD has a great air-drying clay.
Go with the oven baked clay. You may find that shaping it over the back of a metal spoon will give you the closest shape to what you want. SCULPY is one of the better brands. There is a sale at Hobby Lobby on the 3.75 lb pkg. it is definitely not runny.
My kids have used Crayola air dry clay that’s marketed for kids. It’s definitely not sticky, and it’s also extremely lightweight (may be helpful for the chandelier). You can buy big tubs of it in white – very reasonably priced!
What about a wire leaf shape with netting or fabric over it?