Simple Decorative Pillow
Good morning to you! Yesterday I worked on a couple of sewing projects for J & A’s master bedroom, and as I was sewing this pretty little pillow…

I realized that this would be a perfect project for those of you who want to learn to sew, or are just learning to sew, or who want to sew but don’t have the confidence yet to take on a big project like draperies. Pillows are the perfect starting point!!
So dig that sewing machine out of the closet, dust it off, and plug it in. Here’s how to make this cute little pillow.
To make this 18″ x 12″ pillow, you’ll need two fabrics and your choice of trim. The trim needs to be a flat decorative type. Some trims have a “lip” on them that is meant to be sewn into the seam where the lip won’t be seen on the final product. You’ll recognize this type of trim because the “lip” isn’t very pretty at all. So select a trim that is meant to lie flat and is completely decorative. Got it?
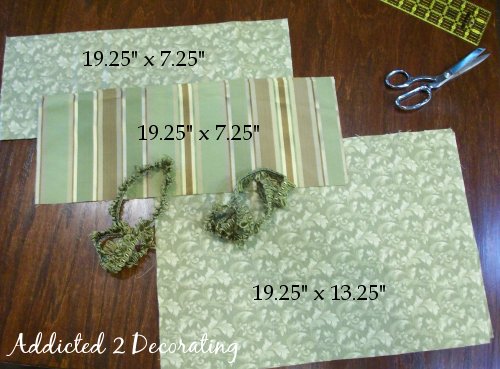
Okay, from the main fabric (green floral), cut one piece that measures 19.25″ x 7.25″ for the front of the pillow, and then cut the back piece 19.25″ x 13.25″. From the contrast fabric (stripe), cut one piece that measures 19.25″ x 7.25″. The trim should be at least 20″ long. (I made two pillows, so I have double of everything.)
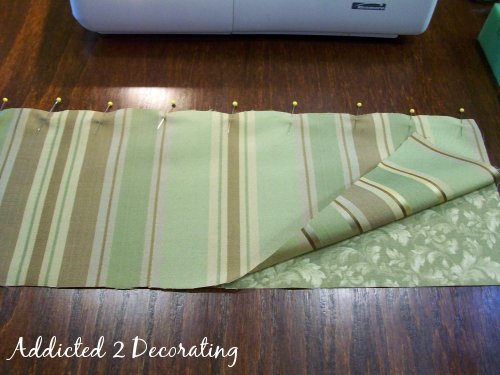
Place the two smaller front pieces with the right sides together, and pin along one of the long sides. Sew with a 5/8″ seam along the pinned edge.
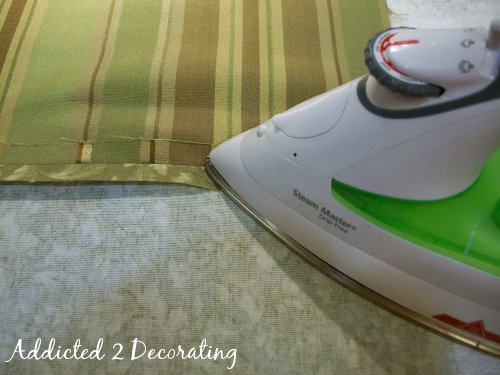
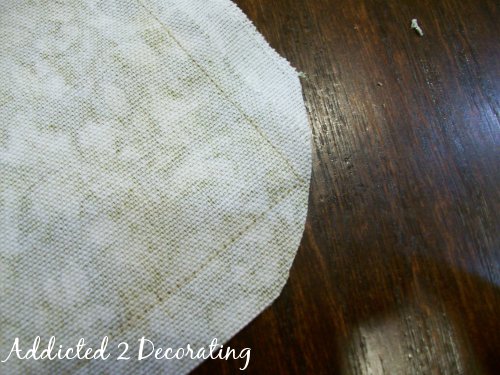
On the back of the fabric, use your iron to press the seam open, as shown.
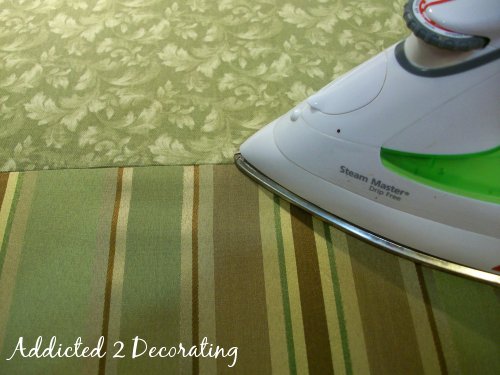
And then flip the fabric over and press the seam from the front.
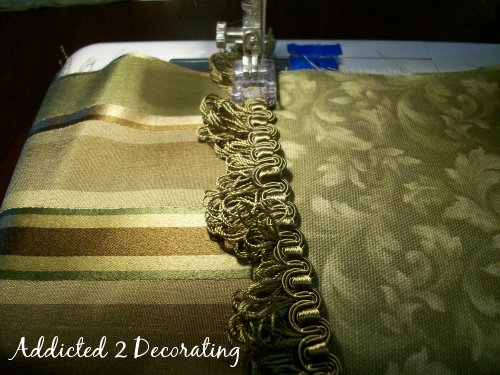
Place the fabric back on your sewing machine so that the seam is under the foot. Position the trim over the seam, and lower the foot so that it holds in place. Slowly begin sewing the trim along the seam. Take your time on this part!! It’s the hardest part of the pillow, so don’t get in a rush. Just be sure that you’re placing the trim right on the seam and that none of the little loops of the trim get caught on the sewing machine foot, and you’ll do fine.
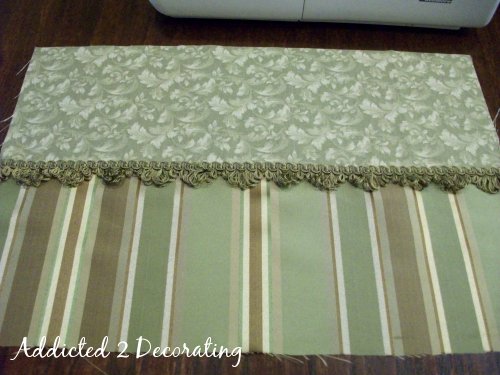
When the trim is stitched all the way across, your pillow front is finished! See? That wasn’t so bad, was it?
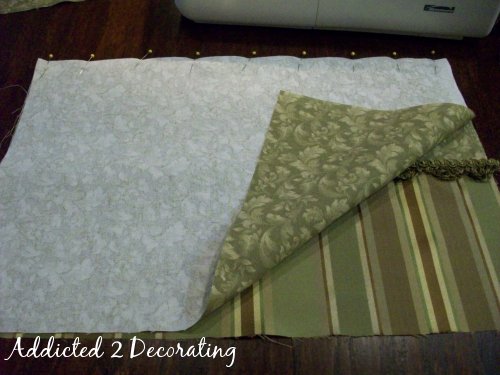
Next place the fabric that you cut for the back of the pillow on top of the pillow front that you just finished. The right sides of the pillow front and pillow back should be facing each other. Begin pinning around the edge. I always start at the corners, and work my way towards the center of each edge.
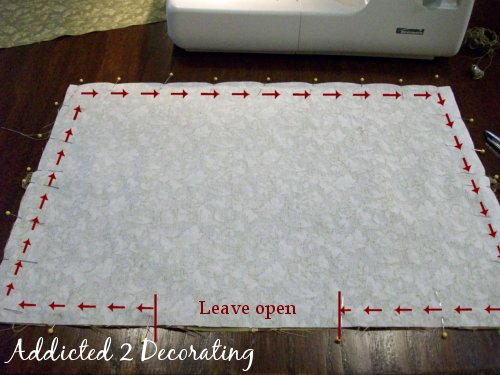
Starting on the bottom edge of the pillow, begin sewing around the edge with a 5/8″ seam. Leave an opening at the bottom large enough to fit your hand through, as shown here.
After you’ve stitched all the way around (except for the opening), trim the corners as shown. This prevents bulkiness when the pillow cover is turned right side out.
Now you’re ready to turn it right side out. Pay special attention to the corners. It may be necessary to use a straight pin and use it to gently pull the corners so that you have a nice pointy corner.

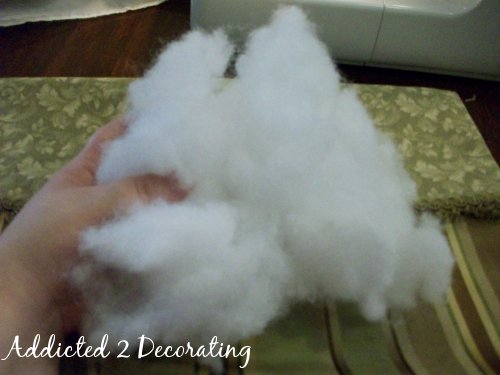
Now stuff your pillow. Take a handful of polyester filling, use your hands to fluff it up, and then stuff it into the pillow. Again, pay special attention to the corners. I can’t stand a pillow with empty deflated corners!!
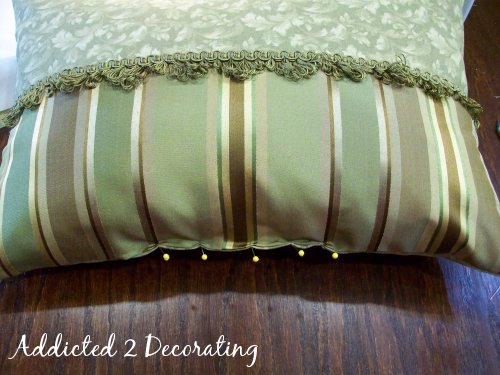
When the pillow is stuffed as much as you like it (I prefer mine more stuffed than less stuffed), use straight pins to close up the hole on the bottom. Try really hard to maintain your 5/8″ seam all the way across. You might want to have a friend help you hold the seam closed while you pin the seam.
You have two choices for stitching the opening. First, you can use your sewing machine to stitch it closed. This is how ready-made pillows are made. I’ve tried it a couple of times, thinking that it would be the easiest option. But the fact is, if you’re going to try to place the edge of a stuffed pillow under the foot of your sewing machine, you definitely need a second set of hands. Because I work alone, this process generally results in me frustrated–possibly crying–with the worst attitude and hurling insults at my sewing machine.
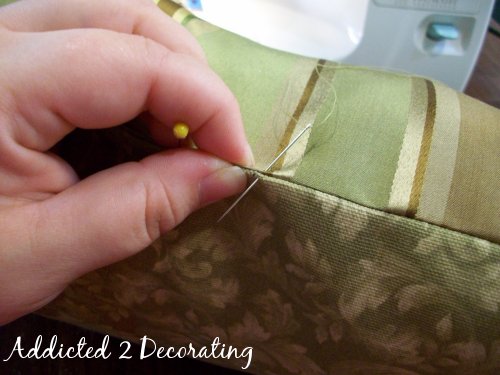
So to avoid all of that, I just hand-stitch the opening closed–a much more peaceful process, and it really doesn’t take very long. I try to keep the stitch about 1/8″ from the edge, and place a stitch about once every 3/8″. Now there’s no need to get out your measuring tape for the. Just eyeball it.
The finished hand-stitched area will look something like this. As you can see, you will always, ALWAYS want to ensure that this hand-stitched part is on the bottom edge of the pillow.

And you’re done!! See how simple that was?!

And the contrasting fabric and trim on the front make you look like a pro!

Now go get sewing!! I wanna see some pillows from you! 🙂
Now here’s a little peek at the pillow shams I’m working on.
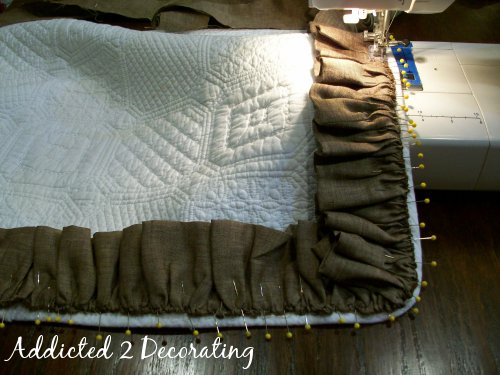
I’m just adding a linen ruffle to a ready-made pillow sham, but this is many times harder than making the pillow above!!! I never realized how difficult it is to gather linen. It unravels so easily, and it just a pain to work with. So, you’ll have to check back to see how these turn out.
Well, I better get busy. Hope you have a wonderful day!!
(Seriously, if you decide to make this pillow, or one like it, be sure to show it off! You can upload a picture of your creation on the Addicted 2 Decorating Facebook page.)

Addicted 2 Decorating is where I share my DIY and decorating journey as I remodel and decorate the 1948 fixer upper that my husband, Matt, and I bought in 2013. Matt has M.S. and is unable to do physical work, so I do the majority of the work on the house by myself. You can learn more about me here.


Kristi.. BEAUTIFUL and thanks for the tutorial.
Beautiful pillow! I was just in a store and saw pillows that were nothing but a square of print fabric and a square of solid sewn together and stuffed. They were $40 each! Yours is so much more elegant and you showed us how to make it! Thanks.
Love the fabric you chose, someday I am going to try this!
I have a project this tut will be perfect for—thanks!!
I love this kind of creativity, especially because the materials have this warm romantic look that is sensational for in the bedroom.
Thanks for the great post!
I can't sew at all (the one dress I made in Home Economics in high school was a disaster!), but I enjoyed your blog! Have a great day! All the best, Terri Kirby Erickson, author of Telling Tales of Dusk, http:terrikirbyerickson.wordpress.com
I love this kind of creativity, especially because the materials have this warm romantic look that is sensational for in the bedroom.
Thanks for the great post!