Studio Floor Progress — On The Home Stretch!
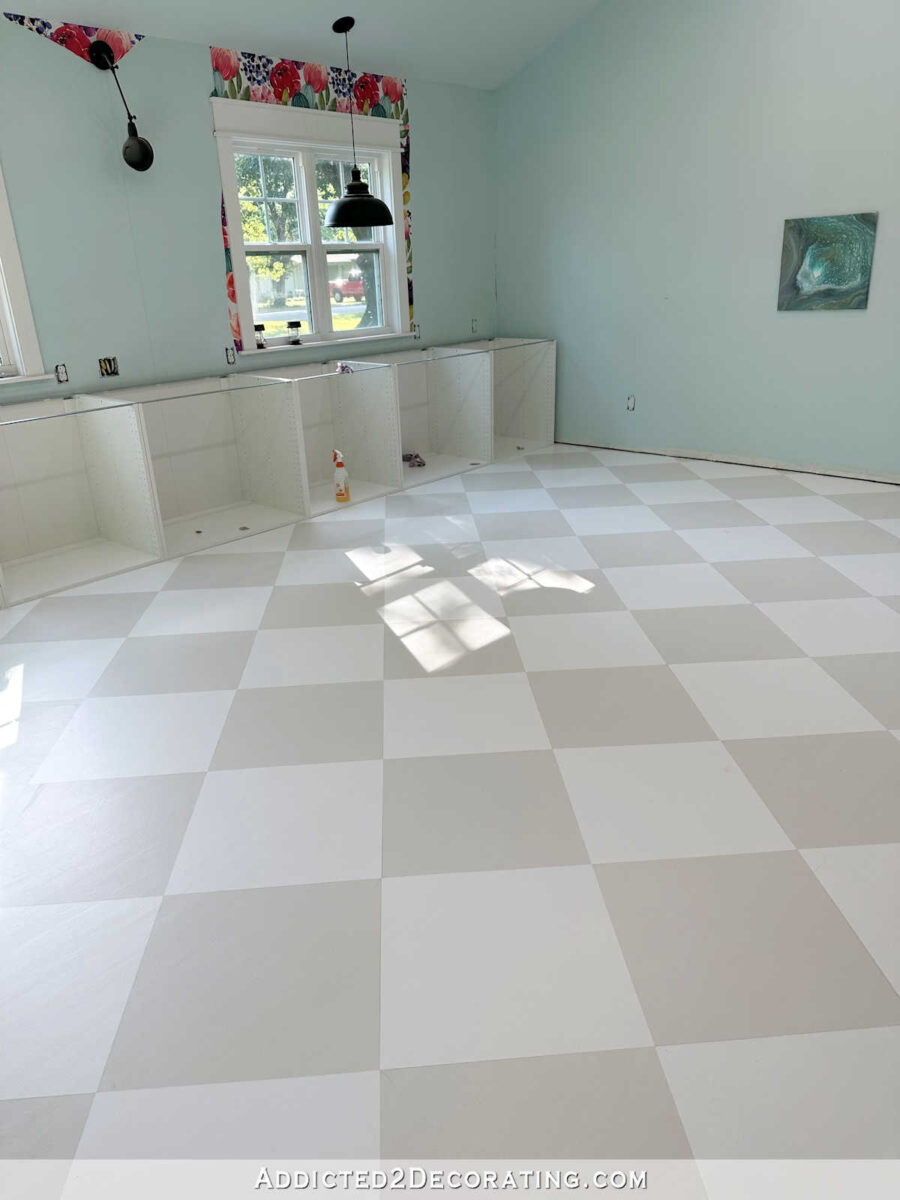
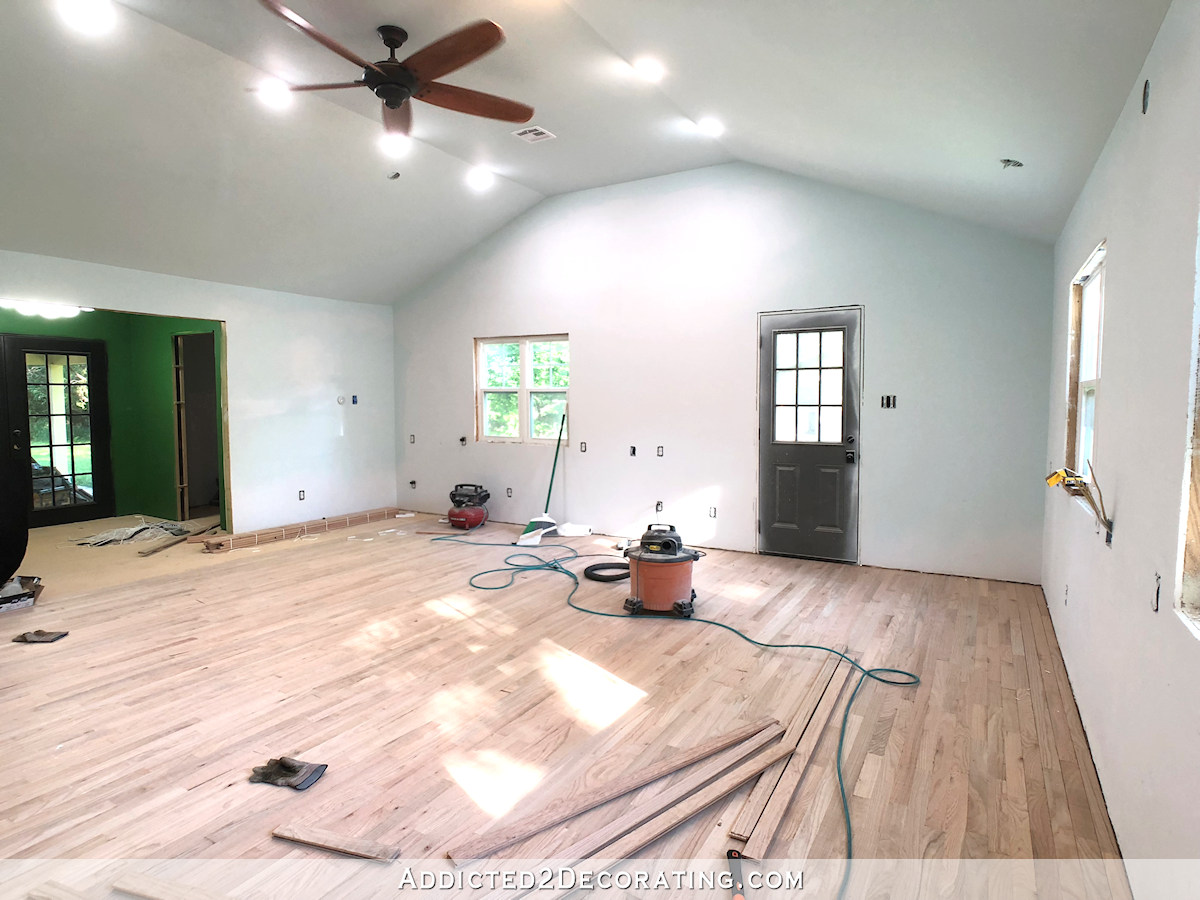
Since I wasn’t able to completely clear out the studio and do the entire floor at one time, I’ve had to do the painted floor project in stages, which has made it a bit more challenging than it should have been. But that’s okay! I’m making it work. As I showed you last week, I got about 2/3 of the floor in the main room finished…
So before I could start on the other sections, I covered this part of the floor with paper…
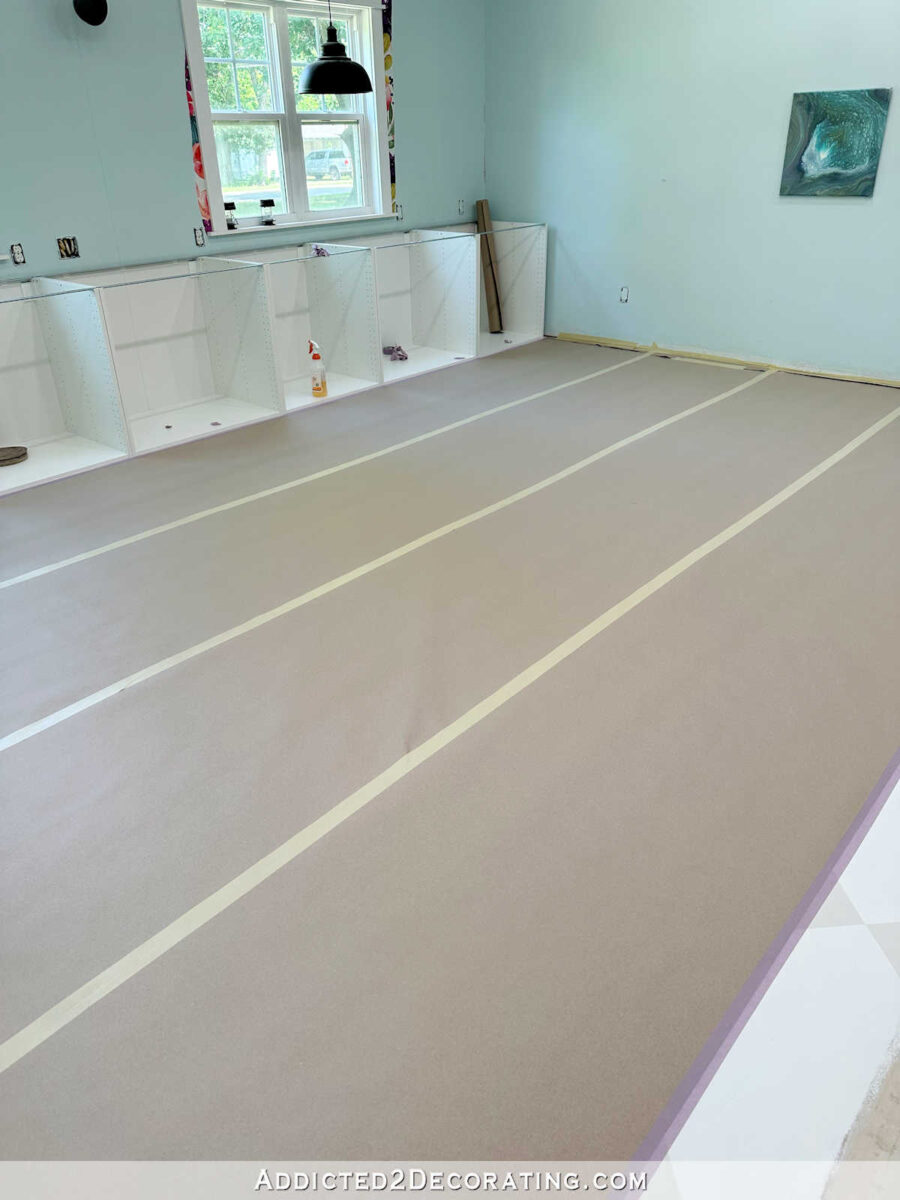
The paint that I used is incredibly durable, so I wasn’t worries about rolling my tables onto this part of the floor. In fact, I’ve already had to roll the tables onto the painted floor twice. But I wanted to cover it so that it wouldn’t get all dusty from the sanding I had to do in the rest of the room. This section is all neat and clean, and I wanted to keep it that way.
Once I had it covered, I moved everything over to this side of the room to start on the back areas.
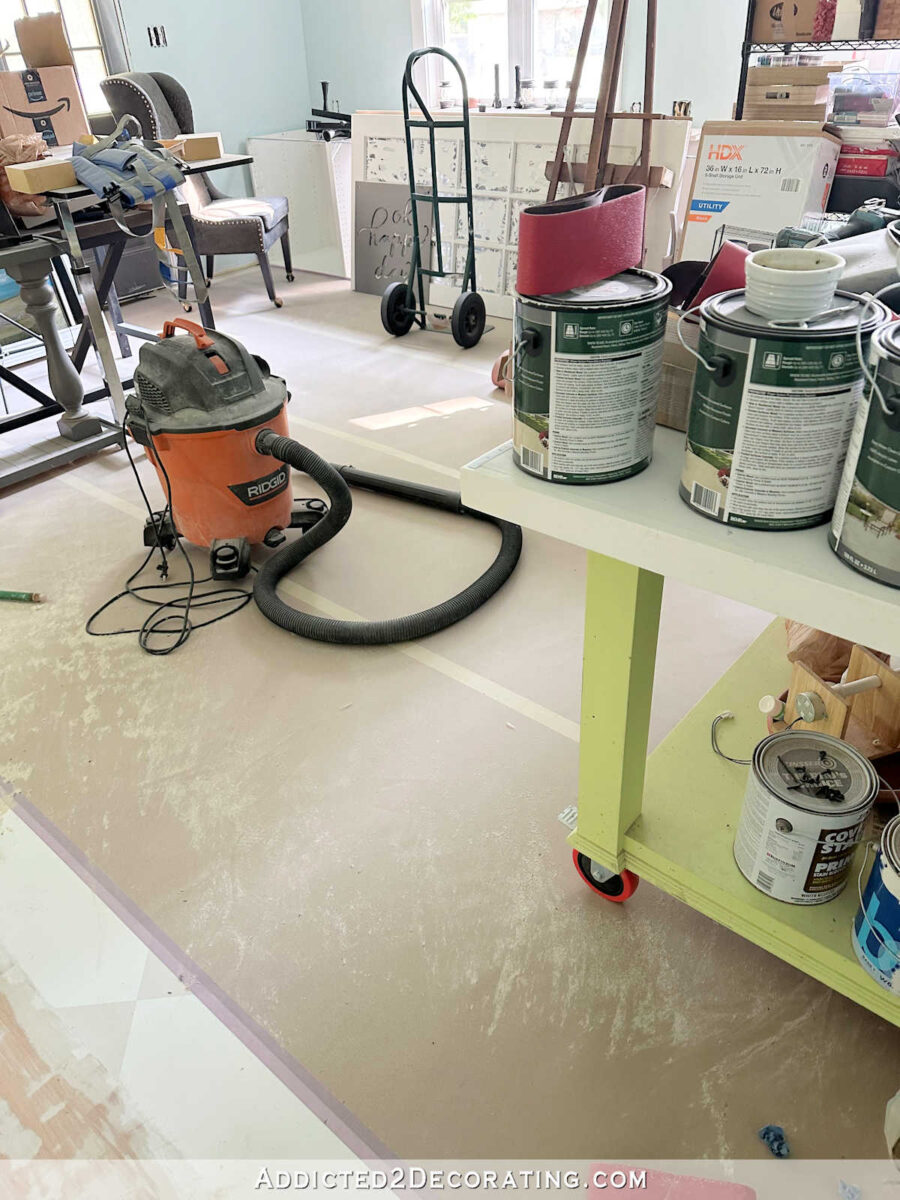
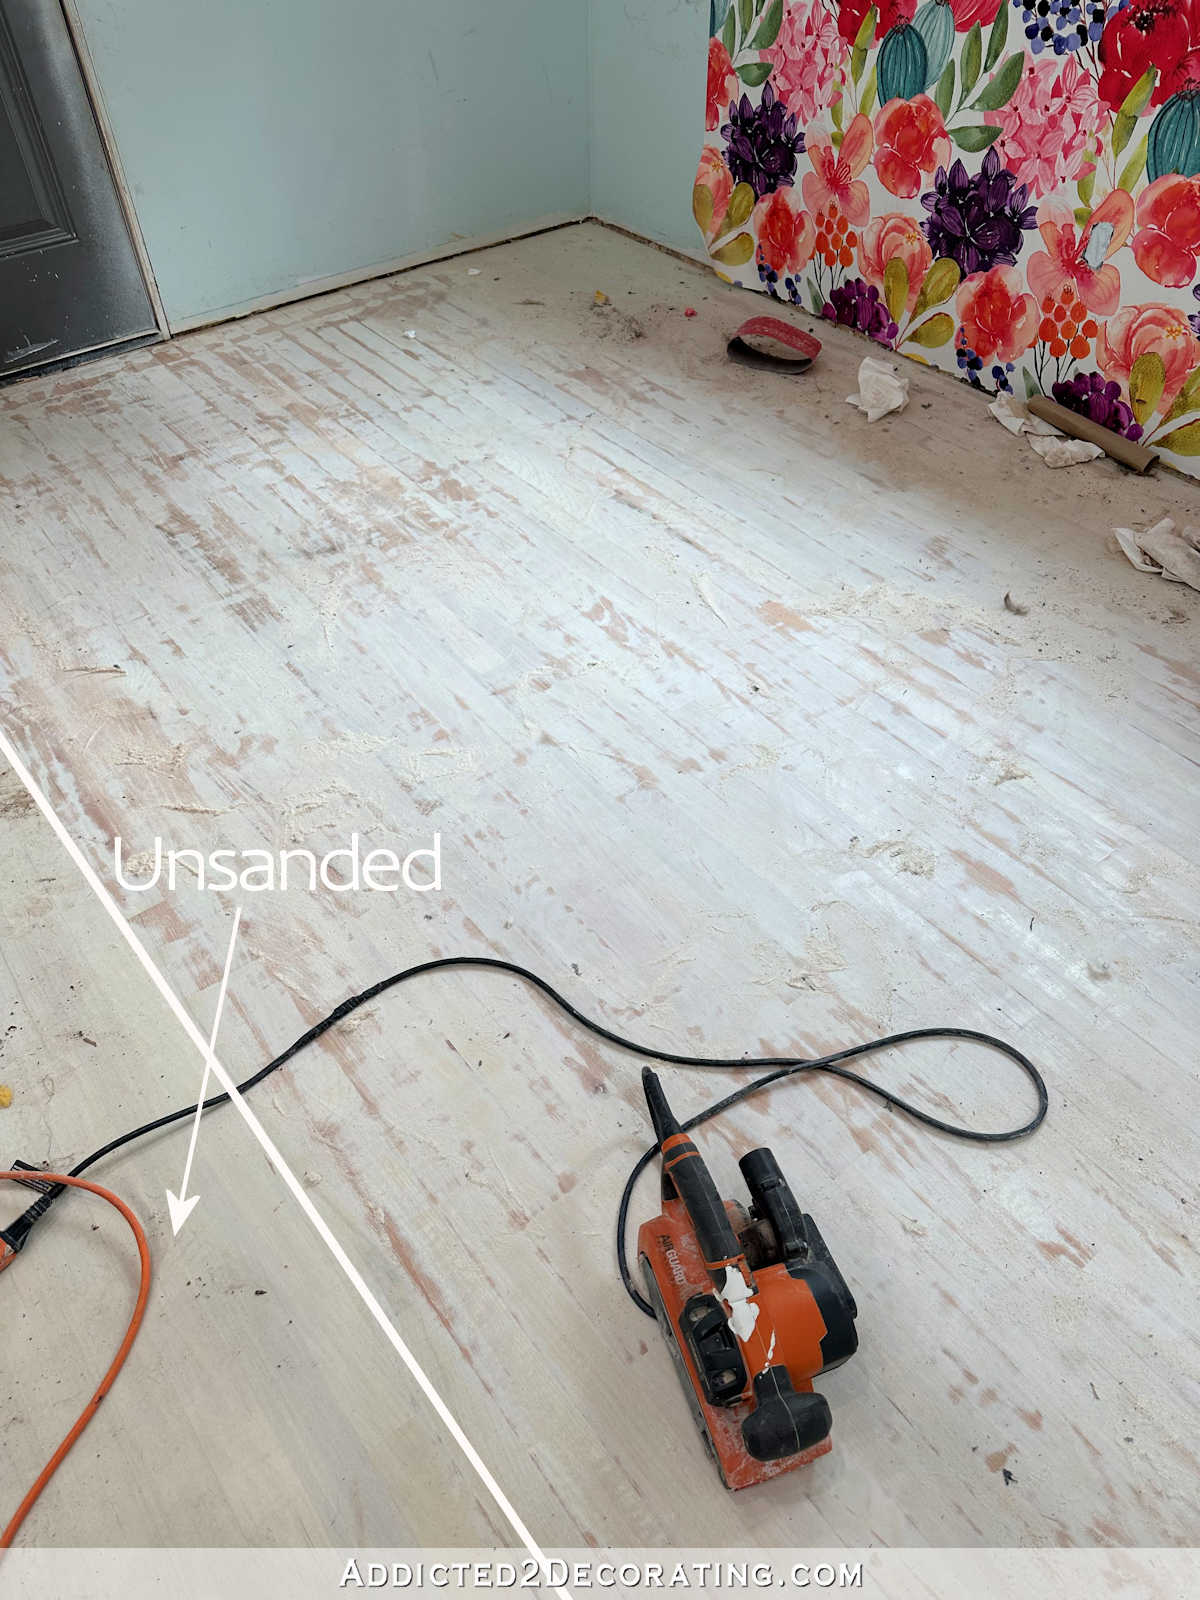
I got the rest of the main room sanded using my hand held belt sander and 80-grit sandpaper…

There are several reasons I didn’t rent a floor sander for this project:
- I knew this project would span several days, including some days (like Wednesdays and Sundays) when I wouldn’t be able to work at all, so renting a sander for the duration of the project would have cost a fortune.
- Floor sanders are very powerful and would have taken off too much from the floor. I just needed the surface roughed up a bit. I didn’t need all of the paint and stain removed.
- A big floor sander would have been less than useless in the small areas like the storage closet and the bathroom, and it would have been difficult to maneuver in the small back entry as well. So I’d have to do those areas with a hand sander anyway.
After weighing the pros and cons of renting a floor sander, I decided to just stick with my hand held belt sander. It’s a happy medium between a floor sander and a little 5-inch random orbit sander, like one that you might use to sand a table top. The belt sander is very powerful, so it gets the job done. The down side is that I have to be down on my knees to sand the floor. That a definite “pro” to the floor sander. You stand up to use a floor sander. But to me, being on my knees to sand the floor was a small price to pay for avoiding the hassle of a big floor sander and avoiding the cost of rental for over a week.
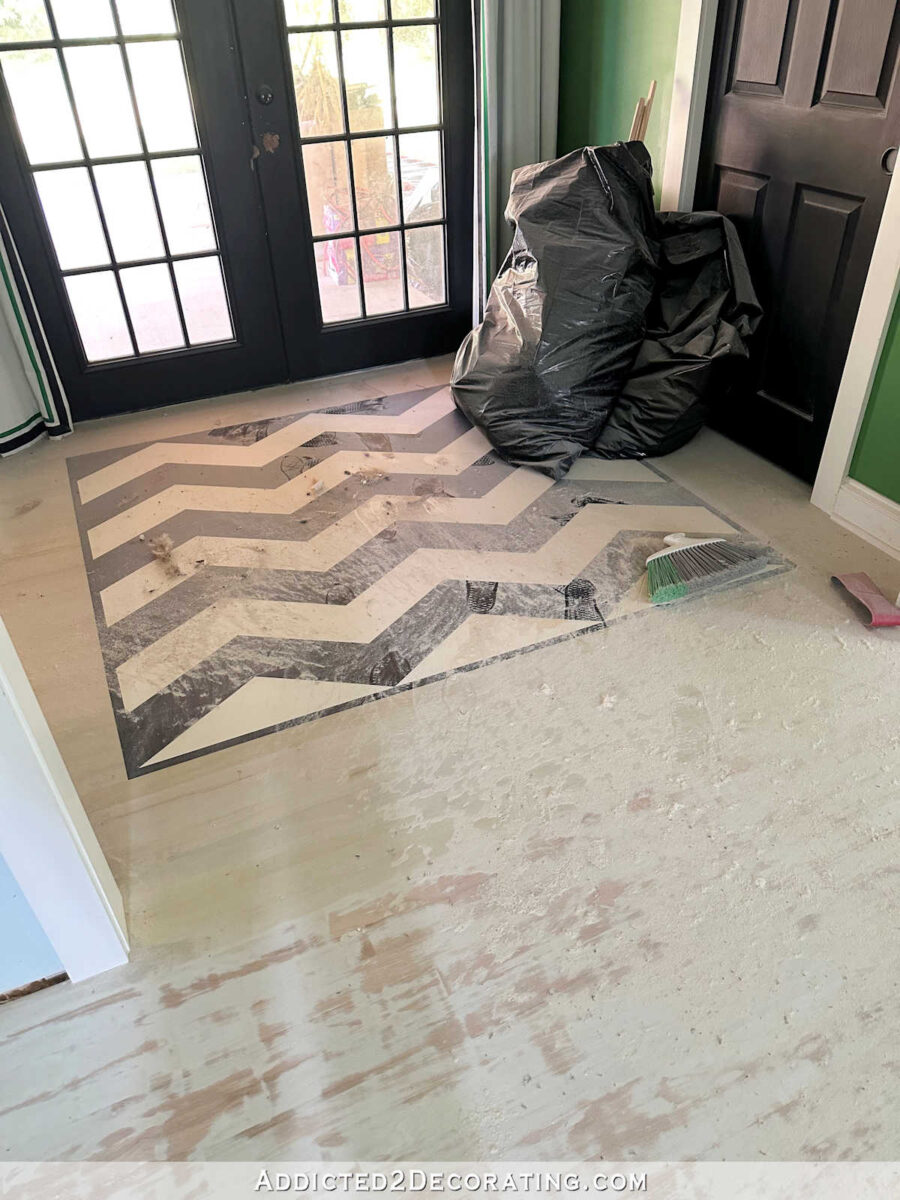
I still have to sand the back entry, which is the one area that has already been painted. But again, I don’t need to remove all of the paint. I just need to get rid of any ridges where the design was taped off and painted, and where the painted “rug” meets the whitewashed floor.
Sanding the bathroom floor will be the hardest part simply because I’ll need to move the toilet and the vanity out of the room completely. That’s going to be a real pain, but it has to be done.

But it’s getting there! I’m hoping that by the end of the day today, I’ll have the entire floor sanded, vacuumed, cleaned, and primed. If things go perfectly, maybe I can even paint it, but that might be pushing it.
As a side note, I’m very excited about giving this bathroom a little makeover. I’m going to change the walls, the tile, and the vanity color.
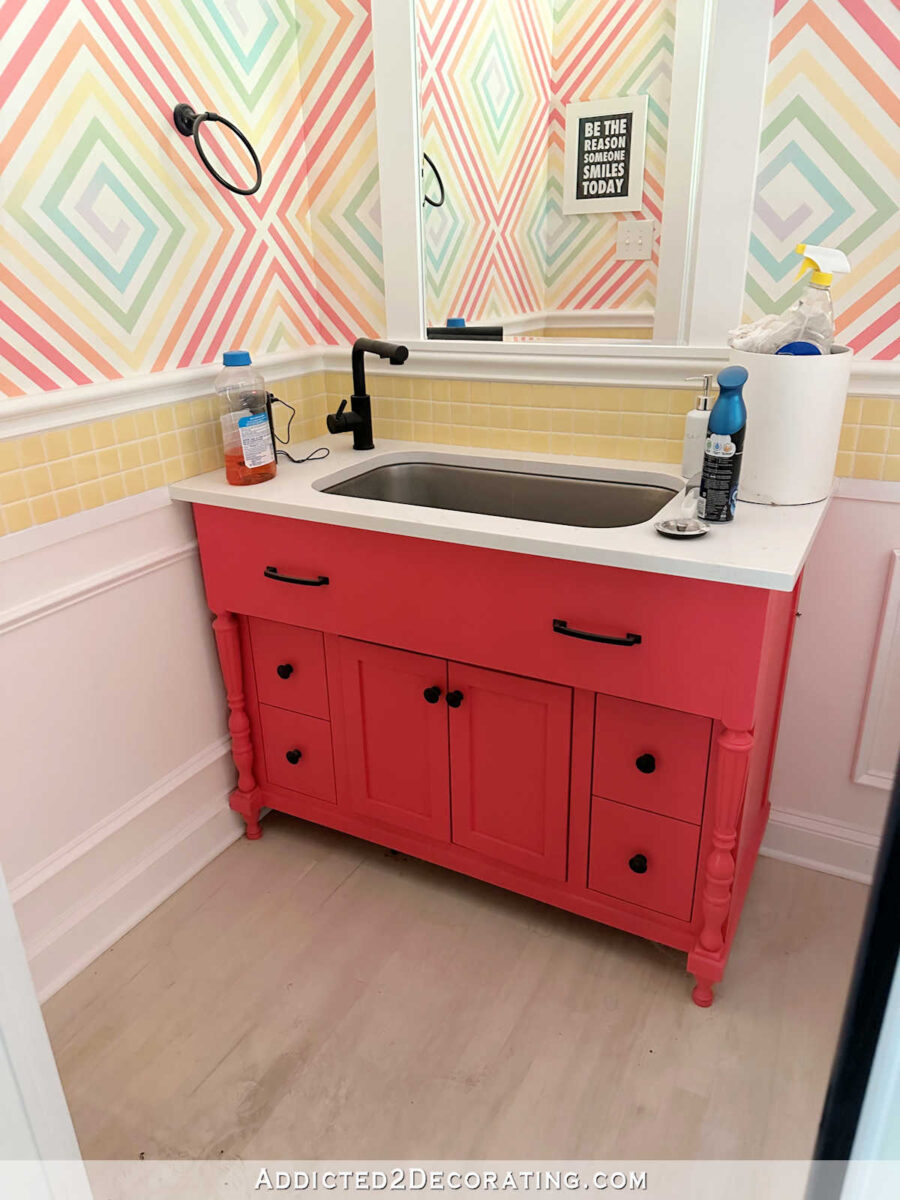
I don’t have my plans completely nailed down just yet simply because whatever I do in this bathroom depends on what I do in the back entry. I need to decide on that first, and then make plans for the bathroom. But the vanity color needs to change because I have a feeling it’ll be too close to (but not quite the same as) the color that I’ll be using on the studio cabinets. They’ll be similar but off just enough so that it’ll look like a mistake rather than a coordinated decision.
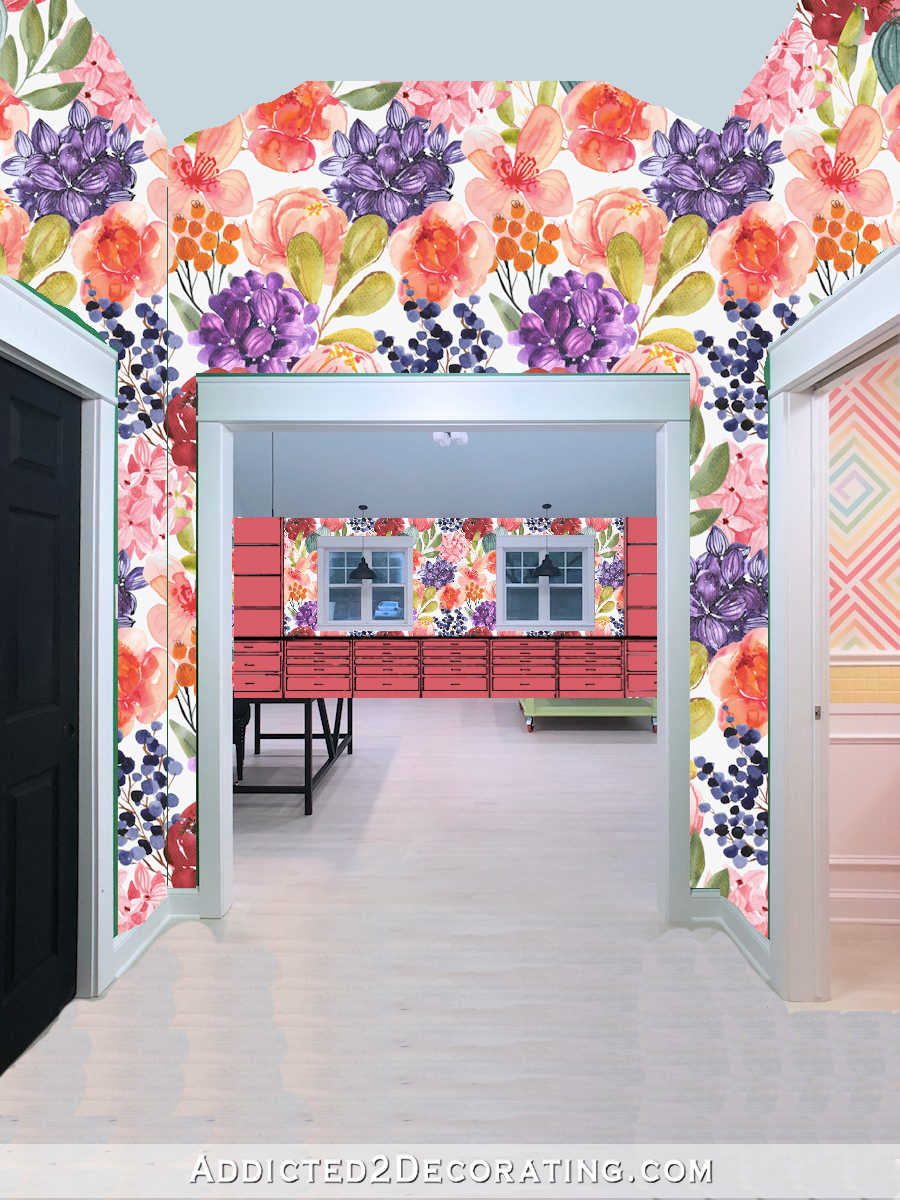
Speaking of the back entry, I do think I’ve made a decision on that. I am going to use the wallpaper in that area, but as of right now, I plan to wallpaper the upper walls and do wainscoting on the lower walls. I think that’ll give them enough pattern and color, while keeping them from looking too busy (for me). They’ll be just busy enough. 😀

I’ve also decided to keep the blue ceiling in the main room. I love the idea of a flower garden on the main wall and a ceiling the color of the sky. But the walls will still be white. So I just played around with the idea of bringing that blue into the back entry. That’s not a firm decision yet. I just wanted to see what it might look like.
But I’m getting ahead of myself. I need to finish the floor first! So I’m off to do more sanding. I’m hoping for a productive and uninterrupted work day today, because I’m ready to move on to the next project soon!

Addicted 2 Decorating is where I share my DIY and decorating journey as I remodel and decorate the 1948 fixer upper that my husband, Matt, and I bought in 2013. Matt has M.S. and is unable to do physical work, so I do the majority of the work on the house by myself. You can learn more about me here.


In your post addressing whether to paper the back entry walls, I thought the bathroom walls looked terrific nearby.
Agree 100%
You know, I love your bathroom walls AND I love them with your wallpaper. A few posts ago, you showed a mock-up looking into the studio from the entry where you could see the bathroom wall and the wallpaper. The colors coordinate. The graphic pattern of the bathroom complements the large floral wallpaper beautifully. I have always liked mixing patterns and these two — I love them together…just another perspective.
I love pale blue ceilings. I have them in several places throughout my house. The blue in the entry way looks good to me. Wishing you a productive day!
The back area lie that looks choppy to my eyes, but I do like the wallpaper. How about treating that small area like a jewel box, and wallpapering the ceiling, too? Just in that space, of course. If you haven’t looked at jewel box rooms, especially bathrooms, google them. They’re pretty cool, and not over the top for you, I don’t think.
Love the floor!
You make me laugh…..you are so talented that the ideas just flow out of you. You certainly are keeping me interested!! Btw, I’m in an apartment so have limits but must say I’ve gone as crazy as I can within those limits. I’m right there with you!!!!
I love the new proposed look and the blue sky. The wainscoting in the back with the wallpaper front wall visible really pulls the look together. Love it
I really like the floor. The blue for the ceilings look a little dark which makes the room feel smaller, I would think. But you are the expert and you do good work.
I agree. I think the blue is a bit saturated, but I know Kristi likes stronger shades than I do. I would lean towards a pale blue, and maybe even dry brush a hint of yellow/orange/pink here and there for a more sky -like look!
Im wondering if you have thought about building some flat files into your cabinet design? I have been looking for wide, deep and shallow drawers to hold big pads of paper, eg 30 wide, 30 front to back and 3-4 inch deep drawers. Anything that is made for flat files, eg for holding blueprints, 24 x 28 pads of Watercolor paper, finished art prints, wallpaper mock ups etc costs a fortune to buy. They are usually $4-500 a drw and I would like to have a whole bank of them. I would use them with dividers to hold hand tools, alcohol inks, stamps, and lots of other small things to keep them organized and visible. The main feature would be the distance front to back, with full depth drawer slides so nothing gets lost in the back.
This has got me fired up to build some myself. I think I will buy myself a Kreg jig and go build myself some. I bought one when you first posted about how you used one to build cabinets. When I was down-sizing I gave mine to my son along with most of my tools I didn’t think I would need again.I’ve had to rebuy several tools. I downsized my house but now I’m furnishing an outside workshop to be my studio.
Perhaps you could build some inside your mobile work benches.
I am a watercolorist and found full sheets of watercolor paper fits on shelves in my old analog TV stand. The stand is from Pottery Barn and looks pretty too. Perhaps you don’t need flat files and can repurpose a used stand.
I like the mock up of the entry with wainscoting. That said, if you’re worried about it being busy, something to consider: wallpapering to a wainscoting introduces another pattern (from the wainscot) under an already bold wall paper. It may feel busier than just having the one pattern from the bold wallpaper ceiling to floor.
I agree that the wainscoting will make the hallway look busier than using wallpaper on the entire walls. It would also show off more of the flowers without cutting across them.
I think I’m gonna have to see your vision on this one- Can’t wait!
It’s coming along! I can’t remember, in the bathroom is it still the DIY resin countertop? Or did it get switched out for stone? I’d love to see an update on the counter when you get to that room if it’s still the resin.
I ended up going with quartz because the resin countertop yellowed really badly. I have no idea why it did that. The only reason I can come up with is that the countertop sat in that bathroom over a summer (a Texas summer) before I started actually using the studio, and so I didn’t turn on the A/C in the studio at all. I think maybe the heat in that room during the summer contributed (or solely caused) the yellowing of the resin.