Studio Office Cabinet Progress — Building Out The Cabinet Boxes & Running Electrical For The Sconces
I made quite a bit of progress on the studio office area cabinets yesterday, and it’s getting really exciting to see this area come together. I showed you the other day that I got all of the doors and drawer fronts finished. I installed most of them and took a picture so we could get an idea of how this finished area will look. It still takes some imagination to envision it, but here was my progress…

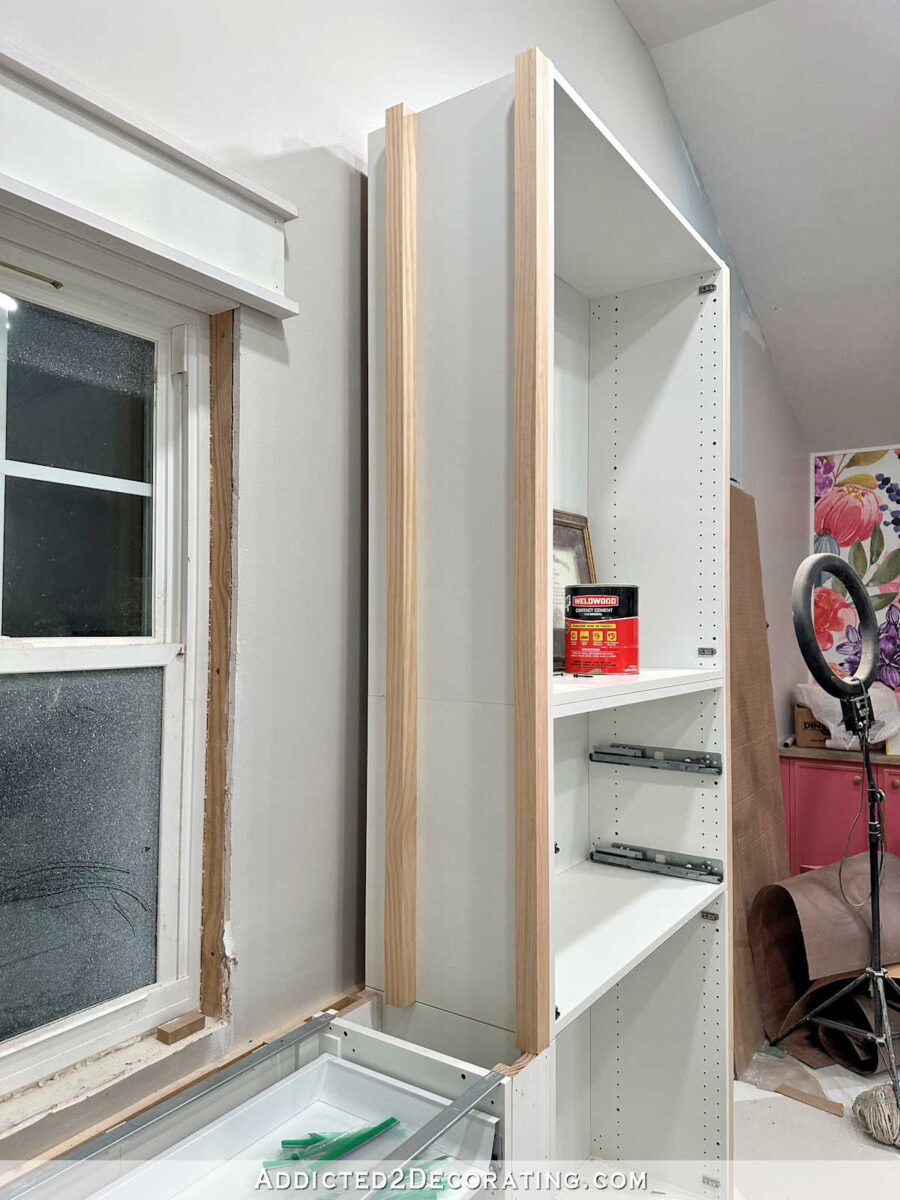
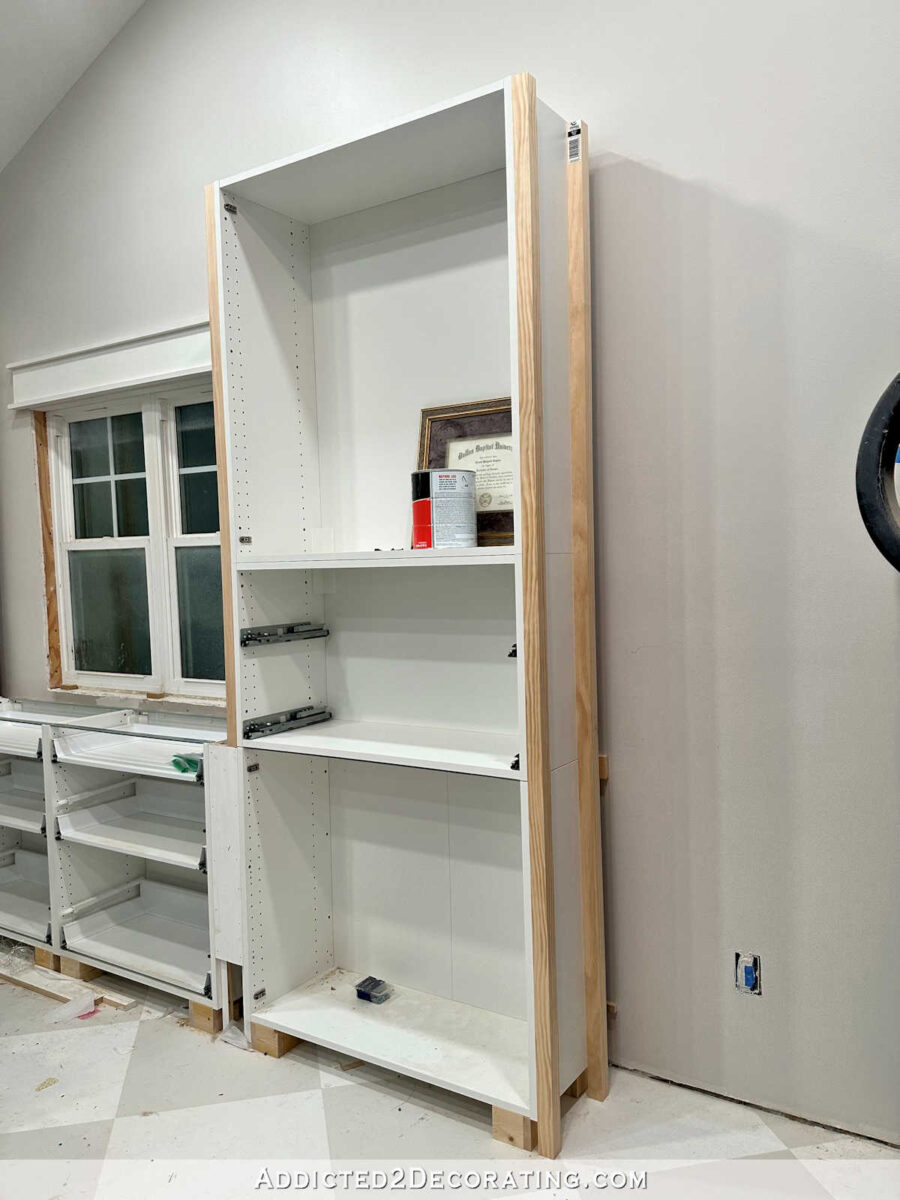
So with those finished, I had to remove all of the doors and drawer fronts to work on the cabinet boxes and get those finished. I started by adding 2″ x 2″ lumber to the side of the left cabinet to fill in the space between the left cabinet and the wall. I attached this using screws that I screwed through the shelf pin holes (I used holes that I was sure I wouldn’t need for my shelf placements) inside the cabinet and into the 2″ x 2″ wood. This 2″ x 2″ wood piece gives me a surface to attach the final trim piece later.

I did the same thing on the other sides of the cabinets. But on the other three sides, I attached two 2″ x 2″ pieces of wood, one flush with the front edge of the cabinet and another towards the back, because these will be used to attach the plywood to cover the sides. Again, I attached these using wood screws that I screwed through the shelf pin holes inside the cabinet, through the cabinet, and into the wood. But the important part with these was to make sure that the front 2″ x 2″ piece was perfectly flush with the front edge of the IKEA cabinets.
I repeated that process on the other side…
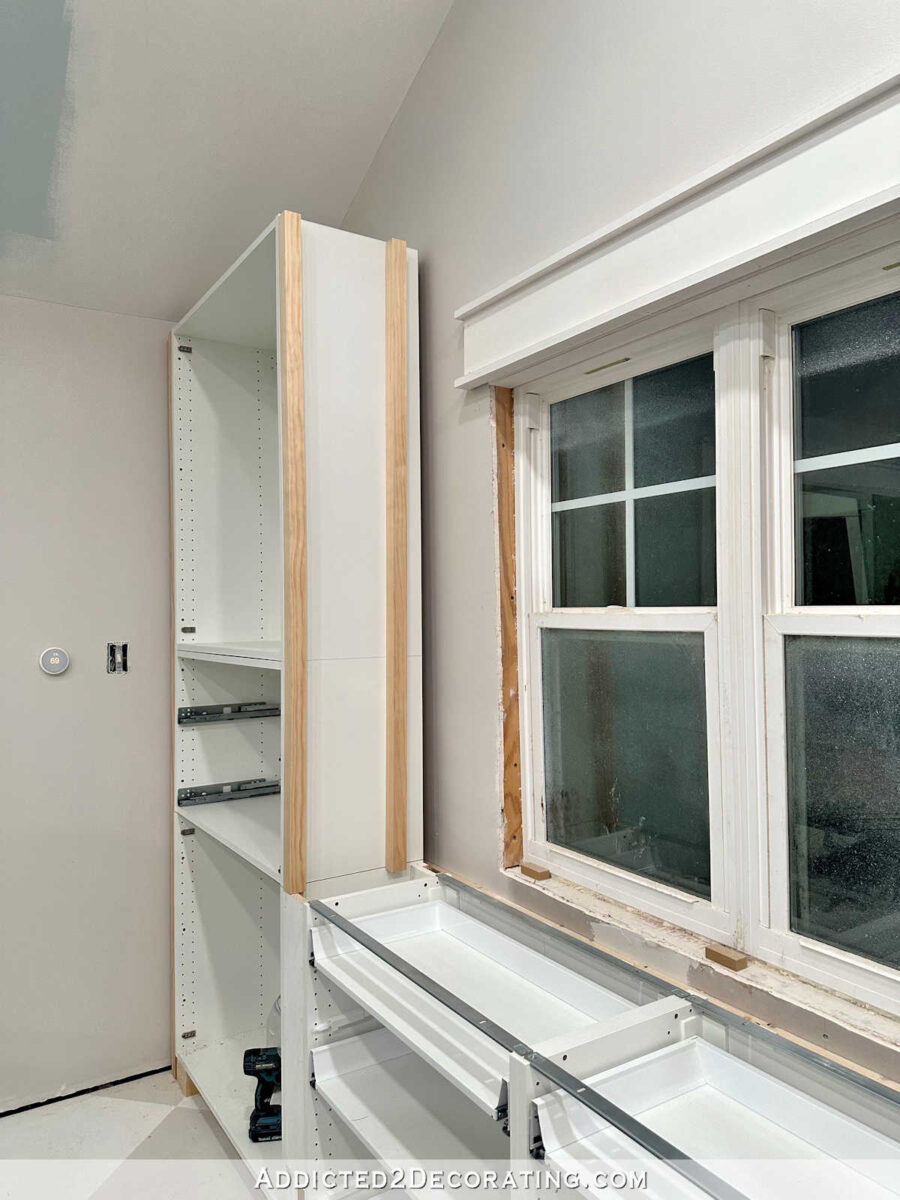
And then I repeated that process one more time on the outside of the right cabinet.
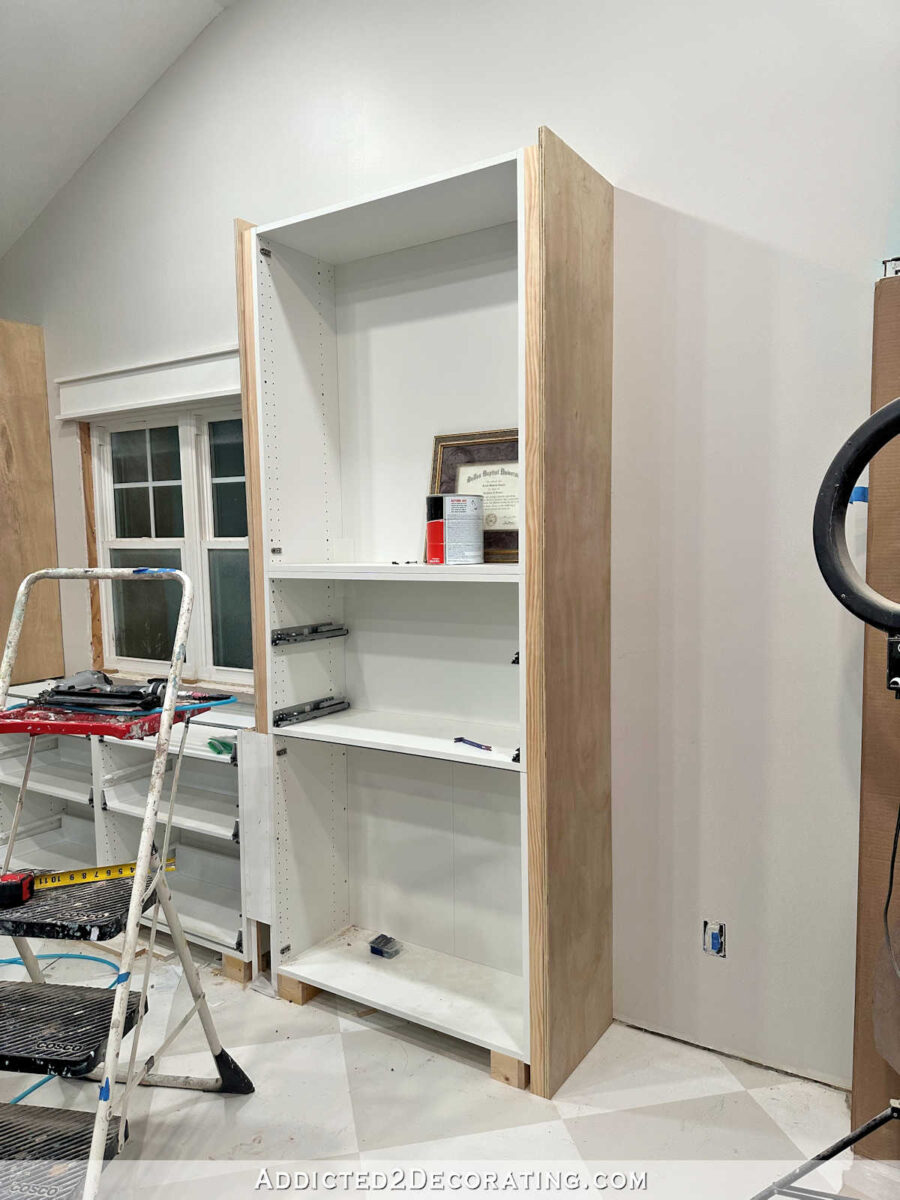
With those strips attached, I could attach the plywood piece to the outside of the right cabinet. I attached this using 1.5-inch 16-gauge nails, and I nailed it right to the 2″ x 2″ wood pieces. You can see that I cut the plywood pieces a little taller than the cabinet to give me something to attach trim and crown molding to in a later step. And once again, I made sure that the front edge of the plywood was perfectly (or as perfectly as possible) flush with the front edges of the 2″ x 2″ wood and the front edge of the IKEA cabinets.
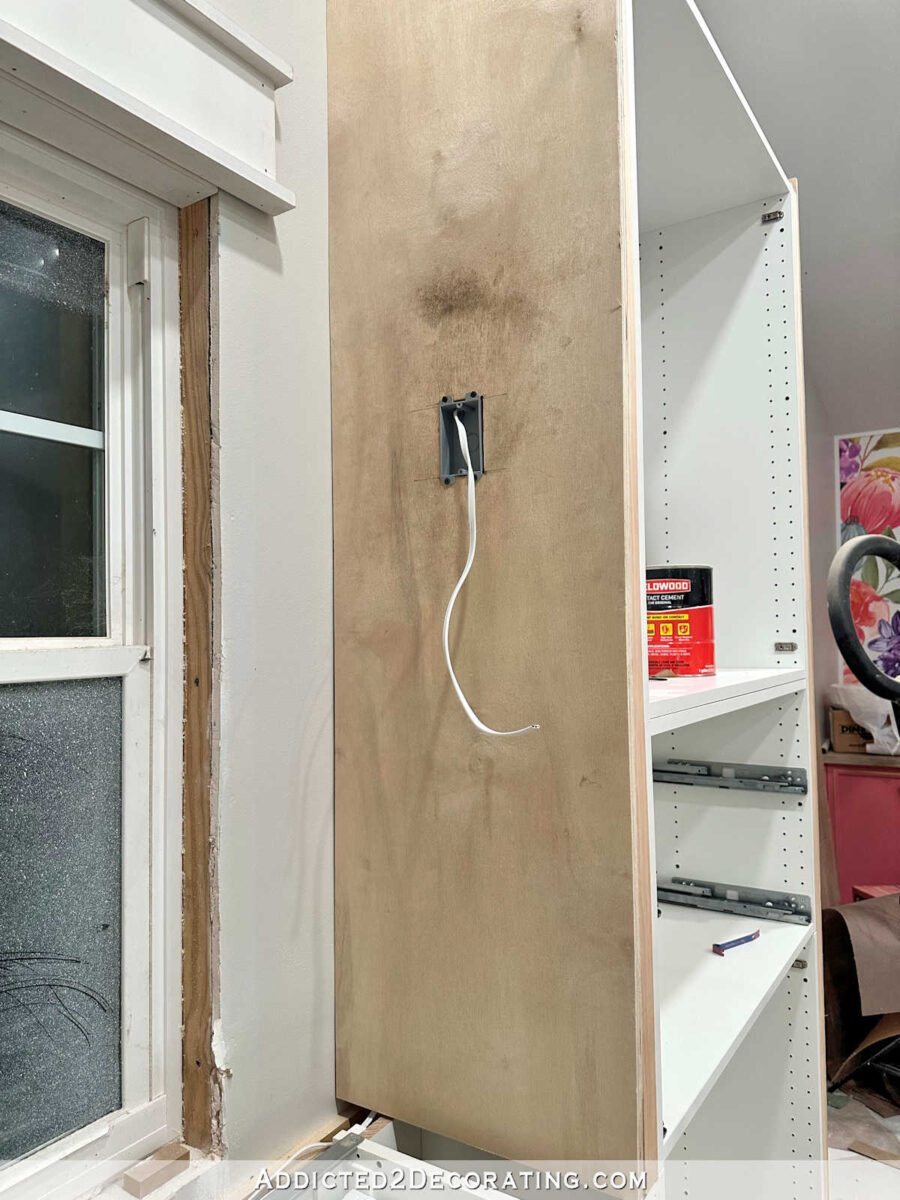
Since I decided to add sconces to the window side of each cabinet, I had to add junction boxes to the plywood panels before I could attach those. I used shallow old work boxes for this so that they would fit inside the area between the plywood and the side of the IKEA cabinet. I didn’t want to have to cut through the inside of the IKEA cabinet for a standard size junction box to fit. I measured and marked where I wanted the box to go on the plywood panel, and then used the box as a template to trace around to mark where to cut.

I made sure to get it just right because I only had one chance at this. If I messed this up, I’d have to cut a whole new piece of plywood.

I used my Dremel Multimax oscillating saw to cut the hole for the box. You could also use a drill and jigsaw, or even a router. With the hole cut out, I attached my old work box, which just screwed to the plywood.

I forgot to take a picture of the junction box before standing the panel upright and running the wire through it, but you can still see it pretty clearly here. You can see that old work junction boxes sit on top of the surface (drywall, or in the case, plywood), making it very easy to simply screw the box into place. New work boxes sit behind the surface material (generally drywall), so they’re not useful for a project like this.

I decided to use heavy duty extension cords (with the ground wire) to wire the sconces. In order to use the extension cord, I had to use my wire cutters to cut off this end.

The wiring had to be done before I attached the plywood panel to the cabinet. So I ran the wire behind the panel and through the junction box.
The other end of the cord came out at the bottom of the plywood panel…

You can see here that it just ran straight down behind the plywood and into this space between the cabinets.

And then using a 1-inch drill bit, I drilled a hole in the back spacer in that section, and threaded the wire through that hole.

And then I ran the wire in this space behind the cabinets, but above the spacers/braces that I used to attach the cabinets to the wall. I placed a scrap 2″ x 2″ piece of wood on top of the cabinet where the countertop will eventually go so that you could see how much space the wire has to travel through. It’s quite a large space (about 2″ x 1″), so you can see that nothing will be constricting the wire once the countertop is in place.

Once the wire was in place, I was able to nail the plywood panel onto the side of the cabinet.

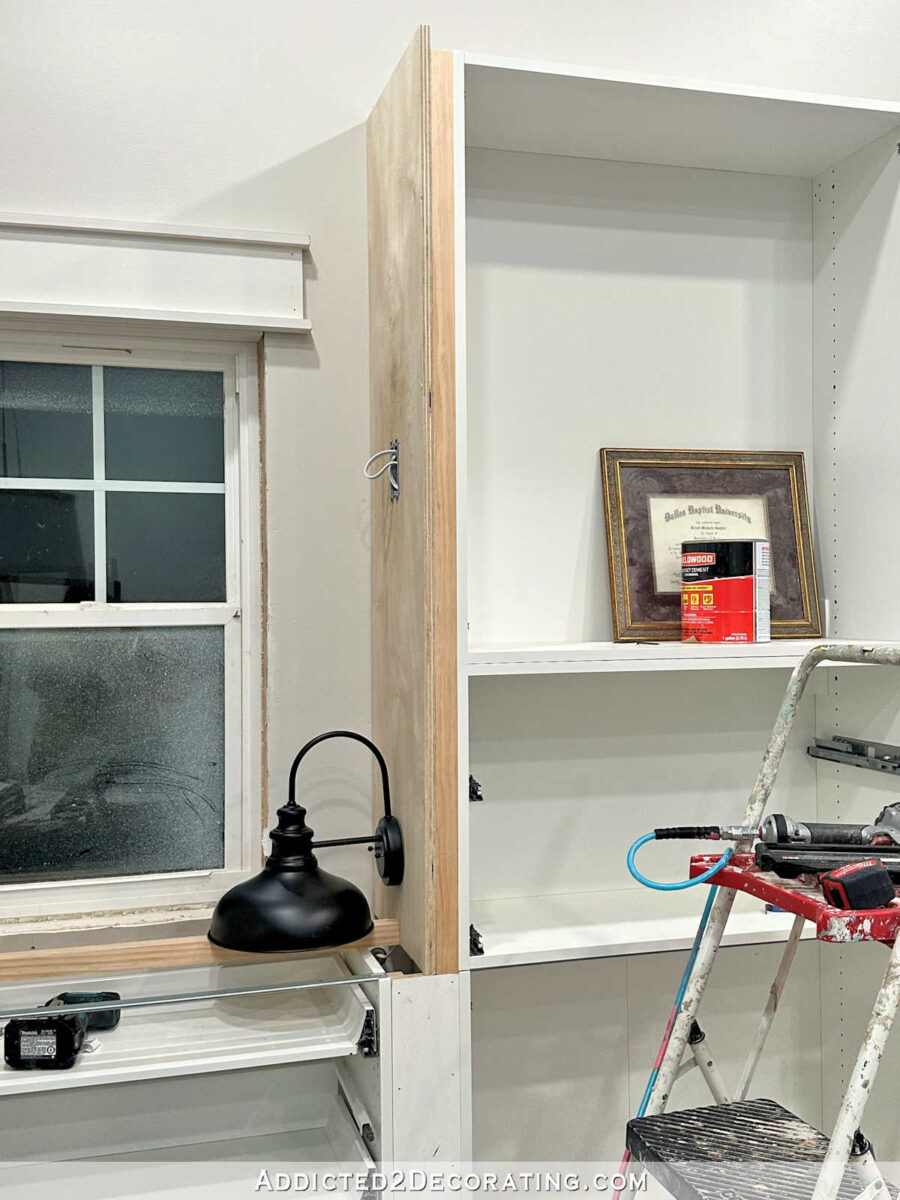
At that point, here’s what the right bank of cabinets looked like with the 2″ x 2″ lumber and plywood panels added to both sides of the cabinets.

Here’s a peek at one of the sconces. I couldn’t hold the sconce in place and take a picture, so you’ll just have to imagine it up on the side panel where the junction box is. And of course, I will need to paint and gold leaf the sconces to match the pendant lights on the mural wall.
With that side panel in place, I needed to finish up the side panel on the left side. The wire from the right side ran behind the cabinets all the way across the back under the window.

And then I ran that wire, plus a second wire (extension cord), through a hole that I drilled in that back spacer, just like I did on the other side.

And then I ran those up behind the plywood panel, and through the junction box.

That second wire (extension cord) then ran behind the left cabinet, and through this access panel that I had to cut in the back of the middle cabinet on the left side.

You’ll notice that on the first extension cord, I cut off both ends so that I was just left with the wires. But on this second extension cord, I only cut off the end where the sconce will be wired, but I kept the end with the plug. That’s because, after I finish wiring up this outlet behind this access panel, the sconces will plug into the outlet. I’ll control the sconces with a remote-controlled outlet.

After those wires were run on this side, I was able to nail the plywood panel into place.

So that’s the progress so far! I was so excited to get all of this done. Working through the logistics of wiring up those sconces took me a bit of time to figure out, and it’s always such a huge relief when a plan works out. 😀

Today, I’ll be working on the bridge with the cubbies. If you’ll remember, this is the vision…

I’m working by myself, so I’ve been thinking through exactly how I’m going to build a big, bulky plywood bridge with cubbies, lift it into place by myself, while attaching it to the side cabinets by myself. These are the challenges I have to work through quite often as a DIYer who works alone. But I think I have it figured out. I guess we’ll all find out tomorrow if my plan worked. 😀

Addicted 2 Decorating is where I share my DIY and decorating journey as I remodel and decorate the 1948 fixer upper that my husband, Matt, and I bought in 2013. Matt has M.S. and is unable to do physical work, so I do the majority of the work on the house by myself. You can learn more about me here.


This is coming along so nicely. I’m curious why you used an extension cor instead of regular electrical wire for the sconces. The end that plugs in makes sense, but was just curious on the other.
I wanted to use the same wire for both, and I needed something with a plug.
Link for the lights? I need to change out our bathroom fixtures, and want to go from three light bar to one like these, and wonder if they will provide better light. I would have to paint the insides white for the most light. I’m just not sure if it will be better unless I try it. My husband says no, but he never thinks my ideas will work, so what do you think? The light bar we have now has three smaller versions of this shade shape with gold undersides.
Here’s my affiliate link for the single light: https://amzn.to/3v8e96N
This is the two-pack that I bought: https://amzn.to/49FYo69
Kristi,
Your genius kicked in and wow….what an amazing job you have done here. You are so amazing. Be extra careful when you get to the lifting up of the cubbie bridge. You being so tiny, I’m thinking you should use the scaffolding you used to do the gold leaf in the ceiling fixture in your entryway. I do give you a high five for doing this alone, but do be careful. Everything in your studio is so colorful and feminine.
FYI, the last two days, I have received duplicate postings from you. I was delighted thinking you had sent two separate posts then I was disappointed when I realized they were the same.
Oops! Sorry about that! I found the problem and fixed it. That shouldn’t happen anymore.
I had same thing. But didn’t worry about it. 😁😁
This happens to me also.
Kristi,
You are absolutely amazing. I am impressed every time I read your blog. Surprised, amazed, impressed, shocked, everything you do is outstanding. Over and over again. I love that you take pictures. Your studio is getting closer and closer to being finished. I am so excited. How on earth are you going to do the bridge? Can your brother help you? If not call me and I will get my husband to help. Honestly. We are both retired, and he loves woodwork. He will understand the language. 931-801-7049 for me.
Hi Kristi, I had a similar situation lifting a heavy cabinet with no help so I rented a Contractor Lift from Lowes. If you go this route, here’s a tip, don’t put the toe kick on before you use the lift so you can roll it under the cabinet.
https://rentals.lowes.com/item/12%20ft.%20Contractor%20Lift%20-%20Manual/24510
Kristi I honestly don’t know how you can accomplish all the projects and still have time to take us step by step through it all. You are amazing
Kristi …… you are SO clever, and a real inspiration that we can do ANYTHING!!
I applaud you xx
Wow, this space is going to be so pretty & fun! I’m in awe of how quickly you get things done. You’re such an inspiration! Are you self-taught? I have so many house project ideas, but lack the courage to try since I don’t know how the heck to do any of them.
Your thought process is so complex. It’s exciting to follow the progress.
Your always-meticulous work is coming along at such a fast pace! The cabinets will be works of art, not utilitarian storage.
I noticed one thing: Before you repaint and install your sconces, perhaps take a look at whether they are the right ones for that location. They are very large, fixed, and will obstruct the window once they are installed.
Have you considered a less obtrusive, articulated sconce instead? Something like this: https://www.bedbathandbeyond.com/Lighting-Ceiling-Fans/Modern-Farmhouse-Wall-Lamp-Swing-Arm-Wall-Sconce-Set-of-2-L19.7-xW7.53-xH9.1/31606602/product.html?opre=1&option=57945635. Out of the way when you are not using them, and leaving the view through the window unobstructed.
And DO make sure you have your brother or some other strong friend(s) help you lift that bridge! Do your heavy lifting in your gorgeous exercise room instead!