
Sunroom Remodel Update (I Met With My Contractor To Discuss Details)
Yesterday, I met with my contractor to discuss the details of the sunroom remodel, and I’m starting to get pretty excited about this project. This doesn’t mean that the remodel is going to start right away. As I’ve mentioned before, the goal is to do this out-of-pocket so that we incur no debt. That means it will be done in stages as we save up money for each new step of the process. But the first step in the process is going to be the most expensive because it will require raising the roof on the back side of the house.
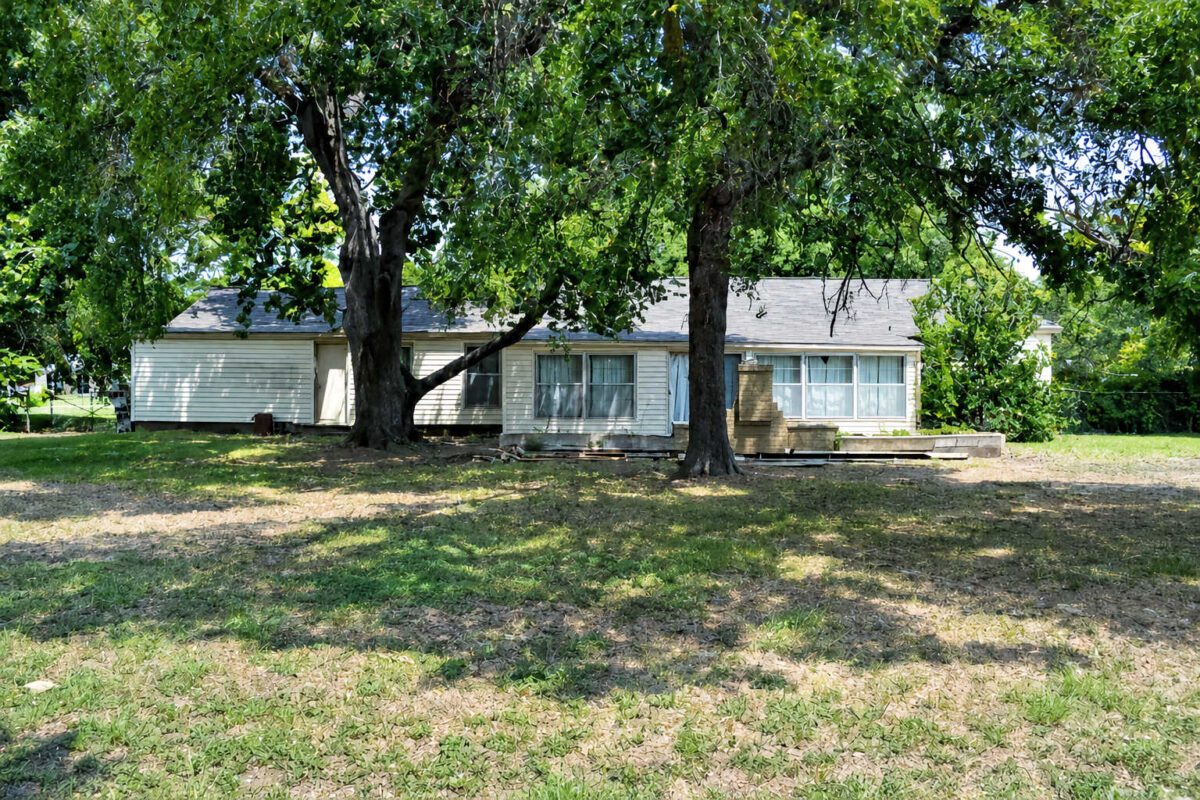
My big question for the contractor, Mike, is what kind of roof structure he would suggest for the sunroom. As far as I could tell, there were two possibilities. In order to explain them, I have to go way back in time to when we bought the house 13 years ago and remind you what the back of the house looked like back then. Here is the original back of our house…
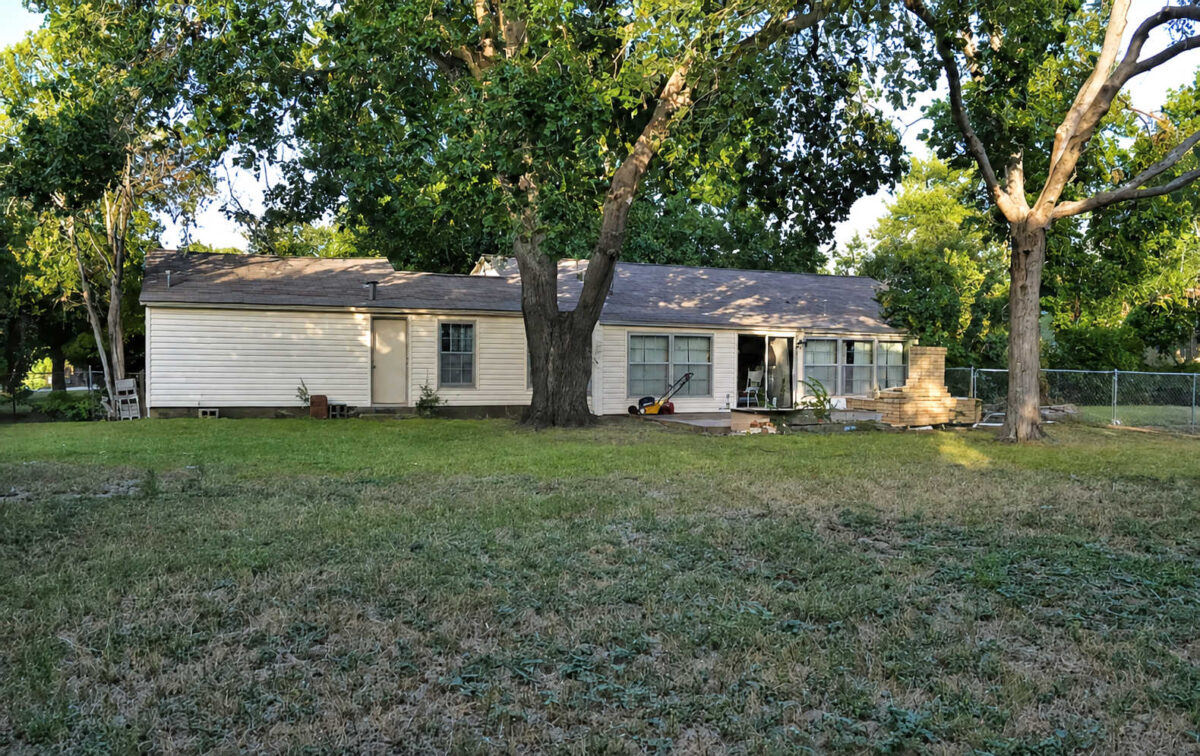
Here’s another view with fewer shadows from the trees…
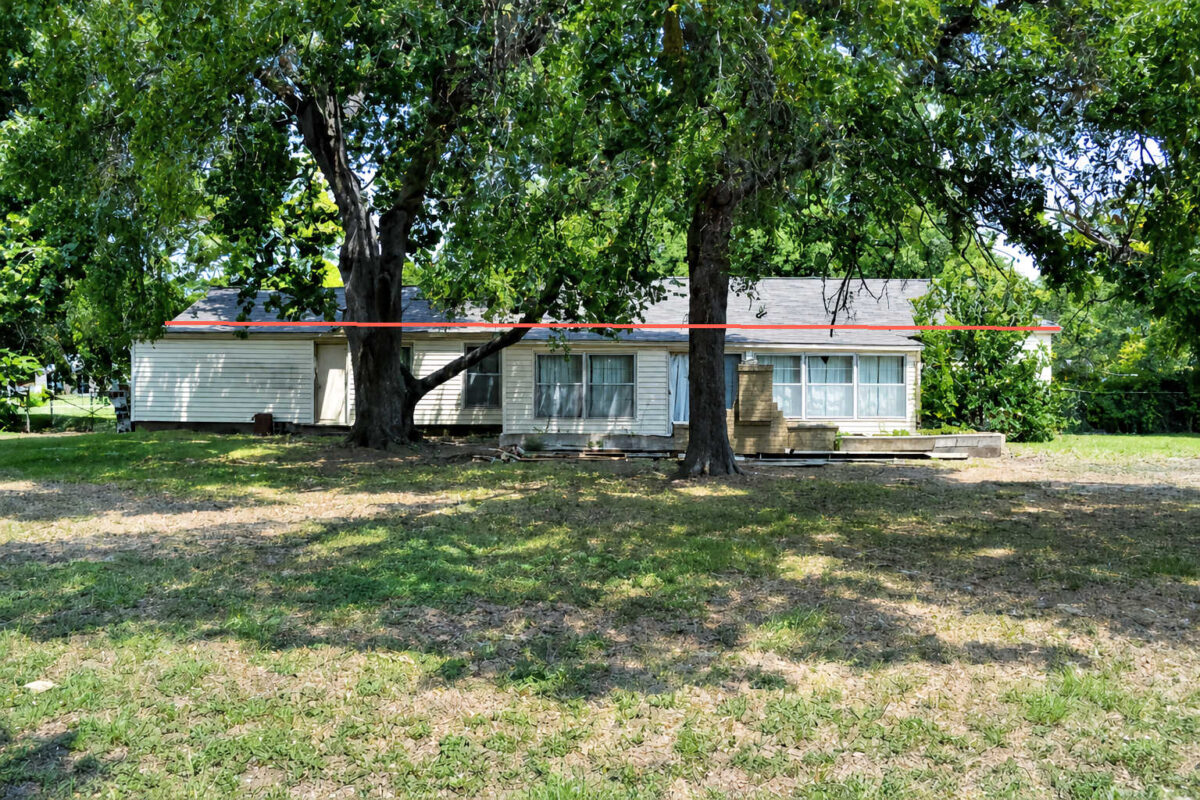
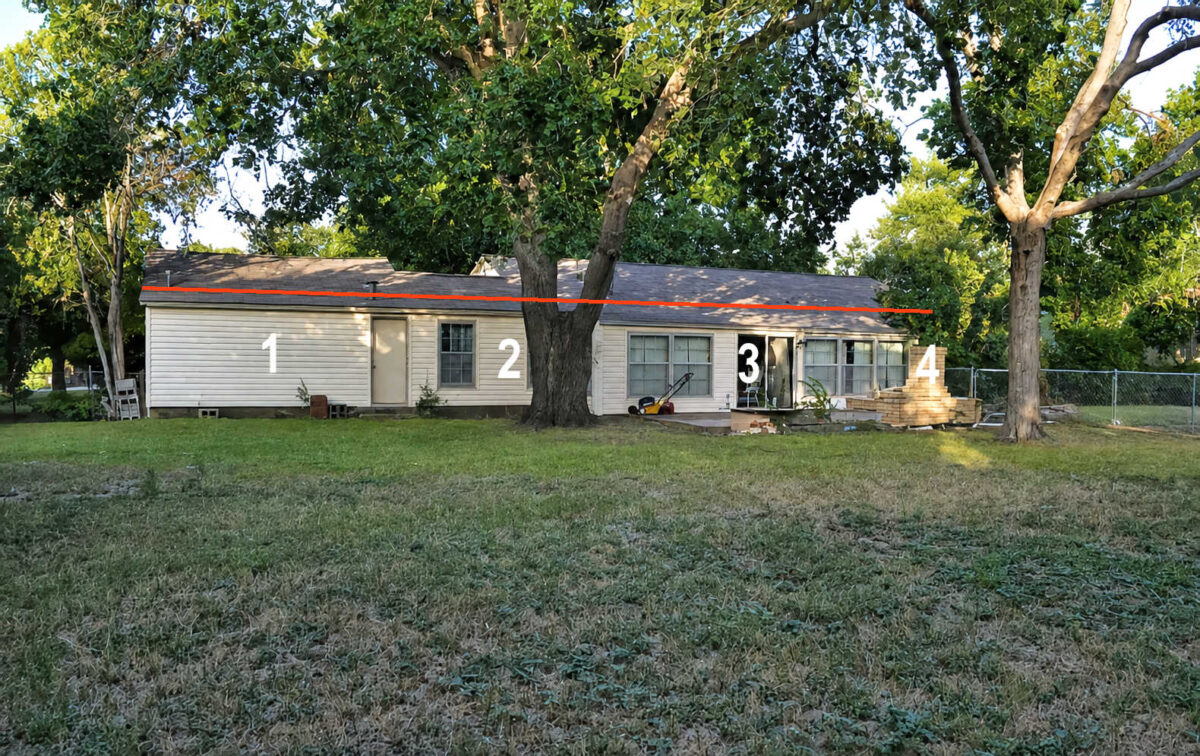
So let me explain what’s going on here. Before we bought the house, a previous owner had added on quite a bit of additional space almost all the way across the back of the house. In the photo below, the orange line indicates where the original roof on the original back of the house ended. So everything past that line was added on later.
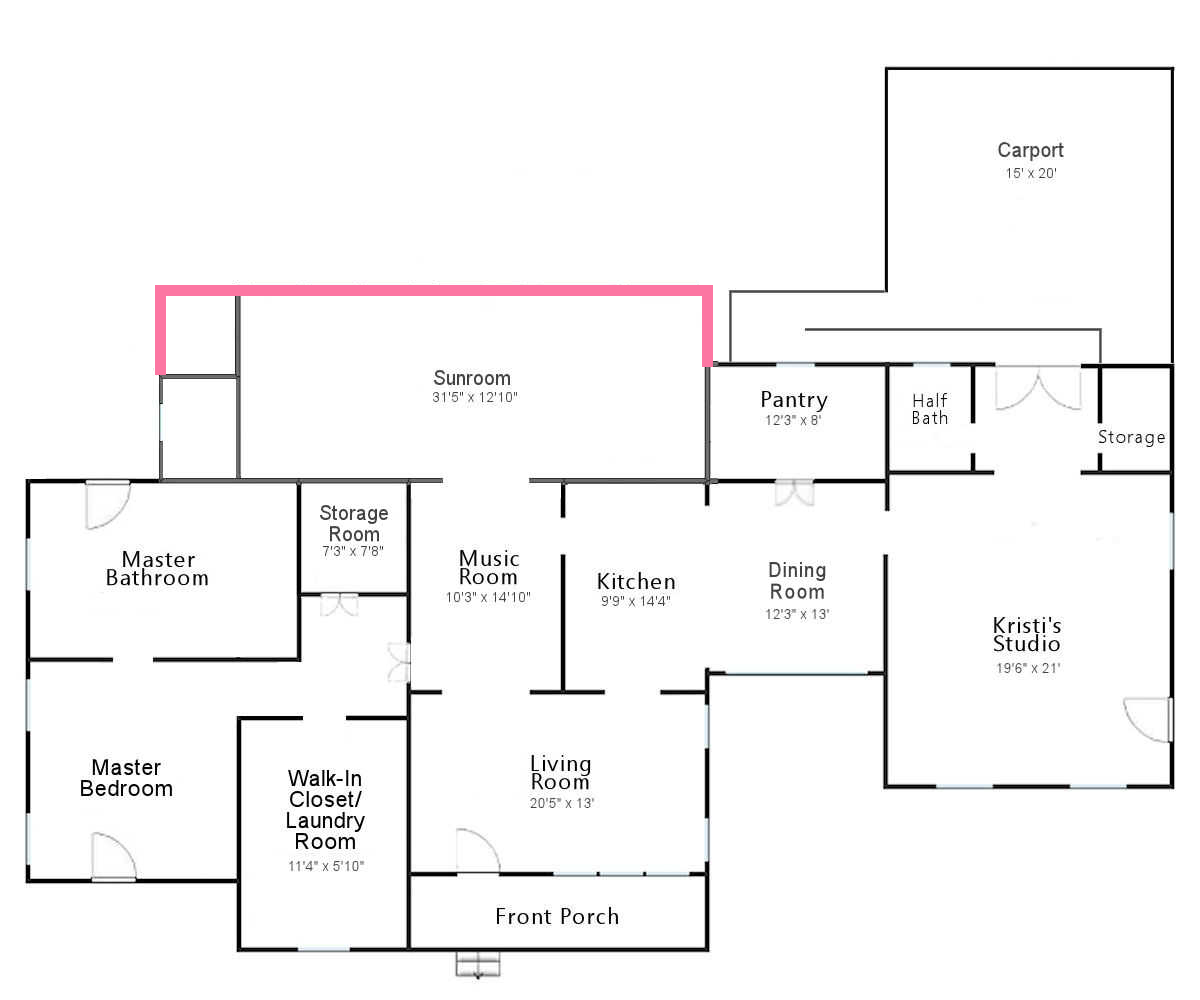
That includes (1) the storage room at the back of the garage, (2) the area at the back of the original den (which is now my pantry), (3) the sunroom, and (4) the small bathroom that is now completely inaccessible (which is obscured by the tree in the photo below). So all of that was added on to the original structure of the house.
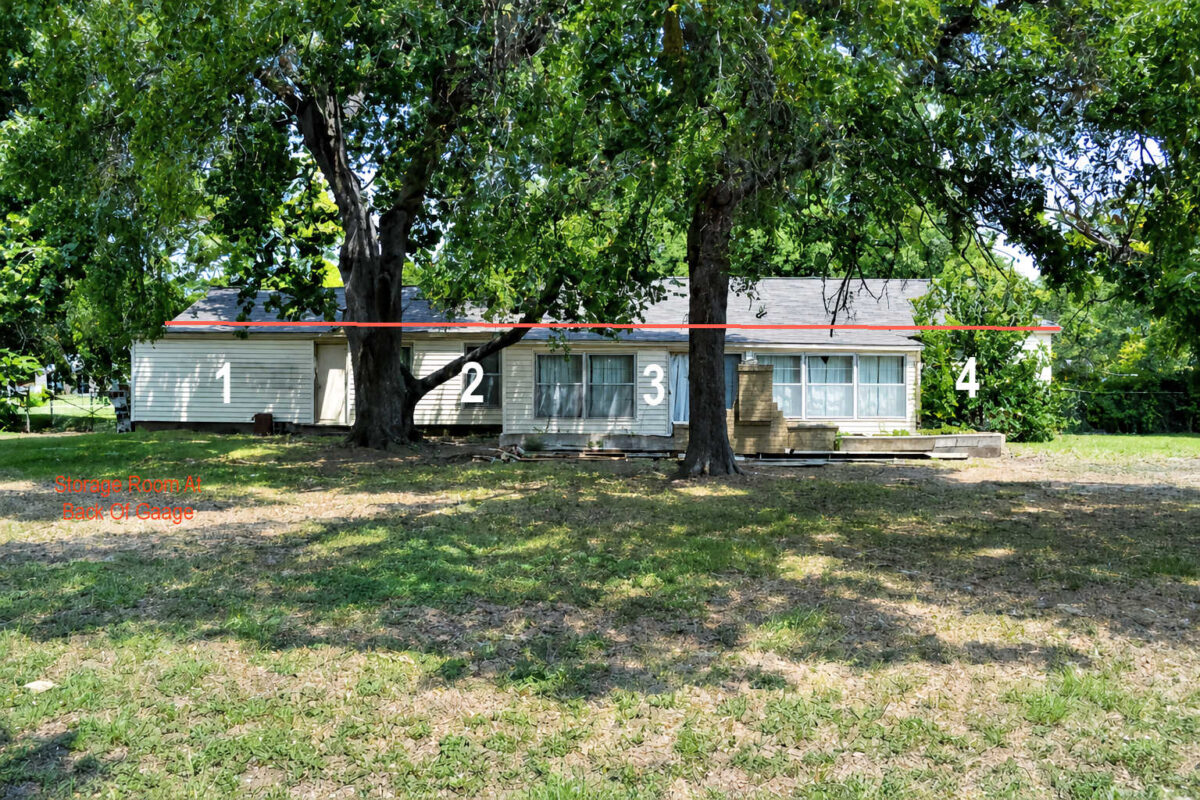
Here’s another look, with fewer shadows, showing those areas. The bathroom (#4) isn’t visible in the photo because it doesn’t extend towards the back yard as far as the sunroom does, so it’s kind of tucked back behind there.
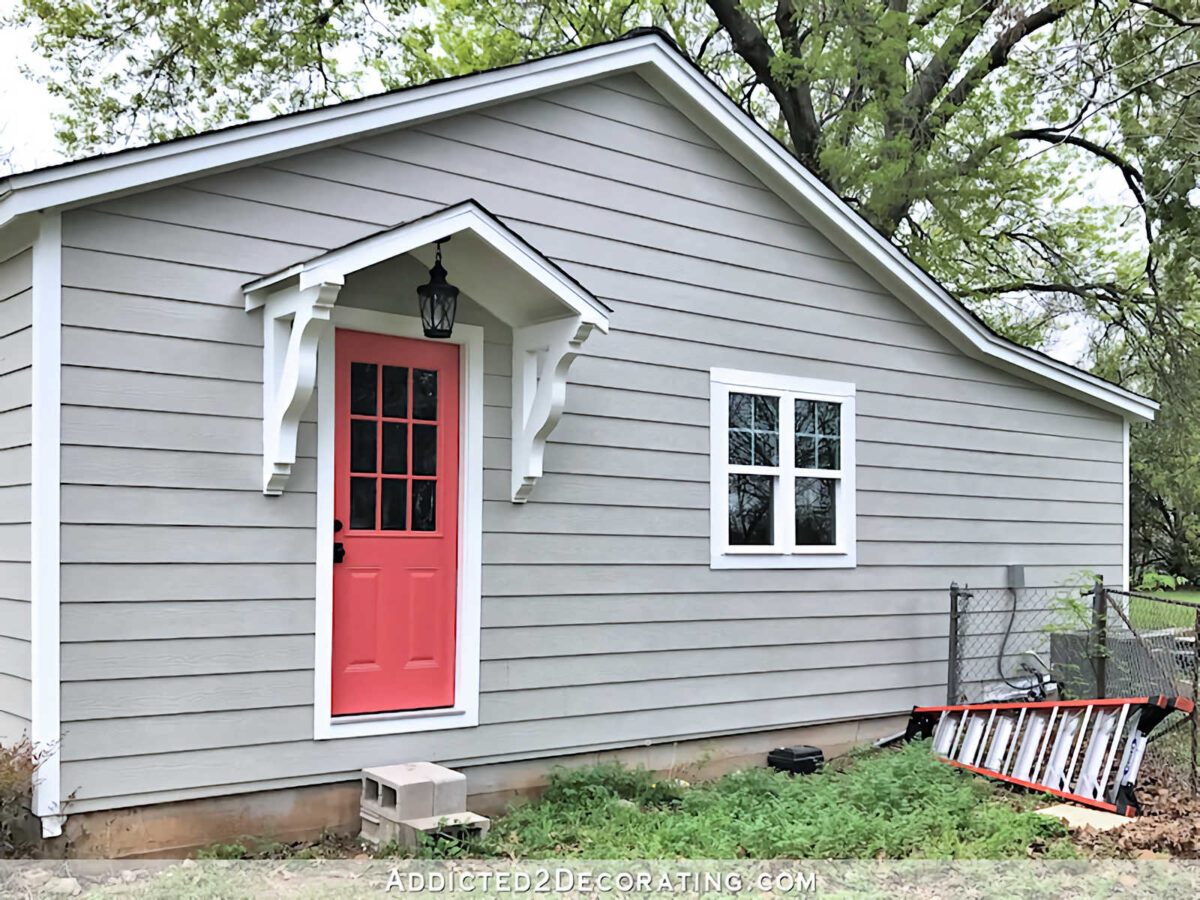
So on all of those areas that were added on, the roof from the side looked just like the side of my studio used to look.
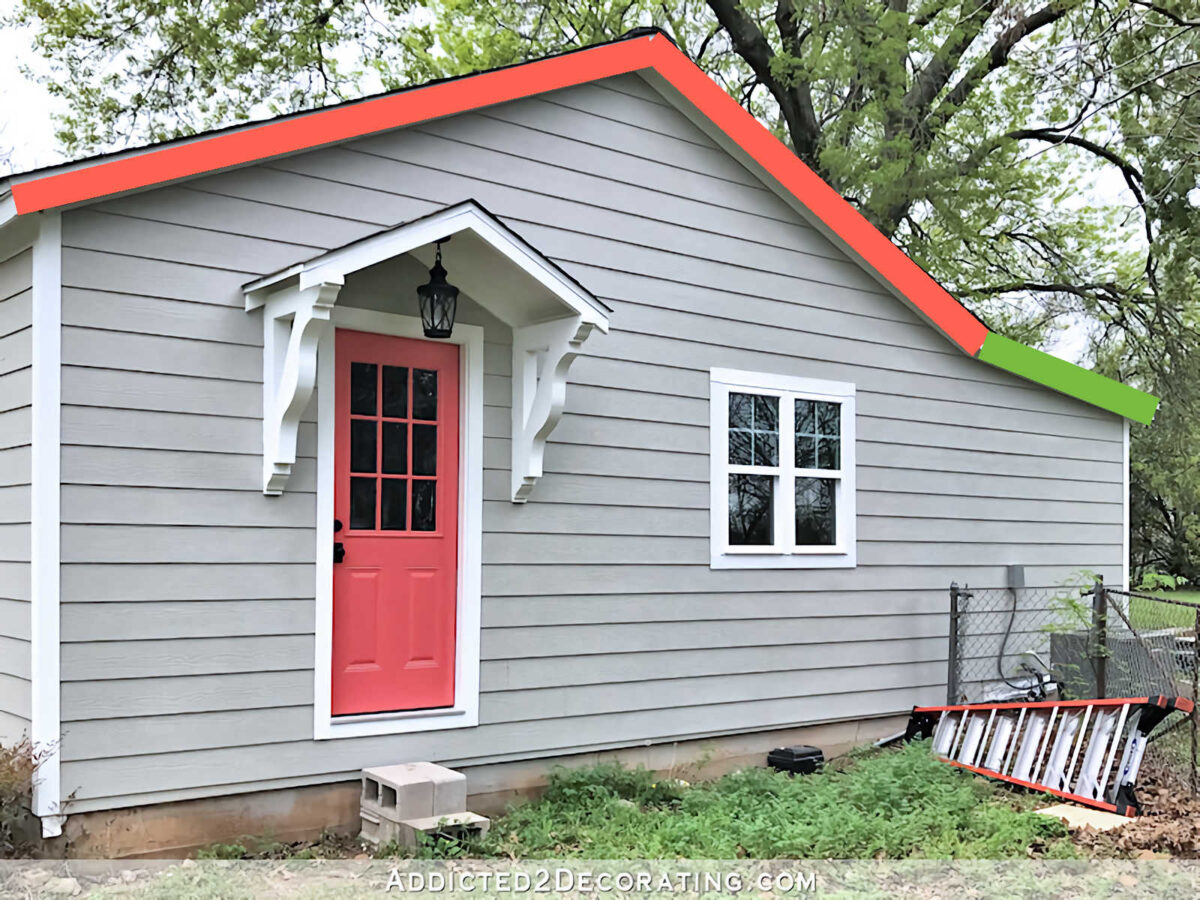
You can see that the orange area is the original roof, and the green area is the add on. So when all of these areas were added, they simply started the new roof at the bottom gutter edge of the original roof, extended it as much as they needed to in order to cover the new area, and put the tiniest slope possible in that new roof extension.
And of course, when you start the new roof at the 8-foot height and then slope down even more towards the back, that leaves you with a back wall that’s way too low. And the further that extension goes out, the lower the roof goes.
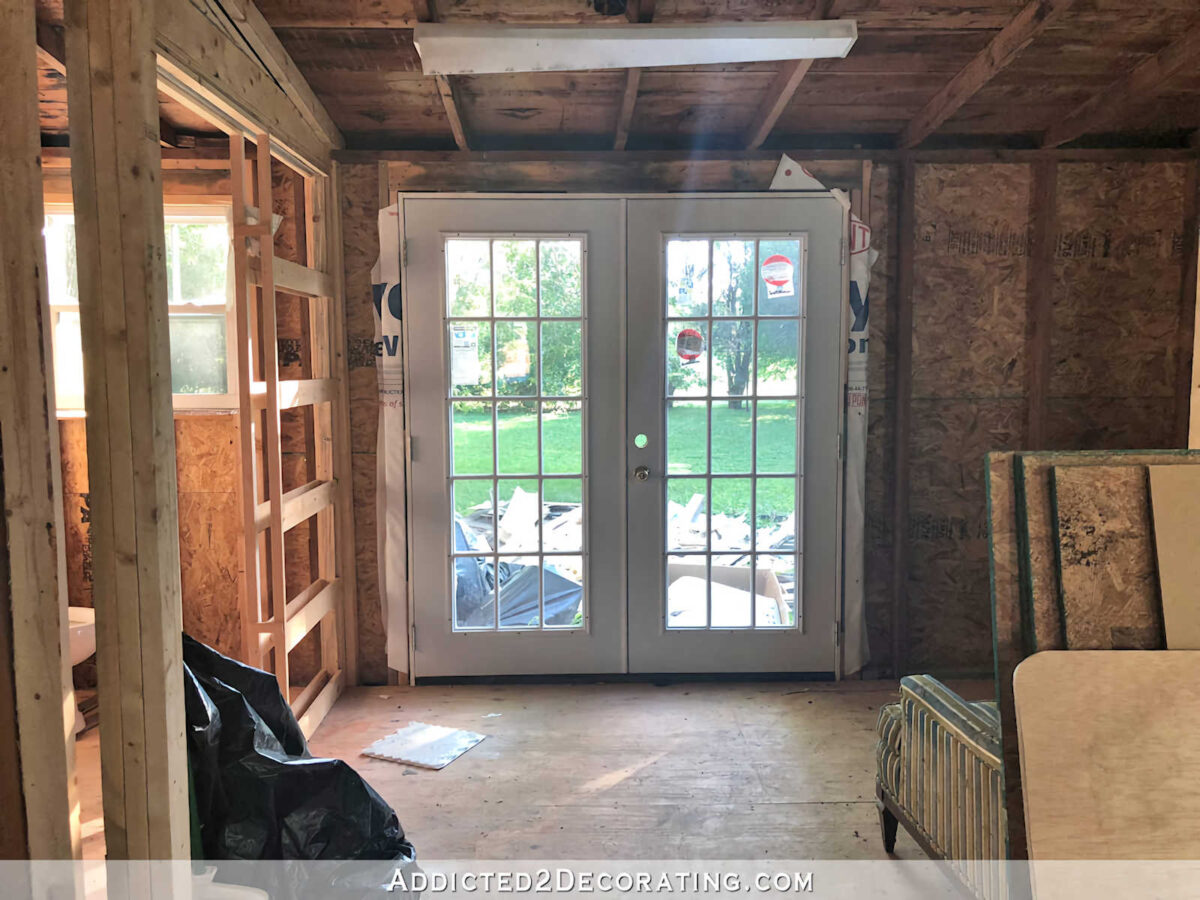
When we originally started turning the garage into my studio, we ran into this problem in the back entry of the studio. The plan when we started was to keep the original roof over that back section. At the time, we had no plans for a carport beyond those doors. So when the new French doors were added, there were only about six inches between the top of the doors and the ceiling on that back wall.
But then, at some point along the way, we decided to add the carport behind the studio. And that solved the problem. Because the carport had to extend 20-ish feet beyond the back wall of the studio, there was really only one way to build the roof. In the picture below, you can see the original roof with the gutter edge on the back of the house, and then the new roof for the carport was built with the gable end extending towards the back yard.
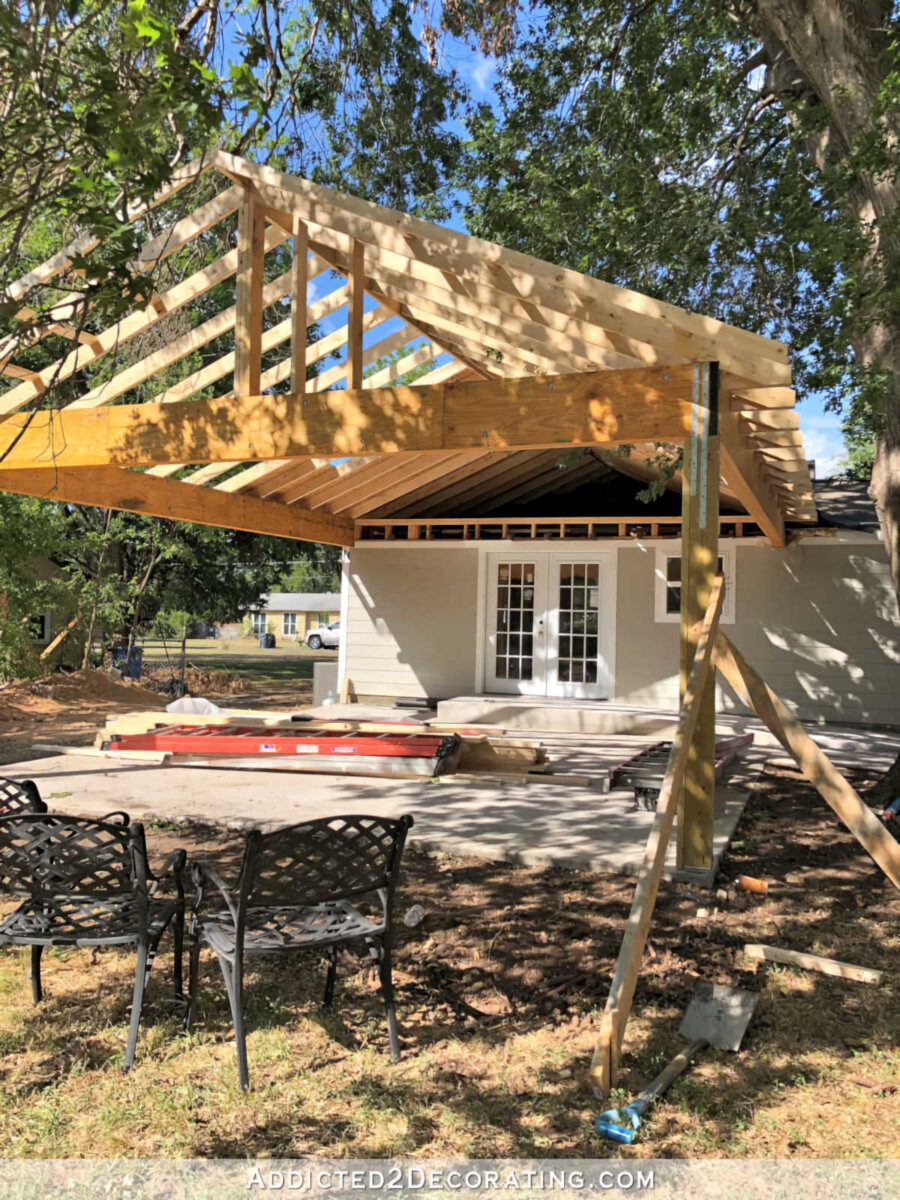
This allowed for the wall of the back entry to the studio to be raised up and the original roof that was now covered by the new roof of the carport to be removed.
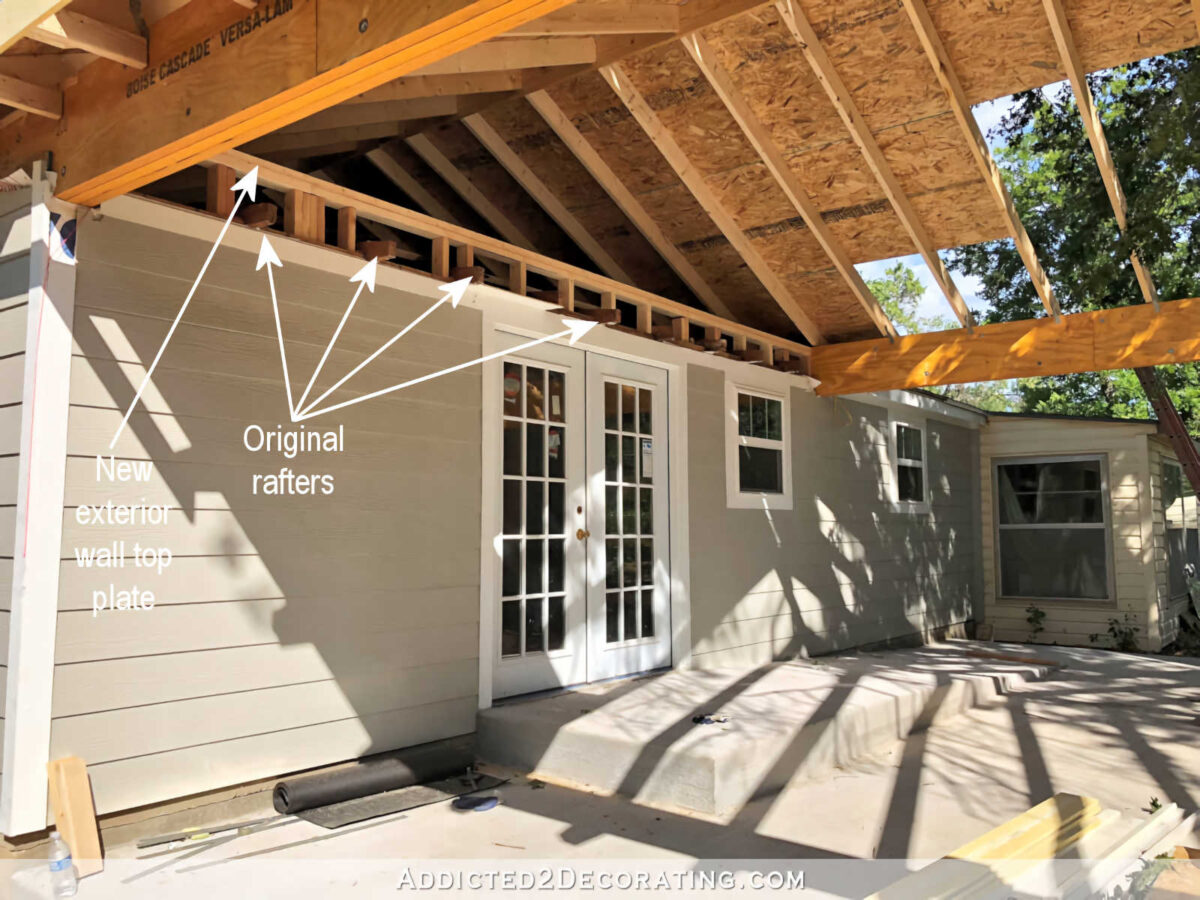
After all of that was done, this is how the wall with the door looked. It went from six inches between the top of the door to the ceiling to about five feet.
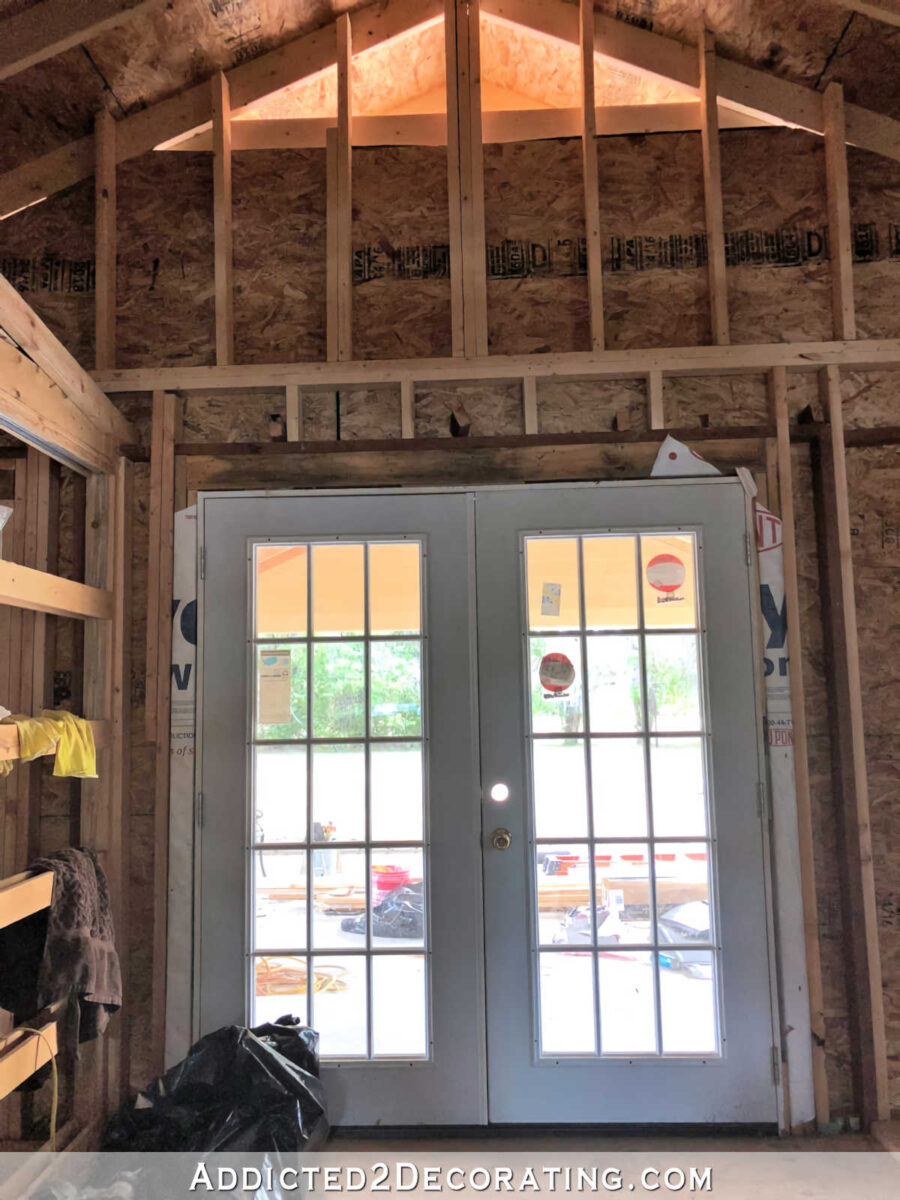
And today, that area looks like this…

What a huge difference, right?
And from the exterior, where’s what the side view of the studio looks like now with the carport roof built on the back and extending towards the back yard…
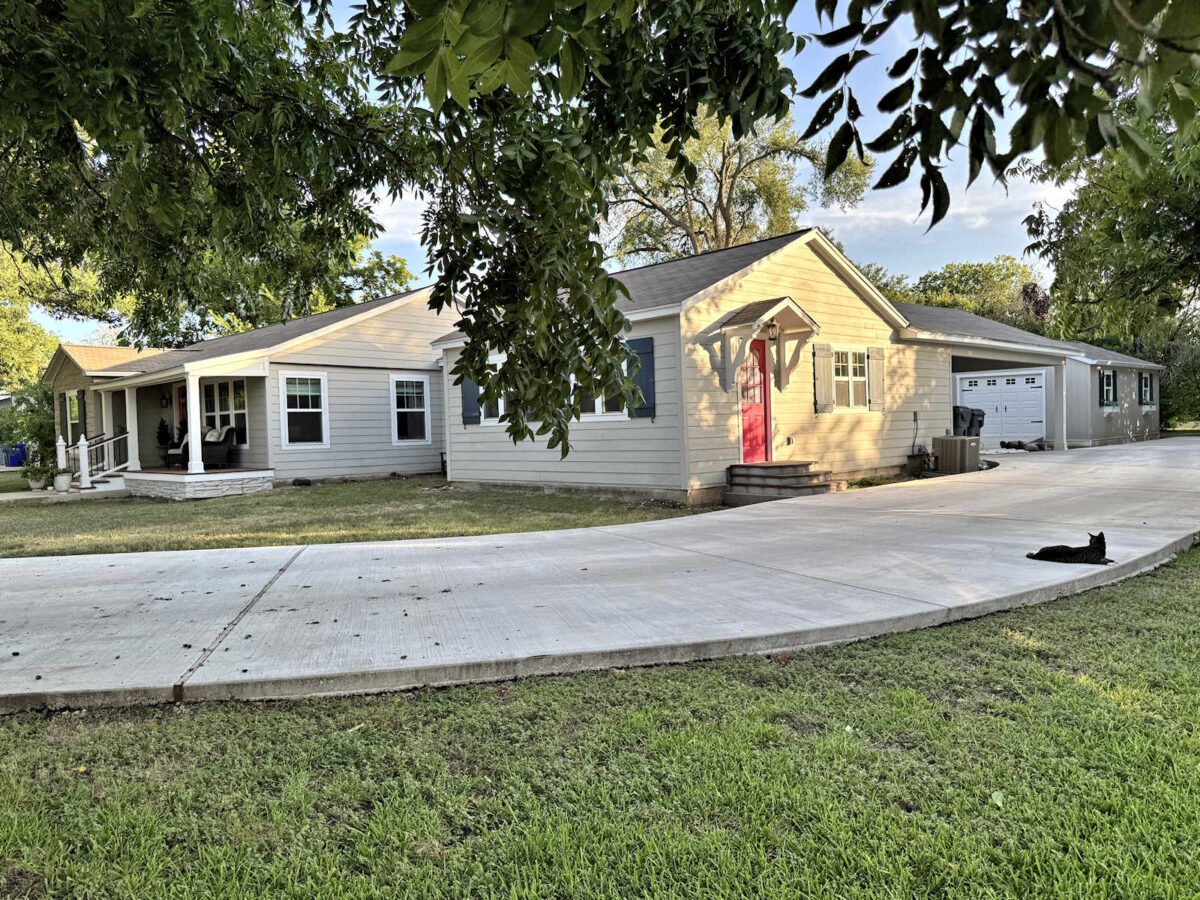
Here’s a side-by-side comparison of the roof before and the roof now.
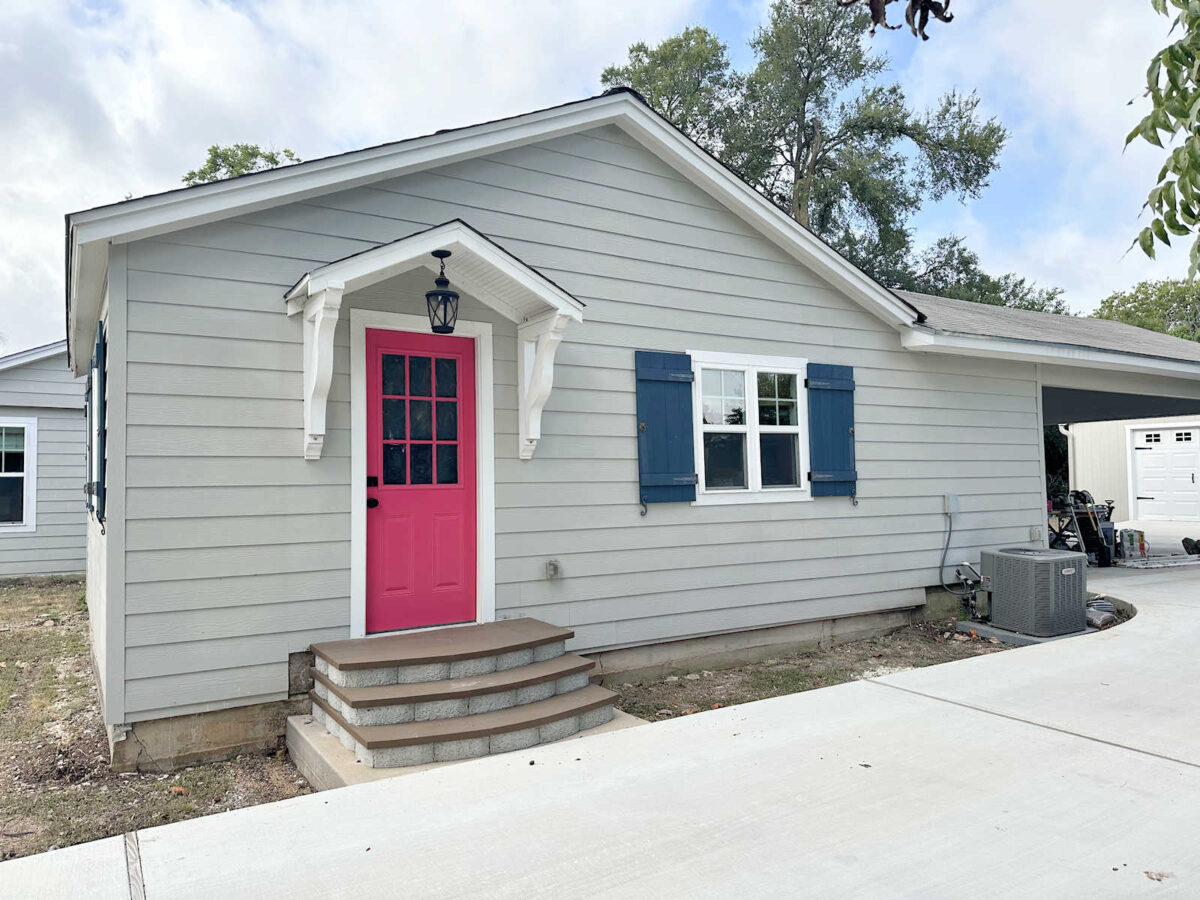
So I went through all of that background to say this. When it comes to the sunroom, there are two possibilities that we talked about for the roof above the sunroom and bathroom. The first option would be to build the exact same roof structure over the sunroom and bathroom that we had built over the carport. While this isn’t a great example because the carport extends out 20+ feet, which isn’t represented on the photo below, you can still see what I mean here…
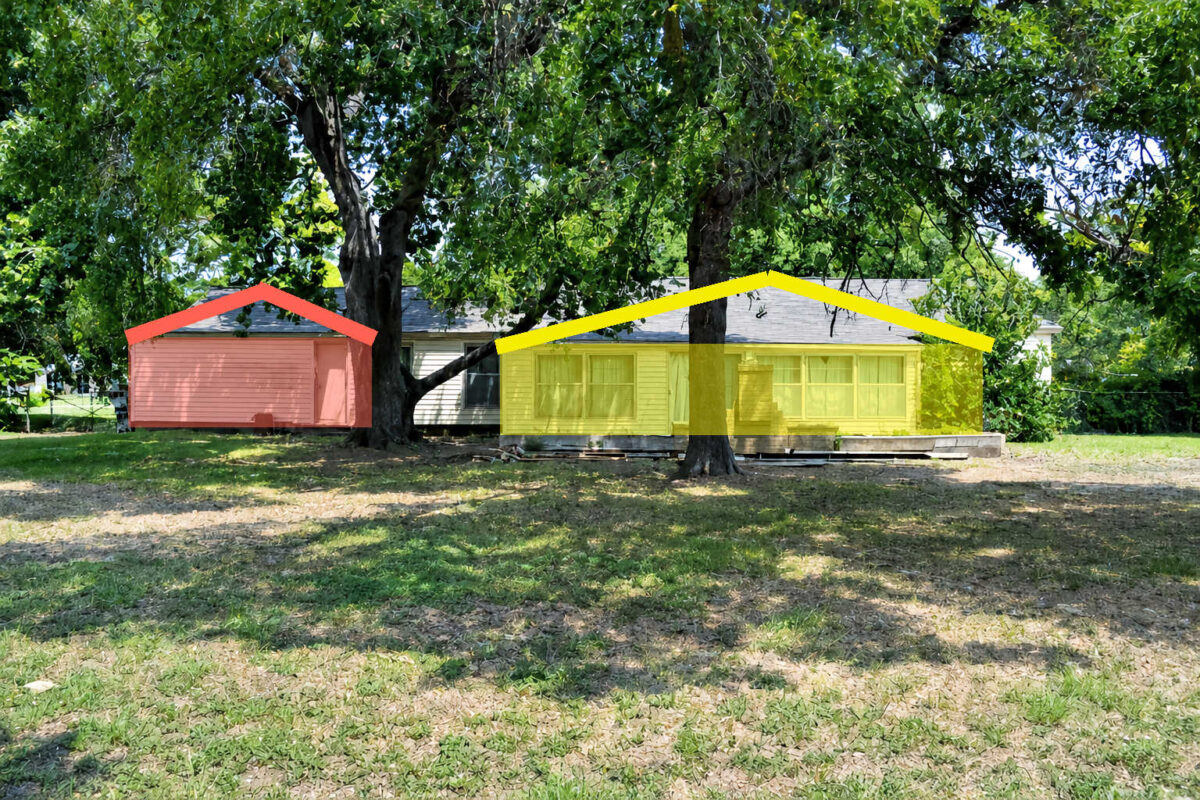
While I love the idea of the gable end of the roof being the most visible from the back yard, I’ve been reluctant about this option for one main reason. The carport is only 20 feet wide, but the sunroom and the bathroom are about 38 feet wide. The roof on each one would be the same height because I obviously don’t want it to be higher than the top ridge of the roof on the original part of the house. And the gutter sides of each one would be the same height. So what does that mean? It means that I would have two different roofs with gable ends facing the back yard, and the two roofs would have different pitches. And I’m pretty sure that I would hate the look of that.
So after discussing the options, the one that we settled on yesterday was this one. We’ll start the new roof at the original top ridge of the house, and then slope it back to the new, taller back wall. I don’t have a side picture of the roof above the sunroom, but this is a good demonstration.
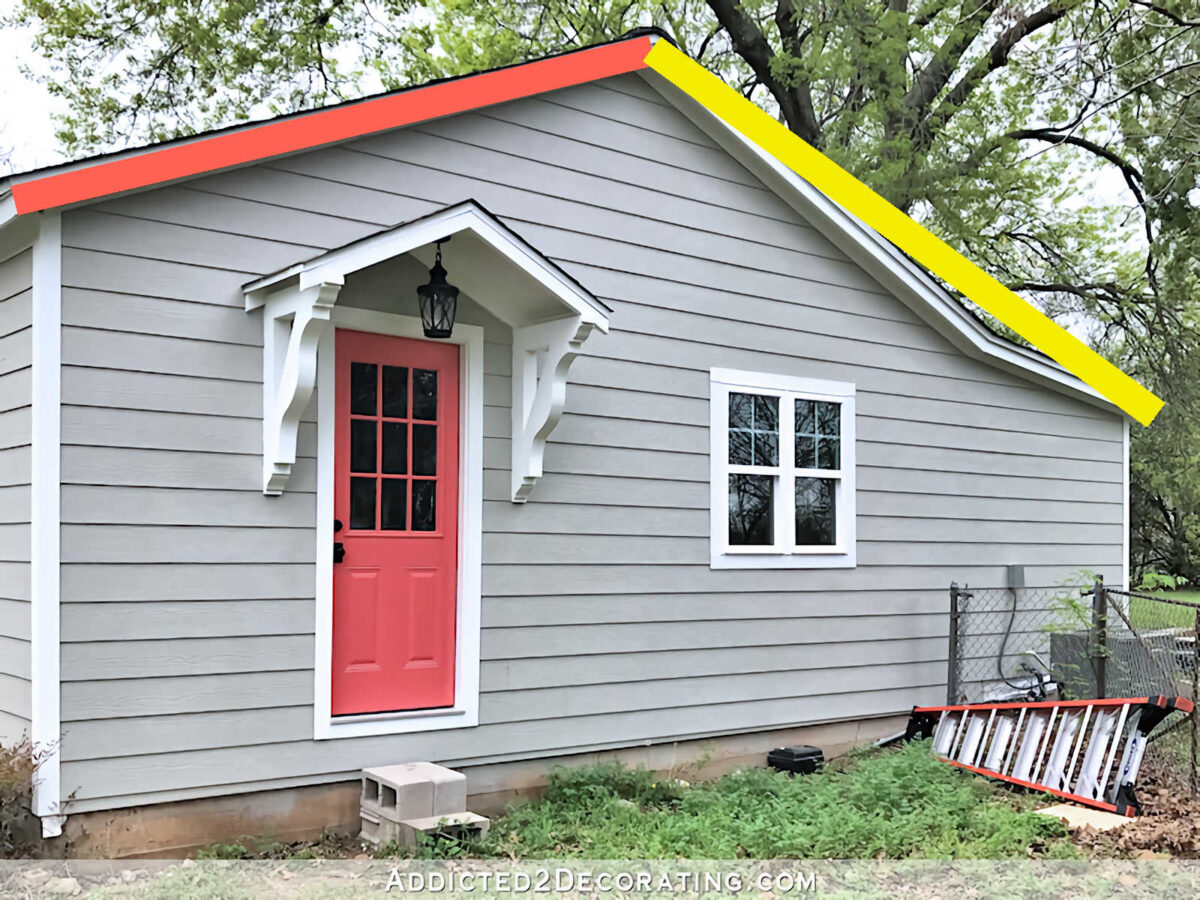
So from the back, I don’t have competing gable ends with different pitches. It will look more like this…
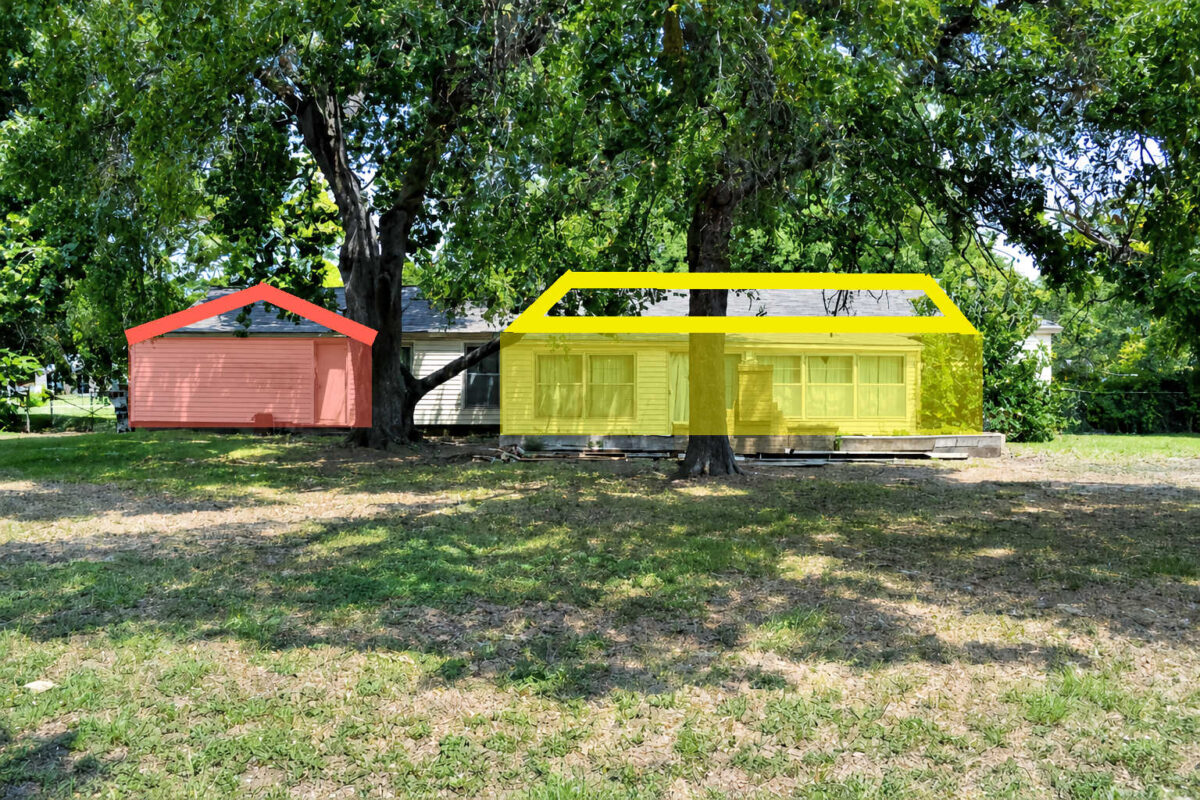
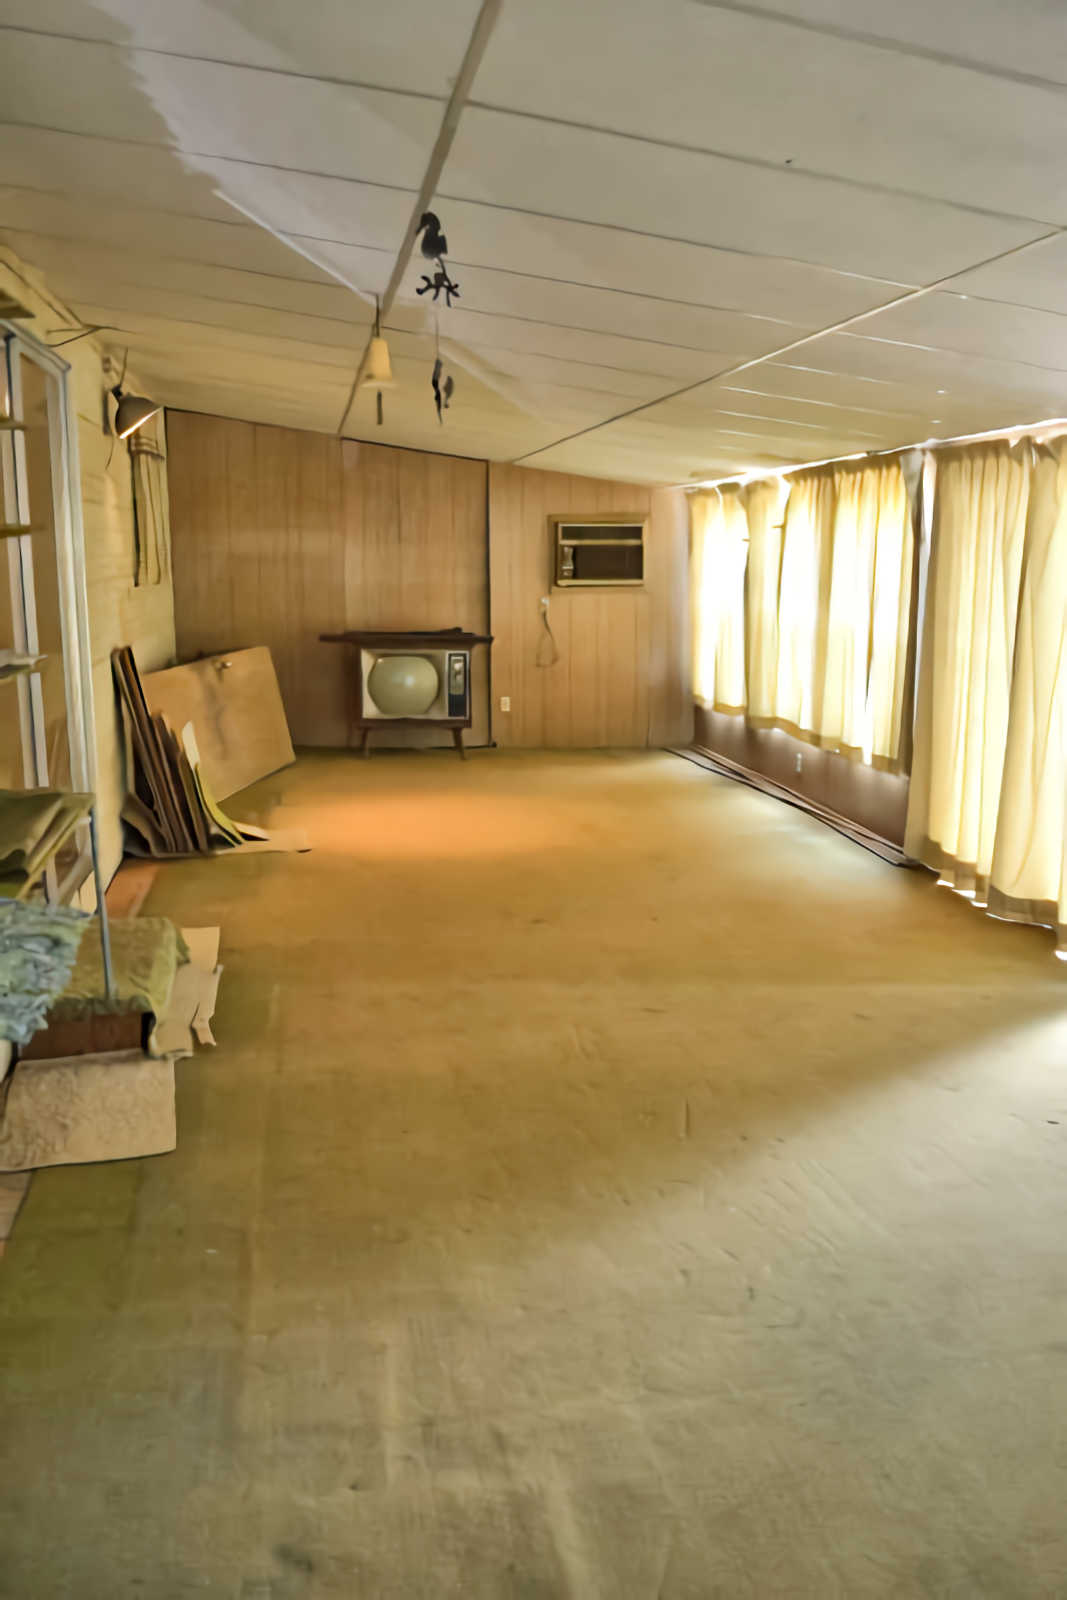
And the best news is that the whole roof will have enough of a pitch to it that the whole thing can be shingled, as opposed to the current situation where the original roof is shingled, but the roof over the sunroom and bathroom aren’t sloped enough for shingles, so they have that ugly sheet roofing on them. I hate the look of that stuff, and I’ve wanted it gone for the last 13 years.
Anyway, we discussed a whole lot more, including the whole process, how we can divide it up into stages, etc. But I’ll save that info for later because we’re still working out details, costs, etc. I’m excited, though!

Addicted 2 Decorating is where I share my DIY and decorating journey as I remodel and decorate the 1948 fixer upper that my husband, Matt, and I bought in 2013. Matt has M.S. and is unable to do physical work, so I do the majority of the work on the house by myself. You can learn more about me here.

Looks like an awesome plan. Figured they’d have to cut into the roof and either do a gable or some sort of shed dormer, either way, it will turn out great. Can’t wait for the demo to begin.
Cheers to you, Matt, and the Fur Inspection Team!!!
It will be fun watching this remodeling/addition project. I am curious as to how you will divide the project into stages. I don’t know a lot about construction but I’m guessing you’d need to raise the foundation to the level of the rest of the house and build walls to support the roof. When would it need to be enclosed with windows and doors to keep out the elements? You must be very excited!
I love the evolution of this future project! I also applaud your financial strategy! So much Kristi goodness to look forward to!
Do. The. Gable. Big open roof inside. Many houses have two different gables. Many. Put windows up in the gable!!!!
How much more will is cost to extend the roofline over more to the end of your house. Then you will have a small covered porch off your master bathroom. In the future you can put cat-scratch proof screen along those two sides and have a catio. I promise that you will truly enjoy sitting with your cats in that private screened-in porch watching them sniff, listen, and study the goings on outside.
I am camp pitched gabled style – I know you are very symmetricly oriented (I am, too!), but it looks balanced!
If the two Gables were too close in width with different pitches, it would look odd – but the sunroom portions gable is adequately wide enough to appear designed!
😉
Another caveat to doing a gable over the sunroof is the amount of light you could bring in through a window in that second level…
Exercising with the increased light and sky/tree views is heavenly! It would become a room that you look forward to being in…
You could go all Swiss chalet with a flower box below that window as well!
Also, imagine using trees and bushes to add to the balance…don’t stop at face value – trick-out your vision with a mock-up or two before you decide…
Since you are already forgoing the addition, you might as well make that sunroom airy, light-filled, and a stunning surprise on the backend of your home!
Just sayin’ 😉
I love the gabled roof! The pitch difference wouldn’t make a difference since they’re the same height.
It seems like houses have different sized gables with different pitches quite often. Before you completely rule out the gable based on looks, could you work your AI magic to have it mock up what it would look like and see if it really bothers you?
I’m going to repeat another person. Do. The. Gable. In my mind, not competing–more interesting! And to coin a phrase from a great DIY’er about a back door with a gable roof—“What a huge difference, right?”
If anyone can figure out all the logistics…it is YOU! You have always been able to regroup, reroute and get it done in the end! Do you still have someone that picks up your bagged demolition materials, could you hire out the whole cleanup? Are you going to hire out all of the dry wall?
I do have someone who picks up my demo material. I’m going to call him as soon as the bathroom demo is done. And I’m going to hire out the drywall, but not the taping and mudding.
I’m team gable. To me, the different style of roof lines is way more distracting than the different sizes of the gabled roofs. Also, a gable on the sunroom will allow for a cathedral ceiling (if desired) on the interior. Whether you would add gable windows or not is your choice also, and combined, will make the sunroom seem larger than it is; always a plus! I think it would be beautiful!
That requires a lot of thinking which you are excellent at doing. I would not like two
different pitches in my backyard so I’m glad you went with Option 2. It will look better.
I know you are excited about this. I’m excited about this and it isn’t even my remodel!
You get to pick new windows, new flooring, new paint colors, new shingles, new siding.
And money, money, money. It will all be worth it when you get to enjoy your new “sunroom”.
Have a good week. Hug Matt. Pet the animals.
Different height gables would give more interest to the back elevation in my mind. I don’t find the idea of different height weird in the slightest ESPECIALLY as they are not both over living spaces. One is clearly a carport, and thus “less important” than the living space of the sunroom.