
The Front Porch Is Finished! (Front Porch Makeover With DIY Concrete Faux Stone Skirting And Cedar Sealed With Pine Tar)
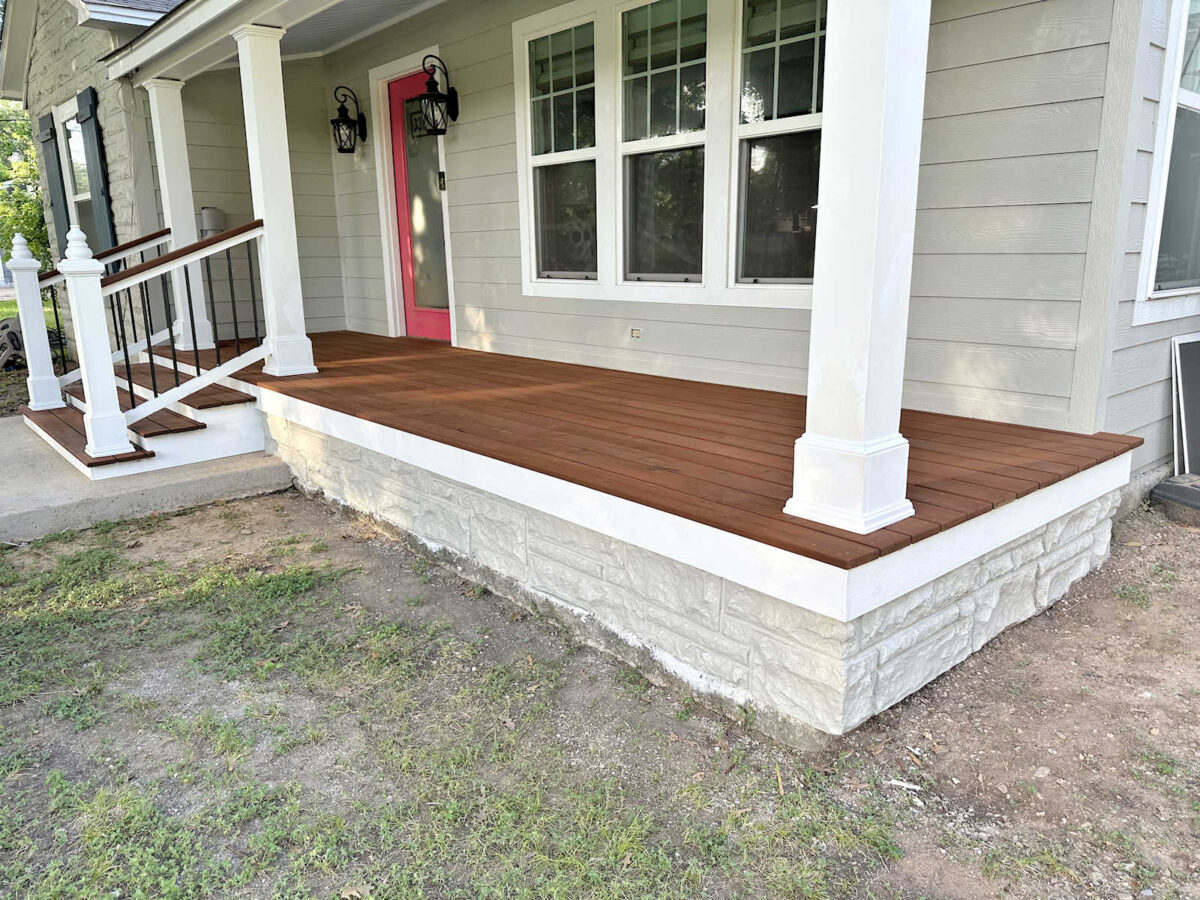
My front porch makeover is finished! Well, it’s finished for the most part. All of the big projects are done, but as is normal for me, I went out to take the final pictures and noticed that I had forgotten two small things. First, I forgot to replace the fallen tape lights, so the old fallen tape lights are still hanging by the side of the front steps. Ugh! Now I’ll have to wait for the pine tar to dry before I can install the new ones. And then I noticed that I forgot to paint the small stone skirting area to the left of the front steps with the gray paint color once I remixed the color to make it match the original paint color. But other than those two things, it’s finished!
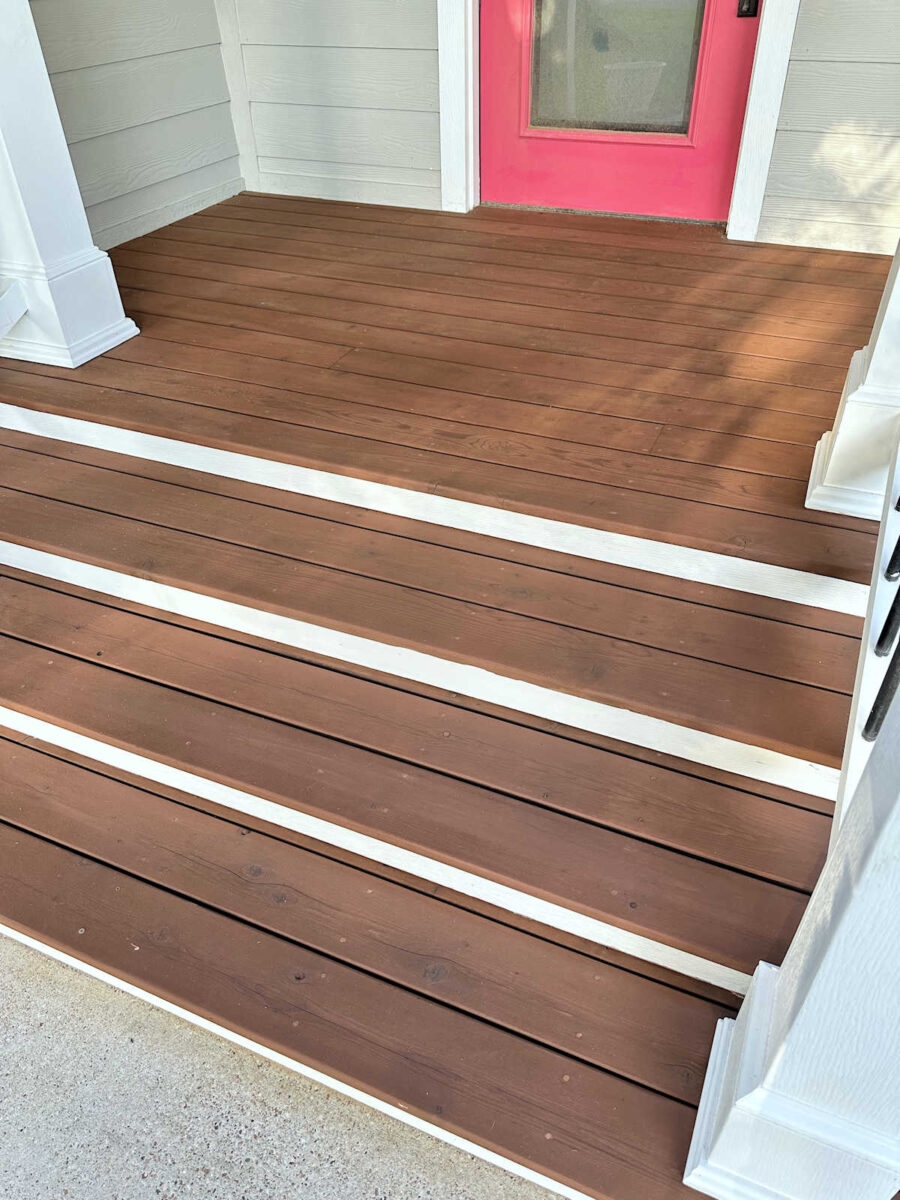
Here is a closeup of the cedar porch boards with the new pine tar and linseed oil finish. I can’t even tell you how impressed I am with the coverage and the evenness of the color of the pine tar.
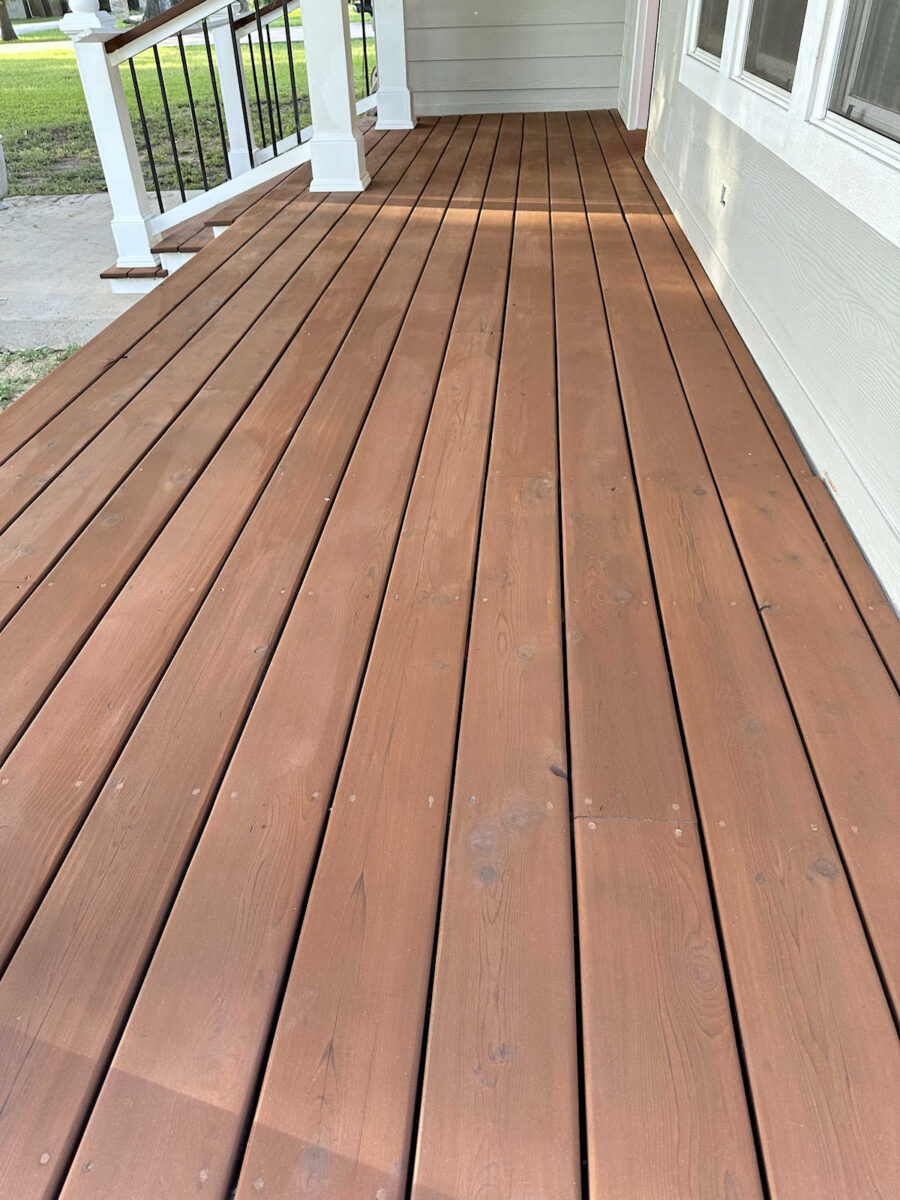
As I mentioned yesterday, the one drawback of pine tar is that it takes a lot longer to dry and cure than any outdoor stain product that you’ll find in a big box home improvement store, so I won’t be able to walk on it or place things on it until the end of the week.
If you missed the post where I shared details about the pine tar and linseed oil finish, you can find that here: Sealing My Cedar Porch With Pine Tar And Linseed Oil
I’m so pleased with how this turned out. And I’m even more ecstatic about the fact that for the first time since we bought this house, the front porch is completely finished. I did a major front porch makeover back in 2018, and that did wonders for the front of our house. But even at that point, the skirting of the front porch was still plain, ugly concrete. But now the porch is finished finished, complete with a faux stone skirting that actually matches the stone on the front of our house.
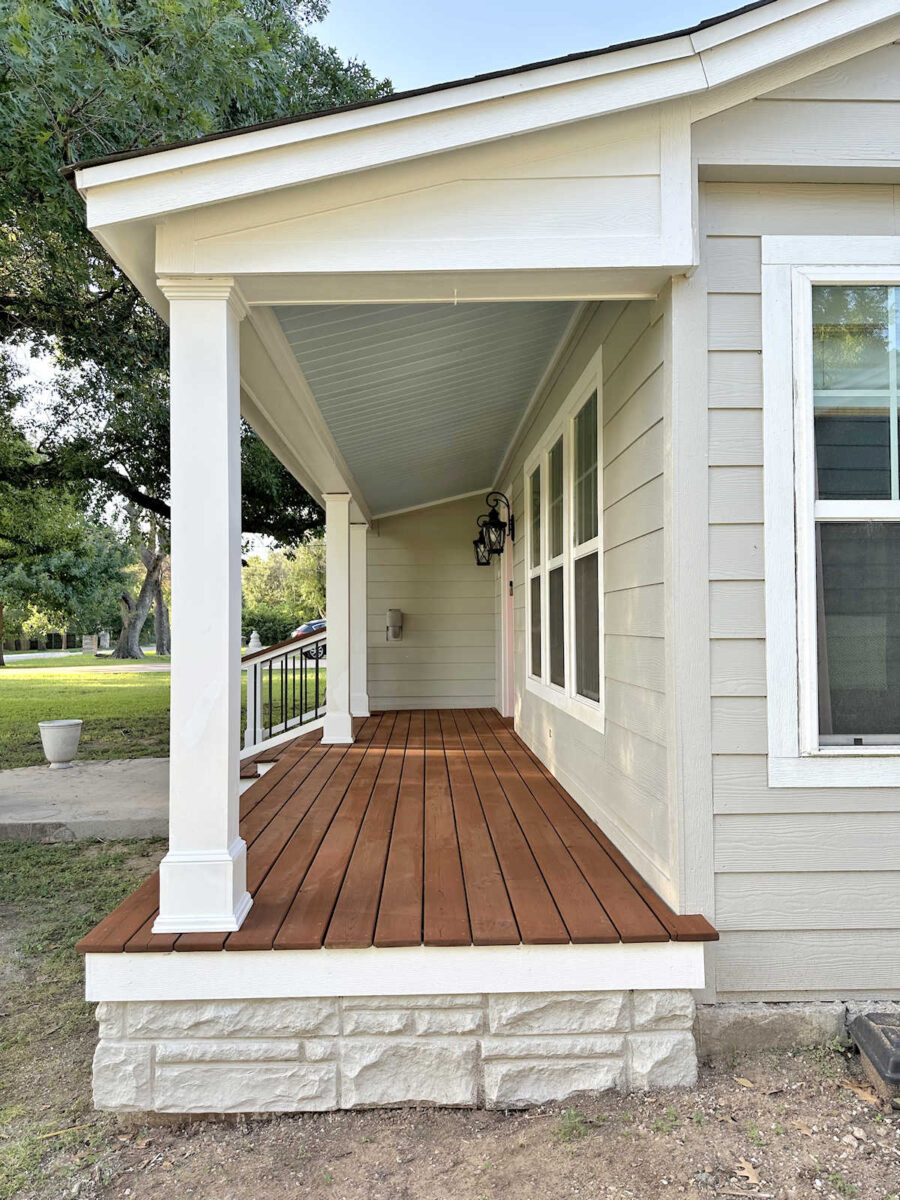
If you missed how I made the DIY faux stone concrete skirting, you can find that info here: DIY Concrete Faux Stone Facade
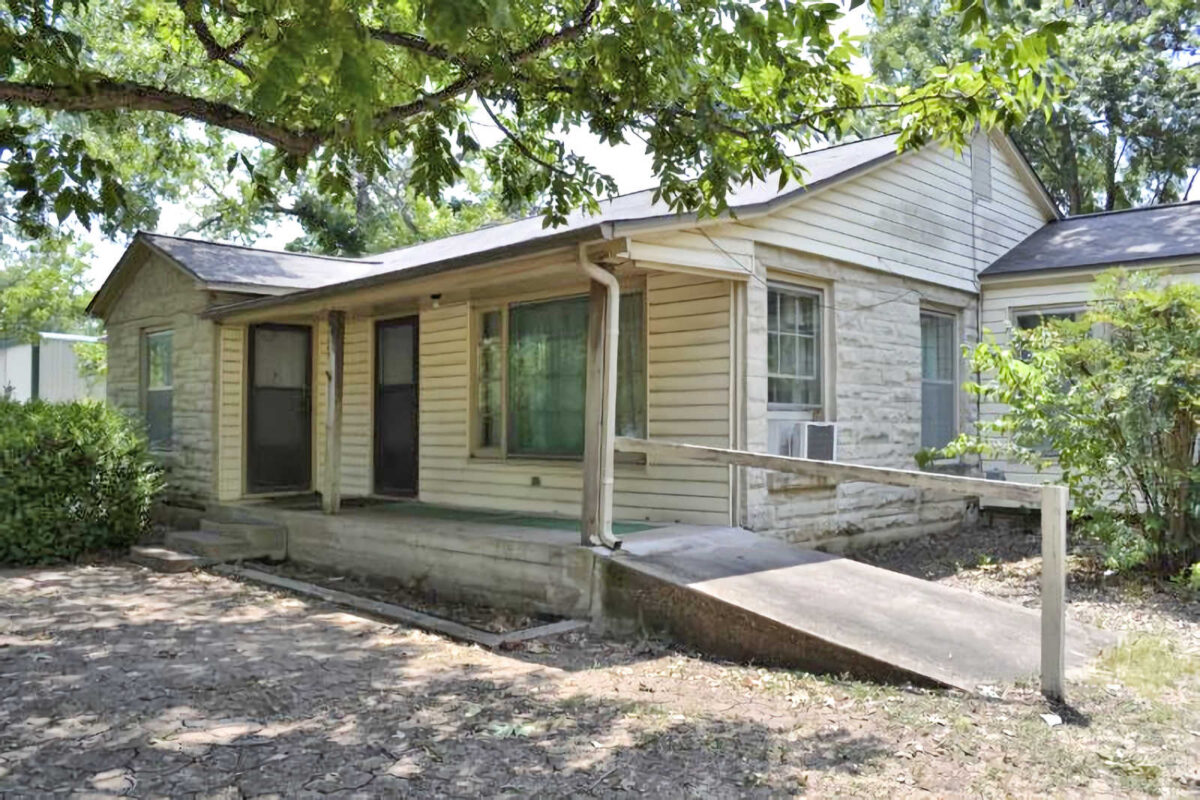
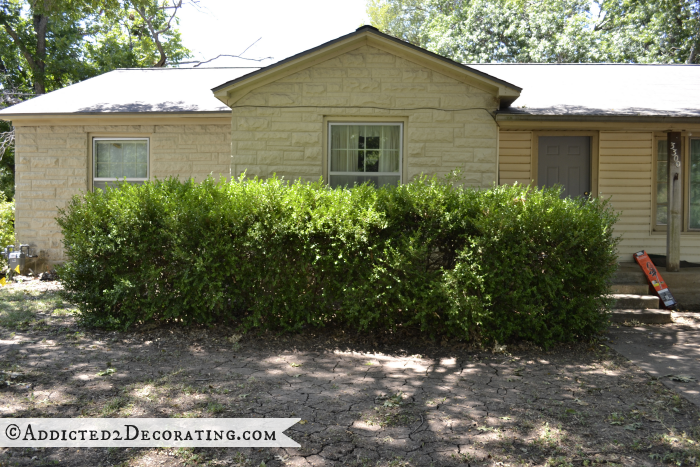
Before I show you more pictures of the finished front porch, I have step back in time and remind you of what this porch looked like when we bought the house. It was a lot to take in, and not in a good way. But I knew there was a diamon in there somewhere.
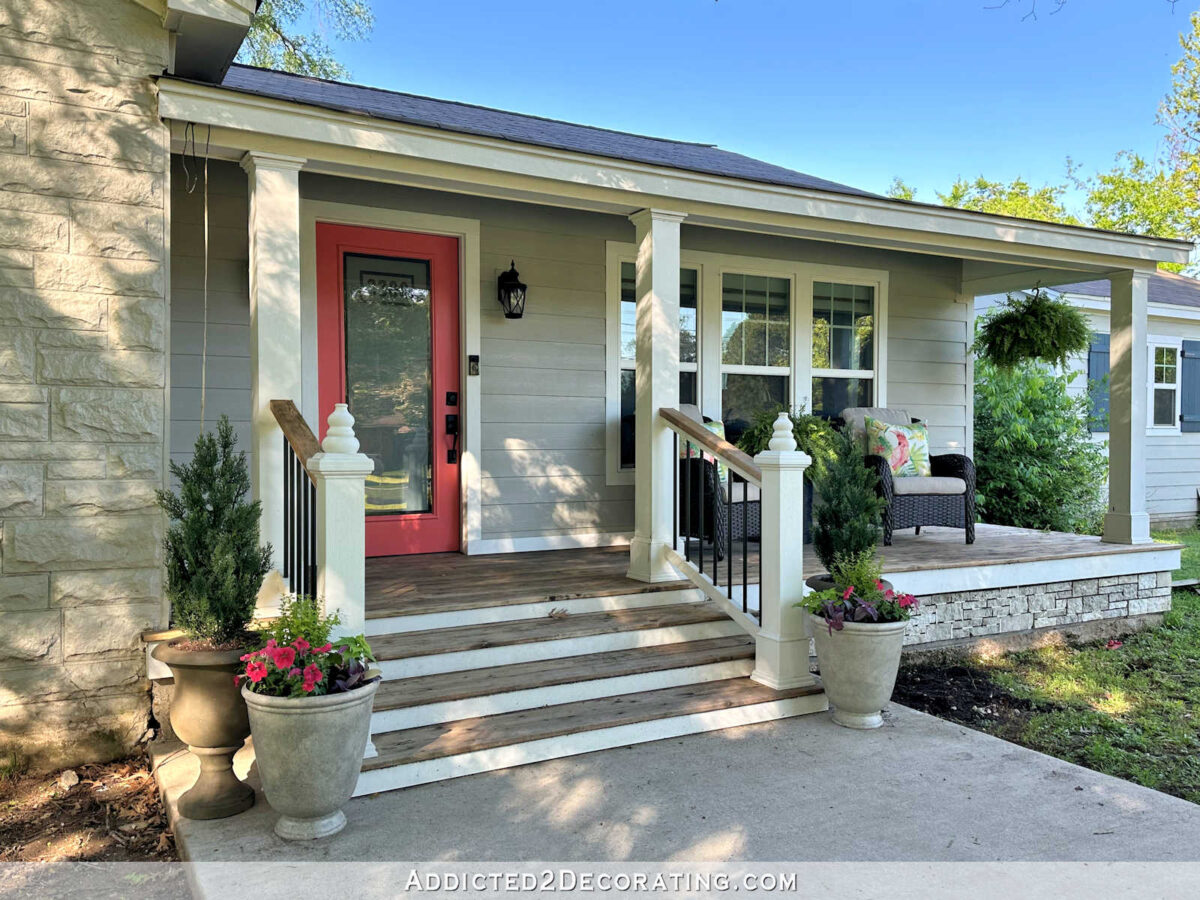
And then in 2018, we got new siding, and that’s when I did the original front porch makeover. This picture below was taken before I built the front steps, but it’s the only one I could find that shows the porch makeover with the plain, ugly concrete skirting.
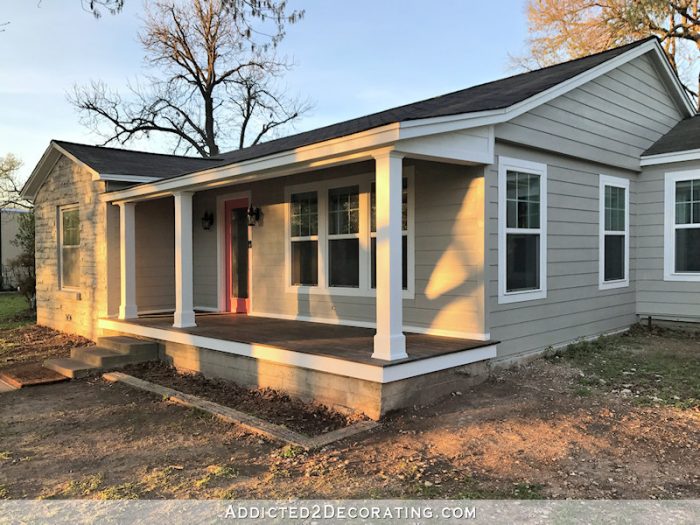
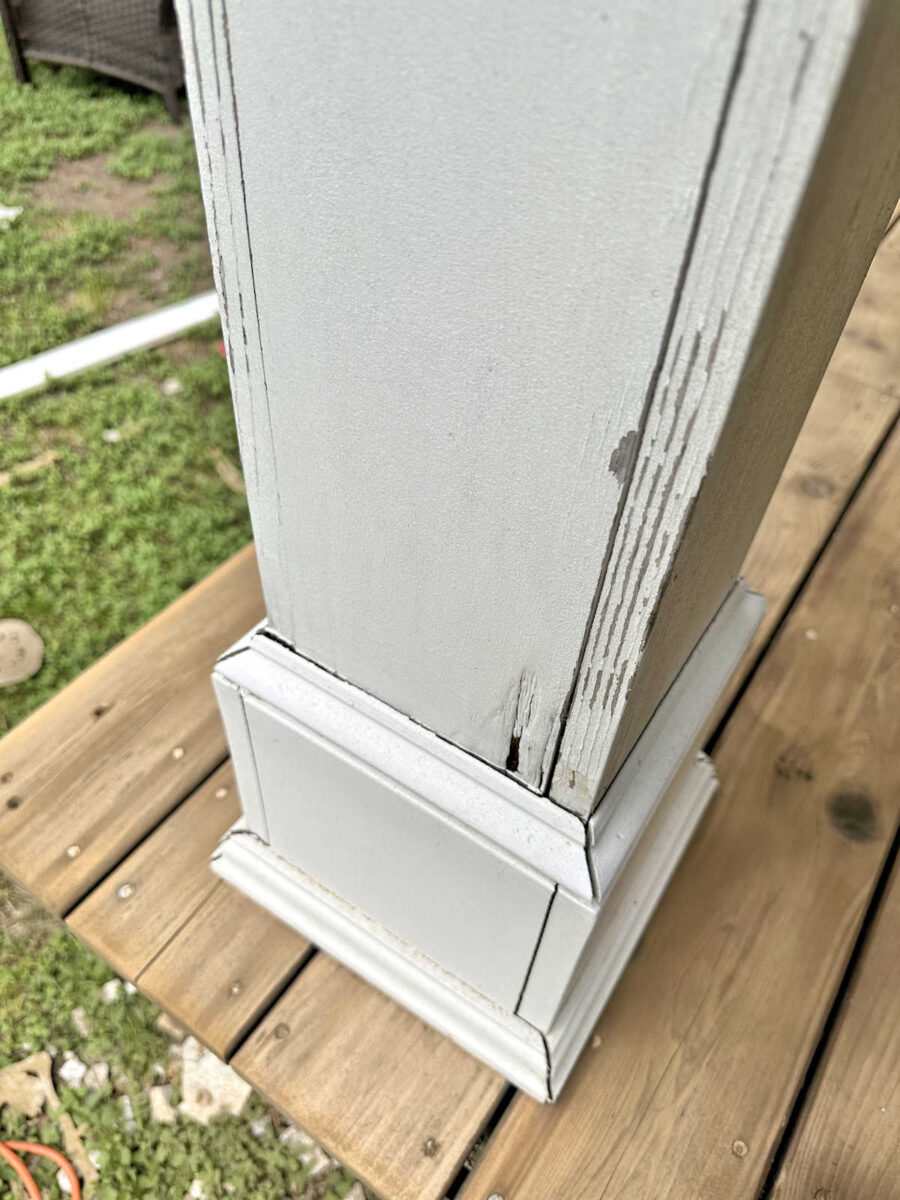
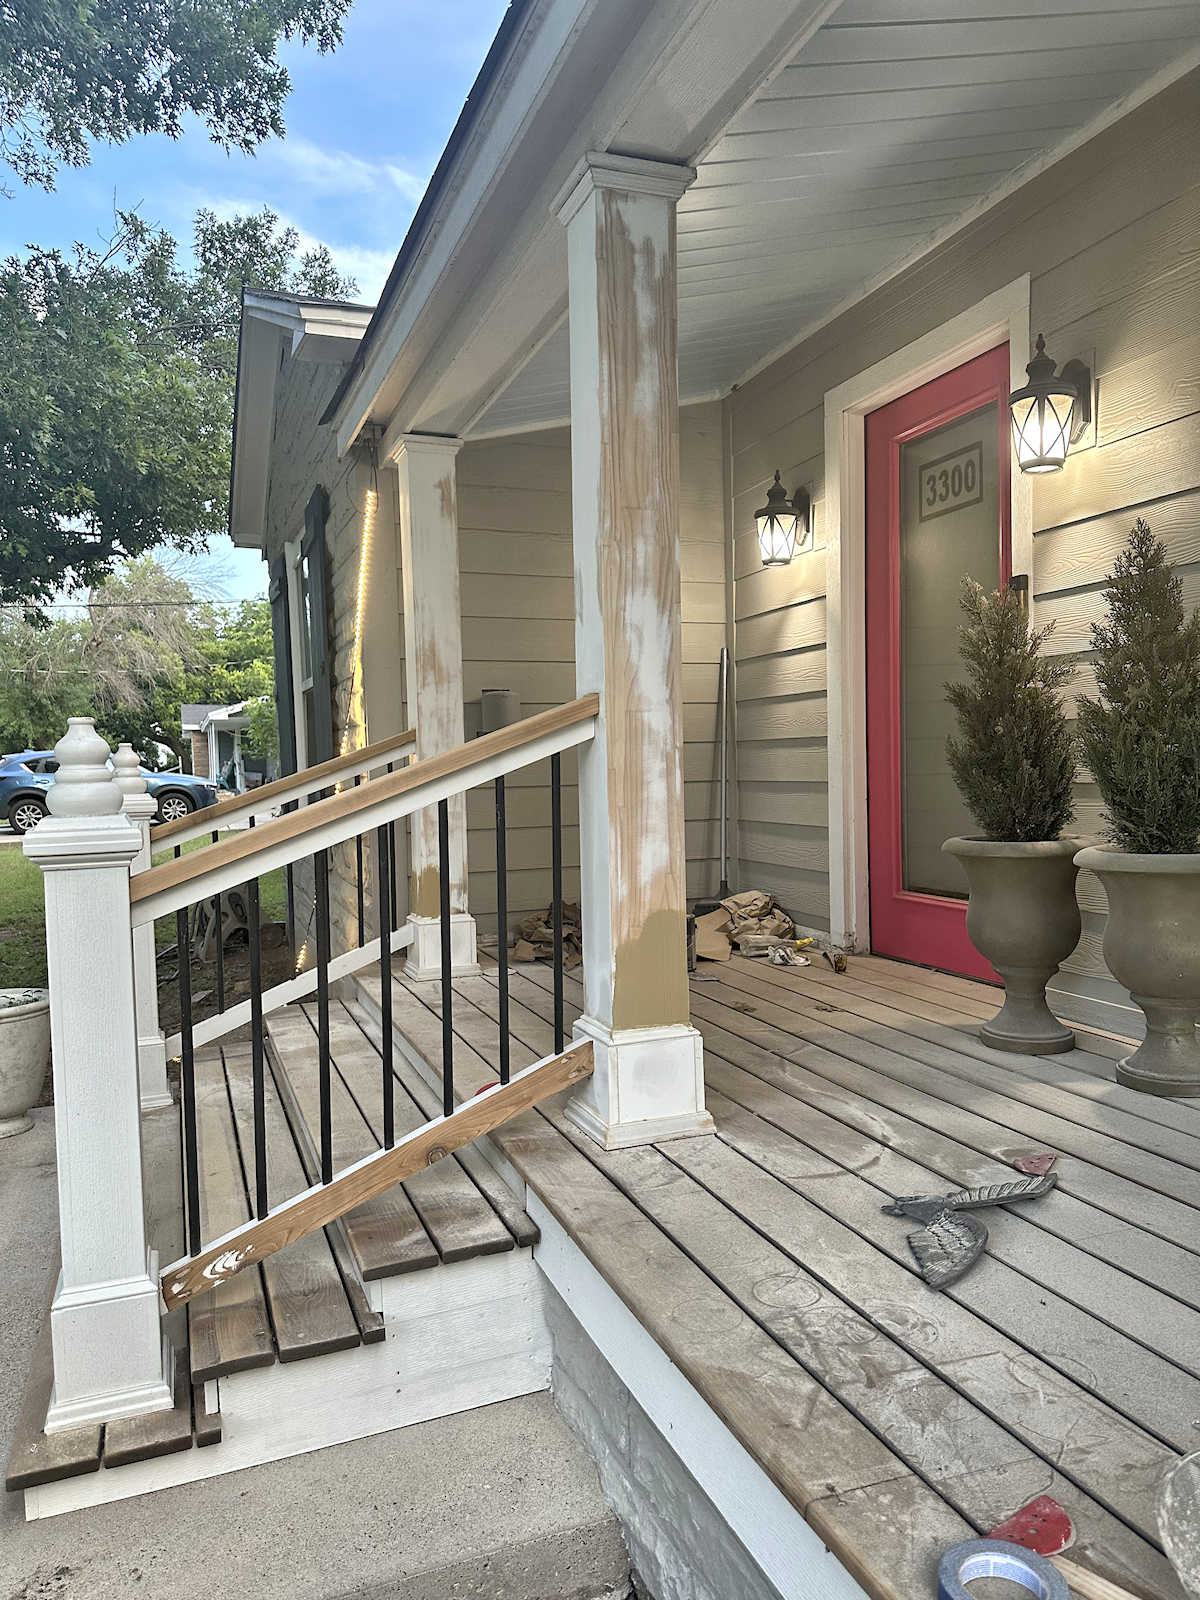
And then over the years, that original front porch makeover started looking really worn and old. I was dealing with some rotting wood on the columns…
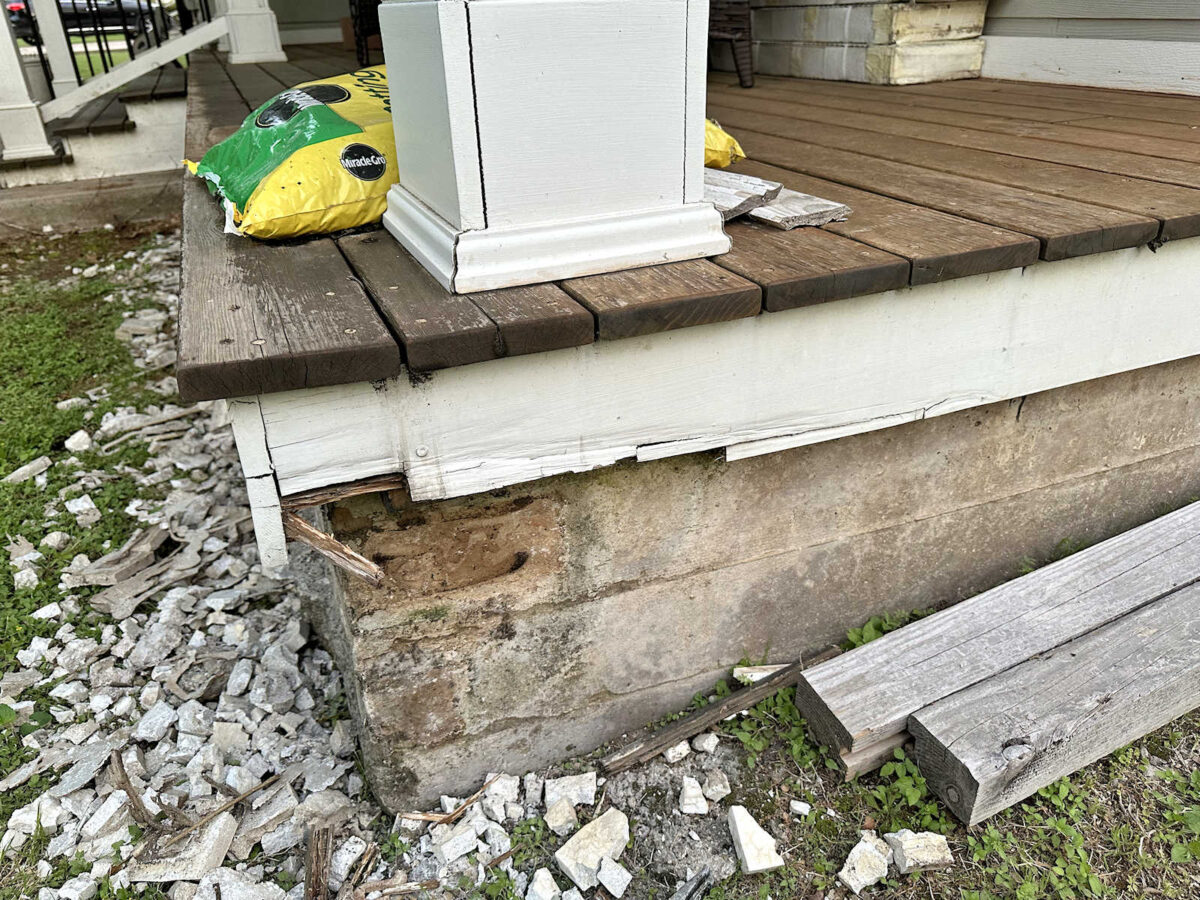
And because I used real wood (and not even the right kind of wood), the fascia boards were also rotting.
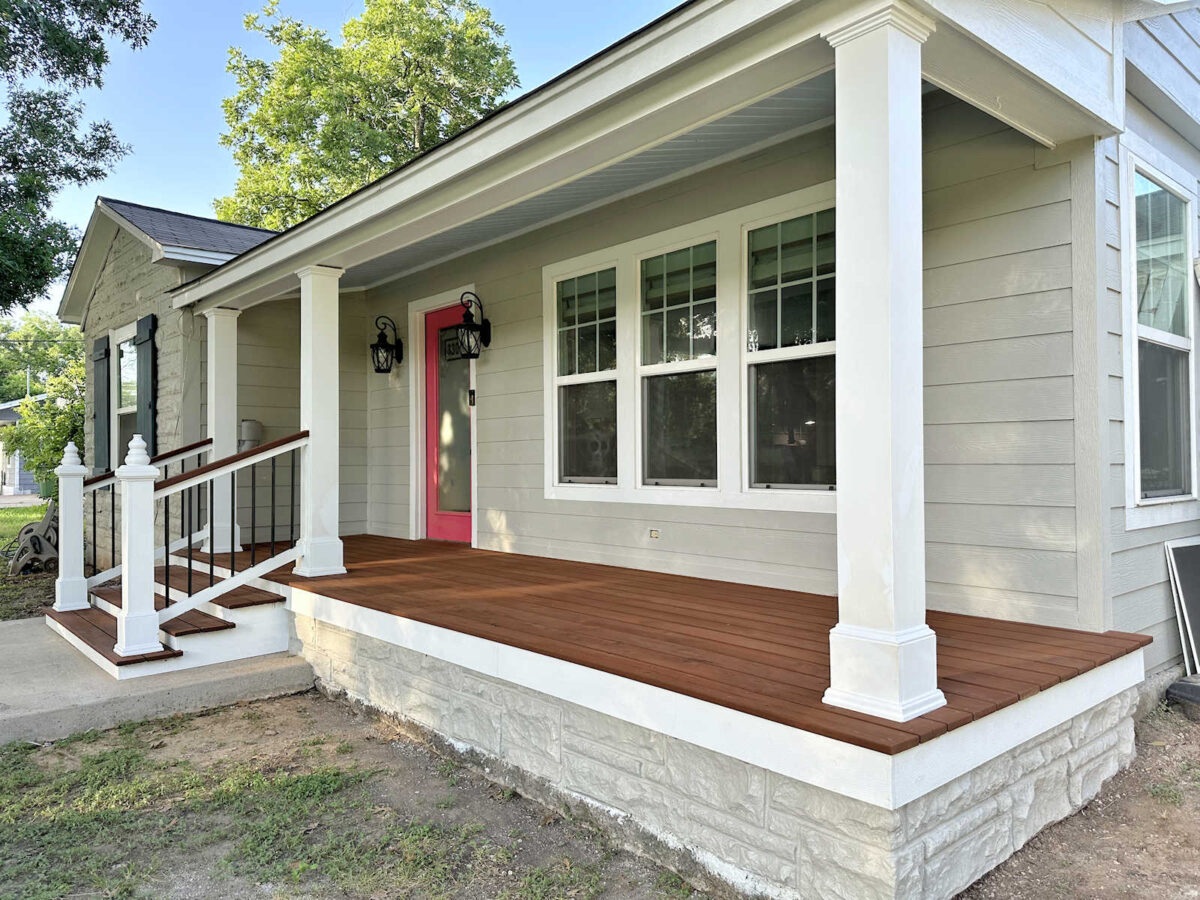
But now, the columns have been repaired and repainted, the rotting fascia boards have been replaced with PVC boards, the concrete skirting has been covered with faux concrete stones to match the stones on the house, and the cedar boards have a fresh coat of Authentic Brown pine tar and linseed oil.
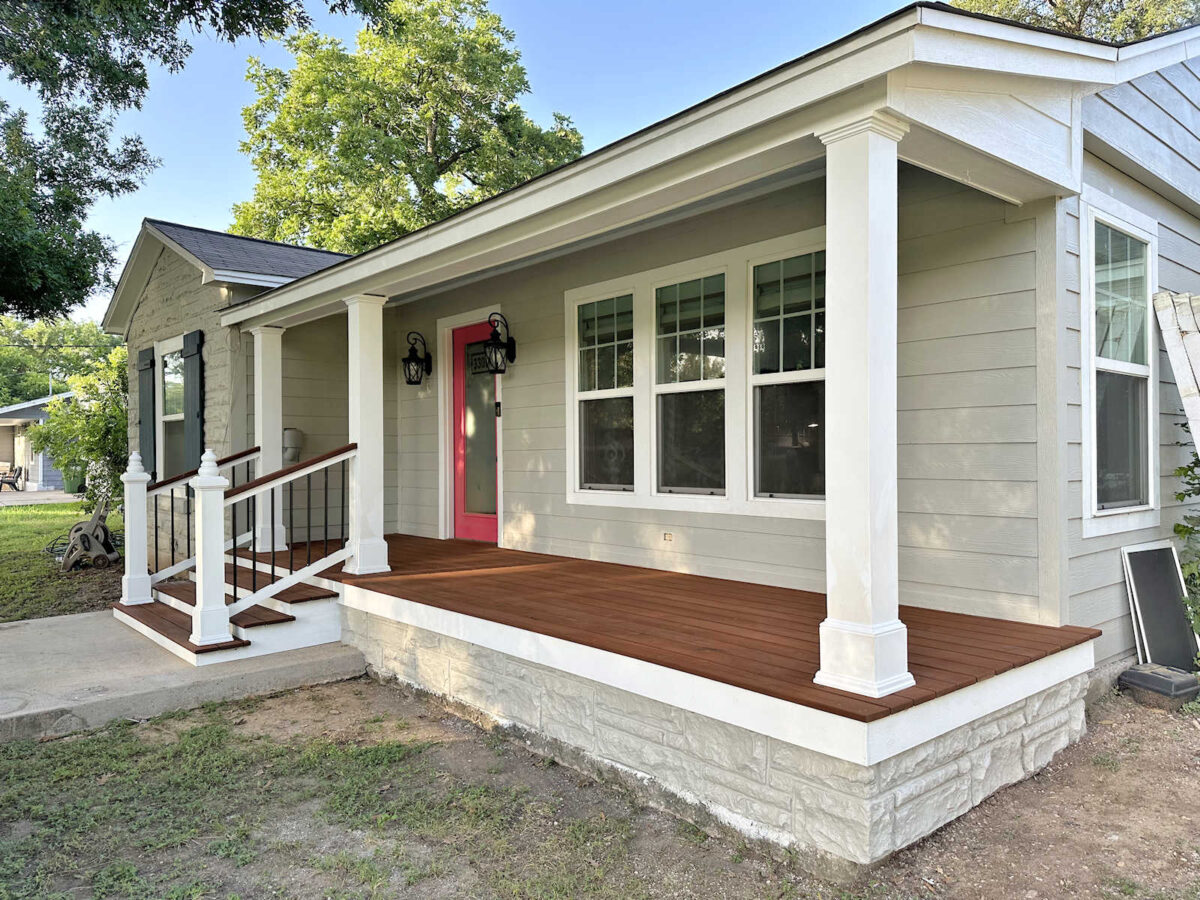
I also gave all of the white trim on and around the front porch a fresh coat of paint. I installed new lights by the door. And the door has a new paint color.
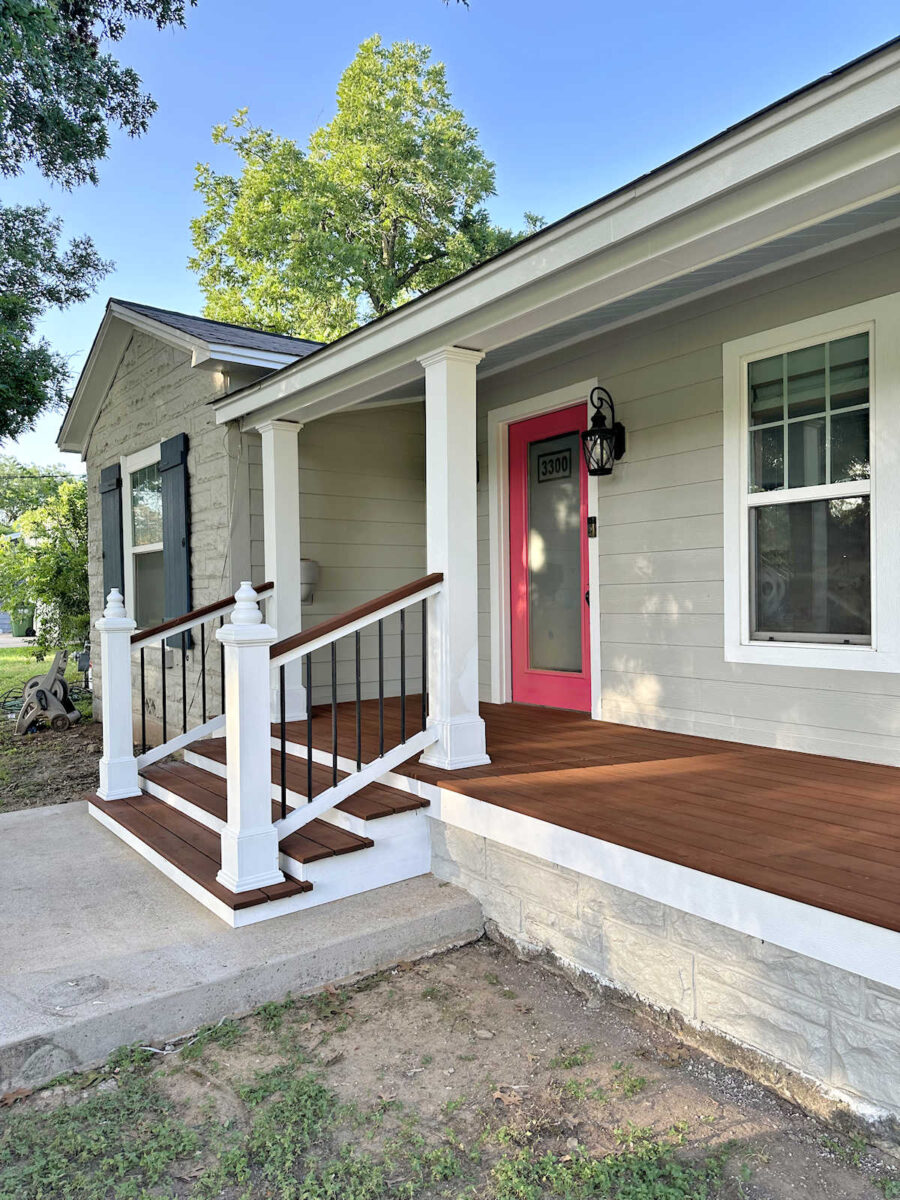
Please kindly ignore my fallen tape lights. 😀 I can’t believe I forgot them again! I’ll try to remember to replace them as soon as I can walk on the front porch, but if I forget them again at the end of this week, or if I get too busy on another project, I’ll definitely replace them when I return to my outdoor projects later this year.
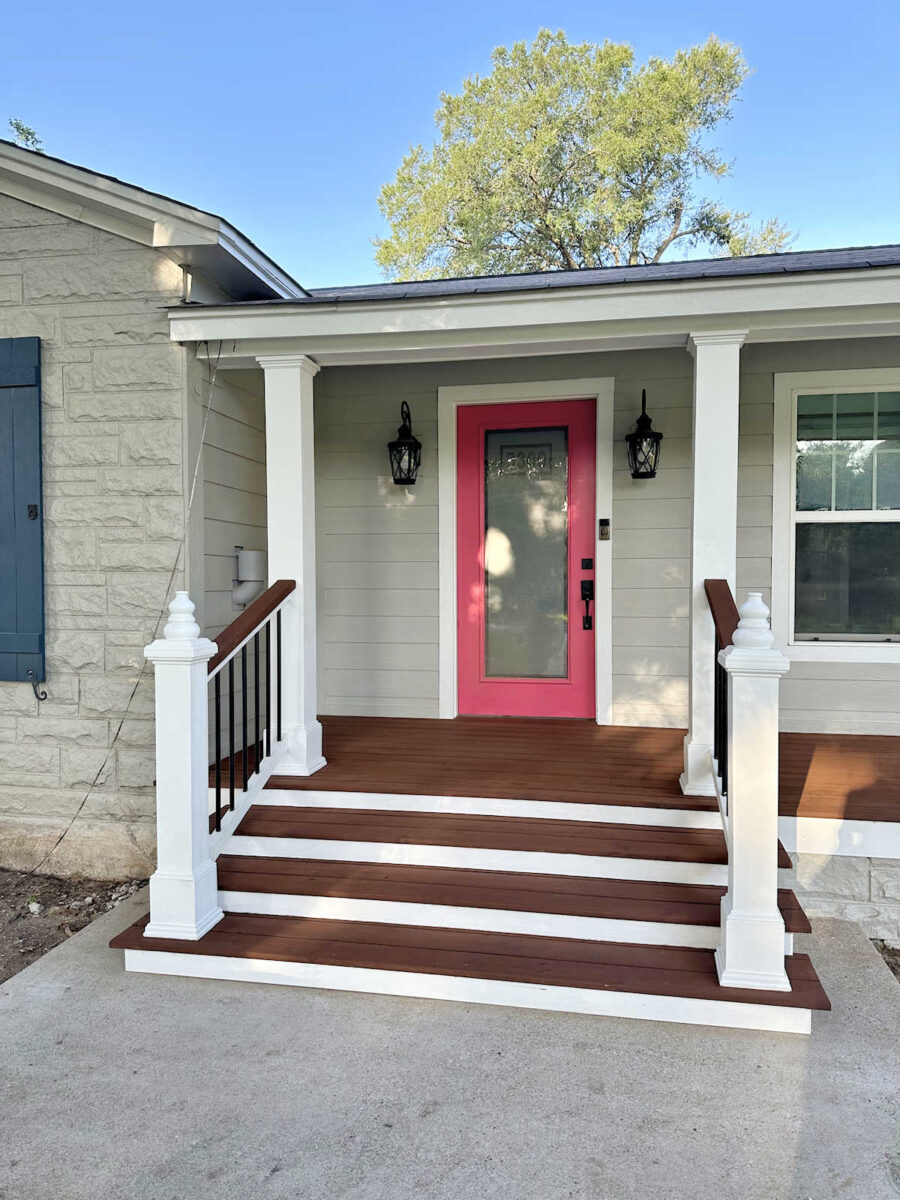
I can’t wait for the pine tar to dry enough for me to walk on the front porch so that I can get all of the pretty stuff back in place. The porch looks so pretty and clean and fresh now, and I can’t wait to see it with the chairs, maybe some new colorful pillows, potted plants, etc.
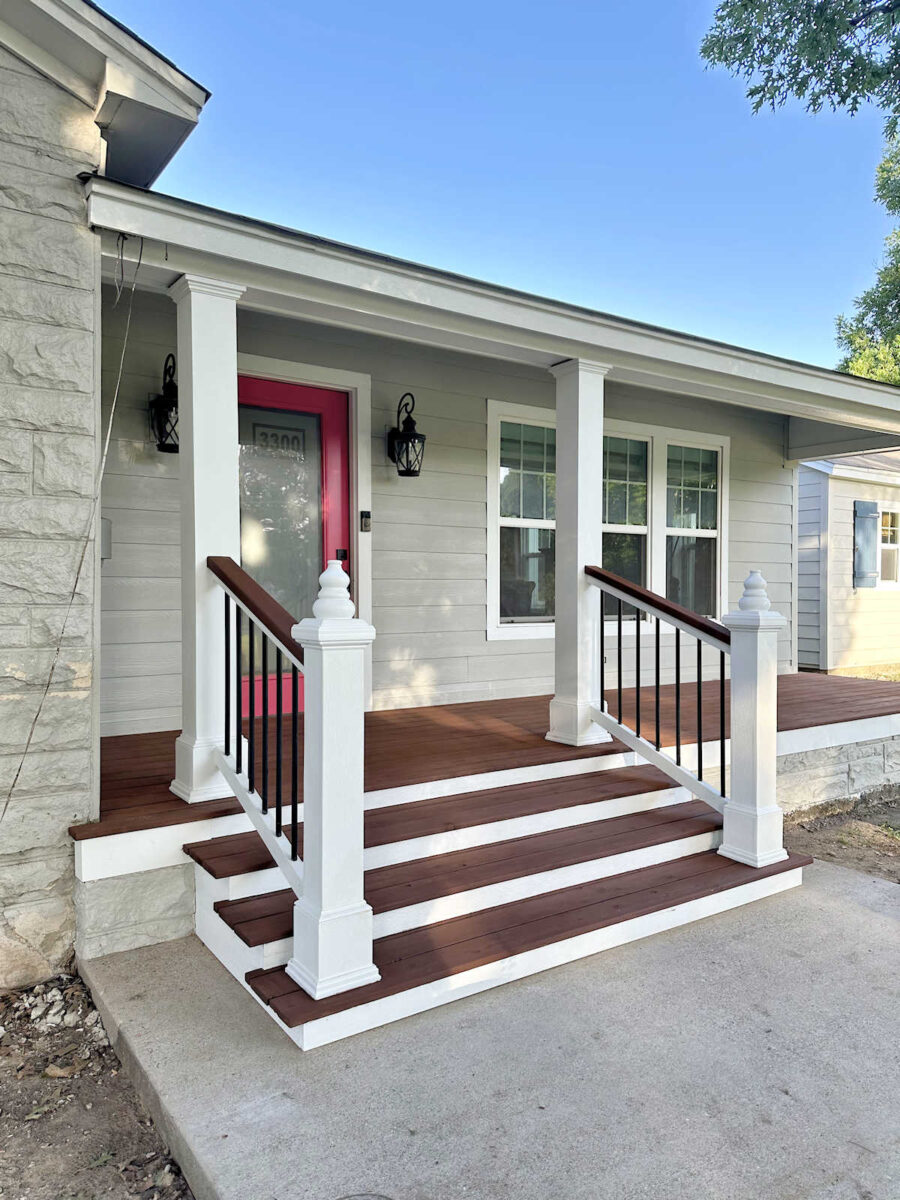
And then in the fall, my main goal will be to get the planting beds around the front porch done. I’ll need to bring in more dirt so this area is more level with the sidewalk. Right now, there’s about a five-inch step down from the sidewalk to the dirt. I want that to be more level, and then I want to get mulch around the porch so that I won’t have to deal with dirt coating my porch skirting every time it rains. (Yes, I know I need gutters, too.)
From a distance the porch looks so dark. I really love the dark color because I like that high contrast with the white trim. But when you get close, you can still see the wood grain. I’m so glad I went this direction instead of going with my plan to paint the front porch!
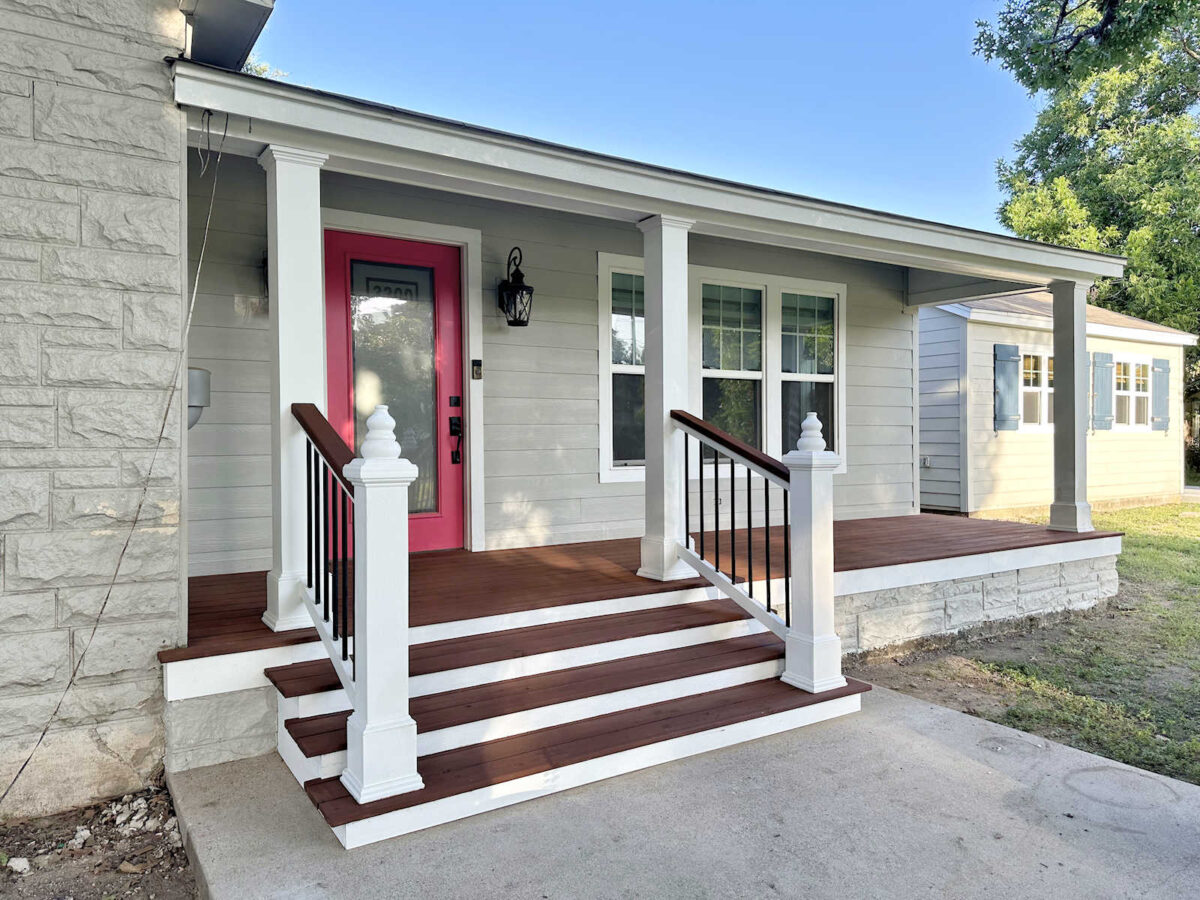
This front porch has come a long way! It was a lot of hard work, but it was so worth it.
It has taken a long time to get from this “before” to this “after”, but I finally feel like the front porch is complete. I love it!
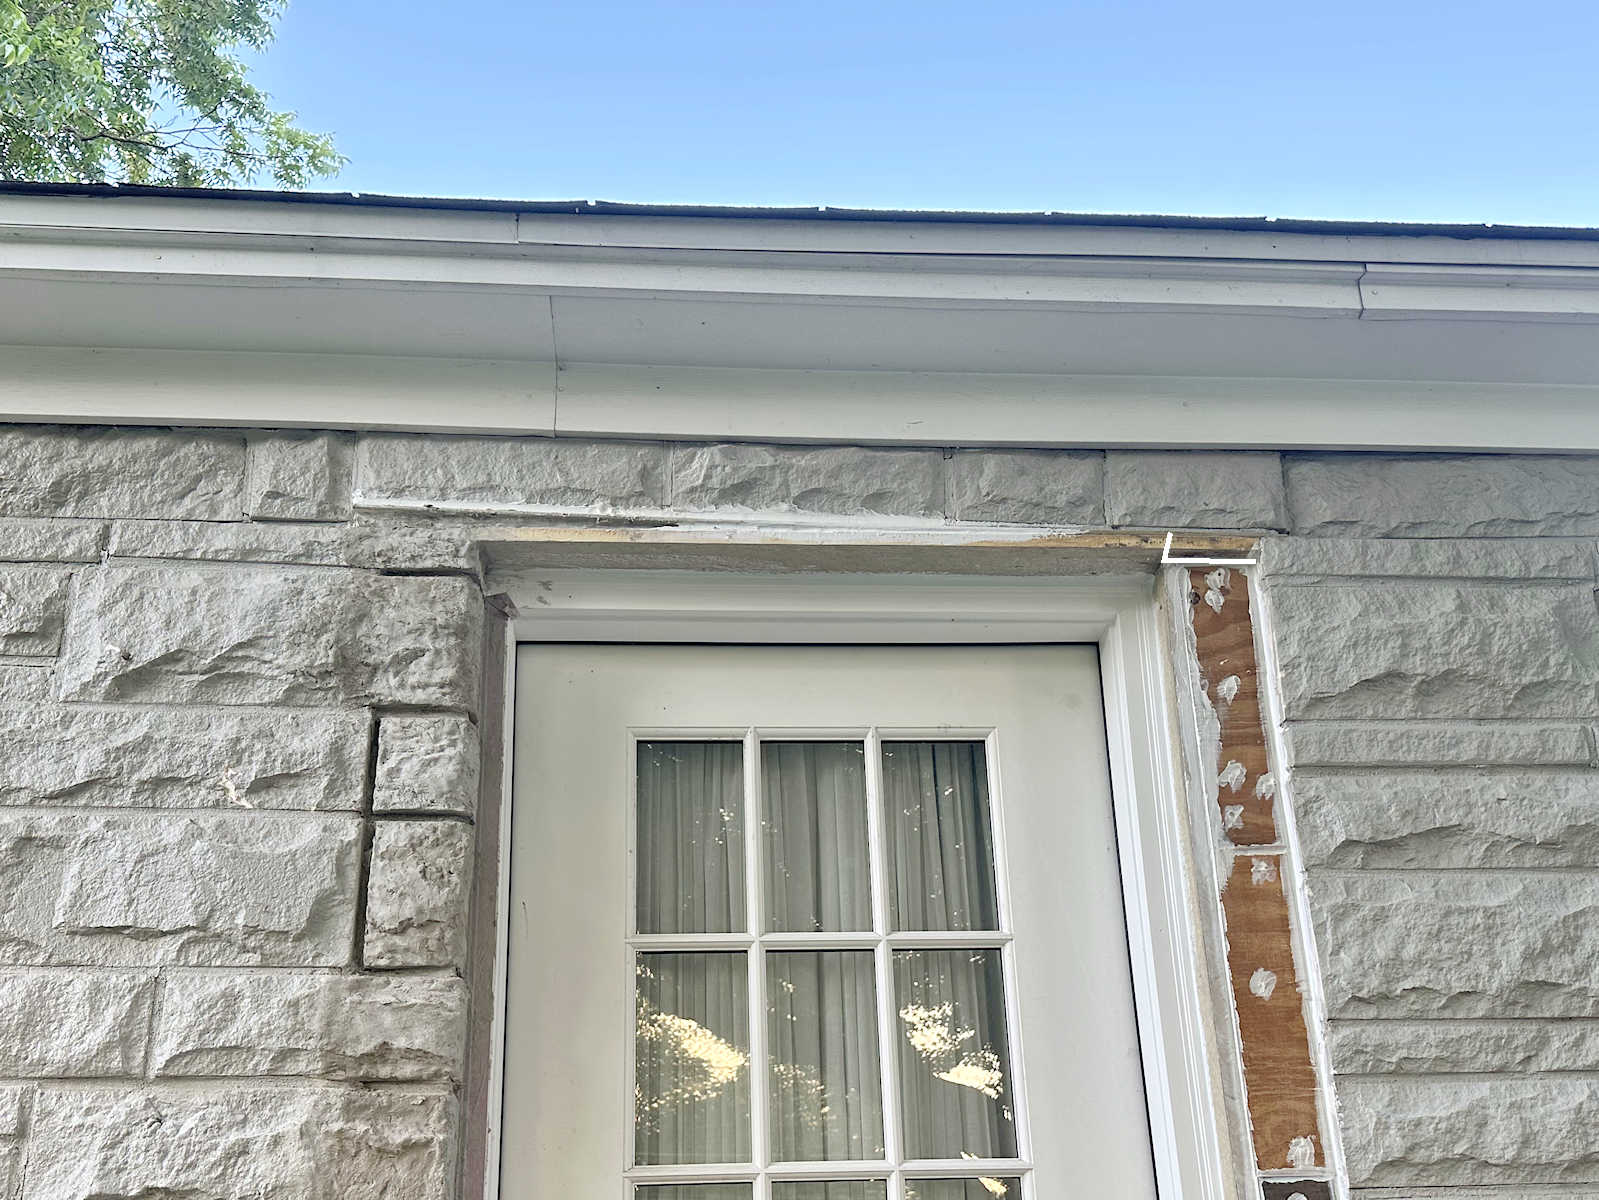
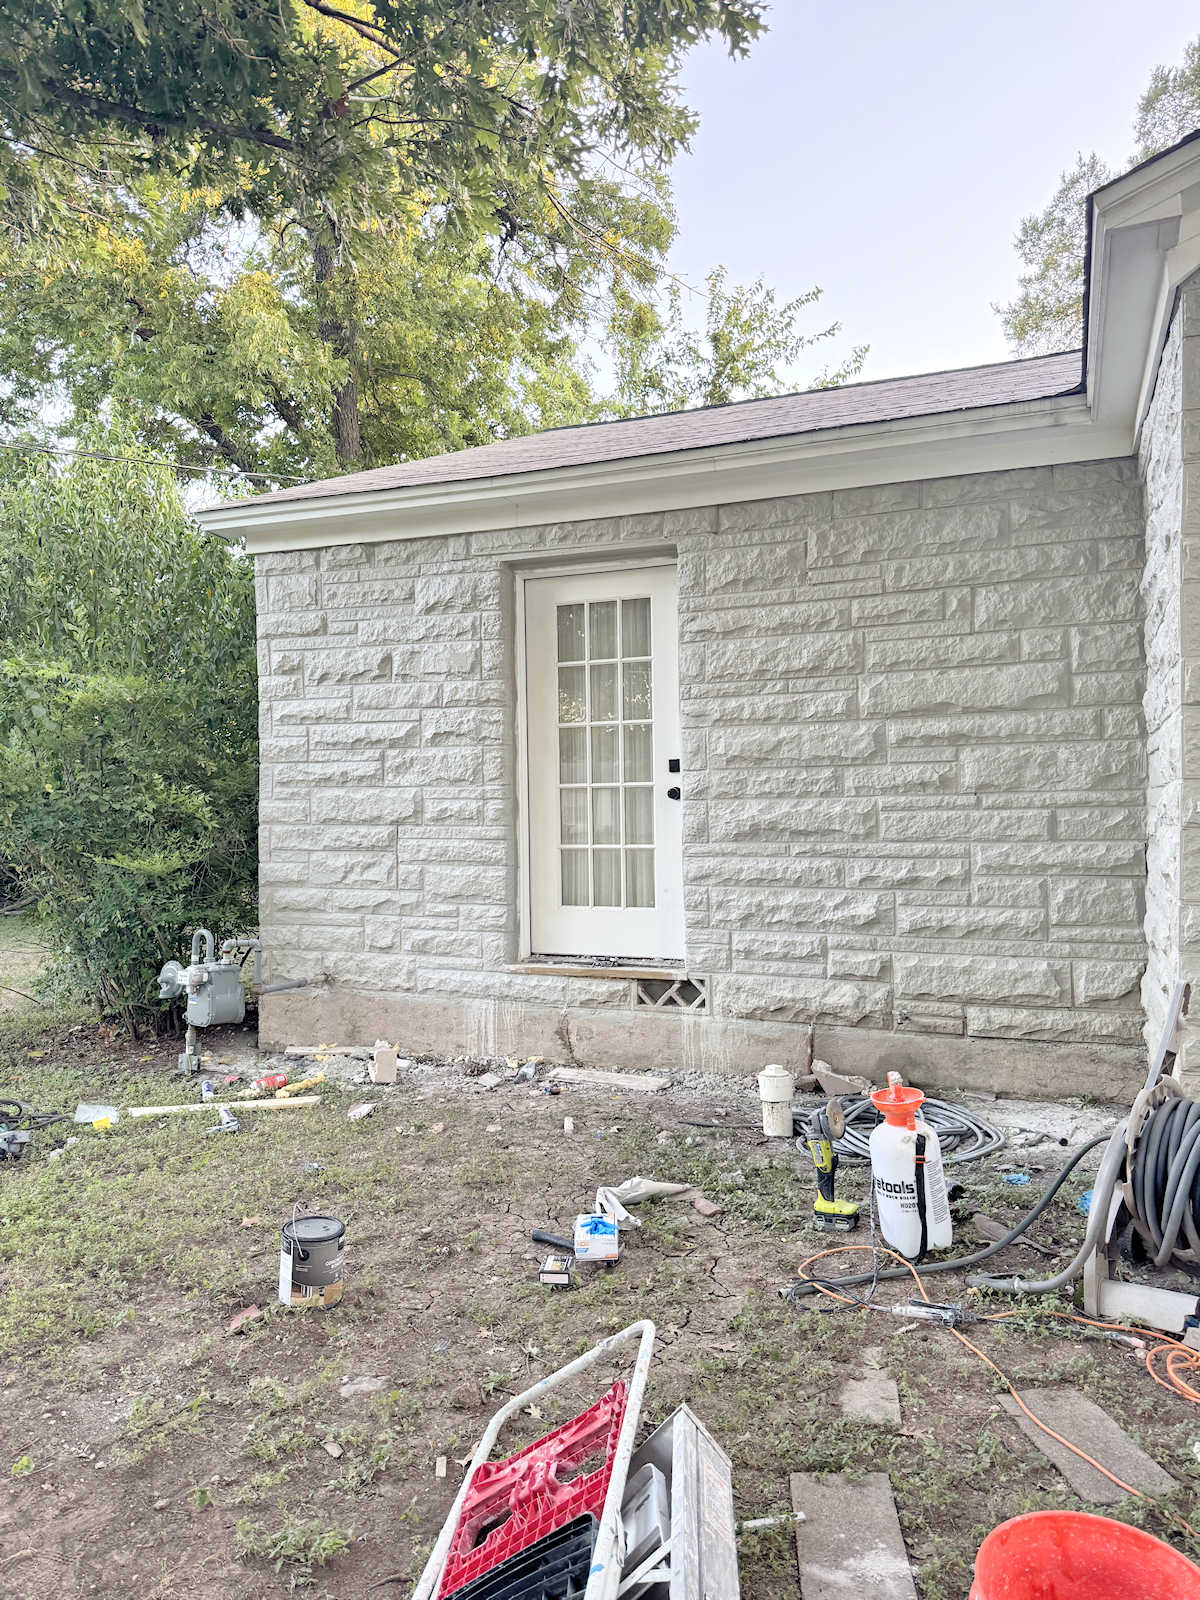
I have one more outdoor project that I want to finish for now before I head inside and focus on the storage room. I want and need to finish the stones (i.e., more faux stone using concrete) around the bedroom door.
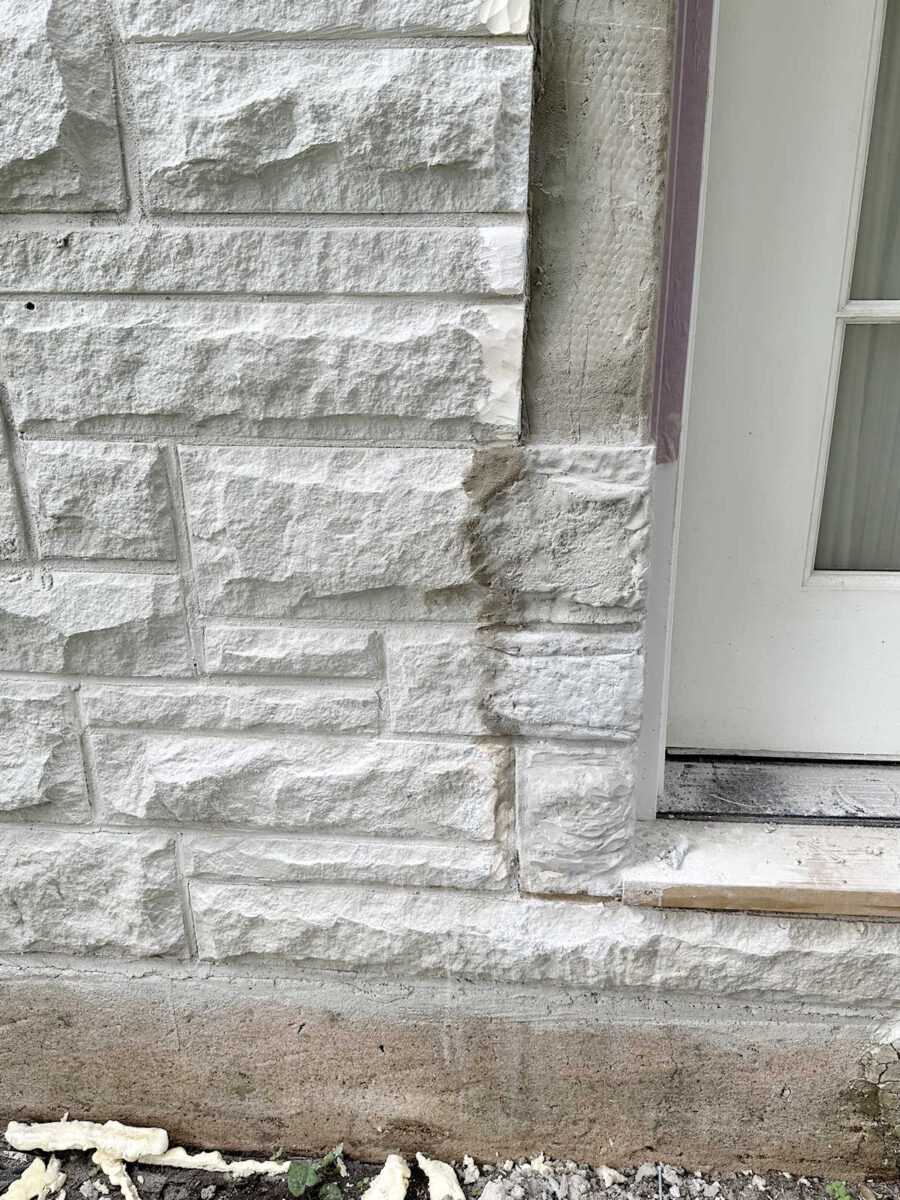
Once that’s finished, that will wrap up my outdoor projects for now. And I’m ready! Our temps here in central Texas are getting into the 100’s. It’s supposed to reach 103 degrees today and 105 degrees tomorrow. So I’m ready to finish up this outdoor work and head inside for a while where I can work in the air conditioning. 😀 But I won’t walk away from this unfinished project. I’m determined to finish it before calling it quits for the rest of the summer.
More About Our House Exterior & Yard
see all exterior &
yard diy projects
read all exterior &
yard blog posts

Addicted 2 Decorating is where I share my DIY and decorating journey as I remodel and decorate the 1948 fixer upper that my husband, Matt, and I bought in 2013. Matt has M.S. and is unable to do physical work, so I do the majority of the work on the house by myself. You can learn more about me here.
Beautiful!!
This is one of my favorite projects!! You making the stones just made this so perfect!
Gorgeous. I’ve lost track of the many projects – although I do recall the original front porch makeover. This is a “forever finish” 🙂
You must be so happy with the whole look…It is SO nice, and will even be better when you can add your chairs and plants. It will be exciting to drive up your driveway and look at the beautiful entrance…you have waiting a long time for this…enjoy the view! I live in Florida…I know about working inside this time of year…outside is brutal! Best wishes as you move on with an inside project.
BRAVO….!!! 👏🏻👏🏻👏🏻
That diamond in the rough is shining bright now!
Once again..INCREDIBLE! The porch looks beautiful…and your cast stonework is a work of art!!
If your soil is even with the driveway and sidewalk, it will leach dirt on those. Some added soil would be good. Keep your mulch level near the same as the concrete. If it travels in heavy rain, you can sweep it back in place.
That’s what I meant to say. I want the finished height, including the mulch, to be no more than an inch lower than the driveway and sidewalk. But I don’t want to have to add five inches of mulch all the way across from the sidewalk to the driveway, so I’ll need to bring in some dirt to build it up some before adding the mulch.
You should add the 5 inches of mulch. Deeper mulch is better for weed suppression and will stay in place better than a shallow layer of mulch.
Im not sure if you’ll need more dirt alongside your walks if you are planning to mulch anyway. If you make them level with the concrete then when it rains it will keep washing your mulch onto the walk and be a pain. You actually will probably want the sidewalk to contain your mulch.
Your hard work paid off! Absolutely gorgeous!
Looks great! 👍
Fabulous concept and execution of the front porch. It is a fantastic transformation from the diamond-in-the-rough stage! I really appreciate your writing about your projects and the level of detail that you include. Thank you and all the best!
The porch looks beautiful! The new light fixtures and door color look so fresh. The skirting is amazing. I am so glad you decided to use the pine tar finish on the cedar porch boards that allows the grain of the wood to show through. Please show us a photo of your Freedom Flyer when you have it hung. I love that you’ll have a piece that was meaningful to your grandparents on the front of your house.
Oh Kristi, love, love ,love ❤️ 😍 you should be very proud 👏 It is amazing!
Beautiful. The landscaping will really complete this stunning transformation . A row of river rock against the stone will help keep the dirt from splashing onto the stone when you get to that landscaping.
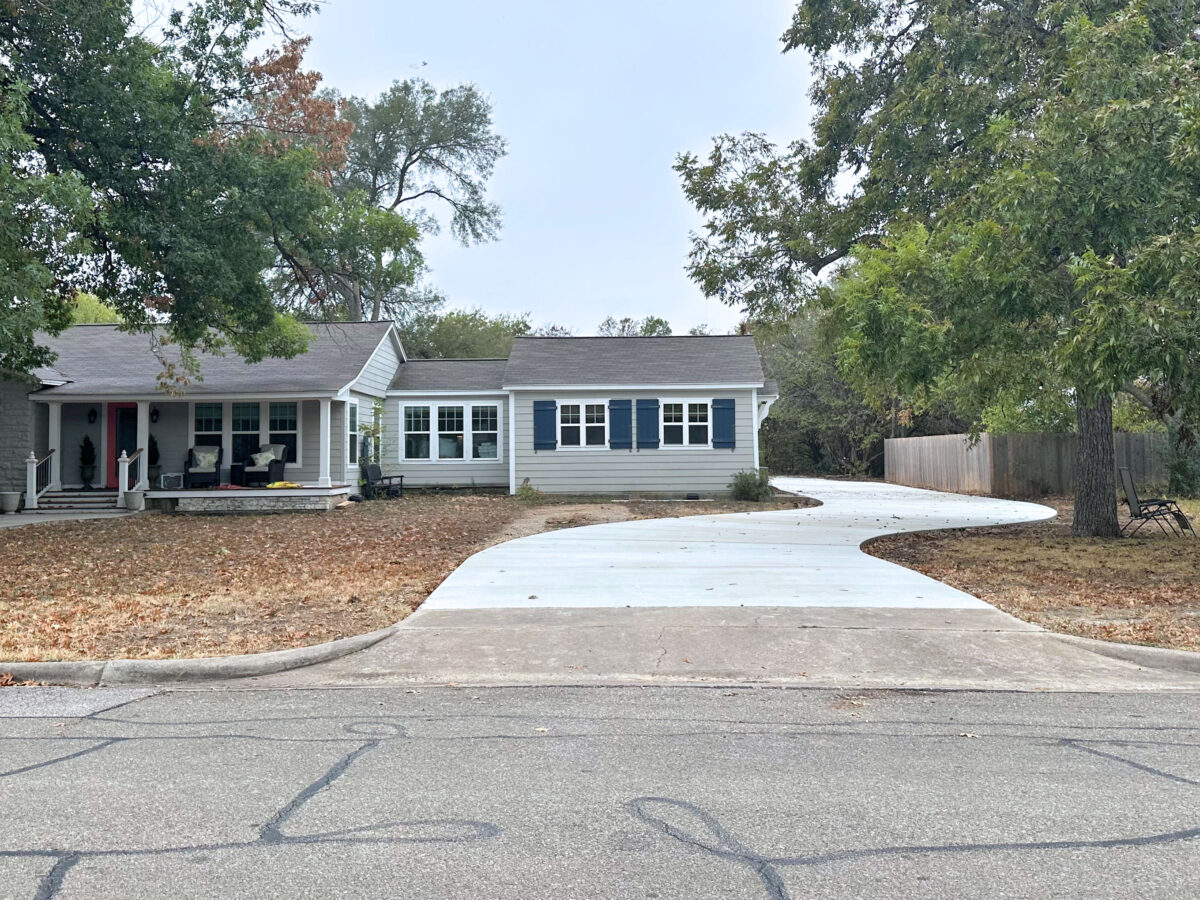
Excellent Kristi! You must feel so proud and happy for a job well done. It looks fantastic. Could you please show us a picture of the whole front of your house so we can see how well the stone looks now? Thank you.
Absolutely! I plan to take pictures of the whole front of the house as soon as I finish the bedroom door. I hope to share those pictures by the end of this week.
It looks so fresh and clean, and just SHARP! I am loving it! If I were you, I would go ahead and put down the mulch now. You can always take it out to work on the planting bed, then rake it back in when it’s done. That way you won’t have rain splashing dirt on the fresh look while you wait for better weather – or sidetracked projects that keep you from the planting bed! If you do nothing else, I would put black plastic over the soil and pin it down with landscaping pins. Keep that dirt off the pretty!
Would it be wise to put some yellow caution tape up around the front of the stairs so that people don’t inadvertently walk up to deliver packages, etc. Right now it looks extremely walkable and I would hate to see it ruined by people coming up the front porch. It looks fabulous.
It’s completely blocked off right now.
Way to go!!! I love it. It looks so amazing. Head indoors girlie, it’s way too hot to be working outside. I say this as I am gearing up to go mow 17 acres and today’s head index will be in the 100’s. I love how it all looks.
Cheers to you, Matt and the Fur Babies!
Truly incredible. Well done – it looks fantastic!
Just WOW!!!!!!!!!!!!!!!!!! You never cease to amaze me with your creativity and skill set. LOVE this!
How smart is this?!?!
What a wonderful makeover, and such an interesting process to follow, with loads of successes (and very few failures), to achieve an absolute belter of a result.
Hats off…!!
Put some yellow tape up at the bottom of the steps so the Amazon guy/gal doesn’t walk on it!
I have the whole thing blocked off. 🙂
What curb appeal!!
Isn’t it funny how some projects just take time to percolate in your brain to come up with the perfect solution. You certainly nailed this one!
I’m pretty impressed with the pine tar finish too. The boards look new and the color is so even! My advice is to get those gutters asap, they make all the difference keeping rain away from your foundation. Plus you don’t want workers trampling over any new plantings!
Kristi, absolutely fantastic job!
Wow, it looks wonderful. I can’t really tell from the picture, but it doesn’t look like the lights are hanging on by much. Can you just pull them down with a little yank? Gutters shouldn’t cost too much for that short length of your porch. I would hate to see mud splattered all over your new stone work. What a job that was, but turned out so good. I reallllly can’t imagine doing anything outside in 100+ heat. At this point, I don’t go outside until October!.
The lights are hardwired, so I can’t really “yank” them down. But I can get my ladder and unscrew the wires. 🙂
The porch looks exceptional. You have done an amazing job.
Before you try to level out the concrete path with more dirt, please talk to someone knowledgeable in landscaping and gardening. I think you will want the pathway elevated above the level of the soil, to avoid having it flood over and pour dirt onto the concrete walkway. You have astonishingly hard rains there, and the soil will soon get saturated. No reason to give it an easy pathway to flood your walkway. You want that to stay clean and elevated.
It looks absolutely amazing. Worth all of the effort. Really great job.
I love your before and after pictures of your porch. Wow, what a difference. Like night and day. Your porch looks like redwood. It is so pretty. You have worked so very hard on your outdoor projects. Why don’t you hire the landscaping work to be done in the fall. That way it would be finished in one big job. Think about irrigation for your flower beds and lawn. You will be glad you did. Put your water feature in your back yard so you and Matt can sit privately and enjoy it.
Have a great rest of the week.
It all looks fantastic! Love the stone look continuing on the porch. If it were me, I might empty a few bags of topsoil in front, but more likely I would add 5” of mulch. Five inches is not too much in my opinion — keep those weeds down and help prevent dirty splatter. I have seen some wonderful gardeners just put down thick mulch over dirt where they plan to have a garden bed and then wait to pick out plants, and plain mulch looks great – it looks finished and neat. No need to make a fancy outline; just spread it out. So I’d encourage you to get quite a few bags (more than you think) and just empty them out in front of and at the side of the porch.
Looks amazing! Have you heard of a company called “ChipDrop? Here in Oregon we have it, and you might have something similar in Texas. You order a HUGE pile of woodchips (for free, or a small amount of $) Tree trimmers, arborists, etc. have to get rid of lots of wood chips, and this company works through Craigslist to pair up people who need them.
Looks really, really great! Is this just one coat? I remember reading that you have to wait 72 hours between coats.
Yes, this is just one coat. I’ll eventually do a second coat, but I’m not in a hurry to do that. I watched a lot of the videos from the company where I bought the pine tar, and in one of them, they waited a year between coats on a house with wood siding that had been treated with pine tar. I don’t intend to wait that long. I’ll try to do it in the next few weeks. I want it done before our hot weather is gone, though, because the hot weather makes it dry much faster.
WOW!!!!!! You must be so proud of your accomplishments on your porch project. It looks absolutely beautiful and you have done yet another amazing job. Your vision and creativity never ceases to amaze us. Well done Kristi.
SO beautiful!!!! Well done!