
Bedroom Door Progress (Replacing Hardie Trim With Faux Concrete Stones)
I was able to make really good progress on the exterior door yesterday, and I’m really excited about how this project is turning out. I didn’t get as far as I hoped yesterday because the weather slowed me down a bit. This time, it wasn’t rain that slowed me down. It was the temperature. When I took a break and checked the temperature, it was 101 degrees with a “feels like” temperature of 110 degrees.

So needless to say, I had to take frequent breaks to stay hydrated, but I’m determined to get this final outdoor project finished before I take a break from my outdoor projects for the rest of the summer.
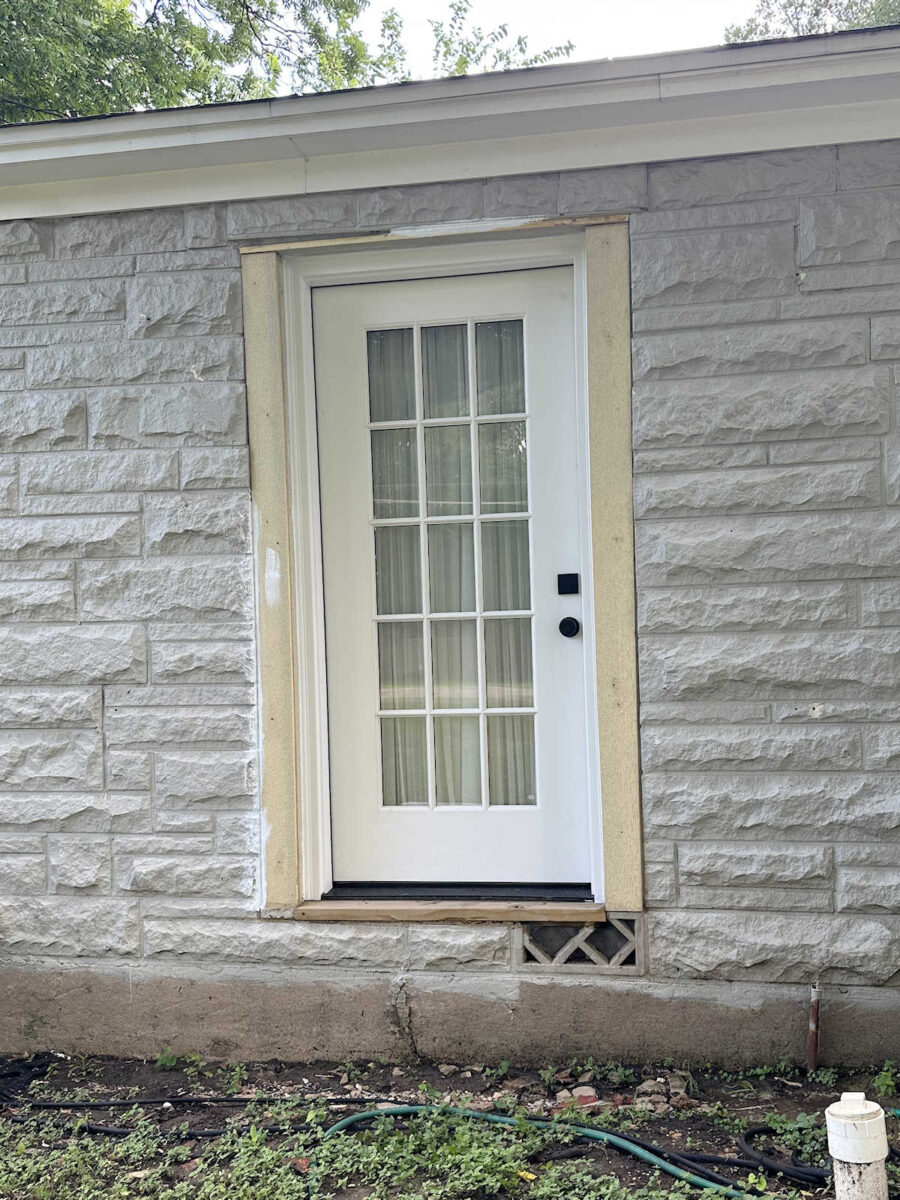
Just as a reminder, this is how this door started out…
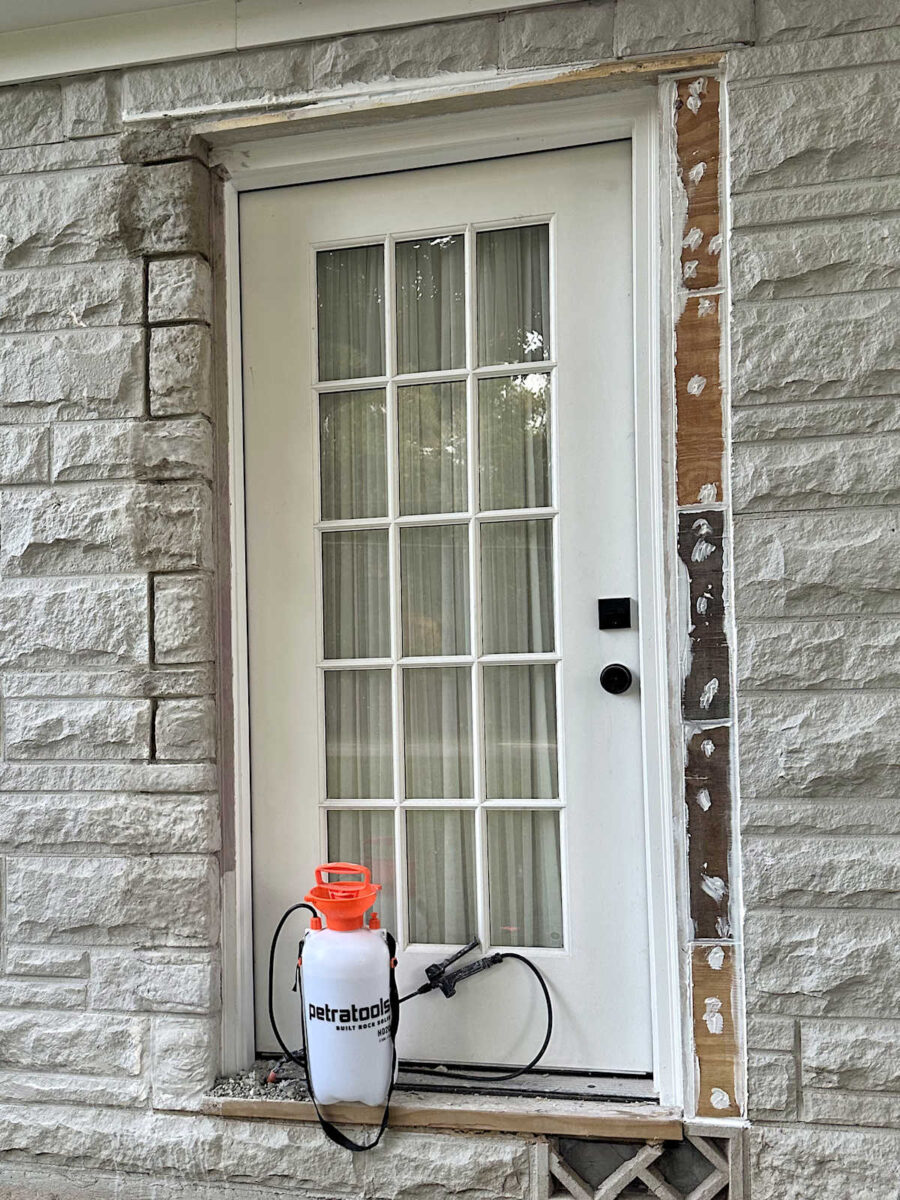
And here’s what it looked like last night when I finally decided to call it quits for the evening…
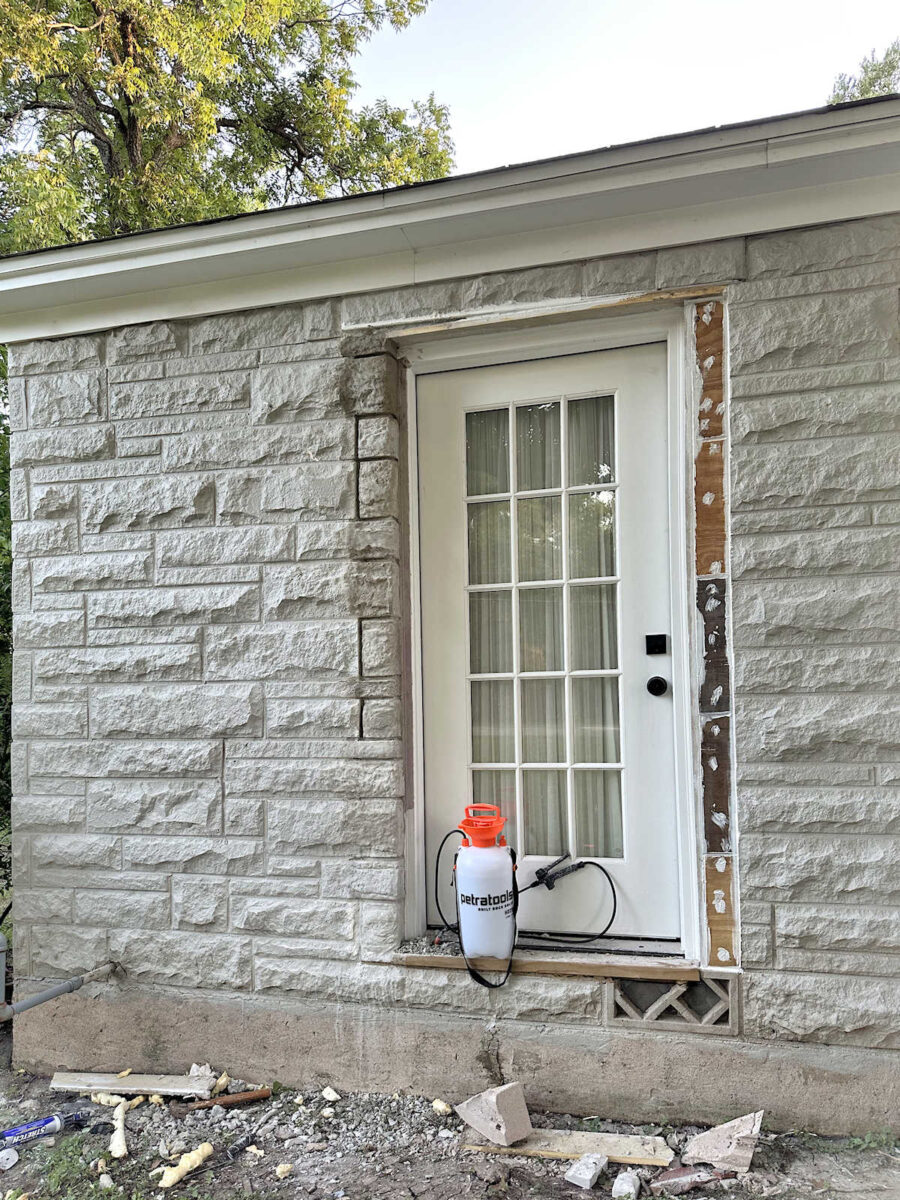
Note that there’s purple painters tape on the white door trim to protect it from the concrete. Once that’s removed, more of the white trim will show.
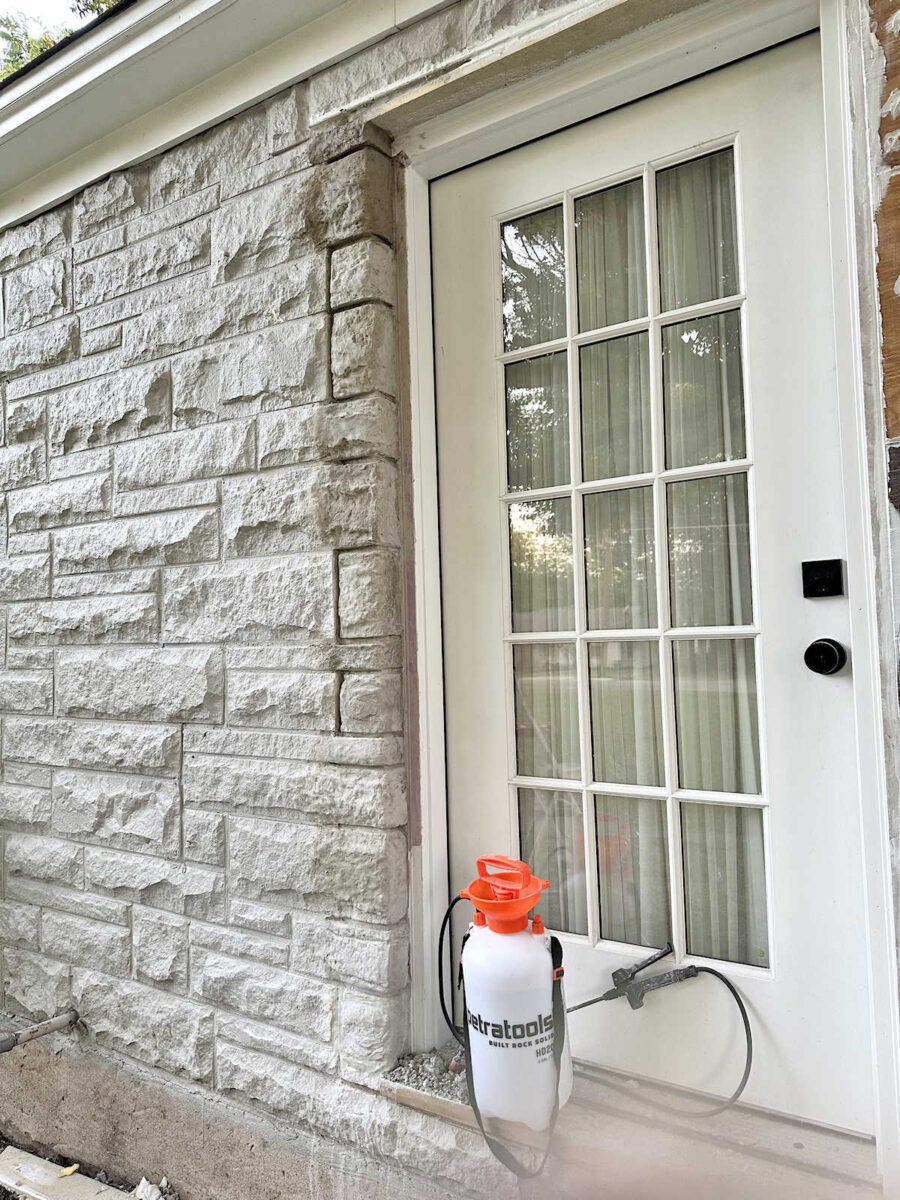
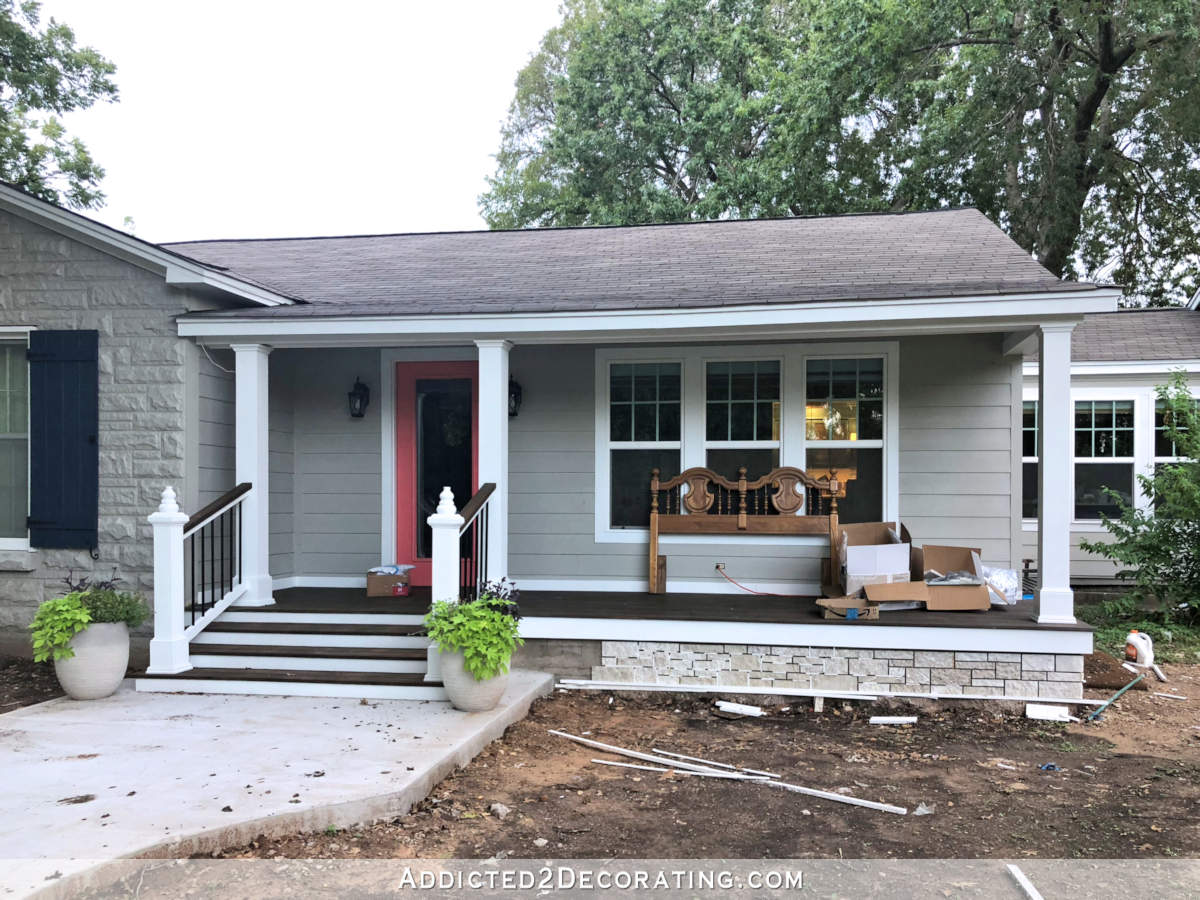
I know these “stones” don’t look nearly as good as the ones that I made for the front porch skirting, but I’m equally as proud of and excited about these because I took a chance, tried something completely out of my comfort zone, and IT’S WORKING!
If you missed the post where I shared this whole process, you can find that here: Exterior Bedroom Door Progress – Replacing Hardie Board Trim With Faux DIY Concrete Stones
Here’s what it looked like this morning. Obviously, I still have to fill in the mortar lines, but the “stones” on the left side are finished. They’ll still need primer and paint, but I’ll wait and do all of the priming and painting on both sides until both sides are finished.
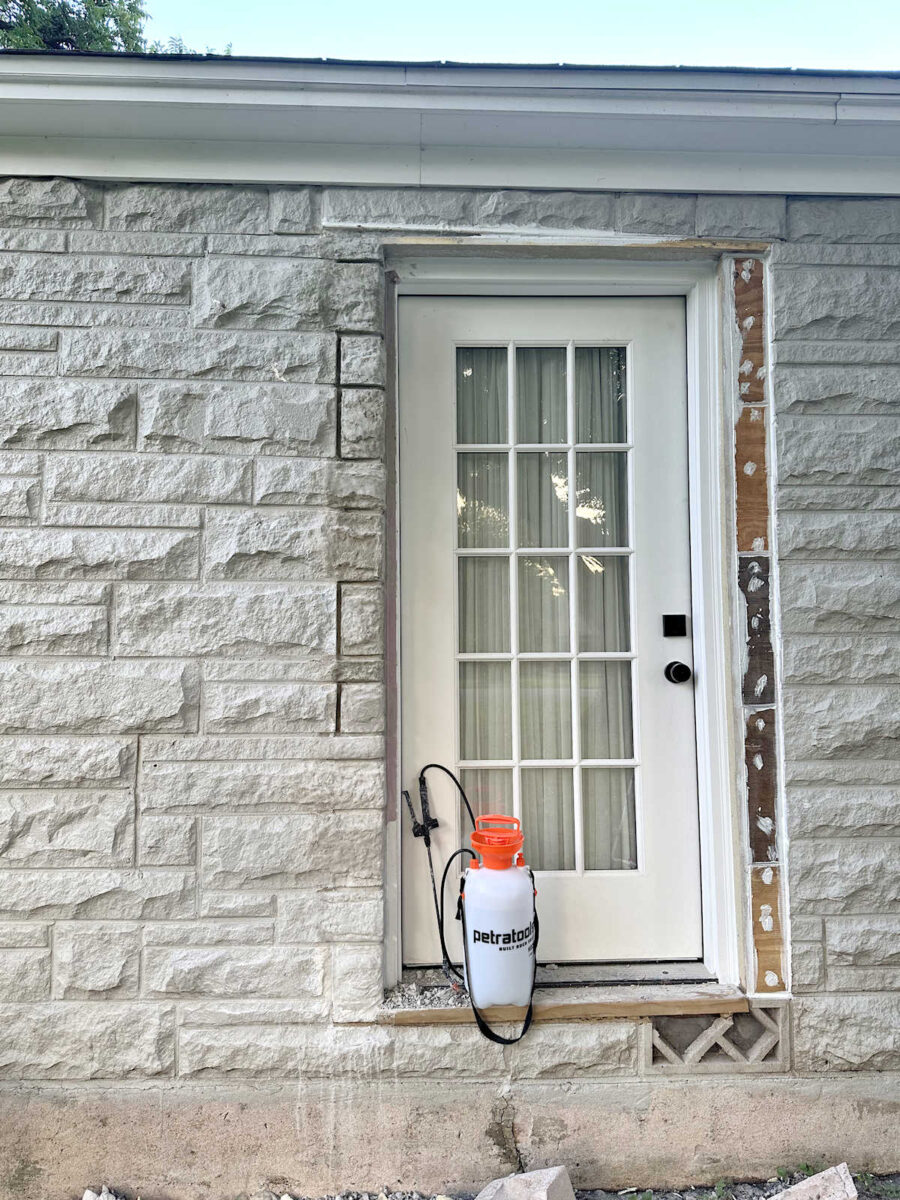
I ran into a challenge when I reached the top. This top part still doesn’t look great, and there’s really nothing I can do about it. But I think I was able to minimize the wonkiness a bit. The problem is that there’s a thick metal plate that goes all the way across the top of the door. That metal plate is original, and that’s what’s holding up those top stones. That metal plate is very obviously unlevel. But since it’s actually structural, I can’t mess with it. But then underneath that is the Hardie trim that trims out the top jamb of the door. That piece is level, as is the door.
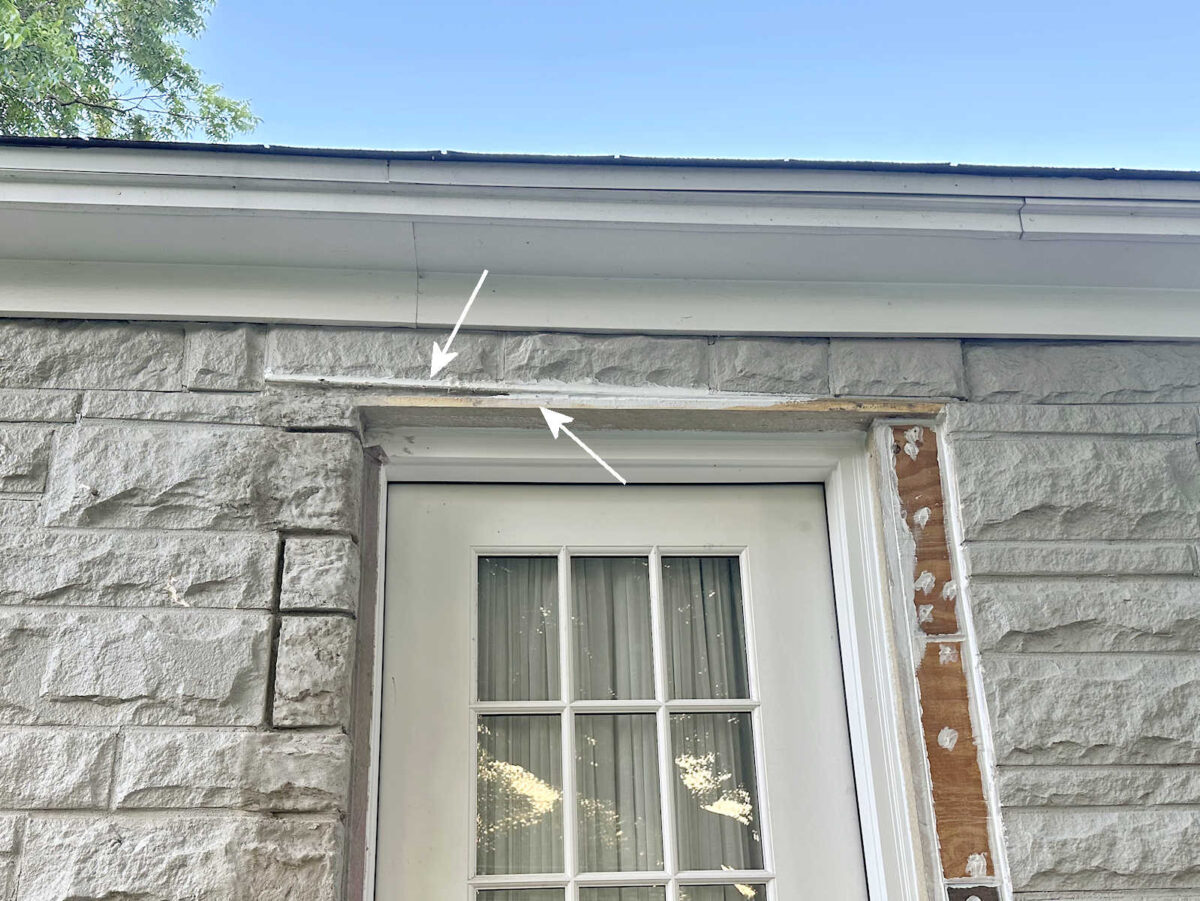
So what I ended up doing is using my Dremel Multi-Max to cut off just the part of the Hardie trim that extended past the door framing (as indicated by the white lines on the right side of the door in the picture below)…
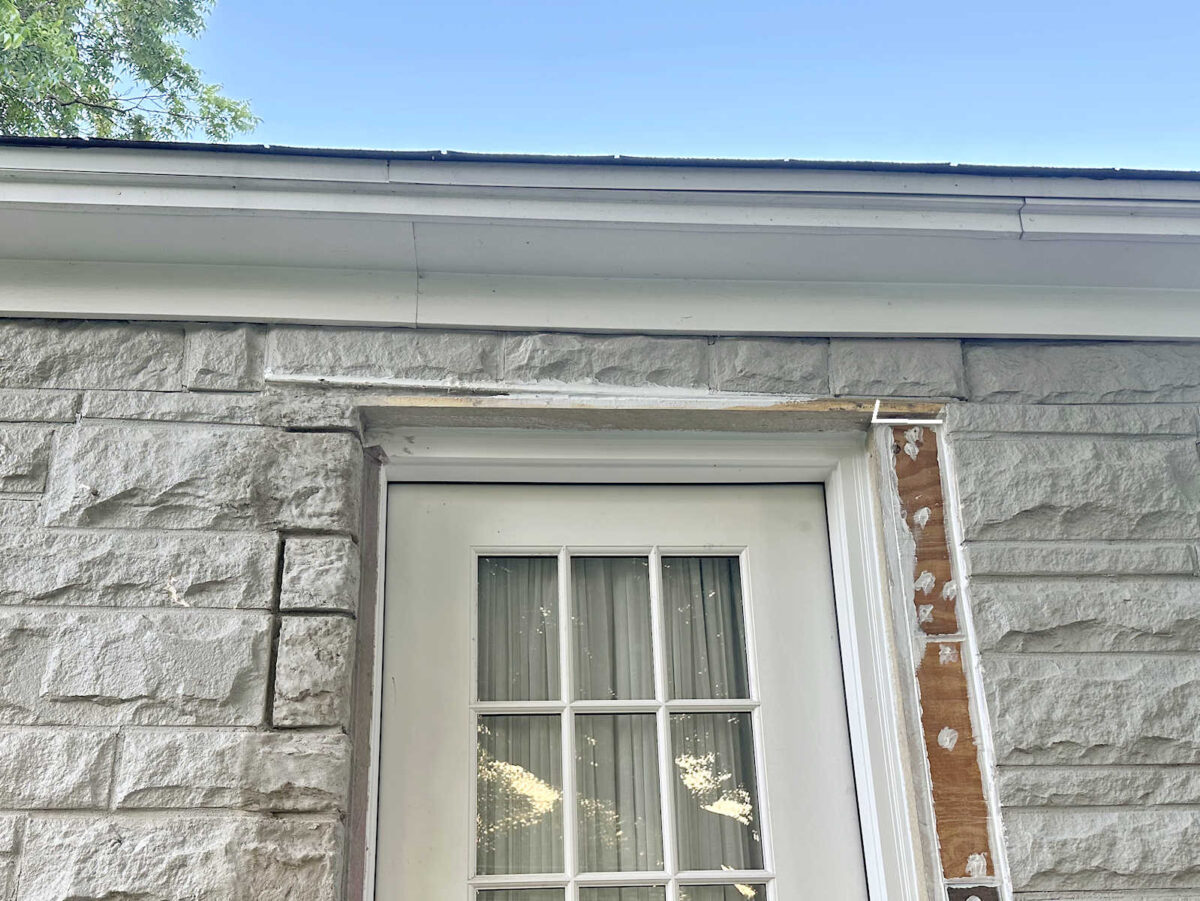
So that I could carry that final top stone up to the metal piece instead of having it dead end into the top Hardie trim piece. And then I’ll find a way (which I haven’t quite figured out yet) to fill in and disguise that gap created by the unlevel metal support piece.
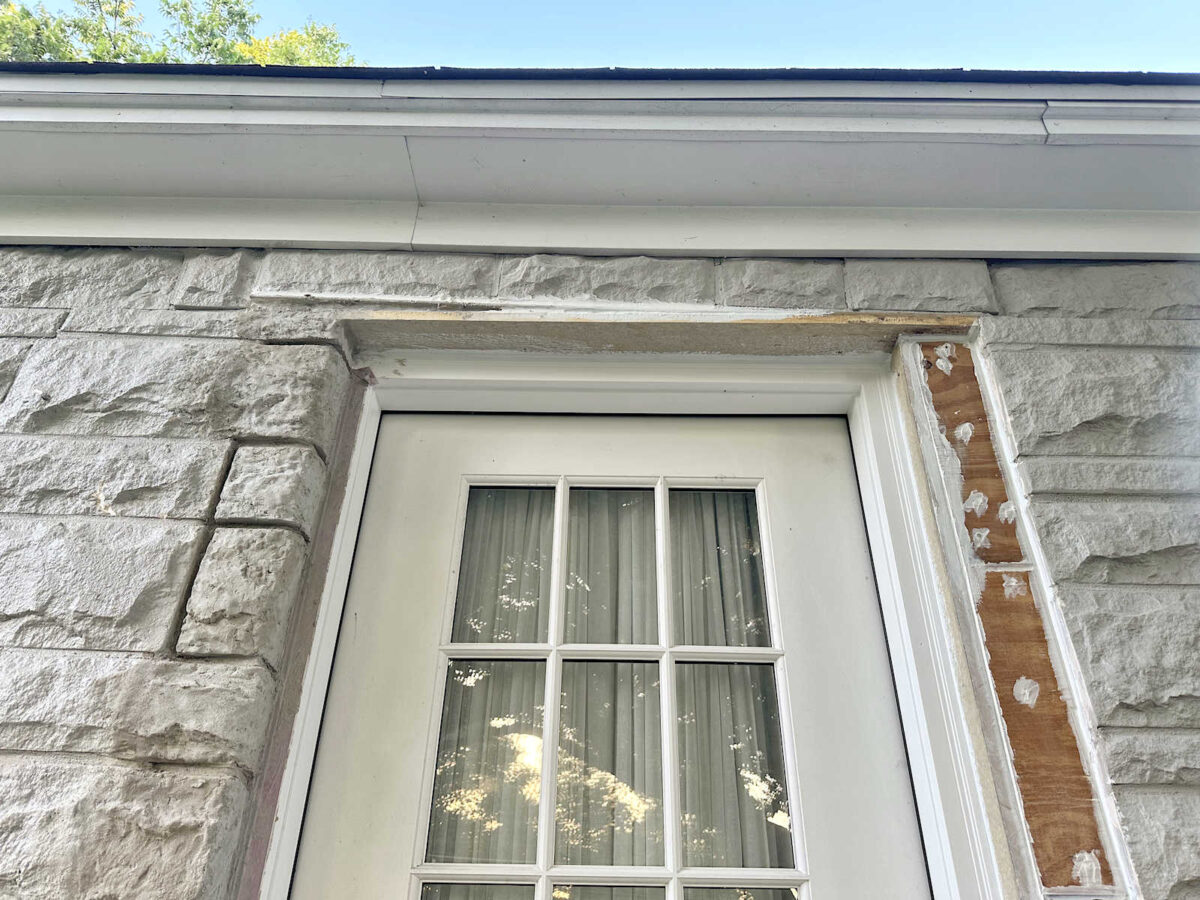
Trying to deal with and figure out clever solutions to those wonky problems is just part of the fun of working on an old house. I don’t have it figured out yet, but I will! I don’t think I can use concrete to build that part out and cover it up because there’s nothing for the concrete to bond to. It’s just caulk and metal in that area, and I don’t think concrete will bond to either of those things. But you can bet that I’ll do my very best to find a way to disguise that and make it look level.
But even with that little wonkiness at the top, I think this looks so much better already! Here’s a comparison of what this side looked like after I removed the Hardie trim…
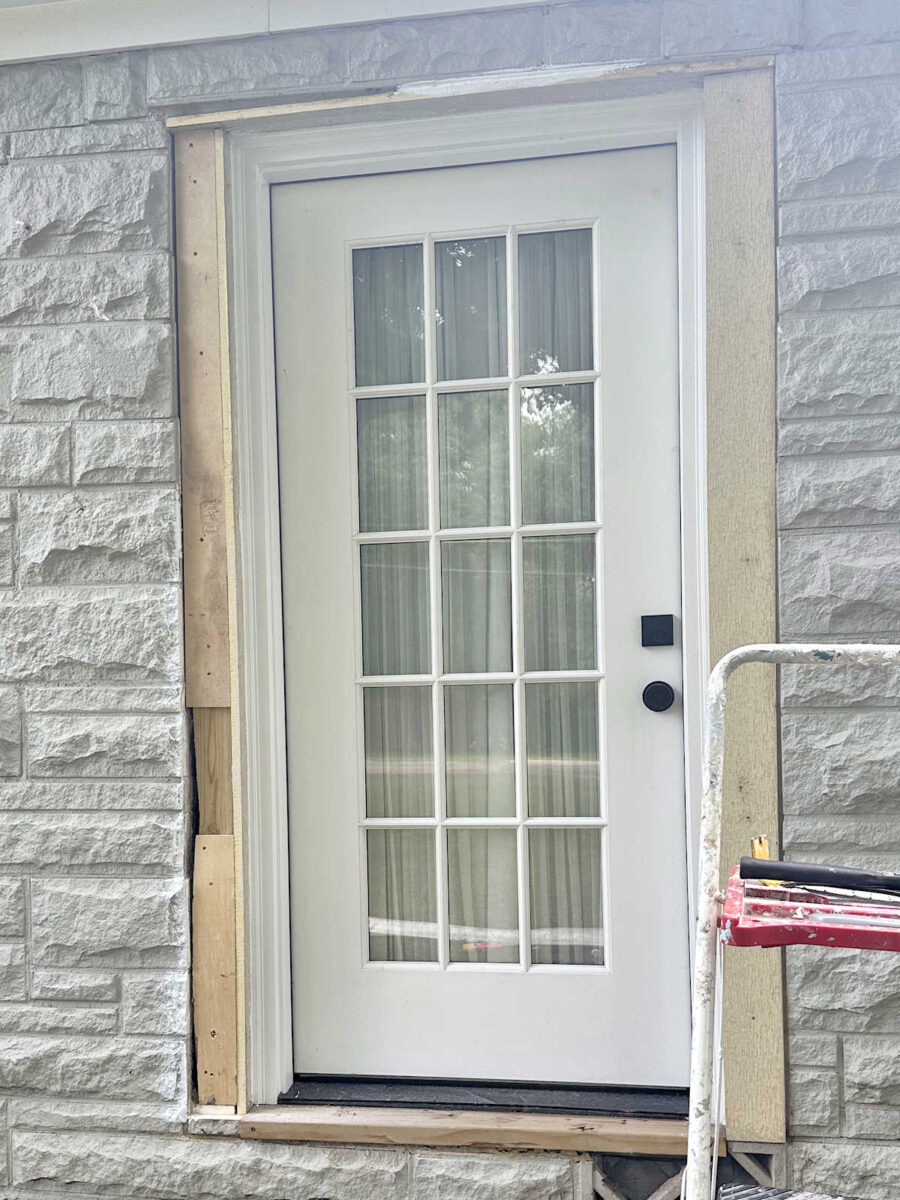
And what it looks like now…
You may disagree, but I think that this is a huge improvement!
And while these stones don’t look nearly as good as the ones on my front porch skirting, and they’re obviously not an exact match for the original stone (since I used two completely different processes to make them), I’m okay with that. This door isn’t the focal point of the front of our house. Our porch is front-and-center, and it’s the focal point of the front of our house, so I wanted those stones on the front porch to be an exact match. This door is off to the side, so it won’t get nearly as much attention. And from a distance, I don’t think anyone will notice or be able to tell that these stones aren’t original, or that they’re not a perfect match to the original stones. Once they’re mortared, primed, and painted, I think they’ll blend in perfectly.
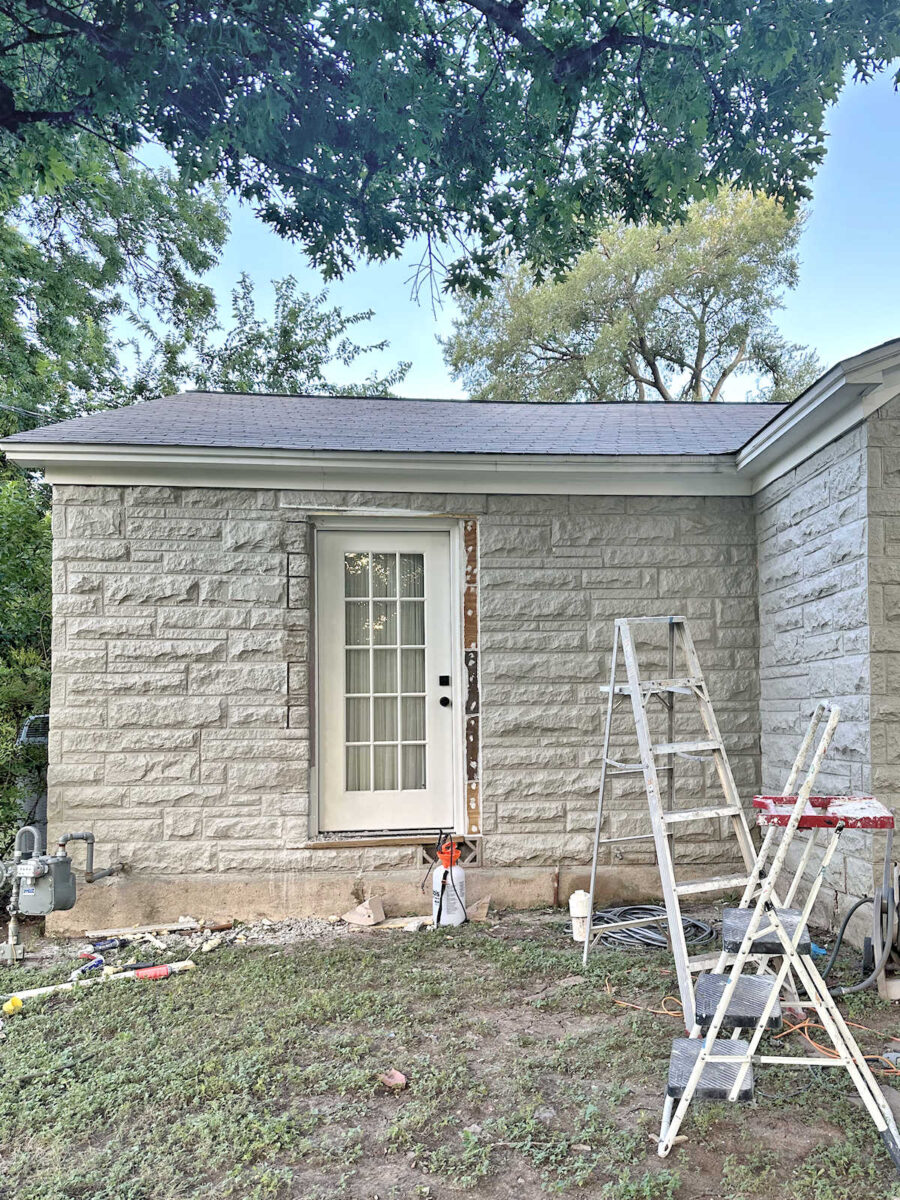
I am so proud of how this is turning out. I went from hating how this door looked on the outside to loving it! I’m really hoping that I can get it all finished by the end of the day tomorrow, but I make no promises. The concrete has to cure for a minimum of four hours before I can prime and paint it, so there’s a very good chance I won’t get to the priming and painting until Friday.
Even after 30+ years of DIYing, I tend to have a very unrealistic expectation of how long a project should and will take. And I don’t think that’s a problem that’s unique to me. Just this morning in our family group chat, my mom sent us this message. It gave me a good chuckle because this is me in a nutshell.

More About Our House Exterior & Yard
see all exterior &
yard diy projects
read all exterior &
yard blog posts

Addicted 2 Decorating is where I share my DIY and decorating journey as I remodel and decorate the 1948 fixer upper that my husband, Matt, and I bought in 2013. Matt has M.S. and is unable to do physical work, so I do the majority of the work on the house by myself. You can learn more about me here.
I admire your dedication. It has made a big difference.
It looks AMAZING. What a relief on the eyes! It already matches so well even before painting.
It’s looking so good and will make door look original to house. I love your stubbornness, determination and creativity. Thank you for everything you share.
I think it looks really good! When you have it all painted that ” unlevel” part will fade completely. I love your mom’s joke too!
I think so too! When its all finished, we’ll never be able to tell from a distance. I dont think anyone is going to sit in the street and just stare at that and say “,omgosh” that top is wonky”. I get that’s she’s a perfectionist, but most people won’t even notice without it being pointed out. 😁😁😁
I like that you’re putting more stone texture around the door for sure. Will you be putting the stones along the bottom also using your molds? Excluding where the stairs and ramp will go of course. I know this is a big ask, but it would look better and match that side of the house showing. I hope so, as I love the texture and I know you do too.
I won’t. That would be such a massive undertaking, and I would have to do the entire front and studio side of the house for it to look balanced. I considered it, but I’ve decided to just paint the foundation around the house. I’ll paint it a couple of shades darker than the gray that’s on the house.
Once you get the landscaping in place, the rest of the foundation won’t show.
I think it looks awesome! Good job!
Can you paint the metal piece to match the stone?
It can be painted, but I hope to add some texture to hide it more. I’m just not sure how to do that yet.
Looks GREAT!
For the top trim, I’d tape off the Hardie and paint the rest, the house color. You’ll know it’s there. White highlights it, grey lets it blend in. I didn’t see it, until you painted it. Let the level hardie be the white line.
That metal is a ledger board put in place to support stone facades over openings, like you said. It was likely level at a point…The header is so narrow the house settled that much more in the center overtime. The outside corner did not settle as much being lighter with less stresses and use, it just shows here.
That’s actually caulk, not paint. 🙂 I was trying to fill in that dip between the stone and the metal piece, hoping that would make it look less unlevel. I still need to caulk the rest of it before painting.
Have you considered an over-door arbor/trellis like the one you added on your separate workshop’s door? Would help disguise that metal part.
That’s what I was thinking. Doesn’t need to be as big – just a short, simple version of that.
I have! I think I posted a mockup of that in a previous post. I like the idea!
I don’t comment often, more of a lurker, lol. But Kristi, those door-trimming ‘stones’ look amazing!! I wish you could see them as we do. No one would ever know they weren’t part of the house all along. Once the cracks are filled etc. it will be a non-topic. I’ve followed you from way back in your condo days, and you never disappoint. The amount of work you put into creating the stones for the porch was mind boggling, and now you are just whipping out these ones, basically freehand. What a woman! Coming to you from a Canadian who wishes she had even a smidgen of your talent and drive <3
Ditto and very well said. Thanks for saying what I thought, too!
This looks great! I think you’re a genius!
Not looking as good as under the porch? Oh my, Kristi, it looks amazing. This is so beyond, i don’t have words!
It’s turning out fantastic and will be totally seamless once caulked and painted.
Thinking outside the box here – could you use spray foam in the wonky place and try to form it into a stone look? I know it’s not the same but foam might stick. And it would be just enough to make you happy.
That’s a great idea! That stuff will stick to anything!
Only on HGTV can a person redo an entire kitchen in 3 days! Your DIY skills are incredible! Well done.
It looks fantastic! No one will ever notice that that part of the stone isn’t original. Have you considered a tiny baby door pergola? It could cover that top edge and you could paint it the same blue as the shutters on the windows. So excited to see it all finished – hope you have some shade cover when you’re working in those temps!
I do like the idea of a pergola. I had never considered painting it blue! I’ll do a mockup of that and see what it looks like. I definitely want to bring blue to this area somehow.
I don’t know how you deal with heat, because I can’t be outside more than 10 minutes if it’s 90 degrees or over! The door area is coming along great, but don’t have heatstroke trying to get it done for us!!! Be sure to up your protein as well as the water! Now, for that wonky top area, can you just paint it the same as the brick and cross your fingers it holds? My only other idea would be an open trellis-type “roof” over the door that would effectively hide that metal?
I like the idea of a trellis!
That is hilarious 😂 and so true. Bravo! I think it looks amazing! I know I keep saying that,but it is and once everything is finished, it will all come together.
That is an amazing improvement! I am continually amazed at your resourcefulness and mad skills. Have you considered a small little awning over that door that would disguise the unevenness at the top? Something you could build?
I like the idea of an awning or a trellis! I did a mockup of something similar a while back. I might take another look at it.
Kristi, I think this looks fantastic and I am impressed with your artistic skills. Great job!
I think the faux stone you created by the door looks great! I’m sure once everything is painted you will be the only one who notices it’s not original stone. I would suggest painting the foundation the same color as the stone. When you have plants in front of the house the foundation will disappear. The darker gray would attract the eye and it will be more obvious that it isn’t stone. I especially think the dark gray would be jarring to the left of the porch skirting. I would suggest painting an area in front of the laundry/closet next to the porch in the lighter gray, placing a potted plant in front of the foundation then stand at the street and see what you think about it.
It’s looking awesome. When finished just paint the metal at the top of the door same color and viola, you shouldn’t see it anymore. I love how it is all coming together and I love the part where no mold was needed. I loved your mom’s little funny, I’m going to print it out and put it on the fridge, since no one can see my desk any longer. Stay hydrated, that heat is no joke. I got the mowing done yesterday and got to sleep in this morning to the sounds of rain coming down to beat the band. YAY Rain!!!
Cheers to Wonder Woman, Matt and the Fur Babies!
Maybe a little awning or a trellis with Peggy Martin climbing roses would mask the issue.
This has been so fun to watch. It looks like the door has been there when the home was built.
I can’t imagine how long it must take to show all of us every step of every project, with editing, adding links, photography, etc, and careing for Matt. If you don’t finish a project, just know I sit here on my butt and look forward to watching what one gal can accomplish when she puts her mind to it even if it takes a season…you always finish it.
Your “stones” look great and just as good as the ones on the front of the porch. You really should not be out in this heat. You will have a heat-stroke. Then what will Matt do. The true temperature is supposed to be 108 degrees today plus the heat index. The door will still be there, trust me, it will be when it is cooler.
You are amazing.
One person suggested carving spray foam to extend the stones at the top. Could that then be covered with a thin layer of concrete? The stones at the top could be extended over the wood, just like you are doing at the sides (with the two corner stones shaped like “L”s ?
I’ll have to do a little research and see what I can find. Thanks for the idea!
I was going to amend my post to suggest that! I’m wondering if foam will be able to withstand the weather even with pain over it.
I just saw this reel about carving spray foam, spraying it with water before sculpting it. Maybe that could work over the metal piece?
https://www.facebook.com/share/r/18nKsimY1q/
How funny! I was literally JUST watching that same reel on Instagram! 😀 That seems easy enough.
It’s looking fantastic! Gird your loins–this weather is supposed to last for several more day. Take care and stay hydrated.
The doorway ‘stones’ are looking absolutely fantastic already. Great job Kristi; you have every reason to be proud of this.
And I thought the porch skirt was stupendous… this is even more amazing! I call you “my favorite blogger”. I think my family is tired of hearing about you, but you’re my DIY hero!!! This is absolutely fabulous!