Venting My HVAC Closet In The Studio
I know. That sounds so incredibly exciting, right? 😀 Okay, the process was one of those boring but necessary things that I needed to do before this room could be called finished, but I actually love the way this turned out. The result ended up being way more exciting than the title of this post would suggests.
My studio has its own HVAC unit, and since it was installed back in July 2017, the indoor part of that system has been housed in the storage closet off of the back entry of the studio.

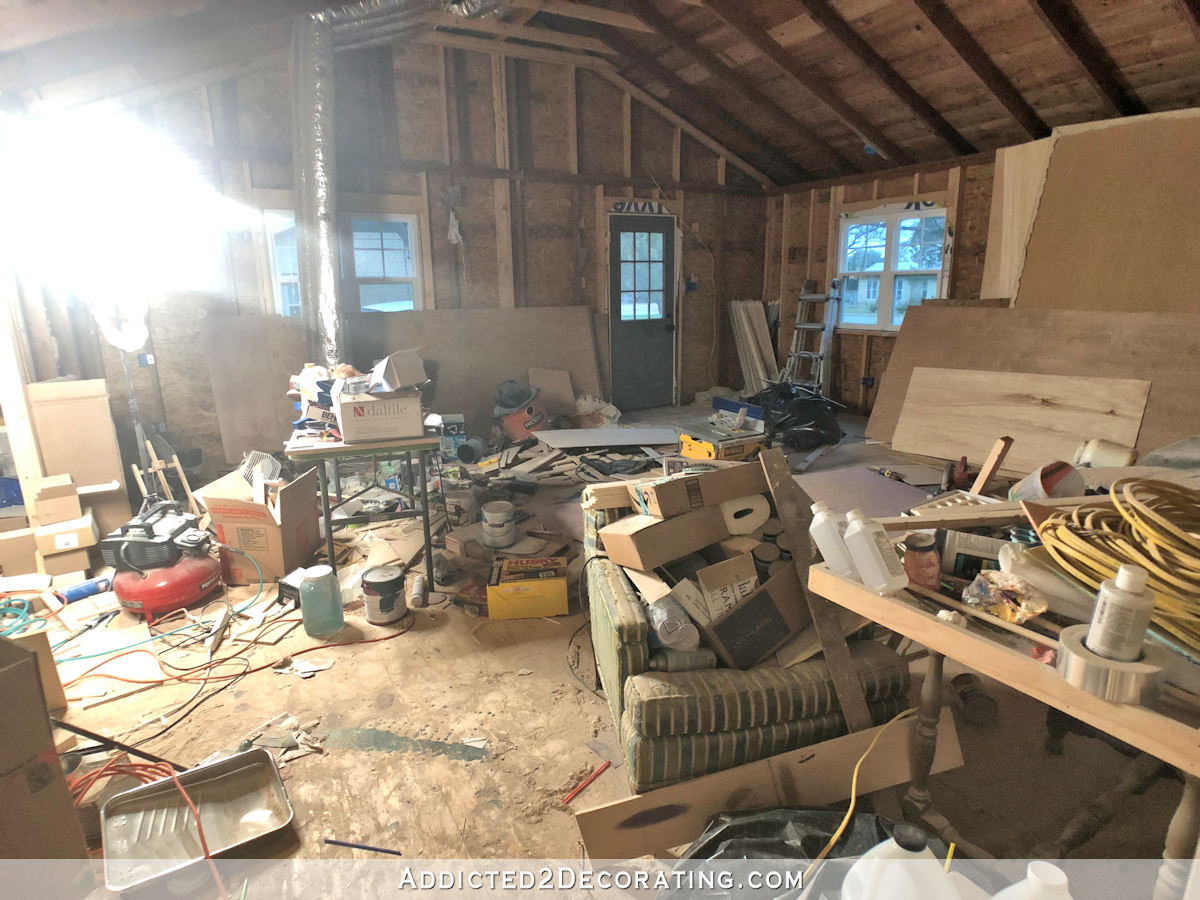
Of course, it didn’t look like that in the beginning. I only finished that back entry in February. When the HVAC was installed, the storage closet actually looked like this…
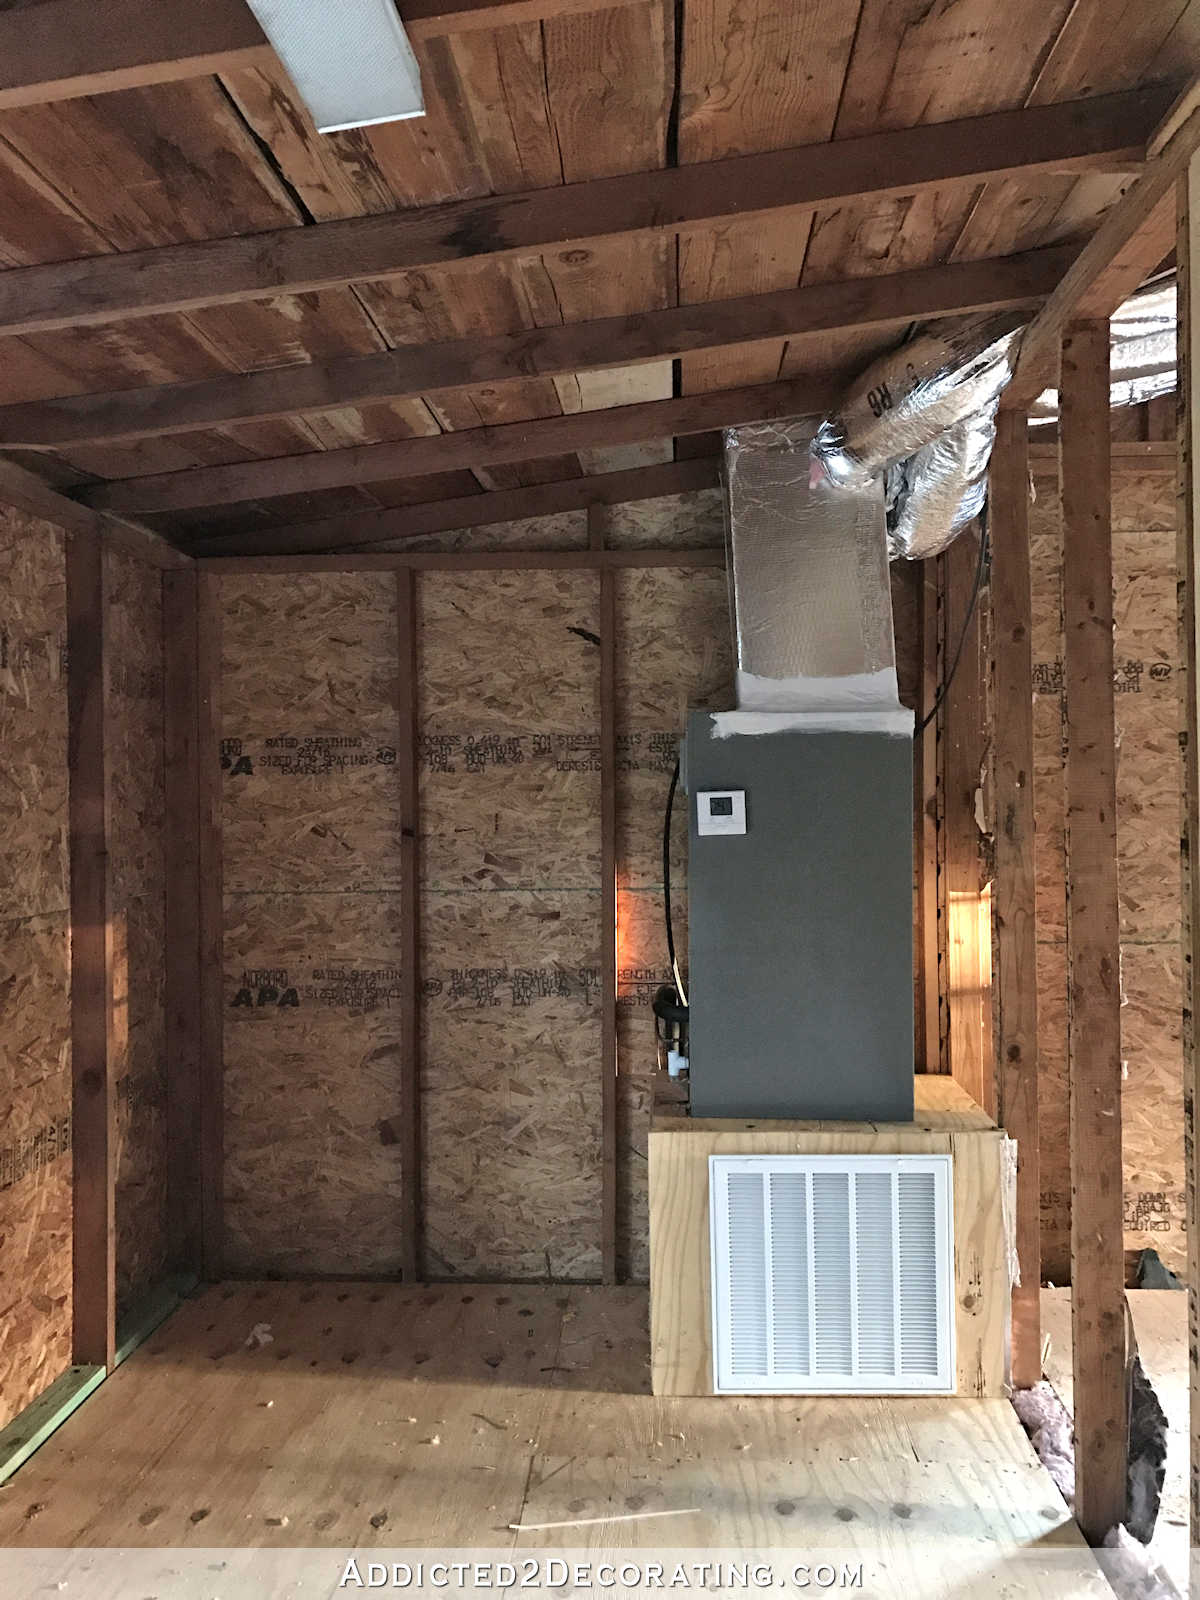
And as long as everything was wide open, I didn’t have to worry about the HVAC unit getting enough air flow. But once work got started on the room, and the drywall went up, and the closet door was installed, I had to always make sure that I left the closet door open so that the unit could get enough air to work properly.
Fast forward to 2024, and while I’ve been making lots of progress on the studio, I still hadn’t vented the storage closet for air flow, so I was still having to leave the door open. I would only close the door (and turn off the HVAC) if I needed to take pictures with the closet door closed. But as soon as the pictures were taken, I’d open the door and turn the HVAC back on.
Until yesterday. The storage closet that houses the HVAC unit is finally vented! I can now keep the door closed and not worry about a lack of air flow burning out the HVAC system. And it only took me seven years! You can’t rush into these decisions and projects, you know. 😀
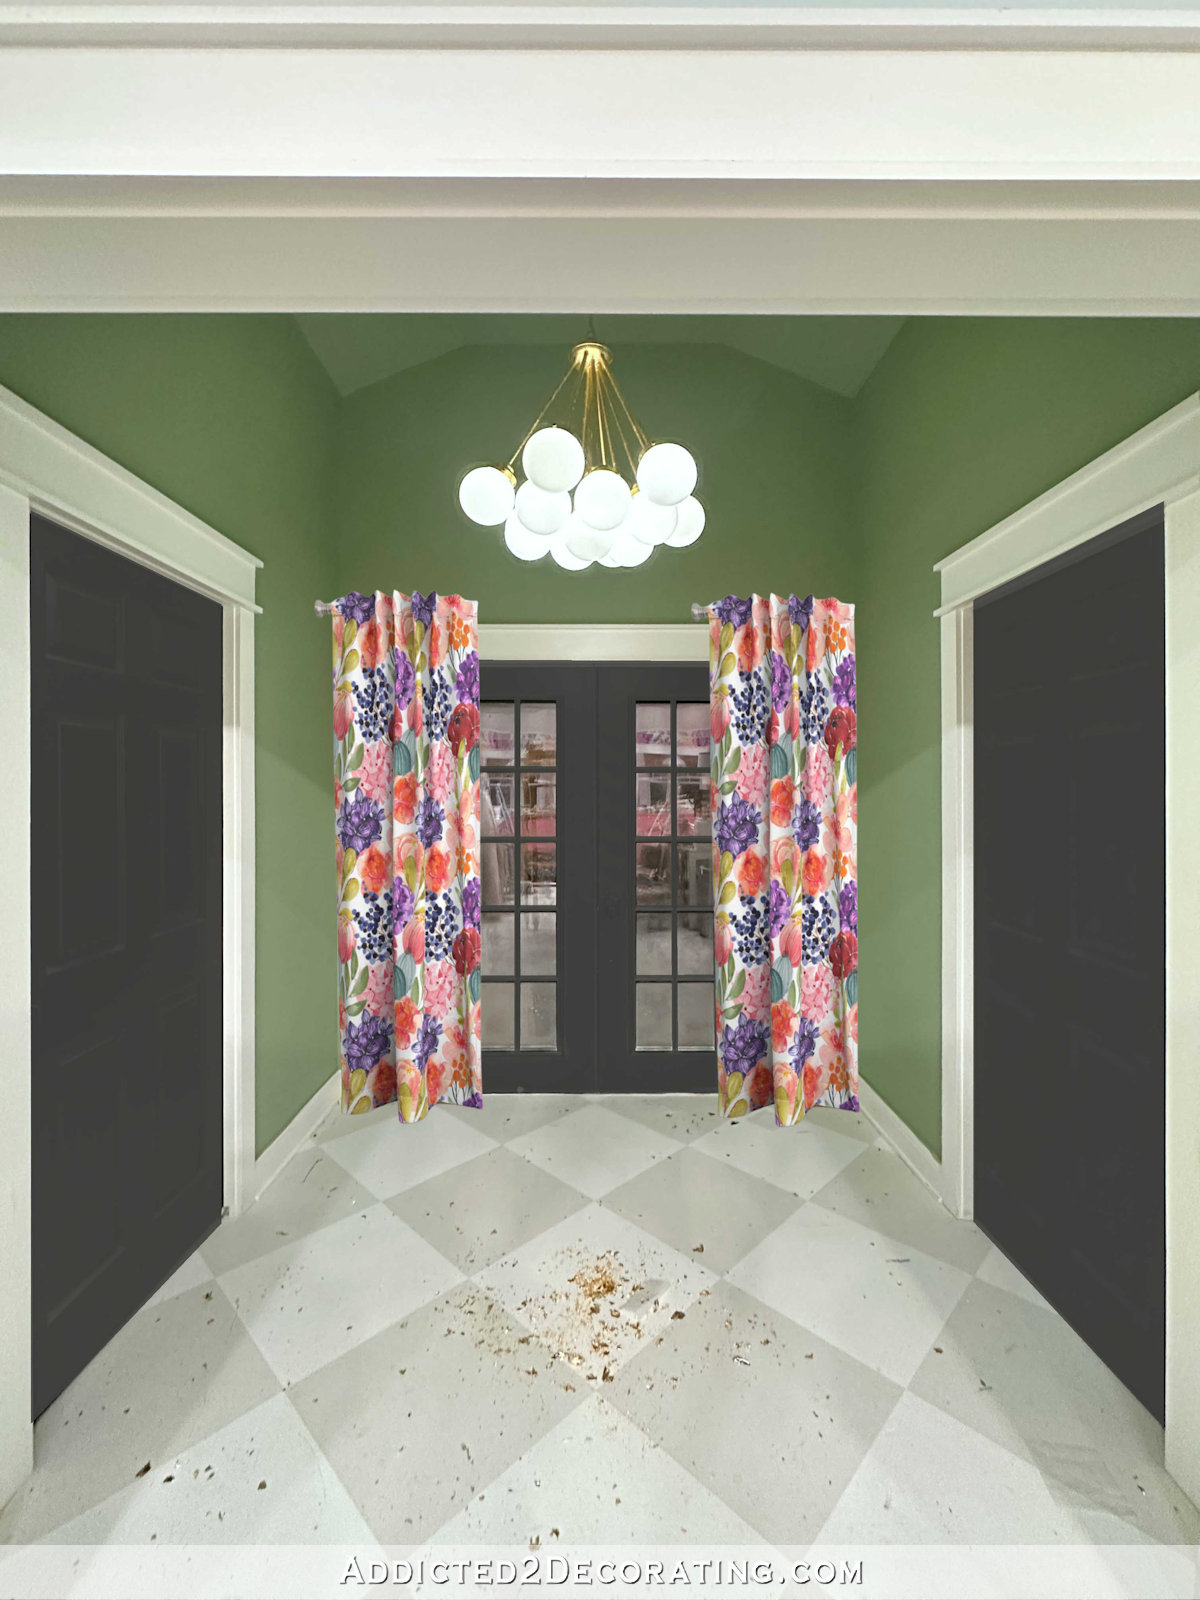
As I shared yesterday, I had originally planned to put this vent on the wall in the main part of the studio that is next to my desk and perpendicular to the office area cabinets. But after reading some suggestions in comments on a post the other day, I decided to put the vent right here in the back entry.

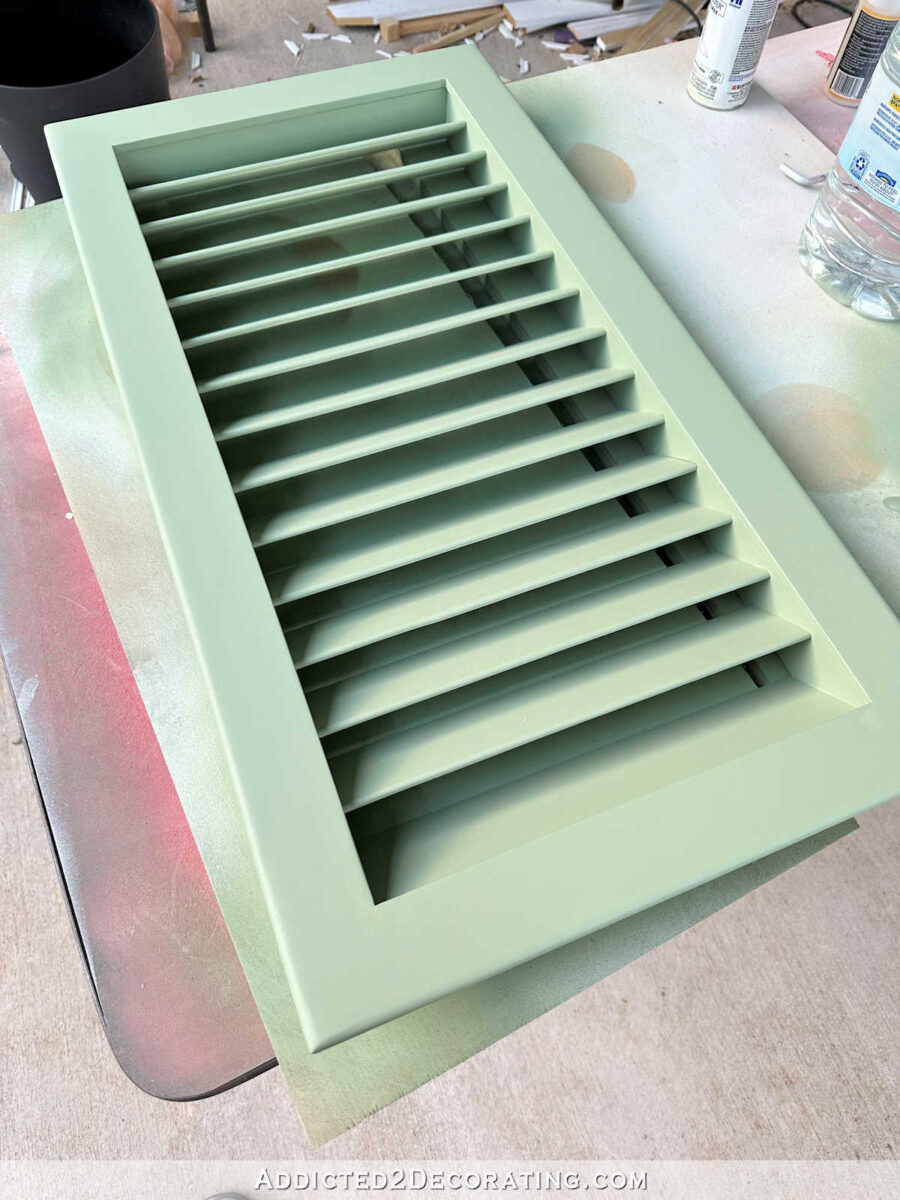
I purchased this primed, paint-ready Worth Home vent (affiliate link) in a 14″ x 30″ size, which was perfect for the space I had available.

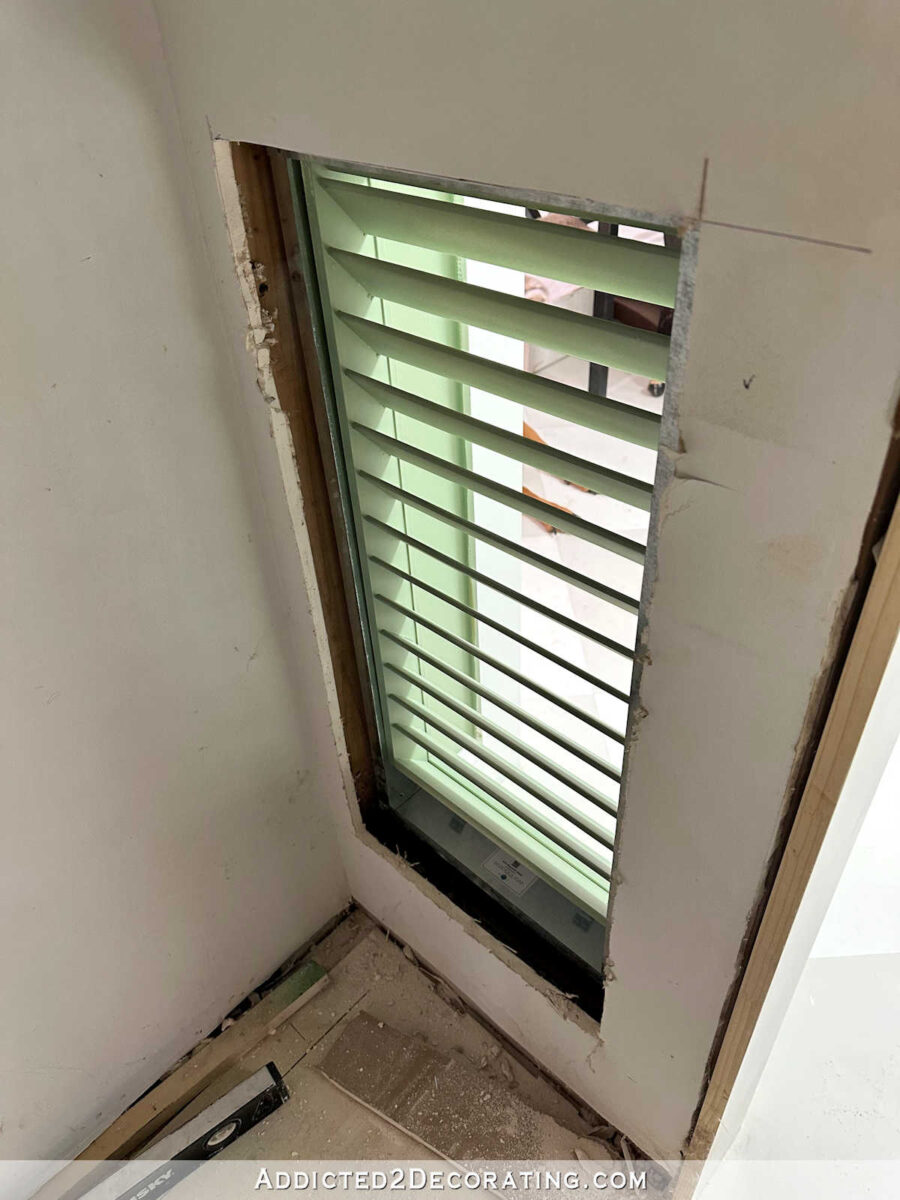
It was delivered yesterday, so I got busy right after lunch. The vent comes in two pieces — the metal frame that fits into the wall, and the decorative paint-ready vent that pops into the metal frame. So using the metal frame as a template, I held it where I wanted it, traced around it, and then used my Dremel Multi-Max oscillating saw to cut the drywall.

And then I used the first rectangle as a guide to cut the rectangle out of the drywall on the closet side of the wall.

The normal application for these vents would be to install the metal frame in the opening to the intake duct on the HVAC unit. But my application for this vent is a bit different. I didn’t need it to go directly into the HVAC intake duct, which sits inside the closet. I just needed the vent to provide air flow into the closet.
I considered not even using the metal frame for my specific application, and just adhering the pretty vent cover to the wall. But I decided that there might be a reason in the future that I’d want to remove the vent cover, so I went ahead and used the metal frame. If I ever repaint these walls, I’ll be glad I can easily remove the vent and spray it outside. I didn’t really have anything to screw this metal frame to, so I ended up using E6000, which is an industrial strength adhesive, behind the flanges to adhere it to the wall. I cut it so that the fit is very snug within the wall, so that plus the adhesive will keep it in place.

After doing some paint touchups on the wall around the metal frame, I took the decorative vent cover outside and used my paint sprayer (this is the one I used and highly recommend — affiliate link) to give it two coats of paint.
And as soon as it was dry enough to handle, I popped it into the metal frame. Here’s how it looked. The wall paint was still a little wet, but I was too anxious to wait. I’m not exactly what you would call a patient DIYer. 😀

And here it is with all the mess cleaned up and the closet door closed…
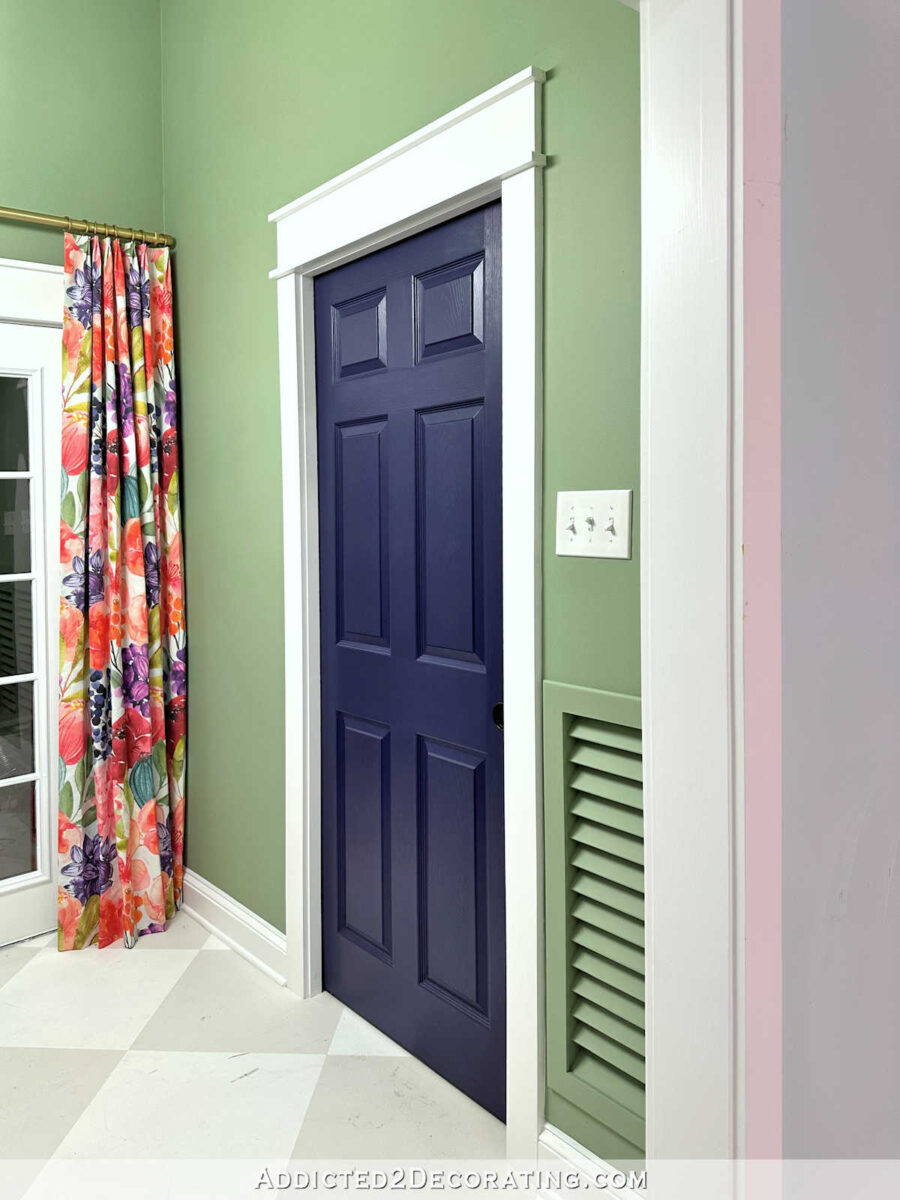
I think it looks great! And I’m so glad that some of you suggested this spot for it. I had resolved myself to having a big vent on the wall next to my cabinets, so I’m very glad that it can be tucked out of the way in a more obscure location. I had hoped to get this wall next to the cabinets painted before I went to bed last night, but my paint got ruined somehow, and it was too late to head to Home Depot and purchase more. So you’ll just have to imagine that wall being a super light gray instead of blue. But does’t that vent look nice?

HVAC vents are some of those things that we just learn to live with, and our eyes generally look right past them. But even so, I’m glad I was able to find a space for this in a place other than a main wall in the main part of the studio. And I think this vent is very pretty…for a vent. I mean, it’s a vent. It’s a necessary thing. But as vents go, I’m very pleased with this one.

Now I just need to take care of the mess inside the closet. The person who installed the HVAC did the worst job ever in building this plywood base for the unit. I wasn’t home when it was done, and I wasn’t so frustrated when I came home and saw it. So somehow, without removing the original, I have to find a way to make it look better. And I need to cut the rectangle out of the base so that a vent cover fits properly. I removed the vent cover long ago because it wasn’t installed properly, and it was very hard to get open and closed to get a filter in there. So all this time, I’ve been taping filters over the opening. 😀 This all needs to be redone so that I can use a proper vent.

And then I need to finish this on the inside. I’m not quite sure how I’ll do that, but I’ll figure that out later. Or maybe I’ll just leave it. It’s inside a closet, so does it really matter? And while these vents are made to hold a 1″ filter, I don’t see any need for me to put a filter on this since I’m not using it for its standard purpose. I don’t want to restrict air flow into the closet, and the actual HVAC unit has a filter. So I plan to leave this one filter-free for unrestricted air flow.
What matters is what it looks like from the studio, and I’m really very pleased with how that turned out. And I’m so glad that I can finally keep that door closed!

Addicted 2 Decorating is where I share my DIY and decorating journey as I remodel and decorate the 1948 fixer upper that my husband, Matt, and I bought in 2013. Matt has M.S. and is unable to do physical work, so I do the majority of the work on the house by myself. You can learn more about me here.

You did great! I agree, no extra filter needed. You just need the circulation. Have a great day!
What a perfect solution, Kristi. It looks so great. Maybe you have inadvertently created a mini-panic room. A two-for-one bonus.
It was the perfect solution, and it looks like you planned it that way from the get go! Great job!
The final result looks great!
Regarding the rough edges on the inside back of the air return cover, consider just finishing it off with mud, tape, and paint. The dust particles in the cut portion of drywall will be pulled toward the filter of your HVAC unit and you will need to change the filter ore often. If you simply finish it off, that and the closet will stay much cleaner.
The cover looks fantastic, by the way. I am glad to know there are paintable versions of these.
That looks great and it looks like it belongs in that spot. It’s also nice and large which is good for air flow.
Beautiful solution.
You’ve done an excellent job! That looks so nice! I think it blends in very well and love that it was ready to paint so no priming involved. It’s perfect!
Awesome job on the vent, looks fabulous. I know your pain when it comes to the right HVAC contractors. We had the best in the world when we first moved down here, and then he went up and died. How’s that for loyalty. All joking aside, it was like losing a member of our family since he was the first guy we met when we bought our farm, and he recommended so many other great contractors and always went above and beyond. We went through about a dozen before we found the new company that we use for everything and are grateful we had Byron at least get us started on the right path. I agree on the not needing an air filter for the vent, it’s to bring air in, not filter it first. I’m sorry I can’t send my team down there to fix the HVAC for you. Chin up, you are doing great. Cheers!
I’m not sure if you covered this in an earlier post, but isn’t there a formula for how large a vent needs to be for the amount of air movement the hvac produces? You seemed to be talking about the sizes of the vents you’d need without discussing this mechanical need. Thanks!
The question I have is how large is the opening in the return air box? Your new vent is about 400 sq inches. It needs to provide approximately the same amount of sq inches as the opening that the filter covers. If there is a significant difference, you could trim an inch off the bottom of the door. My HVAC pulls air thru my pantry. Takes a 20×20 filter. I did put a louvered door on the pantry (as well as all other closets & ensuite bath) for the best air flow. In FL, with our humidity, I wanted air circulation to prevent mustiness. All solid doors are 1″ off the floor due to no return air in every room like code requires here now. If anyone does anything that pulls air through a louvered door, I suggest placing a sheer curtain on the side of the door that the air is coming from. Much easier to wash a curtain than clean those !@#$%^& louvers!
Looks good.
Kristi,
You have done an awesome job with the vent. It looks like it has always been there. I didn’t know the closet that houses the HVAC was so generously spacious. I wonder if in the future you could beautify the room and create some more storage? Or, would that not be a good idea for the inside filter to work correctly? I can see the person who did the HVAC installation wasn’t tidy at all and left quite a lot of dusty stuff. Shame on him. Well anyway the vent on the wall is in the perfect spot and the best part is….you’re done with the vent business.
That looks great. I have 2 existing wall vents metal, ugly.This one is too pricey for me since I need 2. I am going to the archives for the one you did out of yardsticks. Not sure I can do it but will check out your instructions .
Have you thought about using another one of those vents for the inside of the closet to help make it look cohesive?
Why? No one will ever see it except kristi.
Kristi, that looks amazing!
I especially like how it lines up so
well with the panels of the eggplant painted door. It’s little details like that, that mess with my progress in projects. So many times
I’m in a rush I then have a could have should have moment. Thank you for being a great teacher and sharing your projects with us.
Well done!!! The ideal solution!
Egg-cellent! As you said, your eye will soon go right past it as it blends into the wall. Some DIY projects are prettier than others, but we do have to accomodate the necessities. Glad this one worked out so well.
It’s perfect! Blends in so nicely!
You know, it wasn’t until the very last pic in this post that I finally “got” why you couldn’t put the vent low on the wall on the other side of the door. You’ve only mentioned, a hundred times, that this is a pocket door. But somehow, in my mind, the door opened to the right, not the left. Somehow in that final pic it hit me “Oh, the pocket is on that side!” LOL I literally laughed at myself out loud. People are weird! 🙂 By people, I mean me. ;D
Looks really nice compared to some we have in our home. I think I will look for the same kind when we need new. Our new downsized house is at a standstill as the footings were so bad we terminated the contract with the builder. Now we are in a lawsuit, so it will take time…and we will have to start over with a new builder, or cancel the whole thing. NO integrity, totally unskilled workers, who will do whatever the owner says even it is WRONG. I can imagine how annoyed you were when you saw that work done while you were out. My husband came home just in time to see what they had done to the footings, or we would not have known until all the cracks started appearing and he was long gone/off the hook. We don’t even trust anyone anymore, and are not sure what to do now. We are getting a bit too old to build ourselves. 😢
That turned out fabulouso…its great! And pretty well hidden just walking into the room. Happy you have that done.
We built our own return air vents several years ago. We just made a frame and then put the decorative metal sheet type material on the inside of the frame. We got some that have a pretty openwork design to them. Then on the inside, we made a metal frame out of aluminum window screen frames and added window screening to it. It is removable so we can vacuum and clean it every so often. We did this because there was so much dust and pet hair that was getting into the vented area. You might not have the amount of dust or pet hair we have, though, but I wanted to throw that idea out there.
I think your vent looks great and I’m glad you found a less noticeable spot for it.
This looks really good! Is there some tool to monitor, to make sure air flow is correct?
Beautiful! As always, you did a great job! So glad others thought of that solution. That is a much better spot than in your studio. It blends in so nicely.
You are amazing!! Looks amazing, problem solved! As for the filters, just make sure you always have tape on hand to hold the new filter in place. It probably makes a better seal than the usual slide in filters do. Win-win.
I just love the way things are working out! The studio entry looks great. I too live in a fixer-upper, gutted to stud and rebuilt. My suggestions is that you properly finish the inside of your storage/utility closet, your furnace/ac will last longer, and you’ll be happier when you open the closet. My closets were the last thing to receive attention too. The difference was huge! Much better utility and aesthetics. You won’t regret a fully finished project.
I am very inspired by your work. I am painting the interior of my house and was Not sure about what to do with the air vents on the wall. Paint… no paint… decorative vent cover? I hopped online and wanted to look at your house to see what you had done before. There was this post and I am painting them. My vents are not at nice as the custom one you have but if I am not satisfied with the look, I will order the vents you did and replace them. Wonderful.