Wingback Chair Upholstery Progress
It’s a funny thing. When I started working on these upholstery projects, the questions started pouring in—on the A2D Facebook page, in the comments here on the blog, and in my e-mail inbox. Pleas from fellow thrift store shoppers asking me to please explain how to do the tufting, and the measuring for fabric, and the…
I know. Upholstery can be very intimidating. All of that information is coming. I promise. I just need to get this room finished, and then hopefully next week I’ll have time to sit down and write out a thorough tutorial, not only on this chair, but also on the cane chair that I upholstered last weekend.
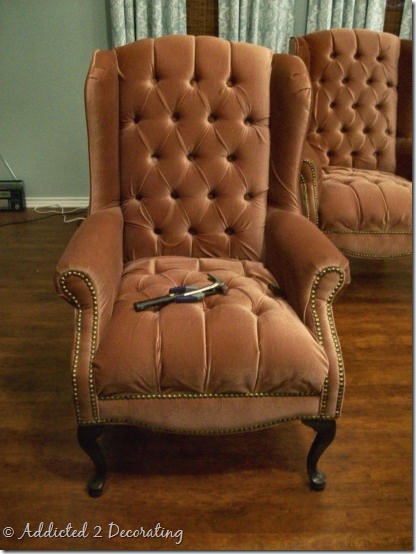
But for now, let me show you my progress. If you remember, I started with a chair that looked like this…
The frame was good. The upholstery was bad—everything from the color of the fabric, to the frumpy seat upholstery, to the nailhead trim.
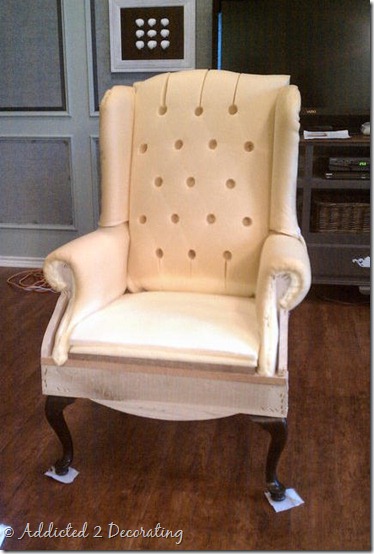
Fortunately, when we got all of the fabric removed (my mom helped me!), we found that the foam was in great shape.
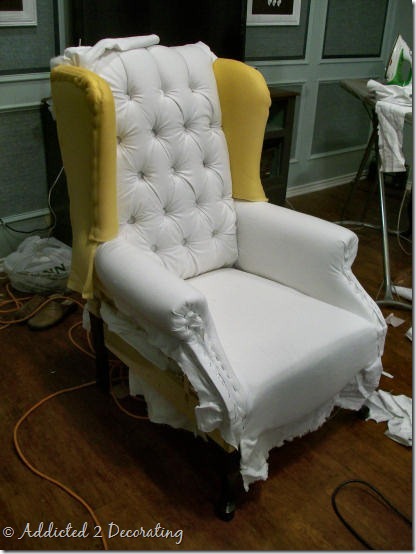
So I just needed to add batting to each part as I went along. And by the end of the day, this was the progress I had made…
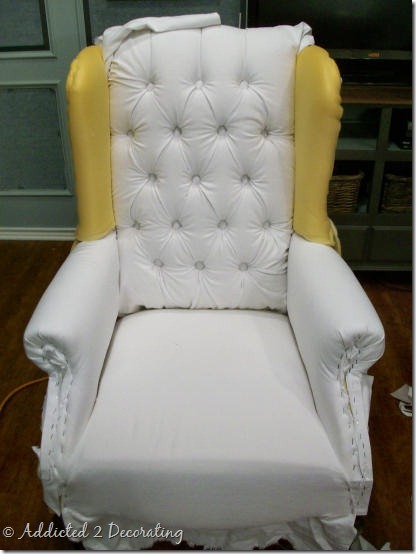
It looks like a complete mess at this point, but hopefully you can see everything starting to take shape. And the “new” chair will have a separate seat cushion, so what you see wrapped there is just the seat base.
The tufted back is also unfinished. Once I got the buttons in, I was ready to call it a day, so I just shoved the extra fabric through the cracks and left it. It looks a bit messy at this point, but it’ll look much neater on the final product. I was so anxious to get those wings covered! My mom did the sewing for me, and they looked beautiful, but I won’t be ready to attach them until I’ve completed the tufted back.
So it’s definitely coming along! Hopefully at some point today, I’ll have a finished chair. And what a different, right? I can’t wait to see it in the finished room!
Well, I’m off to finish the chair. Have a great day!
And by the way, if you do have specific upholstery questions about this chair or the other one, go ahead and put them in the comments so I can try my hardest to address your specific questions in the tutorial. I know there are many questions about tufting. I’ll definitely address that as thoroughly as possible. But if you have questions about anything else, let me know. Thanks!


I'm curious how to finnish off a piece like this. I have only done upholstery with the stapled bit is underneath or otherwise hidden. I had a fully upholstering chair done professionally and it looks like parts were sewn . . . How to hide the staples is my biggest question.
P.S. LOVE the colour you have chosen. This is going to look so amazing and fresh.
Perfect timing! I just got two wing back chairs, both different styles. They are in excellent condition but being a dark green, just doesn't do it for me. I was going to just slipcover them but now I can re-upholster them and make them match! YIPEE! and thanks for sharing.
Love it! Never seen a tufted chair so thoroughly naked. Can't wait to see the end result!
Kristi, you are beyond talented! This chair is looking smashing. Way to go. I just love your style so much.
I already read your blog, but I'm stopping by from Thrifty Decor Chick just to say congrats on the awesome feature and also a big warm HI!
I'm from Austin. I didn't realize you are in Waco! We should so totally plan a meet up sometime.
Allison @ House of Hepworths
Beautiful chairs!!!!!!Love these all!!!!!!!
Nice project girl,Love your sense of passion doing this kind of activity.You really want to have the best chair ever that's why you put lot of hard work on this.Great job.
Is the finished product posted somewhere?
Hi, I am in love with the pictures. I know I am just a tad bit late with my comment/quetion. I am just wondering if you have to cut the foam in order to make the tufts. Can you just pull the buttons through really tight?
Thanks