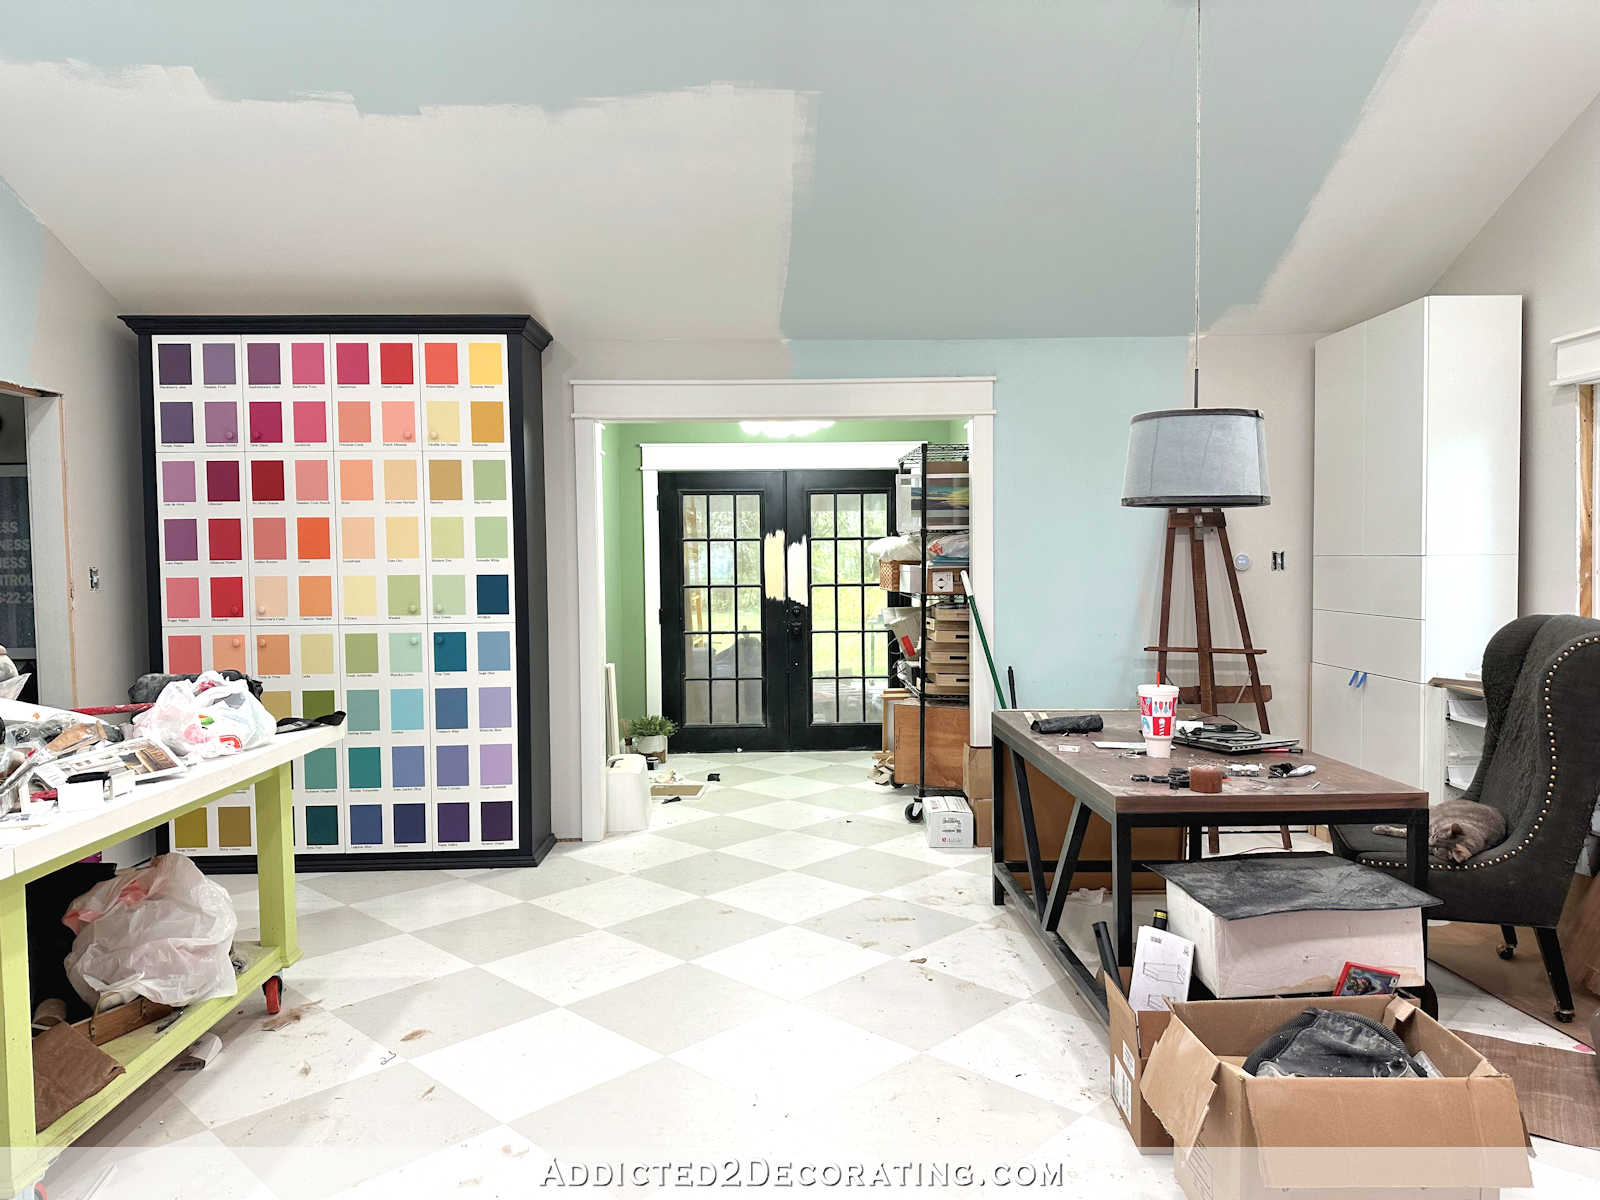
A Sneak Peek Of My New Large Floral Mural
It took me a long time to order the new large floral mural for the studio, but I finally placed my order last Thursday, and it arrived on Saturday! I couldn’t believe that fast turnaround!
The wallpaper pattern is one that I created myself (I showed how I did that here), and that wallpaper was on the studio wall from June 2019 until just a few weeks ago.

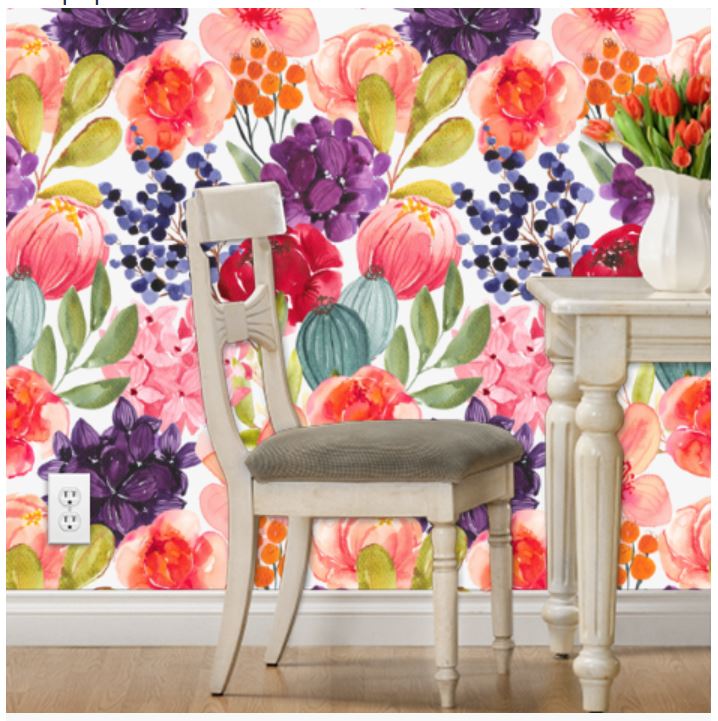
As I’ve explained in previous posts, I loved the design, but I thought that some of the colors needed to be tweaked (especially those dark purple flowers that just looked like blobs from a distance), and I wanted the design printed MUCH larger.
I spent several weeks trying to find the right company to print my new large floral design for me. Since it’s not standard wallpaper where the full design fits perfectly onto one width of wallpaper, I needed to have it printed as a mural. Trying to find a company that will print a custom mural from your own picture isn’t difficult. There are plenty of them out there. But finding a company that will work with you to take your seamless, repeatable design, resize it for you, tile the design for you, and print it so that it covers a very specific area of space (like my 16-foot-wide space) is a bit more challenging.
I originally started working with Photowall (the company where I bought the mural that’s in our bathroom), but I ran into a problem with their design system and decided to find another company. So then I started working with Murals Your Way, but I kind of lost confidence when it didn’t really seem like the guy understood what I was wanting.
And then about four weeks ago, right out of the blue and at just the right time, I got a marketing text from Spoonflower (the place I had the original floral wallpaper printed) with some helpful links, and one of them just happened to be about how to turn a picture into a mural using Spoonflower. So I used their tutorial (although I didn’t do mine exactly how they suggested, but their instructions were a great jumping off point for me to understand what I needed to do), and made my new design double the width of the original.
I was so nervous ordering that mural. I went over my design process countless times to be sure I had done everything right, and then I finally got the courage to click that “Place Order” button last week. When it arrived on Saturday, I was nervous and beyond excited to unwrap two rolls and see if I had done it properly. Well, sure enough, I had done it right, and the pattern matched up perfectly!
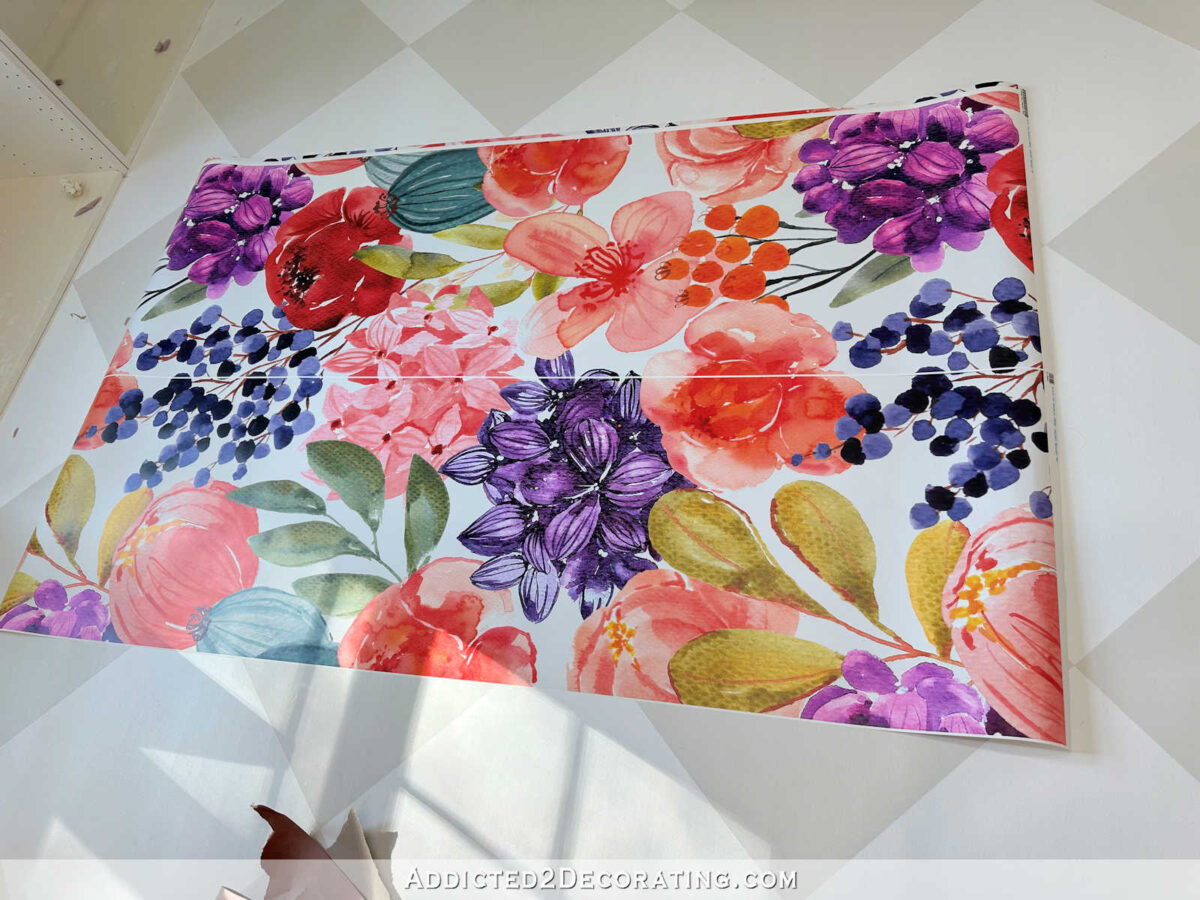
So after this whole process, my design went from one pattern repeat fitting onto one 24-inch-wide piece of wallpaper (this is what the original 2019 design looked like)…

…to the new 2023 design with one whole pattern repeat spanning the width of two pieces of 24-inch-wide wallpaper.

Now I’m sure what jumps out at you are the extra bits on each side of the individual wallpaper pieces. On the left side of each piece, there’s this small 1/4-inch white strip.

And on the right side of each piece, there’s a 3/4-inch printed area plus another white strip.

Because Spoonflower’s system isn’t really set up to print murals, and because they print their wallpaper design so that they overlap just a bit when you install them (which is a feature that I really love about Spoonflower’s wallpaper), these are little quirks that you have to creatively work around when trying to print a mural using their wallpaper-printing system.

So before installing this mural, I will have to trim both sides of each piece. I’ll have to cut off the little white strip on the left side, and I’ll also trim off the extra 3/4-inch of pattern that was printed on the right, along with the extra white strip.

Once those are trimmed off (you’ll have to imagine the thin white strip on the left edge of the right piece being trimmed off in the picture below), the pattern will fit together seamlessly.

I’m really so pleased with how this turned out. It actually exceeded my expectations, and I can’t wait to get it installed on the wall! I love how those dark purple flowers are now light enough and big enough that they’ll still look like flowers (and not purple blobs) even from the other side of the room.

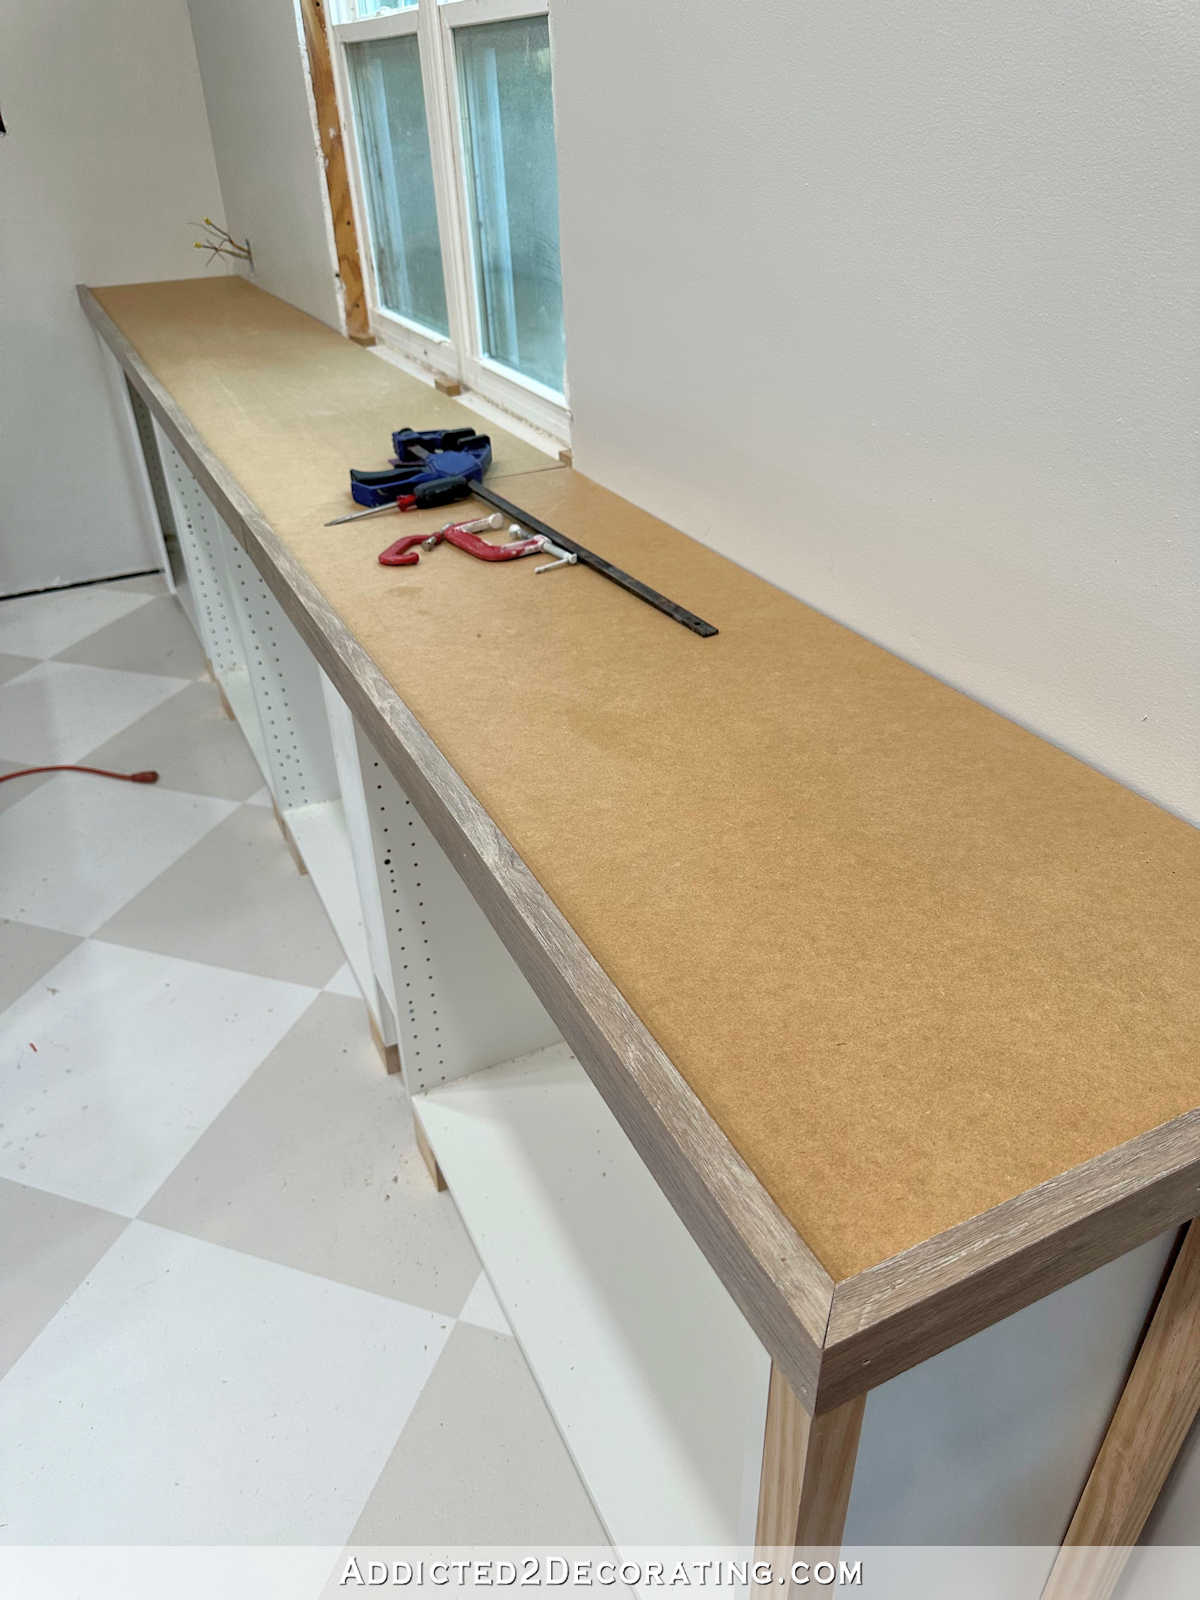
And this second time around was cheaper than the first since I changed my overall design for the long wall and decided to put lower cabinets all the way across the wall. This time, I only had to order enough wallpaper to go from the ceiling to the countertop, whereas before, I ordered enough to cover the wall from ceiling to floor.
I tried to get a picture of the new mural along with the remnants of the old wallpaper for comparison so you can see how much bigger and brighter the new mural is.

But this is a fairly decent comparison of the two, with the new mural on the left and the original wallpaper on the right. Pretty great, huh? 😀
I didn’t do a tutorial on how I went about turning the pattern into a large mural to have it printed by Spoonflower because I didn’t want to go into so much detail if no one was interested in that much detail. But if some of you are interested in learning how to have a mural printed by Spoonflower, and how to work around their system that’s only set up for standard wallpaper with overlapping seams, I’d be happy to share my process.
Like I said, I started off with their tutorial, but honestly, some of their tutorial didn’t make sense to me. And I wanted to end up with pieces that overlap, like their standard wallpaper does. (I really love that feature!) But their mural tutorial results in pieces that have to be trimmed (which you will never be able to do perfectly by hand) and then they butt up next to each other during installation. And then they show going back to the butt joints between the imperfect cuts (which you will have because you’re not a machine) and filling those in with markers or paint.

I mean, that literally, physically hurts me to see that. Y’all know me well enough to know that that’s going to be a NO from me. I don’t want imperfect butt joints between pieces that then have to be painted or colored with markers.
So while I used their tutorial to help me understand how their wallpaper is printed, and what obstacles I needed to work around in order to use their wallpaper-printing system to print a mural, I made some tweaks to their instructions so that I’d end up with a design that will still have overlapping seams (no butt joints between imperfectly cut pieces needed) and create a seamless, flawless pattern with no obvious joints and no need for coloring or painting in between imperfectly cut butt joints.
All that to say that if there are at least a few of you who would like for me to do a tutorial, I’d be happy to do that. But if no one is interested in doing it themselves, but you just want to see my mural up on my wall in my studio, that’s coming up. I hired two guys to come and move all of the desktop-height outlets up about three or four inches. (The current height worked with my previous cabinet and desktop plan, but they’re too low for the IKEA cabinet plan.) They’ll be here tomorrow morning to start on that. Once they’re done, I’ll be able to install the new mural! I’m hoping to have it done by Friday.

Addicted 2 Decorating is where I share my DIY and decorating journey as I remodel and decorate the 1948 fixer upper that my husband, Matt, and I bought in 2013. Matt has M.S. and is unable to do physical work, so I do the majority of the work on the house by myself. You can learn more about me here.

Love it!
OH MY! You have an awesome ability to visualize something and the perseverance to research how to do it and WOW! The result is great.
Oh WOW, that’s going to look amazing! That’s awesome how fast you received your order. I ordered a pair of tennis shoes two weeks ago and they still haven’t shipped. And I’m fairly certain that they were already made. good grief.
At first I didn’t think the difference would be that noticeable and probably wouldn’t have changed the wallpaper if it was me, BUT wow!!!! The sizing and especially the color of the purple flowers really DOES make a big difference! You are going to be so pleased with the studio! I can’t wait to see it done!
I love the new wallpaper
Can’t wait to see finished wall
❤️❤️❤️
The new wallpaper is GORGEOUS! There is more of a difference than I expected. Great job!
Can you put it on the wall butting it up with only one seam cut and then cut through the second one after it’s installed to avoid an oops?
I can’t really envision what you mean.
With their regular wallpaper, and with the way I made my mural, you can put the pieces up overlapping, and then make one cut down the middle of the overlap to have perfectly fitting seams. I don’t really see the need in taking that extra step, though. I prefer overlapping seams.
But with their instructions for murals, I don’t see how that would work. You’d have to cut off the extra before installing in order to get the patterns to match up, and then it’s too late to cut both pieces at once for a perfect joint.
This looks amazing! I am looking forward to seeing it once it’s installed! You are so gifted!
Congratulations!! The new paper looks fantabulous😁😁😁😁. Can’t wait to see it up on your wall!
Amazing! So looking forward to seeing the mural in place.
I may be the only one, but yes, I am interested in the technical aspects of creating a wallpaper mural like that! It is going to be super!
Can you leave the little white strip of extra paper on the left side of each panel, and only cut off the 3/4 section on thr right side of each panel? Then, when you hang the wallpaper, just cover up the extra strip of white with the edge of the piece that will hang to the left of it? Or does that create a bump or ridge where the two pieces overlap (hence the need to trim both sides)? You mentioned their regular wallpaper overlapping so I wasn’t sure whether overlapping these pieces to cover up the white strip on the left would be an option to save yourself half of the required trimming (although I assume you would have thought of that if it was an option!).
I wouldn’t want to take the risk of the white strip showing through the top layer of the wallpaper. The wallpaper is pretty thick, and maybe nothing would show through, but I wouldn’t want to take the chance. It’s not a big deal to trim off the edges, though. Those pieces are only 72 inches long.
It seems like an awful lot of work for such a small area of wallpaper. I do like the print and would like to see more of it.
Oh, I love the new larger design and tweaked flowers. I think it is going to really nice, and am excited to see. That was so fast…not sure how that could be! You must have been a bit surprised too. Looking forward to Friday or soon after.
Great work Kristi, gorgeous wallpaper. As I recall, years ago I ordered and hung custom wallpaper that came with margins on each side. The wallpaper was designed to be hung by overlapping the paper to match the design and then using a clean exacto knife up against a metal ruler or painters trowel, cut thru both layers at once. That cut creates a perfect matched seam line. Then slide out the extra piece from behind and the extra trimmed piece from the front, and roll the seams.
Don’t know if that would work here as I may have had more overlap of design, but it worked perfectly for me. This is a link to a short on YouTube that shows that kind of installation.
https://youtube.com/shorts/h98faFIV2Ic?feature=share
I love the new size so much better! Somehow, with the larger flowers, it’s not as busy as the original. Maybe because there are less repeats, IDK. Can’t wait to see. EEEE, I’m getting EXCITED!
Oh yes! I love the bigger flowers that you tweaked. Absolutely ah..mazing! Can’t wait for you to get it installed as I know you are too.
If you cut it after you put it up, it will fit seamlessly! Use a 4′ straightedge, level and a sharp exacto knife. You’re making a duplicate cut at one time! It works best.
Oh, I want to have this wall paper in my main bath so bad! But I’m in Canada…so it’s a bit pricy to order…even covering only the top part above a chair rail and board & batten. But it is my colours through & through. Absolutely gorgeous. Can’t wait to see it up!
Have you thought of contacting Spoonflower to see if they are interested in your solution to the butt joint and markers problem?
It is beautiful. You are so talented. Glad you use your God given talents to create wonderful, exciting decor!!! And you still have time to entertain Church folks each week.
You are truly a blessing to me. Keep up the good work!
Belated happy birthday, Kristi! Welcome to the best decade!
The larger flowers are lovely!
I think you have the papers lined up backwards, then the pieces will line up without the lines.
Every single piece has strips on the left edge and the right edge. There’s no way to line these up without having to trim the edges.
The wallpaper is gorgeous…I’m excited to see the room take shape! FYI…I haven’t received your received your blog posts via email in several months. I’m not sure why, but I don’t see a way to subscribe on your site. When I select that option from the drop down menu, I just see your “about “ page with no link to subscribe. 🤔🤷♀️
I’d love a tutorial! The new mural looks great. Can’t wait to see the result.
Looks great! It seems like you could just cut the quarter inch white seam off the left edges, and then apply from left to right, with each new piece covering the white edge on the right side, ensuring your pattern lines up. I wouldn’t be worried about the color showing through since you’re literally layering on the same part of the pattern as you are covering, and it was designed to work that way.
It’s not the same part of the pattern, though. It wasn’t designed to work that way. It was printed to work as overlapping wallpaper (one full repeat per one wallpaper width), not as an overlapping 2-piece mural.
That looks amazing and I would love instructions to do a mural with them! I’ve thought about one in our dining room for years!
I’m not sure if I’m understanding this correctly. Can you not leave it untrimmed, overlap the pieces with the patterns lined up, and then “double cut” through both layers and pull out what’s not needed? That’s a common practice with commercial papers with no pattern match but should also work with your situation. Or, as I say, maybe I’m not understanding it correctly. Good luck. I am sure you’ll figure it out.