Breakfast Room — All Trimmed Out
My breakfast room progress is going slower than I had expected this month because I seem to be getting into the habit of taking weekends off. 😀 Imagine that! But I picked back up on Monday with the trim — installing baseboards, trimming out the opening between the breakfast room and kitchen, and trimming out the back of the peninsula.
Then the guys came yesterday morning and installed the crown moulding, so I spent the rest of the day filling nail holes, sanding, and caulking all of the trim. I got everything caulked with the exception of some of the baseboards, so today I’ll need to finish that up, and then I’m ready to paint!!
And you’ll notice that I have paper and a drop cloth covering my floors. 🙂 See? I can do it! 😀
And let me tell you, trimming out this room has been a real test for me. I tend to be a perfectionist with slight OCD tendencies, and nothing in this room is square, plumb, or level. I had the floor leveled before I started on this room, but it didn’t occur to me to check if the ceiling was level.
It’s not. 🙂
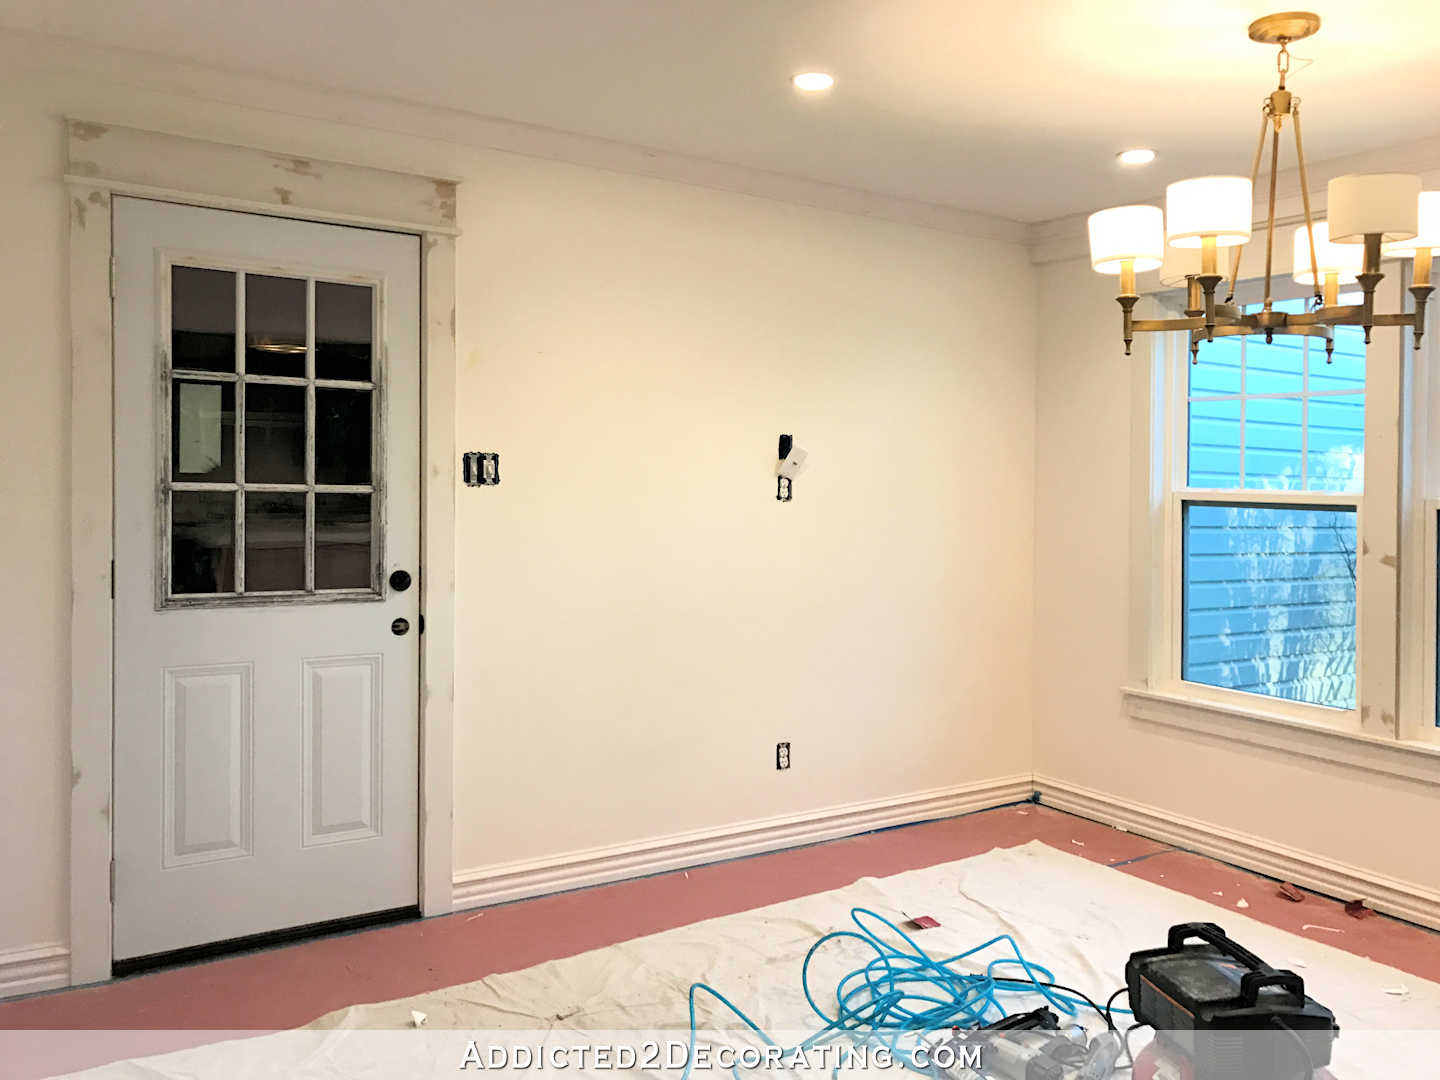
And it was very noticeable above the garage door. The top trim on the garage door is level, but because the ceiling is unlevel, it made the door look crooked. So when the guys installed the crown moulding, I had them butt it right up against the ceiling on the left side of the door, and then shim it down towards the right side of the door, and then I caulked the gap at the ceiling. It’s still not perfect, but it’s much better than it would have been if they had just followed the ceiling straight across.
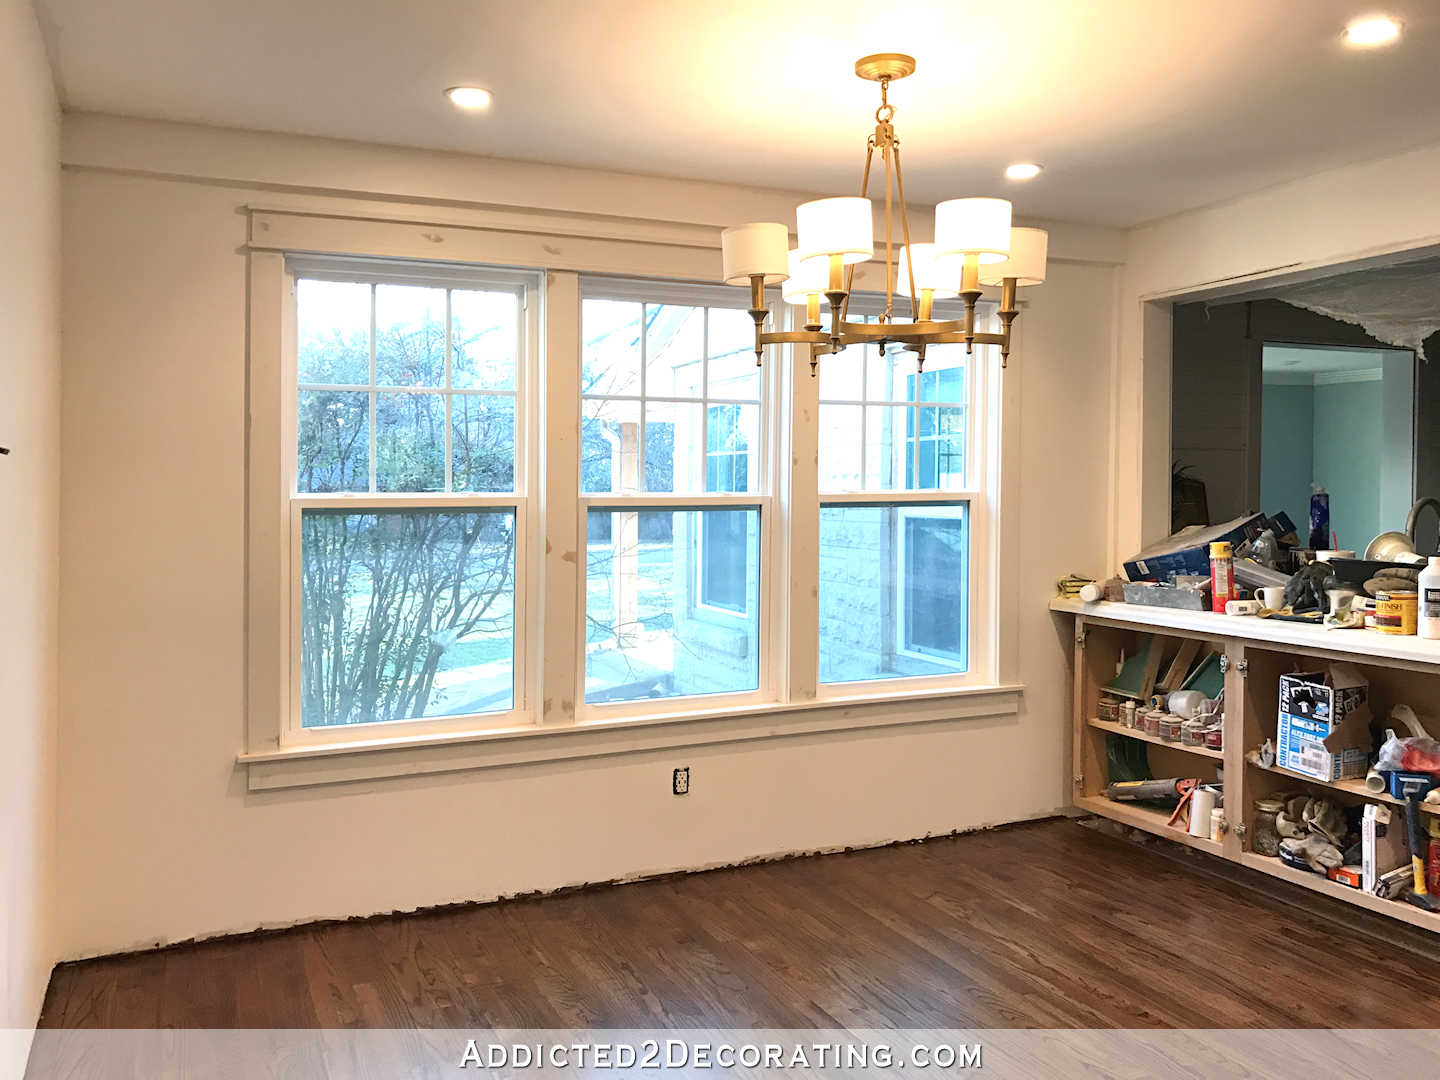
And then there’s the front wall with the three windows. Do you remember the issue there? The ceiling on that wall isn’t level either, and it has that visible header that creates a bump out at the top. So when I added the standard-height trim over the windows, the trim touched the header on the right side, but there was a 1/2-inch gap on the left side. So I decided to create a shorter trim for the top of the windows…

Well, that short trim as been bothering me. So I decided to take the advice that a few of you gave me. You suggested that rather than adding a top trim piece that is the same height all the way across, instead I cut the middle piece of that top window trim so that it fills the space all the way across.
So I tried it, and it looks so much better!
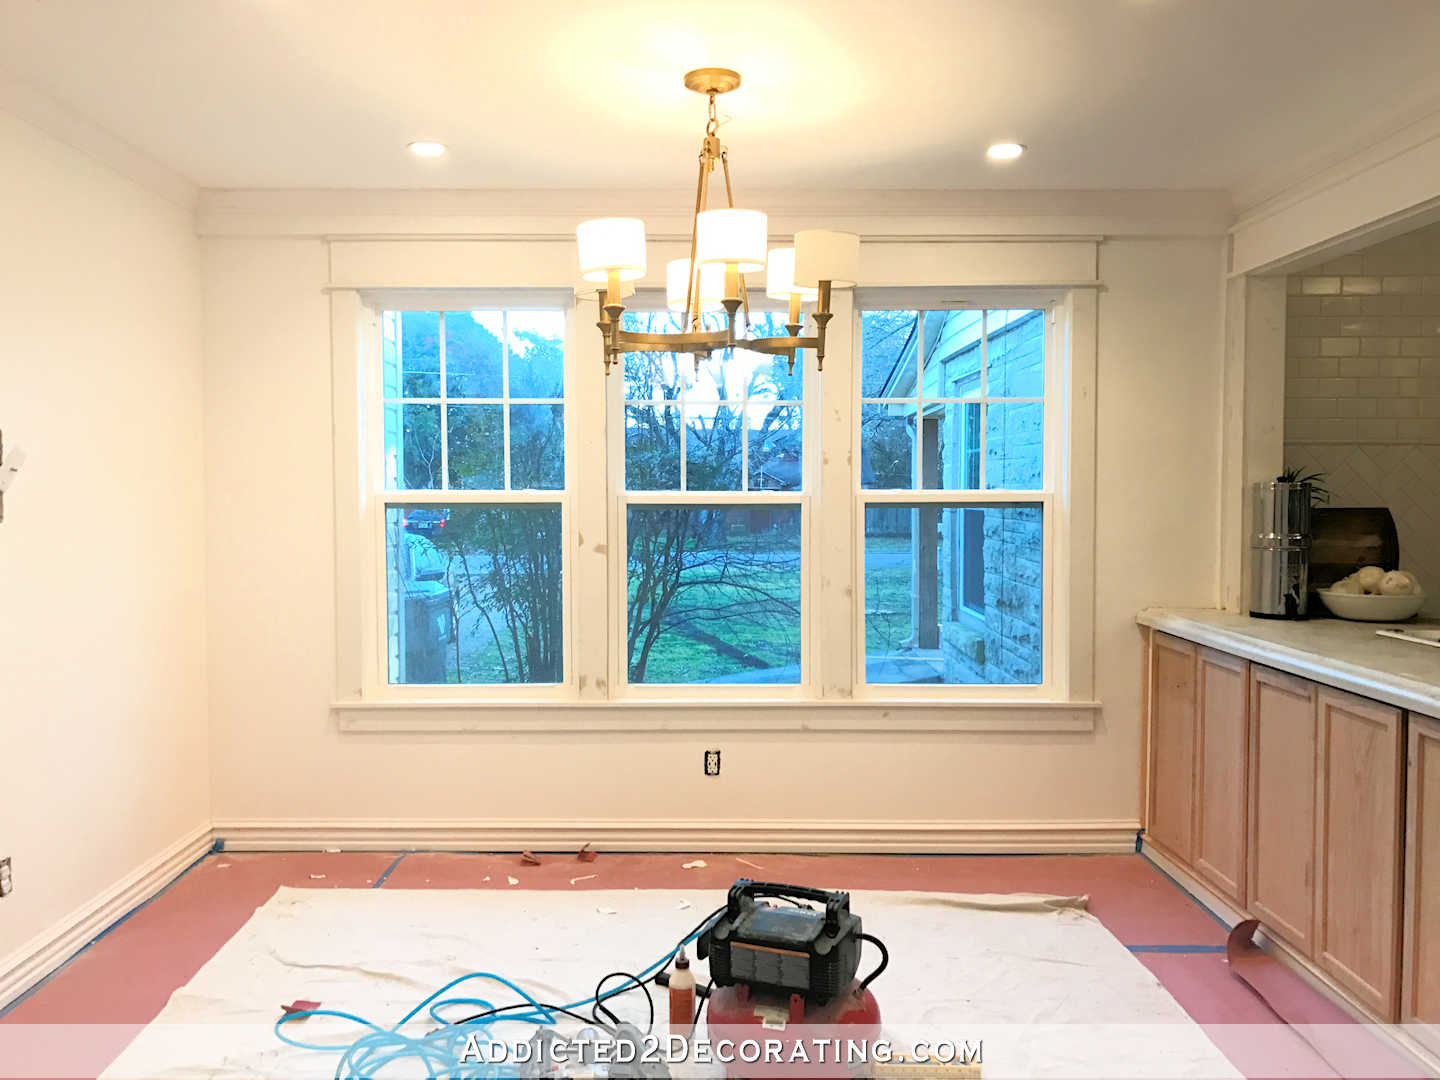
Yes, that trim is 7 inches high on the right side, and 7.5 inches high on the left side (over a span of about 9.5 feet), but I like that it completely fills the space between the top of the window and the bottom of the header all the way across. And once I get draperies hung on the windows, I really don’t think it’ll be that noticeable.
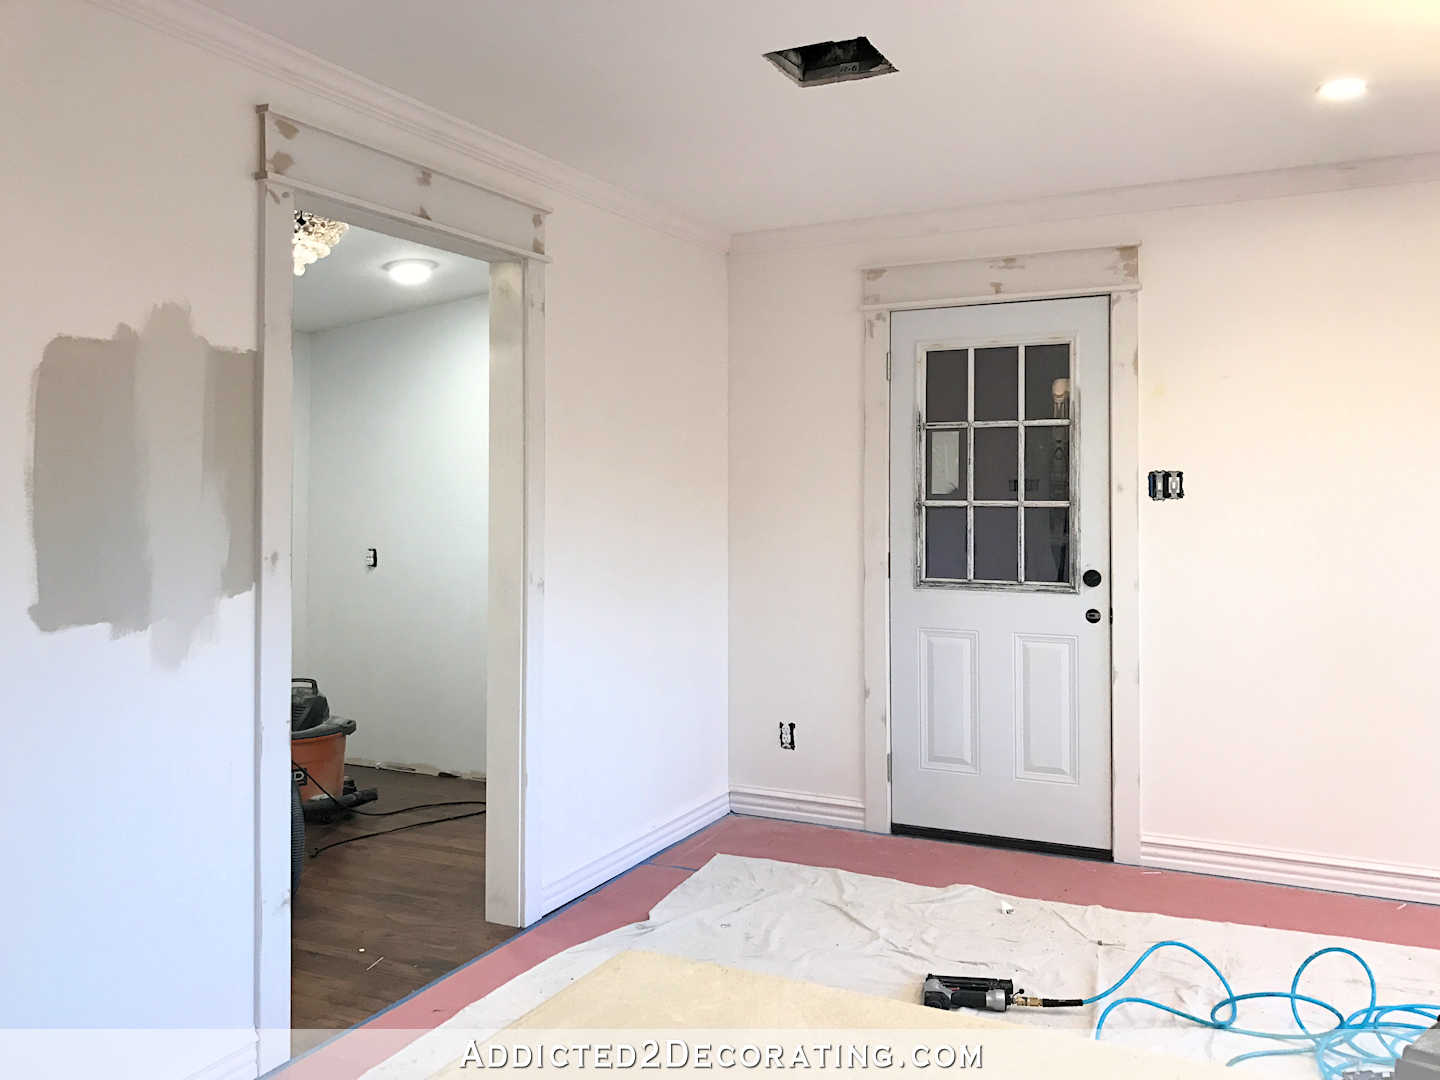
And I finally got the opening between the breakfast room and the kitchen trimmed out on the breakfast room side!! That was exciting, but required a lot of work.

When I originally trimmed out this opening (during the kitchen remodel), I had intended to keep all of the shiplap on the breakfast room walls and just drywall over it. So I ripped my top jamb and side jambs to the appropriate width to cover the tile on the kitchen side, kitchen drywall, 2 x 4 framing, shiplap on the breakfast room side, and drywall on the breakfast room side.
Well, then when I actually got to the breakfast room two years later, I decided to remove all of the shiplap in the breakfast room, which made all of the jambs on that opening 3/4″ too wide. So I had to remove all of them, and redo them. I was able to salvage the side jambs and just trim off the excess 3/4″ with my table saw, but I ruined the top jamb, so it had to be completely replaced.
But it’s finally done. Well…it’s installed at least. It still needs paint.
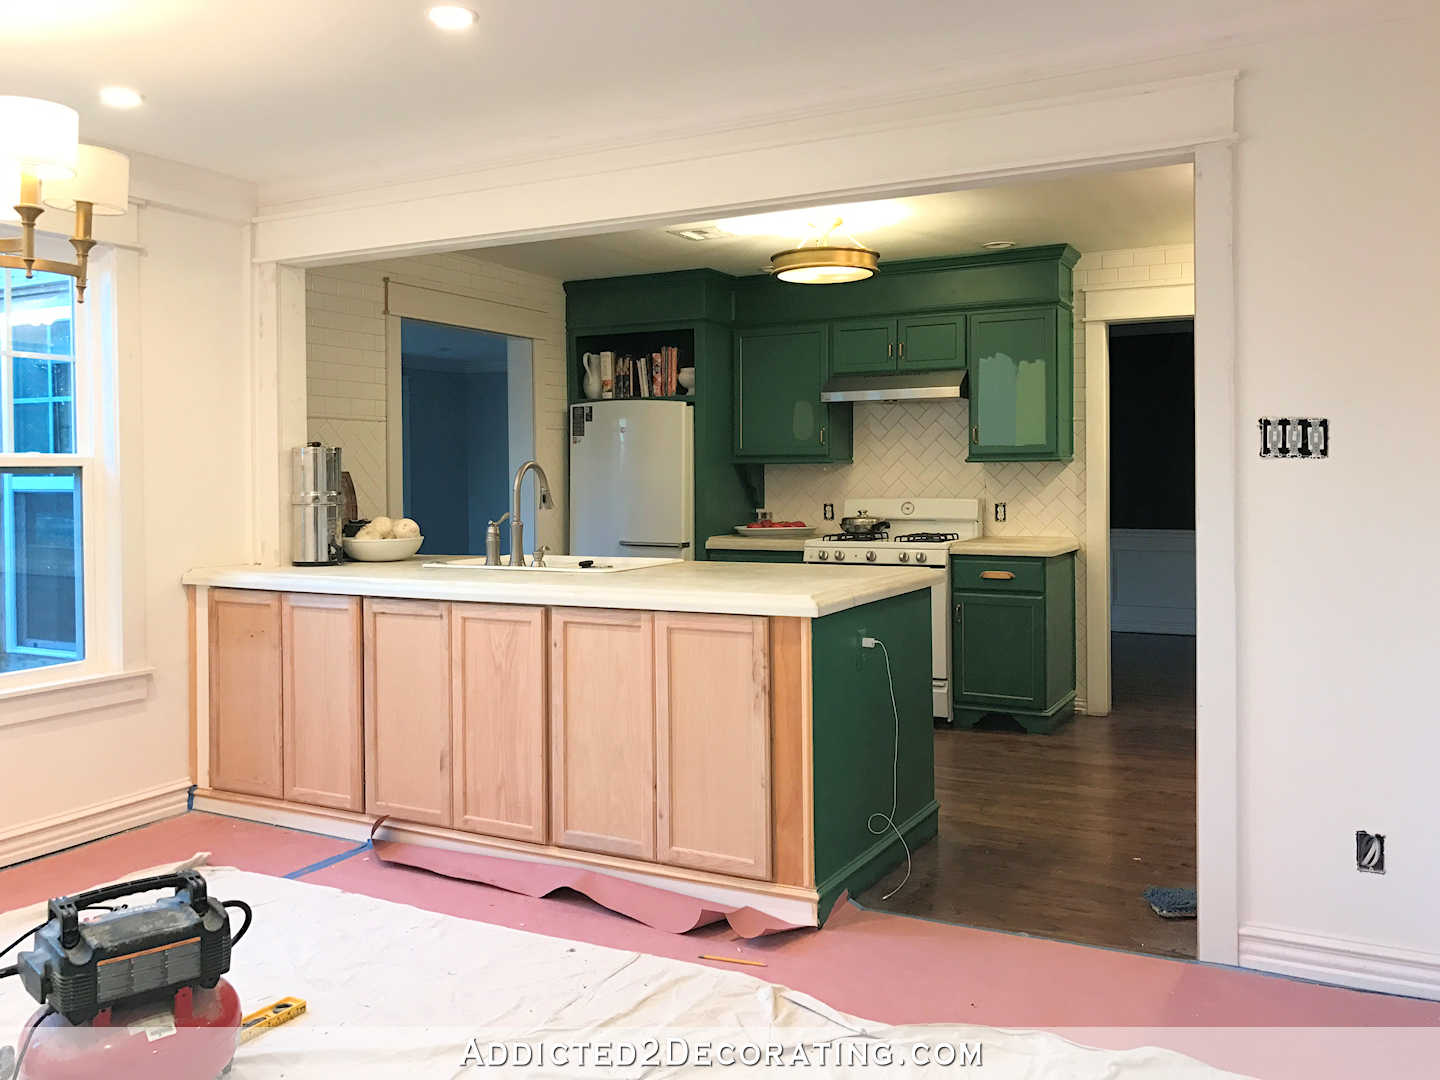
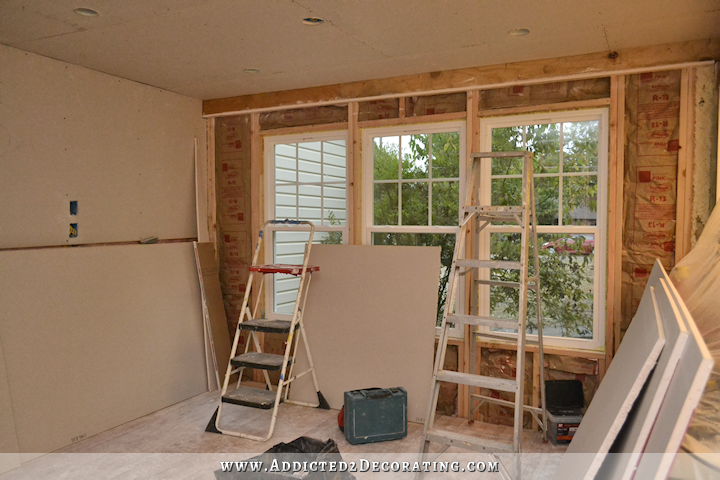
And I also got the back of the peninsula trimmed out. It still needs quite a bit of work, but even as it is now, it’s a huge improvement over this…
Right? 🙂
And now to the fun stuff today. Painting!! I’m so excited to see this trim all painted white, and also to see if I love the Benjamin Moore Classic Gray as much as I think I will.

Addicted 2 Decorating is where I share my DIY and decorating journey as I remodel and decorate the 1948 fixer upper that my husband, Matt, and I bought in 2013. Matt has M.S. and is unable to do physical work, so I do the majority of the work on the house by myself. You can learn more about me here.

The trim and crown molding look great! It’ll be wonderful once you get it painted and I can’t wait to see the wall color. Loving it!
This is all looking so awesome! Great job.
I’ll tell you what my husband always tells me when I stress over the small stuff, “Only you and your mama will ever know the difference!” LOL
It’s all looking so good. Nice to see the house from a ‘new’ angle too.
Cant wait for all the pretty stuff now.
This is really hapeeling Kristi😍
I can’t wait to see it painted!!!!!!!!!!!!
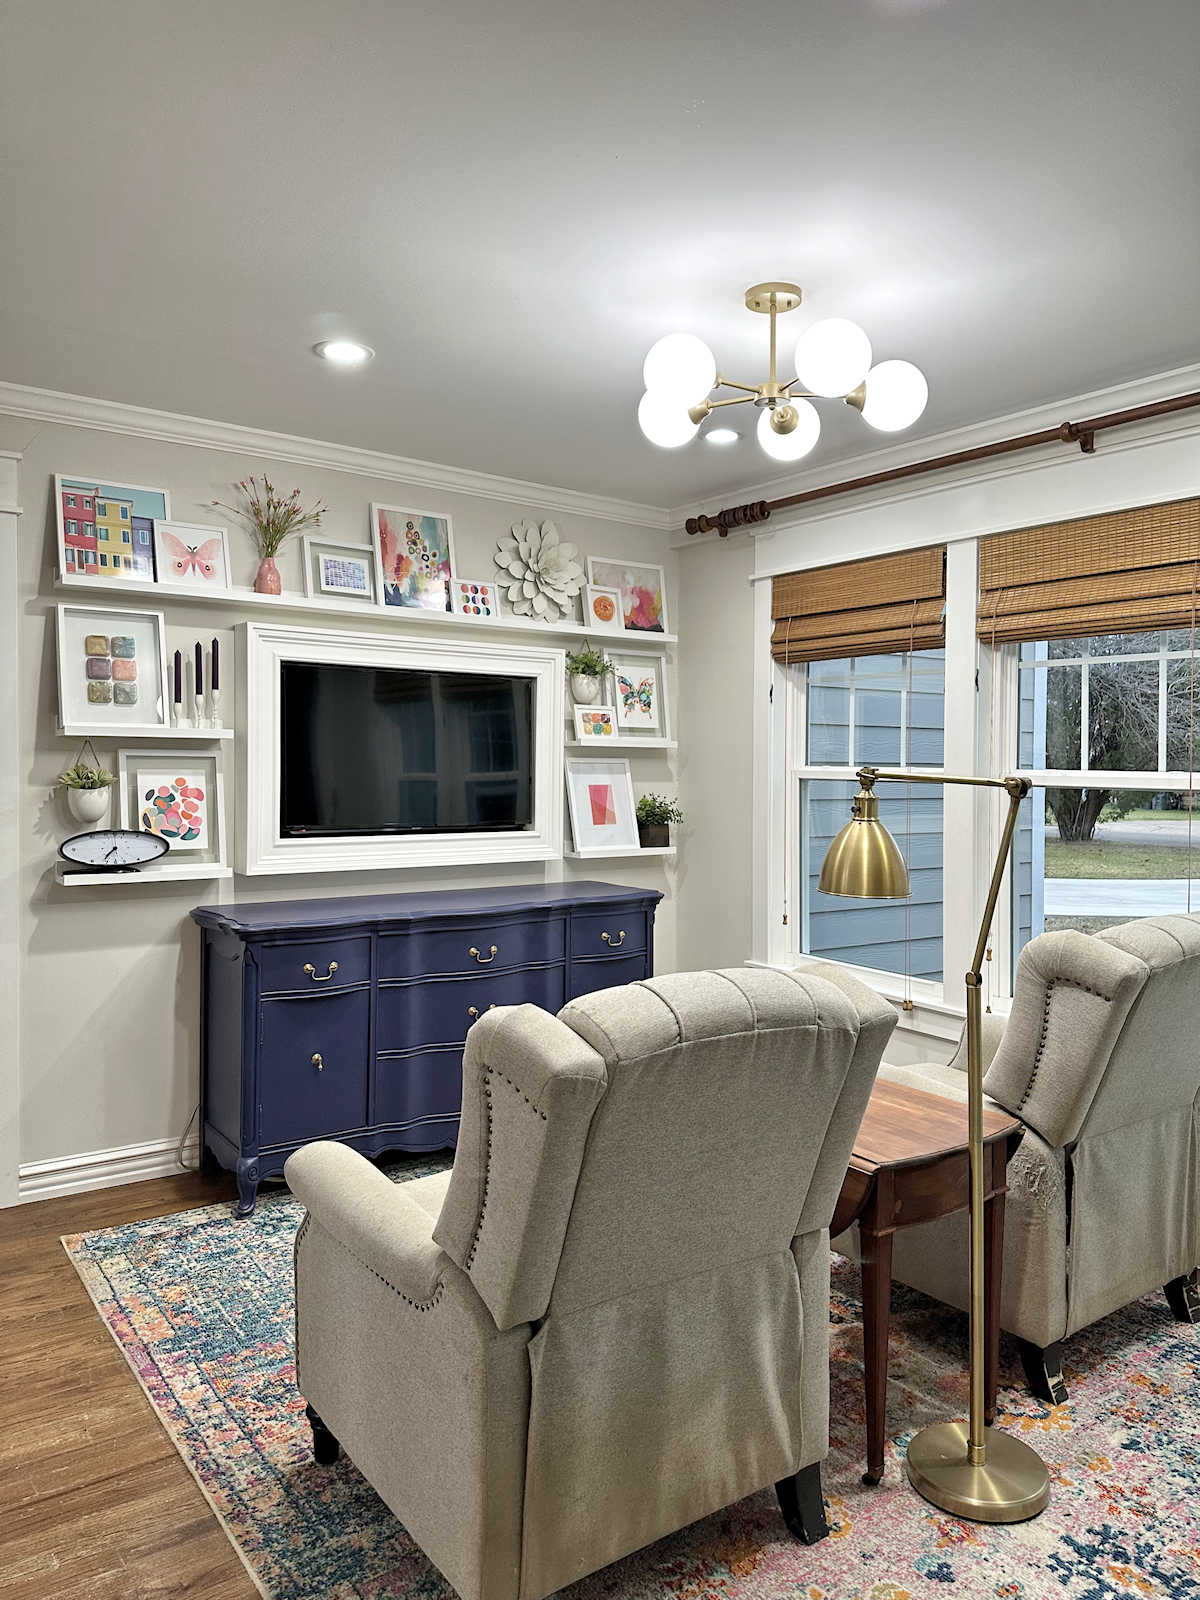
Can you remind us (ok, really me) where you got your light? I love it!
I got it here, but I purchased it when it was on sale. http://www.shadesoflight.com/metrolume-chandelier_polished-nickel-or-golden-brass.html
Love the trim, and those were some great solutions regarding the uneven ceiling. Can’t wait to see the room painted.
Everything is looking great and I am personally glad to hear that you have been taking weekends off to enjoy!
I didn’t think that smaller trim was such a big deal in the breakfast room, until you changed it to fill the space. I agree with you 100%, lol, so much better that way!!!
Now I am anxious to see it finished with paint! Of course, I’m sure I’m not nearly as anxious as you. 🙂
It’s looking fantastic! Love the solution you used for the top of the front window trim.
Catching a glimpse of your cabinets with the paint swatches on them makes me think that a blue/green color is going to look fantastic in there. I can’t wait to see it all when both rooms are done.
Also, nice to see the floors protected. Hopefully it works well for you.
It’s starting to look really great! But, you left out the cat!!!
Wonderful! It all looks wonderful! Yes, painting is going to be so fun to see this space shine! Great job Kristi!
Great solutions! These rooms have come so far!!! Have fun painting. Give it a few days afterwards to let your eyes adjust to the new color. A big change like this is always kind of scary at first.
Good advice about letting your eyes adjust to the color. I was questioning every stroke of paint I applied to my wall with revere pewter. Until it had time to dry, I worried. I think grays make you feel that way. I am in love with my choice now!
Oh, the joys of working on an old house…adapt, improvise, overcome! You are doing a fantastic job and the trim looks great.
I am a sucker for lavishly done, bold trim (so often missing in 20th century houses), so I am especially delighted to see these photos today! Plus, it’s cold and rainy here and your home looks bright and cheery.
You may think you are moving at a slower pace but you are making great progress. Taking the weekends off is recharging your battery for the week. That’s a good thing. Can’t wait to see the trim and wall color!
Trimming is a slow process, but it makes such a great impact to the overall polished look. Love the new larger trim above the front window. You are doing a fantastic job Kristi and can’t wait to see the breakfast room all painted. This room is such a transformation and will look even more so when you get drapery and furniture in there.
The back side of the peninsula looks so different trimmed out! Much more substantial! And, the front window trim looks much better this way. Like one comment above, I didn’t think it looked bad the way you have it, but it looks much better now! Much less busy! Can’t wait for the paint, both the breakfast room AND the cabinets! They are really just one giant room, so I don’t think you’ll really get to appreciate the classic gray until you paint your cabinets the hallowed hush-ish color.
Great job! And, enjoy the weekends off, especially now when it’s not 8000 degrees outside!
Just curious… Are you still planning a banquette? Are you still planning to put it in front of the island doors? I forget what you decided on.
No, my mom talked me out of it. 🙂 She had very valid points, especially about how the table wouldn’t be centered on the windows if I did a banquette (and I’m a sucker for symmetry), and also since this is my only dining area now, it would be harder to seat more people (i.e., expand the table and bring in more seating) if any seating is built in. So I’ll just be sticking with a round table and individual chairs.
It is amazing to think what this room once was and what it is now! The trim looks beautiful. And yeah you on protecting your floors! Lol. I am in the group of “Take the weekends off!”
I love the dimensions of this room, and now that it has been trimmed out, it is even more impressive. I’m considering grays and blue grays for resale purposes of my house, so I’m especially interested in your paint choice. As for taking weekends off, good for you. It’s much easier to chop down a big tree if you take the time to resharpen your saw! Take good care and pat yourself on the back–good job.
Amazing! This all looks so wonderful – you should be really proud! We all are!
Wow. Girl, you are a machine! So much respect. It’s going to all look fab.
Wow, it looks wonderful, what a difference trim makes. The peninsula looks amazing and the new trim over the window made a huge difference. You would never know there was so much uneveness, it completely went away with the new trim. I can’t wait to see it painted with the window coverings.
I think it all looks great!! My guess it that, like me, once it’s all painted white, you’ll want to paint it a color because it will be too much like a blank canvas. BTW, I love the blue lower cabinet paint color that you have/had in the kitchen. I wish you could keep it and just change/darken the upper cabinet paint. I think those colors might flow well into the breakfast room. Good luck with choosing the color – it is the fun part and the challenging part. 🙂
Congratulations! It look beautiful and I cannot tell at all that the ceiling is not level- you’ve really done a wonderful job. I’m so glad you’re taking some time off on the weekends- go to the park or museums or out for lunch. These things are good for the soul!
The trims, especially on the peninsula, make a huge huge difference. It looks fantastic even in the before painting step of the process. You must be so very pleased with all the design choices you’ve made so far. And the disguise of the uneven ceiling is invisible to me – but I get it that you see it. And btw, your kitchen looks wonderful with the opening to the light provided by the 3 windows in the breakfast room. I love it even before you change the color of cabinets.
Looking good, can’t wait to see it all painted out.
i am SOOOO darn excited!!! no more weekends off until this baby is done! ok?? i can hardly wait! 😉
sweetheart seeing the kitchen bench finished on the breakfast room side is a huge landmark step – but i guess there are so many!
can not wait to see it all painted and pretty.
you are amazing. well done – am loving this journey with you.
there was a stage a few years ago where i followed and read LOADS of decor blogs – they have pretty much ALL fallen by the way for me – yours is the only one i still love and read – (for the last about 7 years)
Wow. It’s amazing to me that some of you have stuck with me that long. 🙂 Thank you!
I have to be honest. I know sometimes neutrals can be the hardest colors to choose, but I’m expecting (hoping) that you won’t be thrilled with the Classic Gray and find something different. It’s just so blah and cold looking. You don’t need my 2 cents, but I know how expensive that paint is and just hope you’re really going to be happy with it.
Just wanted to say how lovely everything looks trimmed out – I bet even doing dishes is better looking out into that beautiful space. If it was me I’d want to get that TV installed pretty darn quick!
Aloha!