Breakfast Room Dining Table Makeover
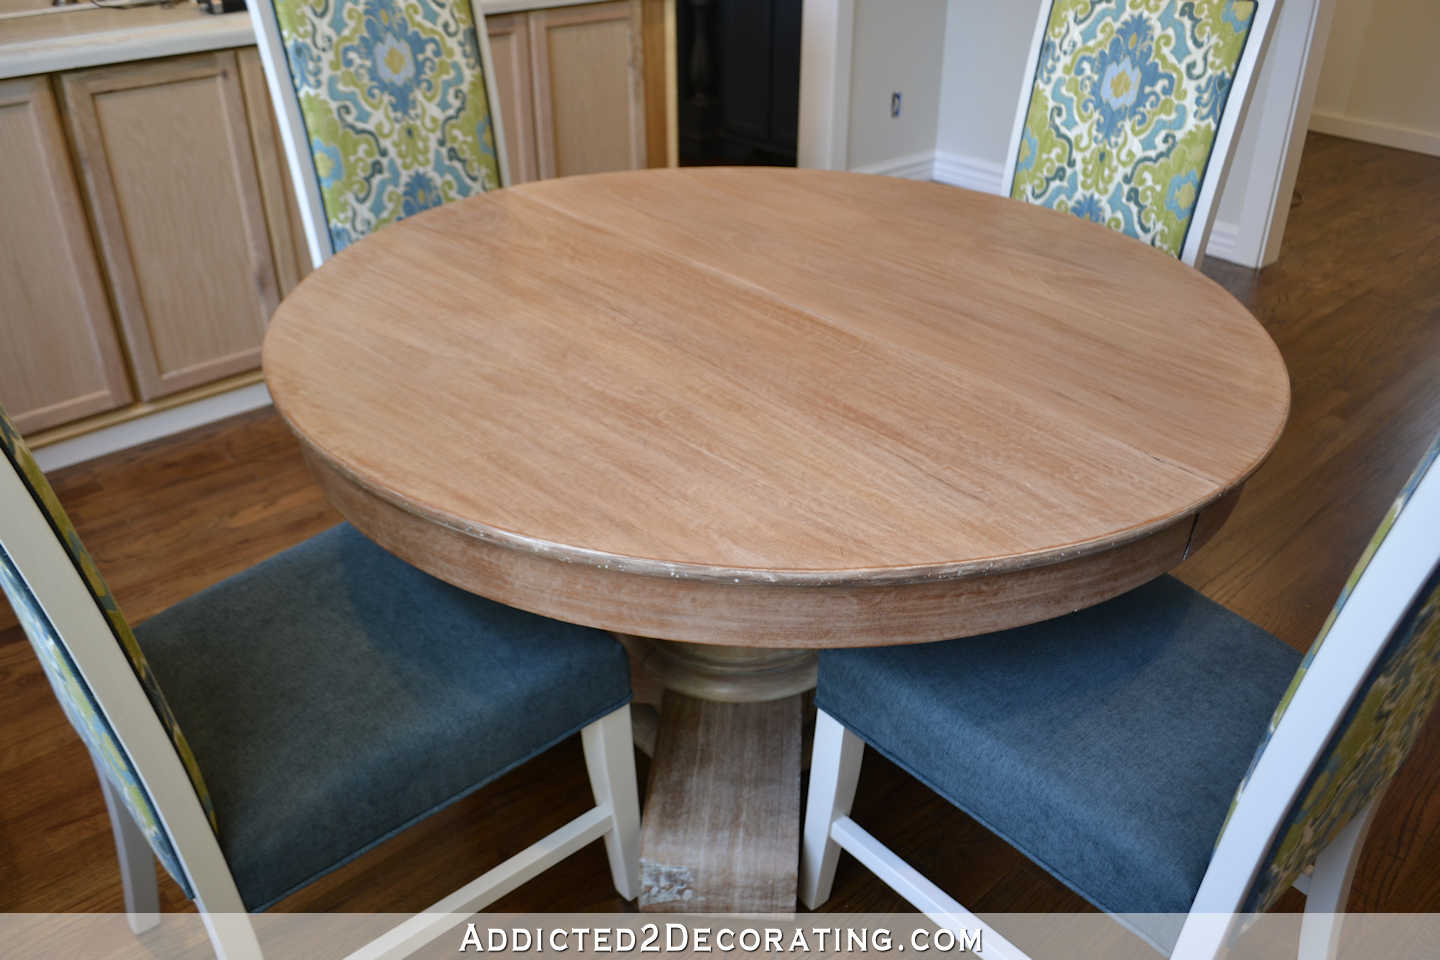
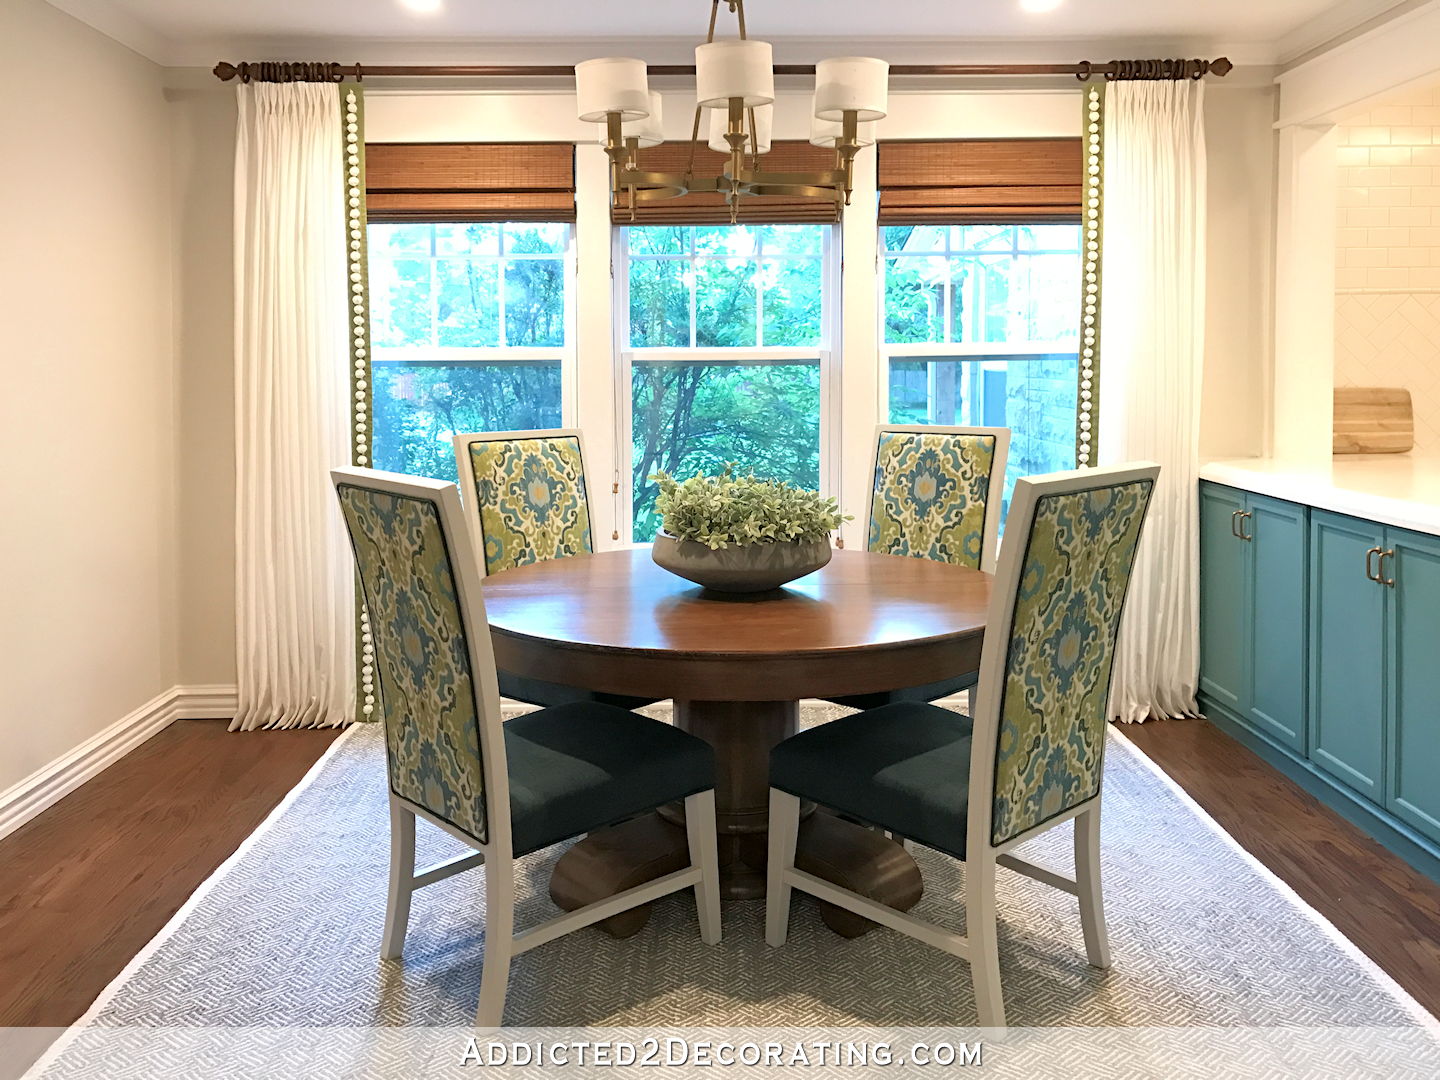
I actually finished all of my goals for February! That means that my dining table is done. Here’s how it turned out…
(*Don’t miss the update at the end of this post!)
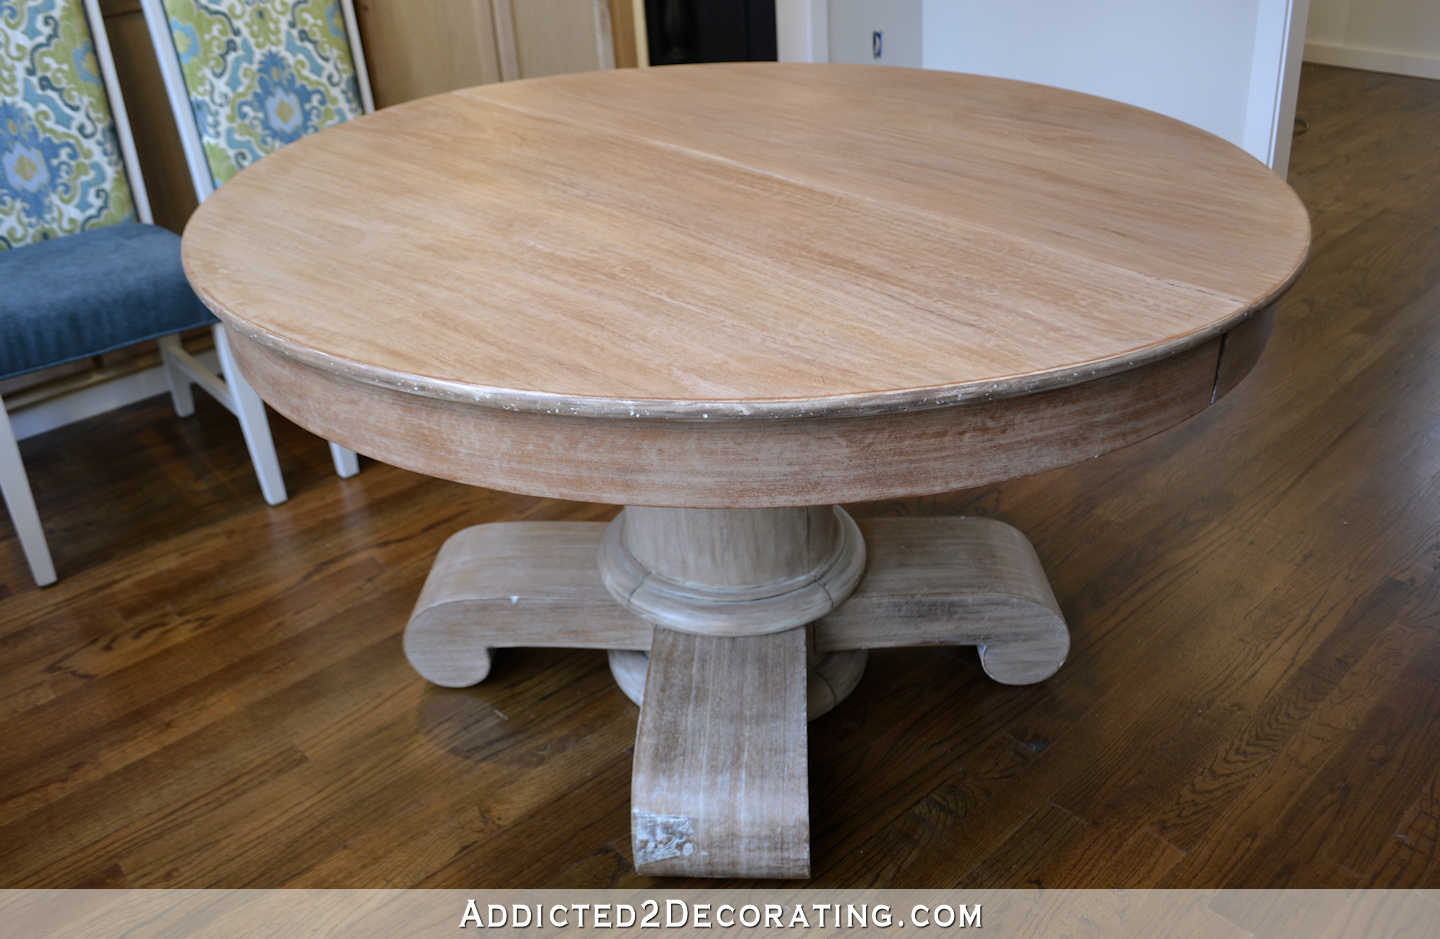
Two of the feet had veneer damage, and I just decided to embrace the imperfections. 🙂 I’m not sure that I achieved the exact finish that I was after, but this will definitely work. I just knew that I didn’t want a dark and heavy finish, like the original finish on this table.
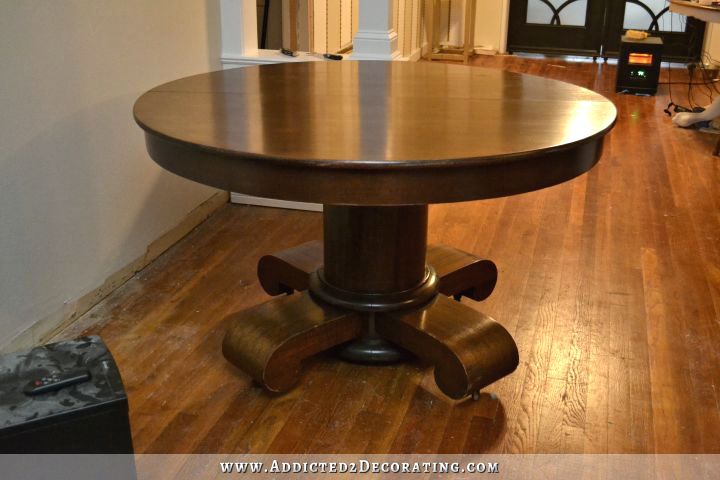
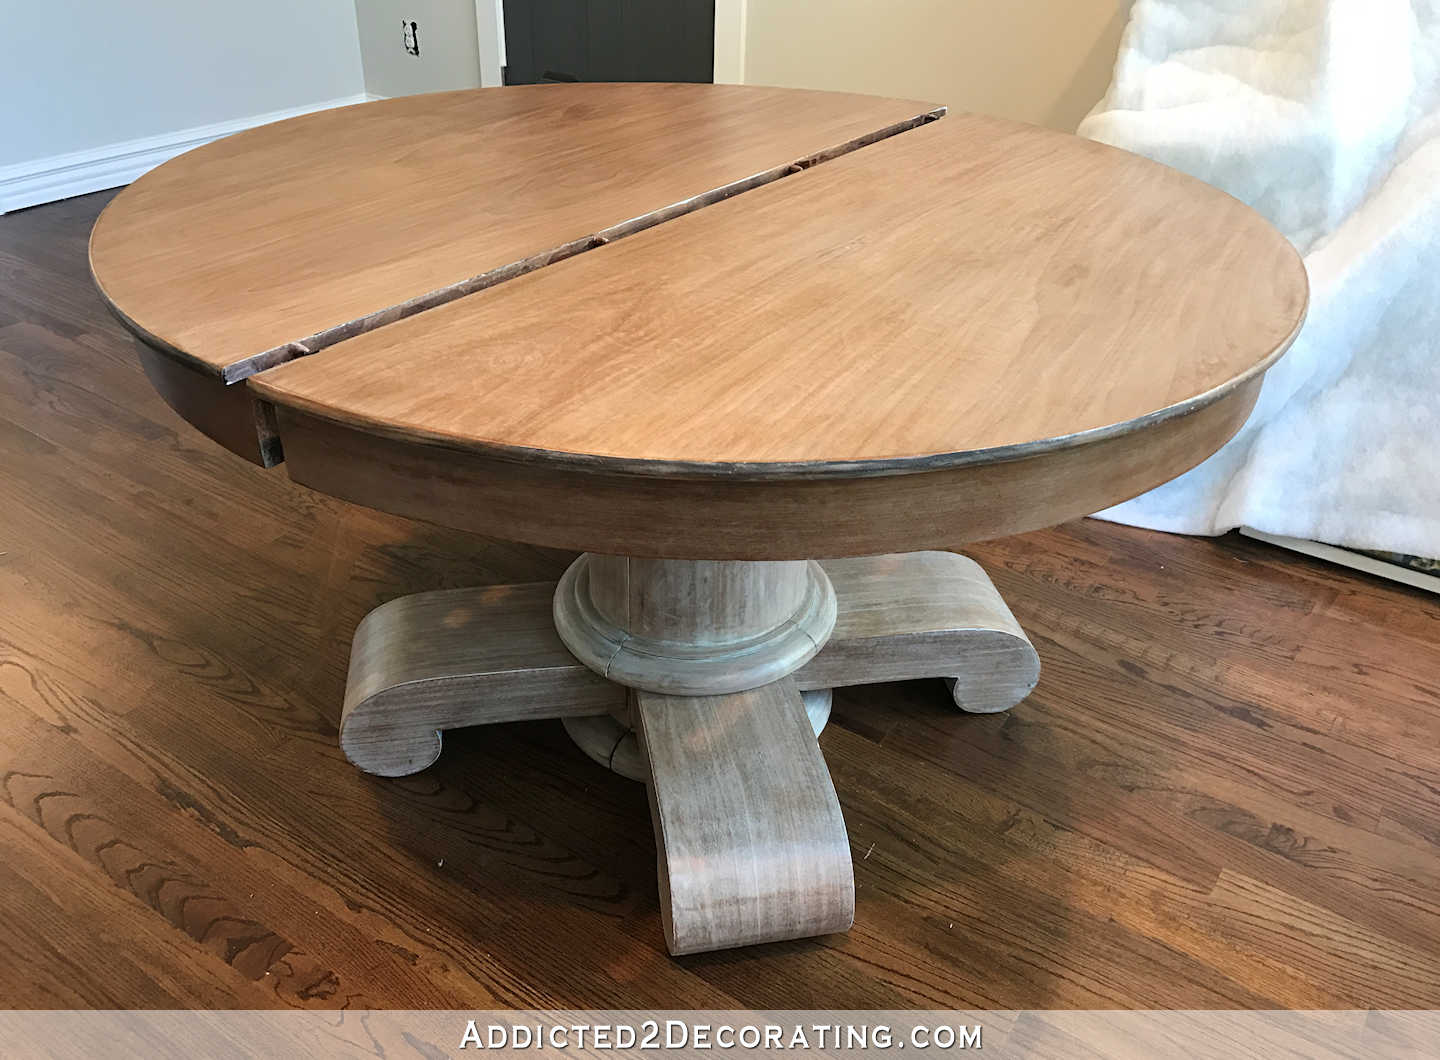
I’m still missing one finishing touch — new casters for the feet. I wanted to use this table instead of the other round table that I have (the cerused oak table) because when this table expands the pedestal actually separates into two parts, rolling towards each end of the table on casters. The old casters don’t roll smoothly anymore, so I need to order new ones. I much prefer this table design over the type of pedestal table where the pedestal stays in the middle as the ends of the table are separated. This just seems like a stronger design.
Anyway, getting this finish was quite a long process. On the table top, I had no idea if I was dealing with solid wood or veneer.
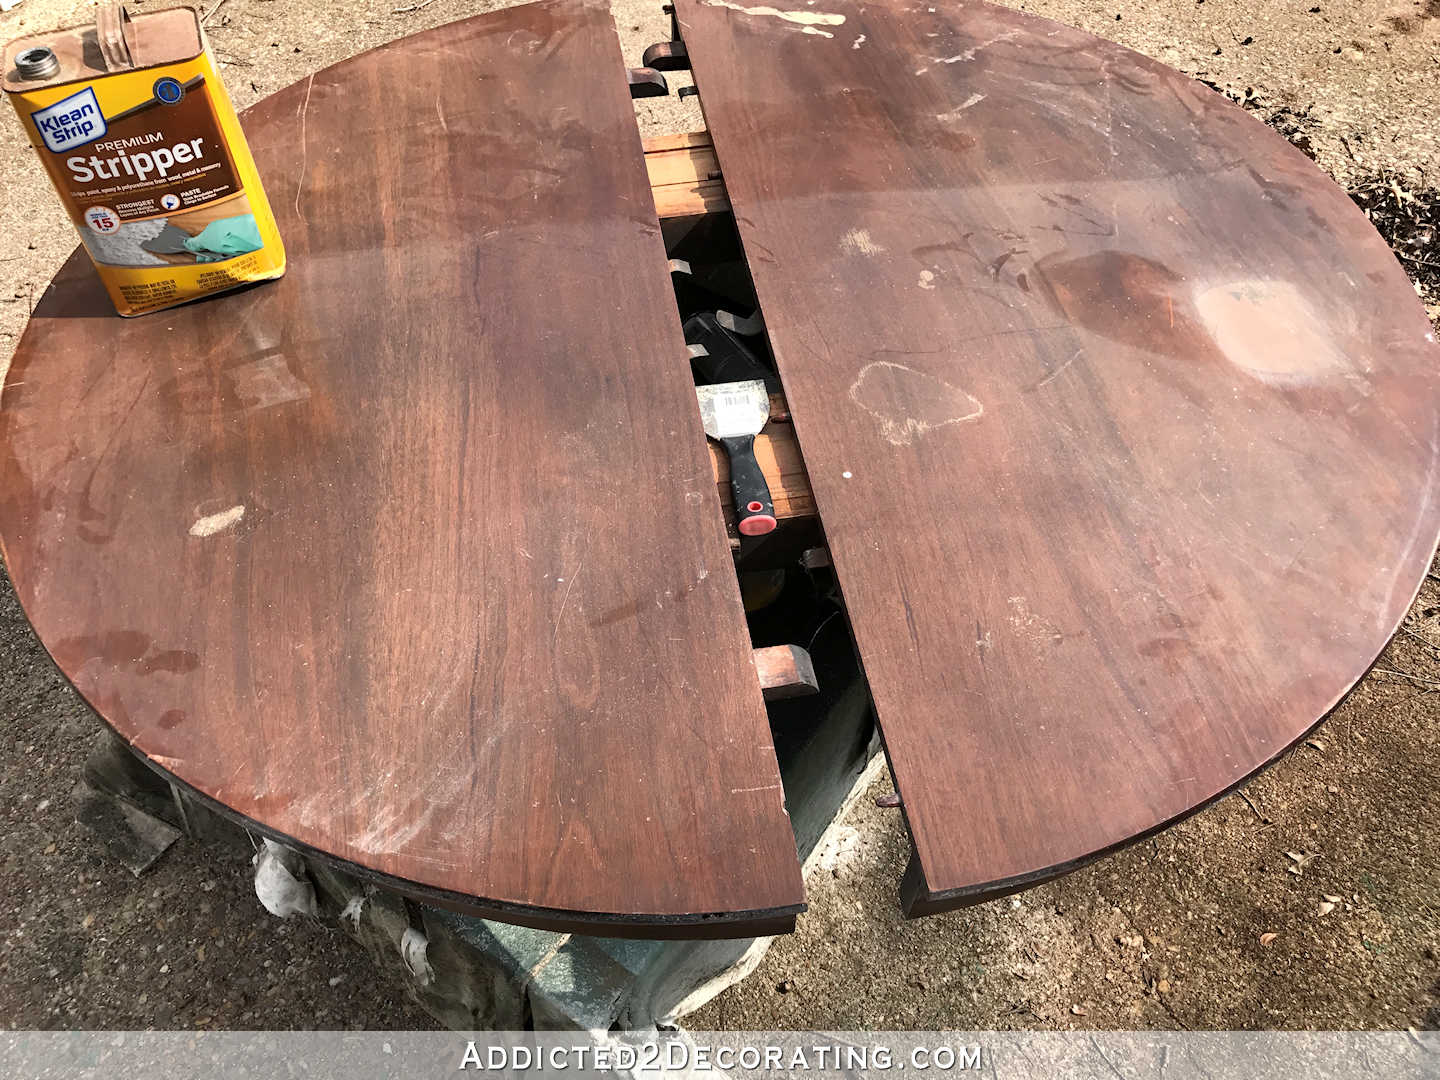
So to be on the safe side, I started by using a chemical stripper to get the first layer or two off of the table. Using a chemical stripper first reduces the amount of sanding necessary to get down to bare wood, which reduces the likelihood of sanding through the veneer.
But for a change, I was actually dealing with a solid wood table top. There’s no veneer on that top at all. I have no idea what kind of wood this table is made of, but the raw wood was very orange. Here’s how it looked after two rounds of stripping and one round of sanding with 150-grit sanding discs on my rotary sander.
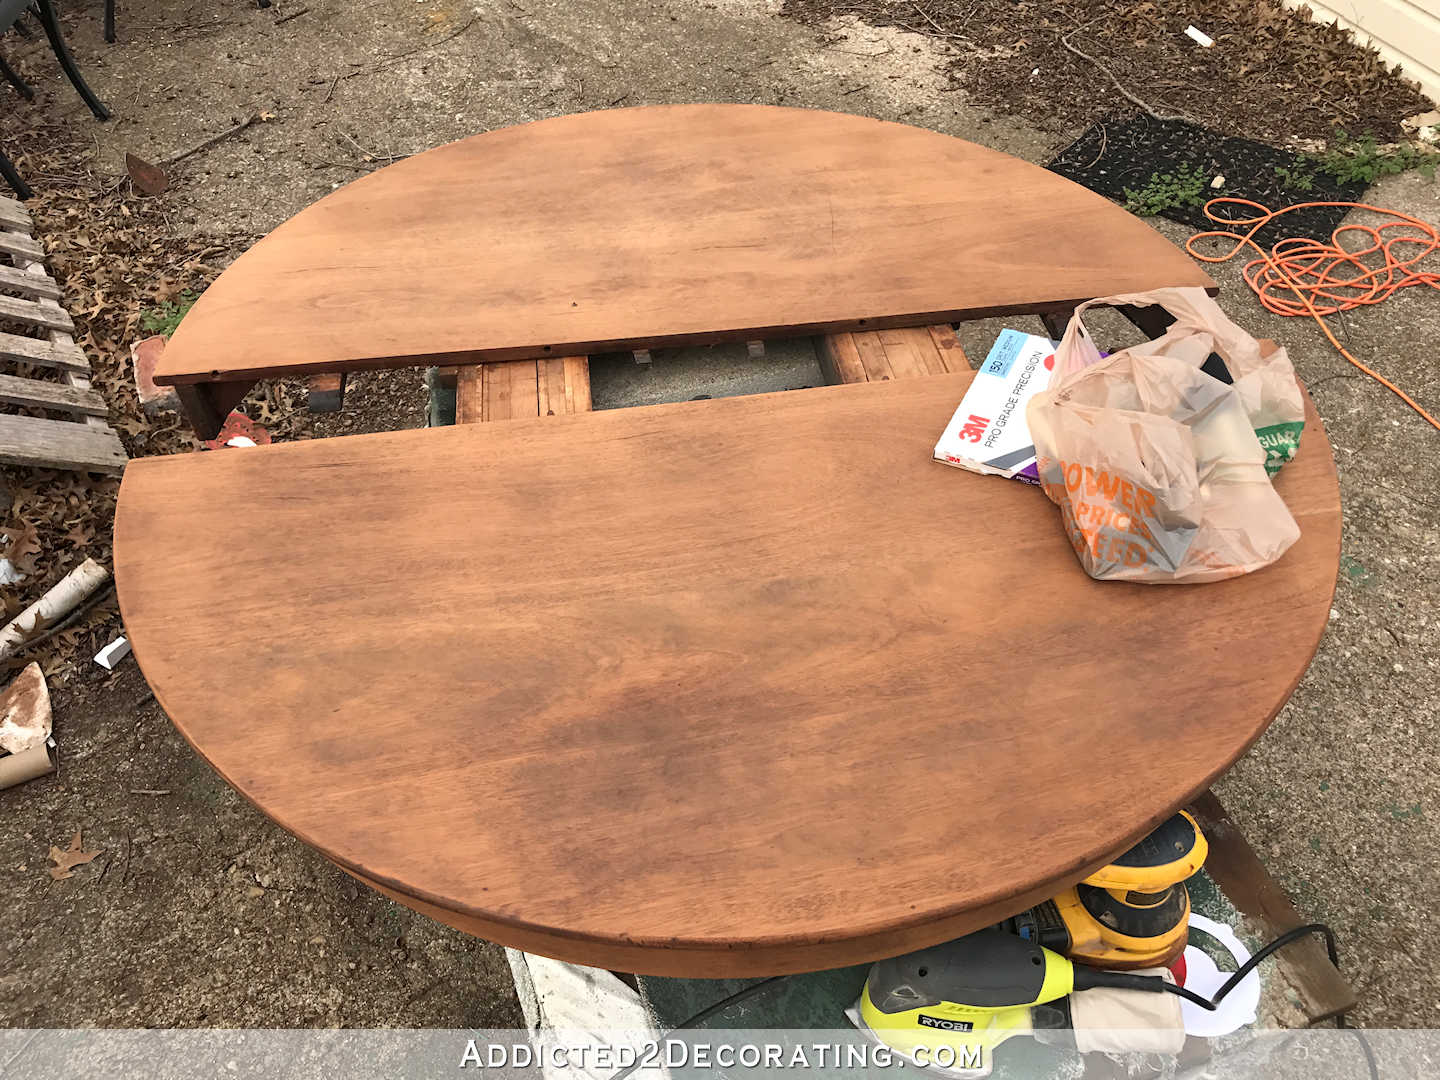
That color actually doesn’t look too bad in the picture, but I’m telling you, it was orange. And I tested out a little bit of oil-based finish on an area, and the color was awful. Just awful.
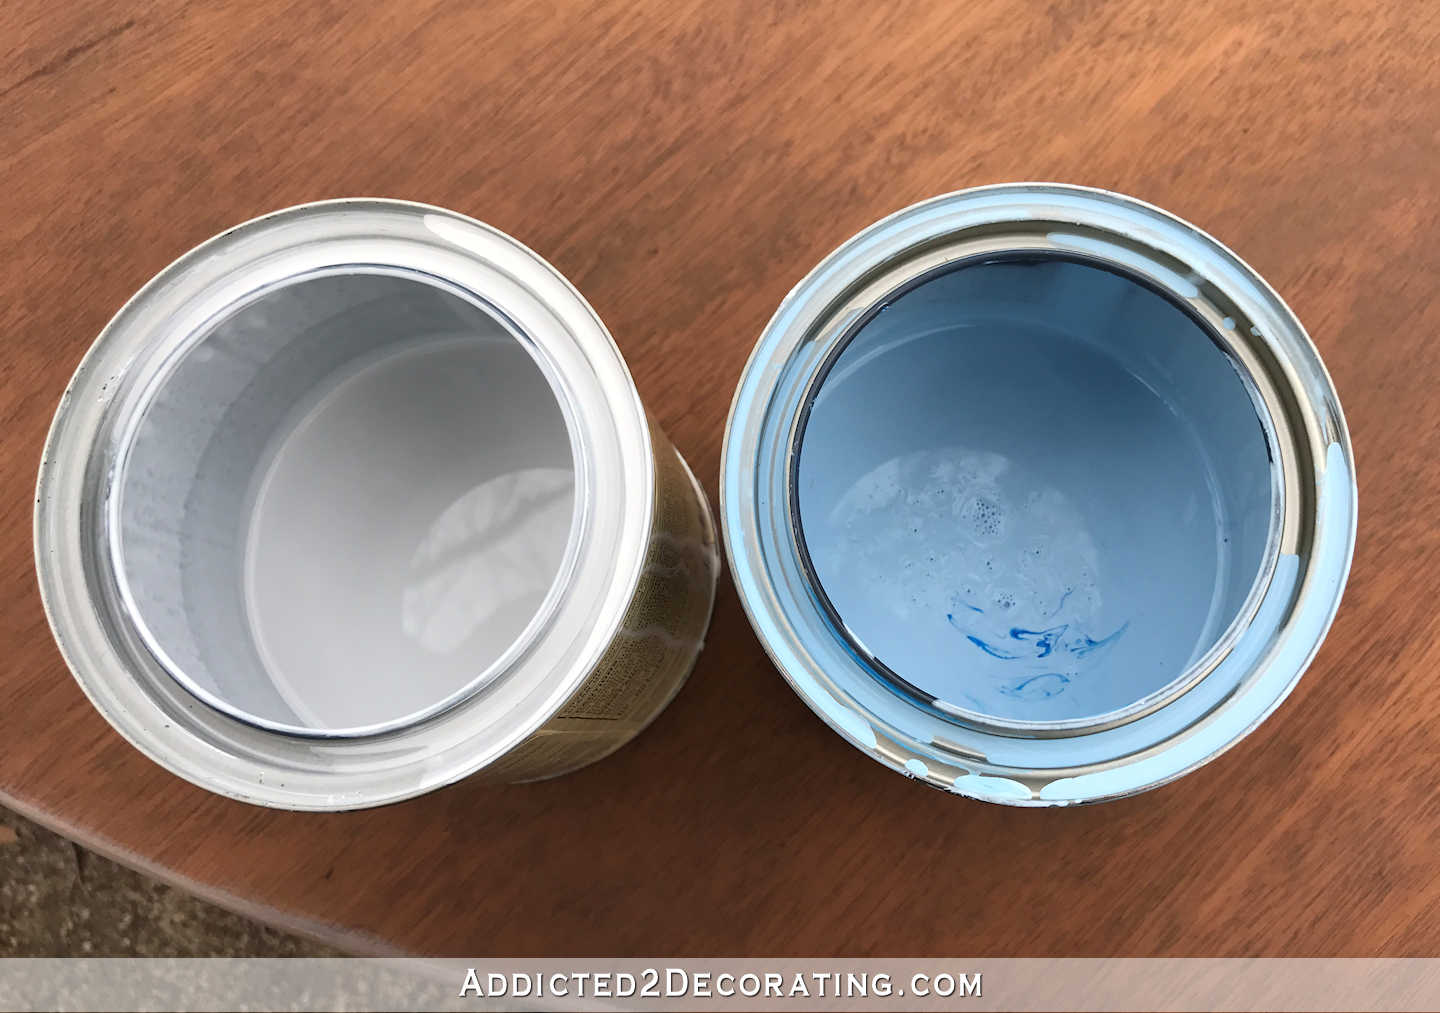
So I knew that any kind of oil-based stain or even clear coat definitely wouldn’t achieve any kind of look I could actually live with. Instead, I decided to try Minwax Water-Based Wood Stain in Pure White. But since my table was so orange, I wanted to be sure to minimize the orange as much as I could. So I purchased an empty quart-size paint can, and asked the guy at the paint counter if he would give me just a tiny bit of blue pigment (i.e., the color opposite orange on the color wheel) in my can. For the record, they’re not supposed to do that, but they know me pretty well at that store. 🙂
I just wanted to add the tiniest bit of blue to the white stain to counteract the orange of the table. And let me tell you, that pigment is so saturated in color that it really does only take a drop or two. You can see here the original white stain on the left compared to the white stain with just a hint of blue pigment added on the right.
I had never used water-based stain before (at least that I can remember), so I had no idea what to expect. But I just went for it. My first attempt was a huge fail. But you can see that the blue color doesn’t really show up. It’s just there to kind of neutralize the orange.
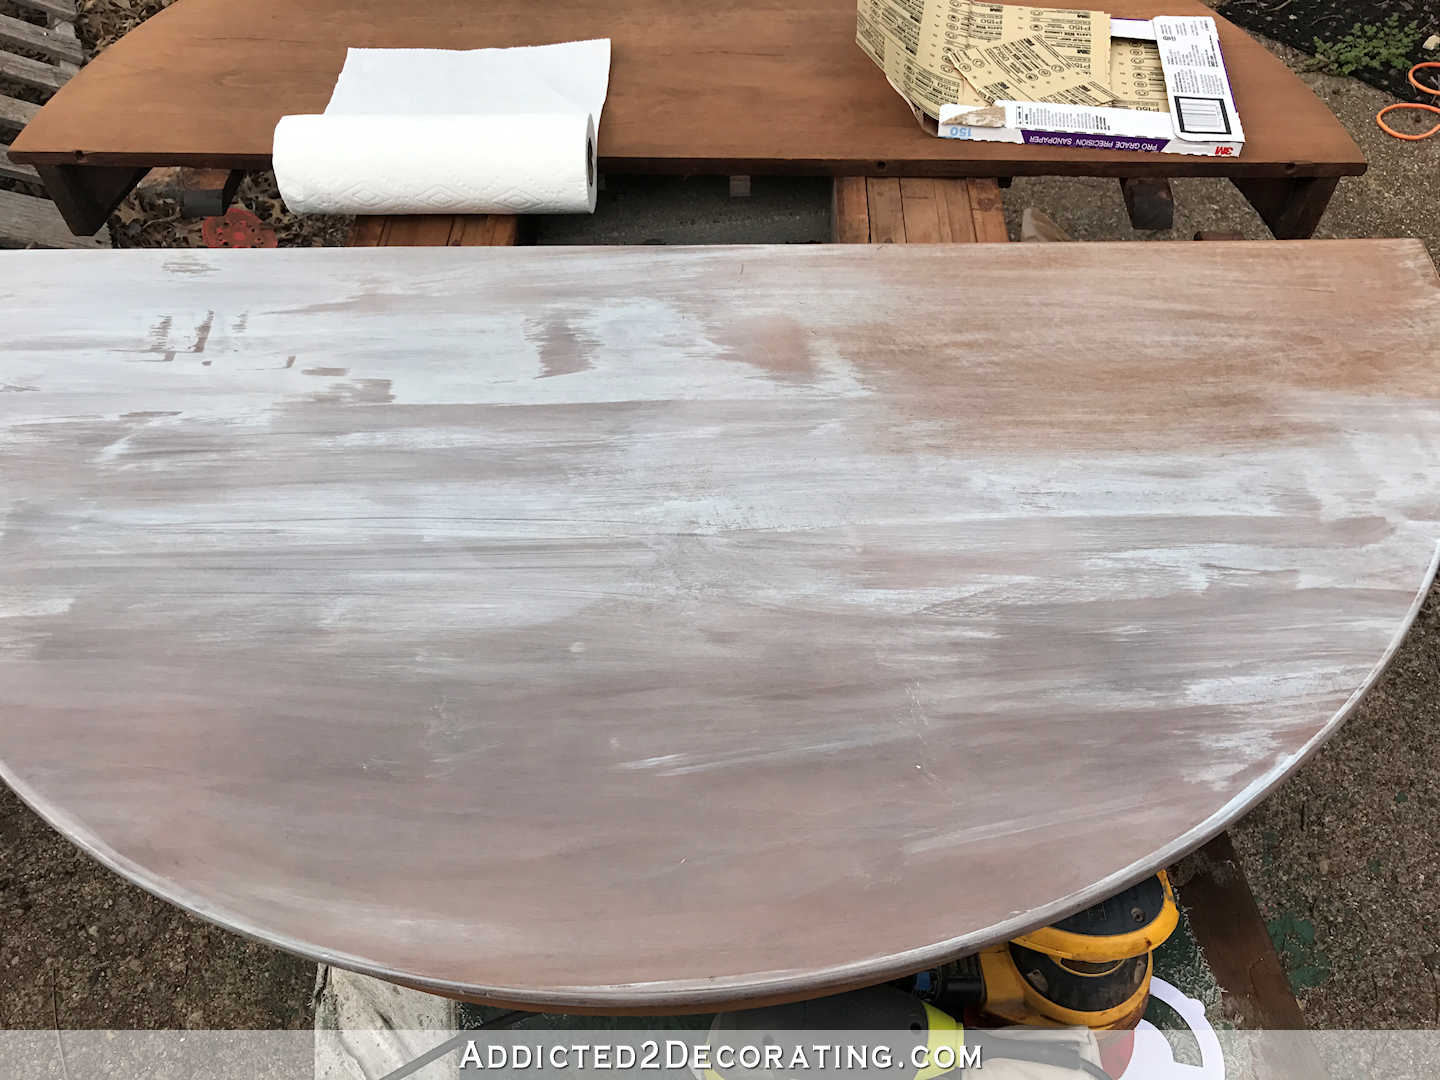
Water-based stain dries really fast, and by the time I went to wipe off the excess, it was already dry.
So then I decided to read the directions. 😀 If at first you don’t succeed, try reading the directions.
The directions say to leave it for no longer than three minutes. THREE minutes!! Umm…that’s pretty hard to do when you’re trying to get an even finish on and entire 52-inch-diameter table top! So on my second attempt (after sanding the first attempt off) I just applied the stain in strips about four inches high going all the way across the width of the table. Brush on, wipe off immediately. It was still streaky where the strips overlapped, so I used 150-grit sandpaper to even out the finish. You can see the white stained wood on the left compared to the raw wood on the right. I thought it looked pretty good!
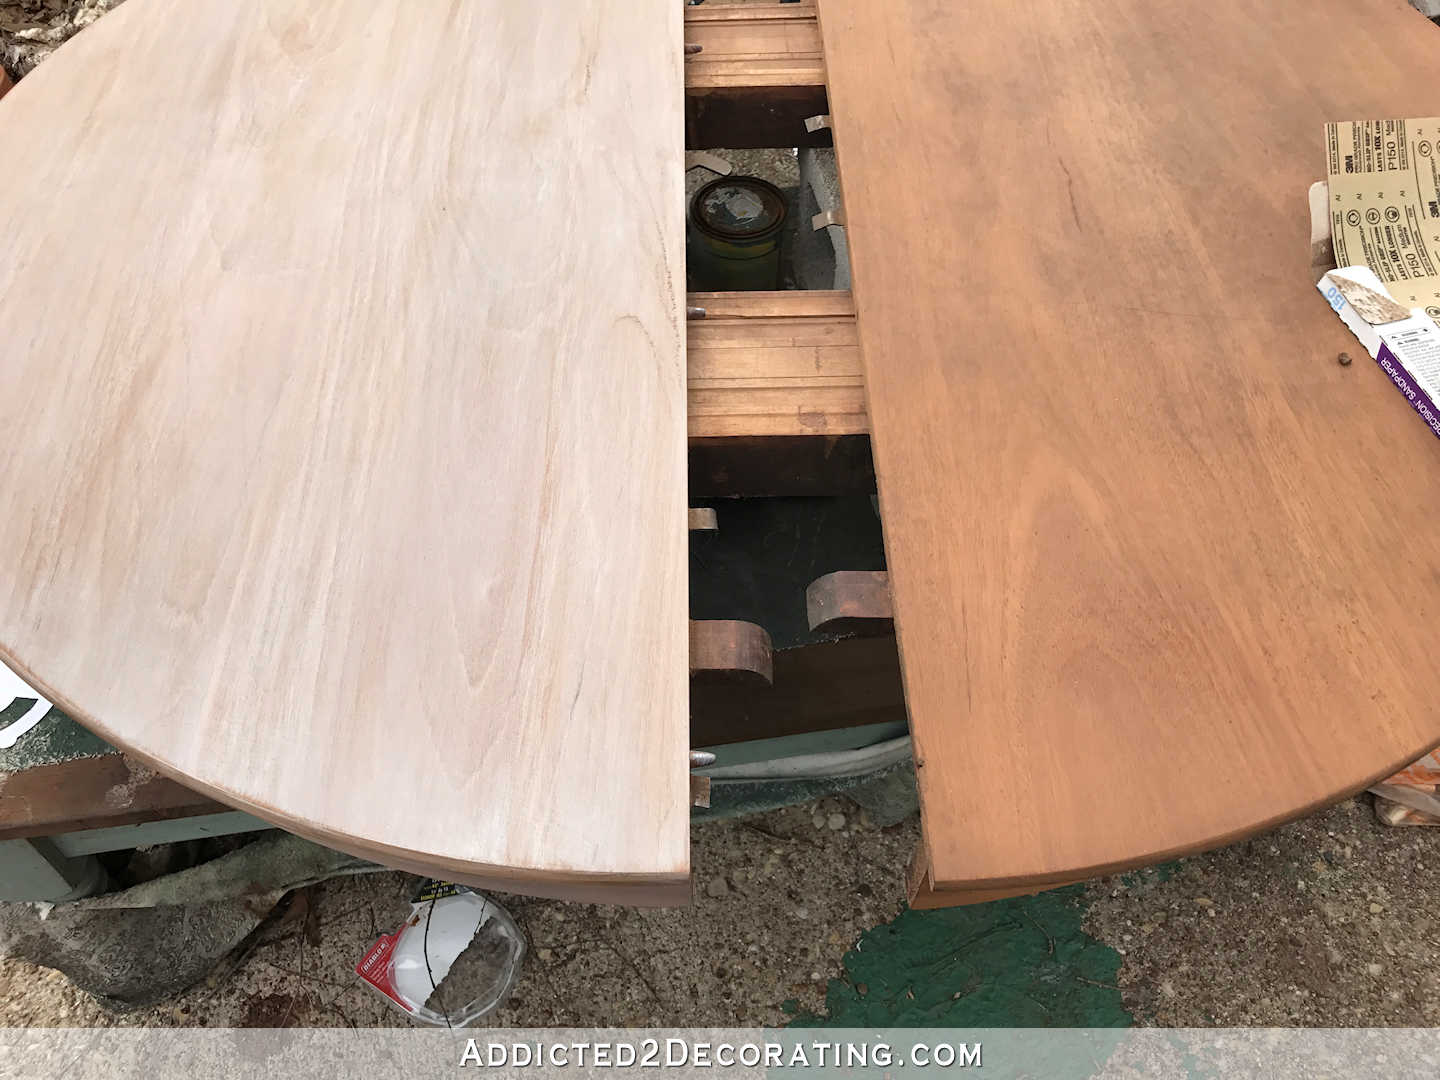
And again, you can see that it doesn’t look blue at all. I ended up doing quite a bit more sanding because I didn’t necessarily want the top to look whitewashed. I just wanted the color lightened up a bit.
After I got all of the pieces stained and sanded, I brought them inside, assembled the table, and then gave the table a coat of General Finishes High Performance water-based clear coat in a satin finish. It scared me at first because it made the table very streaky, which you can see on the left.

(Also, I have no idea why that side of the table has so many sanding swirls on it. No matter what I did, I couldn’t get those to go away. I’ve never had that happen before.)
But let me tell you, after my very frustrating experiences with trying to use Minwax Polycrylic water-based polyurethane on a couple of projects, I was amazed at this General Finishes topcoat. It brushed on beautifully with no streaks. This will definitely be my go-to water-based topcoat from now on. (I used it over the painted finish on my dining chairs as well.)
The streakiness did concern me, but by this morning, the dried finish had evened out.
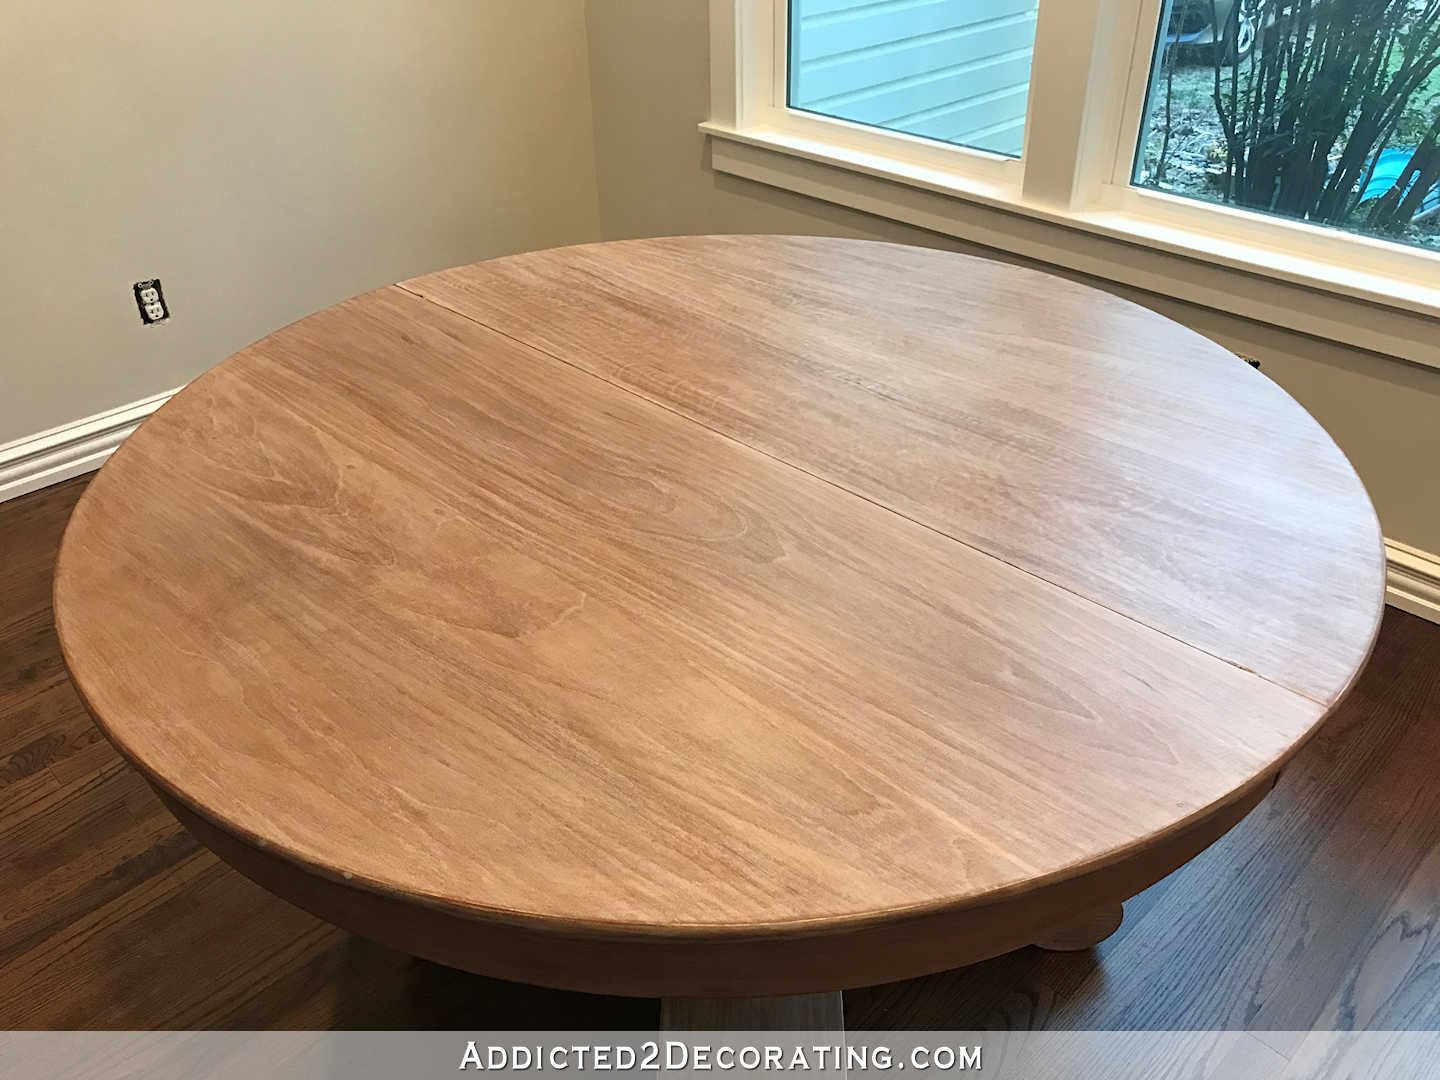
I might need to give it a couple more coats of the clear coat on the top. But other than that, I’m calling it done.

We now have a place to eat our meals, and as soon as those new casters arrive, the table will be high enough for Matt to use.
Now on to my list of March goals. 🙂
UPDATE: The more I looked at the finish today, the more it seemed a bit too light, bright, and as the day went on and the room got brighter, it looked whitewashed, which really isn’t my taste. I wanted to warm up the finish just a bit, so I rubbed some Minwax Wood Stain in Dark Walnut over the top (yep, just right over the layer of General Finishes water-based poly). I like it so much more! Here’s a comparison of the top with the stain and the base and feet without the stain.
And here’s the entire table toned down with the stain…
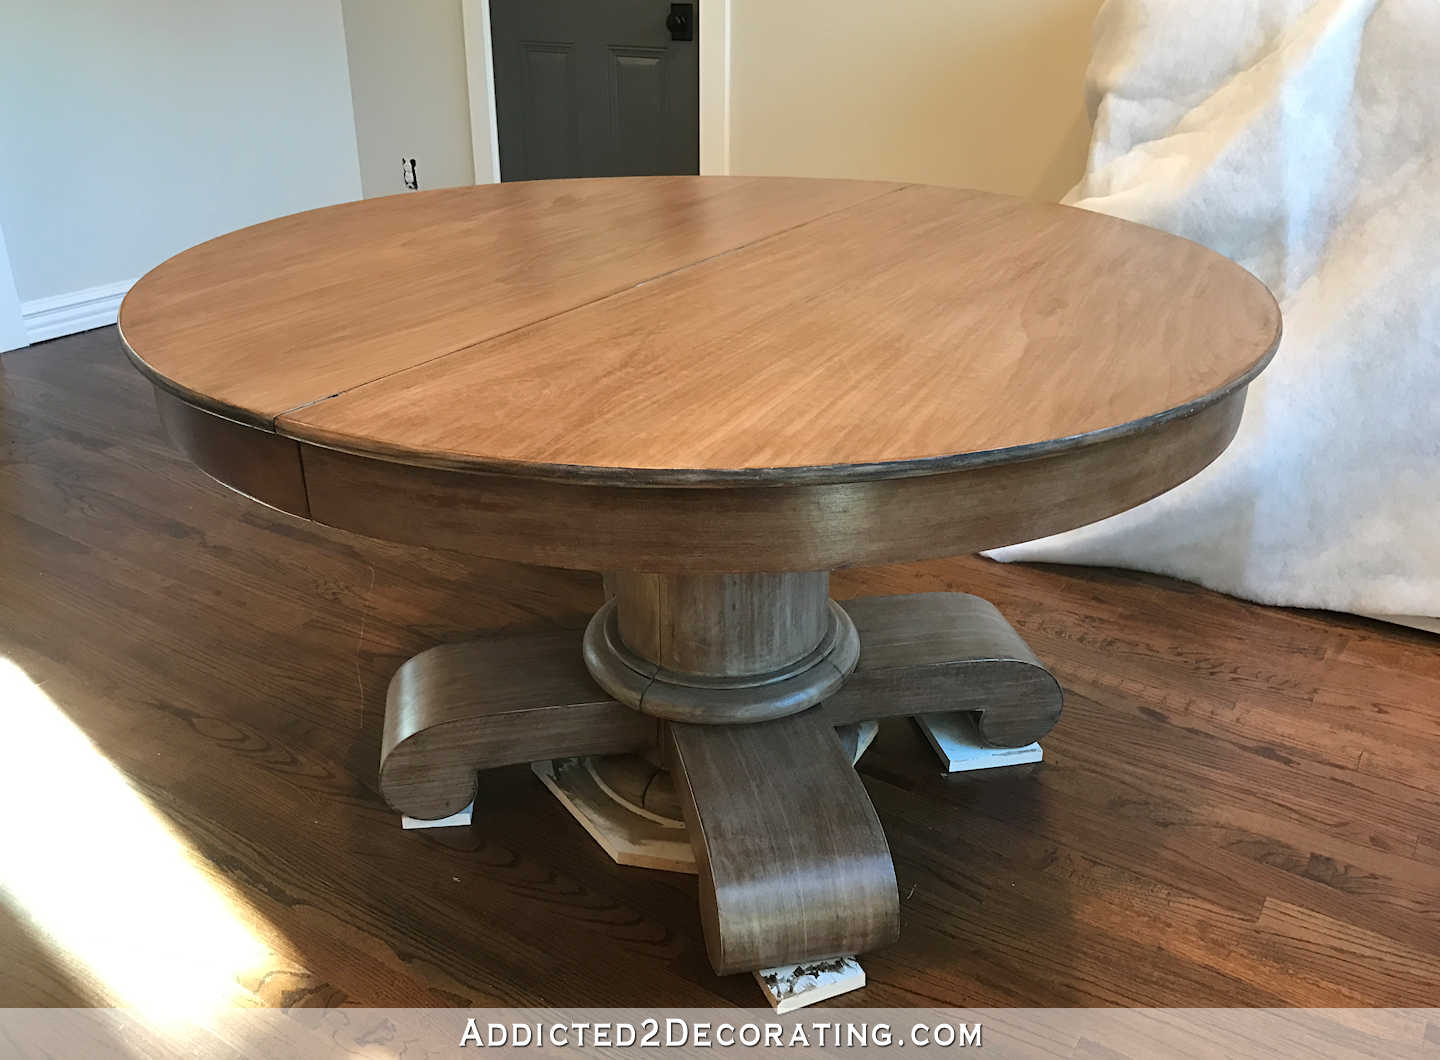
I like it so much more. The original finish was just a bit cold looking to me. This added the warmth that I was hoping for. I’ll let it dry for a day or two, and then add a couple of coats of polyurethane to seal it. So I guess I didn’t technically finish my list for February, but I’m still going to say I did. 🙂

Addicted 2 Decorating is where I share my DIY and decorating journey as I remodel and decorate the 1948 fixer upper that my husband, Matt, and I bought in 2013. Matt has M.S. and is unable to do physical work, so I do the majority of the work on the house by myself. You can learn more about me here.

That looks great! I cannot believe the transformation of that room. Your post last week with the before and afters amazes me.
It looks so pretty and the chairs are perfect with it! Enjoy!
That looks sooo good! Breakfast at Kristi’s, coming up! The table very much reminds me of the one we had growing up – it was mahogany, and well-used by 6 kids!
Yes, there is a lot of red/orange in mahogany, that would be my bet. Nice score, mahogany table!! (Is it REALLY heavy like a mahogany table would be??? Great job and I disagree with the person that thinks it looks silly on tiny casters. I think you don’t really notice them.
The top is very heavy. The base, not so much, but it’s a different kind of wood (looks yellow) with veneer over it.
While I like the color of the original finish, I also like the new finish. It has a much lighter/airier feel to be sure!
Very nice! I like! I did not know that you could get such a natural looking finish with white stain.
Very pretty, love the chairs.
Beautiful results!!
I’m thinking the wood is cherry. But I’m not an expert.
^^I thought the same thing, but I’m also no expert. It would explain the orange color, and cherry has that low contrast grain.
It looks great! Good job!!
Kristi, If you still want to slim down the base why don’t you use something like a sawzall to cut them.
I LOVE the finish you got. Looks great with your chairs and you accomplished all your goals for the month which you need to celebrate!!!!!
Love it! And so glad you use General Finishes now. Ever since I first used it I have not used anything else!
Very pretty!
I love the table and the chairs! I’m in the midst of refinishing (currently sanding) an old Oak table, but was waiting to see how you finished yours, because your work is an inspiration to me! I love the look of this rather than how I had planned to refinish mine (painted bottom, stained top). You are amazing! What a beautiful room for you and Matt to enjoy for many years to come!
You are accomplishing those goals! Another great job. Next!!!!
Awesome look!
I can’t wait until you style and decorate this room! 🙂
You rocked it! Bravo!
On the topic of casters…do you have to replace them? Could you just add some furniture felt or something else that would allow it to glide apart smoothly? The caster have always bothered me on this table. You have this substantial table, and large chunky feet (even after you slim them they’ll still be chunky)…and then, these itty bitty casters. The feet appear to float off the floor. I understand that the central pedestal is actually the weight bearing portion and the feet are more for stabilization…so the design is perfectly functional…but the mind *sees* this very heavy table being supported by these four tiny parts that actually touch the floor.
I’m not sure if it was in the post or on her Facebook page, but she said that the casters also help raise the table up enough so Matt can fit at it comfortably 🙂
I actually agree with you. I guess I could actually add a spacer underneath the table top to raise it up the extra two inches, and then leave the casters off. I do prefer the feet and pedestal actually making contact with the floor rather than floating on little casters.
That was my thoughts, and felt pads to save the floor! I think it would be more stable! Love the color it turned out! You go girl!
I had all the faith in the world in you and your goal with your table. It turned out GREAT!!!
AMAZING!
The set looks beautiful. You could paint the table top edge and base a darker blue and that would hide the imperfections and still tie to the chairs.
Kristi, was the fixer upper episode that aired last night the one that is in your mom’s neighborhood?
I didn’t see it, but they’re still working on the house across the street from my mom’s house. I’ll have to check it out, though, and see if it’s close. My mom lives in a suburb of Waco called Woodway. They’ve done a few houses in Woodway that I’ve seen.
It was a ranch in Woodway and JOJO had on a long blue skirt. I remember you sharing a picture of them and I believe that was what JOJO was wearing. Non the less, it made me think of you and your Mom !
I didn’t see it, but it was definitely not the one in my neighborhood. The one across from me is completely gutted right now. They have a very long way to go before it will be finished!
I’m just watching the episode now, and the first house they show is the one across the street from my mom’s house. I caught a glimpse of my mom’s house in the background 😀 But as you know they didn’t choose that home for the show. It is being fixed up for a future episode, though.
Congratulations on meeting your February goals! The dining room looks lovely!
Love, love the table! I also really like the chairs. I just do not like the two together. Maybe if the wood on the chairs had the same look as the table. Guess I’m old school, still trying to make everything match. Great job Kristi, cheering you on!
I love both as well but there seems to be a disconnect with the table and the chairs design wise. Your table has sort of a Belgian, Restoration Hardware vibe with the lighter color while the chairs are kind of boho(?).
Anyway, you need to follow your vision and keep going!
Congratulations on a successful month. The finished table looks nice and I like it with the chairs.
If you ever want to really lighten and change the tone of a wood, you have to use a two part wood bleach. Caution though, this stuff is really caustic so you have to work outside with long sleeves, long gloves, and eye protection.
Its beautiful! Were you able to get the sanding swirls out? That actually happens to me a lot and would love to know why!
Nope, they’re still there. I’ve never had that happen before. I’ll probably just leave it. If it really bothers me, I’ll circle back around to it next year…or as soon as I get my “to do” list for this year done. 🙂 But no obsessing about projects this year. I’m all about getting things done.
Great job on finishing your monthly goals! That seems more like a year’s worth of goals in our home (ha-ha). Your table and chairs are beautiful! Love all of your plans, thanks for sharing!!
Lovely! So happy for you and Matt! He may give more input if he is in the breakfast room watching…..hmmmmmmm, that could be good or bad. LOL I love that you had a chance to work on pretty things. Great job! On to March!
Awesome Job! Great job with reaching your goals the month of February
Now that is a nice looking dining set! You did a great job!!
Love what you did with this. I love discovering that a piece you have is nicer than you thought, It is like Christmas all over again.
Nice job!
Love it, great job and congrats on reaching your goal!
So pretty. Great job.
Love what you’ve done and I like you warming the table color up. Would like to see the updated color with the chairs. Does this table have a leaf as I remember you saying you wanting a table that expands. If it does are you going to do the leaf also ?
It doesn’t have a leaf. I’ll probably just cut a piece (or pieces) of plywood to fit when I need to expand the table, and then use a table cloth over it.
Love the warmer tone. You really accomplished so much in that room. So pretty
What a great way to kick off your year. Isn’t it amazing what a “to do list” and a deadline does for kicking out focused work! Love the room transformation, the table and chairs, and imaging you and Matt enjoying it for the 11 months in the year still to come!
P.S. As someone who doesn’t have a Facebook or Google account, I love that your blog has a simple system to post that doesn’t require entry through one of those portals! Your blog is my only decorating and DIY one I read any more, thanks to your creativity and writing skills. Many thanks for making it available to us. Cheers!
Love the chairs and the new warmed up table color. The original “finished” color was pretty but looked a little too rustic for your usual style. This new richer “finished” color is amazing. It’s warm and still so much lighter and fresher than the original dark stain. Now your February list is truly FINISHED. Way to go Kristi!